
Learn how to make a DIY t-shirt stamp in any design from the unlikeliest of surfaces! You’ll love this fun fashion project – and it’s so easy, the kids can help! Great craft for tweens and teens.
Skills Required: Beginner. Anyone can do this project, even with no prior crafting experience. If you’re a newbie crafter, start with a small, less complicated design on a fabric sample first.

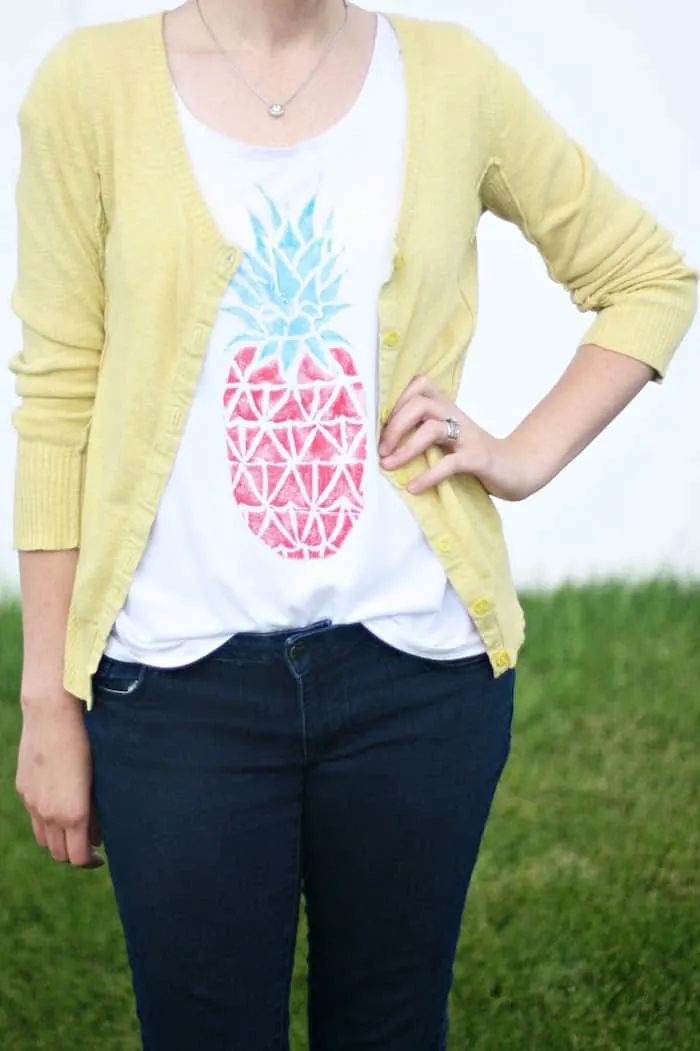
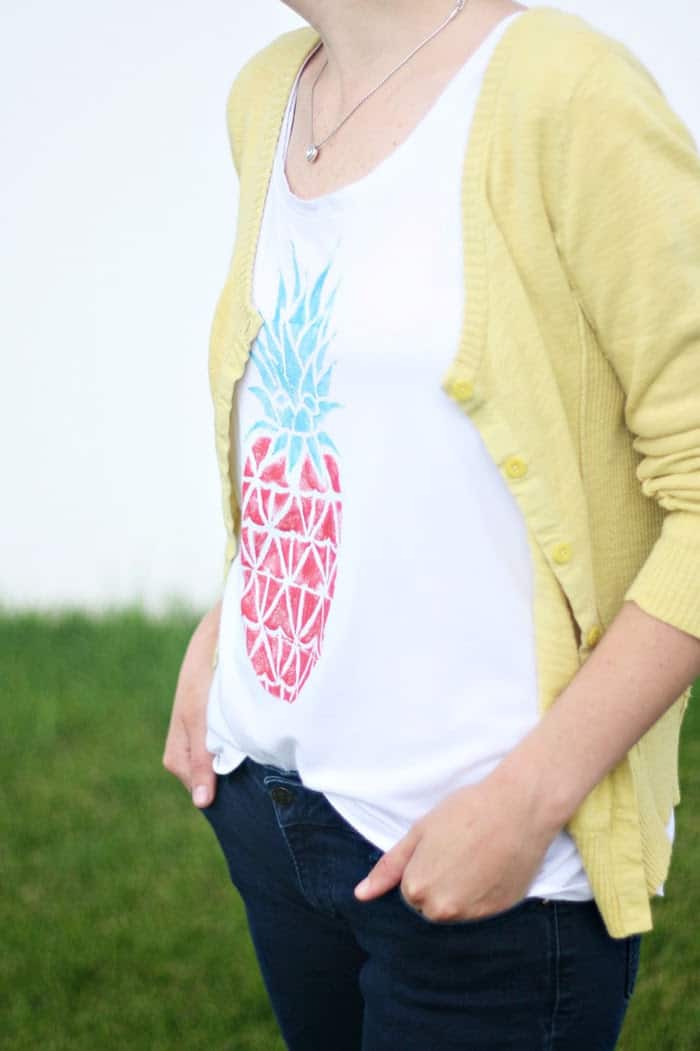
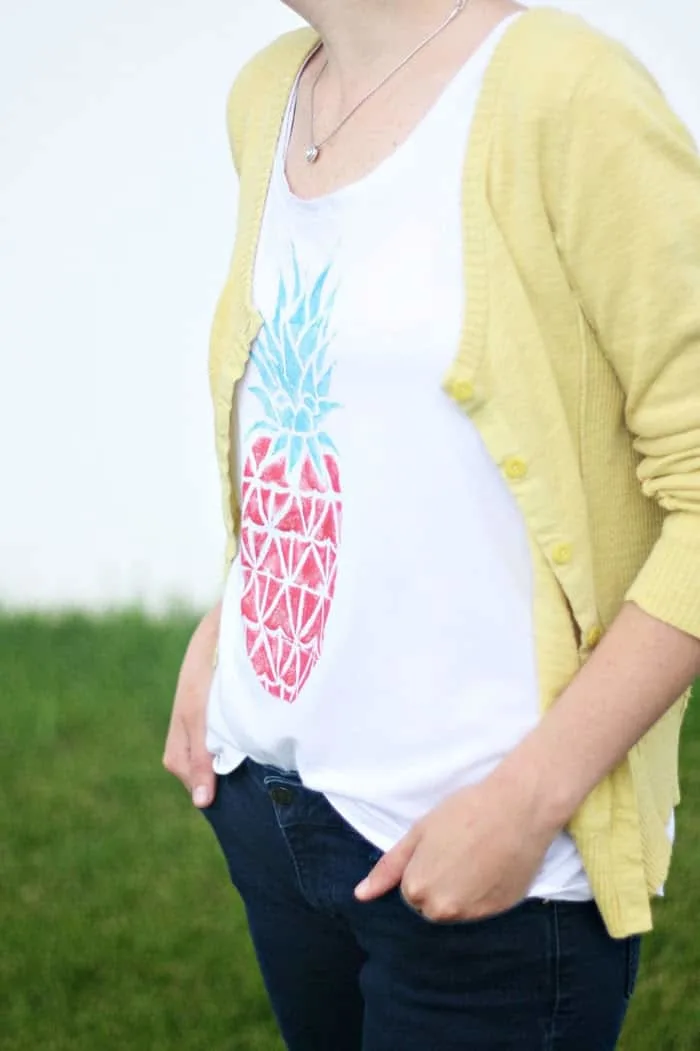
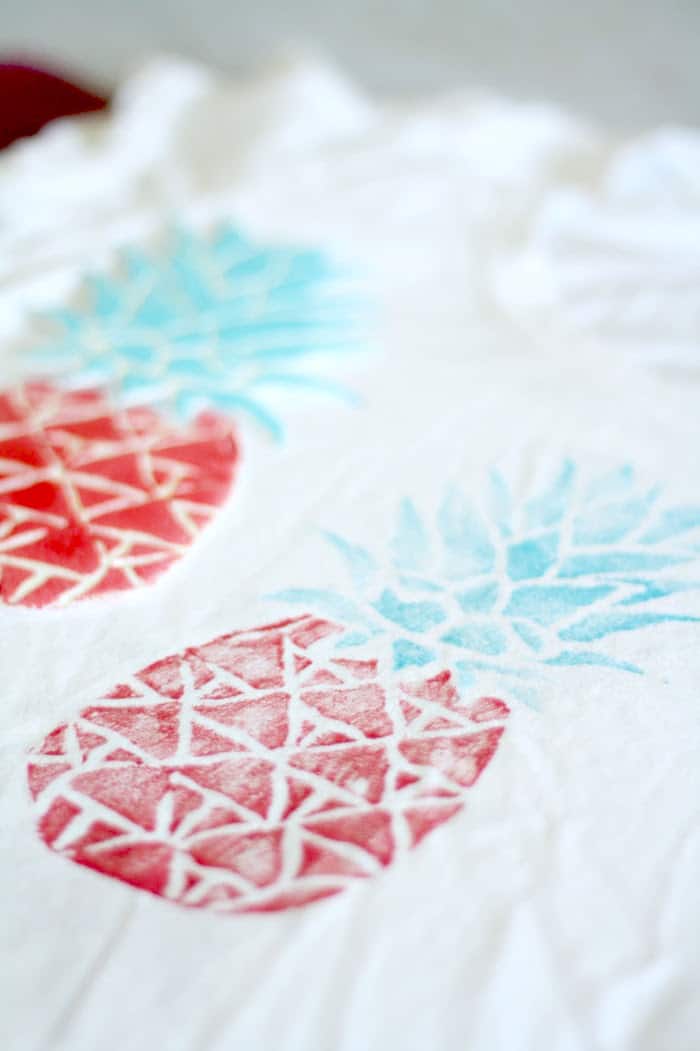
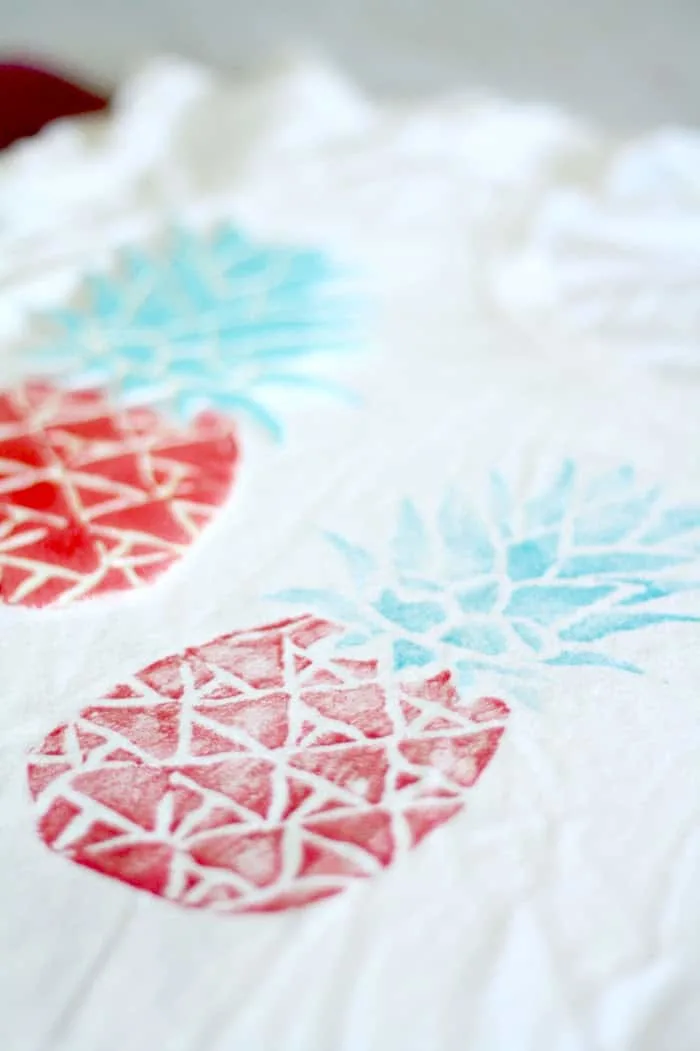
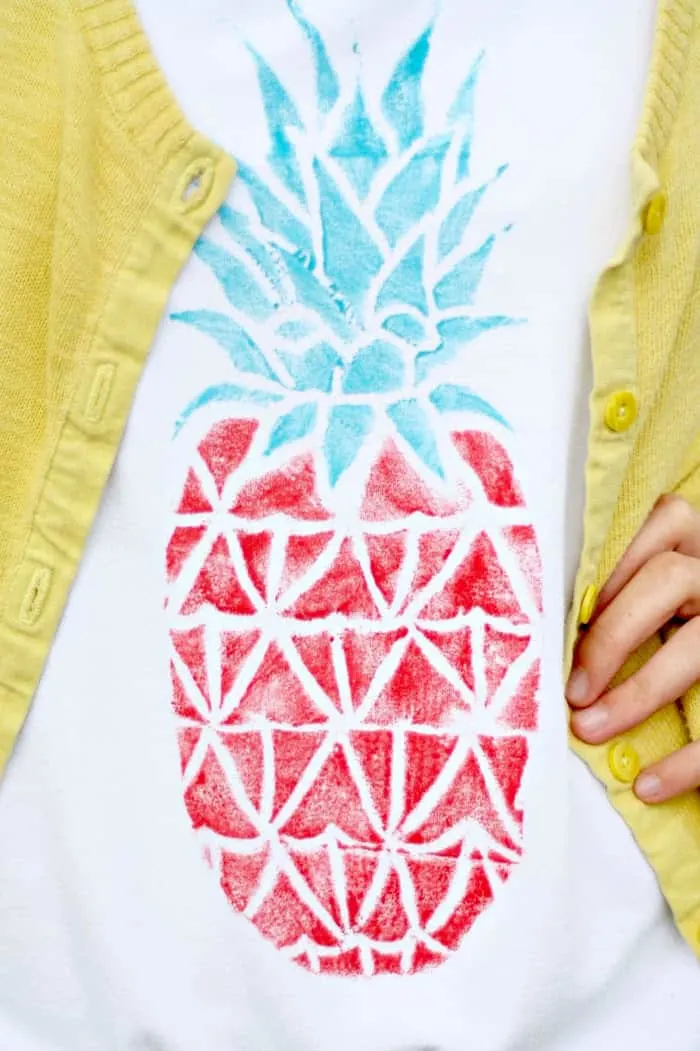
Along with everyone else, we are obsessed with the pineapple craft trend right now. And after seeing this perfect pineapple tee on Pinterest, I decided to make a one of my own using a DIY t-shirt stamp! You’re going to love this fashion craft.
It took me awhile to figure out what I could use for my t-shirt stamp that would be a little unusual and/or interesting.
It finally occurred to me while I was getting Chinese takeout what I could do – use the box!
Using takeout boxes to create a large t-shirt stamp is the easiest and cheapest technique, and you could use it to make any design you want. This hand-stamped pineapple tee is so easy, the supplies are simple, and I love how it turned out!
How to Stamp Fabric
Using a takeout box to make a stamp is pretty straightforward. The amount of size that you have to make a big t-shirt stamp is limited only by the size of the base and lid. You can cut out pieces from the sides to make smaller stamps.
In this project you’ll use a pencil to make the lines of the design. This means you can’t get quite as detailed with your design (and let’s face it, you can’t get too detailed in general with a takeout box).
If you want a bit more detail, use a sharper object with a smaller tip. Just be careful not to rip through the foam.
Textured Fabric
You may choose to be creative when designing your projects and select a ribbed or textured fabric, however, when stamping, portions of the design may be lost within the ribs or over the texture. For best results, we recommend smooth, non-textured fabrics.
All fabrics should be pre-washed using soap and water following the manufacturer’s washing instructions, most denim fabrics should be washed multiple times in hot water to thoroughly remove the sizing in the fabric.
Choosing a Design
Your best bet is to stick with objects that aren’t very detailed or those that can be loosely interpreted like this pineapple. Geometric designs work really well, as does lettering.
I think the challenge is to take your design to the maximum level of detail for what the item is – and still have it look good!
Fabric Paint

This project uses fabric paint, and we recommend the Fabric Creations line by Plaid. HUGE pet peeve: when fabric paint is stiff. It looks bad, feels bad, and even stretches fabric.
The Fabric Creations is perfect because you don’t have to worry about any of that. It’s soft and feels like it belongs with the fabric, plus washes well.
Hand Stamped DIY T-Shirt
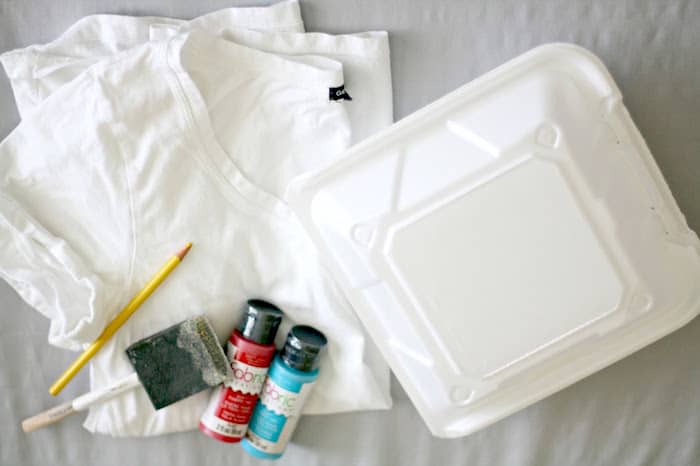
Gather These Supplies
- T-Shirt
- Takeout boxes
- Pencil
- Paint brush
- Fabric paint (I used Fabric Creations Soft Fabric Ink and it’s the best!)
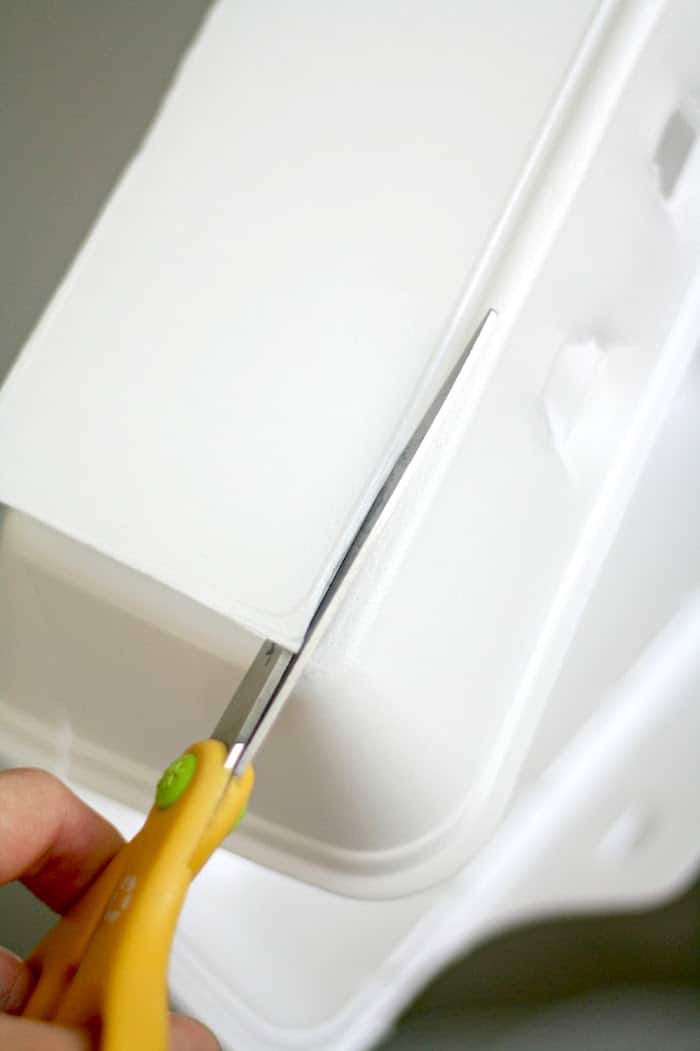
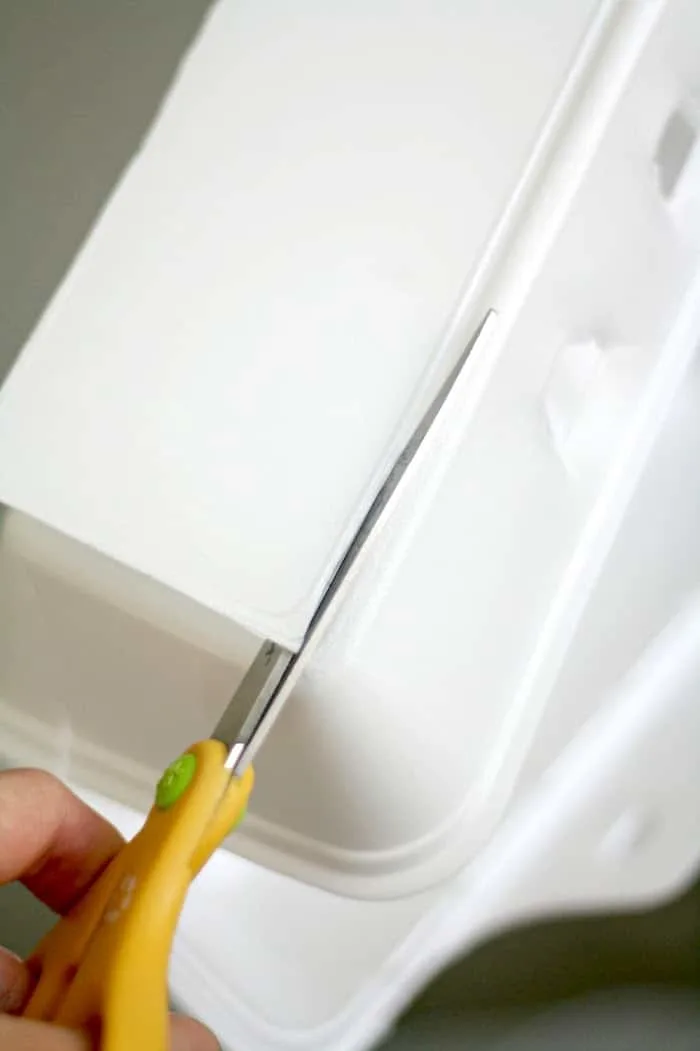
Step 1: Cut out flat foam squares from your takeout box(es). I just ran into a restaurant and asked for a bunch of boxes and they gave them to me for free, but I also saw them at the grocery store by the paper goods. Or if you eat out, save your boxes!

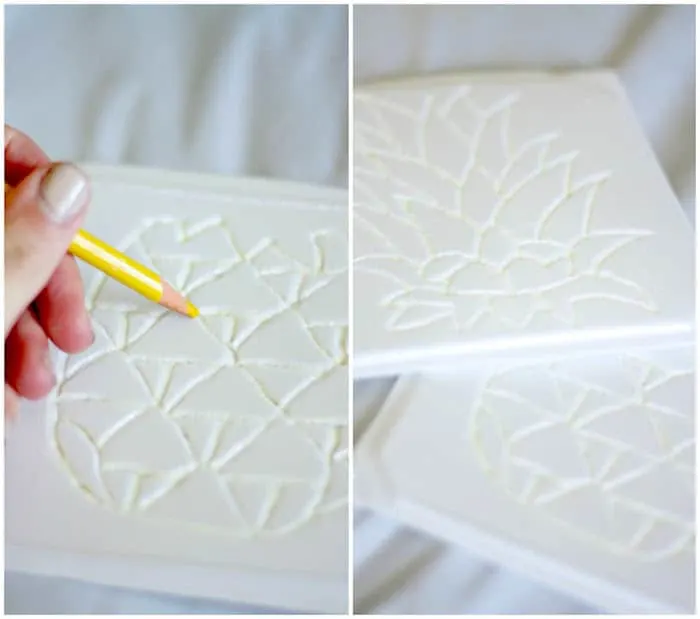
Step 2: Draw or trace your design on the foam.

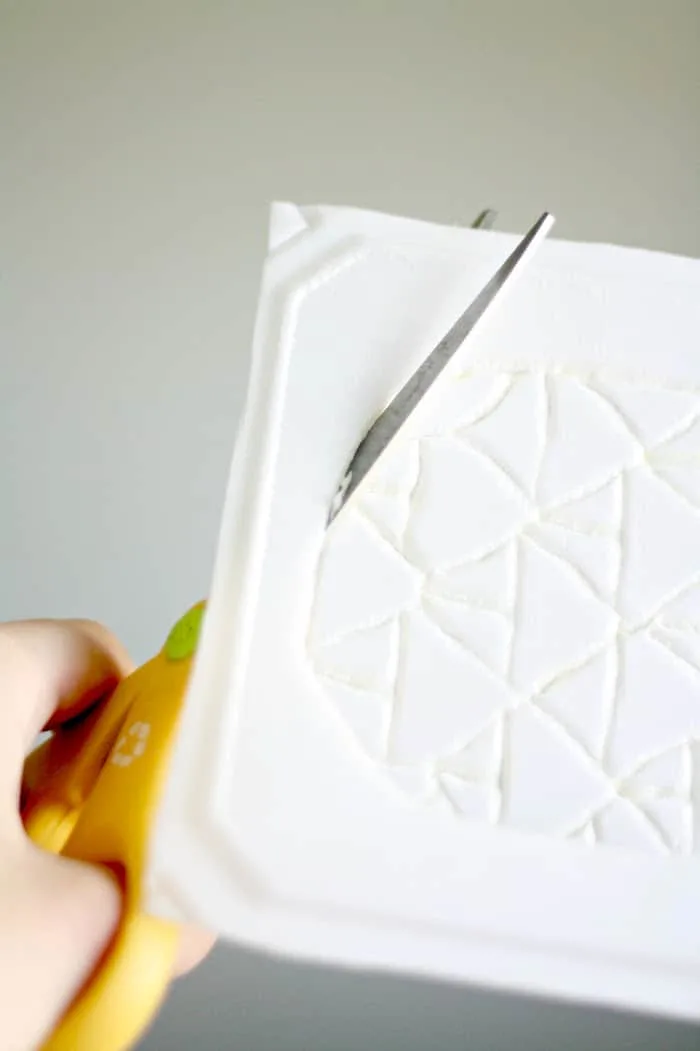
Step 3: Cut the outside edges of your t-shirt stamp design. You’ll want to go right up to the edge, because anywhere you place ink is going to be on your surface.

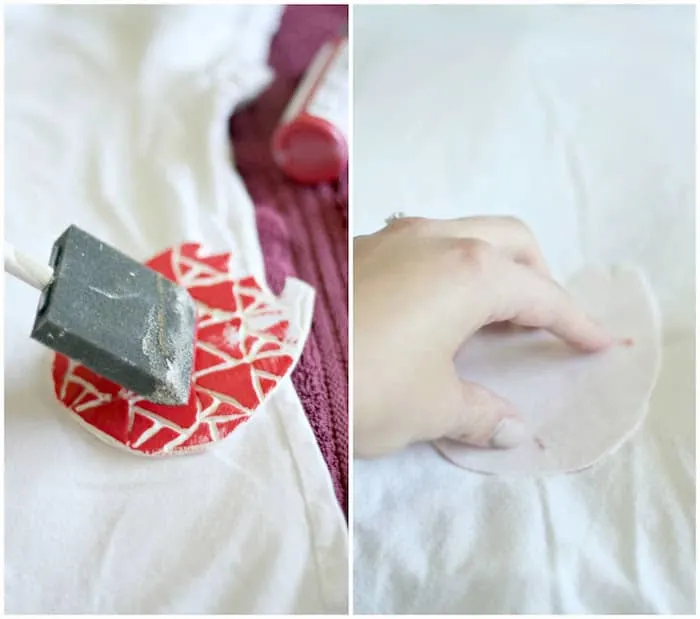
Step 4: Apply paint to the foam. I found it’s easiest to brush the paint on with a foam brush, or roll it on with a roller.
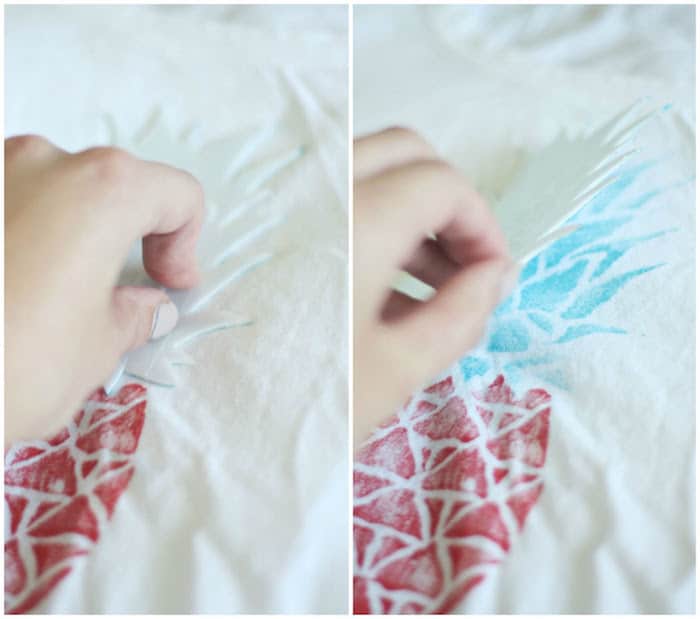

Step 5: Press stamp on shirt, and remove.
Step 6: Let dry. Follow any additional instructions for your fabric paint.
For Fabric Creations, you can let it air dry for 72 hours, bit it’s really recommended that you heat set for best durability. To do this, let your design dry over night.
Heat set the painted surface using a dry, hot iron and a pressing cloth. Lay pressing cloth over the stamped fabric and iron the stamped design for 30 seconds, lift the iron and move it to another section of the stamped design. Your iron should be set at the highest setting allowed for the decorated fabric, no steam.


Isn’t this the cutest DIY tee shirt for summer? And think of the possibilities! You can put a design like this on an apron, beach bag, kids’ white summer dress, tea towels or tablecloths . . . it has a fun organic look that works well.

T-Shirt Stamp
Learn how to stamp a shirt using an unlikely supply - a take out container! Use an existing shirt and this becomes a free fashion update.
Materials
- T-Shirt
- Takeout box
- Fabric paint
Tools
- Pencil
- Scissors
- Paintbrush
Instructions
- Cut out flat foam squares from your takeout box(es).
- Draw or trace your design on the foam using a pencil.
- Cut the outside edges of your t-shirt stamp design.
- Apply paint to the foam.
- Press stamp on shirt, and remove.
- Let dry. Follow any additional instructions for your fabric paint to set.
Happy t-shirt stamping! Now be sure to come visit my sister and me as we blog about style, food, and the things we love over at The Pretty Life Girls.
If you want to try some other fashion craft ideas, I’d love for you to check out these other projects:
Alexandra
Friday 24th of July 2015
This is one of the coolest ideas! The thought of carving into the styrofoam and using it as a stamp NEVER crossed my mind, but now that I see it here, I have so many ideas of other stamps that can be created, and with the ease of just drawing it, rather than trying to carve it out of let's say a potato. Pinning for sure!
Paige
Wednesday 22nd of July 2015
I love the Pretty Life Girls! So fun that you guys collaborated with this post! This shirt is so fun! I'll definitely be making one soon!
Paige