
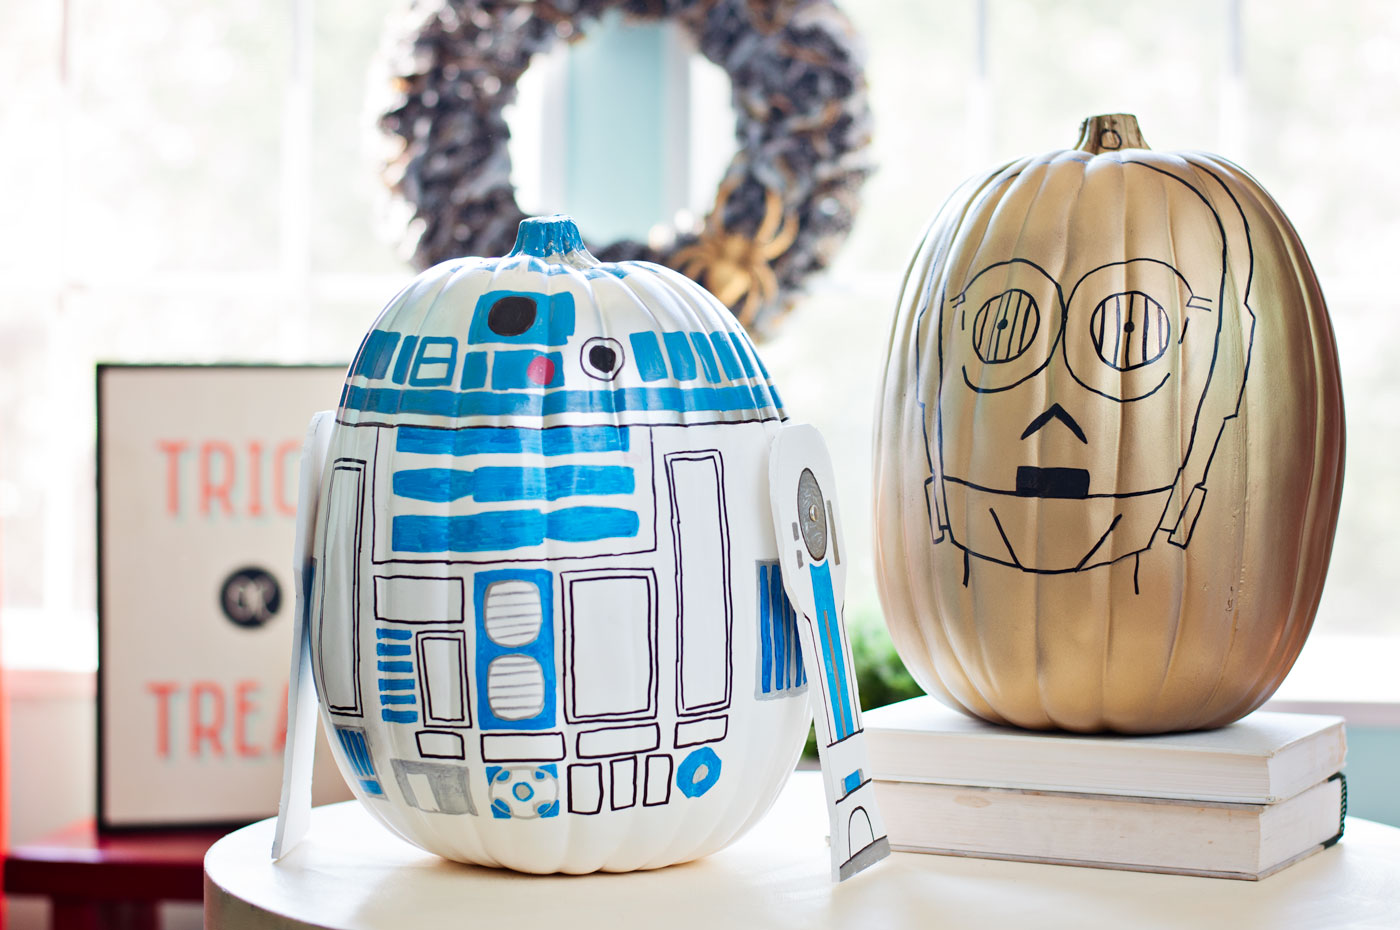
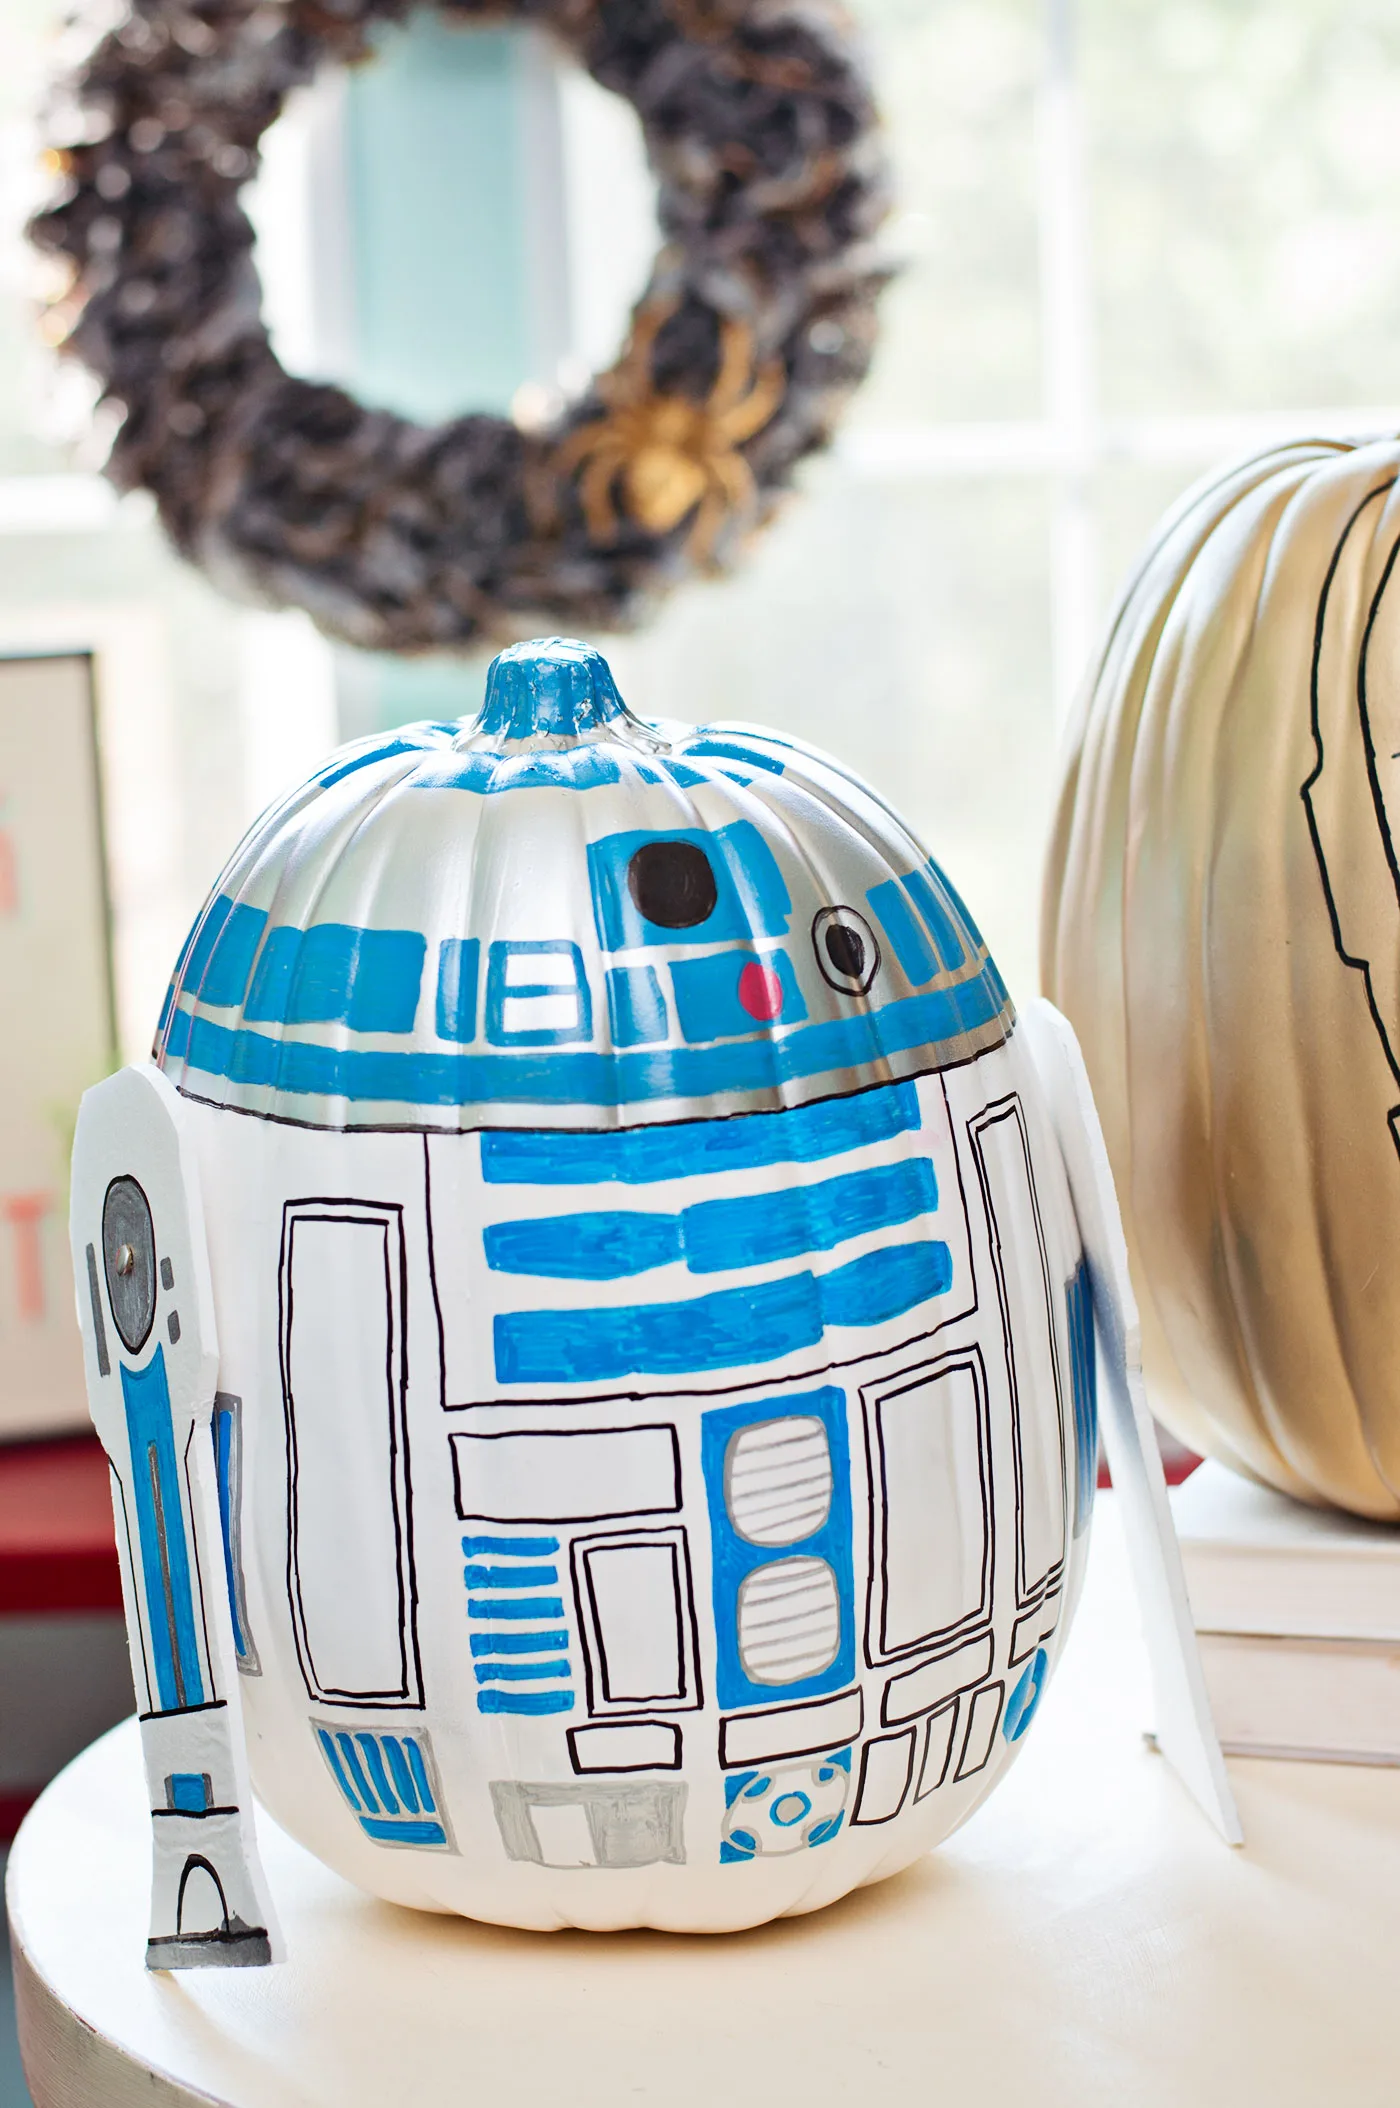
These Star Wars pumpkins are so fun to make. Celebrate fall and Halloween with your own version of R2-D2 and C-3PO. These ARE the droids you’re looking for!
Skills Required: Intermediate. You should have basic experience crafting and preferably experience with paint pens. This isn’t a hard craft, but there are quite a few details and you need a relatively steady hand. If you’re a newbie, just work slowly.
Nothing says the holidays like Star Wars as far as I’m concerned. When I was little I used to watch the movies a lot during the holiday season, so that’s the connection. It’s so engrained that I’ve even done a Star Wars Christmas tree!
Fall is coming soon, so I thought I would get started on a couple pumpkin crafts early. Of course, I had to head to Michaels to grab a couple faux pumpkins for this project.
I knew that I wanted my pumpkins to be Star Wars themed, so then it was just a matter of whether to go with the light or dark side. I decided to embrace the Droids for my office and use an R2-D2 and C-3PO theme. The faux pumpkins work out great because I can keep them up all fall!
Star Wars Pumpkin Painting
Gather These Supplies
- Faux pumpkin(s)
- Spray paint
- Paint markers – in the colors you need
- Pencil
- Tape
- Foam sheets
- 2 paper fasteners (brads)
- X-Acto knife
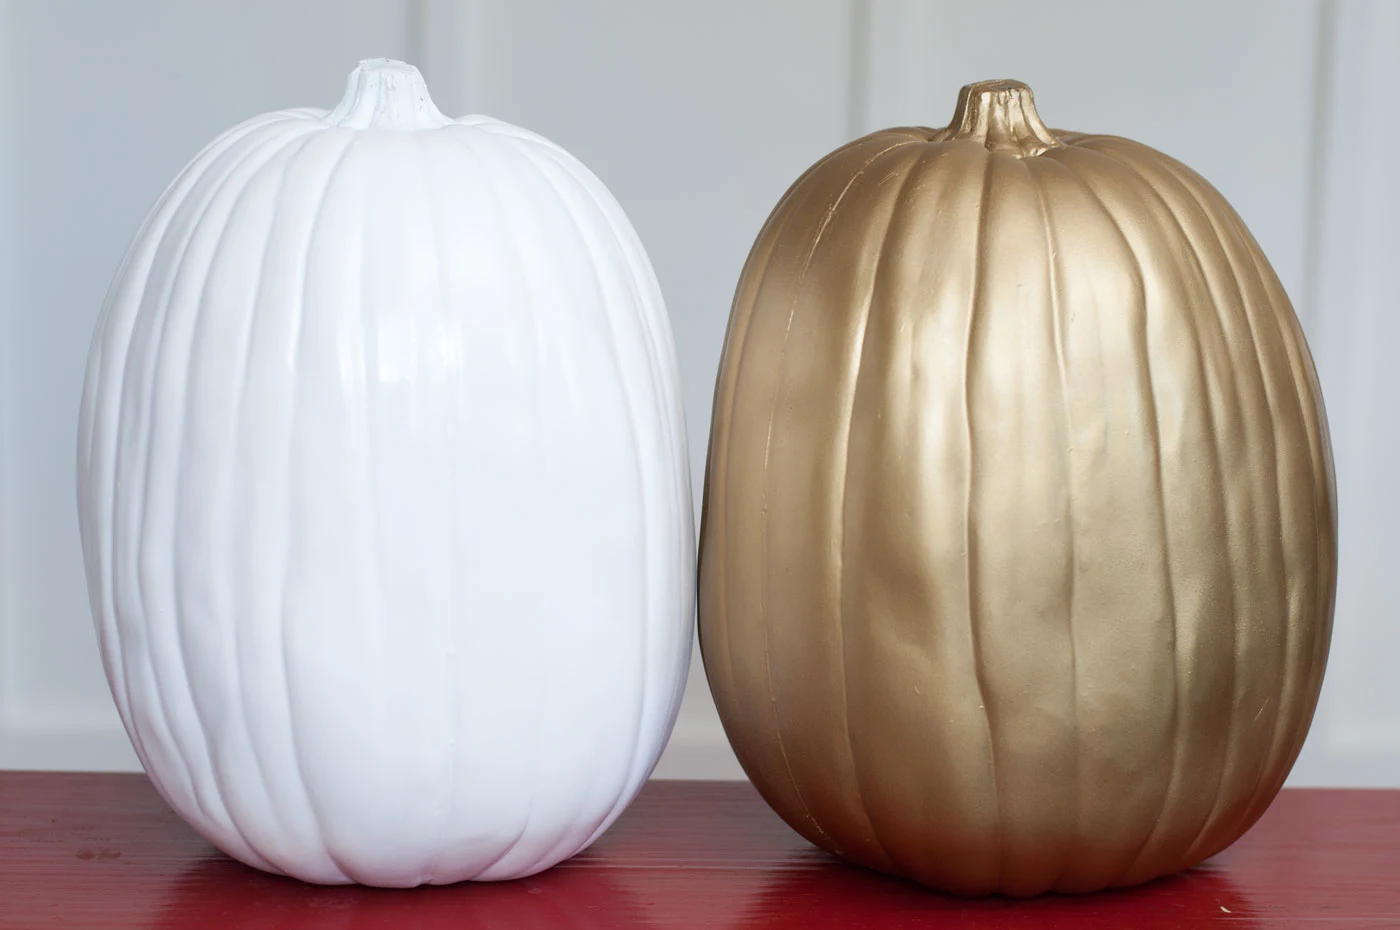
Step 1 – Get Your Pumpkins
Right now Michaels has all their pumpkins out in different shapes and sizes. I found these two taller pumpkins that would be perfect for R2D2 and C3PO. I was excited to get started.


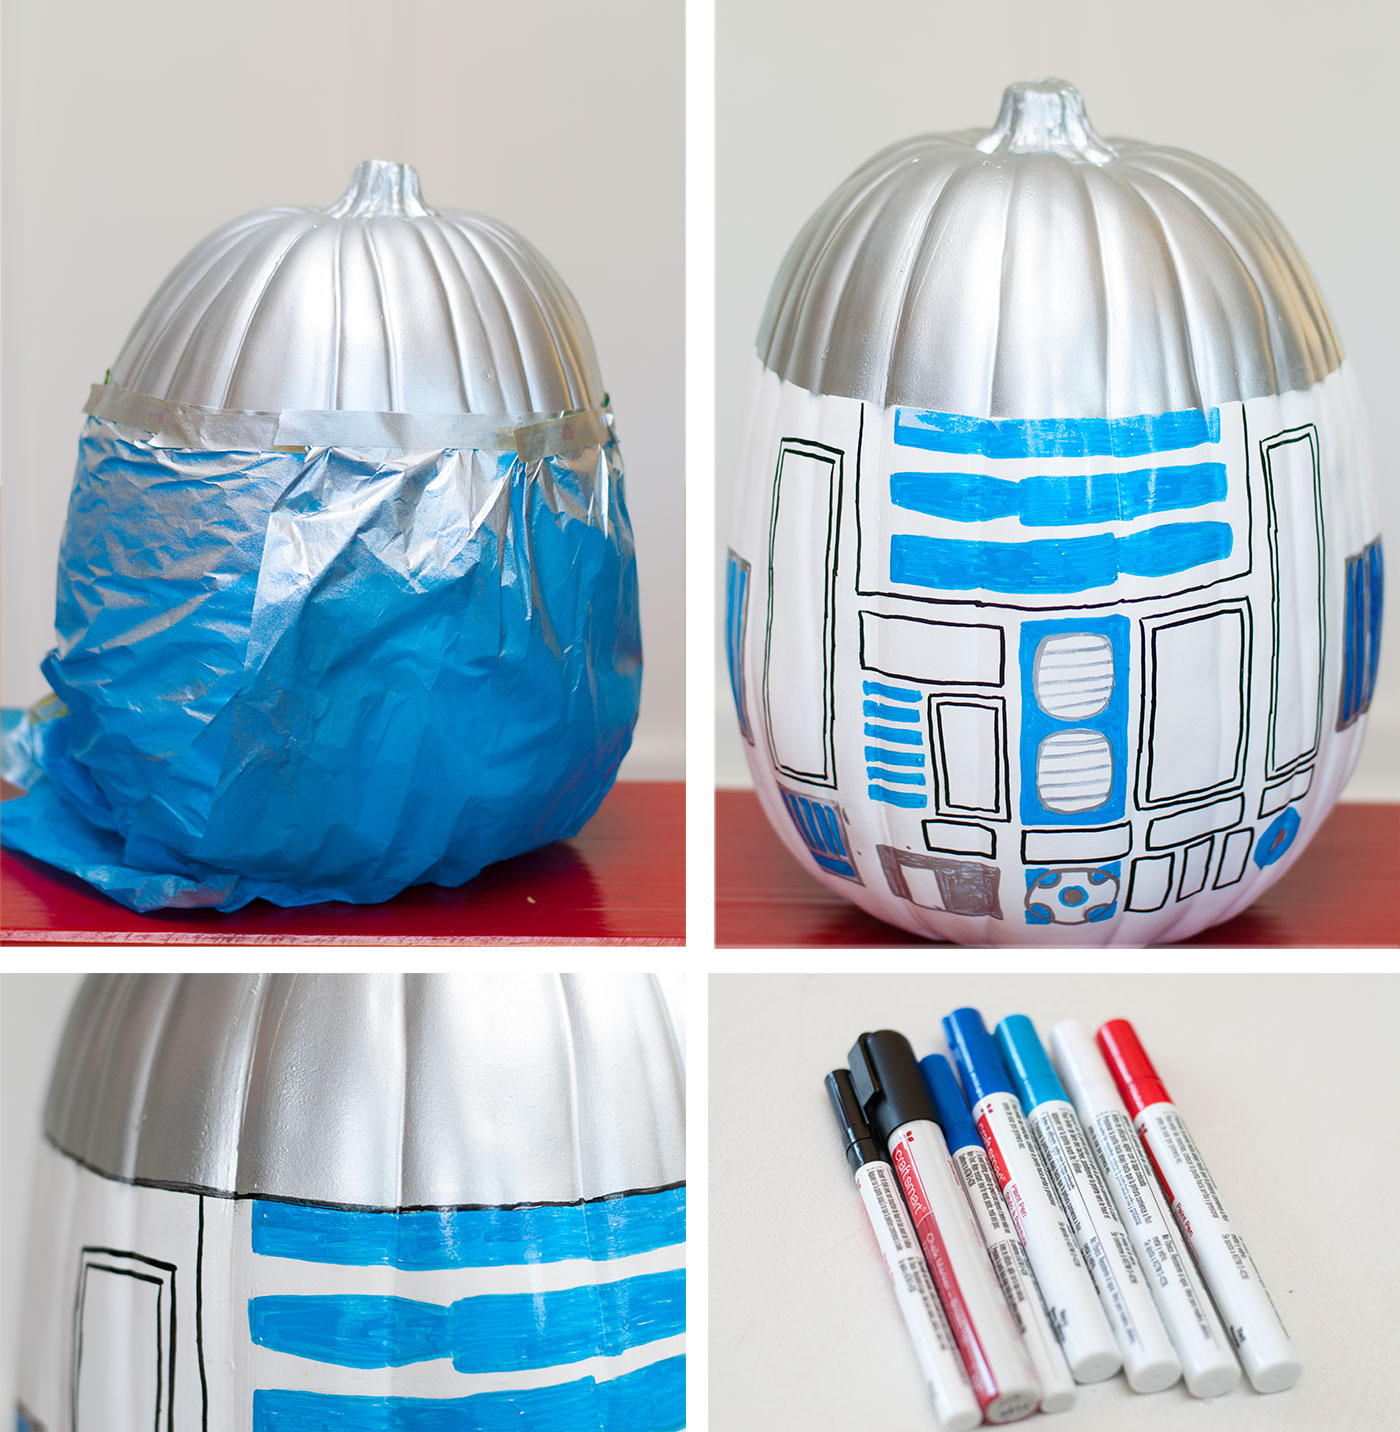
Step 2 – Spray Paint Pumpkins
I took the pumpkins outside and spray painted two coats of spray paint on each pumpkin. It is better to use light coats than thick coats for spray painting!
Let the pumpkins dry for 20 minutes. Once they are fully dry, inspect your faux pumpkins and make sure you hit all areas with the paint. If not, go ahead and fill in at this time and let dry completely.

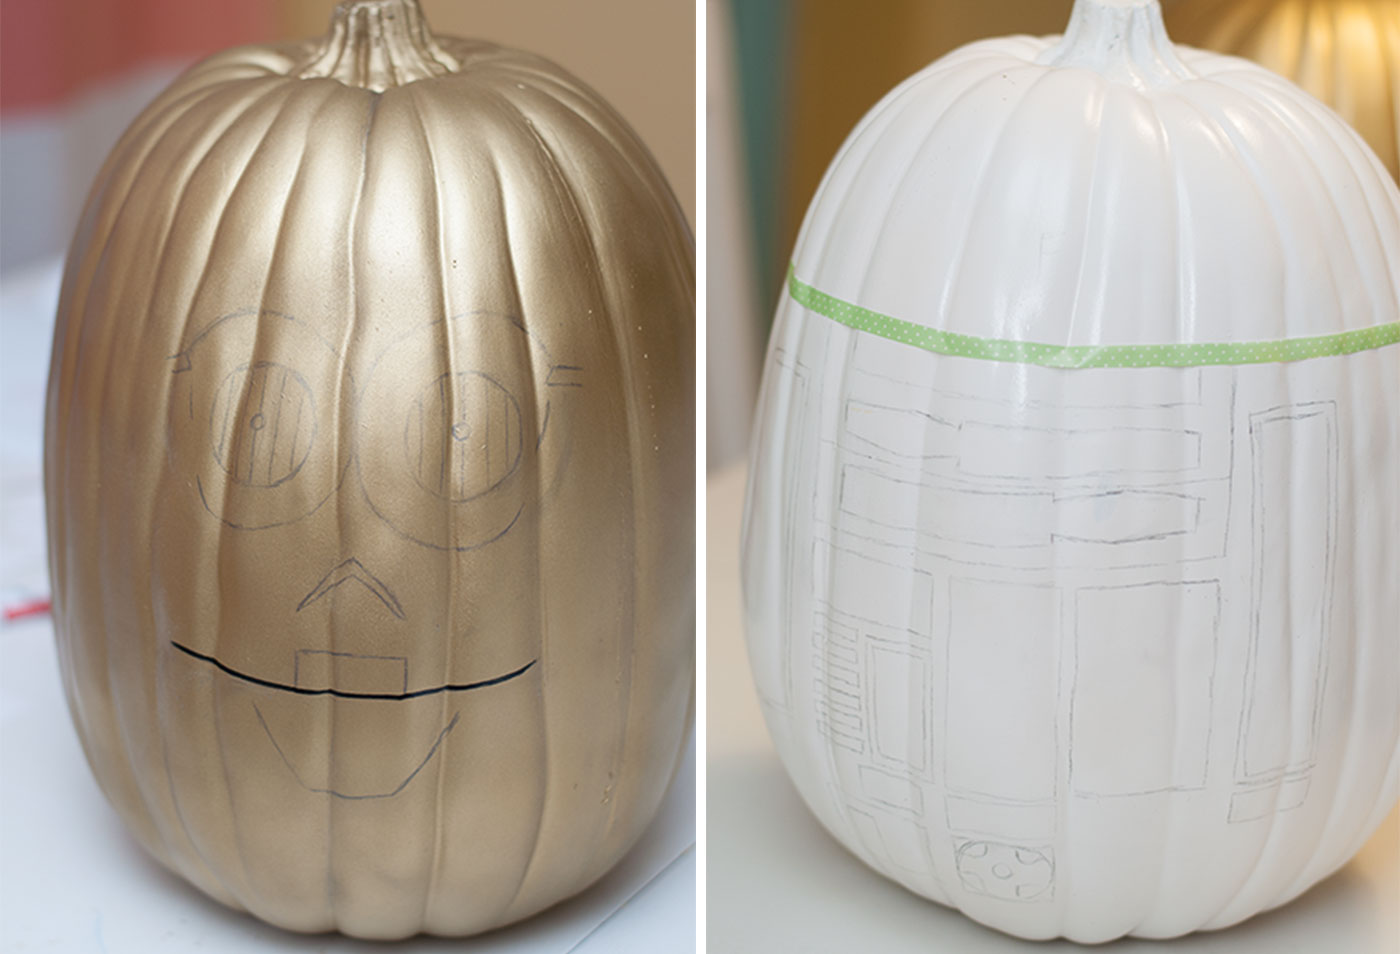
Step 3 – Draw on Details
Next, it’s time to add the details. I drew out the details in pencil first. I pulled up some images on Google for inspiration.
You can add as little or as much details with R2-D2. C-3PO was a pretty easy one to do.

Step 4 – Fill in Details
Then I took R2-D2 outside again and spray painted the top silver. I thought that would be easier than using a silver paint marker and much faster. After the spray paint dried, I used my paint markers to start filling in the details.
The paint markers worked out perfect for this step and went over the spray paint easy. Just make sure not to smudge what you’ve done with your hand before it dries.
Don’t worry about getting the lines exact. The curves of the pumpkin are difficult to draw on but they are forgiving in the final look of the Star Wars pumpkins.
If you mess up: it helps to have gold and white paint pens (or whatever your base colors are) so that you can color over any mistakes. If you mess up, let the paint dry before going over it. You can go over it with acrylic paint as well. Brush several layers and let dry between layers.
You can also just spray paint the entire pumpkin again if you aren’t happy with the look. This is a forgiving project!

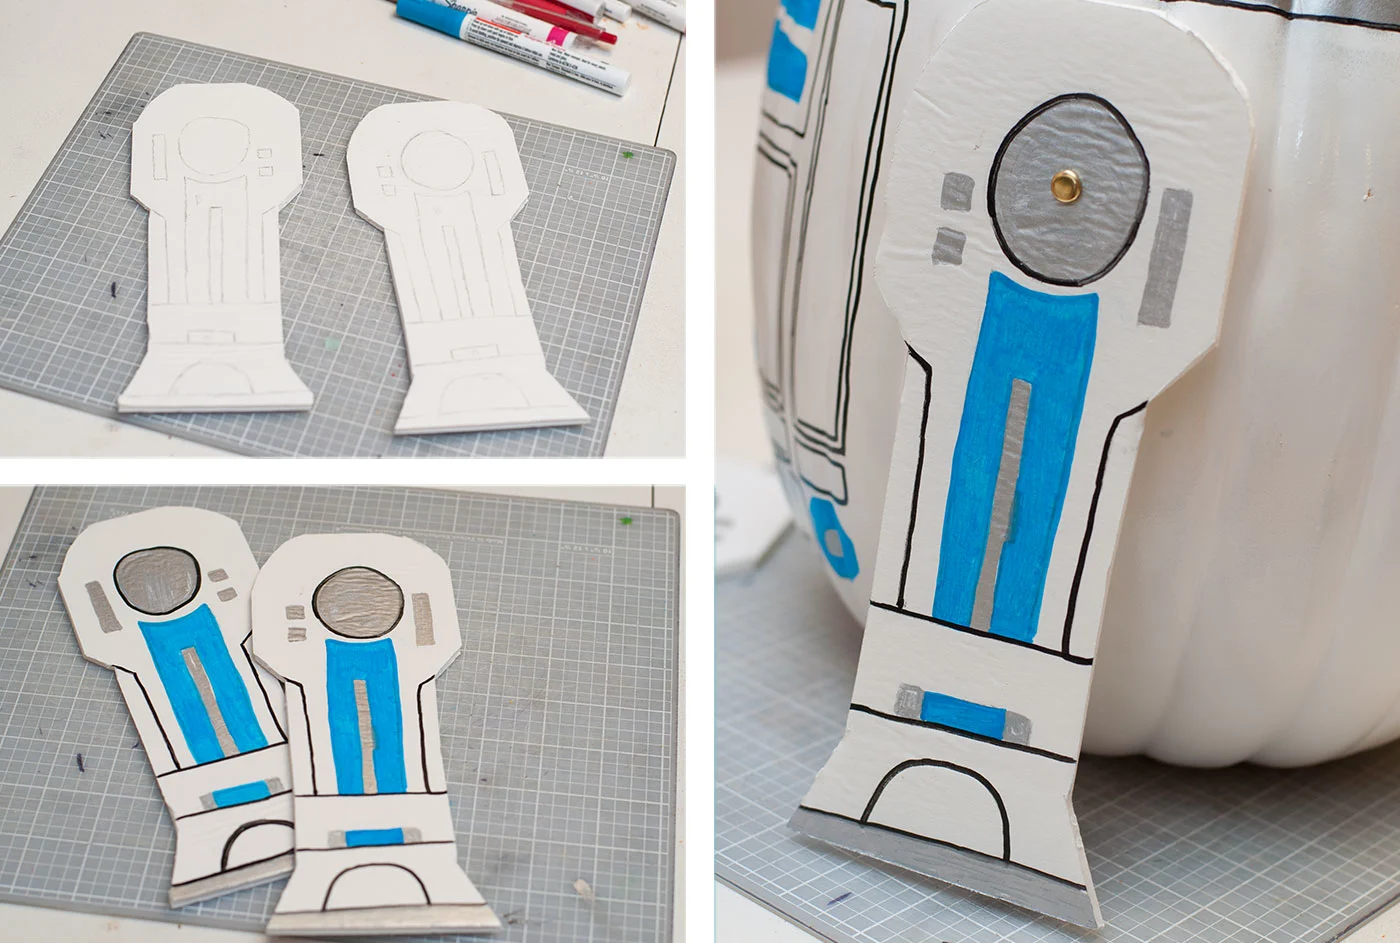
Step 5 – Add R2-D2’s Legs
I wanted to give R2-D2 one last detail, so I grabbed some foam board from Michaels as well and drew out his legs. Then I used an X-Acto knife to cut it out. Once again I drew out my details in pencil then filled it in with paint markers.
To attach the legs I used paper fasteners (brads) so that you could actually move the legs. They went into the pumpkin super easy.

Finishing Touches
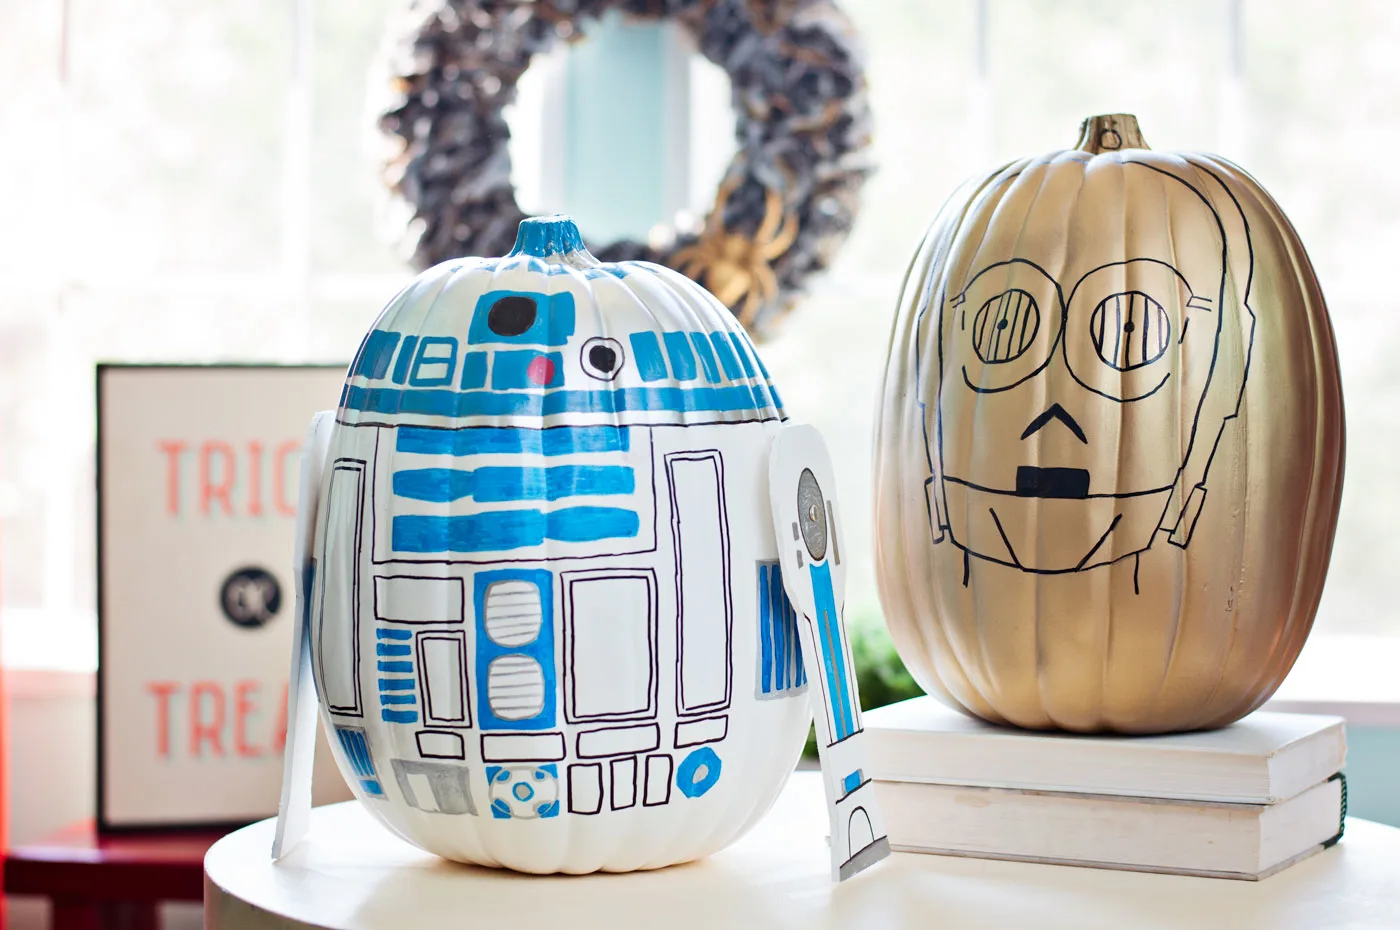
There you have it! Super easy Star Wars pumpkins in no time!! These will look great in my office for Fall.


Here are the pumpkins individually if you’d like to take a closer look!
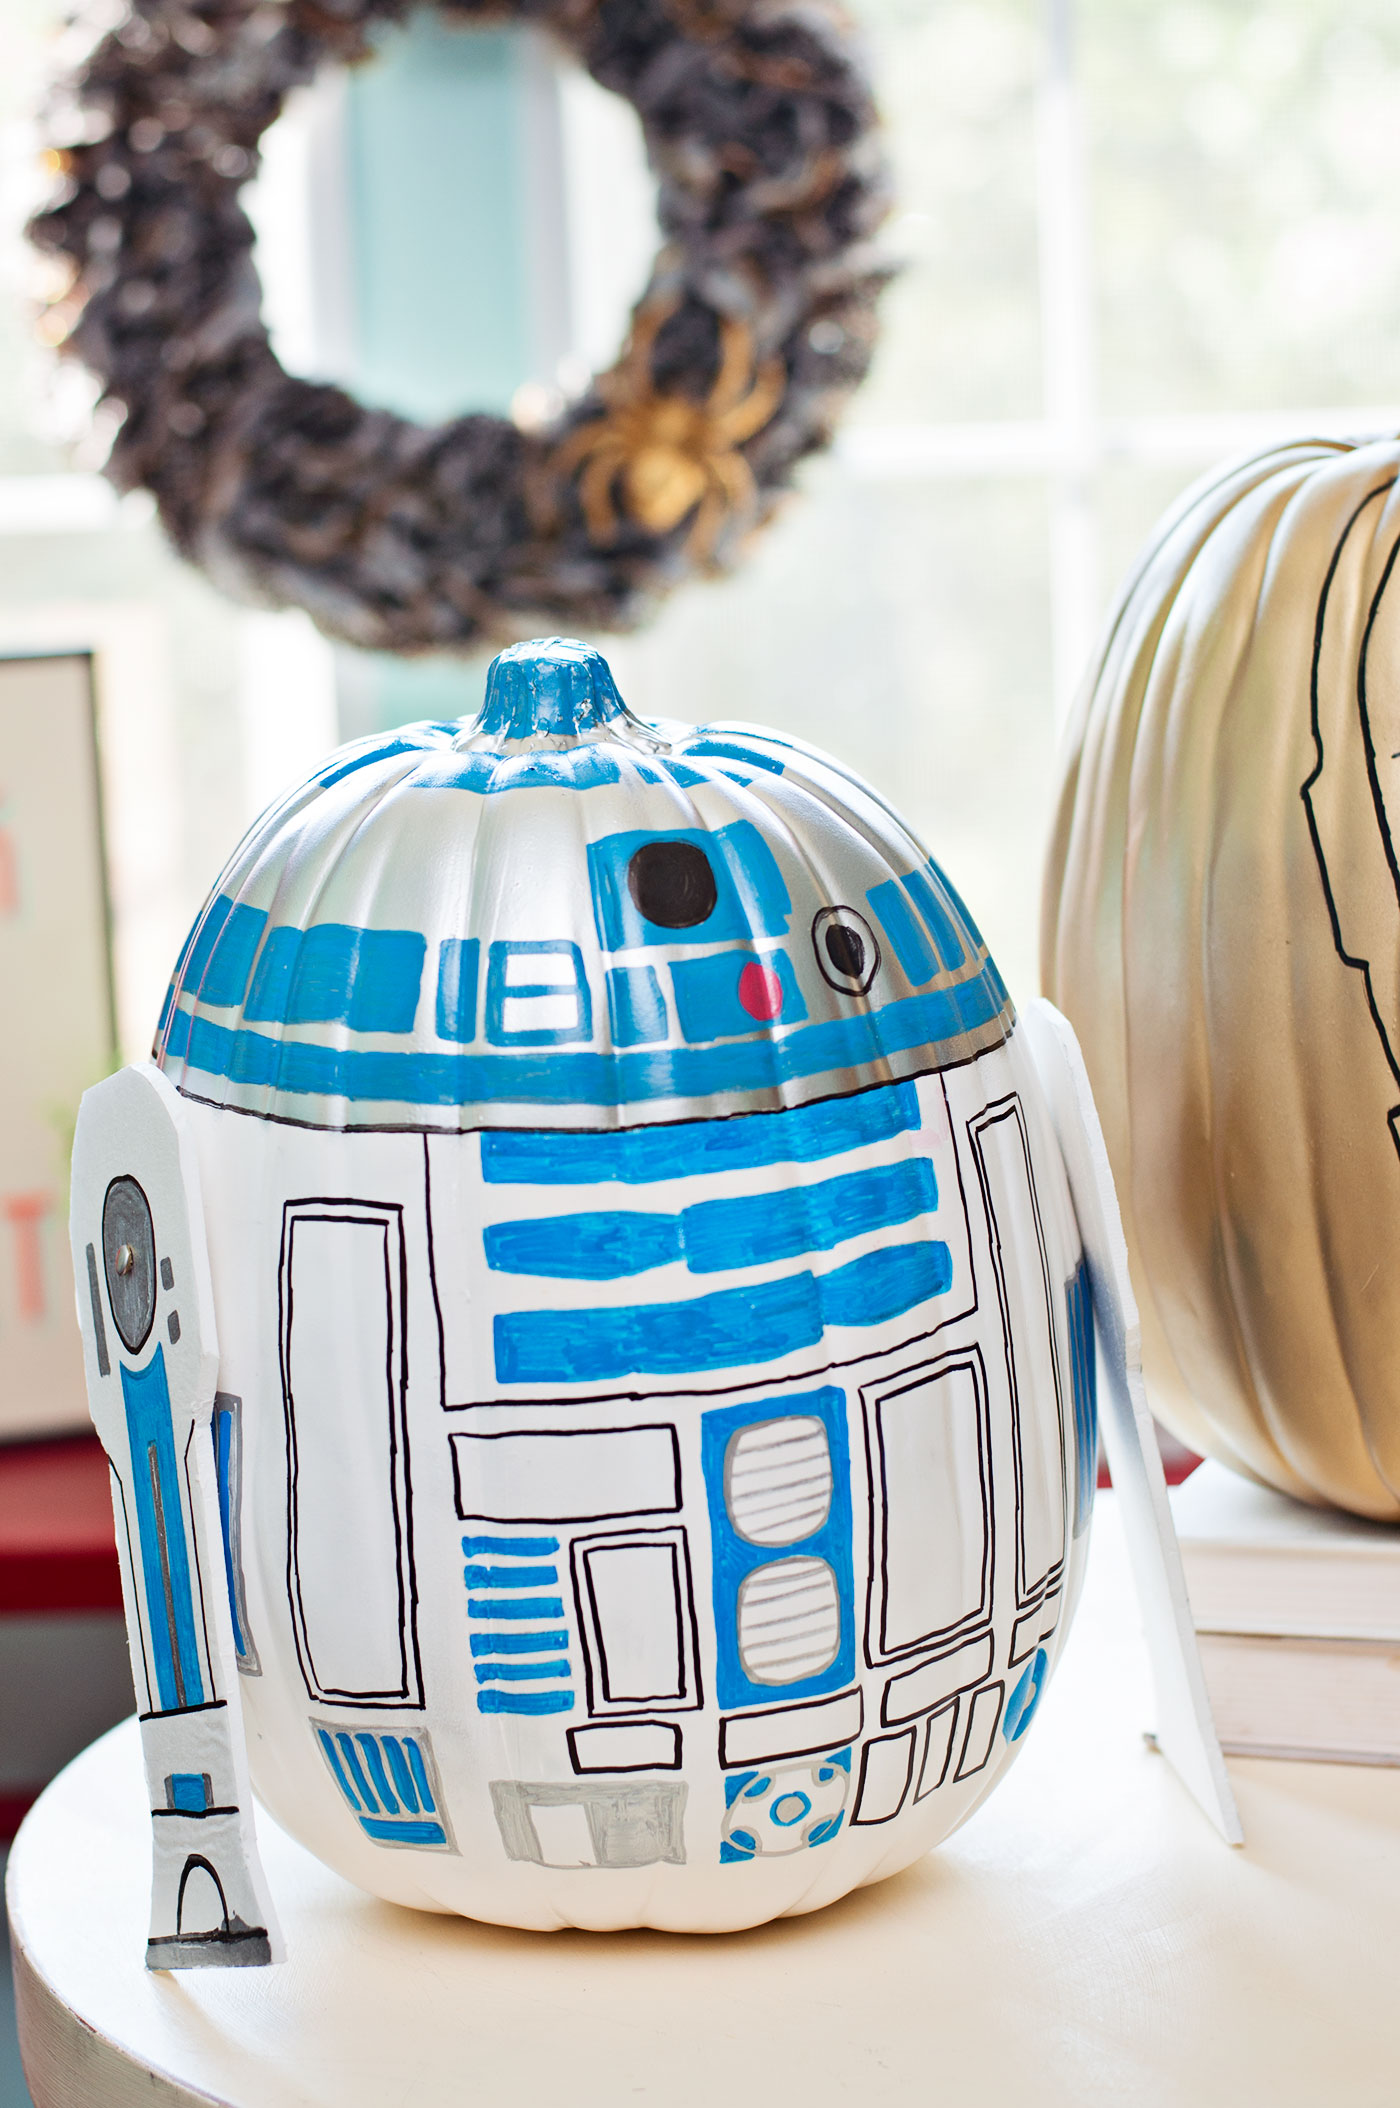


Star Wars Pumpkins


Learn how to make two Star Wars pumpkins that look like droids! Once you learn how they're done you'll want to make the whole cast of characters.
Materials
- Faux pumpkin(s)
- Spray paint
- Paint markers
- Painter's tape
- Foam sheets
- 2 paper fasteners (brads)
Tools
- Pencil
- X-Acto knife
Instructions
- Spray paint both faux pumpkins with the color of your choice. Tape off any areas that you don't want painted. Give several light coats and let dry.
- Use images of the Star Wars droids to draw patterns on the faux pumpkins that you'll fill in. Use painter's tape to keep the lines straight.
- Use the paint markers to start filling in the details. Let dry between layers and when switching marker colors.
- Cut legs for your characters (if required) out of foam board using the craft knife. Add details with paint pens and let dry.
- Attach the legs to the pumpkin using paper brads. You can use an awl to make a hole in the pumpkin if needed. Insert and position in whatever way you like.
Who says you have to have traditional pumpkins?!? Give your pumpkins a little “character” this Fall/Halloween. Make Star Wars pumpkins with a variety of characters!
Ainslee1777
Monday 29th of October 2018
These pumpkins are AMAZING & brilliantly executed! Well done!