
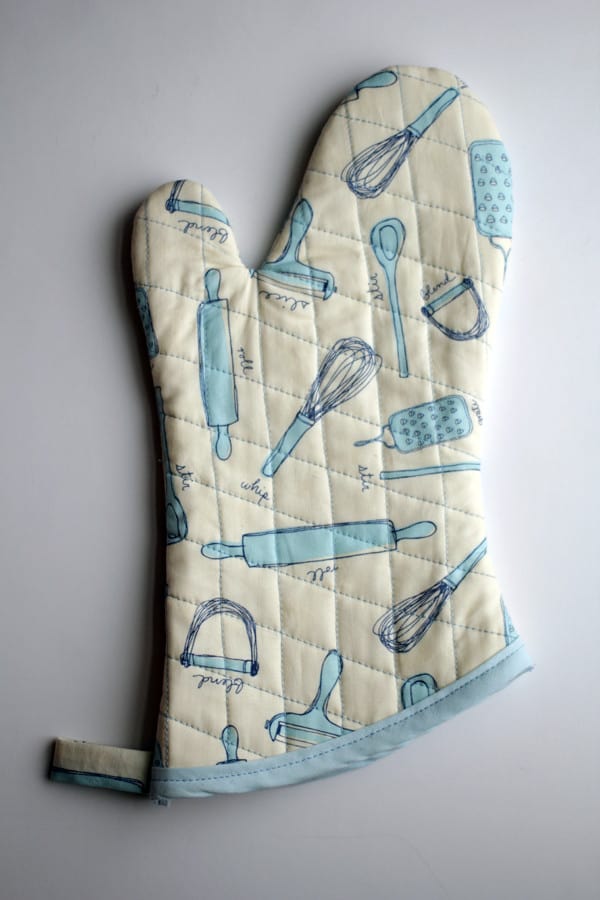
Learn how to make a pot holder, and quilt it, using your fave fabric and this easy tutorial! You don’t even need a pattern for this DIY pot holder.
Skills Required: Intermediate Beginner. This is a relatively easy project, but you should have some basic sewing experience before starting.
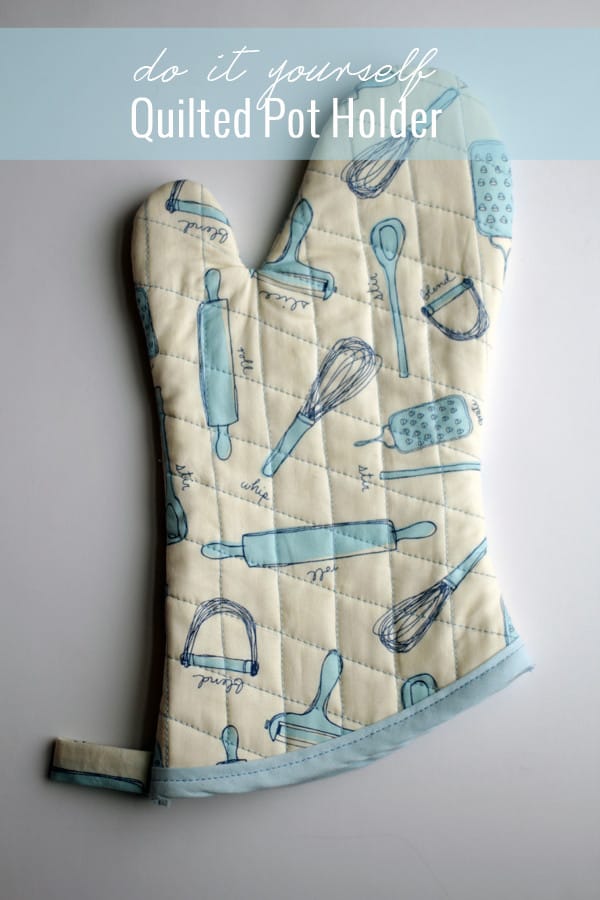

Are your pot holders totally destroyed? I know most of mine are, so when I was out fabric shopping and came across this adorable kitchen utensil fabric I knew I had to have and make a cute DIY pot holder out of it!
This is such a fun and fast project that would make a great homemade Mother’s Day gift. Or you could keep it for yourself to replace some of those embarrassingly stained ones (we all have them)! This is a simple sewing project – way simpler than it looks. Here’s how to make this simple gift idea.
Homemade Pot Holder
Gather These Supplies
- Old pot holder
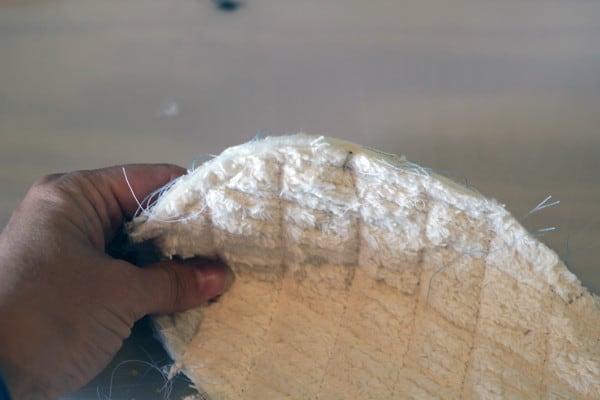
- 1/4 yard of quilt batting
- 1/4 yard of printed fabric for the top
- 1/4 yard of terry cloth for the inside
- 1 yard of bias tape binding, you can make your own or buy it pre-made

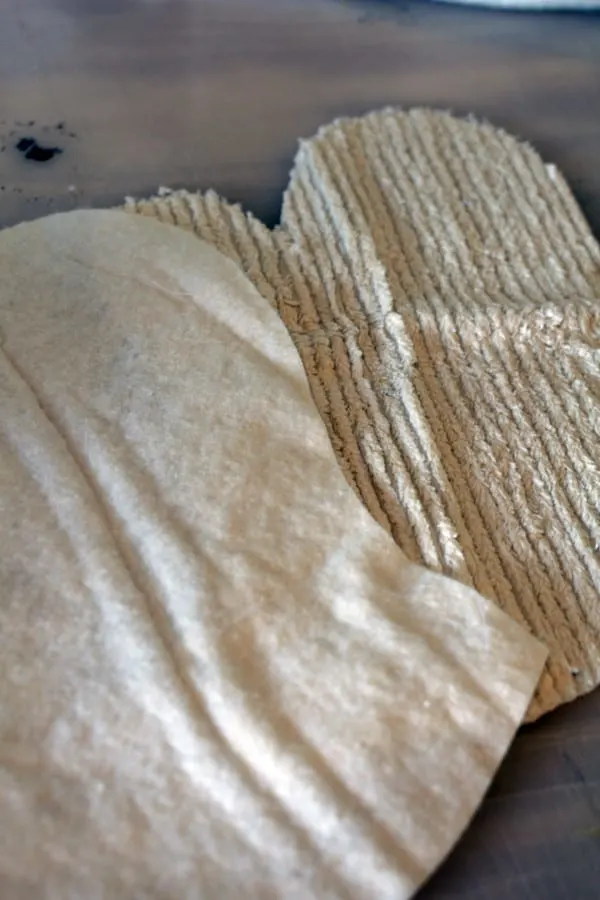
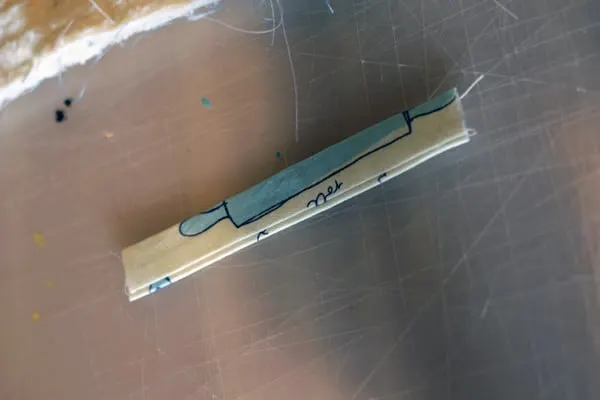
The first step is to cut out your fabric. I just used a pot holder I already had, and traced around it on a sheet of paper for a template.
Using a ruler, add 1/2″ for seam allowance around the outside to the template. Then cut 2 of each of your fabrics.
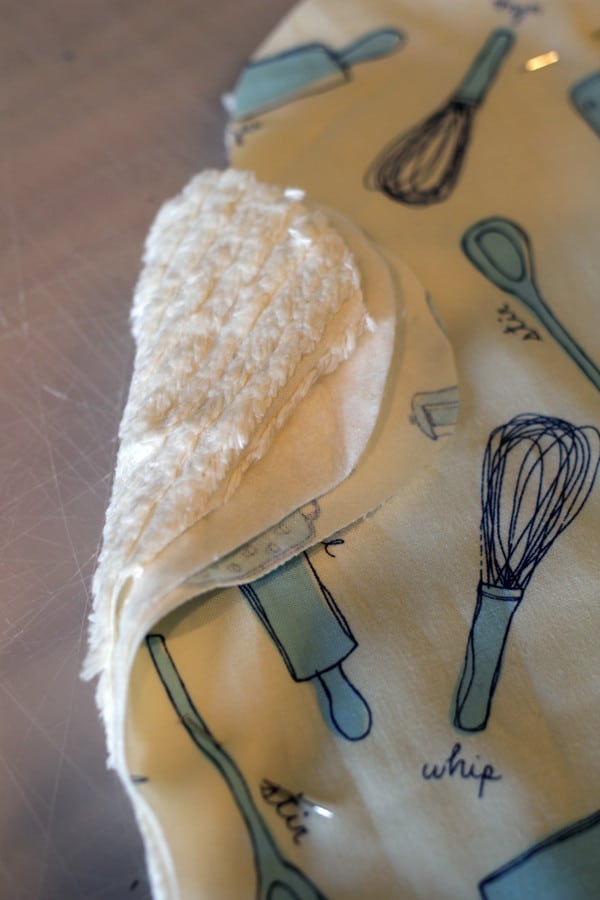

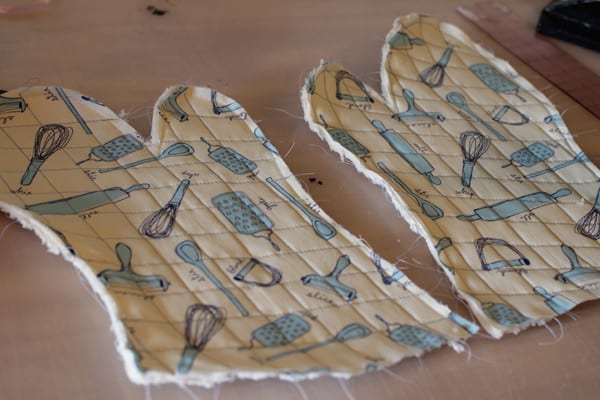
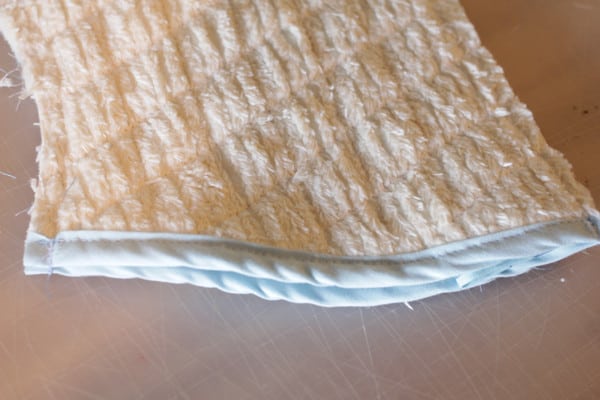
I then pinned the three layers together two times, one for the top and one for the back and quilted them. I’m not going to lie – I am not a “quilter,” so I’m sure there is a tool to help you quilt with your standard machine (but I don’t know about it!).
So what I did was taking a ruler and a pencil I lightly drew the quilting lines 1″ apart and then sewed on top of the pencil line. It totally worked for me!

The next step is to make your bias tape, if you are making it. Cut a 2″ strip of fabric that is diagonal across the width of the fabric, thats what we call the “bias” so it has stretch to it even though its a woven fabric.
Then fold it in half and then fold the two ends into the center so you have a nice finished edge to put the bottom of the pot holder into.
Sew the bias tape onto the bottom of your two pieces, this will give a finished edge to the pot holder.
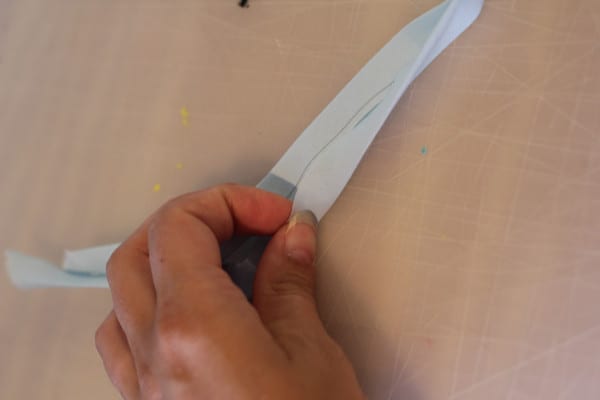
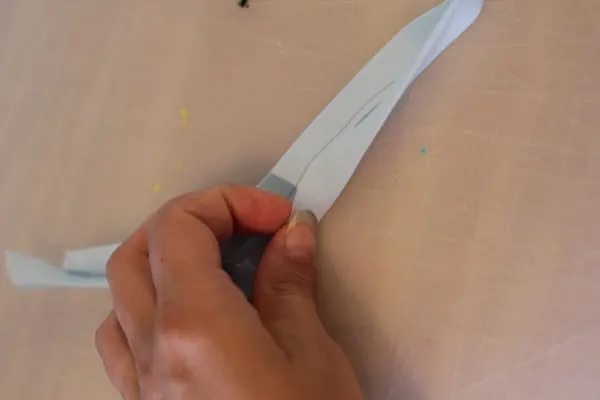
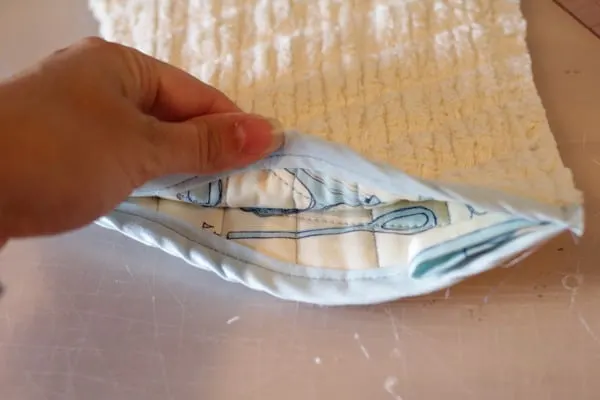
If you want to be able hang the DIY pot holder, you’ll want to sew a loop of fabric into the side seam. For mine, I cut a 4″ x 2.5″ piece of fabric, folded it over lengthwise with right sides together and sewed it up at 1/4″ seam allowance.

After sewing, flip it right side out and then iron it flat.


You’ll want to fold it over so it makes a loop and then pin it between the layers of the pot holder so it will be sewn nicely into the side seam.

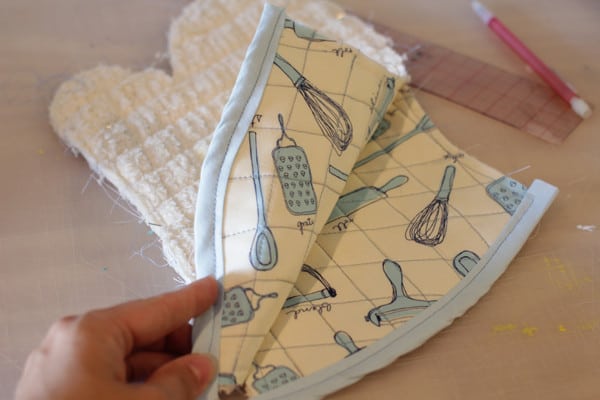
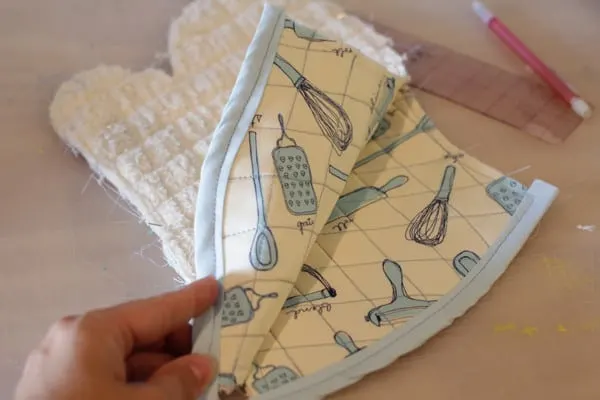
Pin both quilted layers together and sew all the way around the pot holder.
After sewing, trim around the finger indention, between the thumb spot and the rest of the hand spot. Cut into it almost to the stitching. This will ease up some of the fabric tension at that point when you turn it right side out.

Flip your quilted pot holder right side out, making sure to push all the finger spots out from the inside. Run an iron over it and you’re done!

Have fun making your own DIY pot holders!
DIY Pot Holder
Learn how to make a pot holder, and quilt it, using your fave fabric and this easy tutorial! You don’t even need a pattern for this DIY pot holder.
Materials
- Old pot holder
- 1/4 yard of quilt batting
- 1/4 yard of printed fabric for the top
- 1/4 yard of terrycloth for the inside
- 1 yard of bias tape binding, you can make your own or buy it pre-made
- Matching thread
Tools
- Sewing machine
- Ruler
- Sewing scissors
Instructions
- Cut out the fabric. Use a pot holder you already have, and trace around it on a sheet of paper for a template.
- Using a ruler, add 1/2″ for seam allowance around the outside to the template. Then cut 2 of each of your fabrics.
- Pin the three layers together two times, one for the top and one for the back, and quilt them.
- So what I did was taking a ruler and a pencil I lightly drew the quilting lines 1″ apart and then sewed on top of the pencil line. It totally worked for me!
- Make the bias tape, unless you purchased it. Cut a 2″ strip of fabric that is diagonal across the width of the fabric.
- Fold it in half and then fold the two ends into the center so you have a nice finished edge to put the bottom of the pot holder into.
- Sew the bias tape onto the bottom of the two pieces.
- Sew a loop of fabric into the side seam. Cut a 4″ x 2.5″ piece of fabric, fold it over lengthwise with right sides together, and sew up at 1/4″ seam allowance.
- After sewing, flip it right side out and then iron it flat.
- Fold over so it makes a loop, and then pin it between the layers of the pot holder so it will be sewn nicely into the side seam.
- Pin both quilted layers together, and sew all the way around the pot holder.
- Trim around the finger indention, between the thumb spot and the rest of the hand spot. Cut into it almost to the stitching.
- Flip the pot holder right side out, making sure to push all the finger spots out from the inside. Run an iron over it to finish.
Now that you know how to make a pot holder, let me know if you’re going to try it in the comments! I’d also love for you to check out these other popular sewing projects here on the blog:
- DIY Grocery Bag from a Tea Towel
- Simple Tie-On Chair Cushion
- Unique Recycled Denim Ideas
- Make Baby Burp Cloths
- Unique Quilt Patterns for Gifts
Kathy
Tuesday 31st of January 2017
Thanks so much...love the tutorial !
Brenda Boston
Thursday 3rd of September 2015
Could you please tell me where you purchased this fabric. I have looked at Hobby Lobby and Hancock's and their kitchen type fabric is not nearly as cute as yours. Thank you so much, Brenda P.S. I wish you'd put your pattern on here also. I copied my mitt and it doesn't have the cute flare type shape.
Marilyn
Wednesday 13th of May 2015
Thanks so much for the tutorial! I LOVE your mitt and the fabric is gorgeous!