
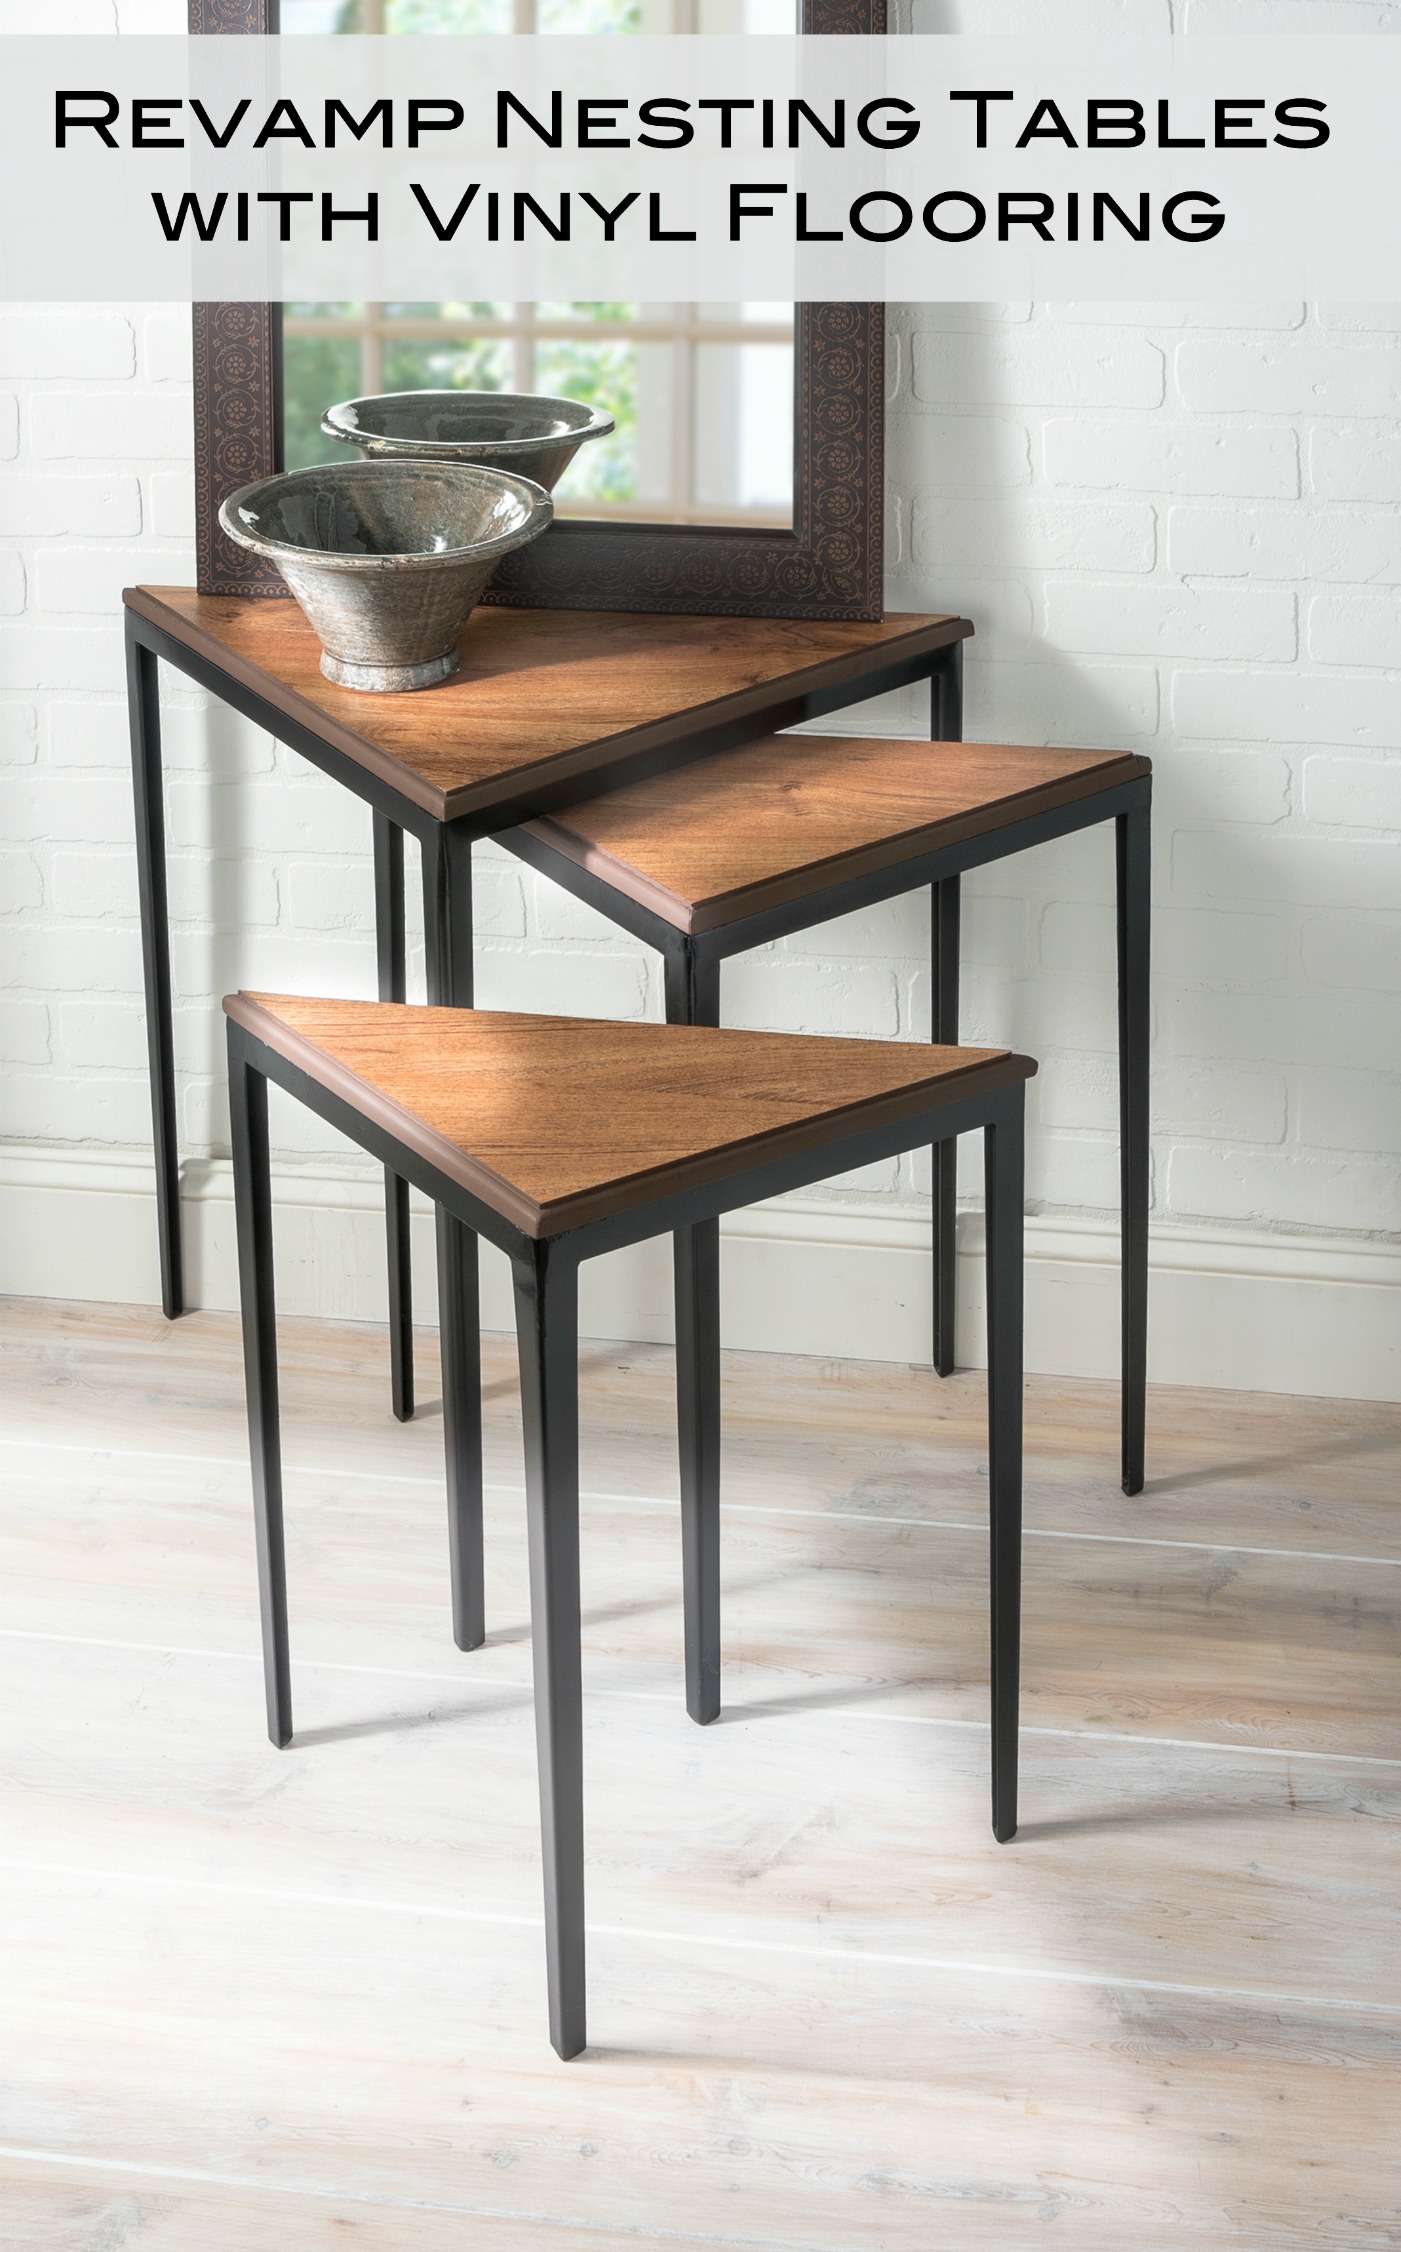
Learn how to revamp nesting tables by giving them a vinyl plank table top! This is a perfect way to use leftover flooring in a DIY project.

Sometimes you walk by an item in the thrift store without a second glance. That’s exactly what I did with a pair of nesting tables at our local junk shop . . . but not Steve. This is the condition they were in when we first spotted them:

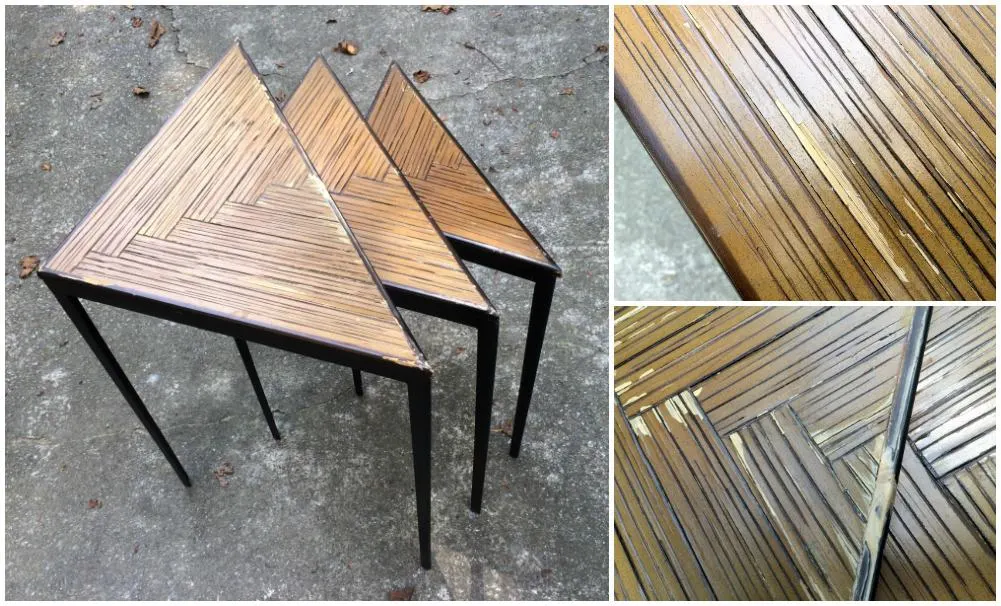
I wasn’t sure that there was any hope given that the tops were so ugly and chipped up, but Steve had something in mind – use the vinyl flooring we had from another project to revamp the top.
The vinyl flooring is tough, water resistant, and easy to cut. If you’ve never thought of fixing up some thrift store tables with flooring, it’s easier than you might think.
If you’re like us, you have a box of leftover flooring that you can spare a few pieces of. If you don’t have the flooring, ask for leftovers at Home Depot. They’ll give them to you for free or pennies on the dollar! Here’s how we revamped our tables with a vinyl plank table top.
Vinyl Flooring Table Top
Gather These Supplies
- Vinyl flooring – enough to cover your nesting tables
- Titebond III Ultimate Wood Glue
- Utility scissors
- Painter’s tape
- Spray paint ( for table legs)
- Paint or stain (for tabletop edges)
- Paintbrush
Tools
Before you begin, sand down any peeled up laminate or chipped wood areas on your tabletops using your orbital sander.

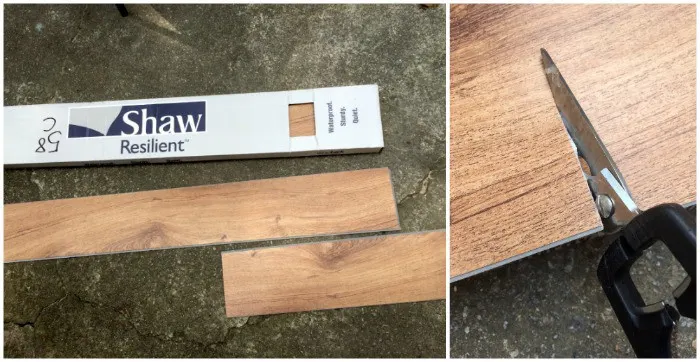
Use utility scissors to cut the vinyl floor down to a size that is slightly larger than the table top you wish to cover. This is just so you aren’t working with long pieces that are flapping around.
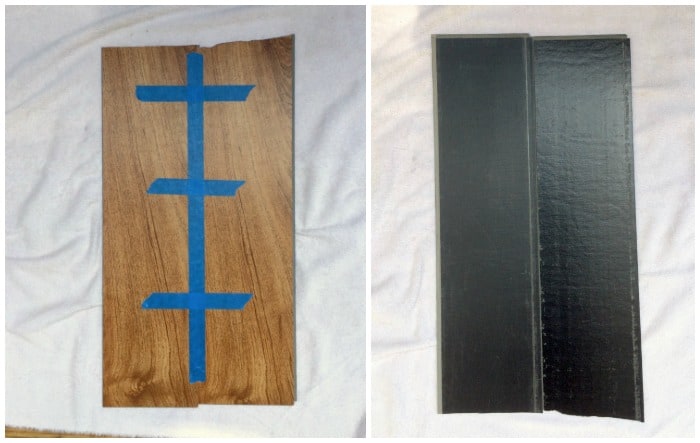
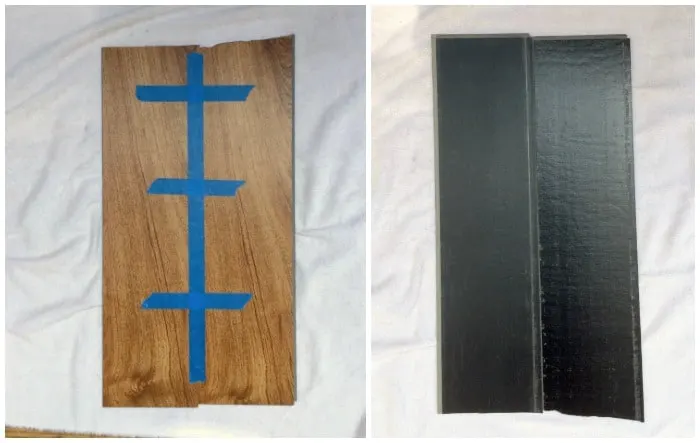
Join the flooring planks together and use painter’s tape to hold them in place when you flip them over. Make sure you join enough pieces to cover the width of the tables, and overhang a bit.

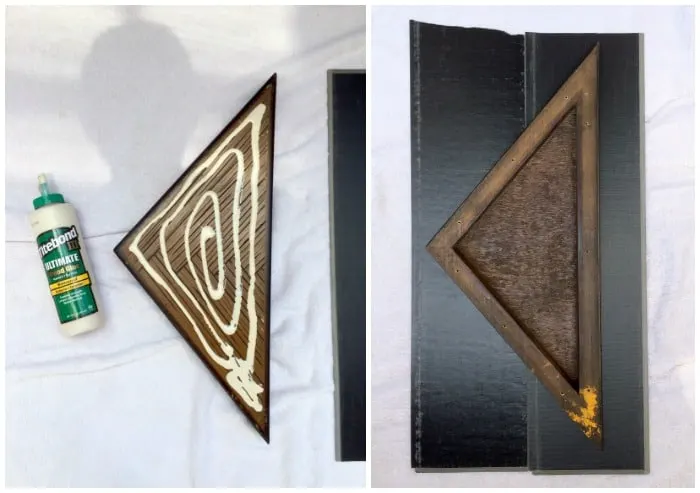
Remove the table top from the legs if possible. Put a strong glue (Titebond III) on the table top as shown; flip over onto the upside-down flooring planks.
Let glue dry according to instructions on the glue bottle.
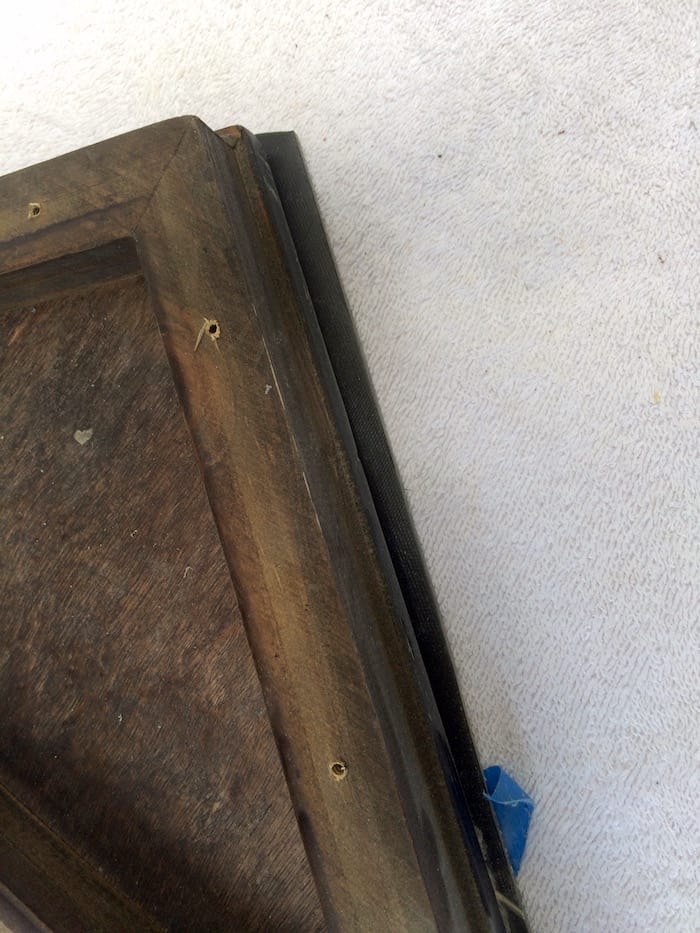

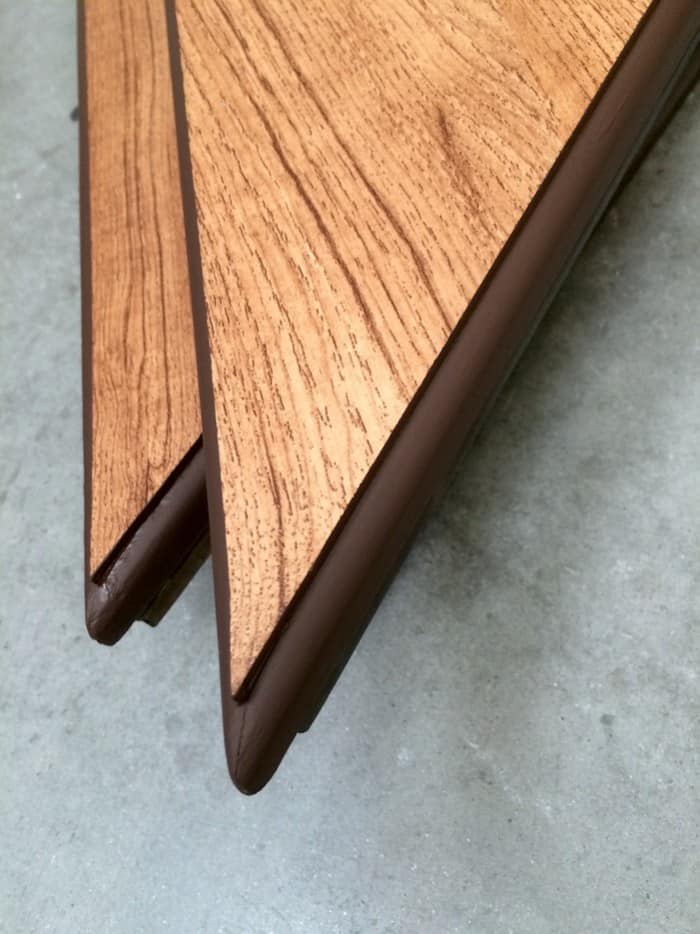
Using utility scissors, trim off the excess flooring leaving a ¼” to an ⅛” overhang all the way around.

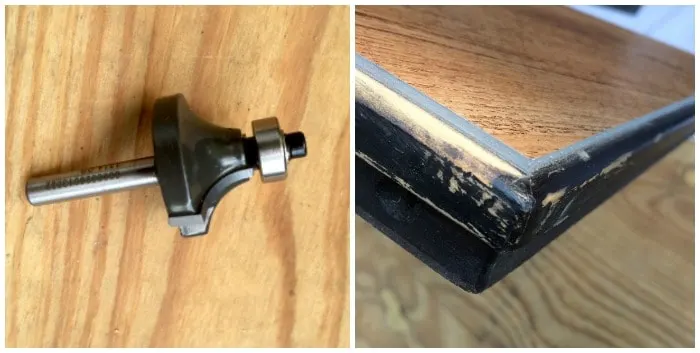
Use a router with a round over bit to remove the excess flooring and clean up the tabletop edges. The round over bit is pictured at left above and you can learn more about it (and how to use it) here.
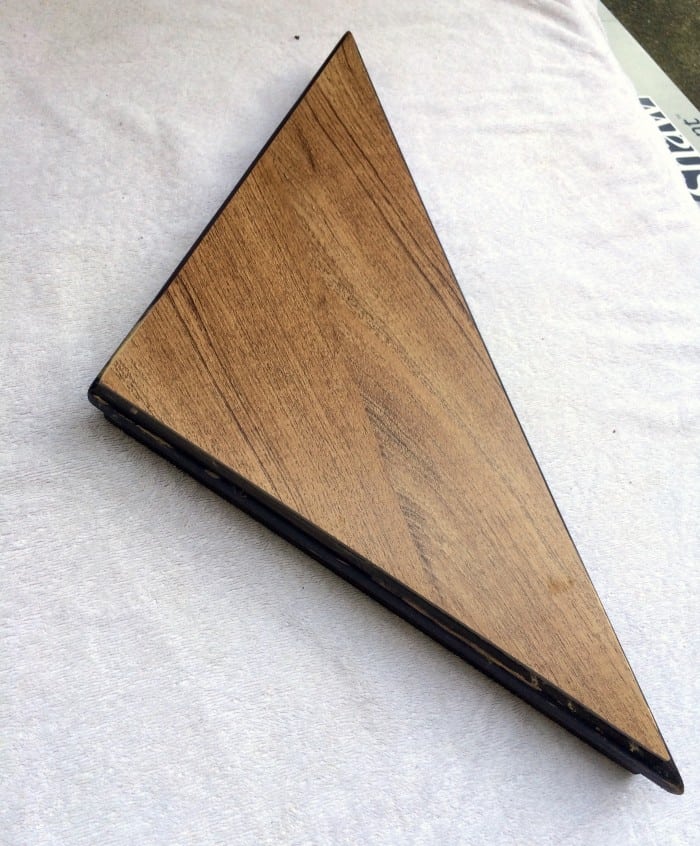
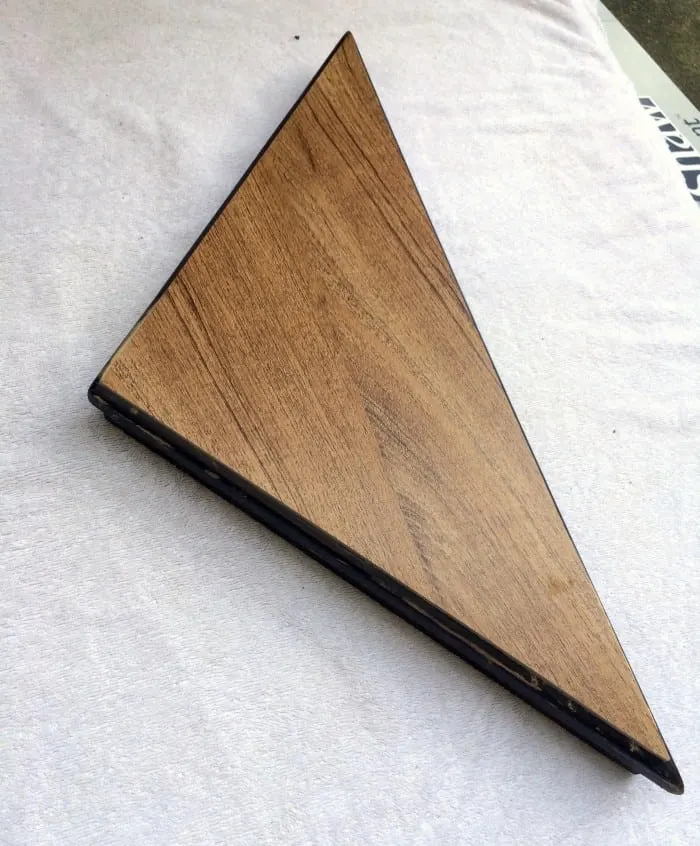
This is how your tabletop will look after it’s been routed. You’re almost there!
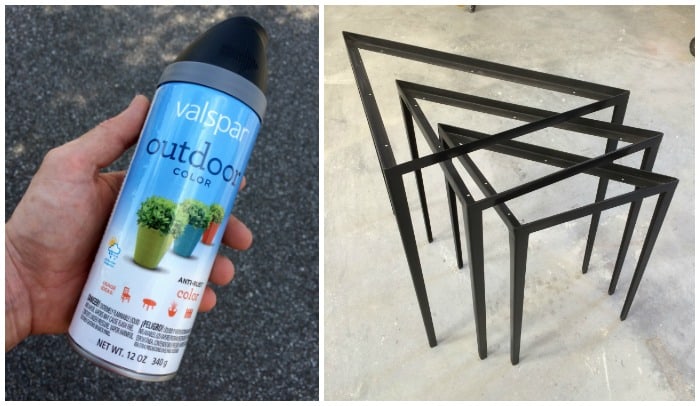

While the legs are detached, clean and sand any areas that need it – then spray paint with a tough spray paint.

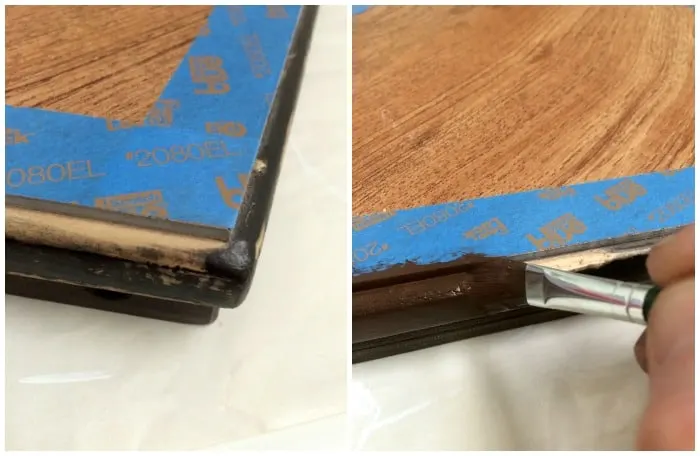
Use painters tape to mask off the new table surface, then paint or stain the edges as needed. We used a brown acrylic paint that was between the tabletop and the legs.

Let your tabletops dry and then reattach them to the legs.
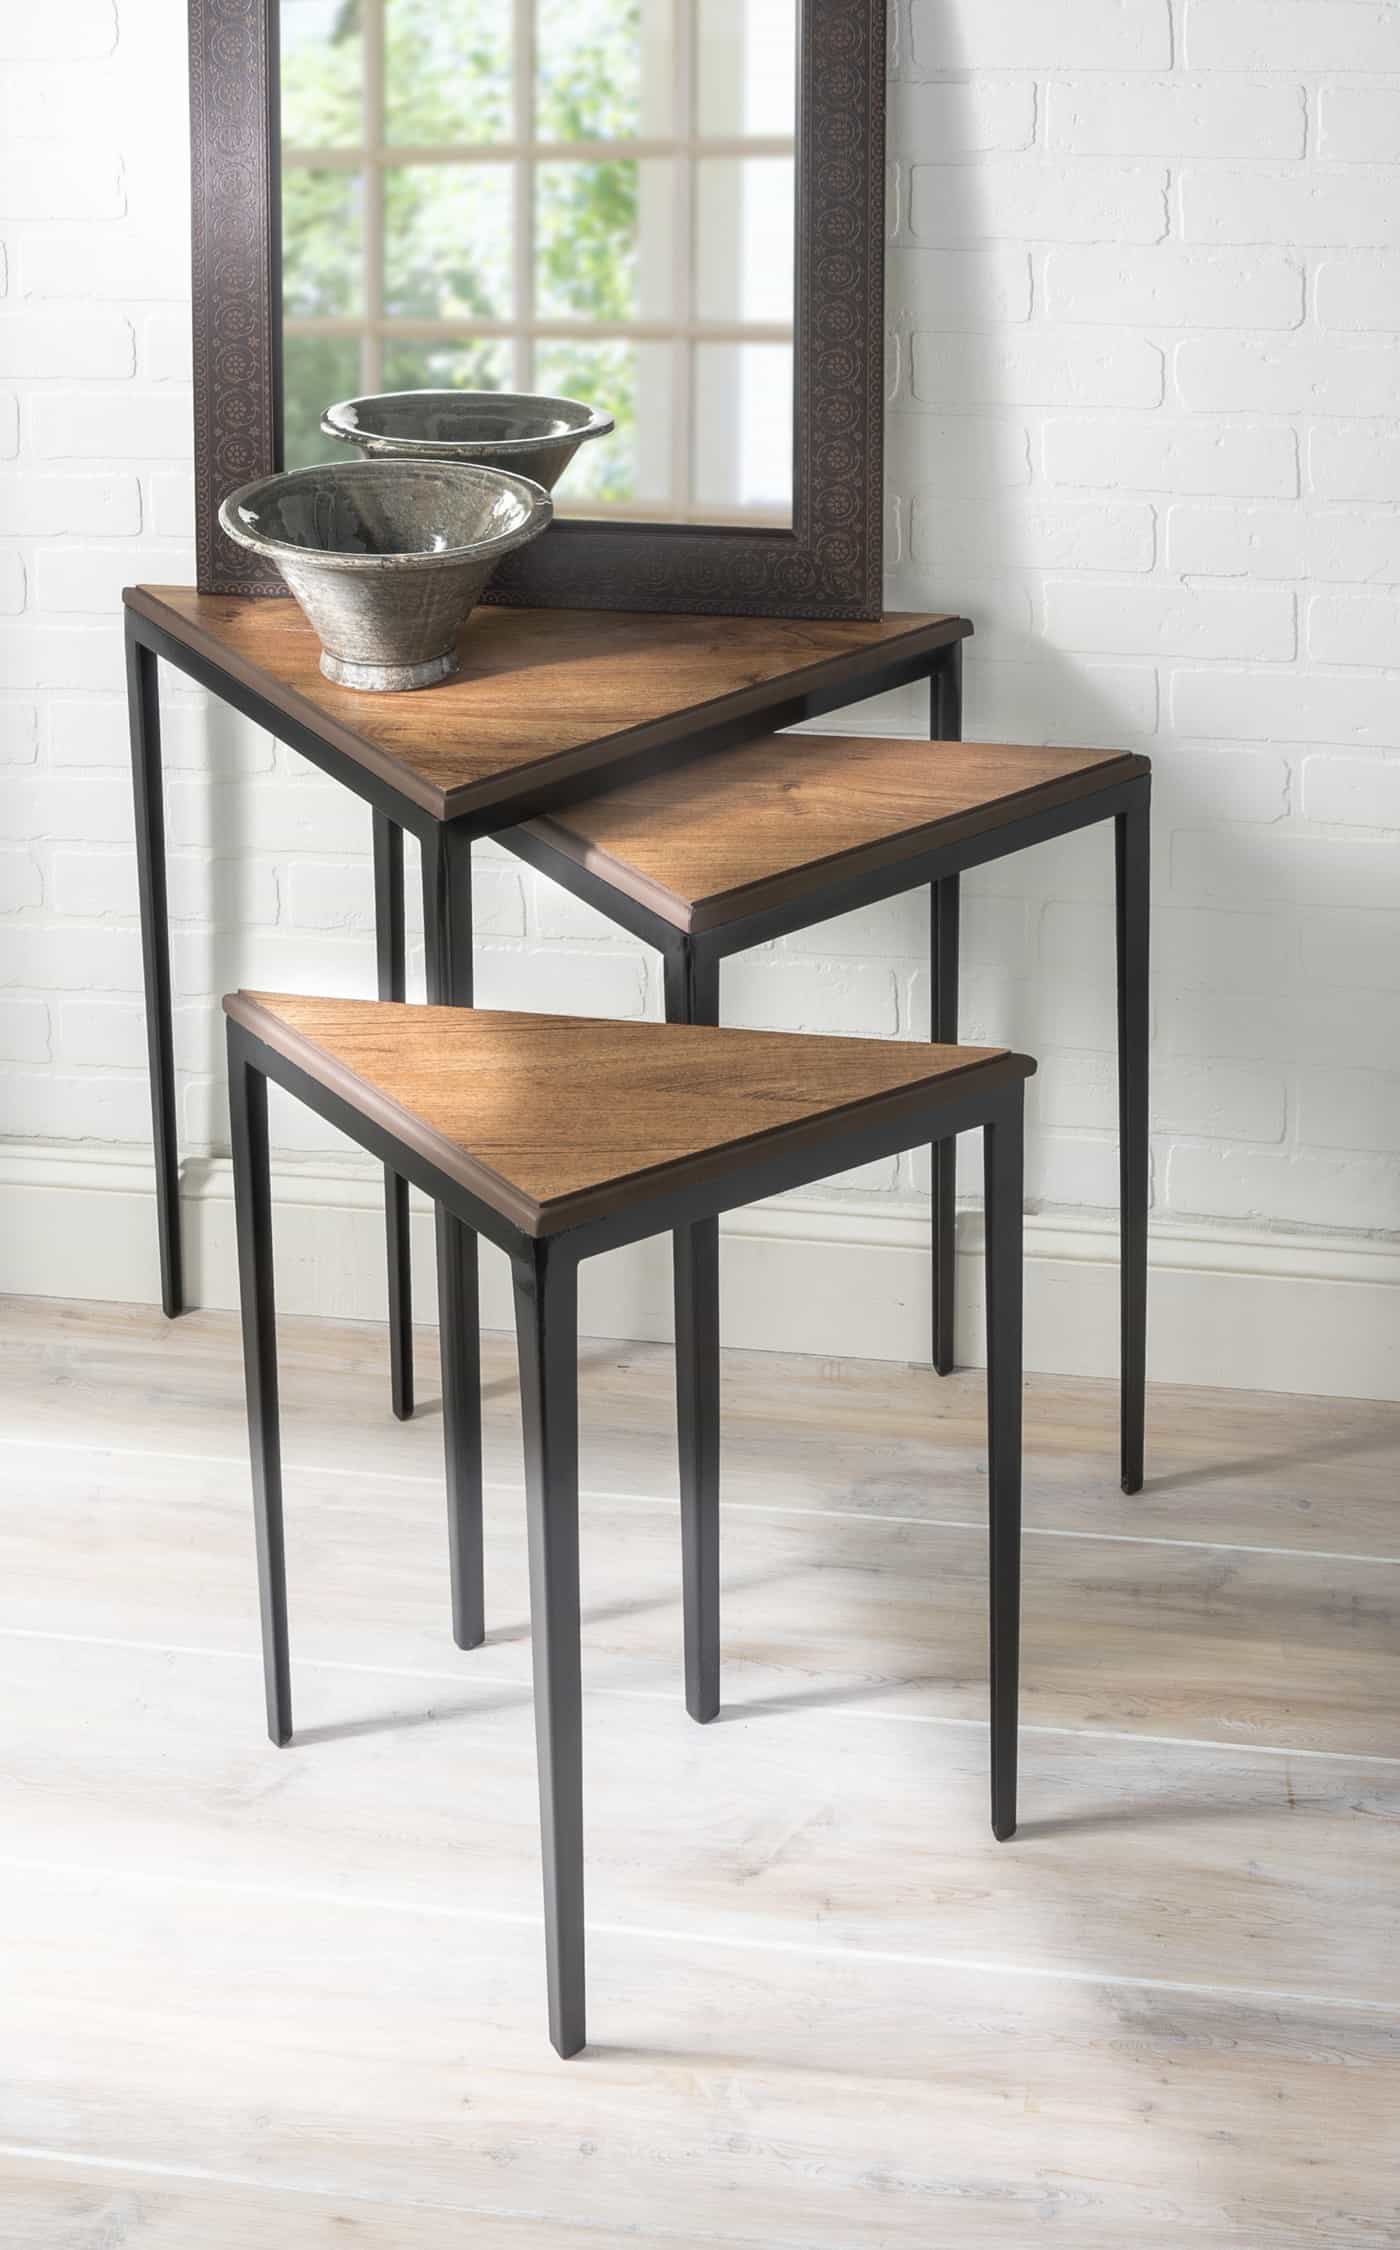

Our nesting tables are turned from trash to treasure! And we can put any sort of cups on the top and they’ll be just fine. Which is kind of nice, because who wants to use a coaster all the time?

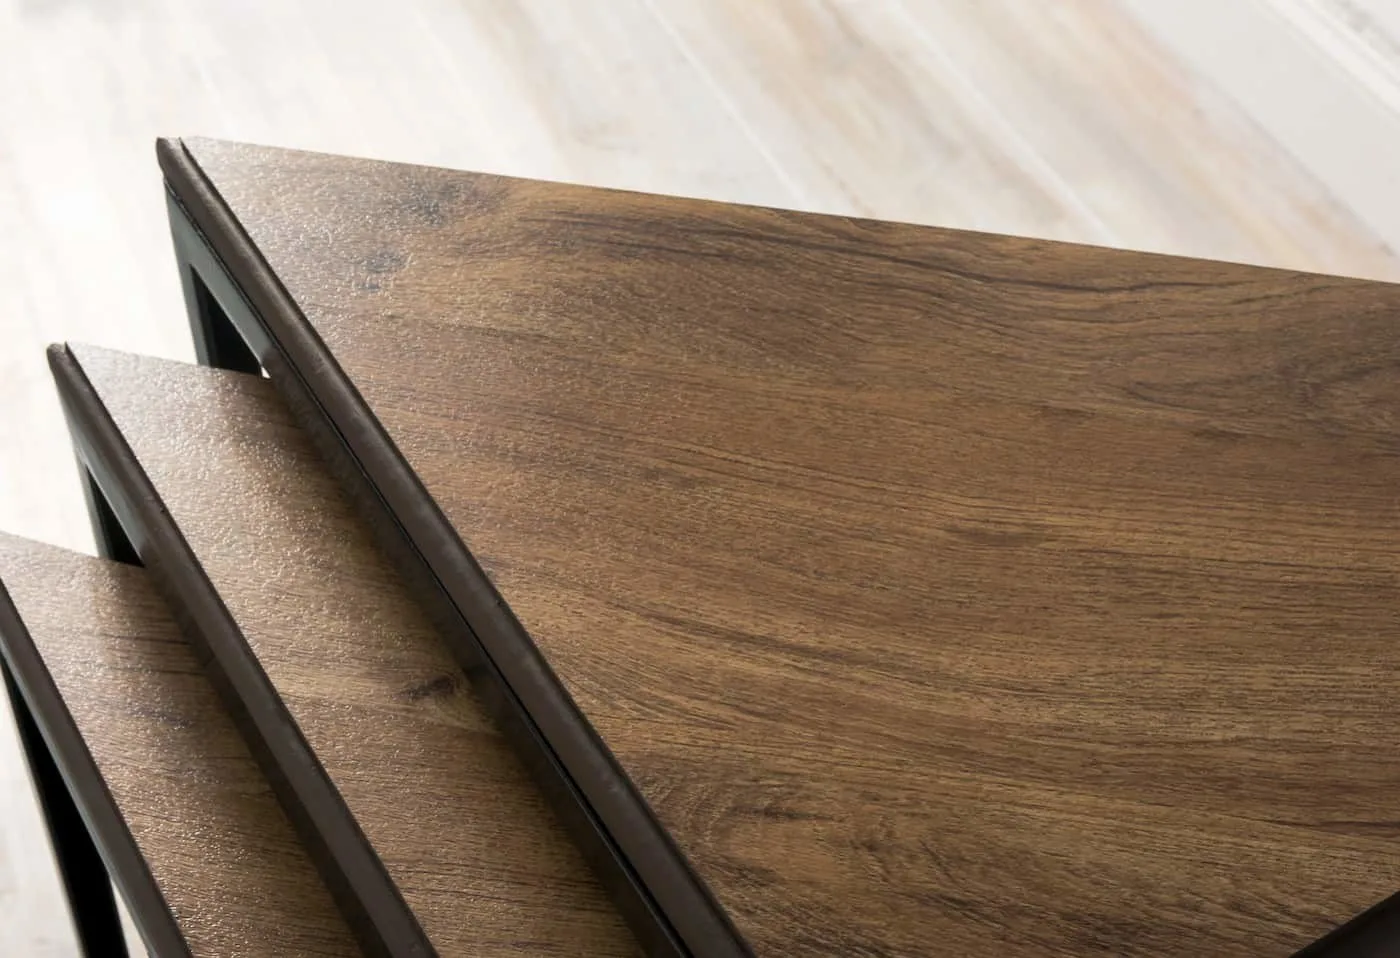
Here’s a close up of the vinyl plank table top . . . what do you think? Let us know in the comments!
If you enjoyed this project, I’d love for you to check out these other DIY ideas:
Sage
Monday 26th of July 2021
Those look so Great! I'm gonna try that after we get moved next year. They do look like brand new tables. Hopefully I will move to a place with great thrift stores. Love thrift store shopping!!!
Amy
Tuesday 27th of July 2021
Thank you Sage! Good luck :D
Kryztyna
Monday 29th of August 2016
These are really lovely. Any reason you chose utility scissors over a utility knife for cutting the vinyl flooring?
Amy
Monday 29th of August 2016
Hi Kryztyna! Thank you! We happened to have the utility scissors accessible at that moment but you could definitely use the knife - and it would probably be more accurate :D
Mindy Drummond
Friday 5th of August 2016
What an awesome idea, they came out beautifully!