
This dual DIY dry erase board and chalkboard makes a lovely teacher’s gift, but is also perfect for anyone that wants to get organized!
Skills Required: Beginner. Chalk paint is harder to use than regular paint due to the texture, so you should have some painting experience. Or at least do a test before beginning if you’ve never crafted before.

I love getting organized. I didn’t know it until I was an adult, because I did not feel this way when I was younger. In addition to organization I’ve also started eating dinner earlier and grown an appreciation for drugstores – it just all seems to work!
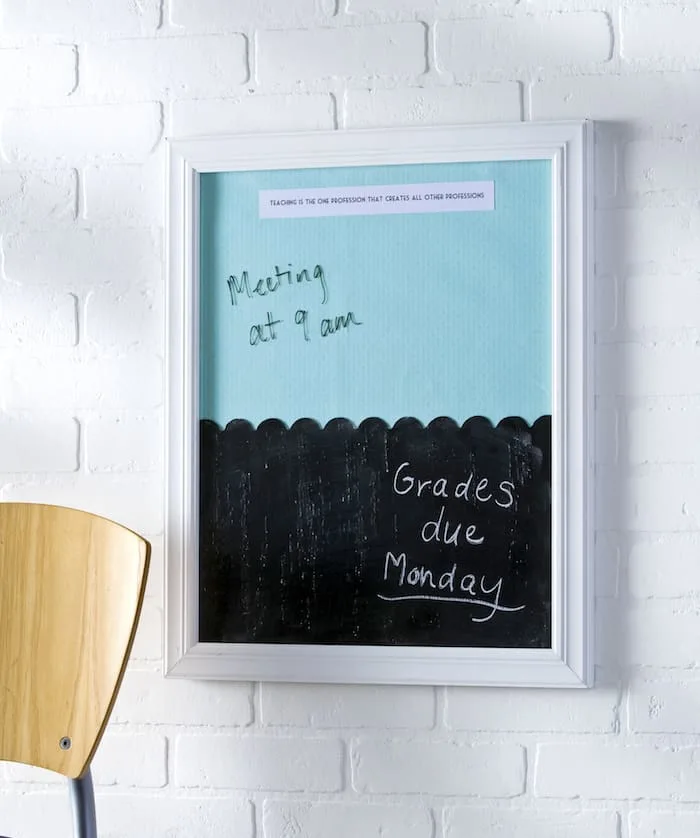
One of my latest projects along these lines is this dual DIY dry erase board and chalkboard. It’s a perfect addition to your home decor, especially in the kitchen. Where everyone can see the notes.
But – it also makes a great gift.
My mother is a former elementary school teacher and was for a long time, so I’ve personalized it to commemorate her years in education. I give my mom a lot of credit for my writing ability and current career, so I chose the quote “teaching is the one profession that creates all other professions.”
This would make a perfect gift for a teacher, back to school, or change out the quote and turn this into a project for your mom for Mother’s Day. Here’s how it’s done.
DIY Dry Erase Chalkboard
Gather These Supplies
- Printer with inkjet paper and presentation paper
- Scrapbook or paper with a repeat pattern
- 16” x 20” white frame
- FolkArt Chalkboard Paint – Black
- Frogtape Shape Tape – Scallop
- Double stick tape
- Quote of your choice
- Foam brush
- Craft knife or scissors
- Paintbrush
- Paper trimmer (optional)
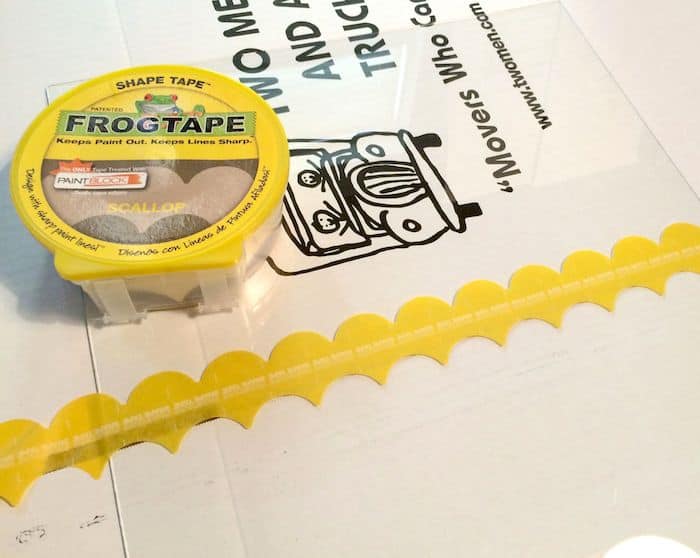
Remove the glass from the wood frame. You’ll probably want to wash it if you see a lot of fingerprints. Let dry and then apply the scalloped tape straight across the middle of the glass.
Adding the tape will allow you to identify how big you want the dry erase section and the chalkboard sections will be.
TIP #1: Measure if you want to find the exact center of the glass. I just eyeballed it.

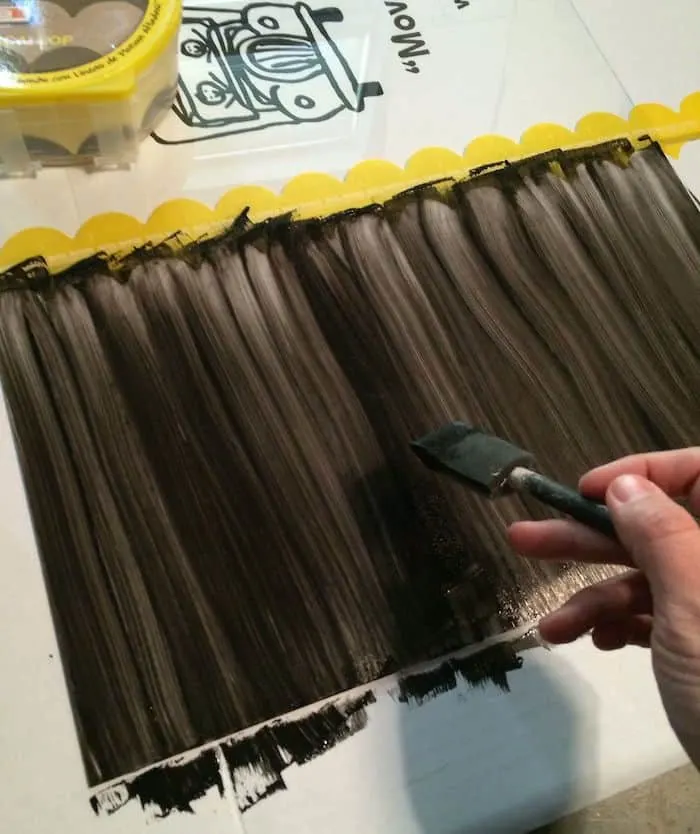
Pick one side of the tape and use the foam brush to paint the chalkboard paint in several thin strips down the glass. Only do one layer and let dry.
TIP #2: Let the chalkboard paint completely dry before painting the next layer or you will pull up paint.
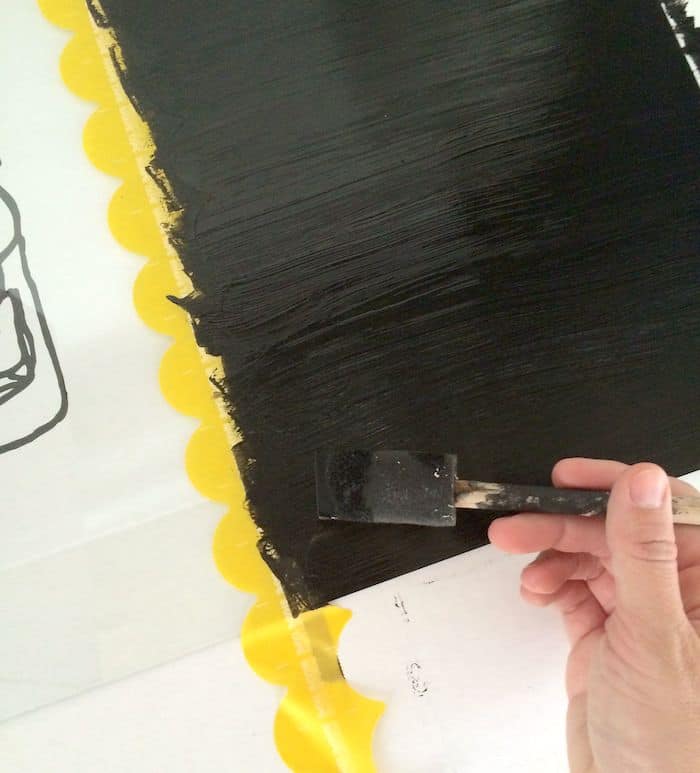

Repeat the process, painting in the same direction. You’ll do this about 4 – 5 times, letting dry completely between layers. Let dry a little longer after the final layer.
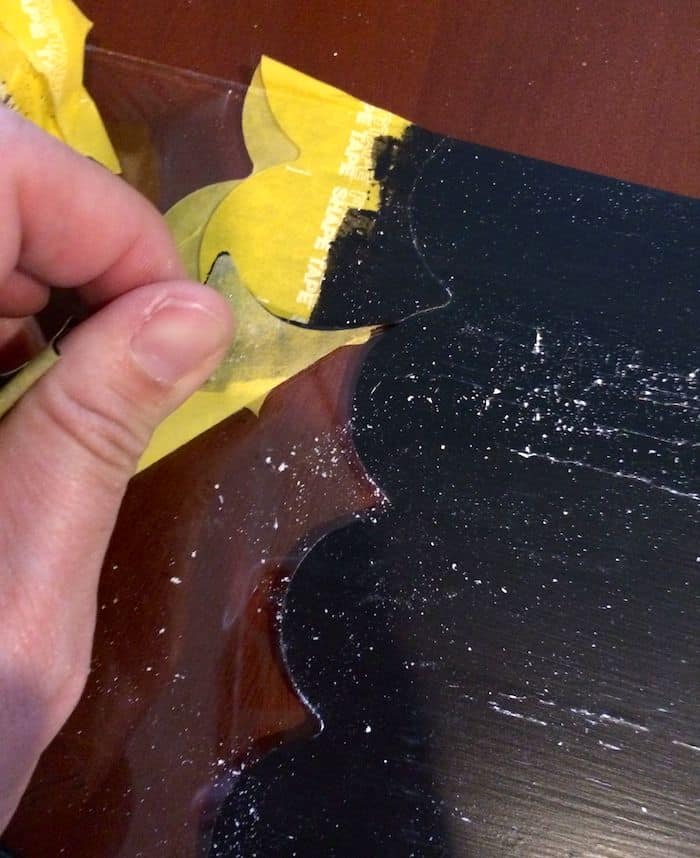
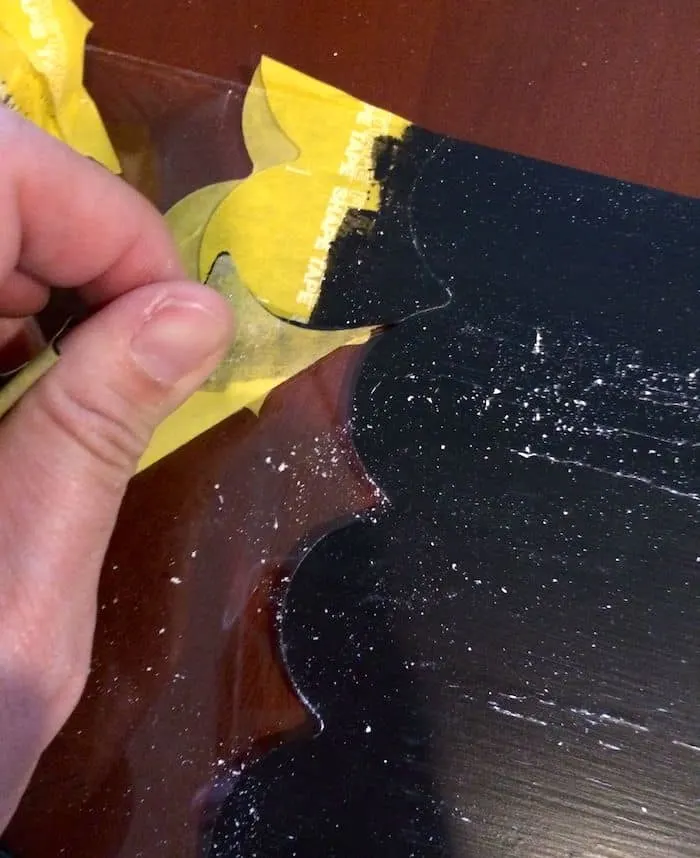
Remove the painter’s tape (start carefully) and then prep the chalkboard paint according to the bottle instructions.
TIP #3: If you find that the chalkboard paint is sticking to the stencil tape when you remove it, use a craft knife to trim around the edge of the tape and release it from the paint.

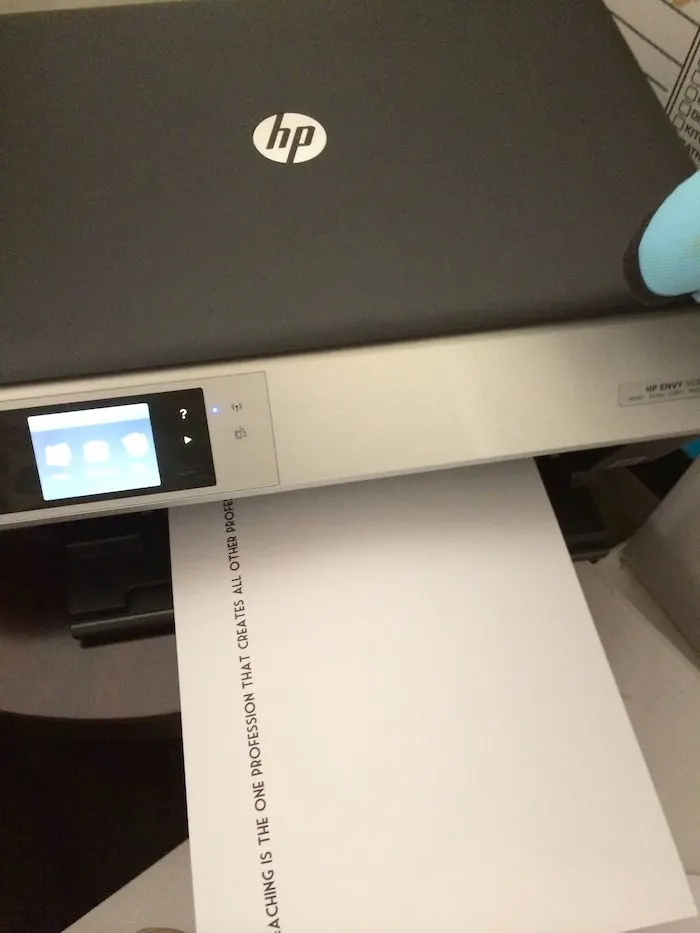
Now it’s time to work on the dry erase portion of the board. Ppick your quote, type it out in a word processing document on your computer and print it out on the presentation (thicker) paper. You can use any quote, but I chose “Teaching is the one profession that creates all other professions.”
I also printed up some repeat paper that I could pattern in the background – you can do this with scrapbook paper as well.


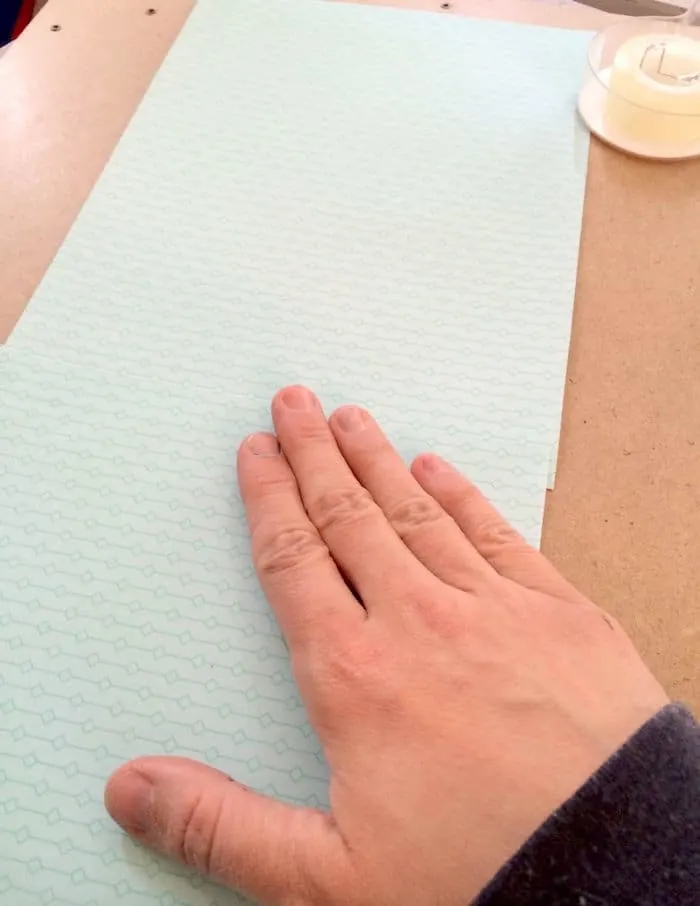
Cut the white border off of your patterned pages if you printed them. You can use scissors, or a paper trimmer might make the work quicker. If you are using scrapbook paper in the background, trim it so you can repeat it.
At this same time, trim the quote out of the Matte paper.

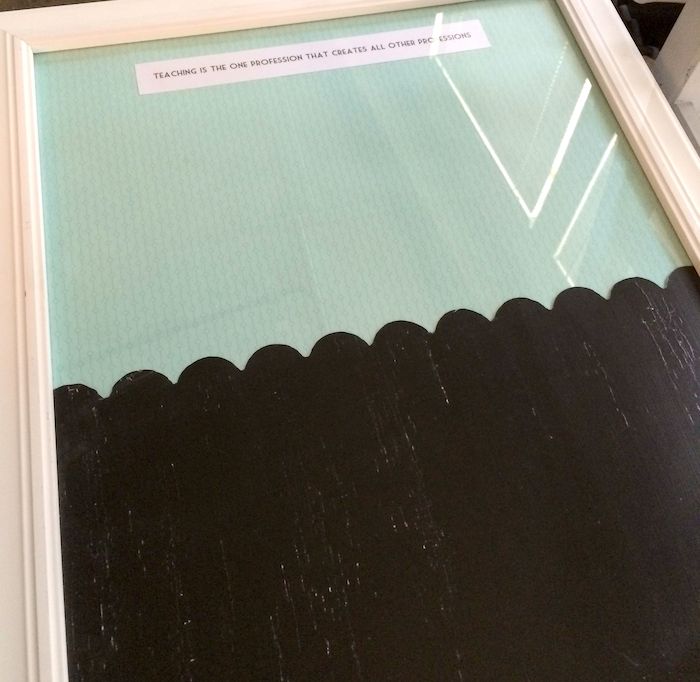
Lay your pages onto the top of the frame back and make sure that you 1) match up the pattern and 2) cover up the entire top half for the dry erase section of the board.
The pages can and should overlap slightly. When your pages are in the right place, use the double stick tape to attach them and then trim around the edge using the scissors.
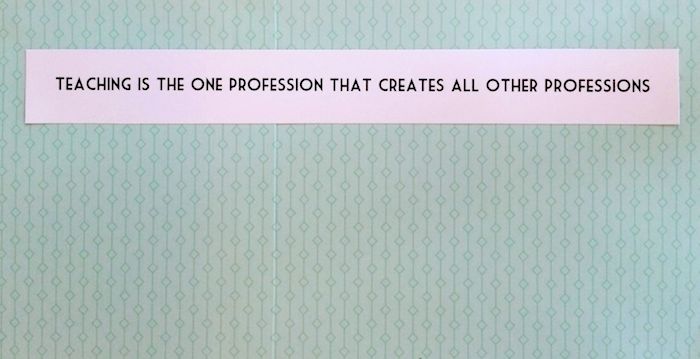
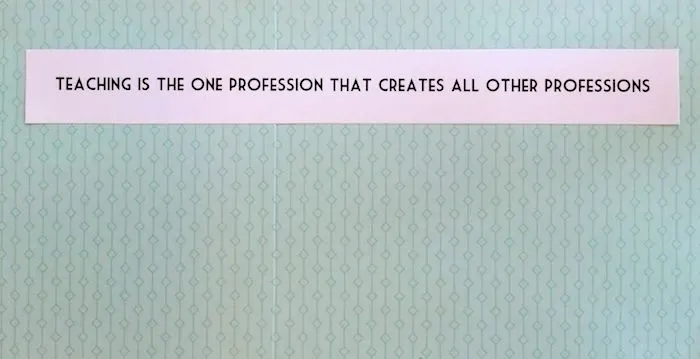
Add your quote in the top center of the patterned pages, using the double stick tap.

Insert the glass back into the frame, and insert the back.

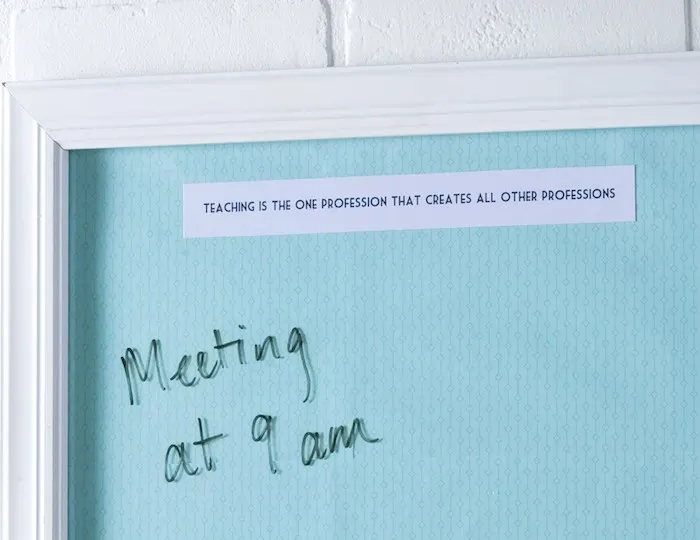
The top of your frame is now a DIY dry erase board with a personalized quote.
And the bottom is a chalkboard! This is such a fun project – I can’t wait to make my mom happy by giving this to her.
There are other ways to incorporate quotes into this DIY dry erase board and chalkboard. You can stencil directly onto the glass, decoupage it onto any area with Mod Podge, or write it directly on the chalkboard portion with chalk.
Dry Erase Chalkboard
Learn how to make a dry erase board and a chalkboard in one using a frame from the craft store.
Materials
- Scrapbook paper with a repeat pattern
- 16” x 20” white frame
- Chalkboard Paint – black
- Painter's tape - scalloped
- Double stick tape
- Chalk
Tools
- Foam brush
- Craft knife or scissors
- Paintbrush
- Paper trimmer (optional)
Instructions
- Remove the glass from the wood frame. Clean if necessary.
- Apply the scalloped tape straight across the middle of the glass and smooth.
- Pick one side of the tape and use the foam brush to paint the chalkboard paint in several thin strips down the glass. Only do one layer and let dry.
- Repeat the process, painting in the same direction. You’ll do this about 4 – 5 times, letting dry completely between layers. Let dry a little longer after the final layer.
- Remove the painter’s tape (start carefully) and then prep the chalkboard paint according to the bottle instructions.
- Trim the scrapbook paper to fit the top half of the frame.
- Lay your pages onto the top of the frame back with double stick tape.
- Insert the glass back into the frame, and insert the back.
- Use the top half as a dry erase board and the bottom half as a chalkboard.
How would you personalize this project and incorporate your quote? Let me know in the comments!
If you like chalkboard paint, you’ll need to take a peek at these other simple projects – I think you’re going to love them:
Via B Design
Sunday 11th of September 2016
It looks great! I recently found chalkboard pens that you can use instead of regular chalk. You can use them just as long as the board isn’t porous.
Amy
Sunday 11th of September 2016
What kind are they Kristina?? I can't find any that will write on chalkboard paint!!
Borei Design
Thursday 8th of September 2016
What an awesome notice above your average dry erase board! I have on that could really use a makeover. Thanks so much for sharing. Following you on Pinterest! :)