
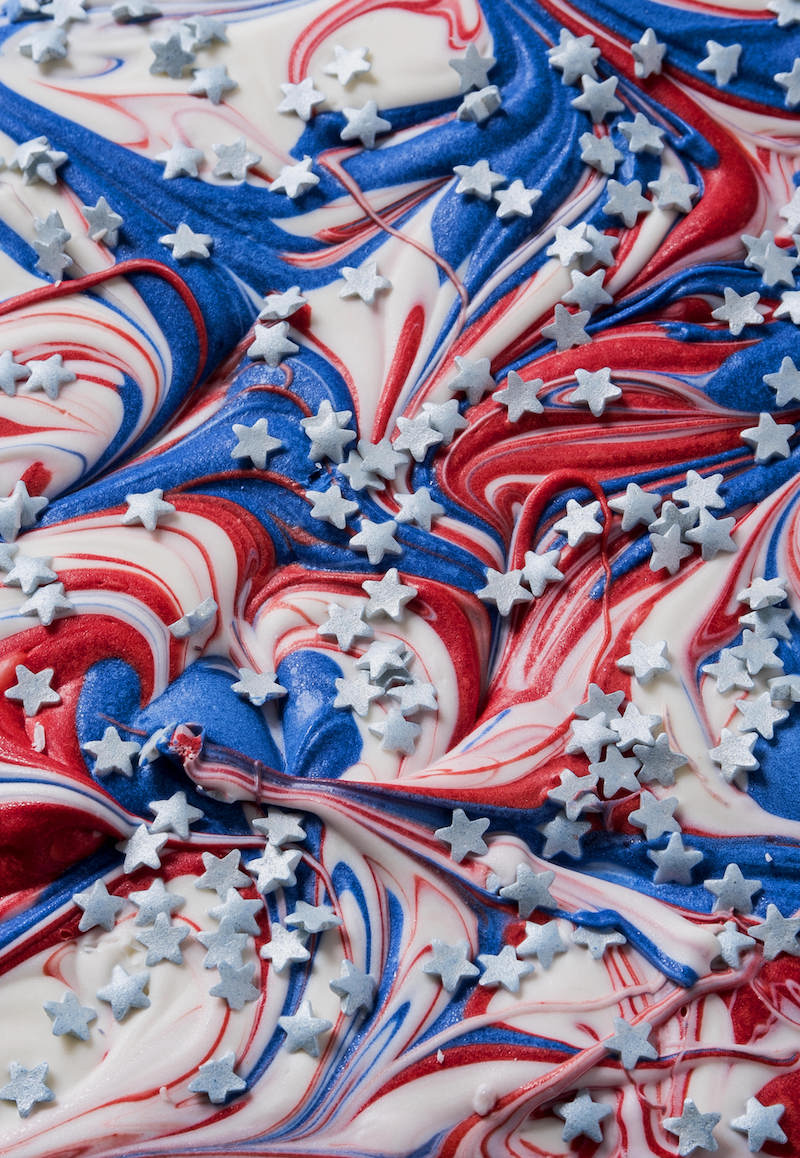
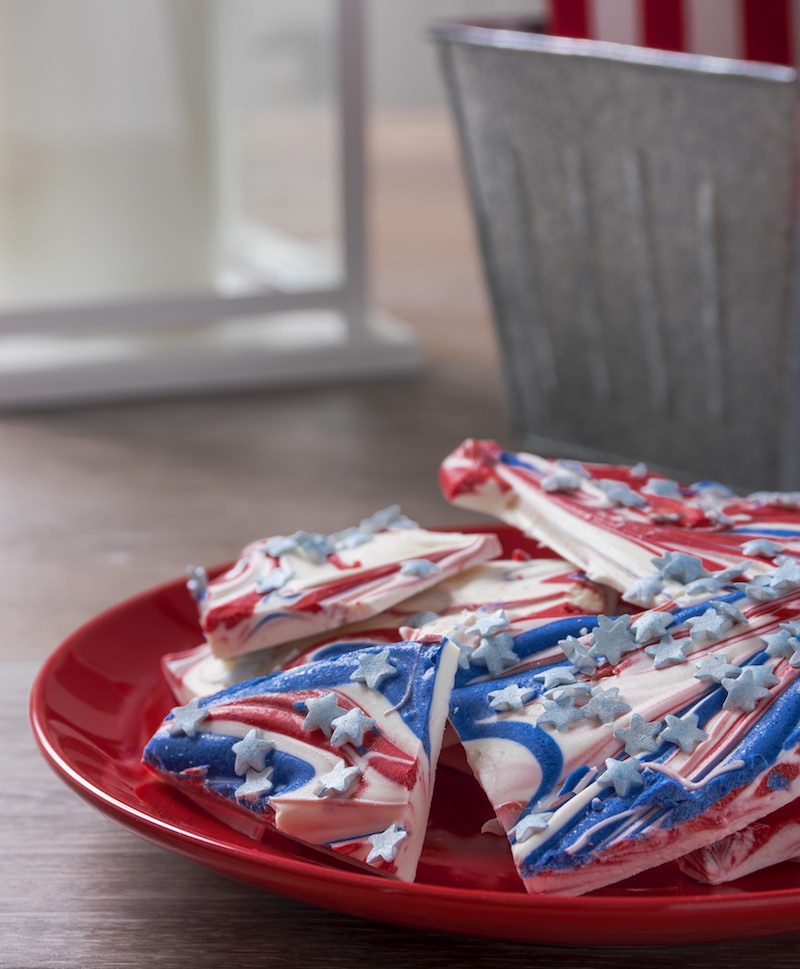
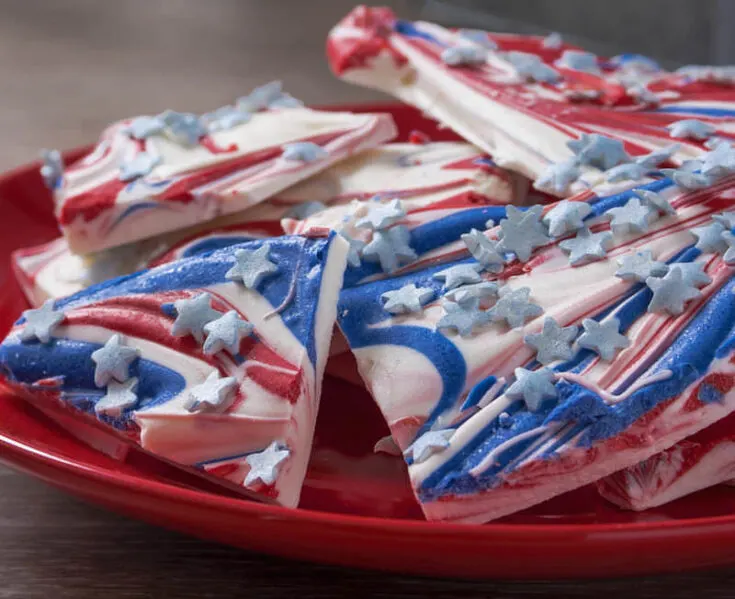
Use multiple colors of melting chocolate to make this red white and blue candy bark! Kids love to get involved with this Fourth of July recipe too.
It’s easy, fun, and so tasty. Don’t forget to scroll down to see a video of how it’s made.


There are a lot of desserts you can make for the Fourth of July, I find that there are two that I always tend to gravitate towards. One is my firecracker sugar cookie pizza that I shared recently, and the other is this red white and blue candy bark.
Red White and Blue Bark
Once you make this, you’re going to want to make it for every holiday. If you’ve never made candy bark before, it’s one of my favorite desserts.
It’s VERY simple to make: so easy that the children can join in the fun. It’s also perfectly themed for your Independence Day celebration!

How to Melt Candy Melts
Before I dive into the recipe I did want to share something important I learned about melting candy melts. I’ve made a lot of candy bark in my life, and I’ve had a lot of failures. Every time I tried to use a stovetop pan it seemed I would burn the melts.
I’d even try low heat and my gas burners were so hot that it still didn’t work on low. Microwaving seemed to take forever, so I finally broke down and got one of these bad boys:
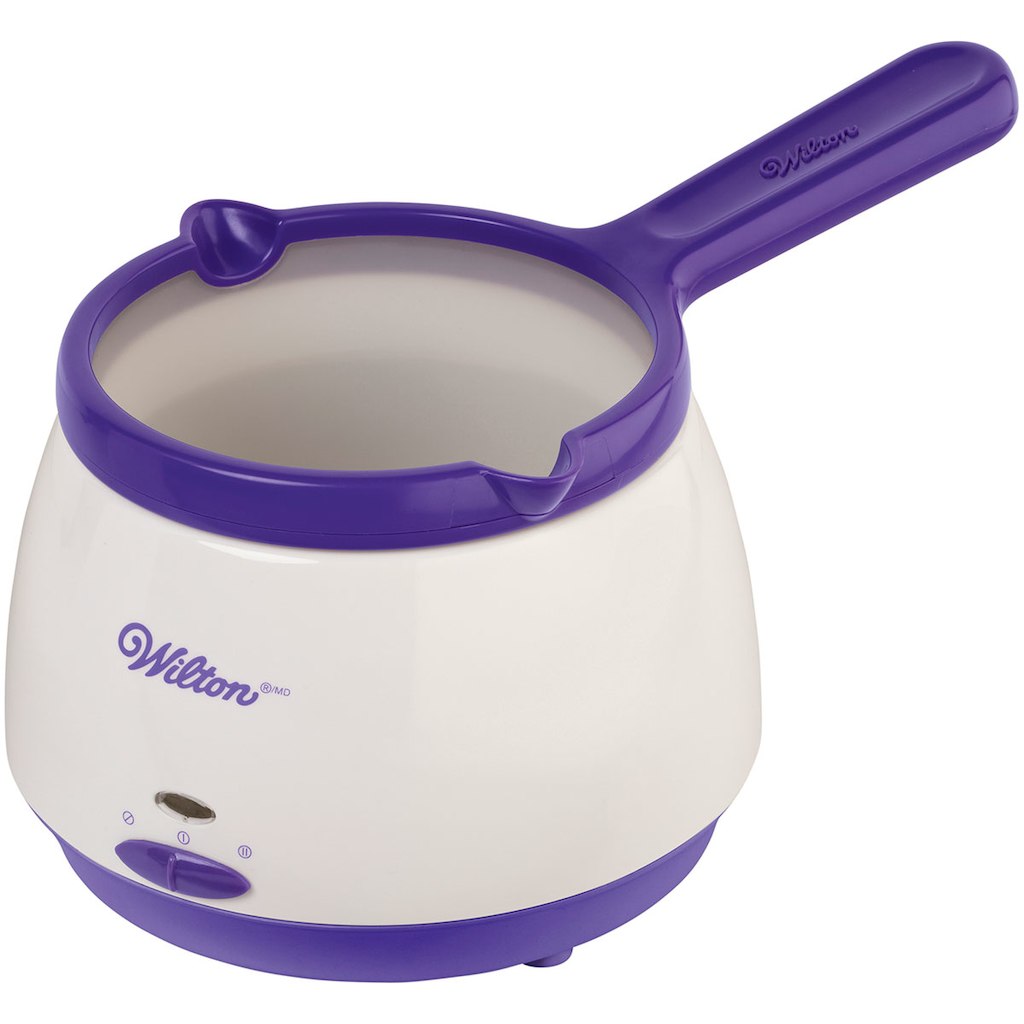

And this melting pot saved my candy melt situation. You’re going to think I’m nuts, but I own three of them – so that I can do as many as three colors at once. Do I think that you need three melting pots?
Not necessarily, but I will tell you that one is incredibly helpful. Especially if you are somehow unable to get your candy melts to melt without burning like me.
Another thing I love about this pot is that you can remove the silicone insert and place it into the freezer when you’re done.
Then you clean it up by cracking out the remaining candy melt material and throwing it into the garbage (you don’t want to put it down the sink because it can harden and clog pipes).
If you don’t want a melting pot, you’ll just need a microwave and patience. Microwave the candy melts in silicone containers in 30-second bursts.
Stir between each 30-second time period, and then do it again until the melts stir easily. It’s going to take several minutes and you’ll want to work quickly with multiple colors.
I recommend silicone containers in the microwave because you’ll be able to freeze them to easily clean. I’ve microwaved candy melts in regular tupperware type containers and they aren’t as easy to bend and break the candy melts if you freeze them. They’re way harder to clean.
Are you ready for the red white and blue candy bark recipe? Keep reading!
To make candy bark, you’ll just need a few simple supplies:
- Candy melts in the colors of your choice (I use Wilton in red, white, and blue)
- Silicone containers or a melting pot
- Cookie sheet
- Wax paper
- Toothpicks for swirling colors
- Sprinkles in your favorite colors and/or shapes – I used star sprinkles
To prepare, line a cookie sheet with the wax paper. Following the instructions on the back of the candy melts package, melt them in the microwave.
Pour onto the wax paper and let your children swirl the colors to make fun designs! Then add sprinkles on top before the candy has solidified.
Refrigerate for several hours on the cookie sheet. Remove from the fridge and use a towel and hammer (or other hard tool) to break up the bark. Place on a decorative plate and enjoy!
I’d love for you to check out the video in the recipe card below.
Red White and Blue Bark

Use multiple colors of melting chocolate to make this red white and blue candy bark! Kids love to get involved with this Fourth of July recipe too. It's easy, fun, and so tasty.
Ingredients
- 8 oz Wilton Candy Melts, Red
- 8 oz Wilton Candy Melts, White
- 8 oz Wilton Candy Melts, Blue
- 4 T sprinkles
Instructions
- Prepare a flat surface with wax paper. In separate bowls, melt each of the colors according to package directions. For instance, for me this meant melting in the microwave in 30 second increments, stirring between each increment until completely melted.
- Beginning with one color of chocolate, spread all but a couple of tablespoons over the wax paper in a thin layer, making about a 9 x 13 inch rectangle. Repeat this process with all colors until all three layers have been spread and layered on each other.
- Using the remaining tablespoons of each chocolate, spoon lines of the chocolate on the bark. Using a toothpick, drag the dollops through the top layer to make a marbled design.
- Top the bark with sprinkles. Let set until completely hardened (or place in the fridge) then cut into pieces with knife or use a towel and a hammer to break apart.
Nutrition Information:
Yield:
16Serving Size:
1 servingAmount Per Serving: Calories: 183Total Fat: 1gSaturated Fat: 0gTrans Fat: 0gUnsaturated Fat: 1gCholesterol: 0mgSodium: 16mgCarbohydrates: 44gFiber: 0gSugar: 28gProtein: 0g
I hope you’ll try my red white and blue candy bark (with the kids!) and make it a part of your Fourth of July celebration! It will make the perfect patriotic dessert that both children and adults will love.
For more candy bark recipes, check out our Halloween bark, our cookie monster bark, and our Lucky Charms bark!
You should also check out the following Fourth of July dessert recipes for more delicious inspiration (from me and my blogging friends!):