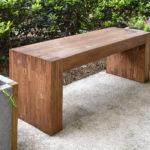
DIY Bench
Make a DIY wood bench without any screws or nails. This modern build is very easy for beginners.
Servings 1 bench
Cost $50
Equipment
- Bar clamps
- 1 Belt sander
- 1 T-Square
Ingredients
- Regular 2 x 4s – pine see cut list in notes
- Wood glue we used Titebond III
- Thompson's WaterSeal
- Rag(s)
- Sanding block 80-grit and 120-grit
- Cardboard box or other surface protection
Instructions
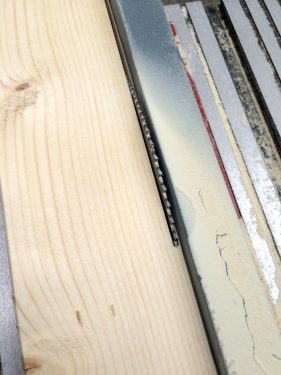
- Using the table saw, “mill” the 2″ edges of every piece of wood so that you get a very square edge (as opposed to the rounded edges that come on a 2×4). This will give your bench a more modern look.
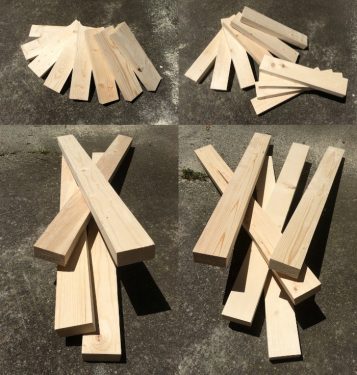
- Cut the pieces of wood according to the cut list in the notes. Keep in mind, these measurements produced a finished bench that is 16″ high x 40″ long x 13.5″ deep . . . AND a little extra was left for the milling and sanding process. If you want to customize the size of your bench, you’ll need to adjust these cut lengths.
- Use your pieces to create a box joint. Place a 40″ piece of wood on the ground, with a 33.5″ piece in the center. On each end, you’ll place a 16″ long piece perpendicular to the other two pieces, as shown in the photo above. Make sure everything is even and as flush as possible (and use a t-square or other item if necessary to for a right angle), then glue into place and clamp.
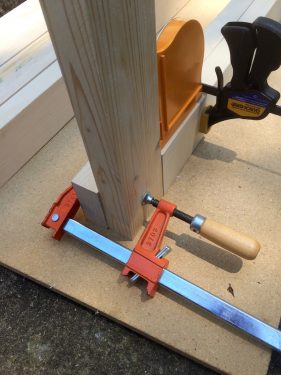
- Add Liquid Nails to the wood, setting it up in your pattern as shown in the final image then adding clamps to hold it together. Remember that you’re doing a modified box joint, so you’ll have one long piece of wood, then one short piece, then long, then short, and so on.
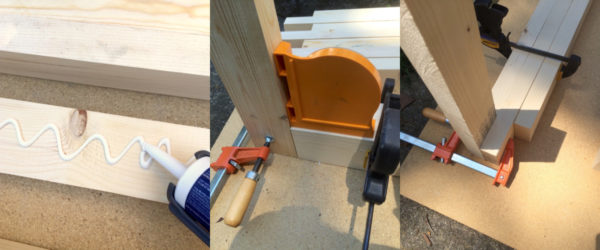
- Once your bench is full assembled, keep it clamped and let it dry overnight.

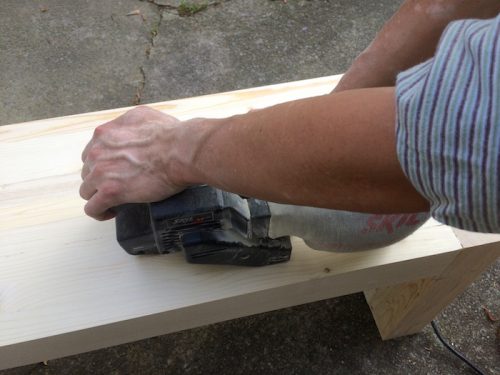
- Undo the clamps and sand with the belt sander to get everything even. Don’t forget to sand with the grain! Sand until it’s completely smooth and flat. Do this on the legs, too. Then wipe away all of the sanding dust.
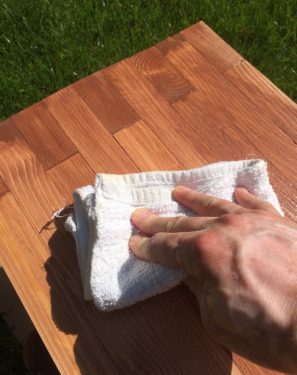
- Use stain to paint the bench. Applying stain is relatively easy. You can use a brush, paint it on, then wipe it off. Seal with Thompson's Water Seal.
- Add furniture feet to keep your bench off of the ground. Drill a hole, insert the foot, and repeat on all four corners of the bench bottom.

Video
Notes
Cut List
- 33.5″ long (five pieces)
- 40″ long (four pieces)
- 16″ long (ten pieces)
- 12.75″ long (eight pieces)
- organize the pieces of wood without gluing FIRST so that you understand how the bench goes together;
- begin at one end of your bench and start assembling with the Liquid Nails, using the clamps as placeholders as you go along;
- continue add Liquid Nails, wood, and increase the size of your box clamps until the bench is fully assembled