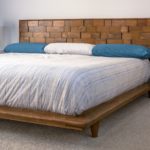
DIY Platform Bed Frame
Why buy a platform bed frame when you can DIY it? Build this mid-century modern king frame using our easy-to-follow tutorial.
Servings 1 bed frame
Cost $350
Equipment
- Compound Miter Saw with Laser
- Belt sander
- Router and bit(s) optional, see Step 15
- Drill with drill bits also a 3/4" countersink bit, and 5/8" Forstner bit
- Square ruler optional
Ingredients
- Wood as specified on cut list in the Notes, we used poplar
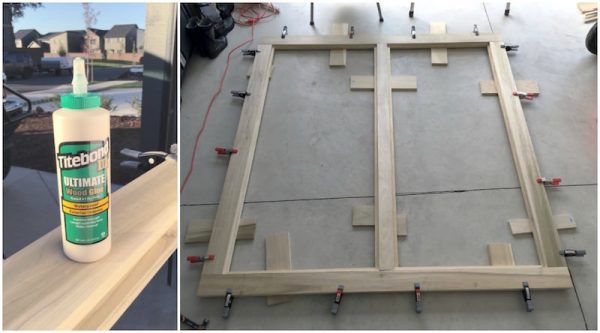
- Wood glue we recommend Titebond III
- 124 Wood screws 1 1/4" length
- Pencil
- 6 Modern bed legs Tablelegs.com, Ladsun, 6" - plus threaded insert bolts and threaded steel inserts
Instructions
- You’ll start this project by constructing the middle layer of the frame first. Use a miter saw to cut two 1″ x 6″ x 8′ pieces to 1″ x 5 1/2″ x 89″. When you’re done, use the saw to cut the head and foot rails. You’ll cut two more 1″ x 6″ x 8′ pieces to 1”x 5 1/2” x 74”.

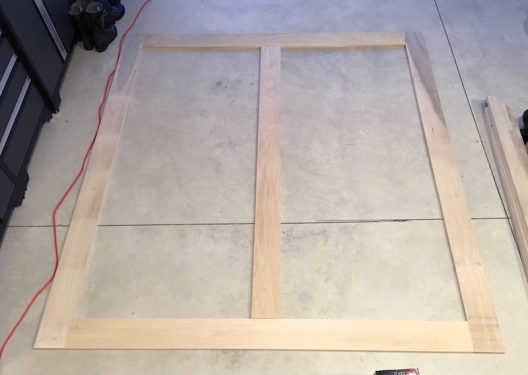
- Lay out the side rails as well as the head and foot rails. The outer dimension should be approximately 85” wide by 89” long, and the inside dimension should be approximately 74” wide by 78” long. Use a miter saw to cut the support piece from a 1″ x 6″ x 8′ for this middle layer of your frame to 74” length. Dimension of the board should be 1” x 5 1/2” x 78”.
- Begin cutting the top layer of your bed frame. You’ll start with the head and foot rails. Use your miter saw to cut two pieces of 1” x 6” x 8′ piece of wood to 85” lengths. Then use a table saw to rip both pieces to a 4 3/4” width.
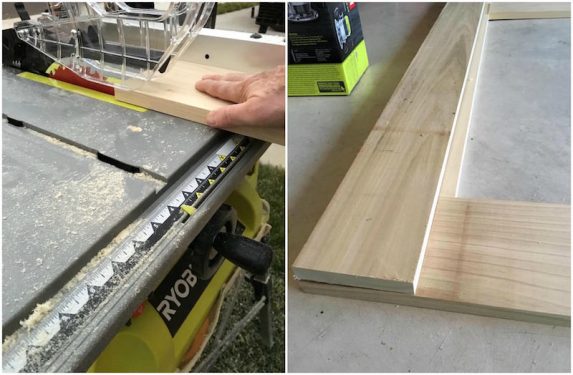
- Cut the side rails of your platform bed. Use your miter saw to cut two pieces of 1” x 6” x 8′ boards to 79 1/2” lengths. Then use a table saw to rip both pieces to a 4 3/4” width.
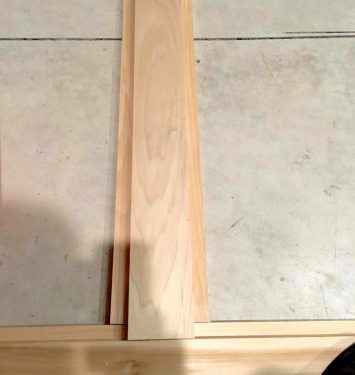
- For the support rail, use your miter saw to cut a 1” x 4” x 8′ board down to a 1″ x 3 1/2″ width x 79 1/2” length. It’s going to fit on top and in the center of your middle support rail as shown (but you won’t attach it now).
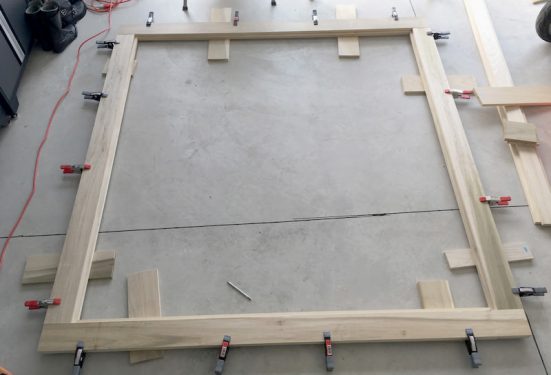
- Lay out the frame pieces with the middle layer on the bottom and the top layer above it. Line up the outside edges so that they are flush. Do this to see if any adjustments need to be made to your cuts (to make sure the frame will be "square"). You can also begin to see your frame take shape, as you've created a 3/4" ridge all the way around the inside edge just for the bed slats that are going to support the mattress. You'll notice that each corner should overlap, like a simple box joint.
- Place the center support pieces in place by centering the lower (5 1/2”) piece in the frame parallel to the side rails and then centering the (3 1/2”) upper middle support piece on top. This creates a 1″ ledge on both sides of the center support rail.
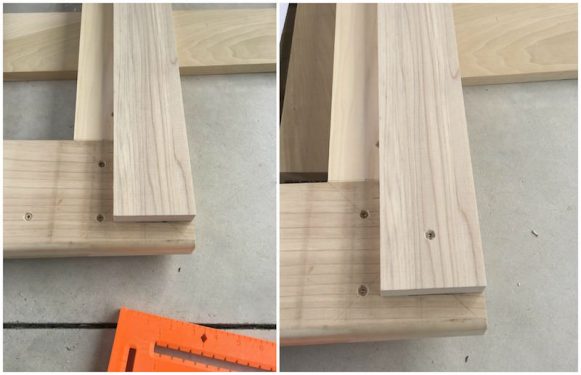
- After laying out the components, start gluing the top layer pieces to their corresponding middle layer pieces below using wood glue. Use squeeze or bar clamps to hold everything in place.
- Flip each rail over separately. In the middle of the rail, drill two pilot holes – one about 1 1/2″ from the outside edge and one about 3 1/2″ in from the outside edge and a few inches away to the left. Only drill the pilot hole into the first layer of wood. You’re going to put five sets of two screws each down each rail. You do not need to screw the center support rail, though you can.
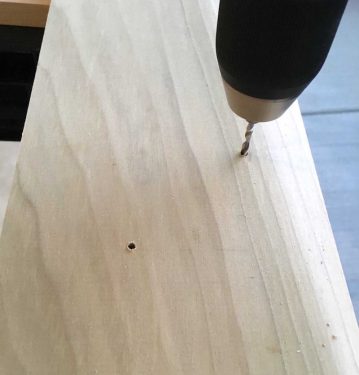
- Use a countersink drill bit on each drill hole so you can sink the screw flush to the bed frame surface.

- With everything glued and screwed, do another test fit. At this point you’re going to center the middle support rail and attach it to the head and foot rails with two screws on each end.

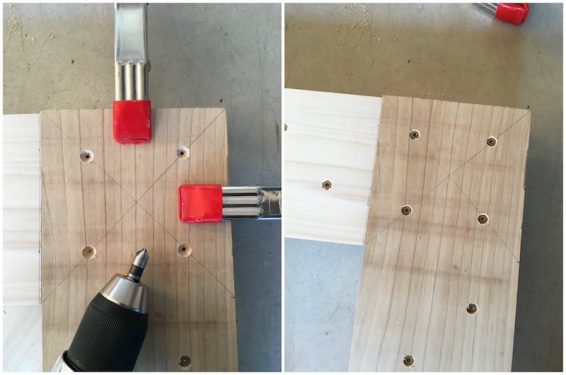
- Flip your frame pieces over and refit together. You’re now going to screw all four corners. In each corner, draw an “X” – this will help you locate where to put the screws.
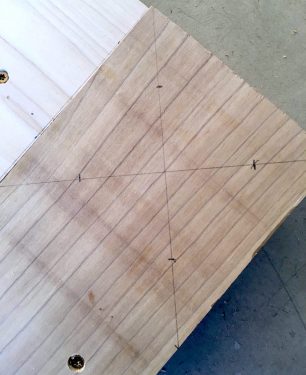
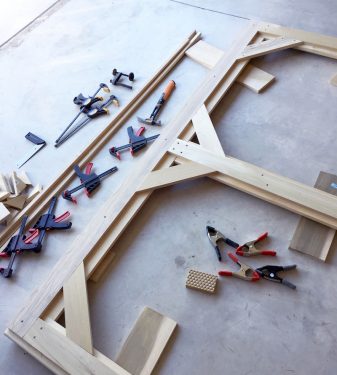
- Clamp the corners together. Drill pilot holes, countersink those holes, and screw in your wood screws.
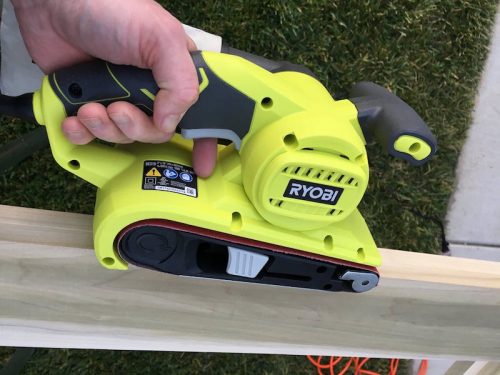
- Clean up the outside edges of the frame. Use a small belt sander with a 120-grit sanding belt and a very light touch.
- This step is completely optional, but we wanted a round edge on our frame. So at this point we disassembled the frame at the corners and use a router to round the edges. Rout the upper and the lower outside edges of the foot and side rails. You’ll only need to rout the side edge of the head rail. If you like a square edge but want to soften it a bit, use a 80-grit foam sanding block to sand the edge a little. Then go back over with a 120-grit (sand with the grain of the wood) for a nice finished edge.

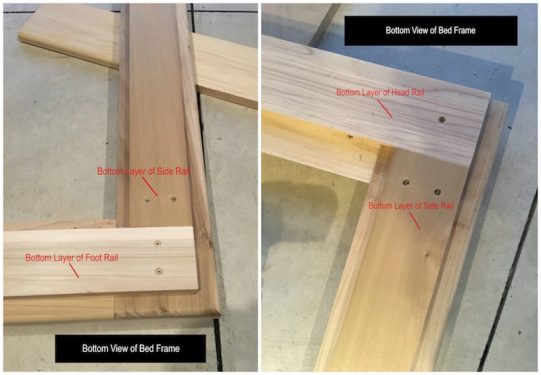
- Time to build the bottom bed frame layer. Start with the head rail piece. Using your miter saw, cut a 1″ x 4″ x 8′ board down to 1 x 3 1/2″ x 82″. Place this piece flush with the outer edge of the head rail, 1 1/8” in from each end. Screw down in four places.
- Using a miter saw, cut a 1″ x 4″ x 8′ board down to 1” x 3 1/2” x 84 1/4” . Center it on the bottom of the center support rail and place against the bottom layer of the head rail. Screw it down in the middle, towards the top, and then in four places at the foot rail.
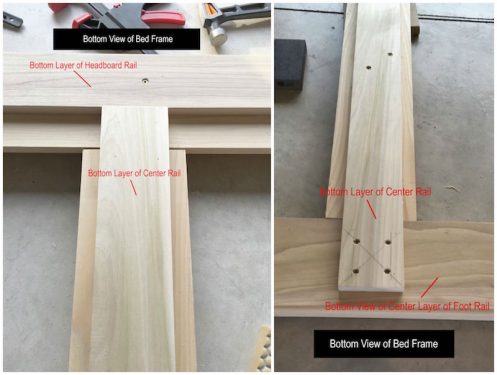
- Using a miter saw, cut two 1″ x 4″ x 8′ boards down to 1” x 3 1/2” x 39 1/2”. These will be the foot rail bottom support layer and will go on either side of the center rail. They will end 1 1/8″ from both sides of the frame. Screw them down using 14 screws total (7 on each side).
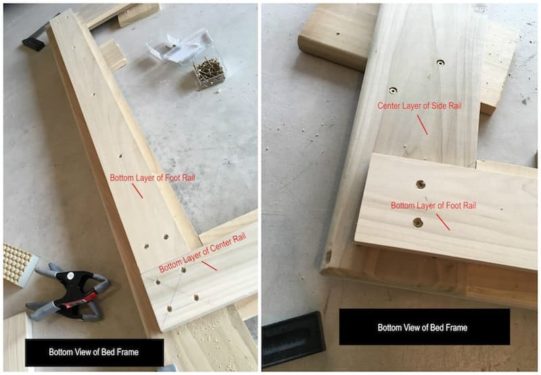
- Using a miter saw, cut two 1″ x 4″ x 8′ boards down to 1” x 3 1/2” x 80 ¾”. These will be the bottom layer side rail support pieces. You will be attaching the legs to these pieces. Place these pieces between the bottom layer of the head and foot rails and screw down using 14 screws total.
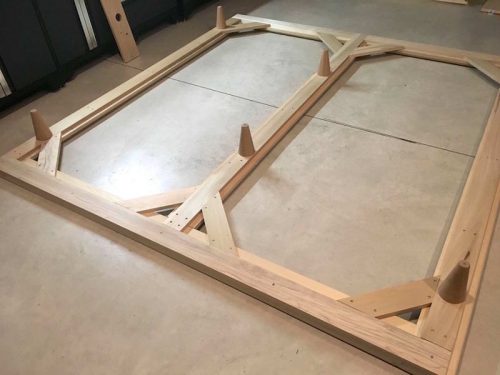
- Create the supports. Using a miter saw, cut two 1″ x 4″ x 8′ boards into eight pieces that are 1″ x 3 1/2″ x 15″. then add 45° angles at both ends.On the bottom side of the frame, place a support in each corner screw into place with four screws each.
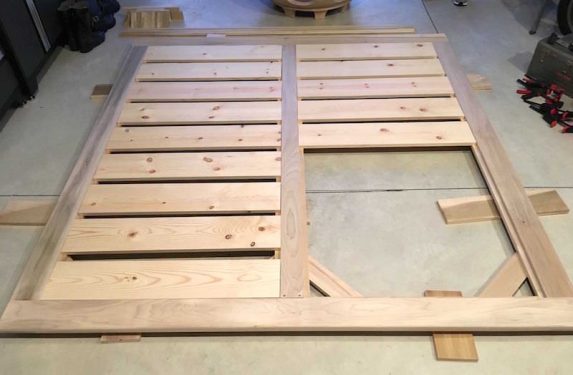
- Cut the slats out of 3/4″ thick pine. Flip the frame over so you can make sure the slats fit as you cut them. Cut about 12 – 16 slats that are 1″ x 5 1/2″ x 35 3/4″. If you run hot while you’re sleeping, cut less slats so that more heat escapes out the bottom.
- Now you’re going to insert the mounting sleeves for the feet into the bed frame. Flip the frame over so the bottom is facing up. Place two pencil marks in the center of the bottom of the foot rail – 1 3/4” in from the edge and 11 ½” from each end. Repeat at the headrail. Place two pencil marks in the center of the support piece, 26″ from each end.
- Use a 3/4” countersink drill bit and, on each pencil mark, drill until you have a 3/4” hole.
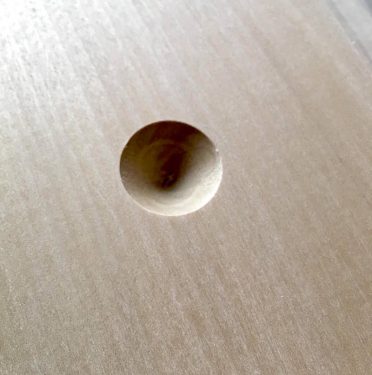
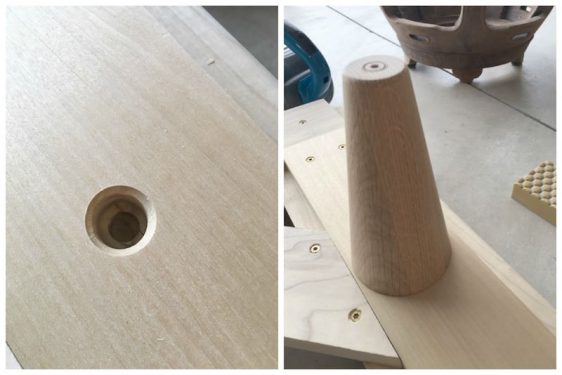
- Use a 5/8” Forstner bit to drill down into the center of the countersink hole you just made. You only need to drill the hole deep enough to completely sink the mounting sleeve, but no more. The hole you drill keeps the mounting sleeve insert from splitting the wood surrounding the hole when being screwed into place.
- Using a 13/32” drill bit, drill a pilot hole so that the extra threads from the leg stud have a place to go. Test fit the leg when you are done to make sure the leg will lay flush to the frame.
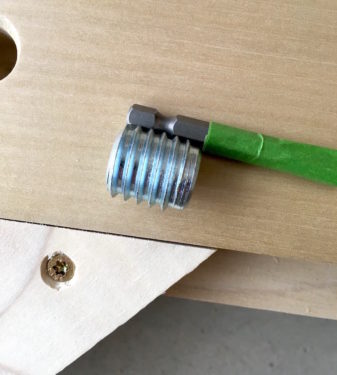
- Use a 10mm hex key wrench to insert the mounting sleeve flush to the frame surface – then screw in the leg until it is completely secure.
- Paint or stain and cover in poly; let dry 24 hours before flipping over and using.
Video
Notes
Cut List
- 2 – 1″ x 6″ x 8′ boards trimmed to 1″ x 5 1/2″ x 89" each
- 2 – 1″ x 6″ x 8′ boards trimmed to 1″ x 5 1/2″ x 74" each
- 1 – 1″ x 6″ x 8′ board trimmed to 1” x 5 ½” x 78”
- 2 – 1″ x 6″ x 8′ boards trimmed to 1″ x 4 3/4″ x 85" each
- 2 – 1″ x 6″ x 8′ boards trimmed to 1″ x 4 3/4″ x 79 1/2" each
- 1 – 1” x 4” x 8' board trimmed to 1" x 3 1/2" x 79 ½”
- 1 – 1" x 4" x 8' board trimmed to 1 x 3 1/2" x 82"
- 1 – 1" x 4" x 8' board trimmed to 1” x 3 1/2” x 84 ¼"
- 2 – 1" x 4" x 8' boards trimmed to 1” x 3 ½” x 39 ½”
- 2 – 1" x 4" x 8' boards trimmed to 1” x 3 ½” x 80 ¾”
- 2 – 1" x 4" x 8' boards trimmed down to eight 1" x 4" x 15" pieces, with the ends cut at 45 degree angles
- 6 to 8 - 1" x 6" x 8' pine boards trimmed to eight slats, 1" x 5 1/2" x 35 3/4"