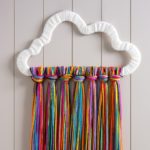
DIY Yarn Art
Make this yarn wall art on a dime, and with no crafting skills required! Perfect for anywhere in your home, kids' rooms, dorm rooms, and more.
Servings 1 word
Cost $6
Equipment
- Pencil(s) or marker
- Scissors optional
Ingredients
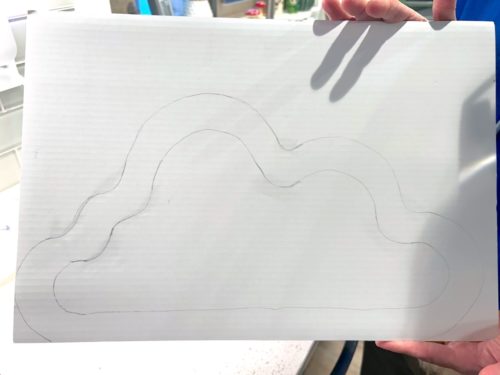
- 1 piece Cardboard Mine was about 13" x 19"
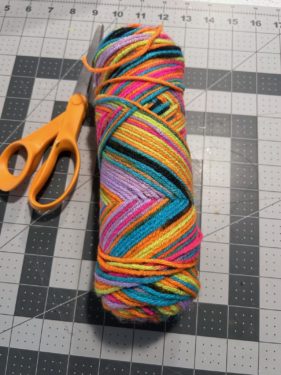
- 2 skeins Yarn 1 white (large), 1 rainbow
- Tape
- Pattern click here to use my cloud
Instructions
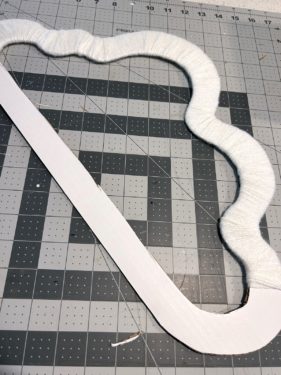
- Use a pencil to draw out the design of your choice on a piece of cardboard. You can use my pattern, but you'll want to round out the points with your pencil as I did.Tip: the key to a design that works well for wrapping is smooth, round (not sharp) curves!
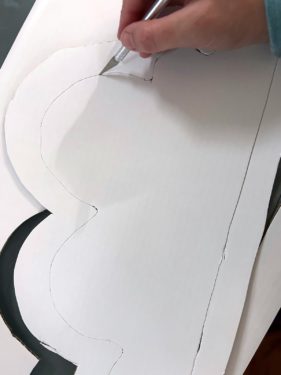
- Cut out the shape with a craft knife. Be careful not to bend the cardboard if possible. This will weaken your shape.
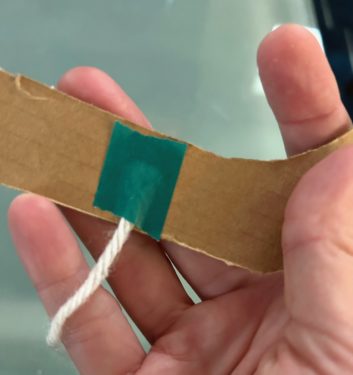
- Tape the white yarn to the back of the shape.
- Begin wrapping the yarn around the cloud shape. You're going to stick the skein through the shape and back around, pulling somewhat snugly and pushing the yarn together to cover the shape.Alternatively, you can cut multiple lengths of yarn, taping and wrapping as you go.At the corners you will need to wrap more layers of yarn to cover the area.
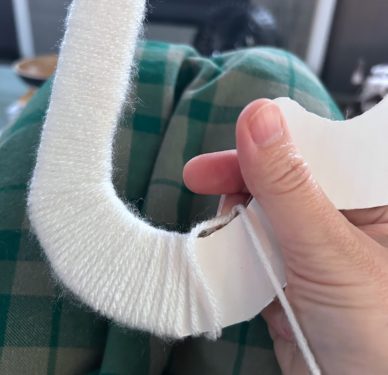
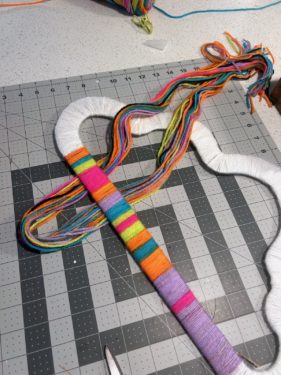
- Continue to wrap the entire shape until the top is completely covered with white yarn and no cardboard is showing through.
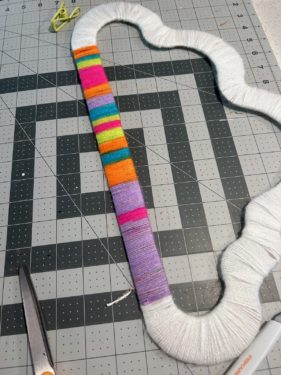
- Now you're going to switch to the rainbow yarn. Cover the bottom part of the cloud shape with the yarn as you did before.
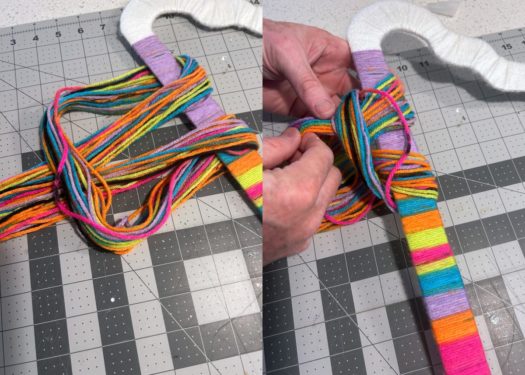
- Once done, you're going to make large tassels using the rainbow yarn. Cut about twenty (20) 36" lengths of yarn to make one tassel. I cut enough for seven of them.
- To attach each tassel, place each bundle of lengths of yarn down in half on the work surface. Place the cloud on top.
- Bring the ends around through the loop, even out, and tighten to create a tassel. Repeat across the bottom. Your cloud is ready to hang.
Notes
When you’re going around a curve with your craft knife, it’s easier to move the surface below the knife than the knife itself. Trust me – try it!