
How to Cross Stitch on Canvas
Learn how to cross stitch on a cotton duck, stapled canvas from the craft store using embroidery floss.
Servings 1 canvas
Cost $12
Equipment
- Printer with plain white paper
- Tool to puncture your canvas bead reamer or awl
- Embroidery needles
Ingredients
- 1 canvas 12" x 24"
- 2-3 bottles FolkArt acrylic paint Aqua or color of your choice
- Printed pattern of a quote or lyrics here's mine
- 6 skeins Embroidery floss for my pattern one skein covered about three letters – I used four skeins of white and one skein each of a few shades of pink
- 1 roll Painter’s tape
Instructions
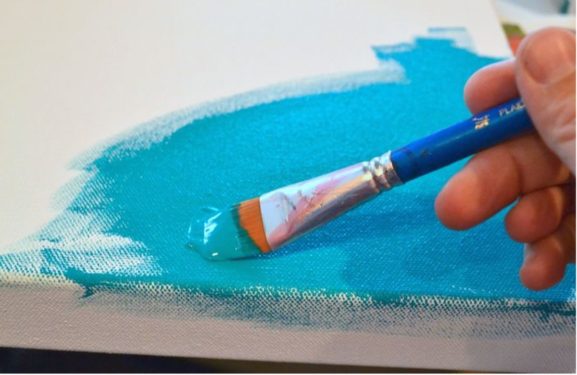
- Paint the canvas with acrylic paint. Give it three layers (completely cover it) and let dry.
- Print your cross-stitch pattern and tape the pages together . . . then tape the pattern inside the back of the canvas (in the center). Make sure that it fits within the wood frame, or you’ll need to print again until it fits.

- Use the bead reamer to puncture through the paper pattern and canvas from back to front, at each corner of every "X" on the pattern. If your bead reamer has a sharp tip, it’s very easy to punch through.
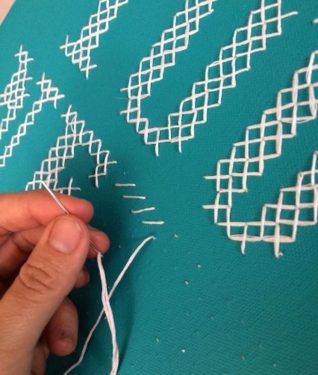
- Thread your embroidery floss through the needle and tie a knot (several times) at one end. Begin cross stitching your canvas, following your pattern exactly.
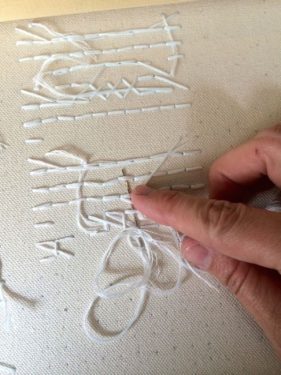
- This is how the back will look. When you finish a strand, tie off the floss by threading under several stitches. Then begin a new strand.
- When you get to the last word(or whatever word you would like to highlight), change the floss to another color. Finish in the same way.

Notes
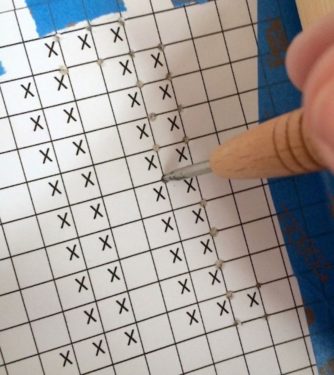
Step 2: Here’s how I created my pattern. I searched for “cross-stitch letter patterns” online, and then used Excel to place x’s in the boxes to duplicate the letters. I then reversed the pattern (since I was taping to the back) and printed to fit. You might have to print a few times to make sure that your pattern fits your canvas – see my attached pattern document for a sample.
Step 3: Just be careful as you are punching– don’t rest the canvas on your leg!
Step 4: I did not remove individual threads from the floss strands – I just used the strand as a whole.