Clear outdoor spray sealerI believe we used Rustoleum
Fabricpattern of your choice
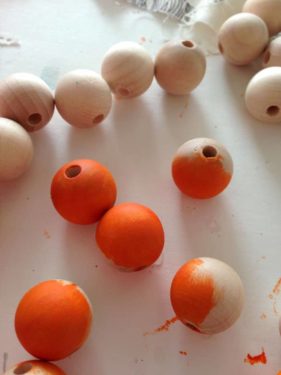
42Wood beads3/4" round
Nylon cordaround 13 feet, make sure it fits through your beads
Instructions
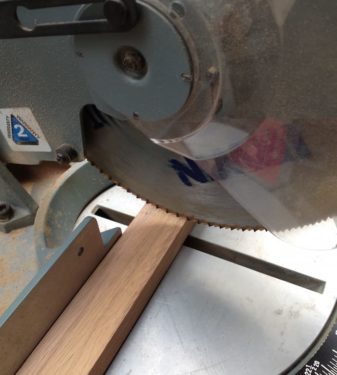
Cut the wood slats on a table saw.
Stain the slats with Thompson's Water Seal and a foam brush after cutting, then let dry.
Drill into the slats. On each slat, measure holes at 2.5", 9", and 15.5" inches on the side of each slat (in the center from top to bottom) - then make a pencil mark at each point.Use a drill bit that matches the hole in your wood beads. Not all wood beads have the same sized hole, so you'll need to use the drill bit that works for your beads.
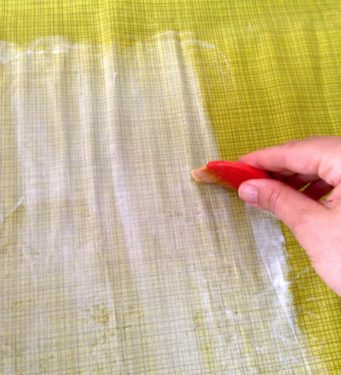
Prep the fabric using Mod Podge Outdoor. Place the fabric on a piece of wax paper and brush Mod Podge on top (a medium layer) and let dry.
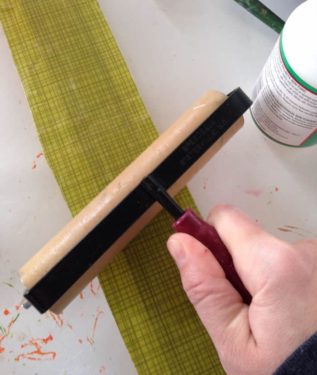
While the fabric is drying, paint the beads with your multi-surface paint, or another paint made for the outdoors.
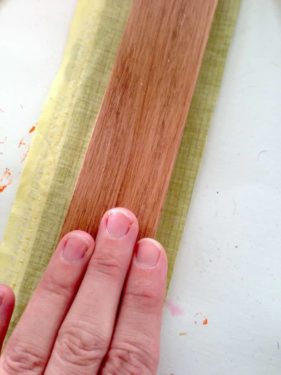
Cut the fabric into pieces to cover the slats. Apply Mod Podge to the slat, then smooth the fabric down onto the slat, gluing it in place.
Turn each slat over and use the brayer to completely smooth it out. Wipe away any Mod Podge that squeezes out the sides between the fabric and slat with a brush.Repeat with the rest of the slats and let dry for an hour or so.
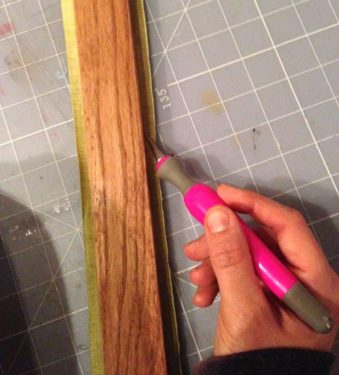
NOW you'll know why I prepared the fabric. Place each slat onto a cutting mat and trim the excess fabric off with a craft knife. It cuts more like paper and doesn't fray.Repeat with the rest of the slats.
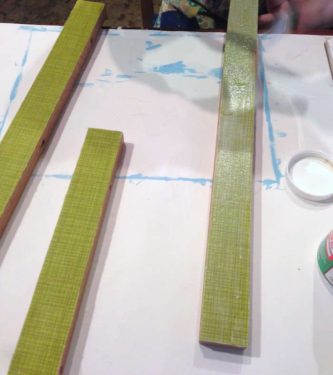
Coat them all with Outdoor Mod Podge and let dry.
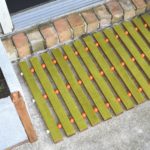
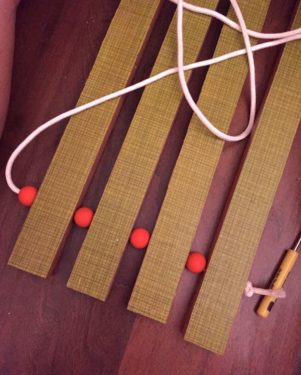
Make a knot at one end of the nylon cord, and put through the hole in a wood slat. Add a bead, then another slat, and repeat.
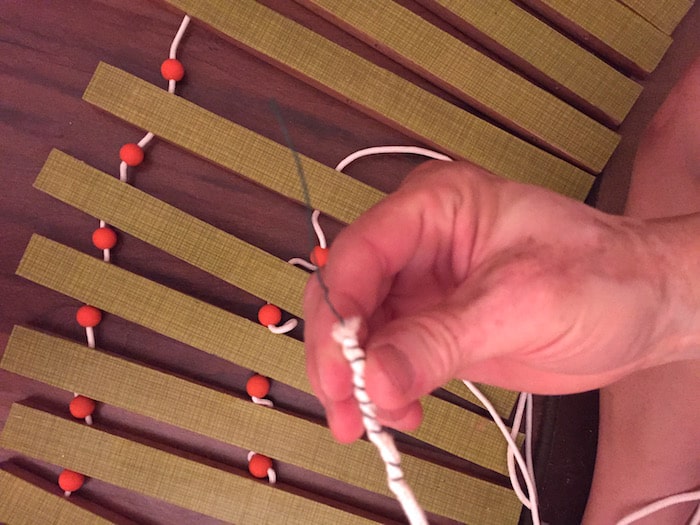
Thread all of the slats together with wood beads in between, then pull the cord taut and tie knots at the end. Trim cord with scissors and melt the ends (slightly) with a lighter to keep from fraying.
Your final step is to spray the entire thing with the clear acrylic sealer, several coats, to reduce tackiness from the Mod Podge and add further protection.
Notes
Step 4: Mod Podge Outdoor can be REALLY thick to work with. My suggestion is to dip your brush in water and use that to stir up the Podge before application.You can do this outside of the jar as well. You don't want to add too much water; dipping my brush in always seems to be just enough without diluting.Step 5: It can be hard to paint (and annoying) to paint wood beads. Using a dowel rod helps. Slide the beads onto the dowel while painting.Step 10: Steven started twisting the nylon cord through the beads . . . THEN he realized that wrapping some wire around the cord made an amazing "needle" for threading! I highly recommend it.