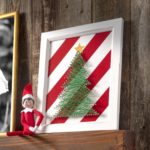
Christmas Tree String Art
Learn how to make string art for Christmas in the shape of a tree! Use the included template for success; it's very easy.
Servings 1 piece
Cost $20
Equipment
- 1 Hammer
- 1 Computer and printer
- 1 Table Saw optional
Ingredients
- 1 White frame 11" x 14"
- 1 Wood back piece at least 1/4" thick
- 3 rolls Duck Tape Red, White, Gold Glitter
- 120 1" nails with heads you'll use 100 - 120 total
- Tree pattern
- 2 skeins Embroidery floss green
Instructions
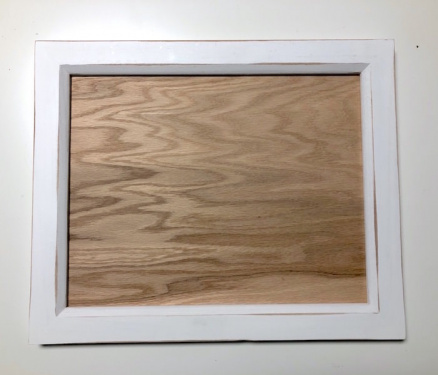
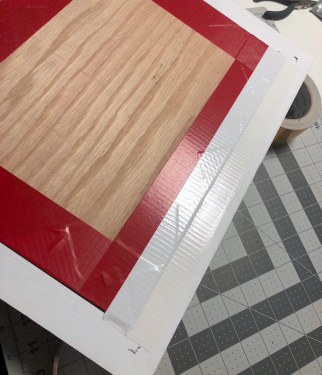
- Remove the back from your frame. Use the table saw to cut a board to fit the frame, with a little bit of room around all sides for wrapping the tape.
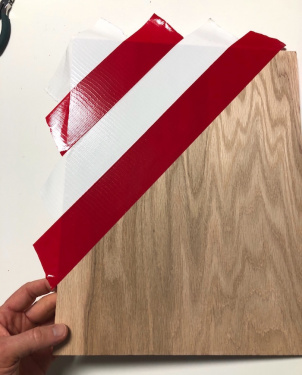
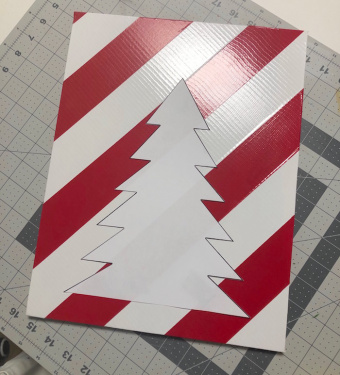
- Stripe the red and white Duck Tape on the wood background, using a diagonal pattern. Butt the tape next to each other as you change colors, and fold it over the back. Repeat until the entire board is covered.
- Open the free template and print.
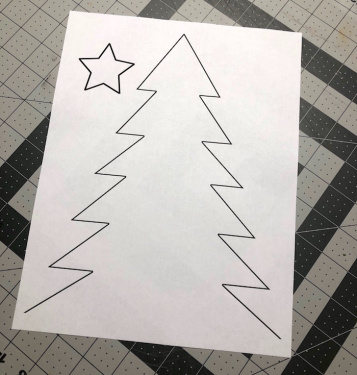
- Place the template down on the Duck Tape board wherever you want the tree shape to go. Remember that the template can't go all the way to the bottom - a portion of the board will be covered by the frame, all the way around the edge. Stick your template down (just use double stick tape or Duck tape).
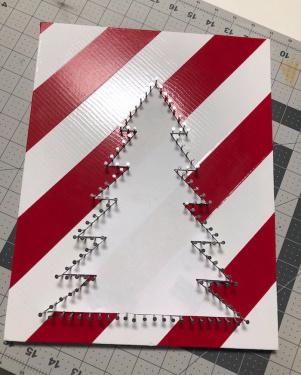
- Nail around the edge of the template. There are no "rules" for the distance between nails. I'd do about 1/2" - 3/4" between each nail (they're a little tight in the photo).
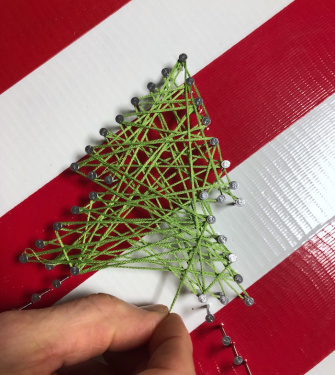
- Pick a nail to start the thread. Unwrap the embroidery floss and go about 1 1/2" up the strand with your finger. Tie a knot around that nail to secure the floss to start.
- Begin weaving your floss around all the nails, criss-crossing to fill the area until you are satisfied with the coverage.
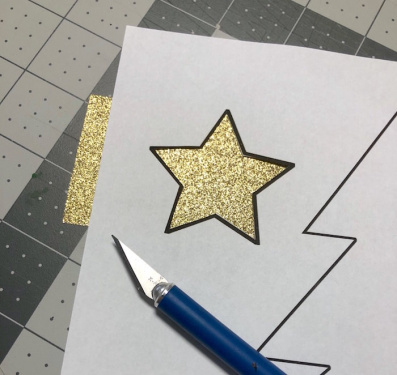
- To complete the tree, use the template to cut a star out of some gold glitter Duck Tape. Use the craft knife and mat; stick to the top.
- Insert the string art into the frame and duck tape around the edges to secure.
Notes
There's really no technique to string art in my experience; you just go back and forth. It does look better with more criss-crossing, because it fills in the area more.
The only decision you have to make is how much coverage you like. The more you wrap the thread, the more your art will be filled in and look "solid." It took two skeins of floss before we were happy with the effect.