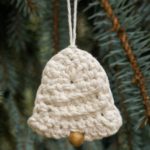
Crochet Bell Ornament
Ring in the holiday season with a DIY Christmas ornament free pattern! You'll learn how to crochet a bell ornament perfect for hanging on your tree or topping off a gift with a handmade touch.
Servings 1 Ornament
Cost $2
Equipment
- Crochet hook H/8 (5 mm)
- Blocking foam or towel optional
- Rust-resistant T-pins optional
Ingredients
- 12 grams ~ 20 yards 100% Cotton Worsted Weight Yarn - I used Lily Sugar 'n Cream in Ecru
- 1 Wood bead 14 mm
Instructions
- Begin by creating a magic ring.
- Row 1: (bottom part of bell) 3 sc in space created by last two dc, 1 sc in hole of MR, 3sc in space between first ch2 and first dc, ch 1, turn
- Rows 2-6: (working in back loops only) 7 sc, ch 1, turn
- Row 7: (working through both loops for remainder of pattern) sc in same st, 2 sc in next sc, sc in next 4 sc, 2 sc in next sc, 2 sc in last sc, ch1, turn
- Edge: Continue around the bell as follows: 10 sc evenly in ends of rows until you reach the top of the bell, 2 sc in next st, 10 sc evenly until you reach bottom of bell, sc in same st, sc in next 3 sc, sl st in next 3 sc, sc in next 3 sc, 2 sc in last sc.
- Finish off making sure to pull MR yarn tight first.
- (Optional): if your ornament is not laying flat, you can block it using blocking foam (or towel) and rust-resistant T-pins.
Notes
Abbreviations Used:
- ch - chain
- sl st - slip stitch
- sc - single crochet
- dc - double crochet
- MR - magic ring/circle
- st - stitch (es)