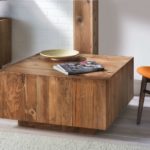
DIY Coffee Table
Transform pallet wood into a stylish coffee table DIY with our step-by-step guide. Perfect for budget-friendly, rustic home decor enthusiasts!
Servings 1 table
Cost $55
Equipment
- Miter saw
- Planer
- Nail gun with 1 1/4" nails
- Pencil(s)
- Safety goggles and other safety equipment
- Staining rags
Ingredients
- 3 - 4 old pallets
- 1 4' x 4' piece of pine plywood
- 4 2" x 2" x 8' lengths of pine
- 2" x 4" x 6' or 8' length of pine (1)
- 32 Wood screws 2 1/2" long
- 8 Wood screws 1" long
- 12 Corner braces 12 total, 2 in each package - 2"
- Titebond III
- FolkArt Home Decor Antiquing Wax
Instructions
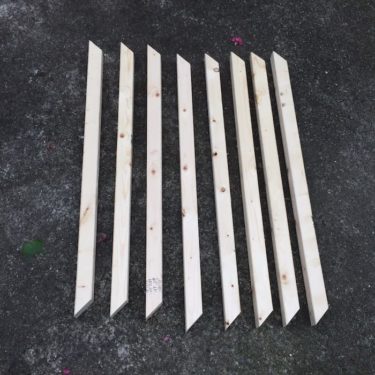
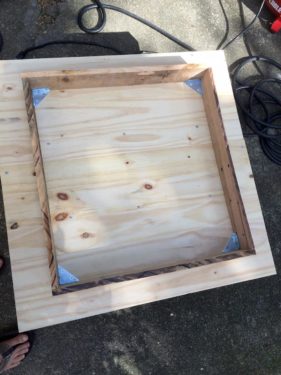
- Grab 2 x 2s and trim them down to eight 30" pieces. Make 45º cuts at each end using the miter saw (Fig 1 on the Cut List).
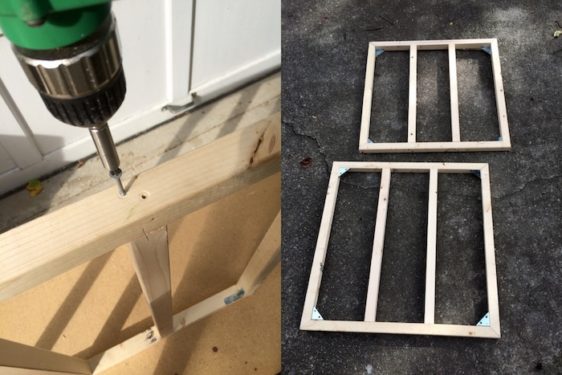
- Use the corner braces with a drill to join the 2 x 2s into two frames.

- Cut down the remaining 2 x 2 wood into 27" long pieces (see Fig. 3 on the Cut List). You're going to add two cross pieces to each frame.
- Use your tape measure to add the cross pieces at 10" and 20" - so equidistant across the frame on the top and bottom. Mark with a pencil, drill two pilot holes, and then screw in 2 1/2" wood screws. If they aren't EXACTLY at 10" and 20" - you'll be fine.
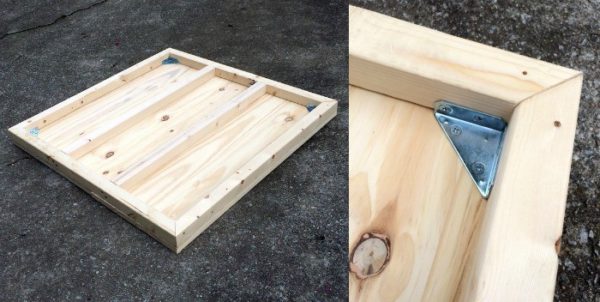
- Cut your plywood down to 30" x 30" using a table saw (or a circular saw - anything you can cut a straight line with, see Fig. 4 on the Cut List).
- Attach the plywood to one of the frames (it doesn't matter which one you pick) using the bottom sides of the corner brackets and your drill. The plywood piece is going to sit on the base of your table, which you'll make shortly.
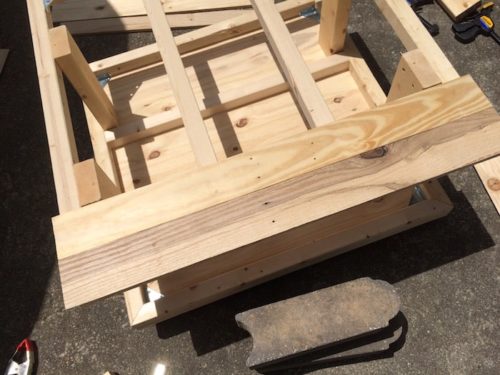
- Cut the 2 x 4 into four 12" pieces (see Fig. 2 on the Cut List).
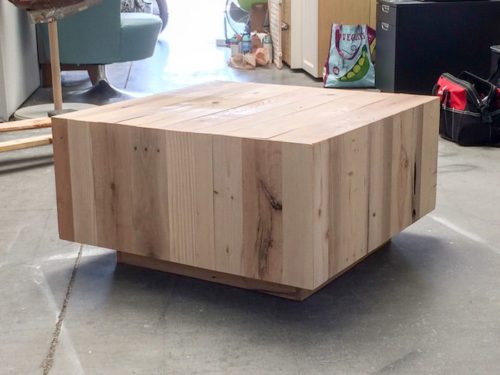
- Attach the four 12" pieces as shown using wood screws and a drill to complete the frame. Notice that the slats on your 30" top frame are perpendicular to the frame on the bottom with the plywood attached. This is on purpose to add some rigidity to the piece.
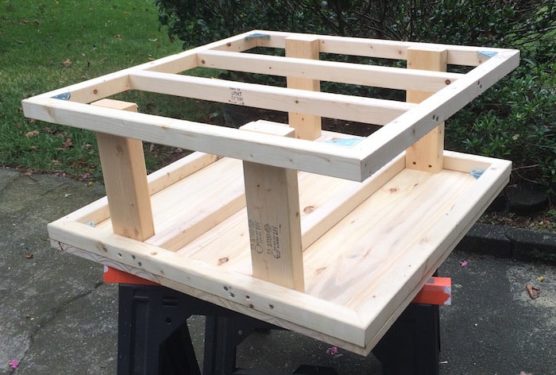
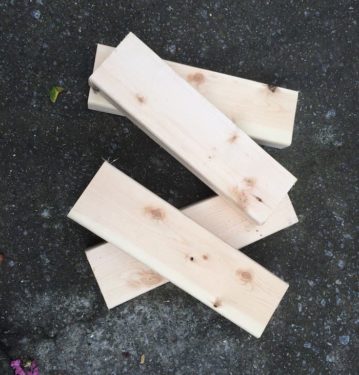
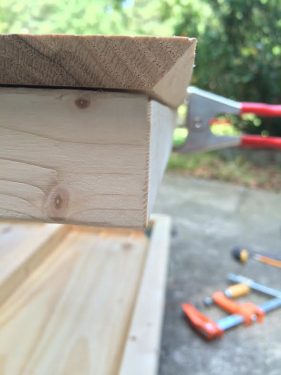
- Turn the table skeleton over so the plywood base is facing up. Cut four pieces of pallet wood to 3.5" wide by 22" long (see Fig. 5 on the Cut List). We used a table saw to cut the length and the miter saw to quickly cut the ends. Use whatever saw works best for you.
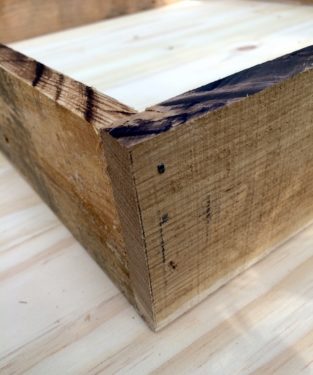
- Form a table base by making a frame out of the four 22" pieces. Put wood glue on the end of each board, attach to another board as shown, then nail the ends with the nail gun.
- Use the four remaining corner brackets to add the base to the bottom of the plywood - use a measuring tape to center the base. Add about eight additional 1" wood screws to attach the plywood to the frame. Add them in the middle, randomly. Flip the table back over.
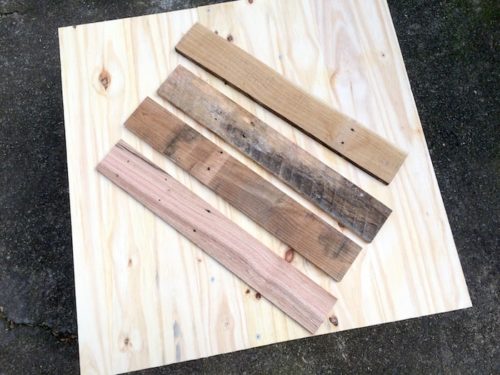
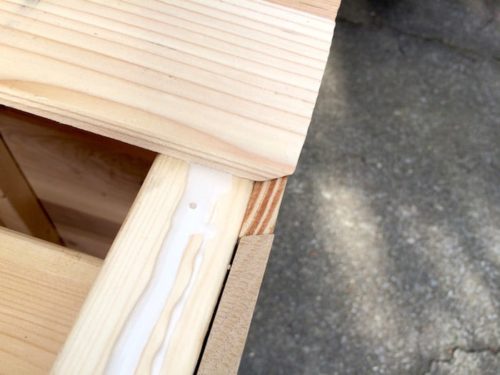
- Now you need to cover the skeleton frame with pallet wood, starting with the top. Cut the end pieces first. The two end pieces need 45º angles down three sides - two short sides and one long side - cut with a table saw. The middle pieces need 45º angles on each end. Our table top has two end pieces (shown as Fig. 7 and Fig. 8 on the Cut List) and SIX pieces in between (the top wood planks shown as Fig. 6 on the Cut List) of varying widths.
- Keep cutting, varying the width of the boards. As the boards are cut, glue them down.
- Let the table top dry for several hours.
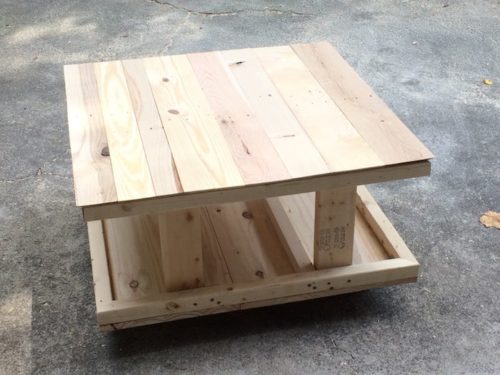
- Cut and glue down the side pieces. The side pieces are shorter (12.5" long), the end pieces need two sides with 45º angles (instead of three), and the middle pieces only need one short end with a 45º angle instead of both. Cut and glue as you did in steps 12 and 13. Repeat with the other three sides.
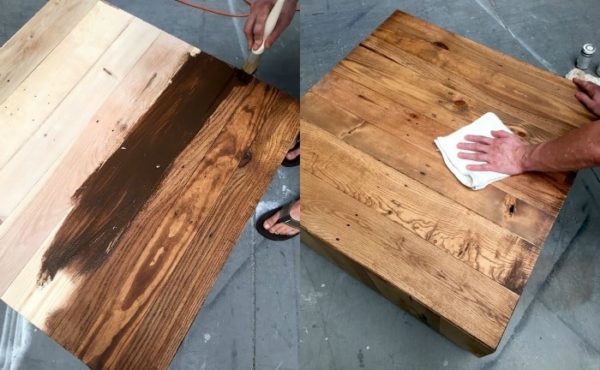
- Do a light sanding with 120 grit sandpaper. Wipe away the sanding dust.
- Stain and wax the table. Glop it on as shown, then rub in with a cloth. Work about 1/3 of the table top at a time, then the sides, then the base. Don't leave the wax on for too long before wiping away with the rag because it will soak in. Let dry for several hours before using.
Video
Notes
This project was originally done in 2017. Costs will definitely vary.