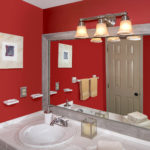
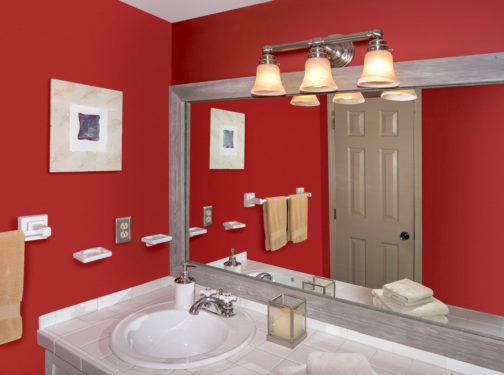
DIY Mirror Frame
Learn how to make a mirror frame DIY on a budget! Keep your current mirror in place and hang this wooden frame over the top. It looks great, it's stylish, and you can also remove it at any time.
Servings 1 frame
Cost $25
Equipment
- Miter saw
- 1 Kreg Jig 1 hole
- Drill with drill bits and a Philips head screw bit
- Level
- Stud finder optional
Ingredients
- 3 pieces 1” x 4”x 8” faux barnwood
- 1 piece 1' x 2' wood board cut to a 4 ½' length
- 3 wood screws 3”
- 3 wood screws 1/2"
- 4 Kreg Jig screws
- Wood glue
- 3 frame hanger loops
- 6 wood screws 2 1/2“, optional
- 4 - 6 spring loaded mirror clips optional
Instructions
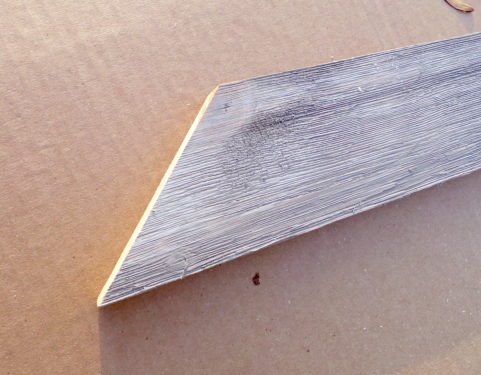
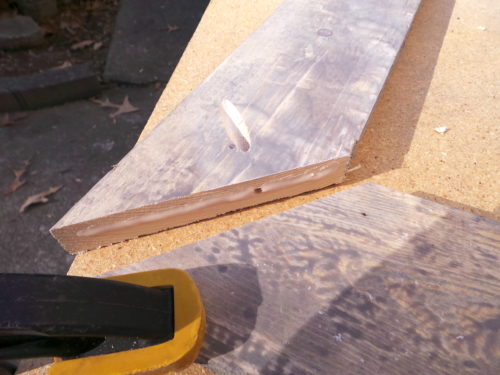
- From the three pieces of barnwood cut (using the miter saw) cut two 3’ 7 ½" pieces to go down the sides. Then cut two 5’ 7 ½ “ pieces to go across the top and bottom.
- Using the miter saw, cut 45° angles at each end of all four pieces.
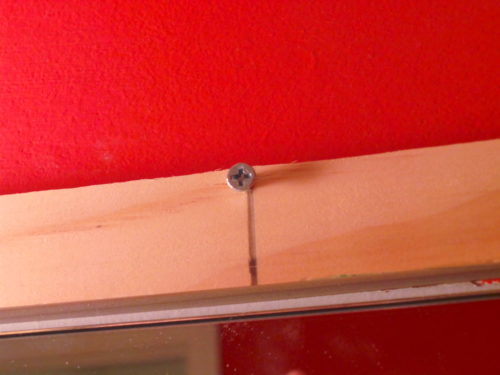
- Cut the 1' x 2' down to 4 1/2' to use as a frame hanger and stabilizer.
- Center this 4 1/2' piece above the mirror and anchor it into the wall using the 3" wood screws. Use the stud finder again to make sure you go into the wood studs.

- After the 1' x 2' is mounted, put three evenly spaced 1/2" wood screws into that piece towards the top. Don’t screw them all the way in; leave them backed out about ⅛“ - leaving room for the frame hanging loops.
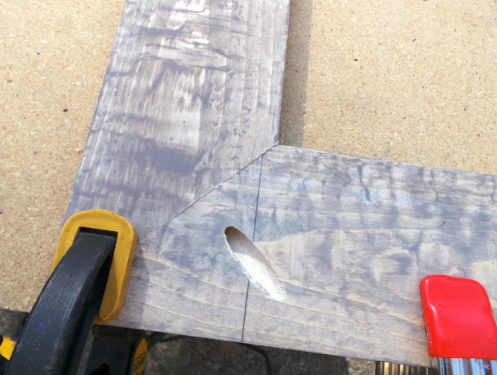
- Begin assembling the frame. Using a Kreg Jig, drill a pilot hole for the attachment screw in the center of one of the pieces at each join (it doesn't matter which one).
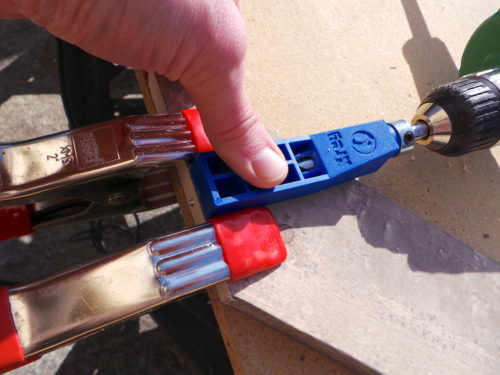
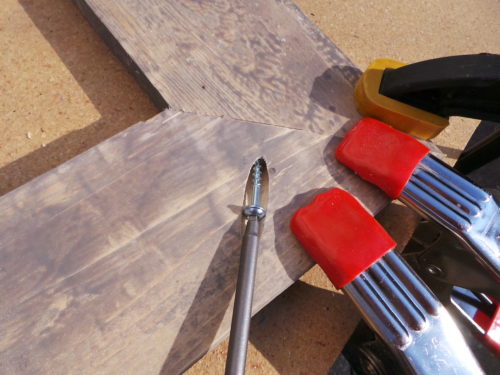
- Working one corner at a time, add glue to the edges of the wood.
- Use clamps to hold the glued pieces of wood together.
- Screw a Kreg Jig screw into the hole of the glued pieces. Do this four times and the frame will be formed. Let the wood glue dry.
- After the frame is dry, mount the three frame hanger loops to the back of the frame at the top to align with the screws that were placed on the 4 1/2' wood piece.
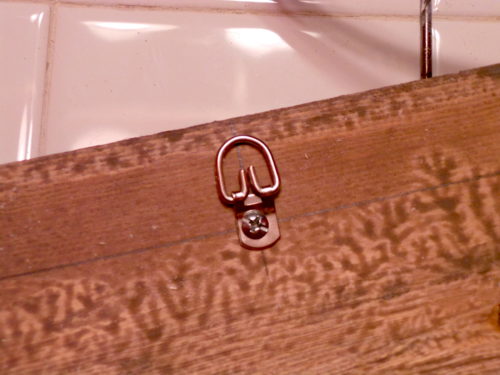
- Use a tape measure to locate the frame hanger loops in the same place as the screws. The DIY mirror frame is ready to hang.
Notes
If you don't have a mirror up before you start, you can purchase a mirror from Home Depot and hang with the spring loaded mirror clips and the six 2 1/2" wood screws. Use the stud finder to mount the clips.