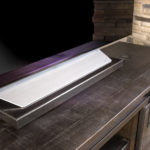
DIY TV Riser
Learn how to make a TV riser stand on a budget! This is such an easy woodworking project.
Servings 1 riser
Cost $5
Equipment
- 1 Pencil(s)
Ingredients
Instructions
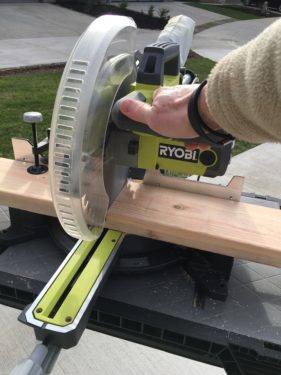
- Figure out the length you'd like to make your stand. Measure the wood using a tape measure and make pencil marks for cutting.
- Use a circular saw to cut the wood down to the correct length. If you need a wide stand because the base of the TV is large, you'll want to cut a few pieces to make more of a platform. We cut three pieces.
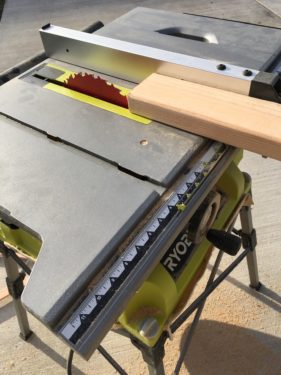
- Use a table saw to cut the rounded (long) edges of the wood down flat so that they can be glued.
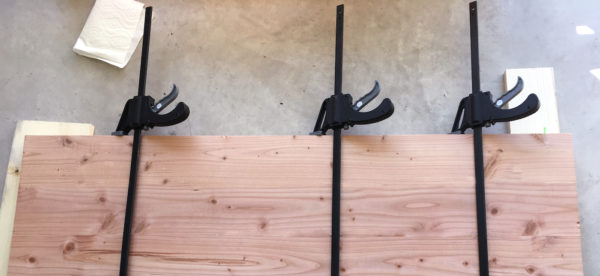
- Make one solid riser piece by adding wood glue to the long ends of the boards and then clamping the pieces together. Let dry overnight.
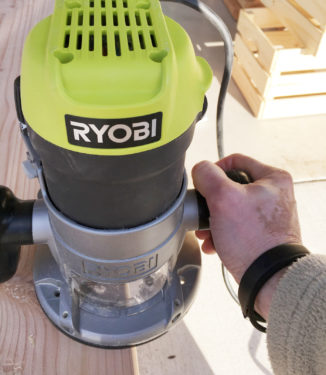
- Route all the top edges of your riser. Sand if necessary and wipe away the dust.
- Stain the wood using the stain color of your choice and then a rag. Let dry.
- If desired, coat the riser with polycrylic and let dry.

- Our piece didn't need legs, but at this time you can add them to finish if desired.