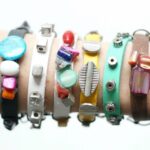
Ice Cream Stick Bracelets
These craft stick bracelets are easy to customize with paint, Mod Podge, beads, and embellishments. Perfect for kids and adults!
Servings 6 bracelets
Cost $5
Equipment
- Jewelry pliers
- Jewelry cutters
- Saucepan
- Glass jars or other glass containers
Ingredients
- 6 Popsicle sticks
- Beads
- Jewelry chain
- Acrylic paint
- Craft glue or E-6000
Instructions
- Fill a pot with water and toss in the popsicle sticks. Place on the stove and let boil for 30 minutes. Boiling the sticks will make them very pliable.
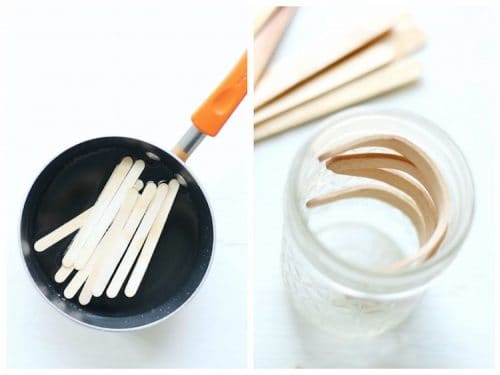
- Remove sticks from water and let them cool for a minute or two, then very carefully bend the sticks into a half circle and slide into a glass or jar.
- Set oven to 200 degrees and place jars in the oven, baking for another 30 minutes. Baking them will dry them out and help them to keep their shape. Carefully remove from oven after 30 minutes.
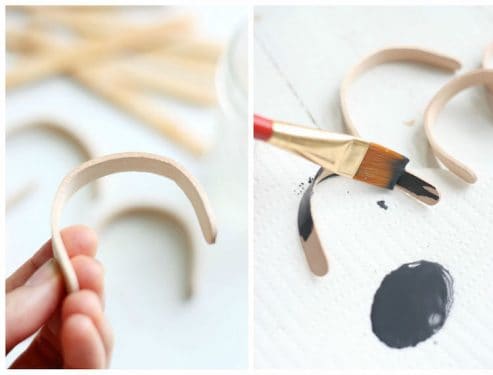
- Paint the popsicle sticks, if desired, and allow to dry.
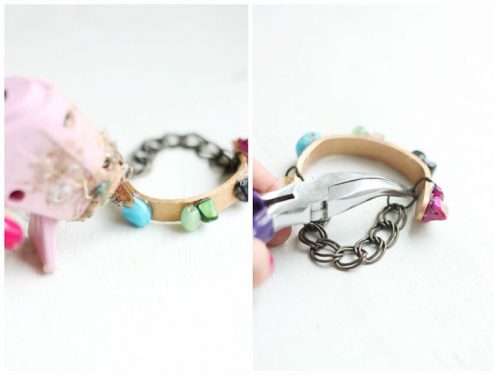
- Attach beads using a glue gun. Attach jewelry chain to finish.
Video
Notes
Step 2: You aren’t going to bend them all the way shut, so don’t get concerned about them not fitting. They’ll only be halfway to two-thirds of a way around the wrist, and the rest is added with chain.
Step 5: You can also use E-6000, which is a stronger glue.
You can do this by nailing a small hole on the end of the bracelet (most of my sticks split when I tried this). I ended up gluing a bead on each end to hold the chain in place. I didn’t try drilling, but that could be another option.