
Shrunken Apple Heads
Learn how to make spooky apple shrunken heads for your Halloween decorating! Great for using as decor, dolls, and more.
Servings 6 apples
Cost $2
Equipment
- Peeler
- Paring knife
- Parchment paper
- Oven
Ingredients
- 6 Granny Smith apples
- Lemon juice
- Salt optional
- Toothpick(s)
Instructions
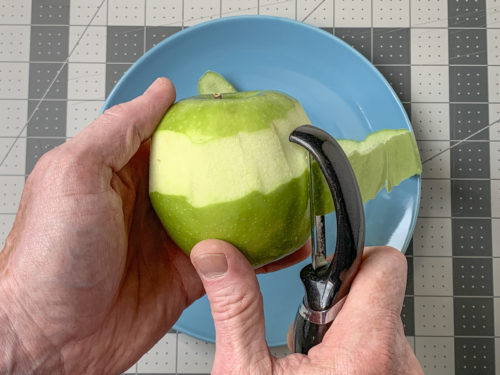
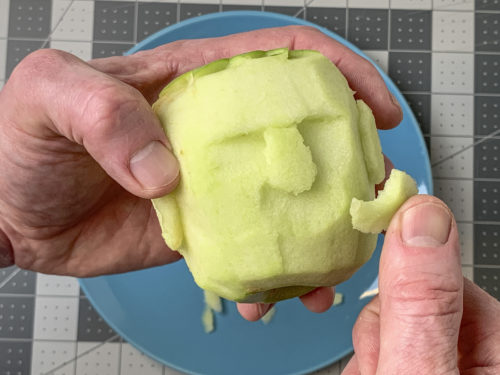
- Start by peeling the apple as you normally would, using a peeler. You can peel ALL of the skin off, or you can leave some around the top for "hair." Leave the stem.
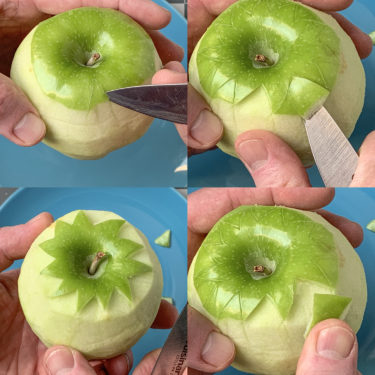
- To make the faux hair, cut triangle shaped wedges into the green portion, working your way around the top. Cut each side, then slice underneath to remove the apple pieces.
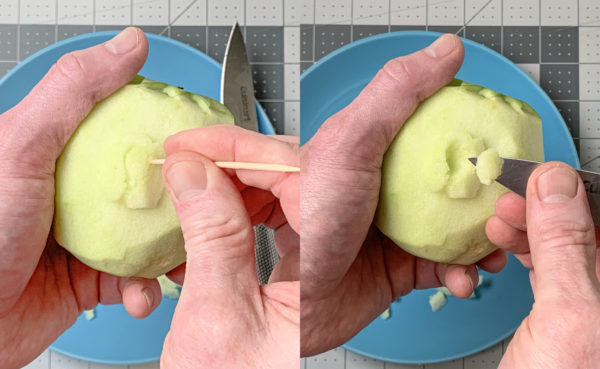
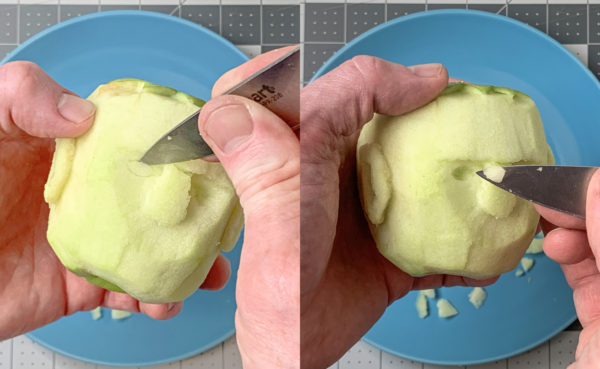
- Pick the places on the side of the apple where you would like the ears. You can mark with the toothpick if you like. Then "draw" an ear shape (an oval) using the toothpick. This is going to be your method to make all the features.
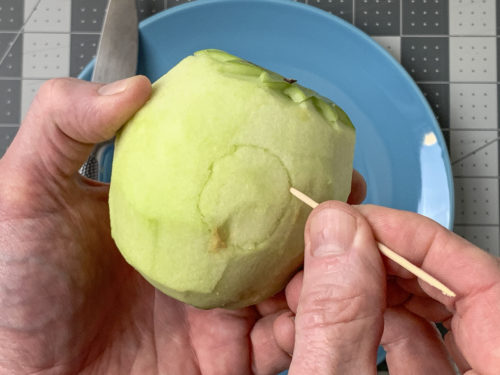
- To make features stand out on the apples, you'll want to recess the area around the shapes. Once you've decided how to shape your ear, remove apple material from around it, without cutting the ear itself. Use the paring knife. You don't have to go very deep - maybe 1/8" - 1/4" maximum.
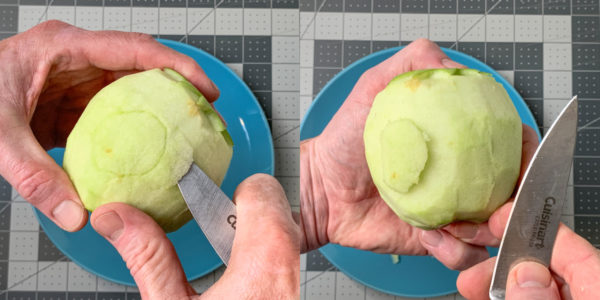
- To cut out the inside of the ear, you'll again use your toothpick to make your design. Then carefully cut out the inner ear with the knife.
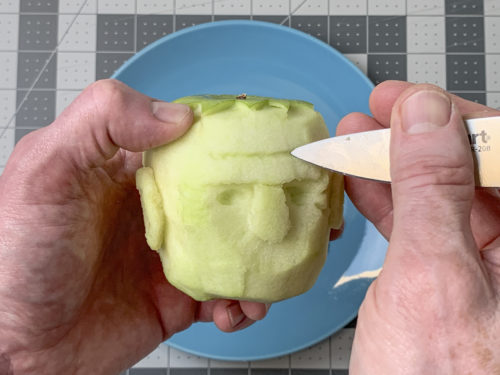
- Time to make the face! Start with the forehead and use a toothpick to make a large wrinkle.
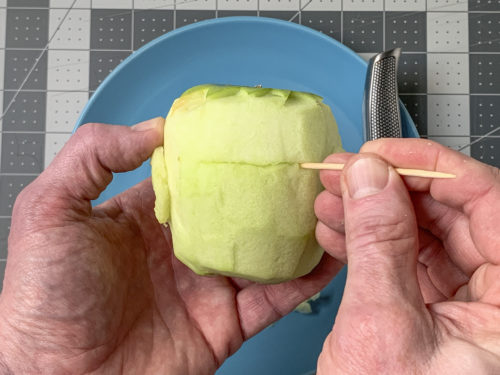
- Draw the nose coming down from the wrinkle with the toothpick.
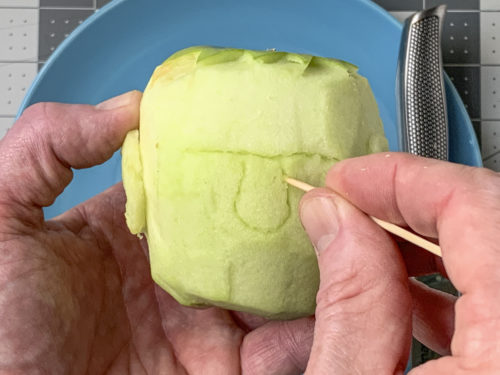
- Remove more apple material. Slice some off around the nose and top wrinkle using the paring knife.
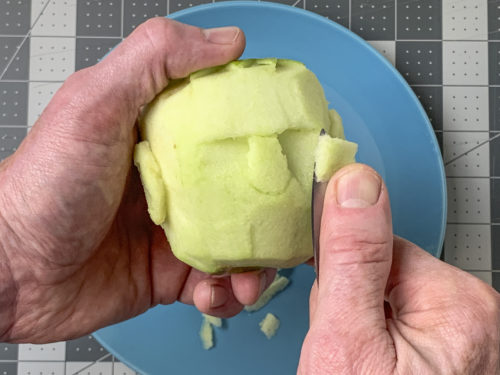
- Carve off more apple from under the nose so you can make it really stand out. As I said, when drying, the features will become more prominent.
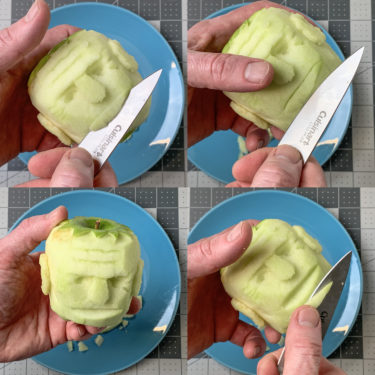
- Now that the nose is set, you know where to put the eyes. Use a small knife to carve them out. You could also scrape them out with the toothpick since they're small.
- Add another nice sized wrinkle or two to the forehead area using the knife. If you want to make some wrinkles around the eyes, go for it!
- The mouth is super easy to make! Carve a v-shape into the apple right below the nose as shown. Then remove the wedge.
- Once the design is cut, cover with lemon juice and salt (optional). You will place the apple(s) on a plate and then add the lemon juice. Some people also soak the apples in a lemon juice and salt mixture (just a sprinkle of salt). That's fine too. Let soak for about 15 - 20 minutes. Remove and dry with paper towels.

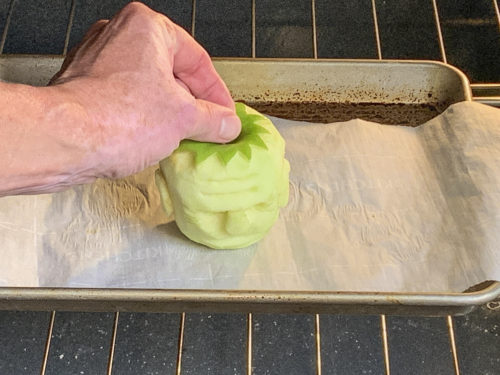
- Place the apples into the oven at your lowest setting (around 160 - 200 degrees) for drying, about 8 hours. Remove, let cool, and display.
Video
Notes
Lemon juice contains citric acid, which is a natural anti-oxidant and will keep the apple from browning as much.