Shrunken Apple Heads for Halloween Fun
Learn how to make the coolest shrunken apple heads for Halloween decorating, parties, and centerpieces! These are easy and kids love them.
Skills Required: None. Even if you’ve never crafted before, you’ll be able to make these. The only thing to keep in mind is you’ll be using a knife for carving. Little kids probably won’t be able to participate and older kids should be supervised. Safety first!
Those of you born in the 70s might remember a little Halloween friend known as the one, the only – Vincent Price. He was a famous actor of the 40s and 50s, and by the time I was put on this earth he was known for cult horror films.
I believe my first exposure to Vincent was in the 1984 Michael Jackson video “Thriller.” He does the monologue. Once you’ve heard his voice, you’ll recognize it forever.
Well, Vincent wasn’t just a voice and film actor, my friends. He also had a craft kit for shrunken apple heads released around 1975 with Milton Bradley. “Create your own collection of delightful shrunken heads.”
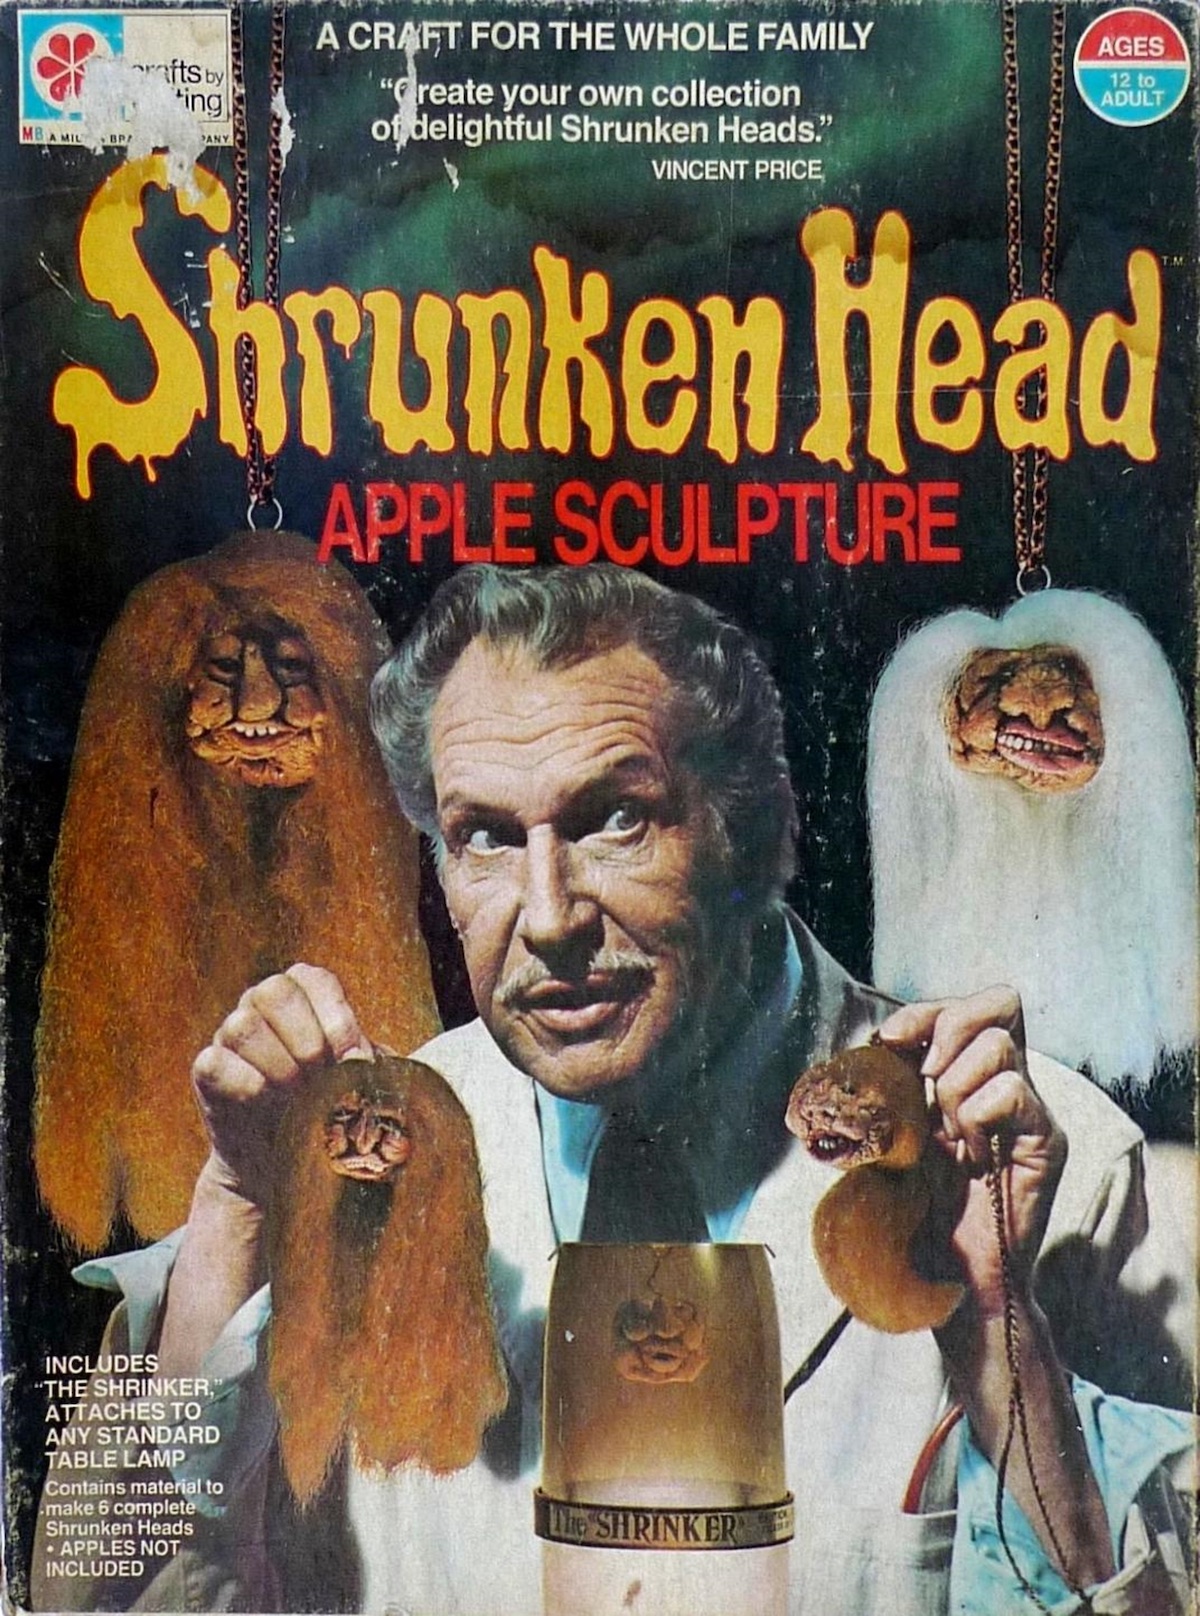
“The shrinker” was part of the kit that attached to any table lamp (interesting?). It included materials like beads and hair to decorate your apples once complete. You could turn them into dolls, or Halloween decor, or whatever your heart desired.
The truth is, as much as I love Vincent Price, you don’t need his spooky kit to create a shrunken apple head. I decided it was time to try this vintage Halloween craft idea myself. With tools I have at home – and my oven. I can’t believe how easy it was!

There’s not much to making these. You’re going to carve a face into the apple after peeling it, and I’ll show you how to do that step by step.
You don’t need to be an artist, because anything you carve into the face is going to be exaggerated once the apple dries.
A few tips for you before beginning the process:
- If you choose very large apples, it’s going to take longer for them to dry. Keep this in mind as you might have to do additional oven drying if the apples are bigger. They reduce to about 1/2 size of the original.
- Remember that you can cut additional apple but you can’t add any back. It’s better to remove a little bit and then see if you want to remove more rather than cut too much.
- Some people use pens and pencils to create the design, then cut. I used toothpicks and found it very easy.
- You can use salt to help prevent browning of the apples during the lemon juice step. I wanted the apples to brown a bit more so I left it out.
- A lot of drying instructions indicate that you can just leave them out in a warm, dry spot and they will shrink. This didn’t happen for me. I had to use several oven sessions. I’m sure this depends greatly on where you live. So give yourself several days for drying.
Are you ready to jump in? Let me show you how these were made!
Gather These Supplies
- Granny Smith apples – no bruises
- Peeler
- Paring knife
- Lemon juice
- Salt (optional)
- Toothpicks
- Baking sheet
- Parchment paper
- Oven
Keep in mind, the apple faces are very forgiving. Play around with the carving and cutting off various parts of the apple. This is your time to experiment!
And guess what – if you mess up, just start over with a new apple. But I encourage you to put everything in the oven to dry regardless. You never know what creepiness will result from a “happy accident!”
How do you know when they are fully dry? They will be firm but they don’t have to be rock hard. You’ll be able to tell, trust me. They’ll continue to naturally dry and shrink on their own even after the oven sessions.
You just want to avoid fruit flies by getting them to a place where they are relatively dry. The lemon juice will help keep bugs away too.
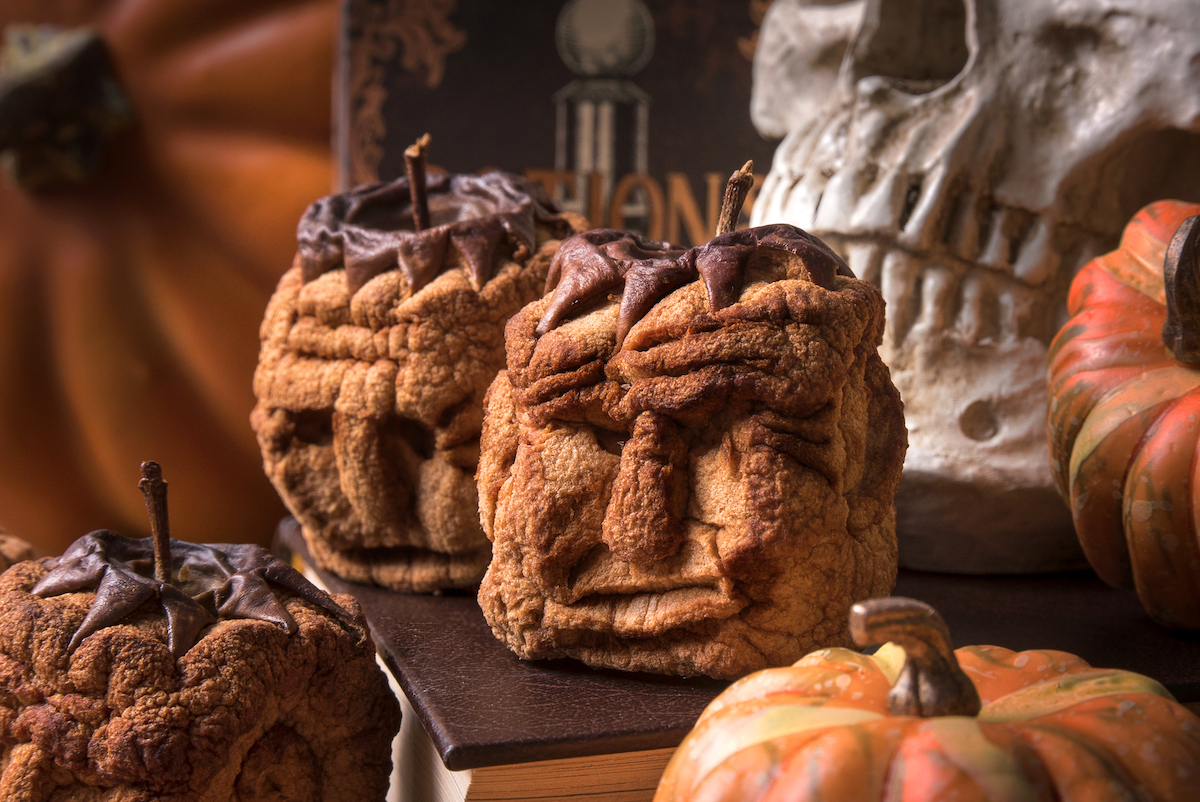
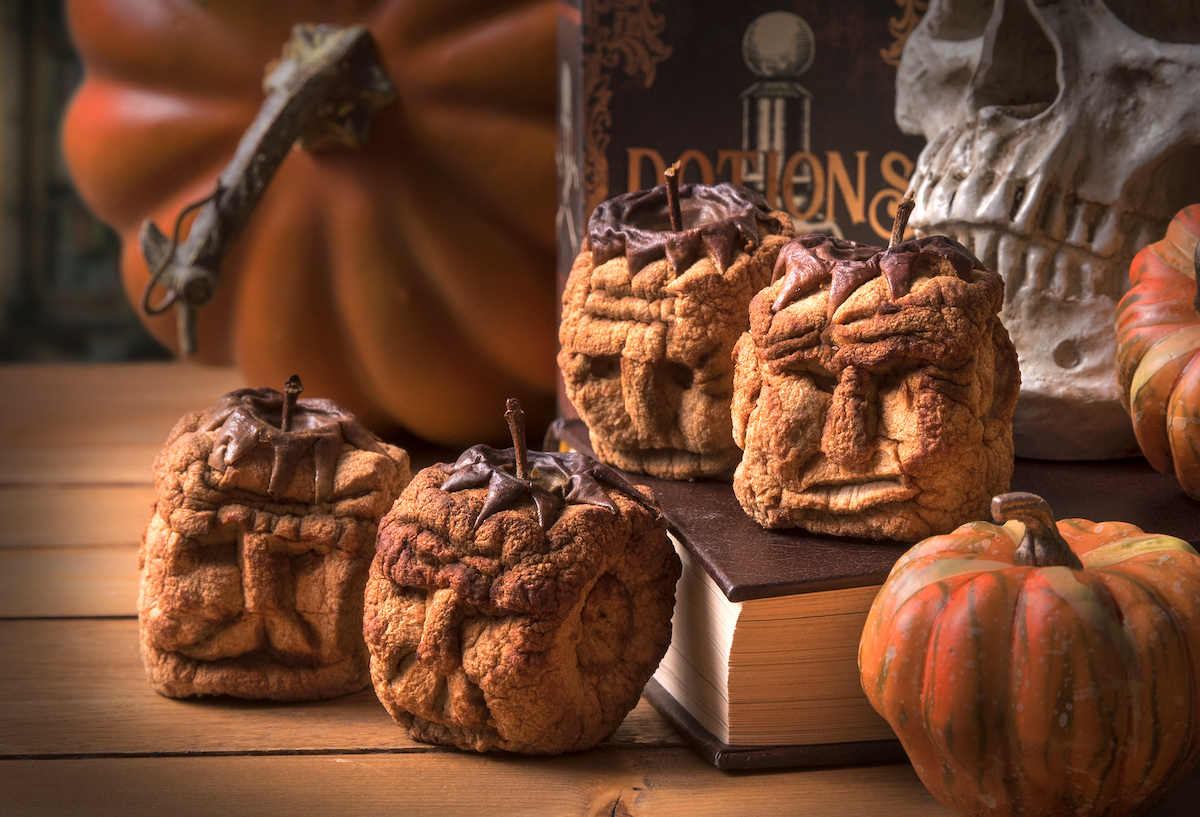
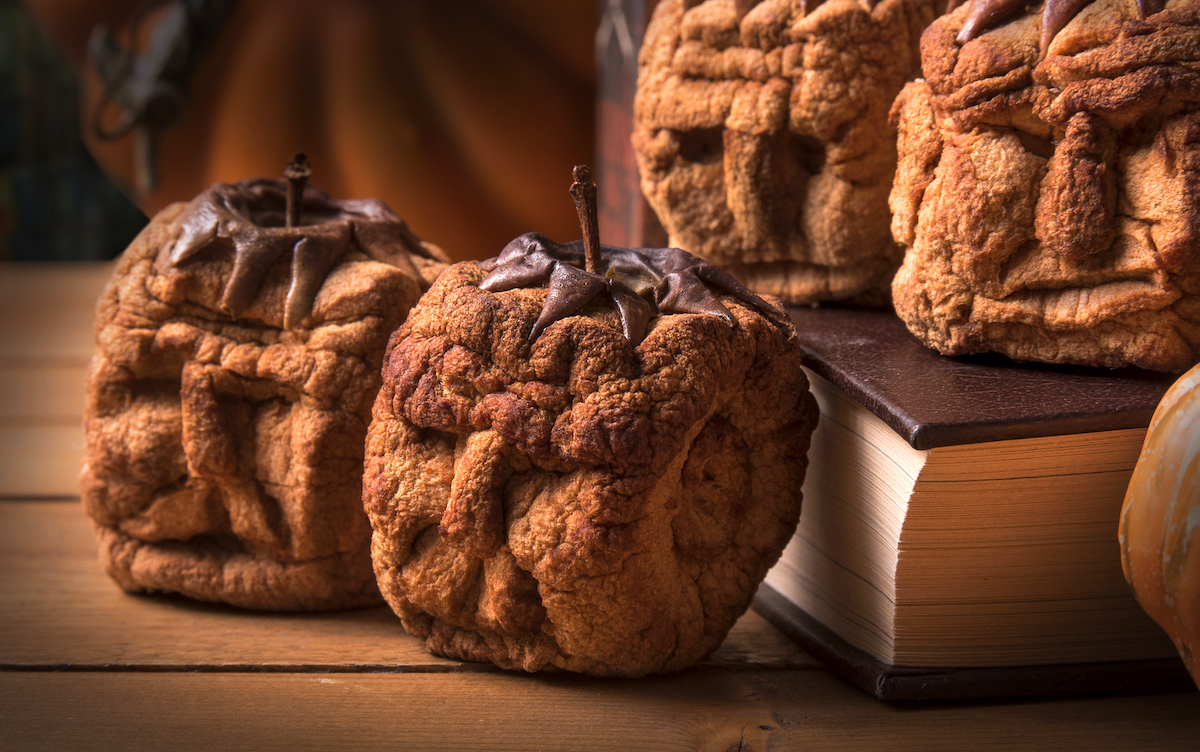
These heads came out of the oven with the creepiest, spookiest (but also funniest) faces you could imagine. And I love the fake “hair!” Are these so cool? There’s nothing else to do except figure out how you are going to use them! Here are some suggestions:
- Decorate with accessories such as rice for teeth, cloves or googly eyes for the eyes, popcorn for warts, doll hair, etc.
- Place them in apple cider punch for a fun Halloween party accent.
- Add several to a basket or clear glass jar for a unique holiday display.
- Put on top of a doll body to make a shrunken apple head doll (spooky!).
- Sprinkle about on a mantel or side table to add interest to your Halloween decorating (this is how I am using them!).
Shrunken Apple Heads
Equipment
- Peeler
- Paring knife
- Parchment paper
- Oven
Materials
- 6 Granny Smith apples
- Lemon juice
- Salt optional
- Toothpick(s)
Video
Instructions
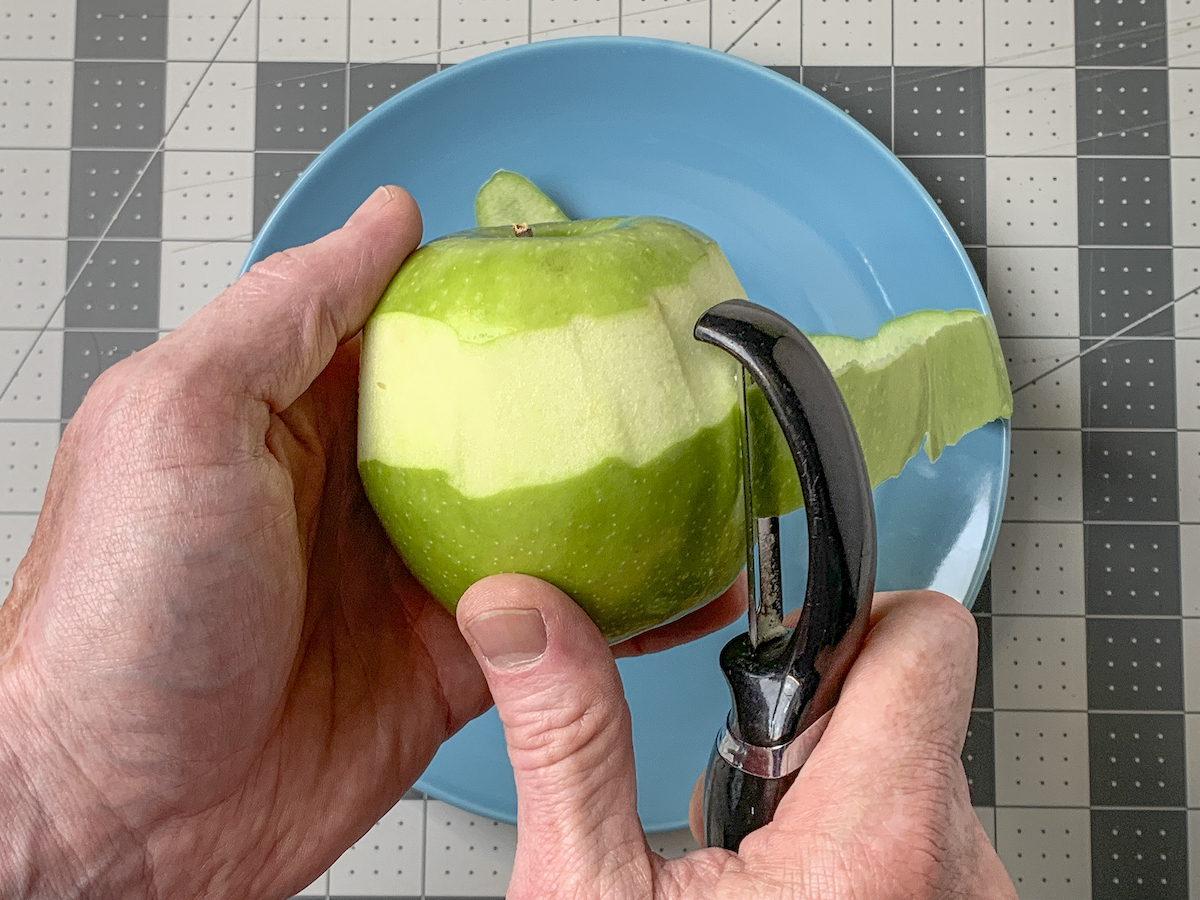
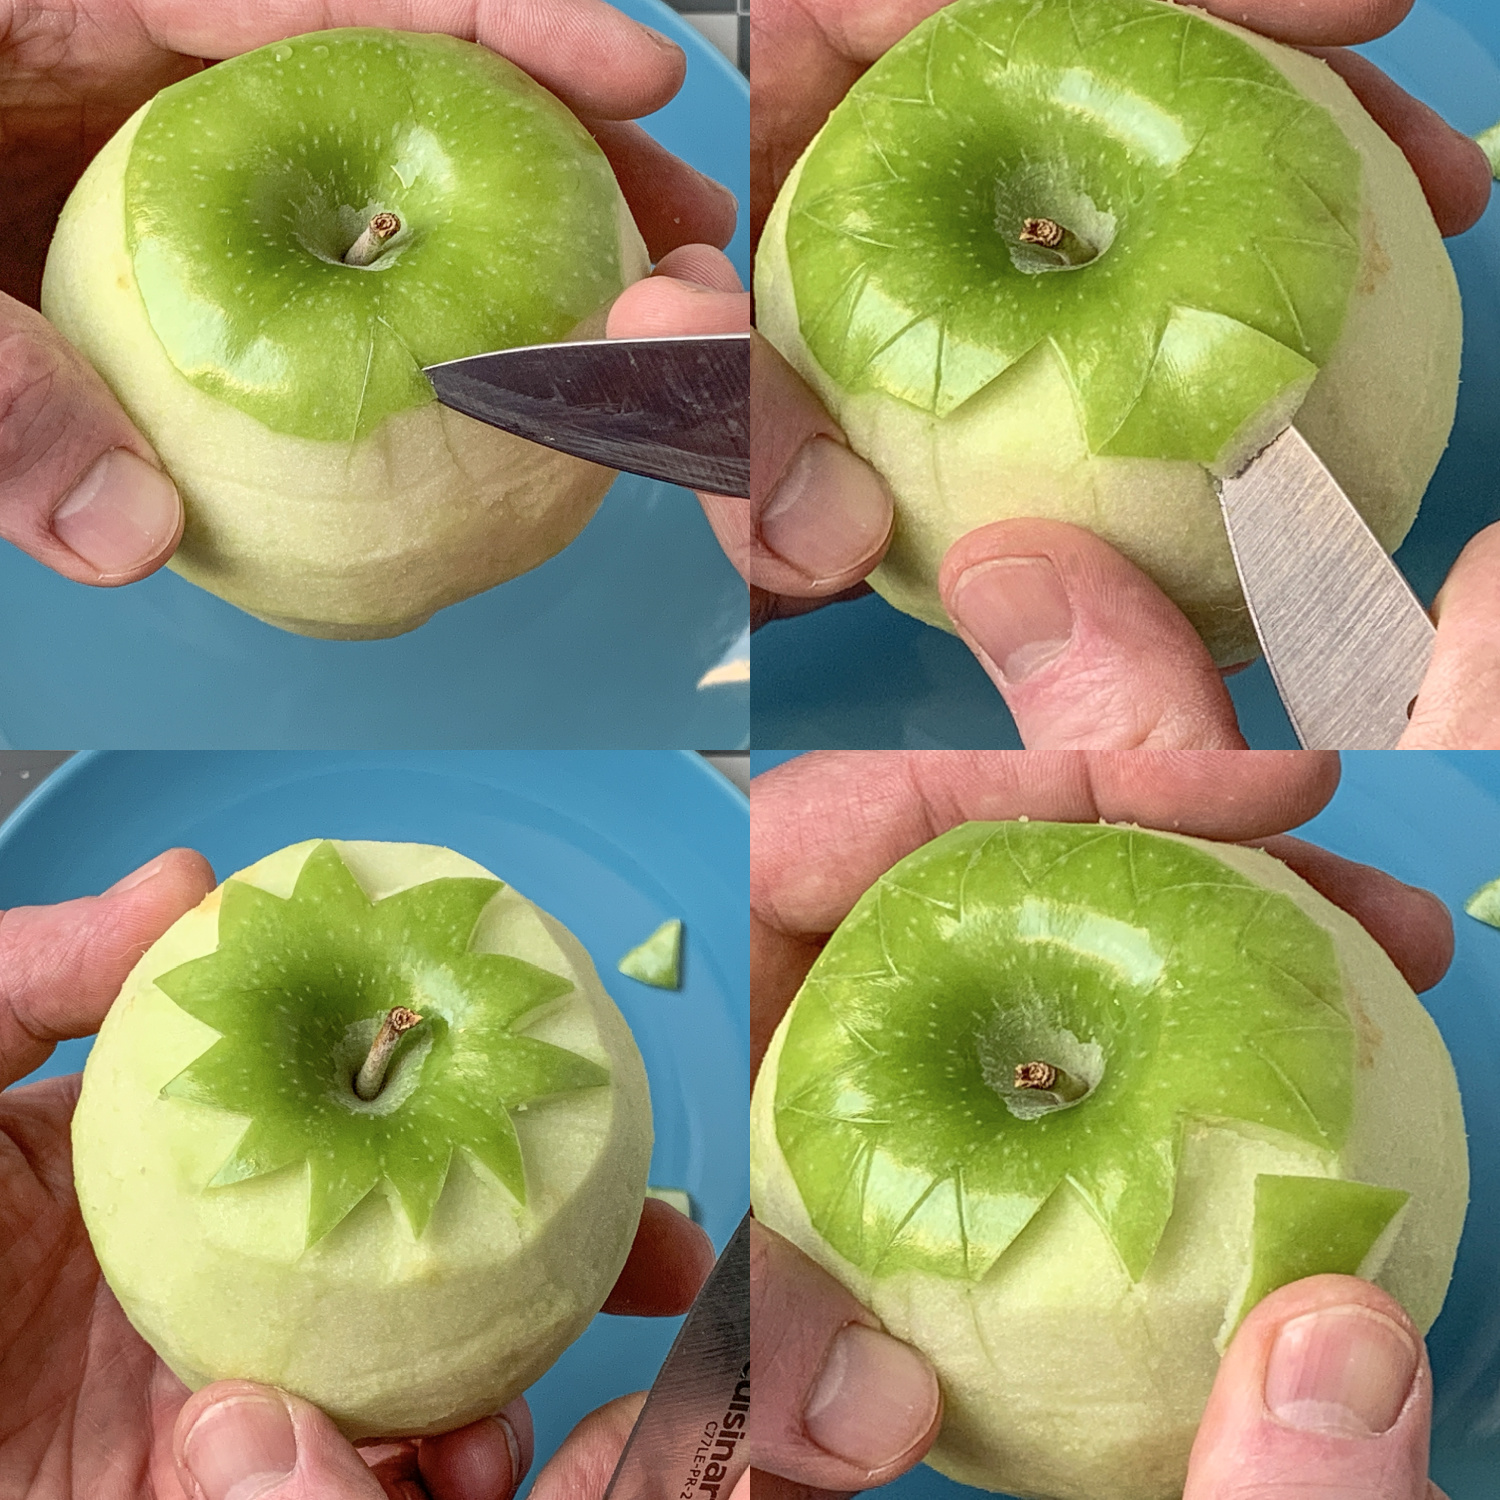
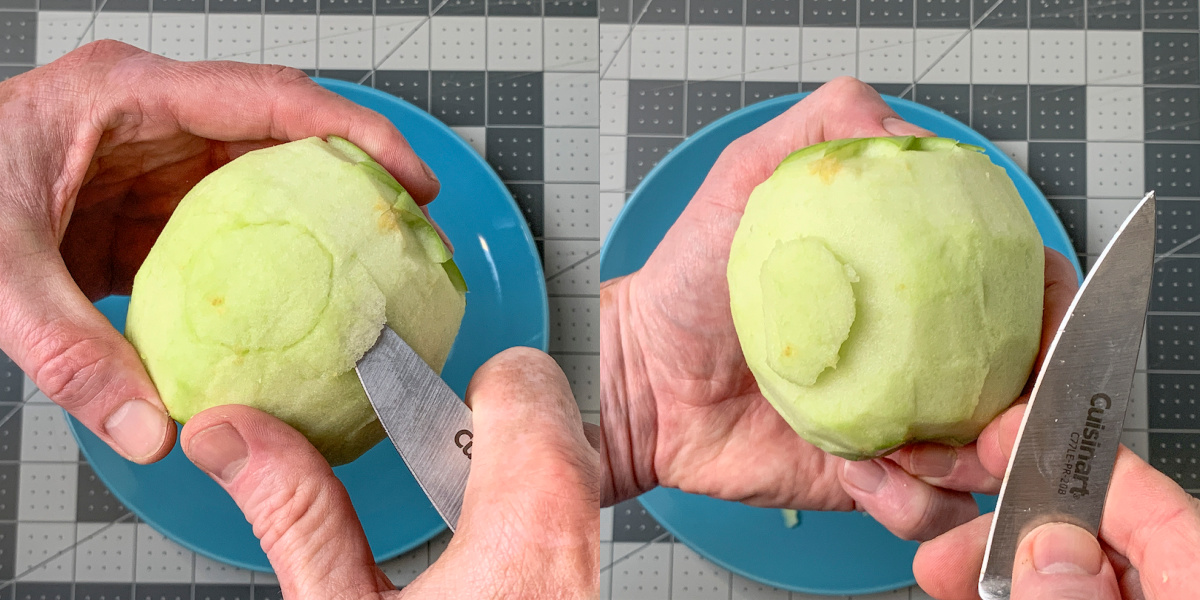
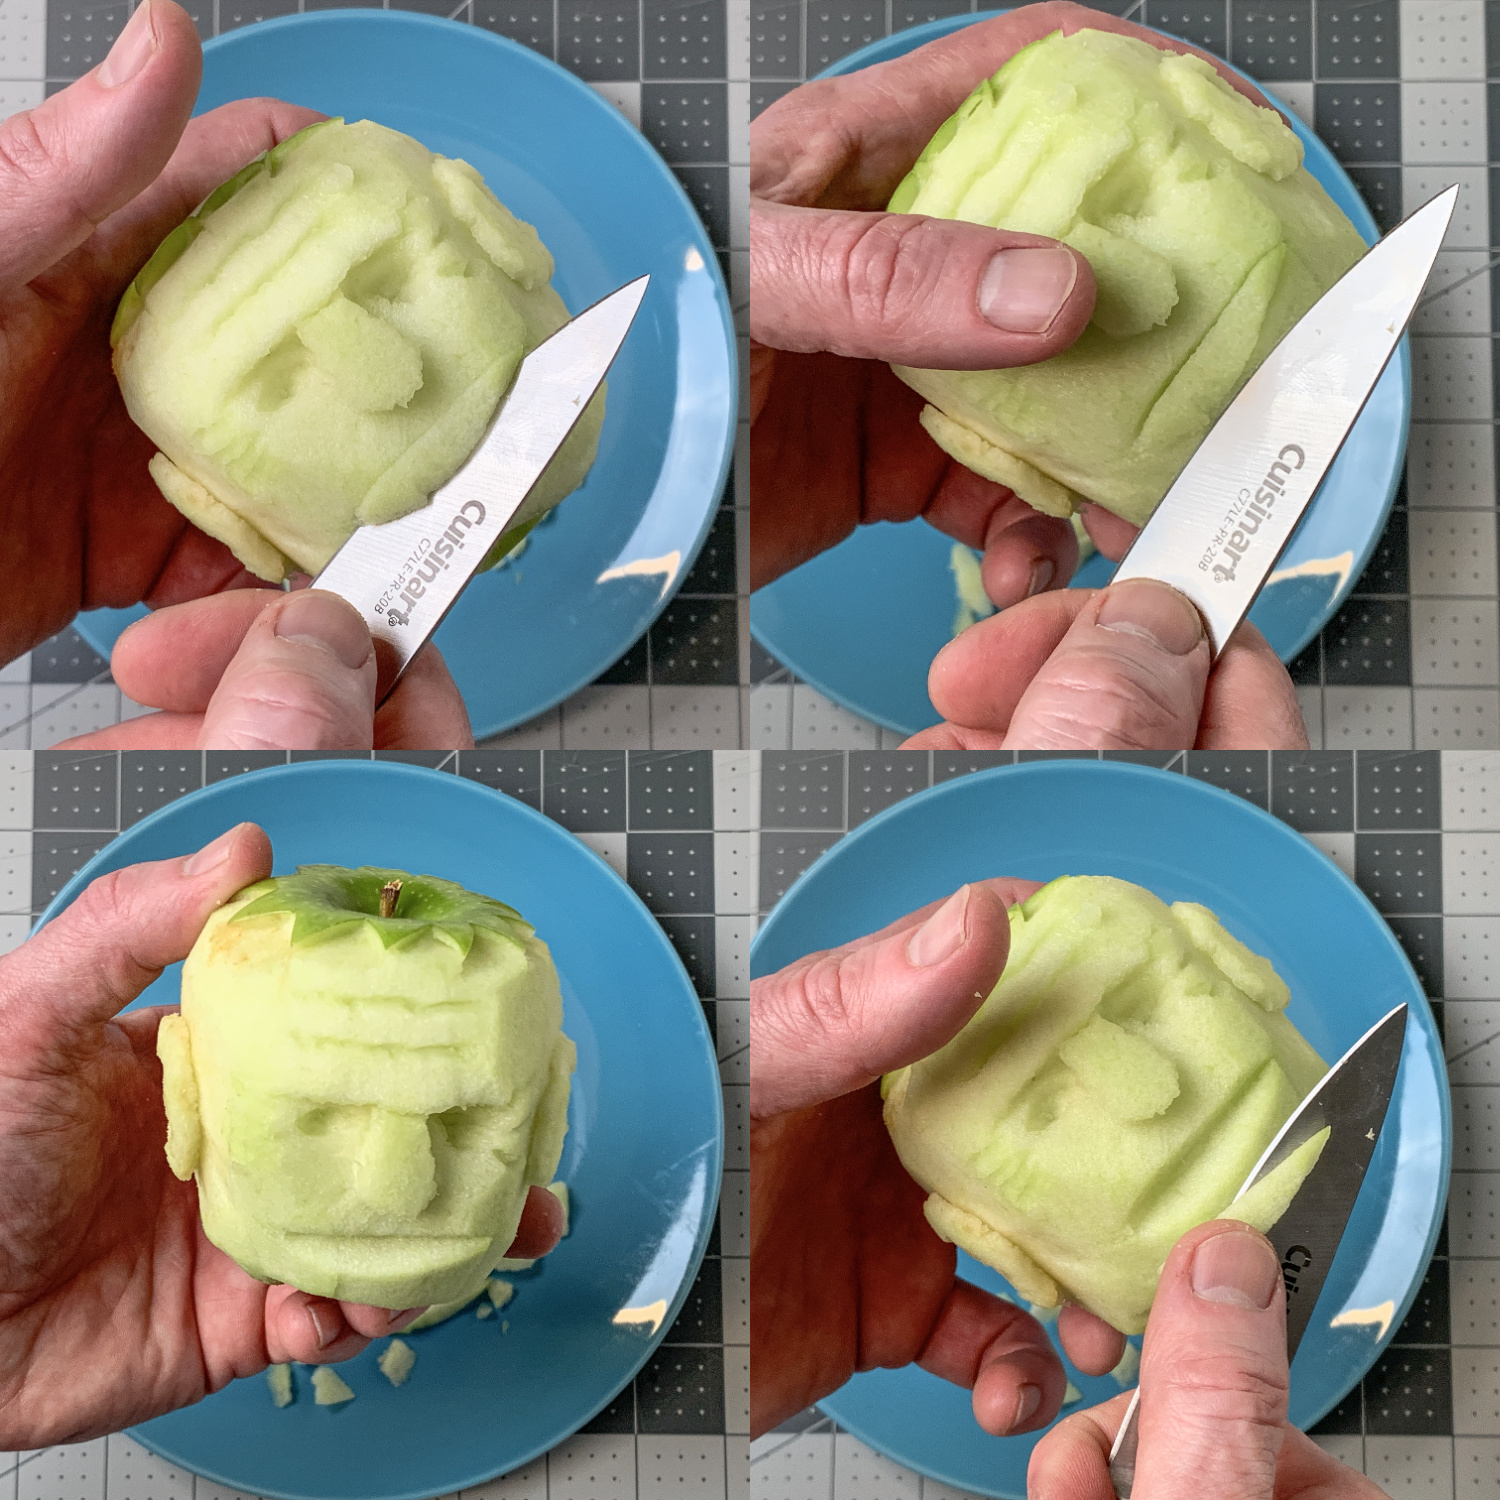
- Start by peeling the apple as you normally would, using a peeler. You can peel ALL of the skin off, or you can leave some around the top for "hair." Leave the stem.
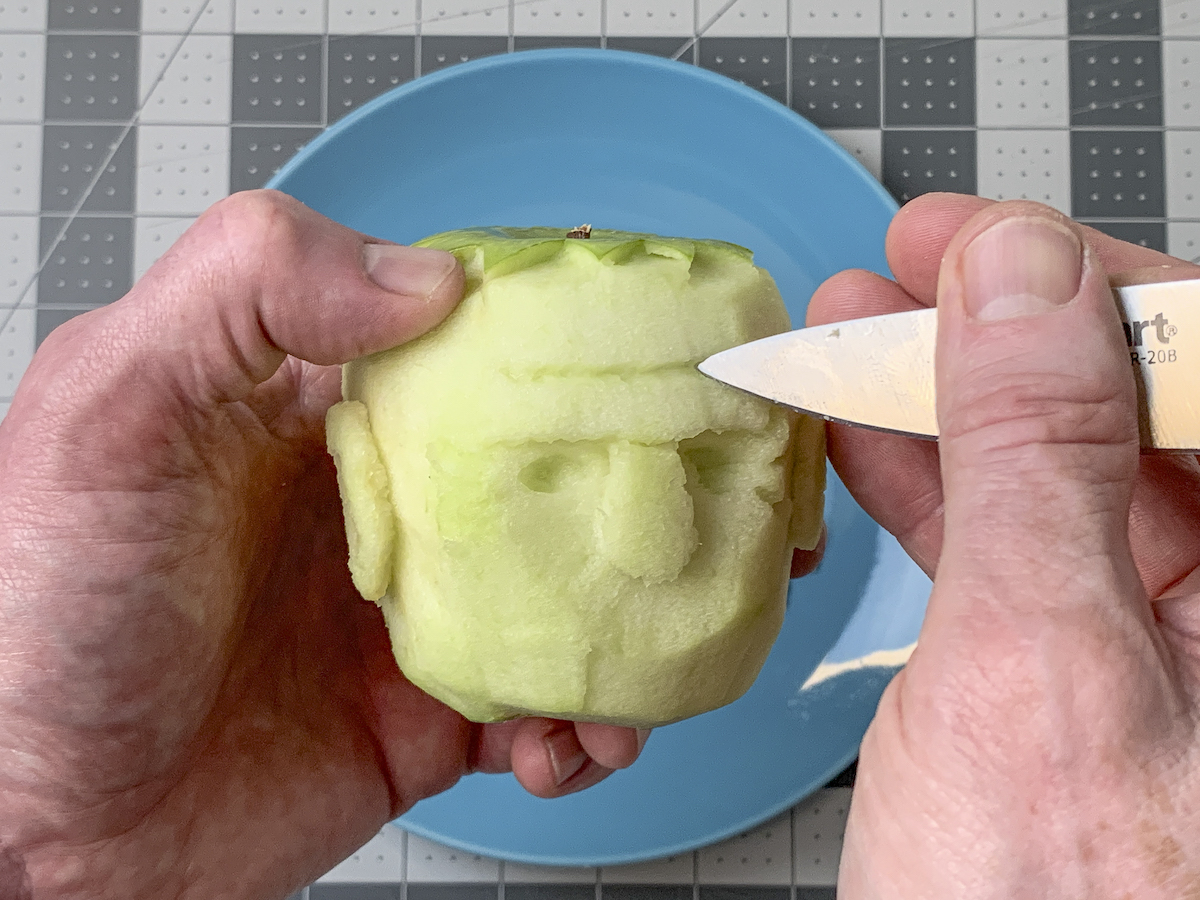
- To make the faux hair, cut triangle shaped wedges into the green portion, working your way around the top. Cut each side, then slice underneath to remove the apple pieces.
- Pick the places on the side of the apple where you would like the ears. You can mark with the toothpick if you like. Then "draw" an ear shape (an oval) using the toothpick. This is going to be your method to make all the features.
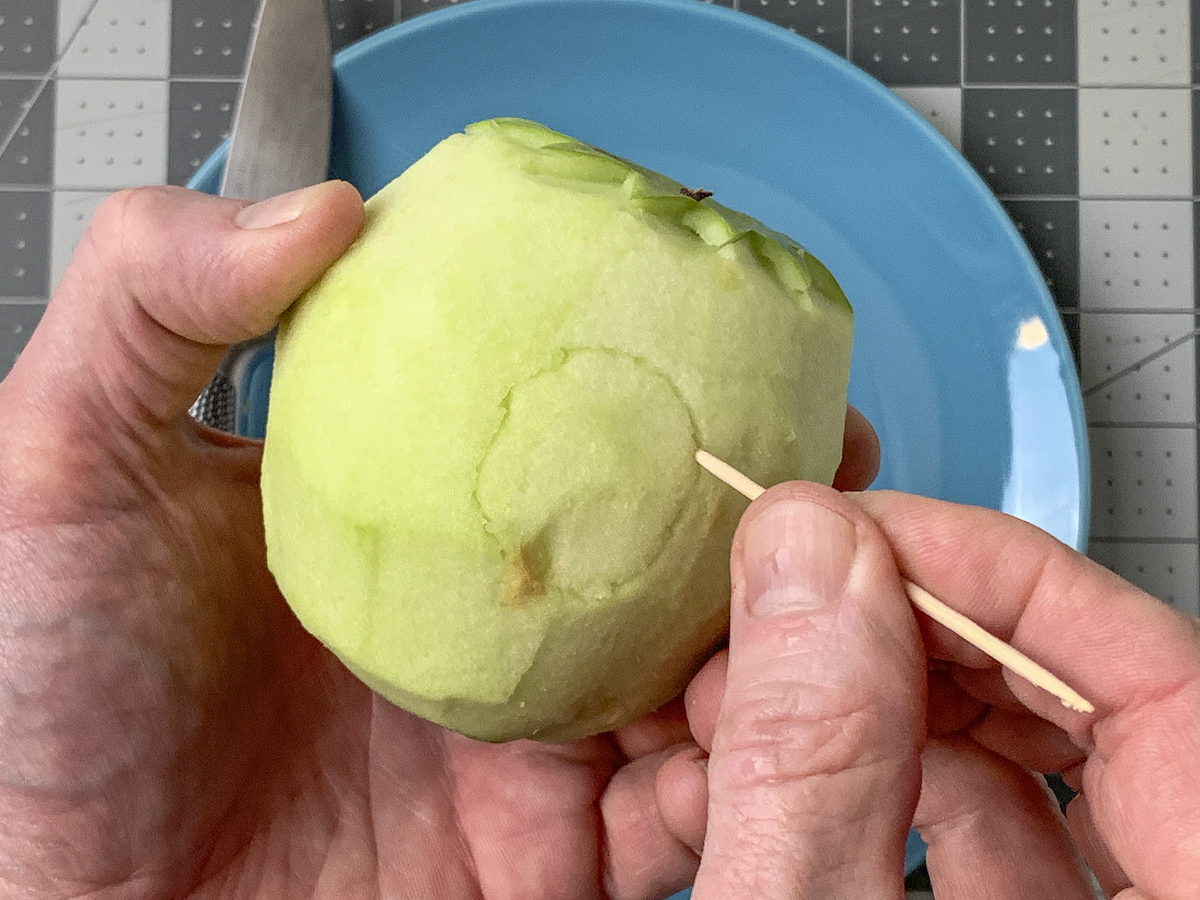
- To make features stand out on the apples, you'll want to recess the area around the shapes. Once you've decided how to shape your ear, remove apple material from around it, without cutting the ear itself. Use the paring knife. You don't have to go very deep – maybe 1/8" – 1/4" maximum.
- To cut out the inside of the ear, you'll again use your toothpick to make your design. Then carefully cut out the inner ear with the knife.
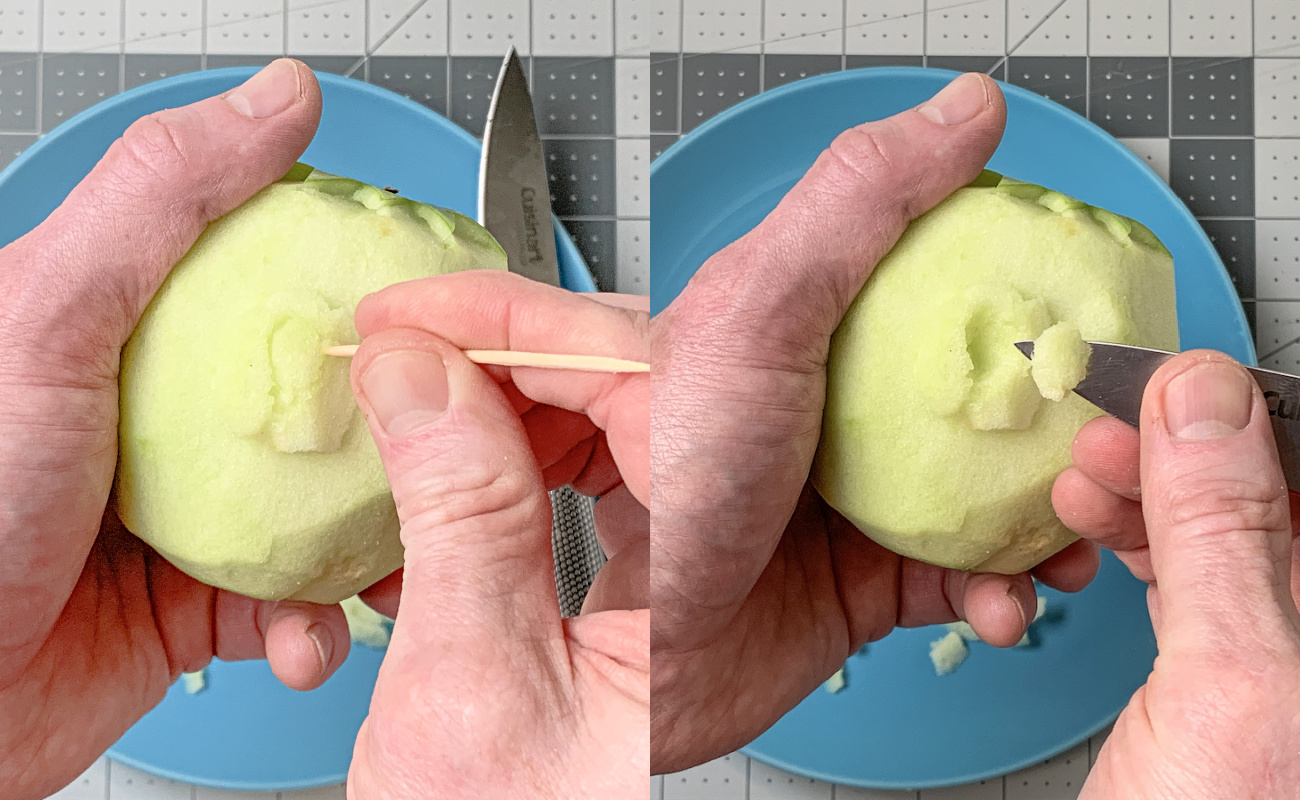
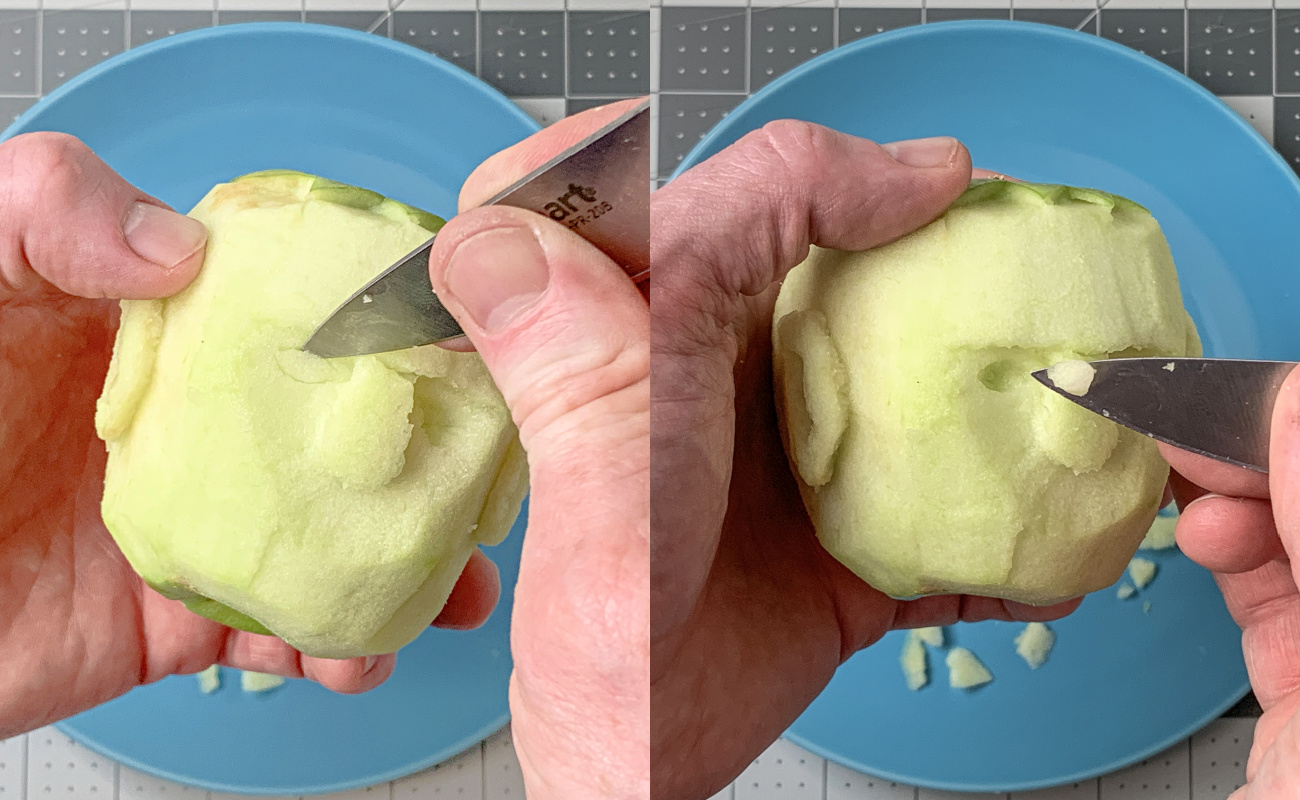
- Time to make the face! Start with the forehead and use a toothpick to make a large wrinkle.
- Draw the nose coming down from the wrinkle with the toothpick.
- Remove more apple material. Slice some off around the nose and top wrinkle using the paring knife.
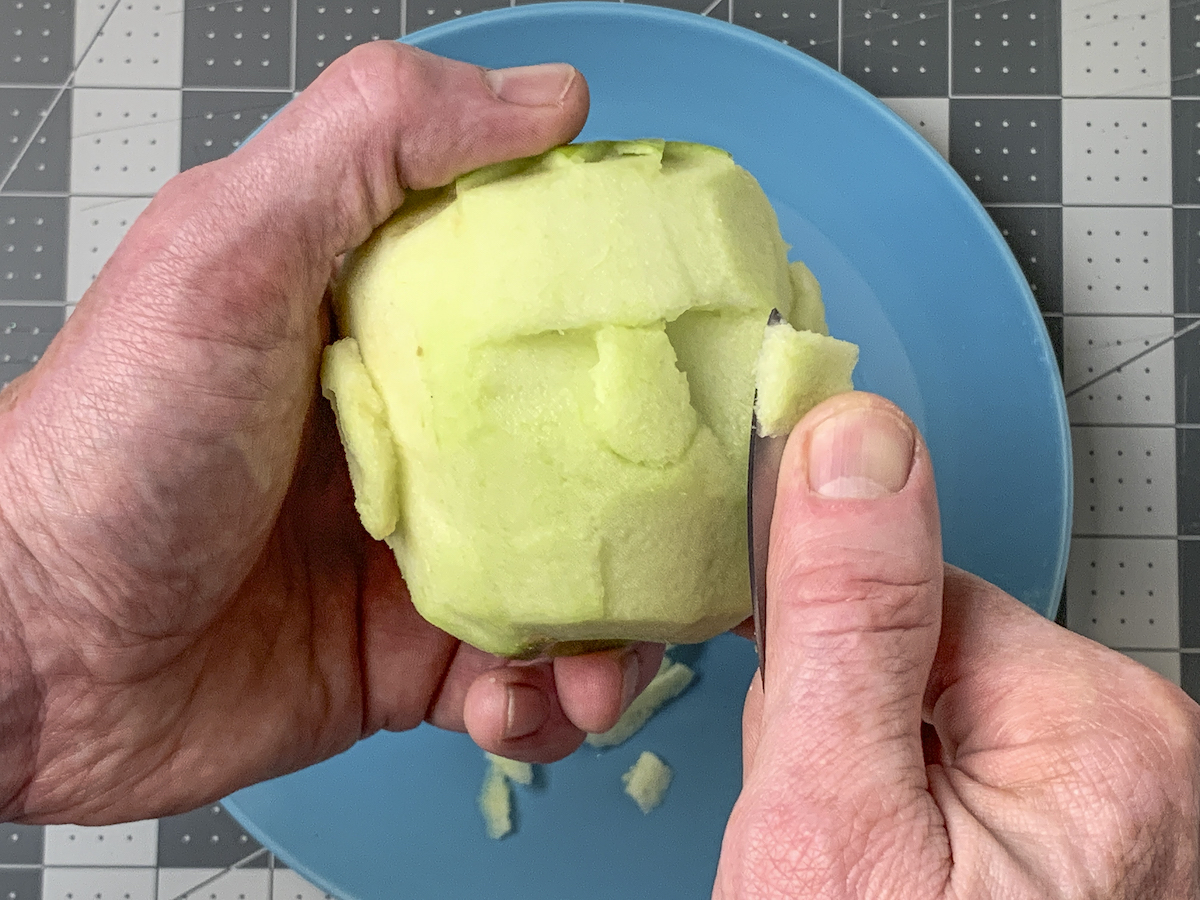
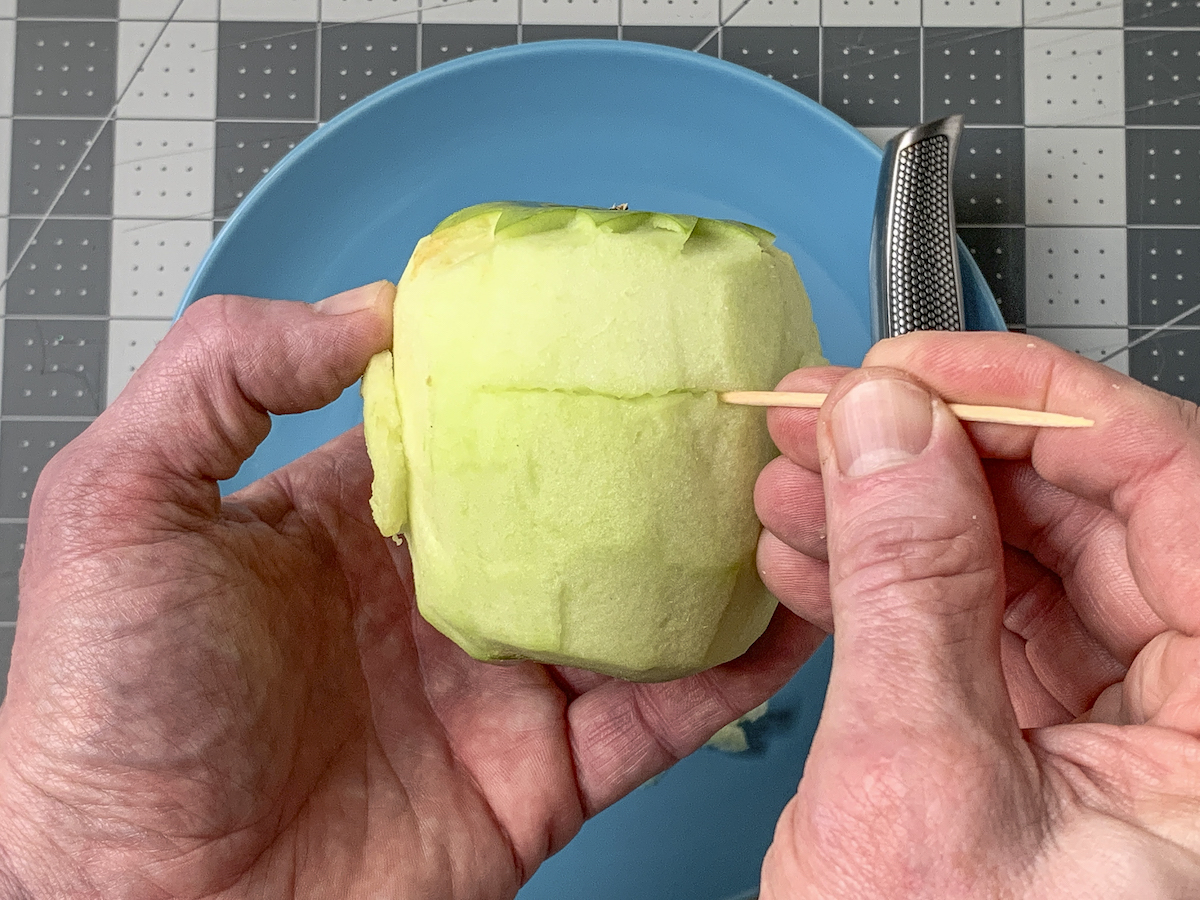
- Carve off more apple from under the nose so you can make it really stand out. As I said, when drying, the features will become more prominent.
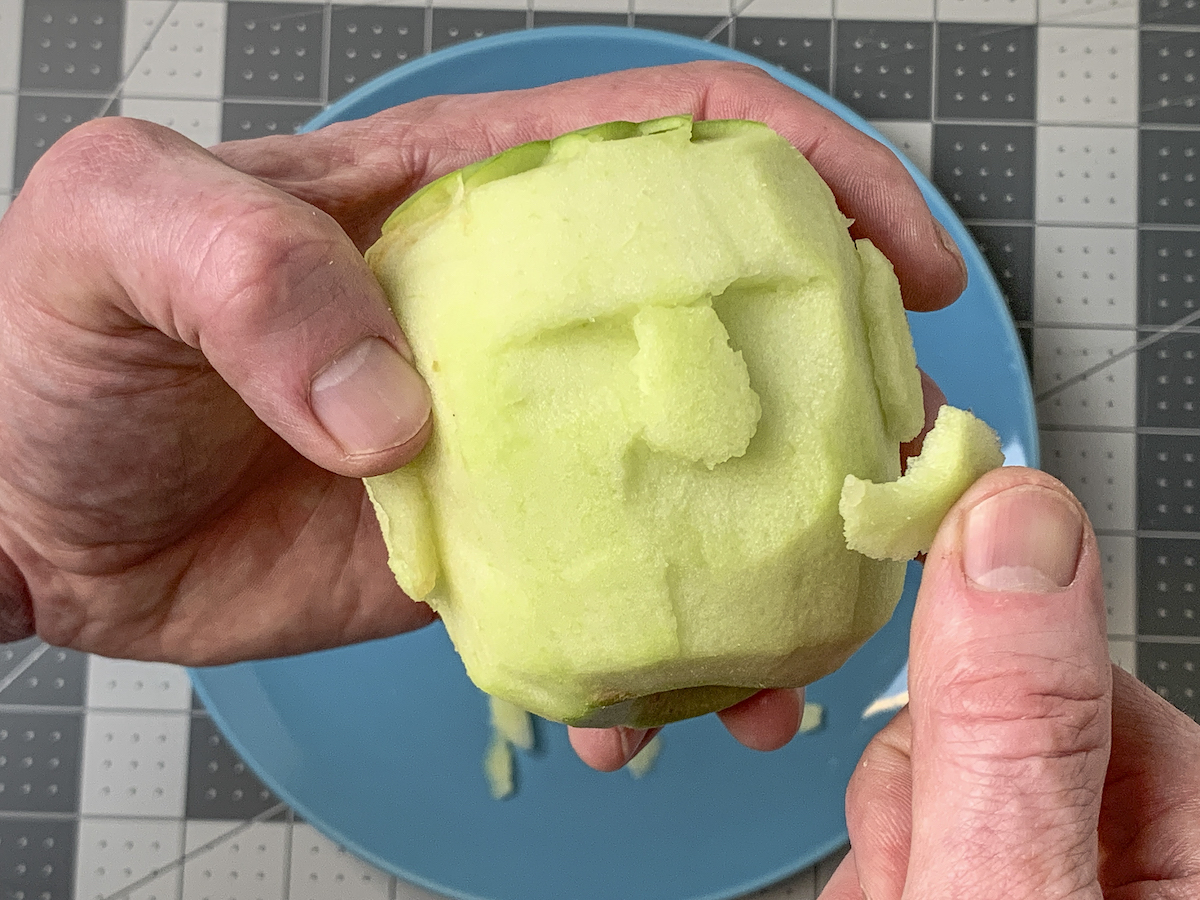
- Now that the nose is set, you know where to put the eyes. Use a small knife to carve them out. You could also scrape them out with the toothpick since they're small.
- Add another nice sized wrinkle or two to the forehead area using the knife. If you want to make some wrinkles around the eyes, go for it!
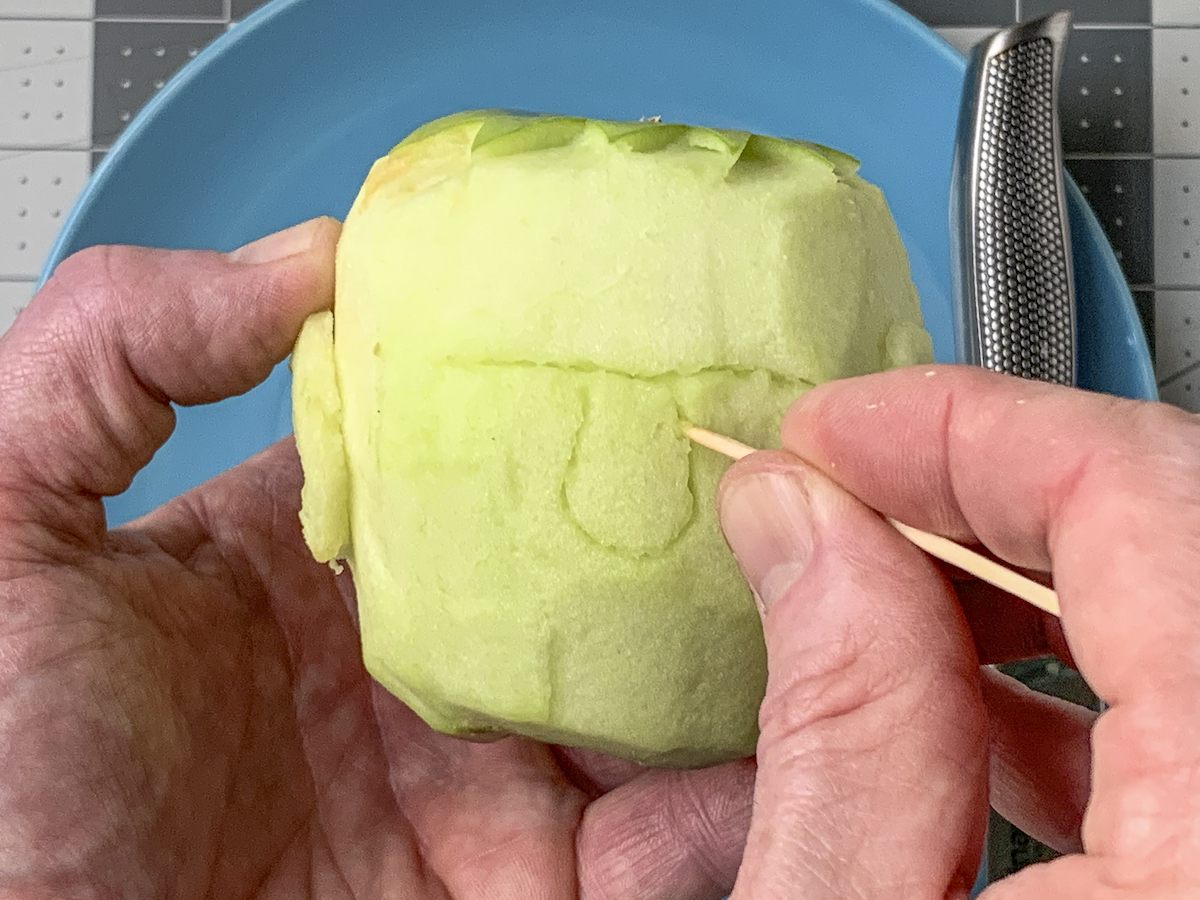
- The mouth is super easy to make! Carve a v-shape into the apple right below the nose as shown. Then remove the wedge.
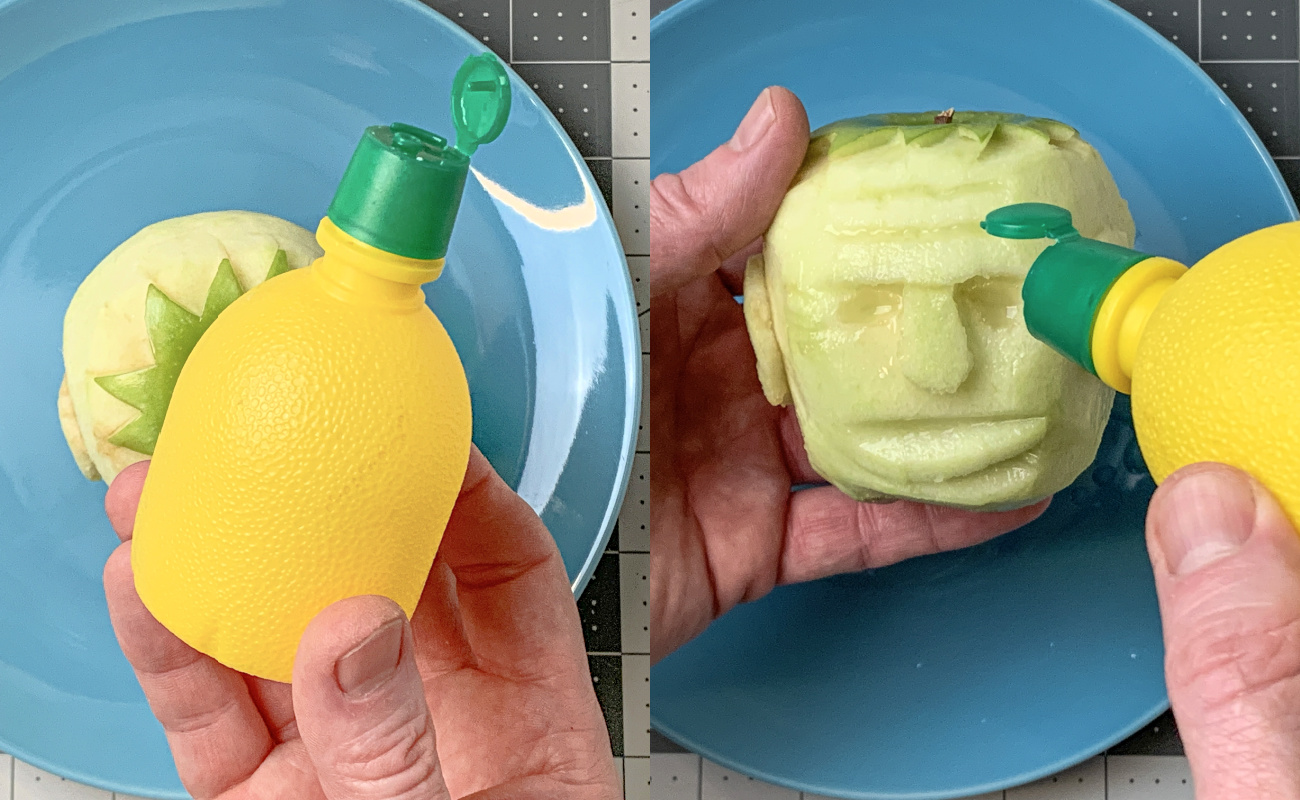
- Once the design is cut, cover with lemon juice and salt (optional). You will place the apple(s) on a plate and then add the lemon juice. Some people also soak the apples in a lemon juice and salt mixture (just a sprinkle of salt). That's fine too. Let soak for about 15 – 20 minutes. Remove and dry with paper towels.
- Place the apples into the oven at your lowest setting (around 160 – 200 degrees) for drying, about 8 hours. Remove, let cool, and display.

Notes
Have you ever tried making these for Halloween, dolls, or otherwise? I’d love for you to let me know in the comments! Plus check out these other posts:
Coffee Filter Bats • Milk Jug Skeleton • Paper Lanterns • Paper Plate Owl • Paper Pumpkins • Perler Beads • Pom Pom Ghosts • Skull Bean Art • Tic Tac Toe • Zombie Slime


I remember doing shrunken heads with salt dough bodies in elementary school, but for the life of me, can’t remember why or what we called them. And we didn’t do them this way (clearly as 3 classes filled with students wouldn’t be able to bake all those apples!) and I can’t recall how it all worked! I am definitely going to have to do some investigating now!
I wonder if you just let them dry for a long time? So cool – please update me!
@Amy, If you live in a dry climate, you can hang them from the stem somewhere that gets air flow and they will dry on their own. It might take up to a month.