Paper Bag Snowflakes for Winter Fun
Make pretty paper bag snowflakes with this easy guide! Perfect for winter decor, these easy DIY snowflakes add a cozy seasonal touch.
Skills Required: Beginner. You’ll be gluing and cutting to assemble a snowflake. This is a simple project that only requires knowledge of a hot glue gun.
Happy soon to be winter to everyone out there! Today, we’re and diving headfirst into the world of paper bag snowflakes.
That’s right, those brown lunch bags you’ve been nonchalantly filling with sandwiches are about to become your canvas for some winter crafting magic.
This is no ordinary crafting session; it’s a snowflake soiree, and your paper bags are the guests of honor.
And the good news: you don’t need to be a crafting wizard to join in on the fun. All you need is a pair of scissors, some adhesive, and a dash of imagination.
The best part? There’s no right or wrong here. Each snip and cut brings your paper bag snowflake one step closer to its own unique form. No two are alike.
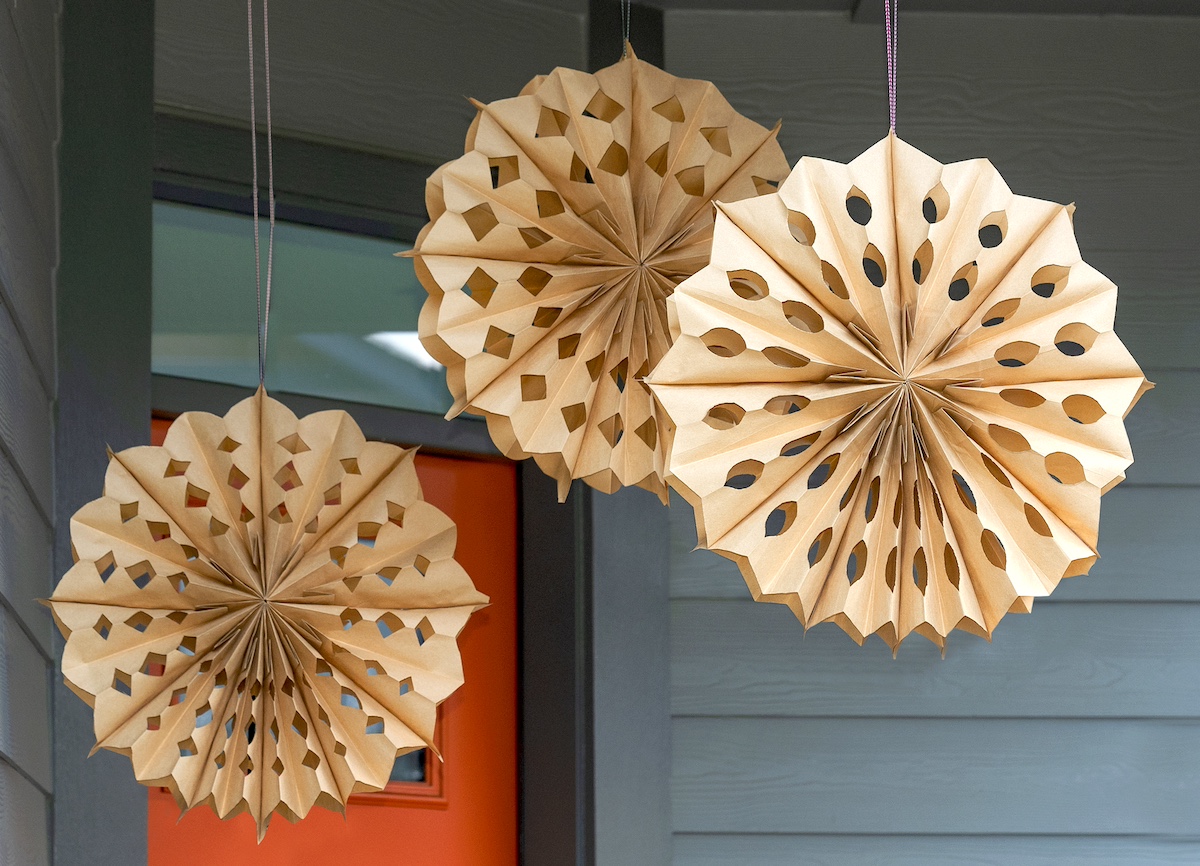
These aren’t just snowflakes; they’re conversation starters, window dressers, and most importantly, proof that with a little creativity, even the most ordinary items can become extraordinary.
So, let’s get those bags ready, set up your crafting station, and prepare to unleash a blizzard of creativity.
Whether you’re decking the halls, adding a touch of winter to your home, or just looking for a fun family activity, these paper bag snowflakes are your ticket to a crafty, snowy adventure.
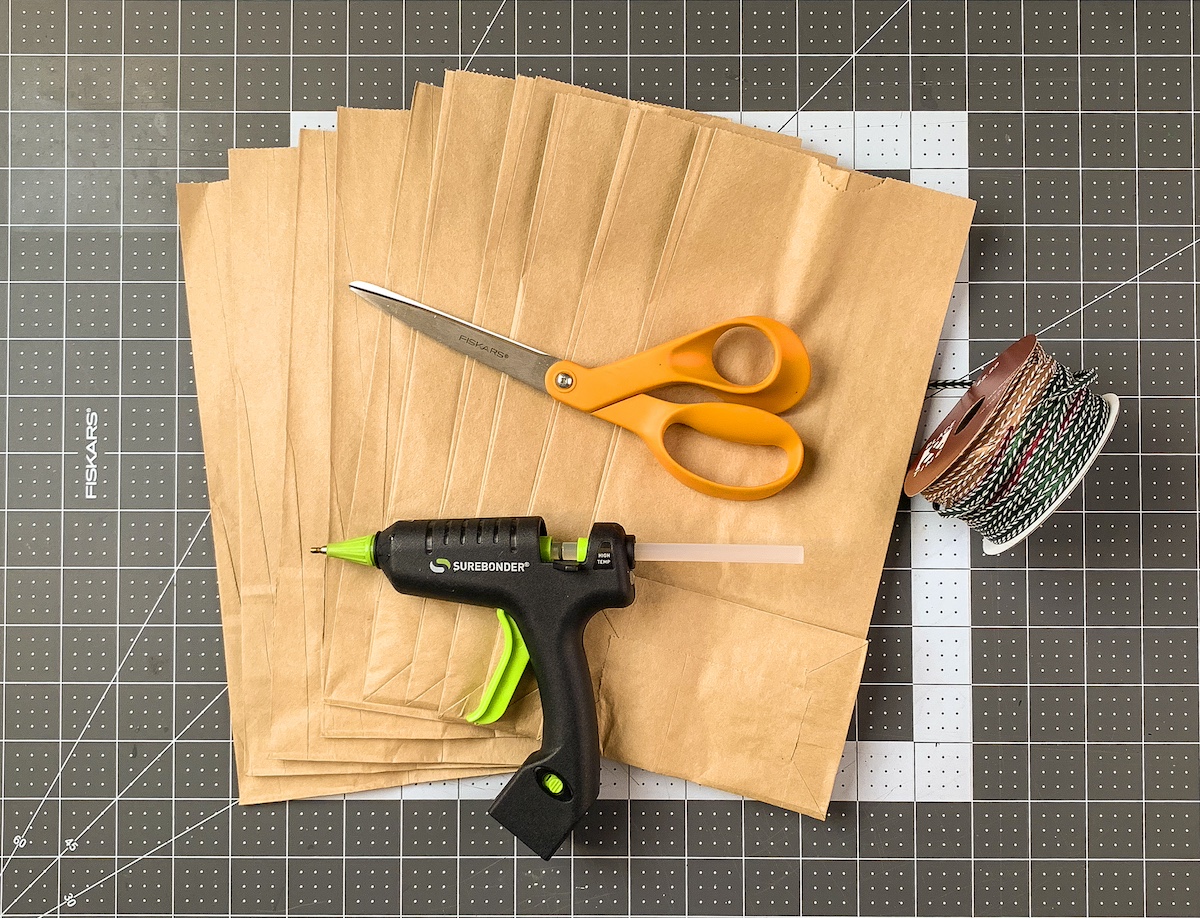
Here’s what you’re going to need to make this fun idea! You probably have these items already in your home.
Gather These Supplies
- Lunch bags – 9 to 10 per snowflake (white or brown)
- Ribbon
- Pencil
- Scissors
- Hot glue gun and glue sticks OR craft glue
Tips and Thoughts for This Project
While we love dollar store crafts around here, I don’t recommend using their paper bags for this project. We tried and our snowflakes were saggy flops. Use thicker, higher quality lunch bags.
You can also use craft glue if you don’t have a hot glue gun. It obviously takes longer for the glue to dry, but then you can do this craft with younger children.
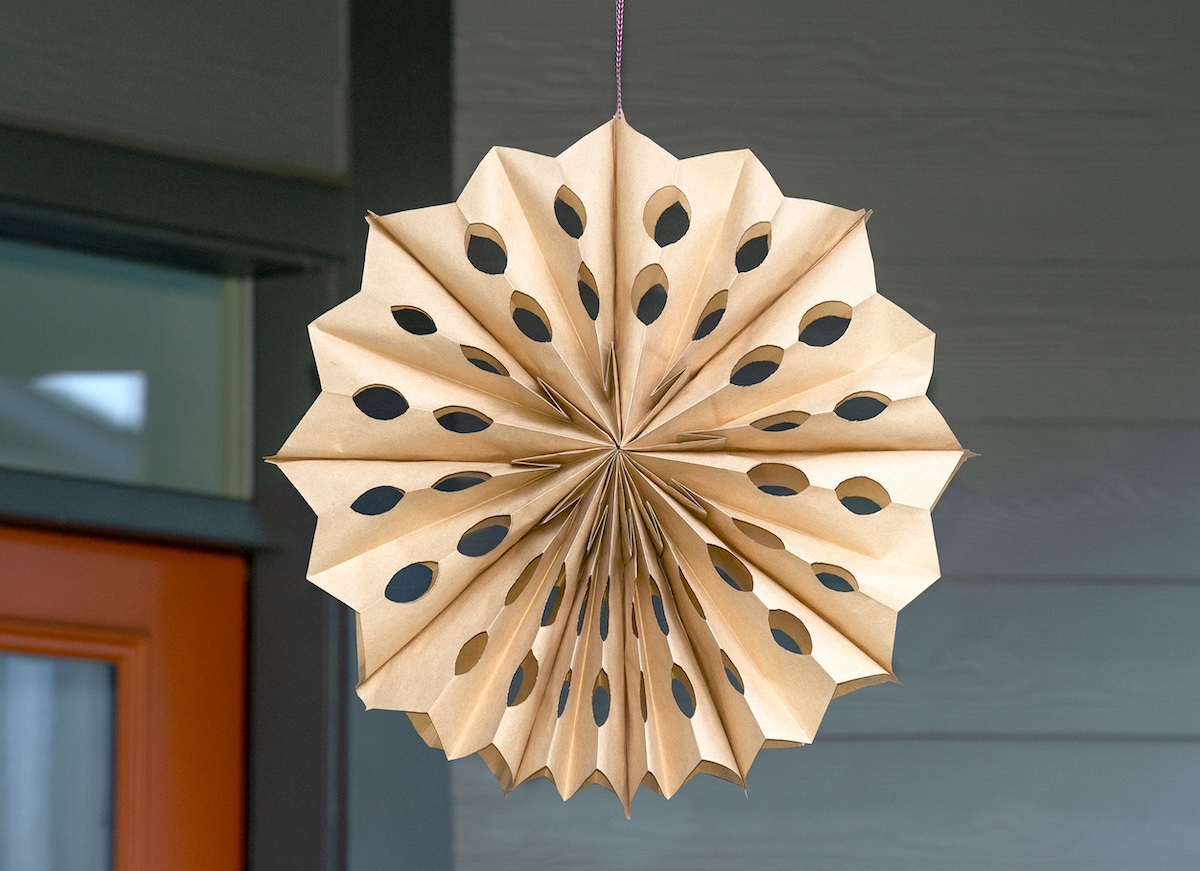
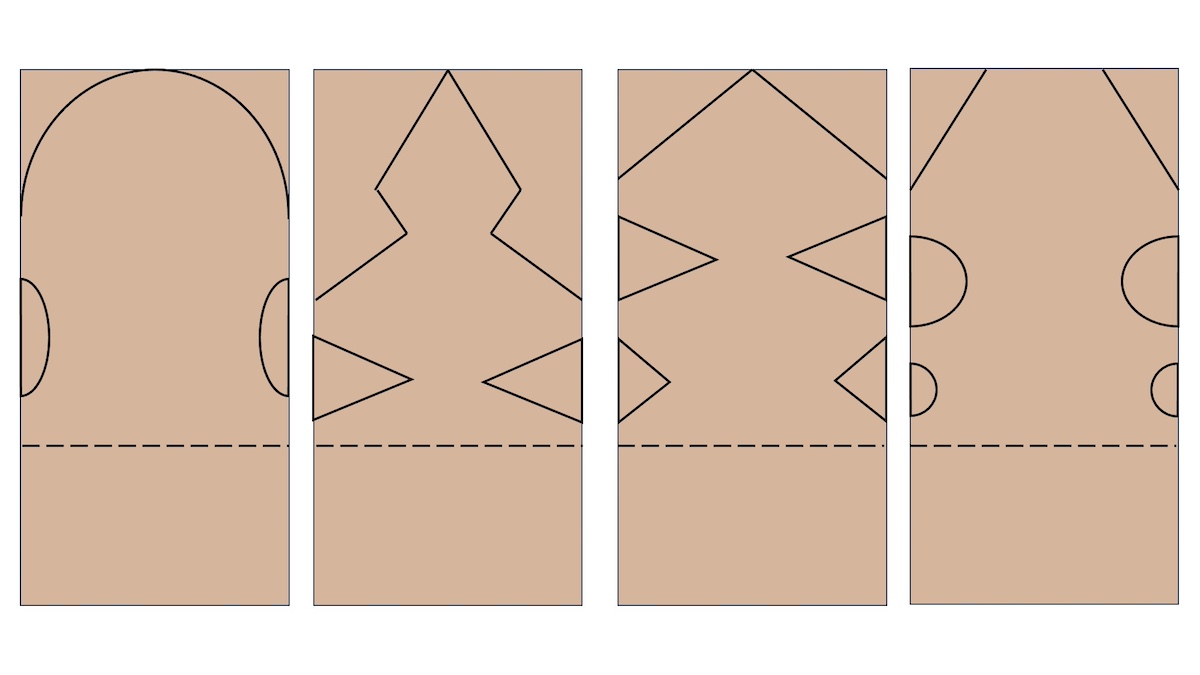
If you aren’t sure what designs to use, get inspired by some of the paper bag snowflakes patterns below:
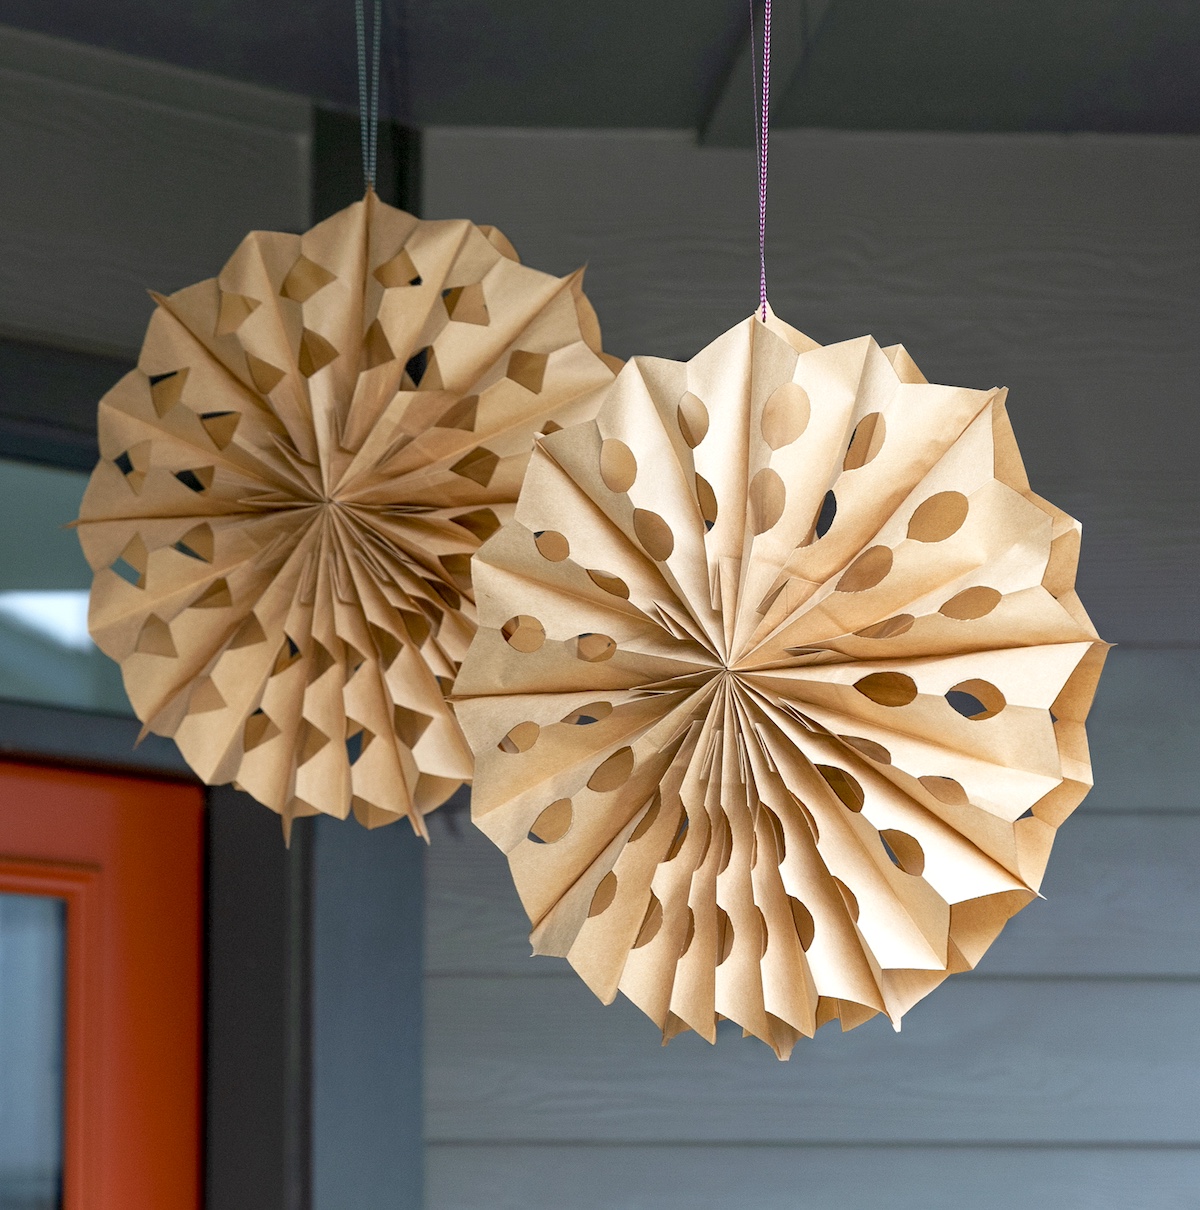
Are you ready to try these? They are actually quite stunning in person. They’re large and make a nice impact!
Get the printable how to card for this project below:

Paper Bag Snowflakes
Equipment
- Pencil(s)
Materials
- Paper lunch bags 9-10 per snowflake
- Ribbon(s)
Video
Instructions
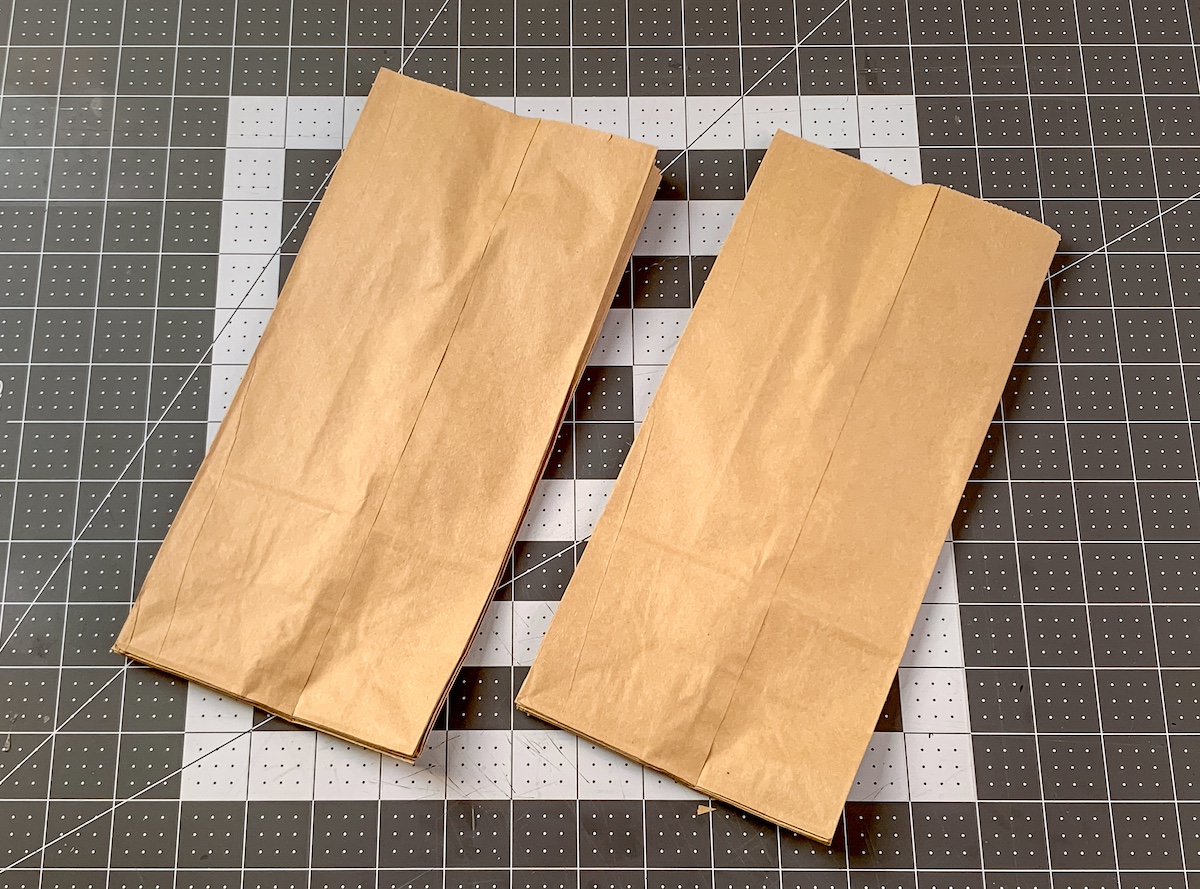
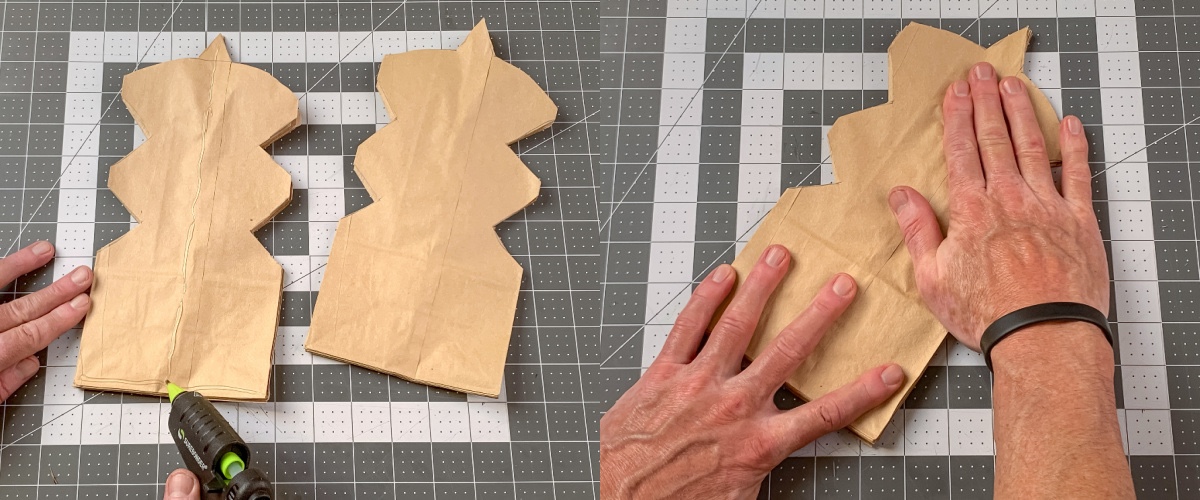
- Make two stacks of lunch bags, with 4-5 in each stack. Make sure all the ends are together.
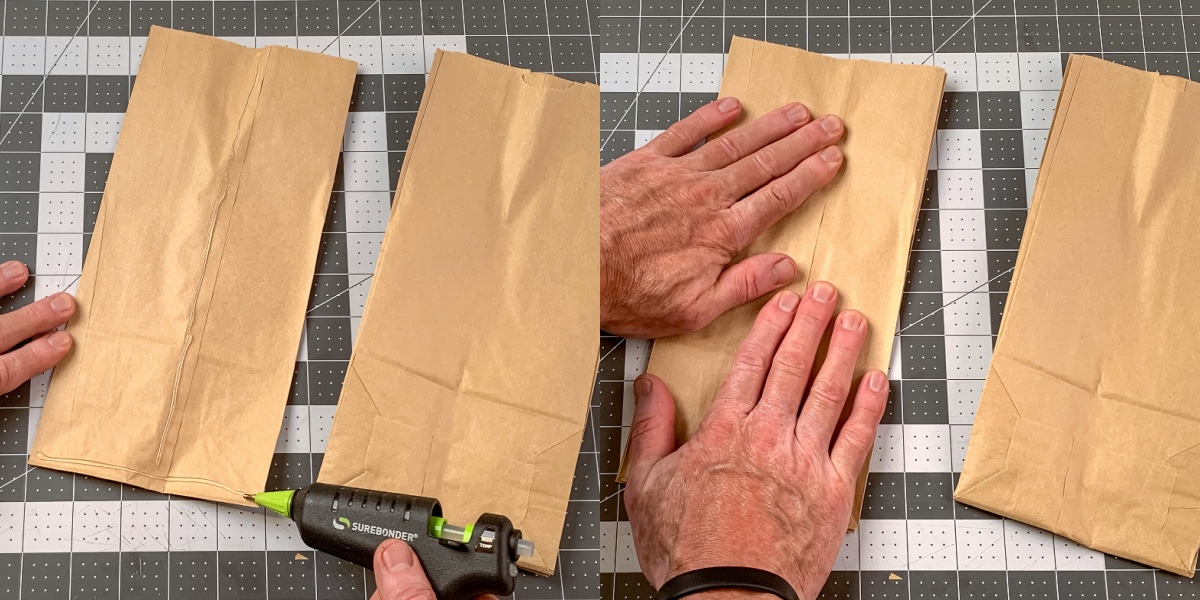
- Starting with one stack, glue two of the lunch bags together using hot glue. You will use the hot glue along the bottom of the bags, then a line of hot glue up the middle. Smooth the bags together, making sure the bottoms of the bags are together.
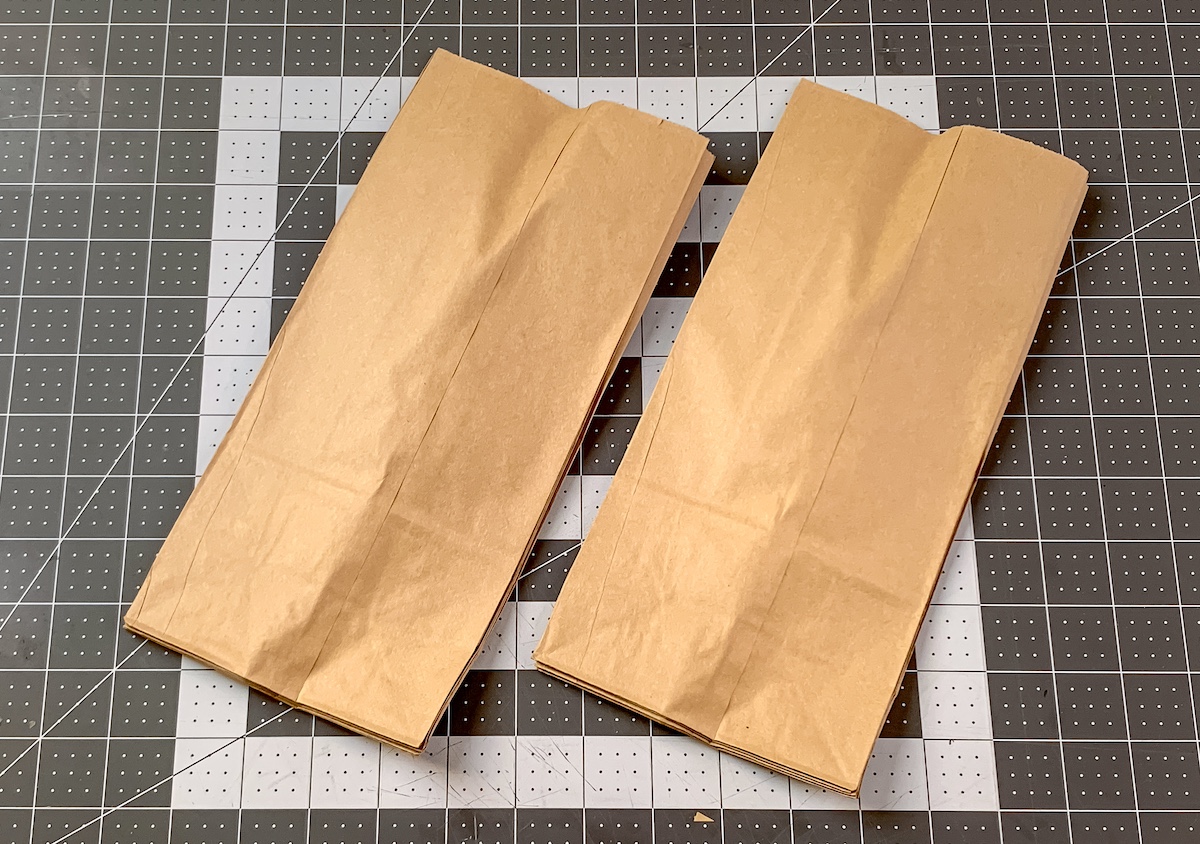
- Repeat step two until you have glued both stack of lunch bags separately. One stack should have 4-5 bags and the other should have 5 bags.
- Draw a design using a pencil on one stack of bags. Keep the design above the bottom flaps.
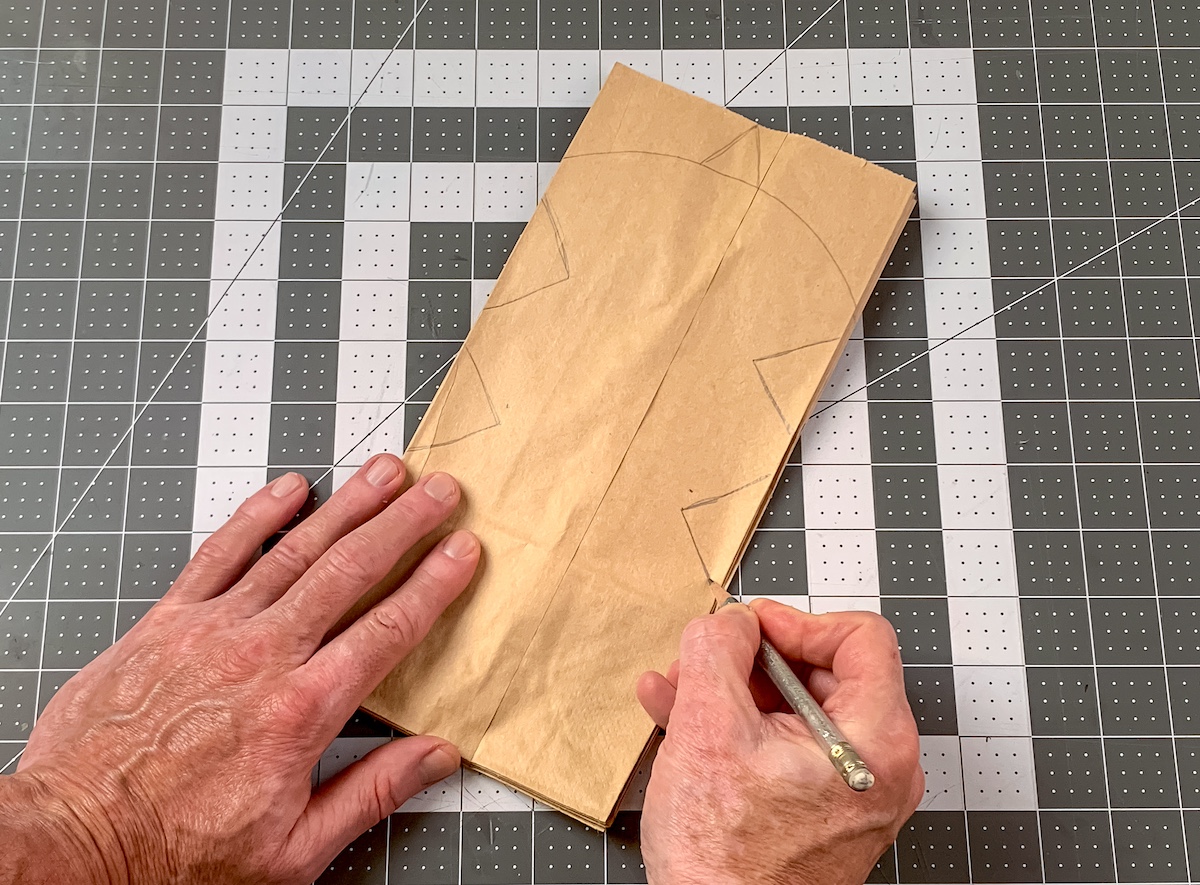
- Use the scissors to cut the design out of the paper bags.
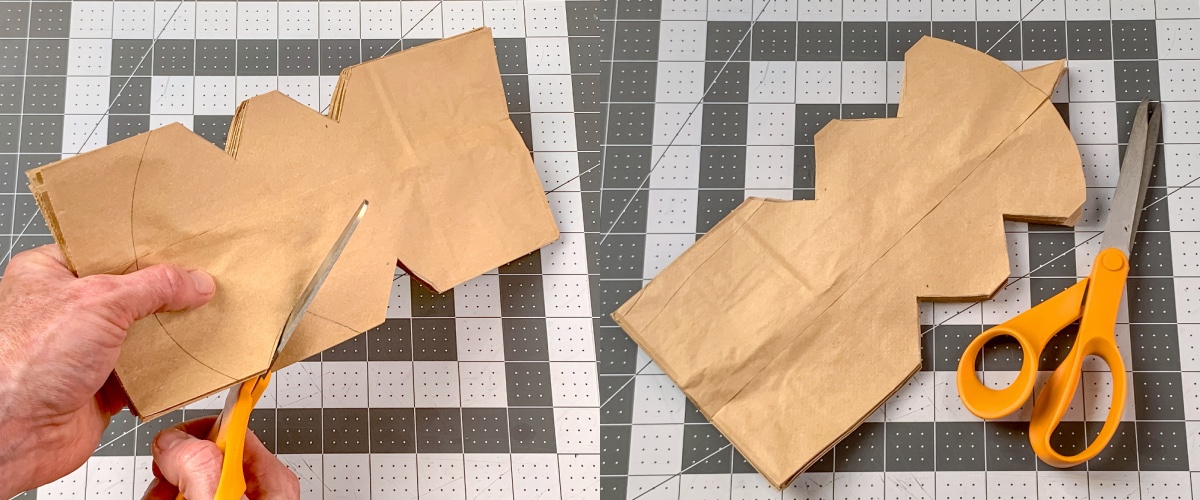
- Place the cut stack of paper bags onto the second stack and trace the design with the pencil.
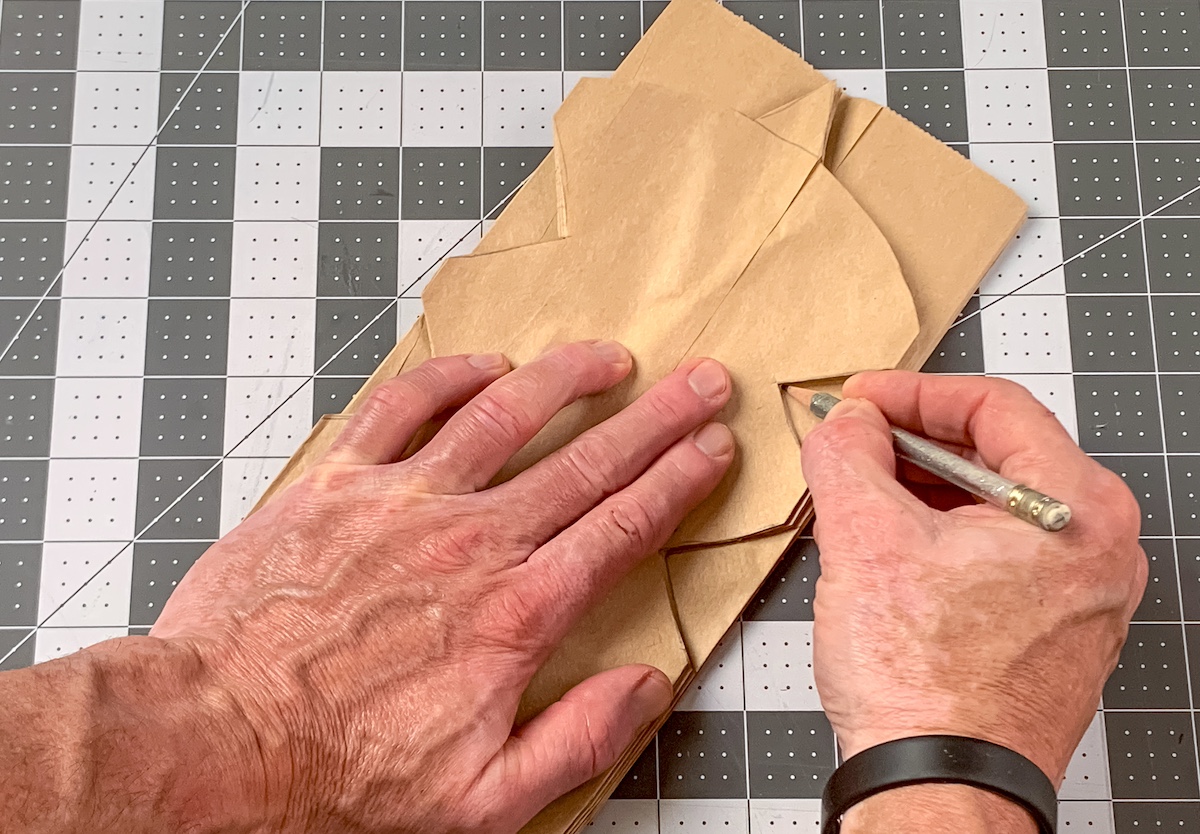
- Cut the design out from the second stack of paper bags. Your stacks should look identical.
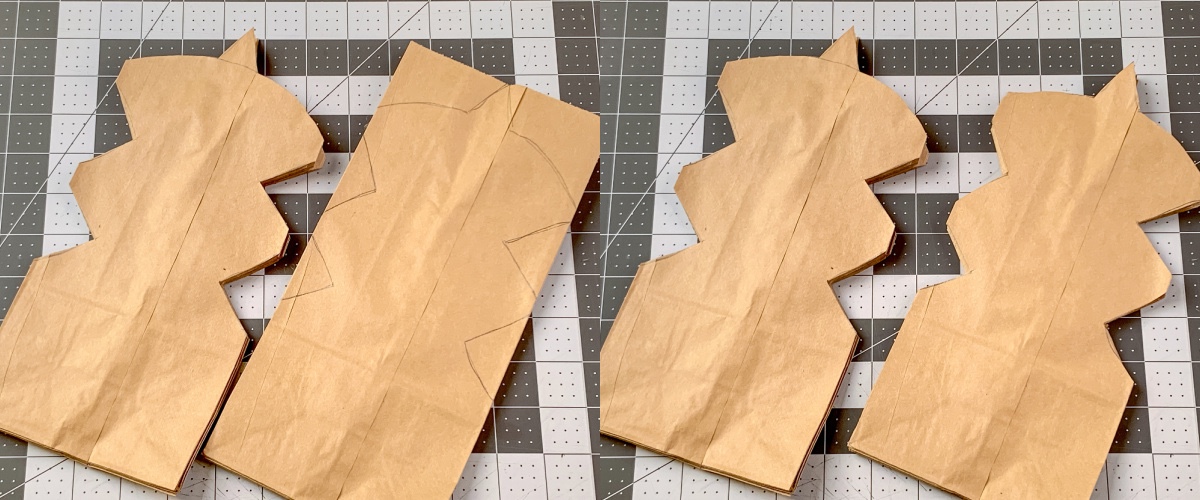
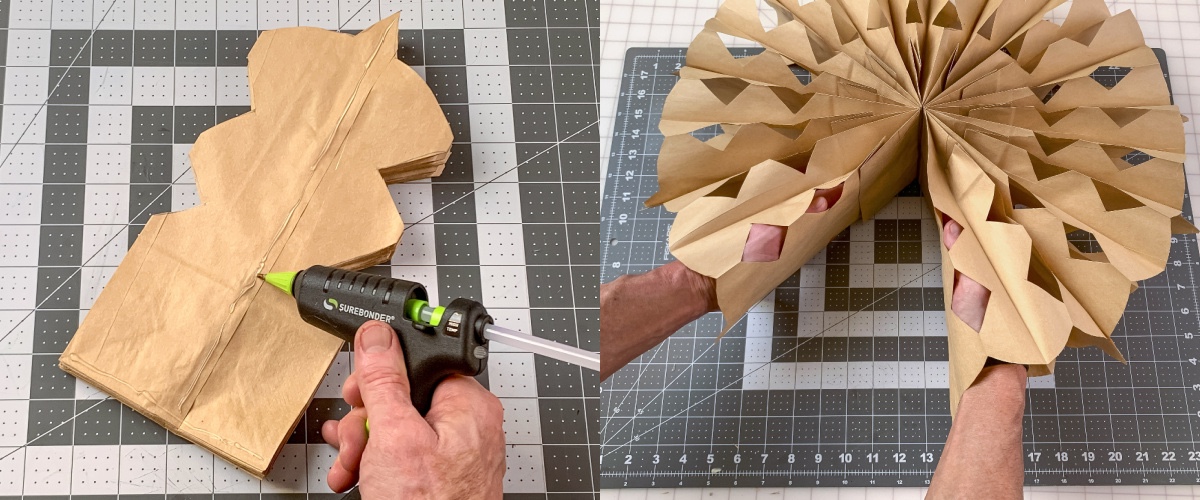
- Place a line of hot glue up the center of one of the stack and glue them together.
- Bring one end of the paper bags around to the other and glue together, forming the circular snowflake. Hold until secure.
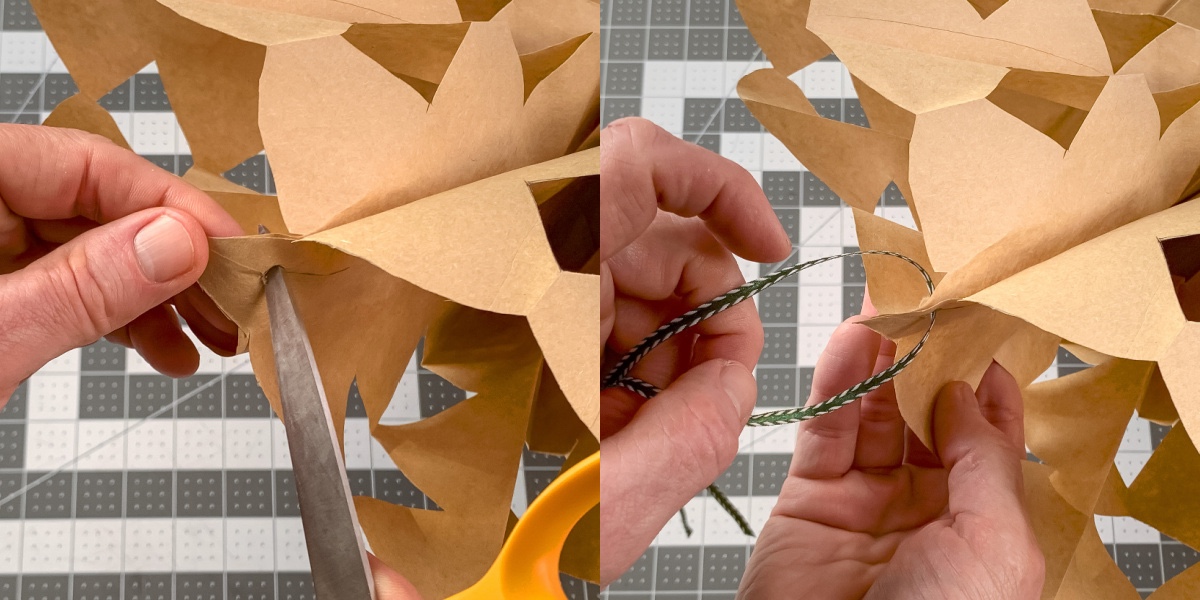
- Punch a hole in the top with scissors or the pencil. Cut a length of ribbon and string, then tie a knot to hang.
Notes
If you enjoyed this craft, let me know in the comments! I’d also love for you to check out these other winter activities: