DIY Paper Pumpkins for a Fun Fall Kids’ Craft
Learn how to make 3D paper pumpkins with kids! Children will love this easy DIY craft that they can create for autumn or Halloween. It’s lots of fun for families to make together.

I don’t know about your kids, but my nieces absolutely love fall and Halloween crafts. My whole family really loves this time of year, so I’m sure she inherited it from her parents.
The most fun thing about crafts with kids is watching them discover things that you used to do when you were little. It’s hilarious seeing their faces as they figure out how to make a craft you did forty years ago – and the most recent example of this is these easy paper pumpkins!
My mom guided this activity for my nieces as she used to teach preschool, and this is a craft they did every fall (it’s that easy!). There are several ways to do this paper craft project, but this is our favorite.
These cute gourds can be made in four simple steps. You’re going to cut the paper strips, glue them all together, then form the pumpkin shape. Then you’ll make the stem/add it to the pumpkin.
What paper should I use?
I bought construction paper from Dollar Tree. I highly recommend shopping for supplies there, but you can also look at the craft stores or Walmart.
In addition to construction paper, you can use scrapbook paper, card stock, or probably even cardboard (not too thick). Basically you need something has a bit of “body” and will remain just a little bit rigid. Notebook and standard thin computer paper are too flimsy.
What adhesives should I use?
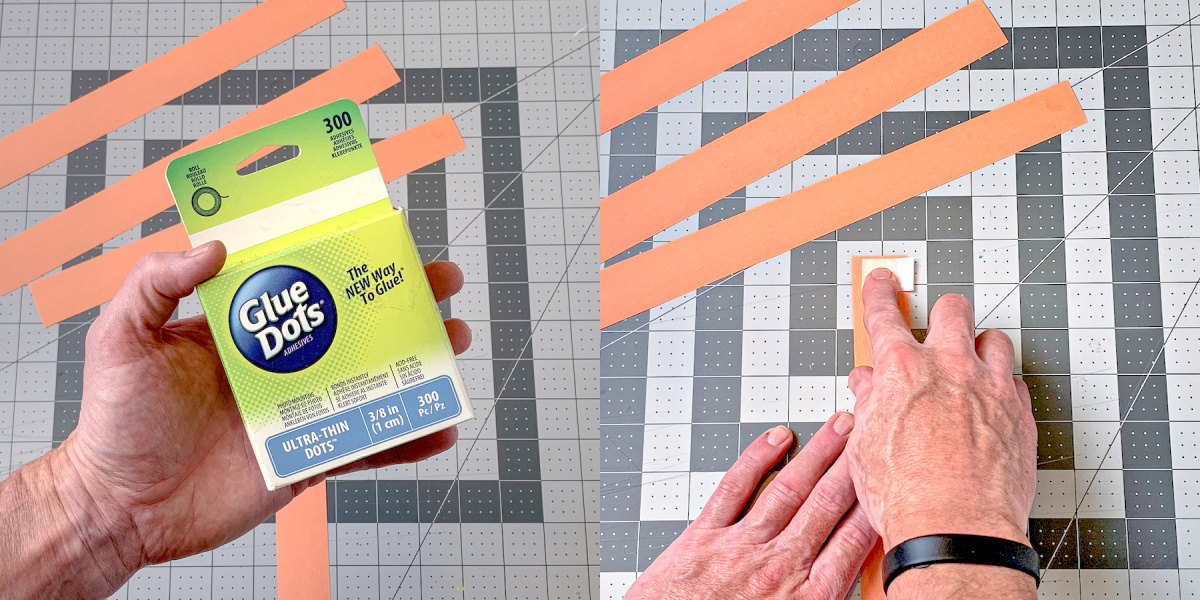
I used Glue Dots for this project, which are basically (strong) little circular double-sided tape stickers. You could also use a hot glue gun.
Gather These Supplies
- Orange construction paper (about 9″ x 12″)
- Glue Dots
- Pipe cleaners – brown and green
- Hole punch
- Paper cutter or scissors and ruler
- Pencil
If you’re making a smaller pumpkin, you only need four 12″ strips of paper.
These stayed out on my hallway table from autumn all the way to Thanksgiving. I hope you have a great time making them and let me know in the comments if you did.
Get the printable how to card below.
Paper Pumpkins
Equipment
- Hole punch
- Paper cutter or scissors and ruler
- Pencil(s)
Materials
- Construction paper orange
- Glue Dots
- Pipe cleaners brown and green
Video
Instructions
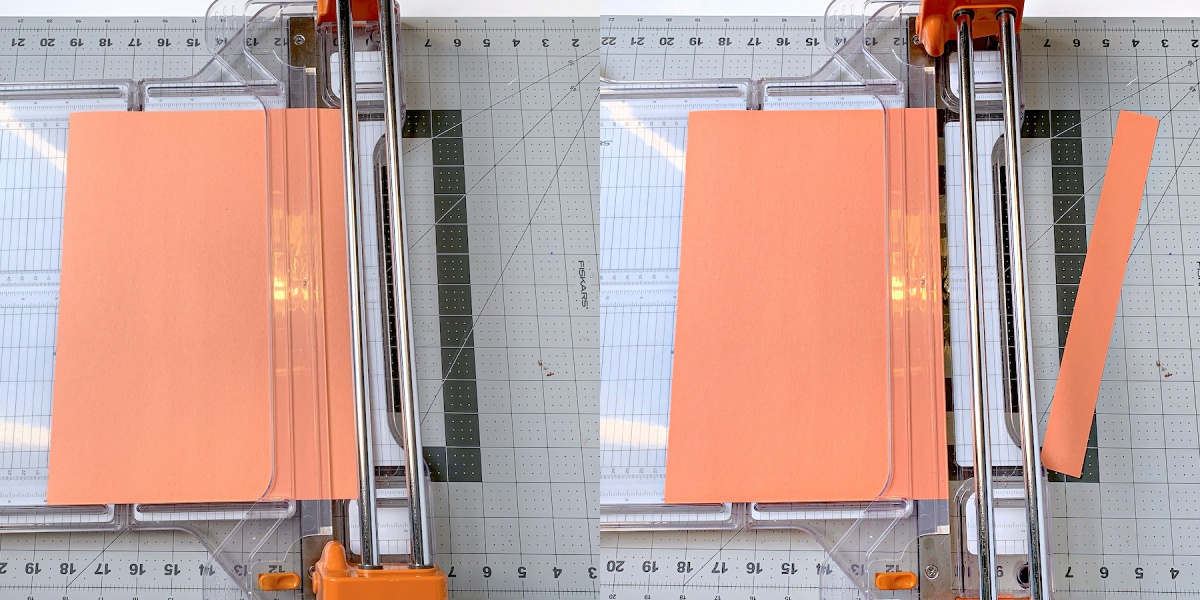
- Cut eight strips of paper that are 12" x 1.25" wide using a paper cutter and scissors or ruler.
- Take four paper strips and put them on your work surface. Tape two of the pieces together end to end with a glue dot, overlapping an inch or so. Repeat this three more times and you will have four long paper strips.
- Tape two of the long pieces together with a glue to make a plus (+) symbol. Repeat with the other two pieces.
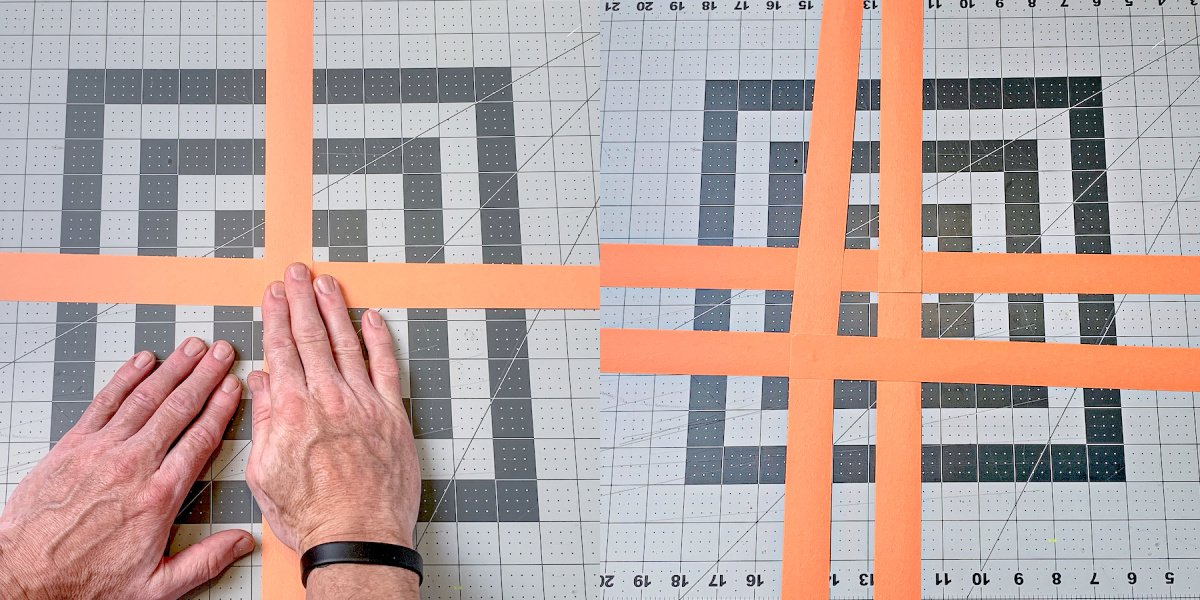
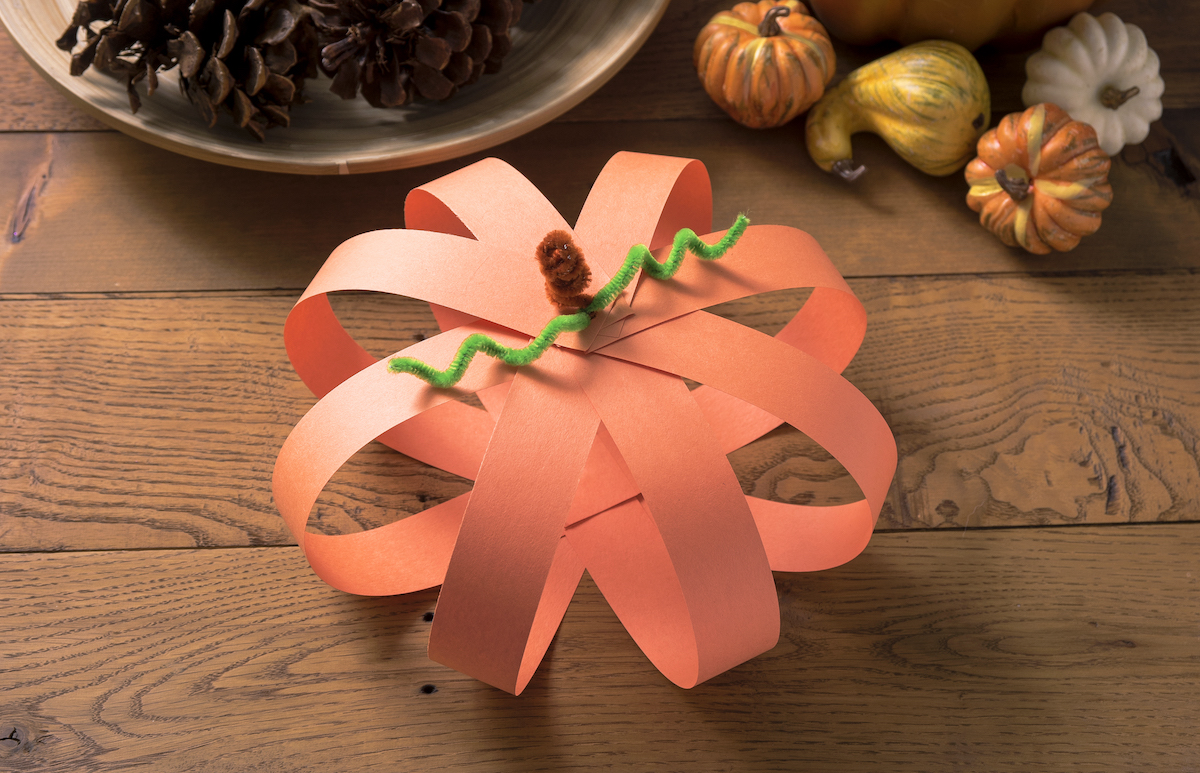
- Tape one of the plus symbols onto the other plus symbol with a glue dot, rotating it so there will be eight even strips to your pumpkin.
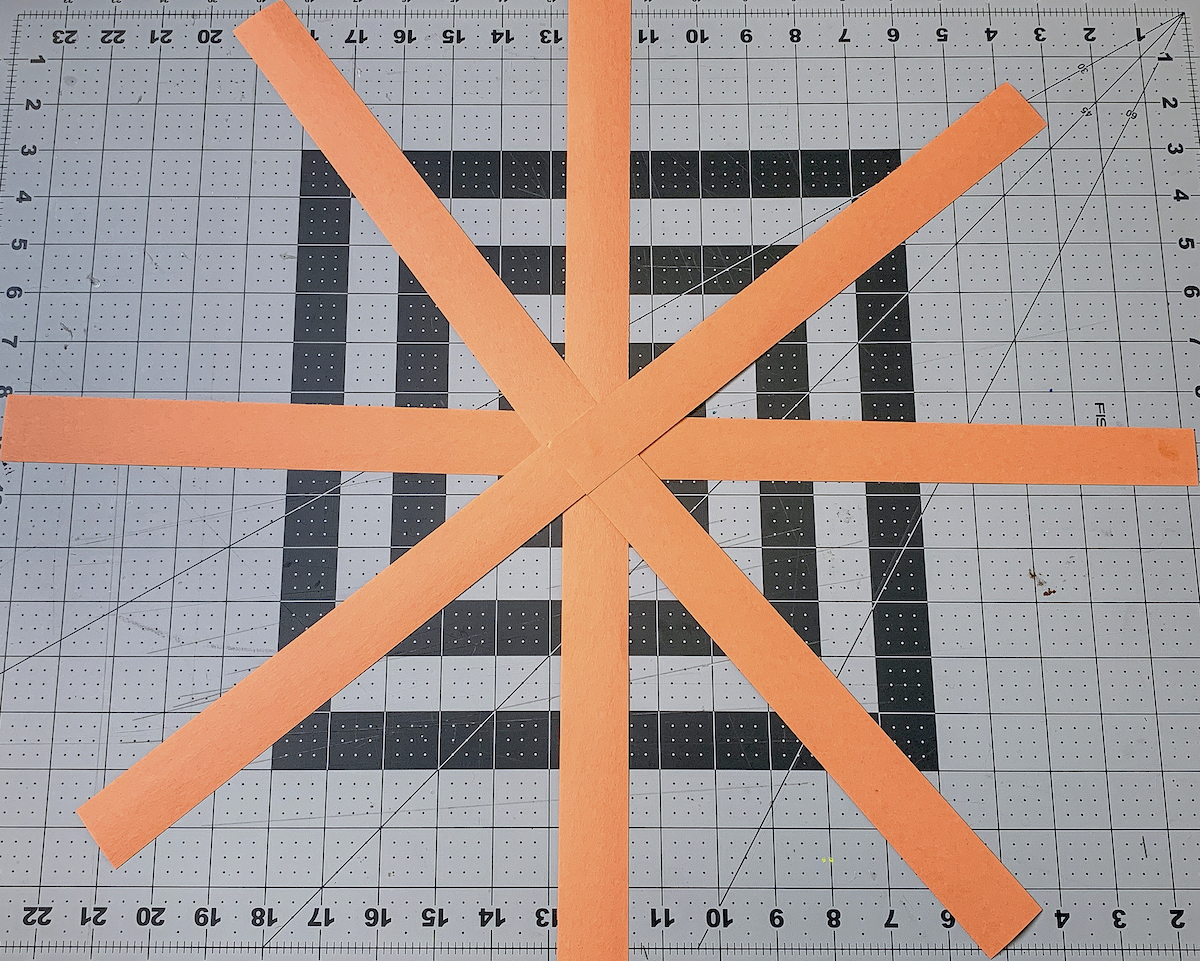
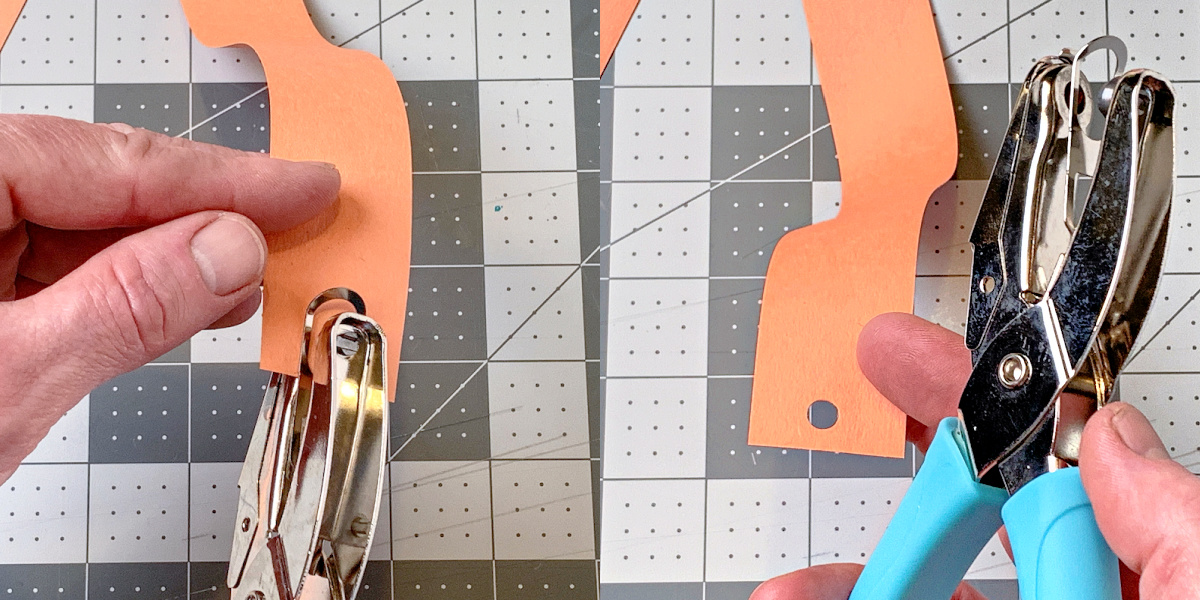
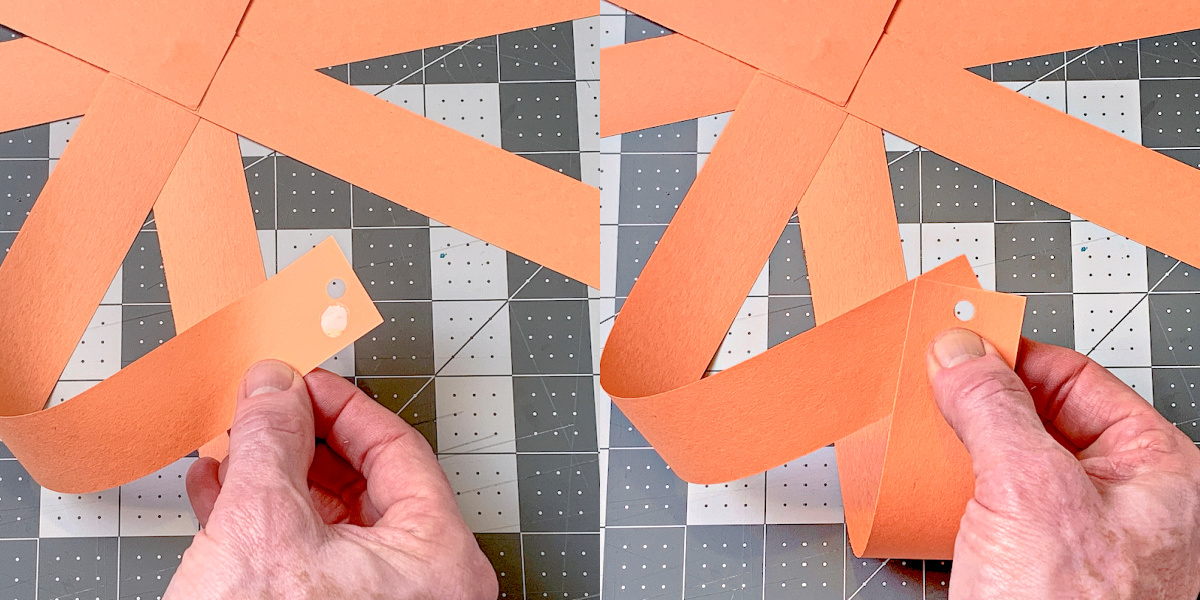
- Punch a hole in approximately the same place at the end of every paper strip.
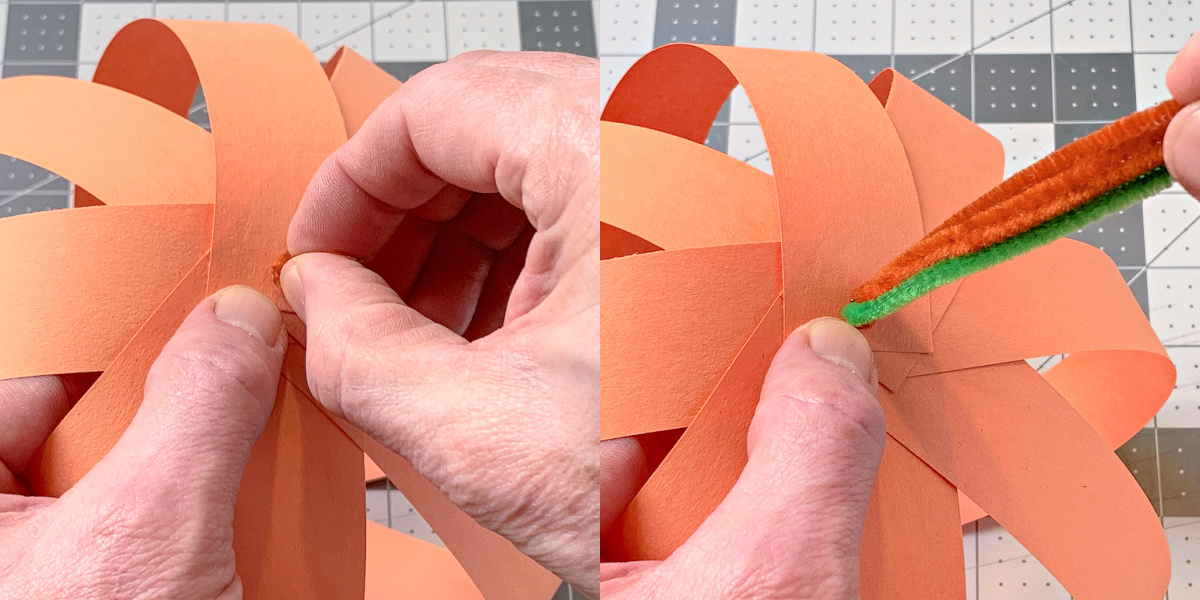
- Use glue dots to bring all the paper strips to the center and attach, matching up the holes. The pumpkin base is complete.
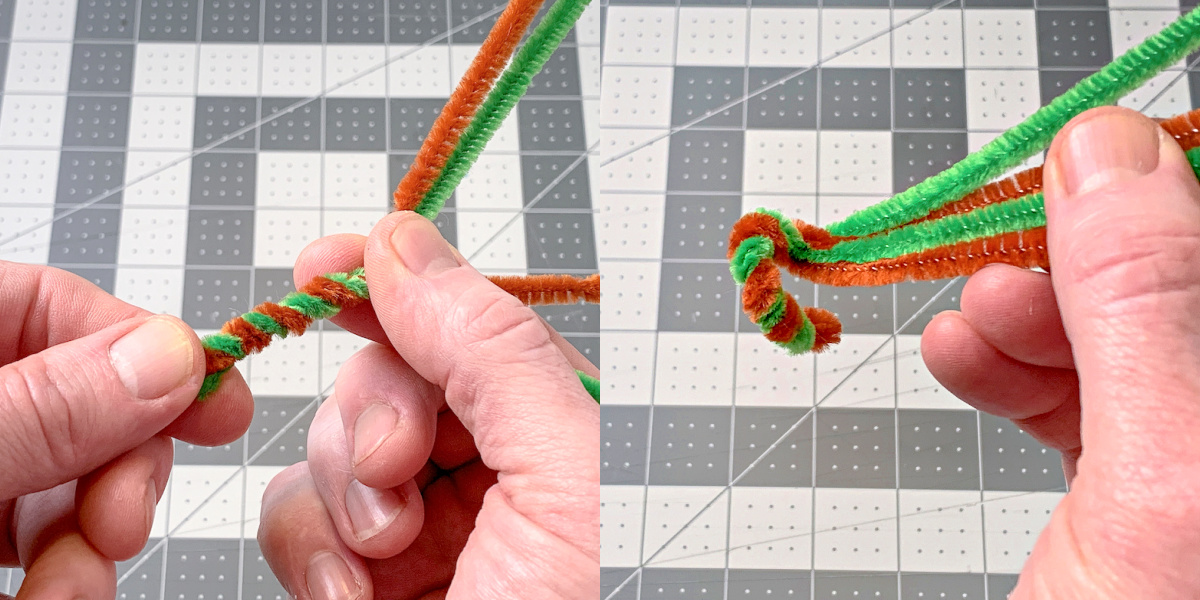
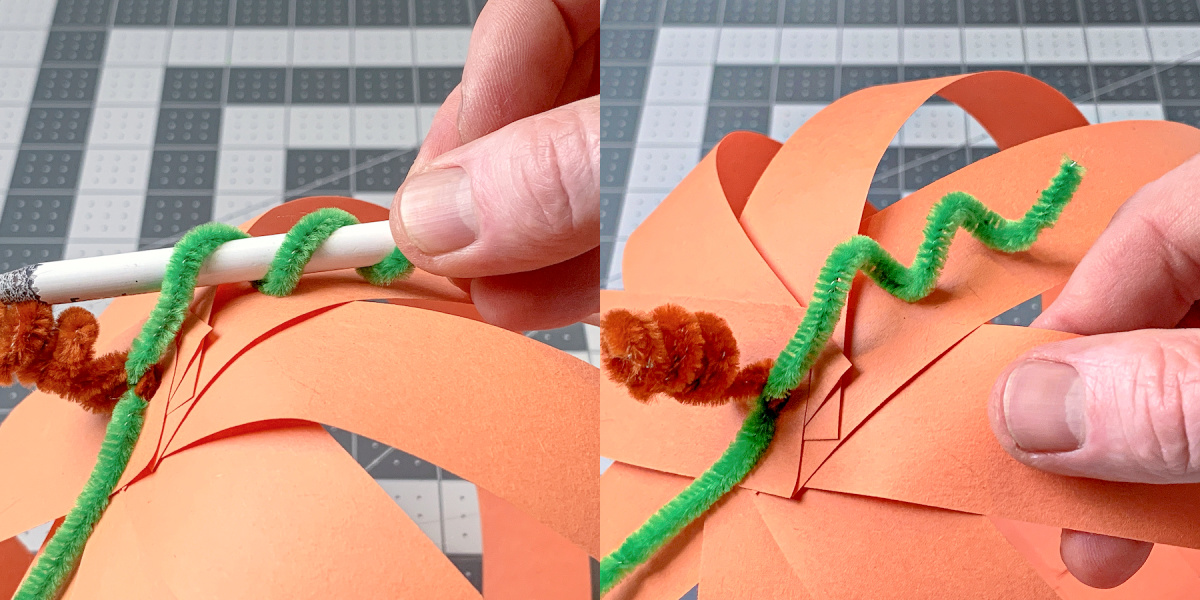
- Fold a brown and green pipe cleaner in half, together. Twist the bottom of the combined pipe cleaners and bend to make a little hook.
- Insert this end into the hole at the top of the pumpkin (created by matching up the hole punched holes).
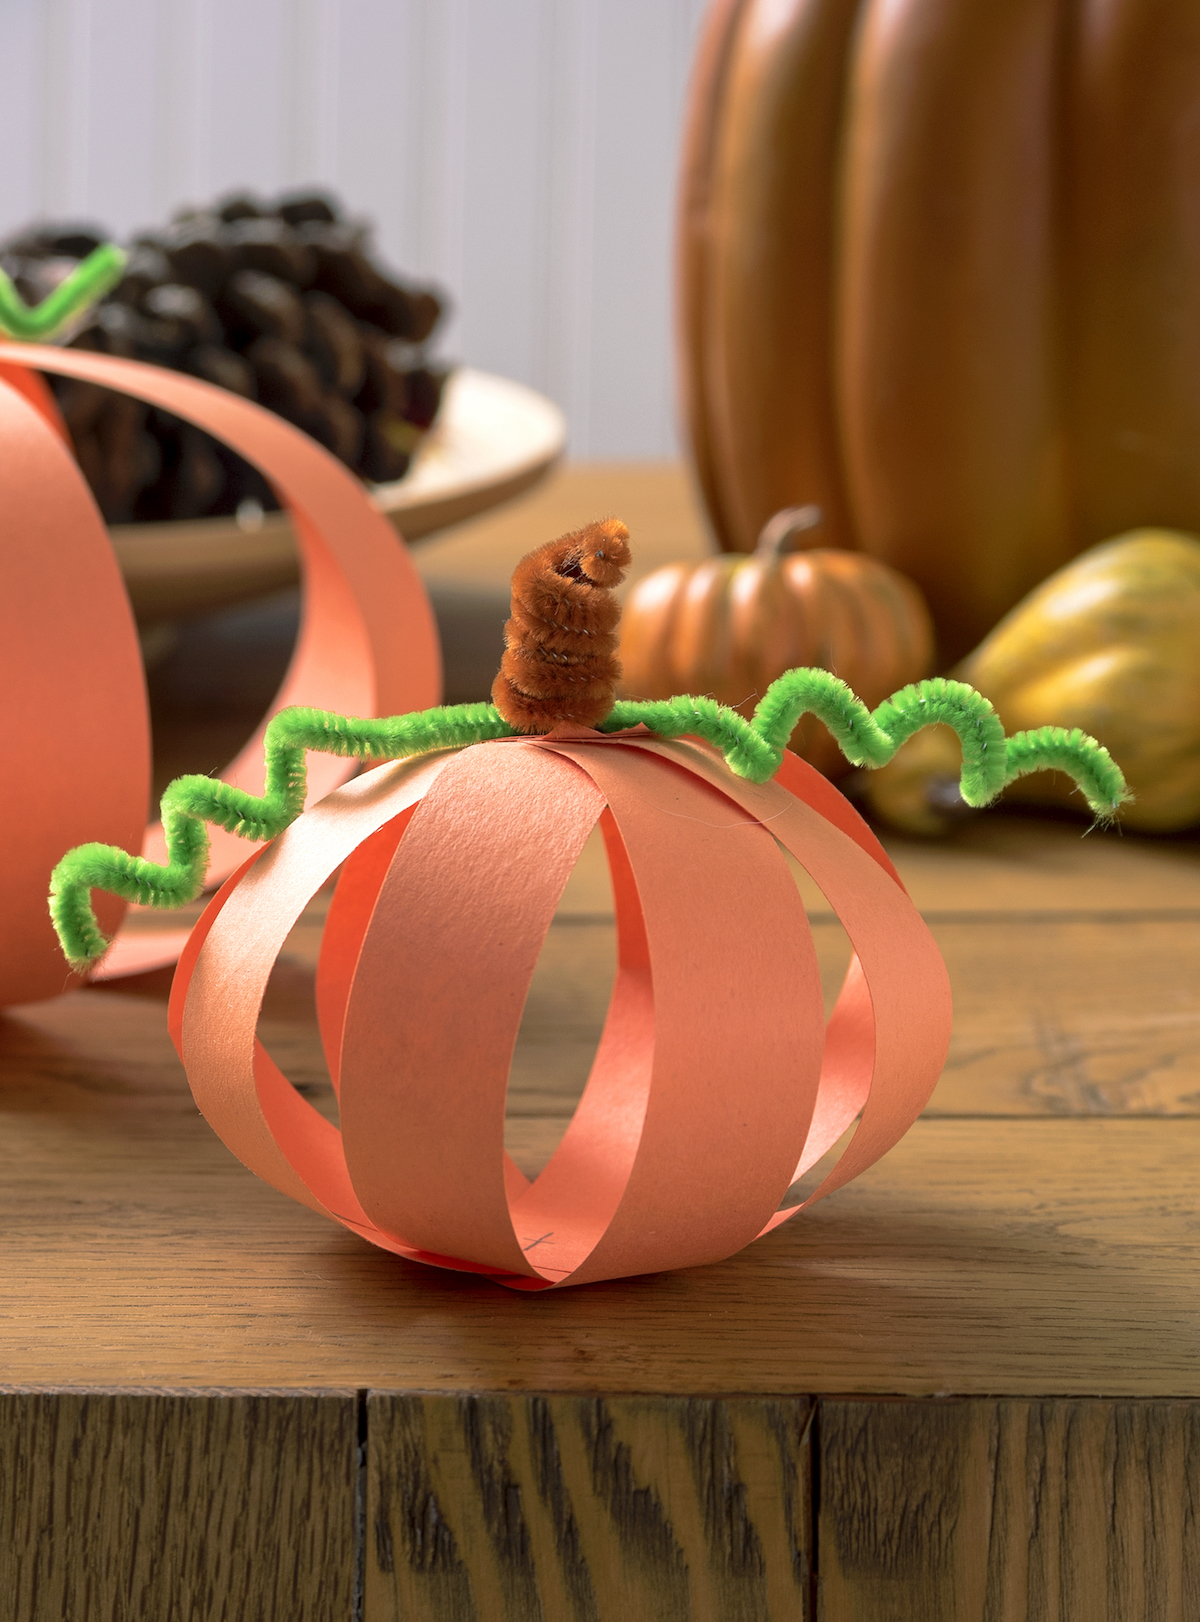
- Fold down the green pipe cleaners, away from the brown. Twist both around a pencil or pen to create a stem. Remove the pencil and pull the stem up a little bit to "poof" it..
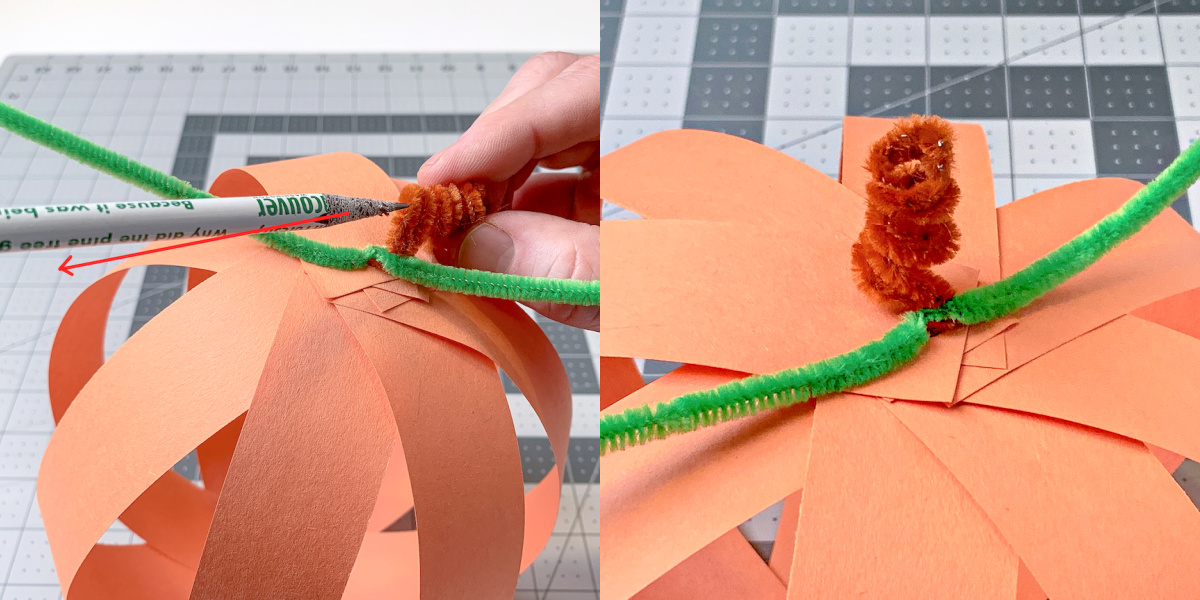
- Wrap each green pipe cleaner end around the pencil to create leaves. Pull them out slowly and your paper pumpkin is complete.
Notes
If you enjoyed making this cute autumn craft, I’d love for you to check out these other ideas:
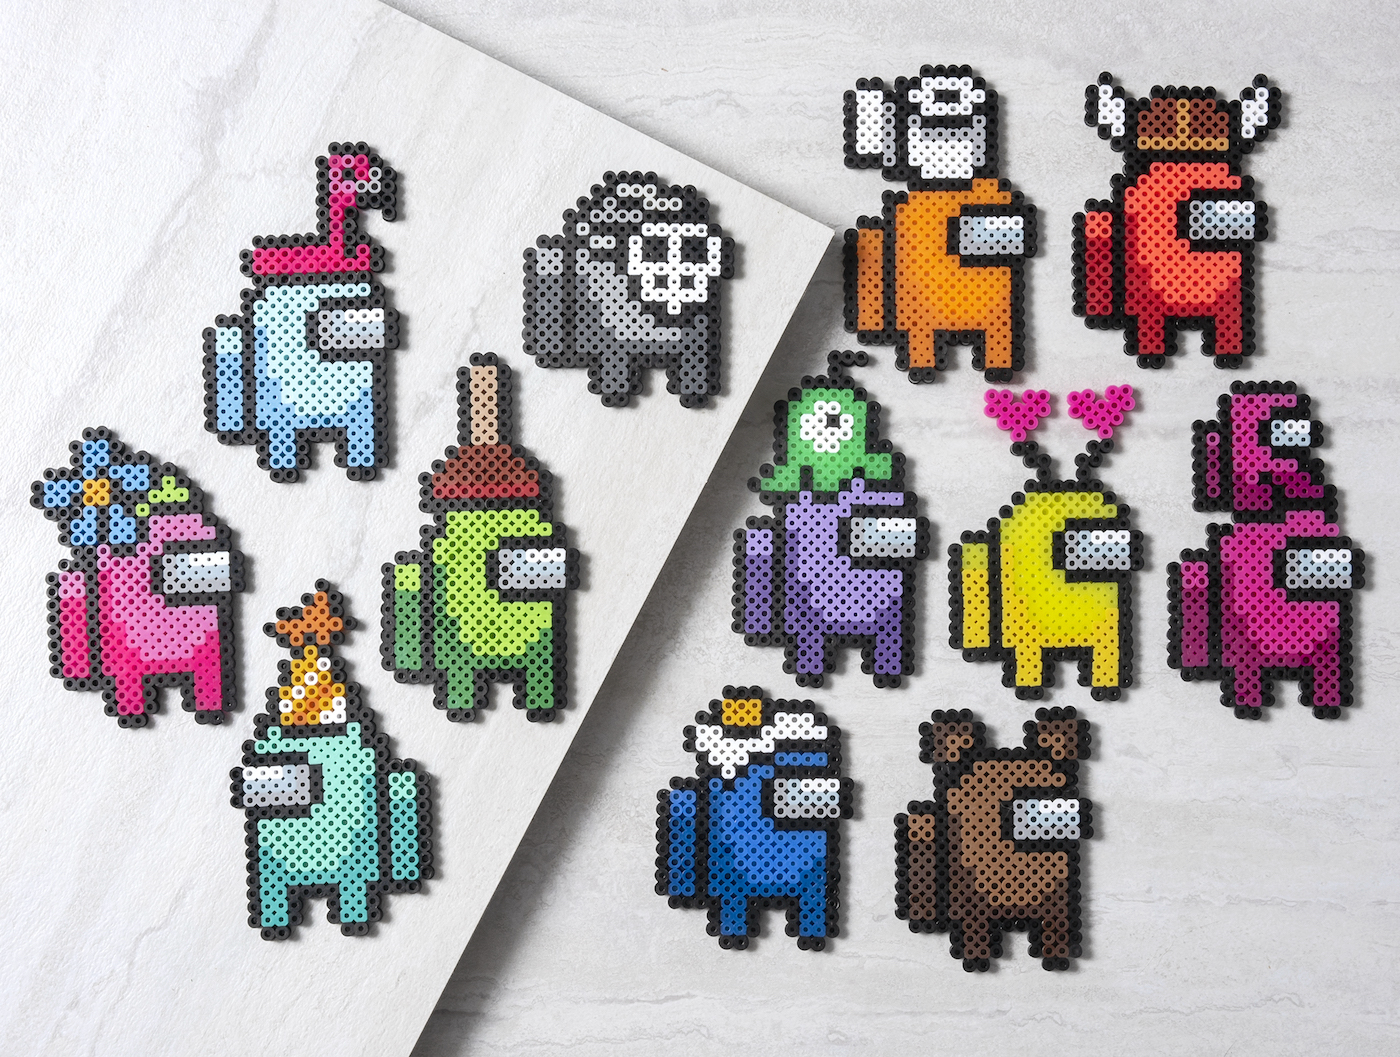
Clay Leaves • DIY Fall Wreath • Halloween Paper Crafts • Halloween Perler Beads • Handprint Leaves • Melted Crayon Pumpkin • Mini Fall Banners • Owl Pom Pom • Paper Lanterns • Paper Plate Owl • Pumpkin Perler Beads