Coffee Filter Snowflakes for Winter Fun
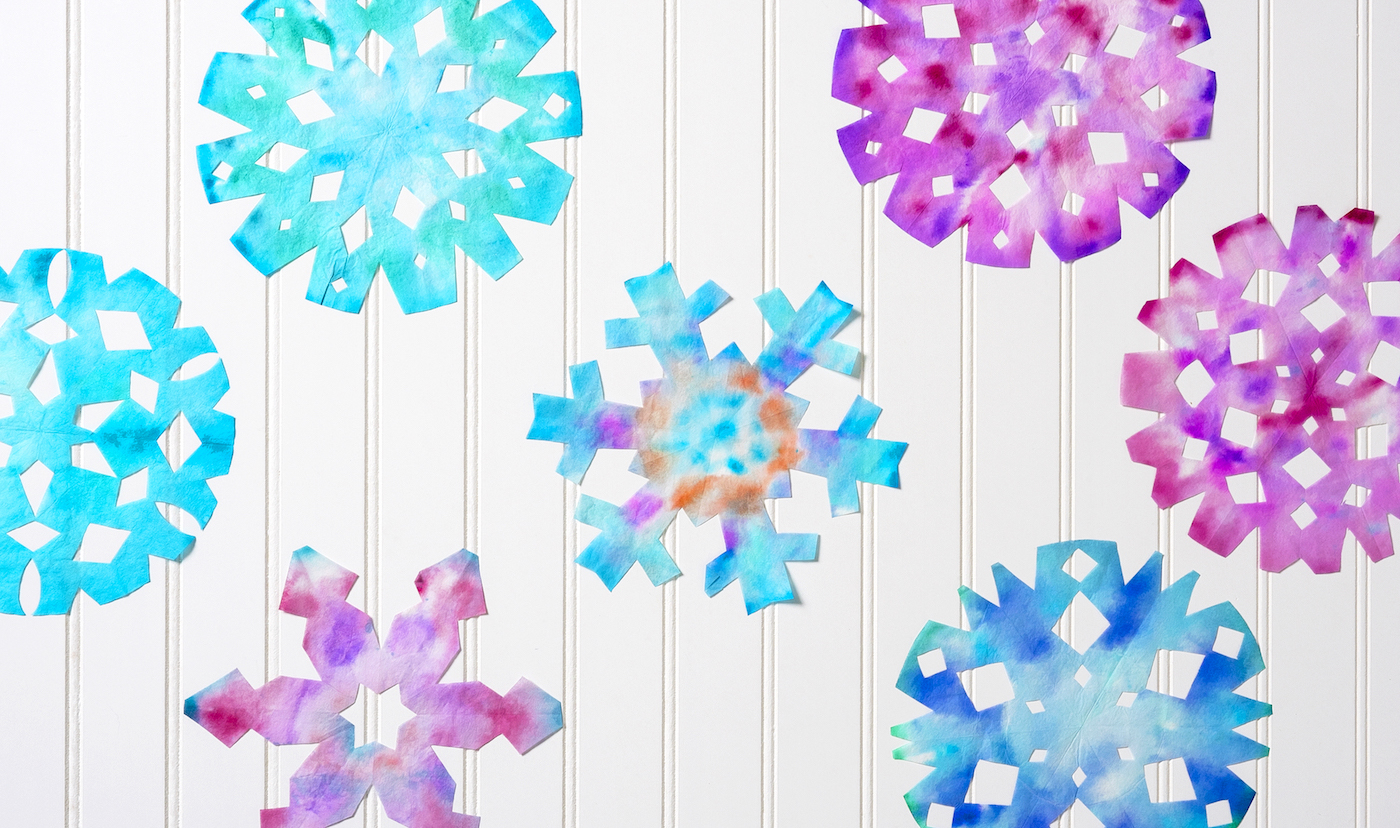
Learn how to make the cutest coffee filter snowflakes for Christmas and winter! These are so easy, budget friendly, and FUN to make for kids of all ages.
Skills Required: None. Even if your children have never crafted before (or you haven’t), you’ll be able to do this craft. You’ll be bleeding markers (easy), folding, and cutting.
I think it’s probably somewhere around first grade when kids are taught that snowflakes aren’t just small lumps of snow flitting through the sky down to the ground.
It was about the age of seven or so, and in class I was shown the images you always see of snowflakes “under a microscope.” They quickly go from lumps of snow to amazing crystal structures. Consider my tiny little mind blown.
I also remember making snowflakes in class during that lesson, by folding up paper and then cutting little notches and curves with mini scissors. Unfold it and WOAH! Mind blown for the second time.
I always liked a good science lesson that had a craft to go with it.
If you do too, I’m excited to share these coffee filter snowflakes with you! They’re a fun craft to do with preschoolers together – and elementary age children can play along too.
You’re not going to believe how easy they are to make, and you only need a few simple supplies. Before we dive in, let me answer a few questions about this project!
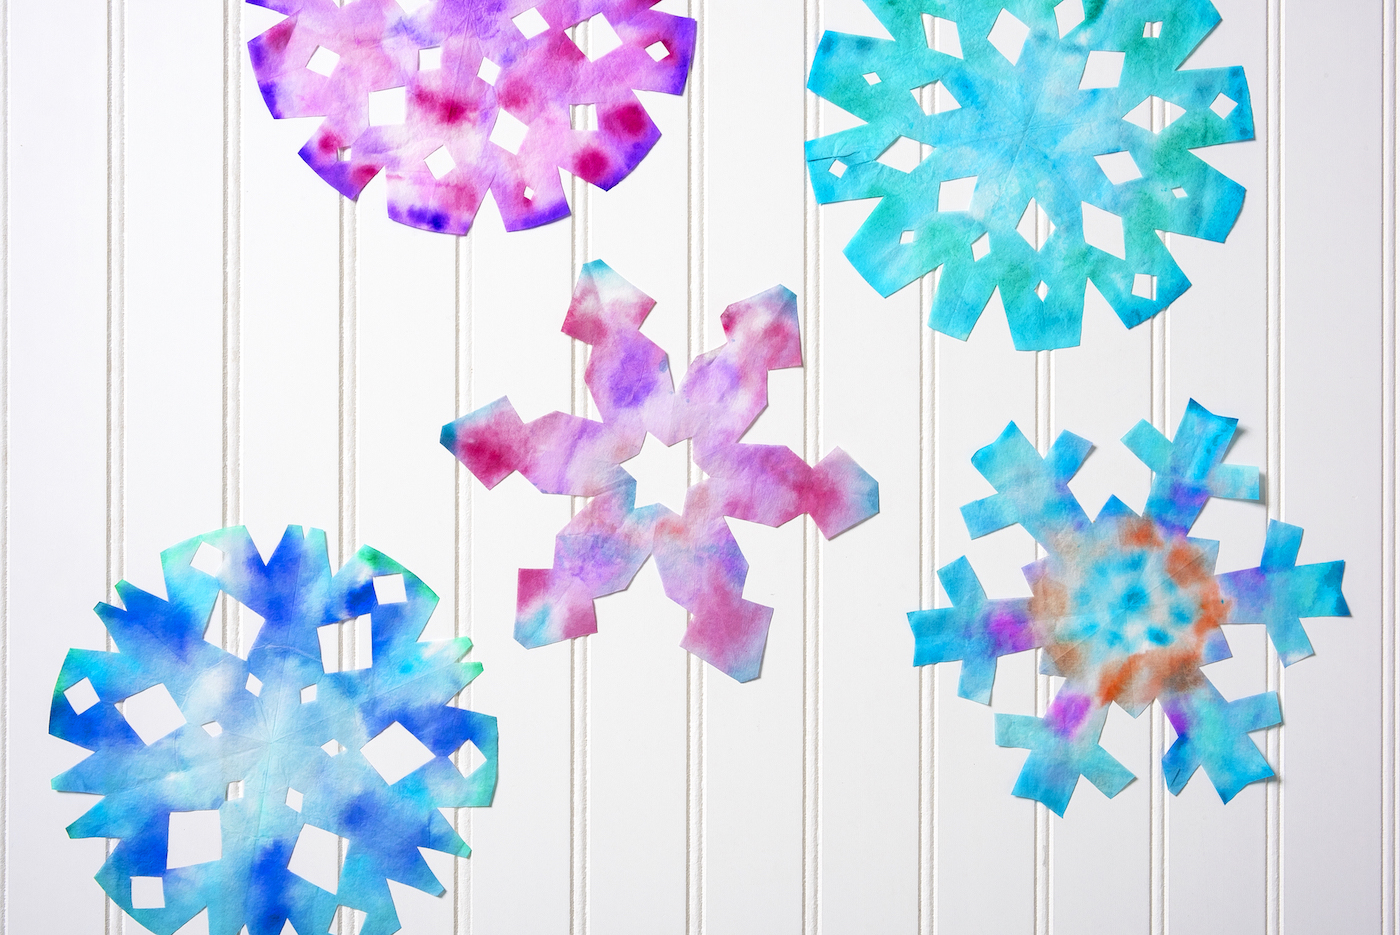
The best color variety comes from picking two lights and two darks that are different. If the colors are too similar, you won’t get the “tie dye effect” you’re looking for. So don’t be afraid to experiment.
Are you ready to try this fun winter activity? Here’s what you’ll need.
Gather These Supplies
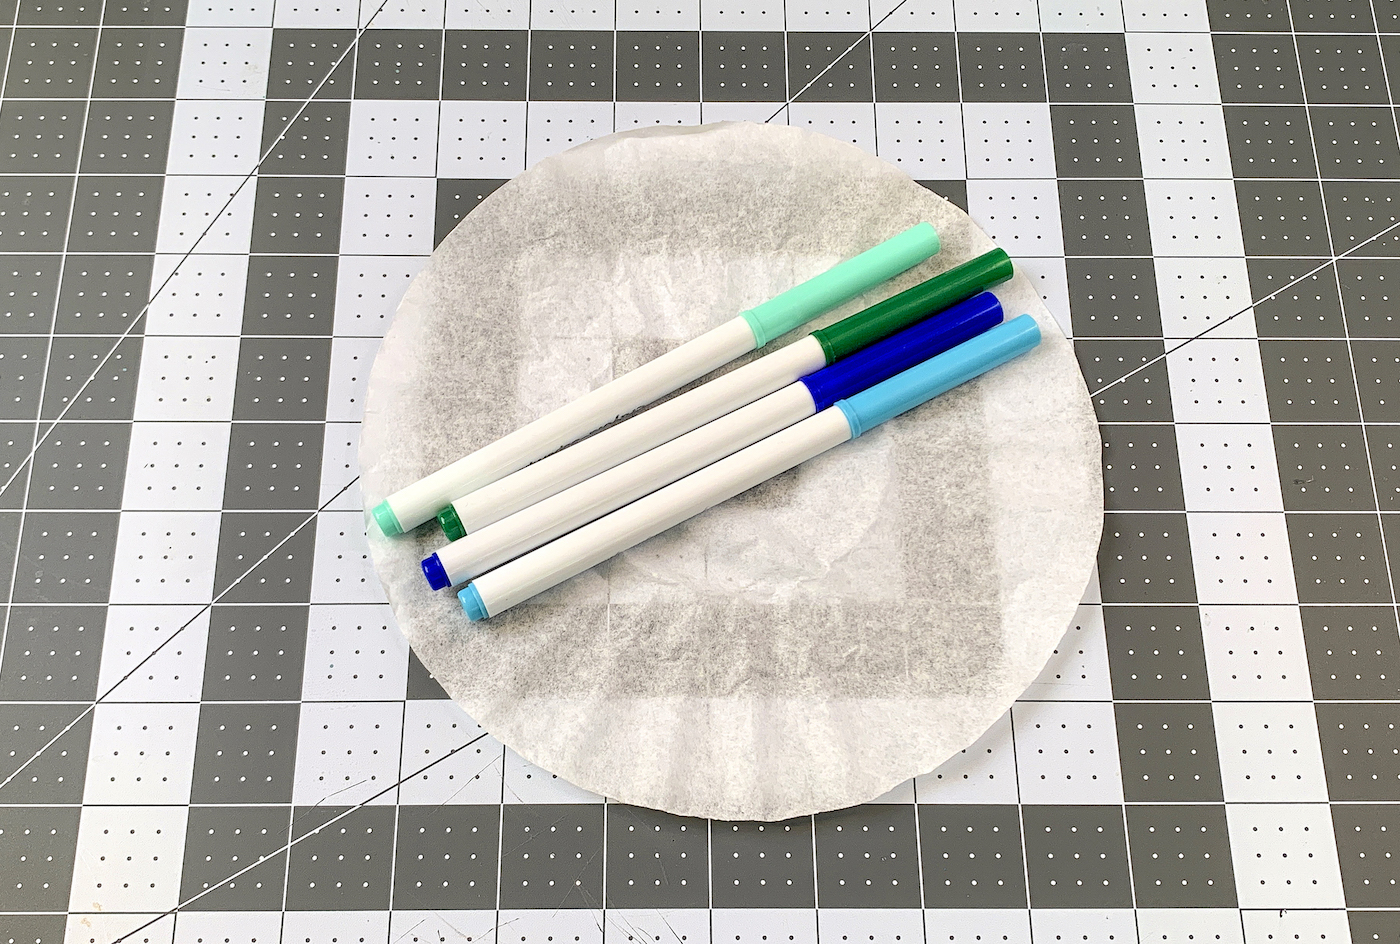
- Coffee filters
- Washable markers – colors of your choice (pinks, blues, purples, and maybe a dark green or orange for fun)
- Scissors
- Small spray bottle of water
- Hair dryer (optional)
If you want a unique snowflake pattern for cutting, go here.
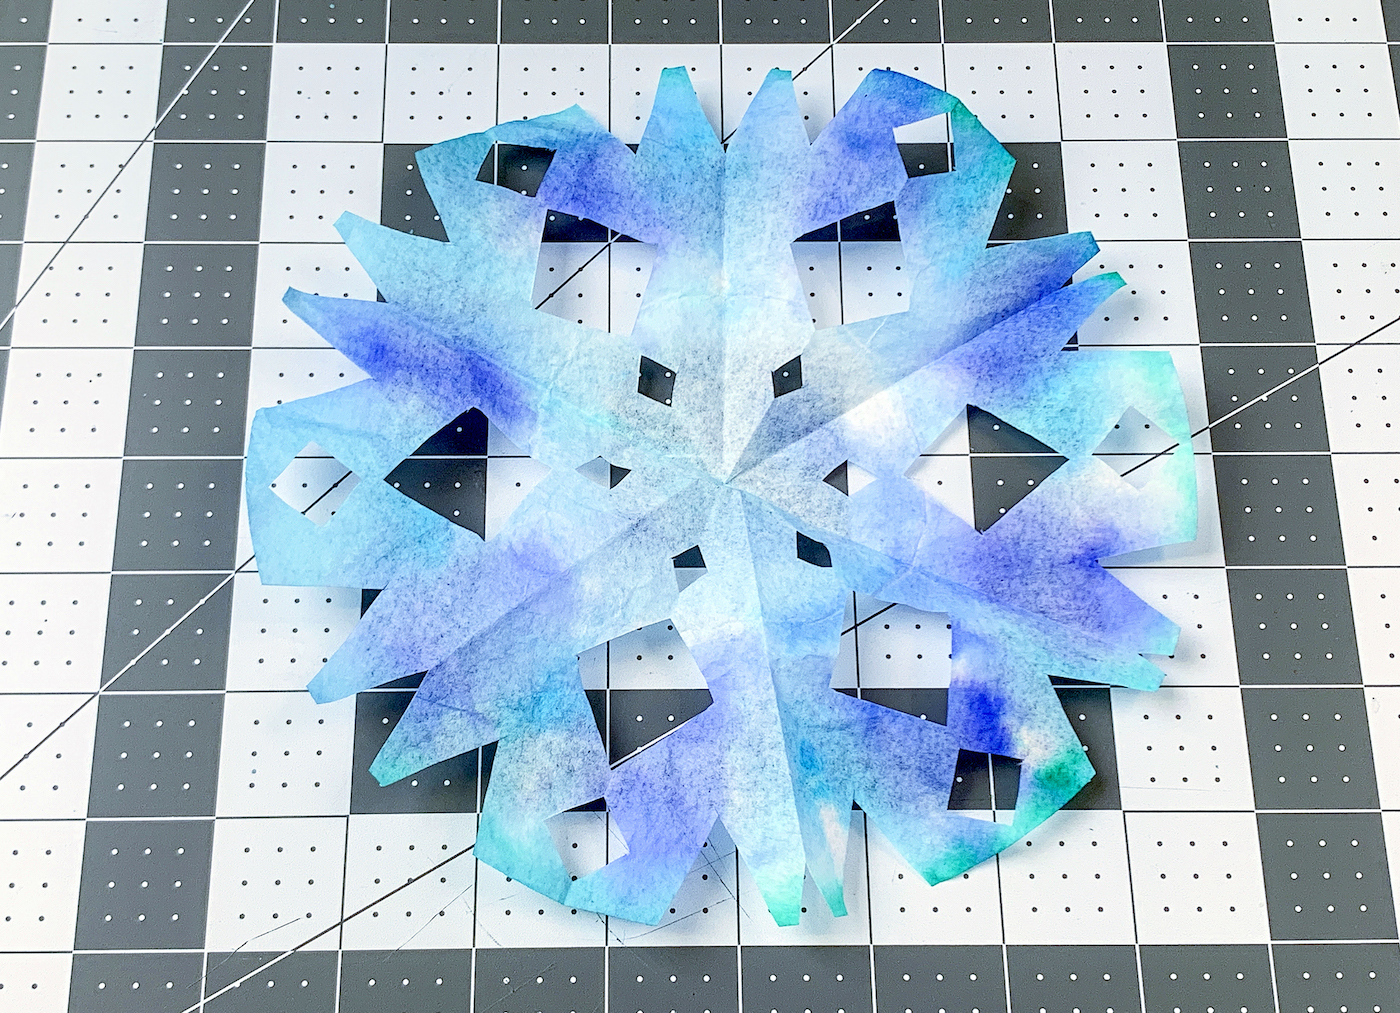
I’m really pleased with how colorful they turned out! It’s raining coffee filters around here! Get the printable how-to card below.
Snowflakes with Coffee Filters
Equipment
- Small spray bottle of water
- Hair dryer (optional)
Materials
- Coffee filters 1 per snowflake
- Washable markers colors of your choice: pinks, blues, purples, and maybe a dark green or orange for fun
Video
Instructions
- Choose four colors that you would like to use for your snowflake. Picking a variety of colors that are different shades (light and dark) makes for the best results.
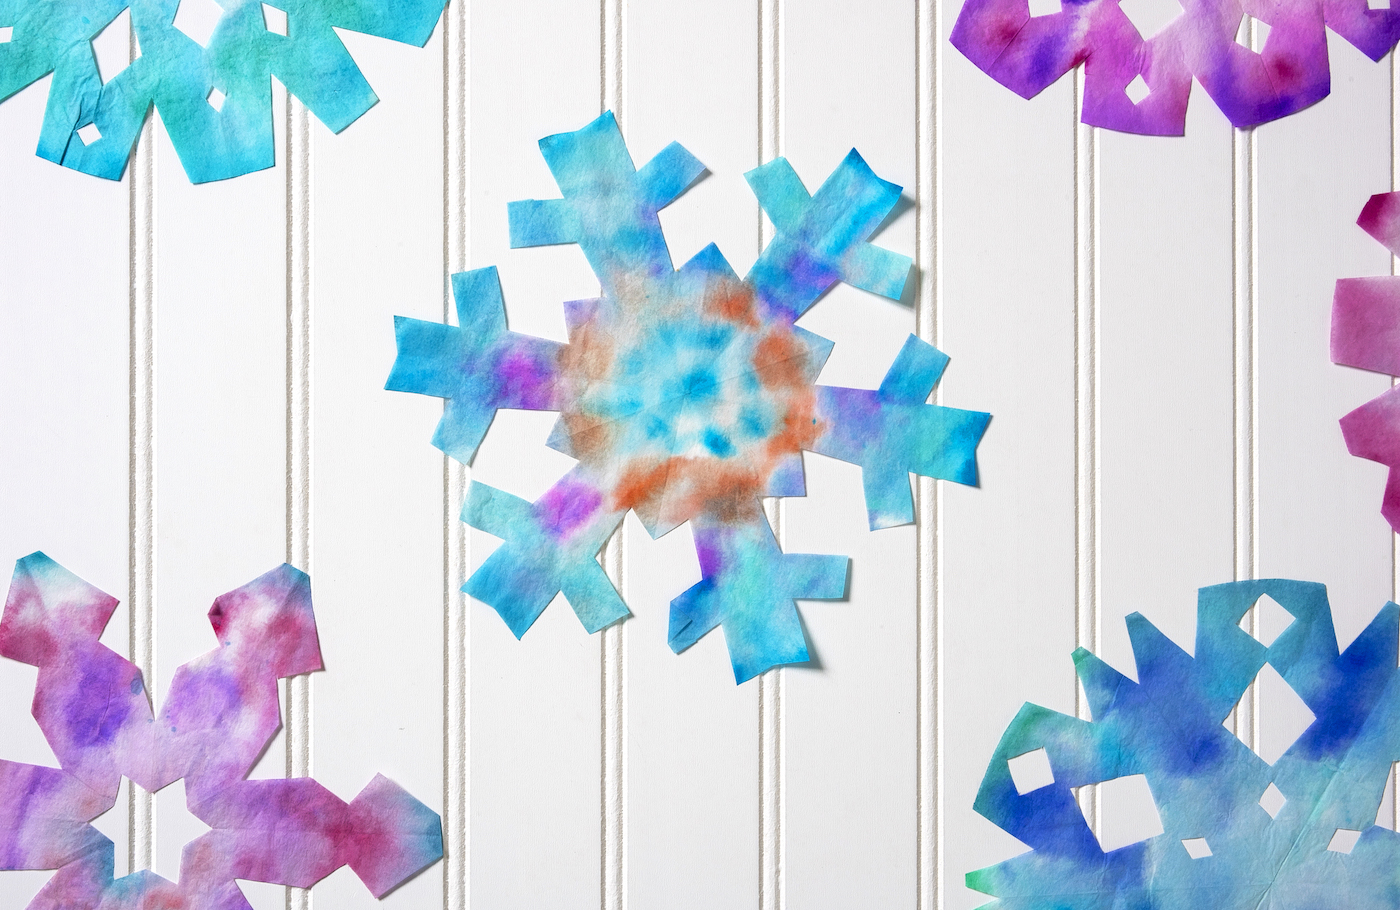
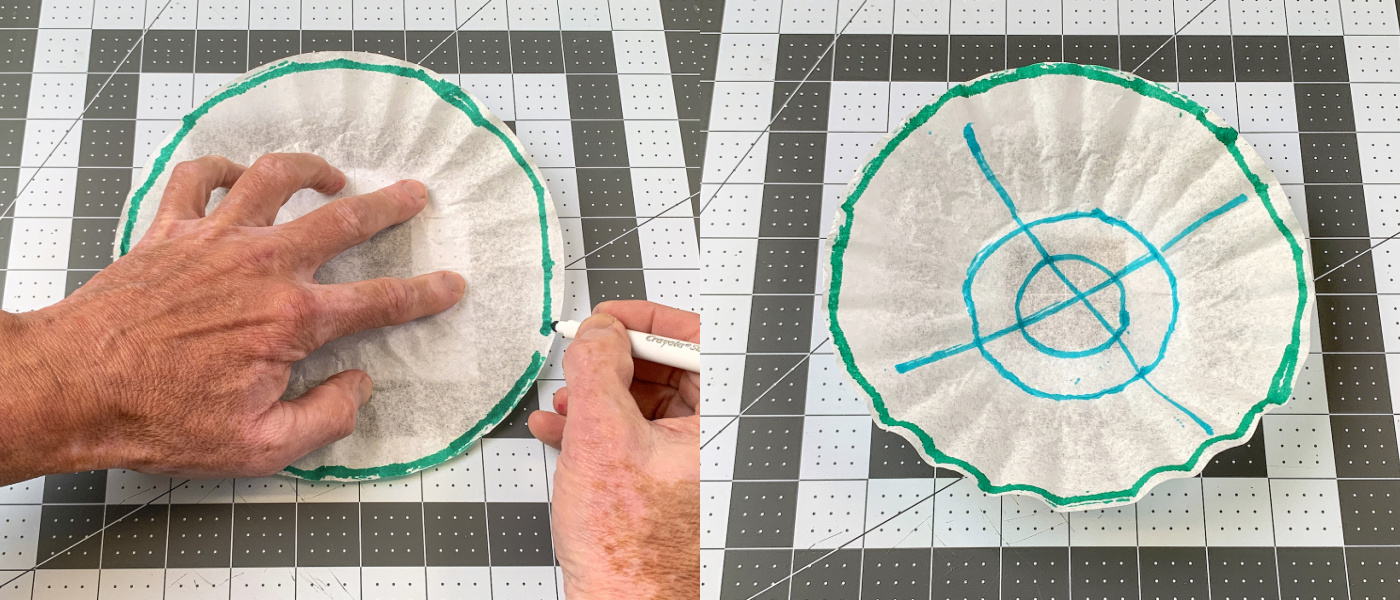
- Start with a green or similar dark shade of marker. Draw a circle around the edge of the coffee filter and then draw some circles and blue lines in an "X" across the middle.
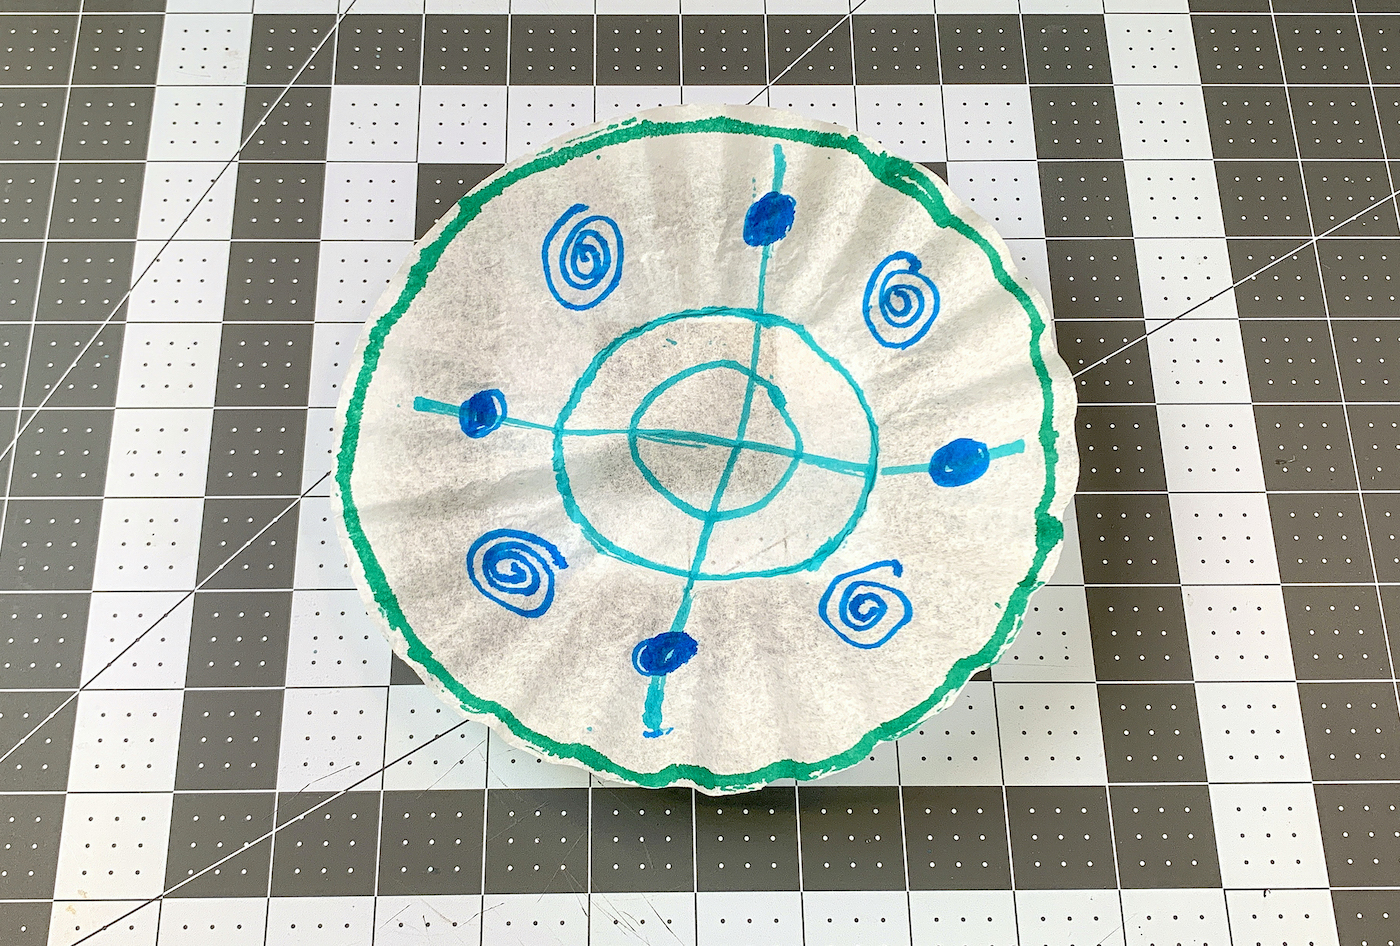
- Take a contrasting color marker and draw some dots and lines within each quadrant on the coffee filter.
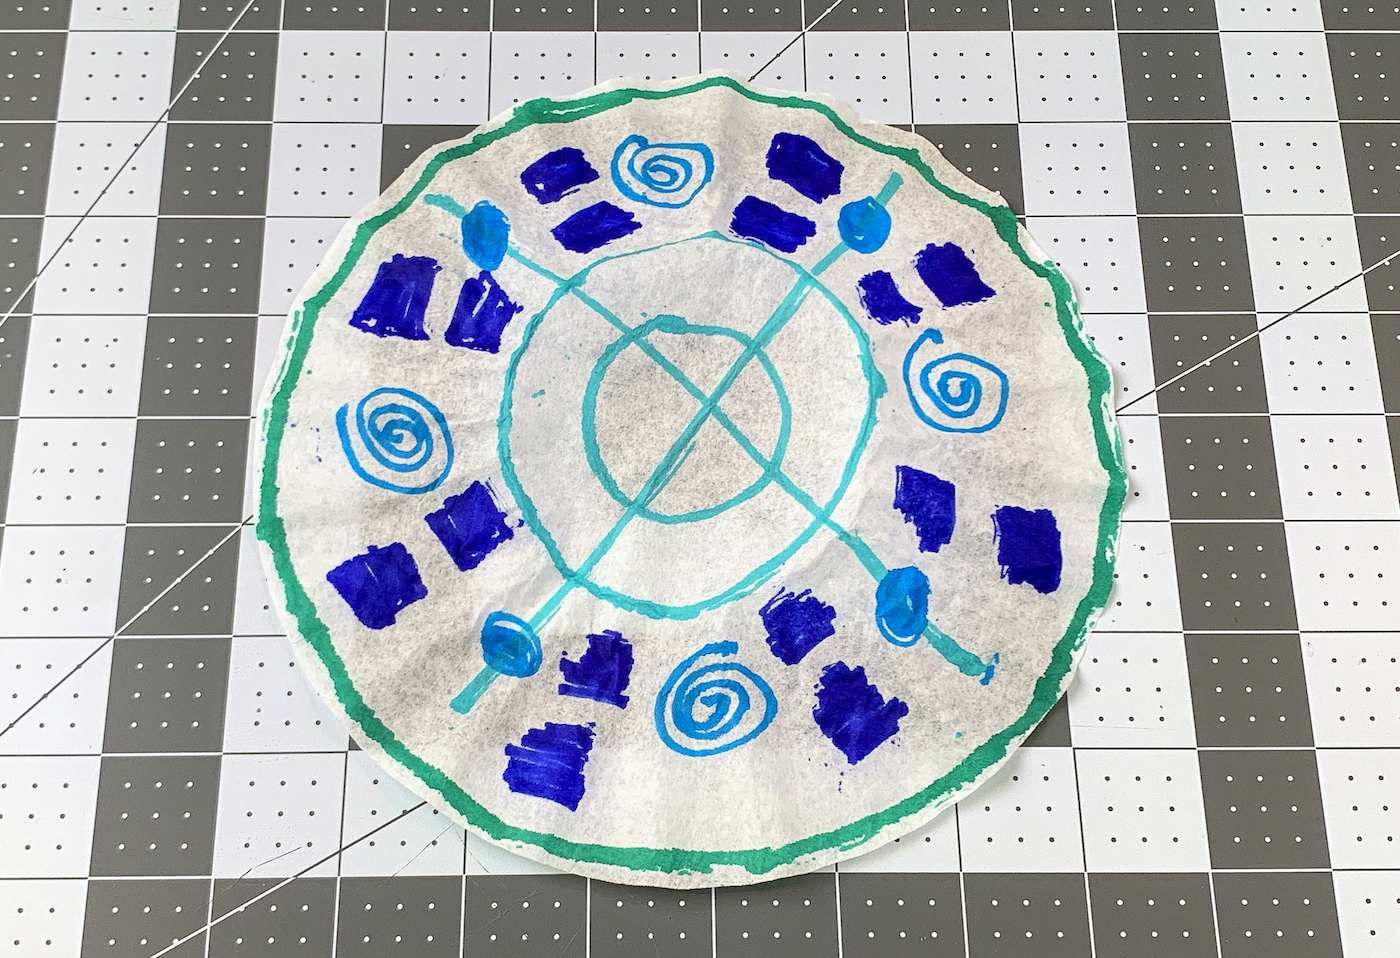
- With the remaining marker(s), add additional lines, squares, and squiggles on the coffee filter. No need to add too many lines or shapes. They will bleed into each other.
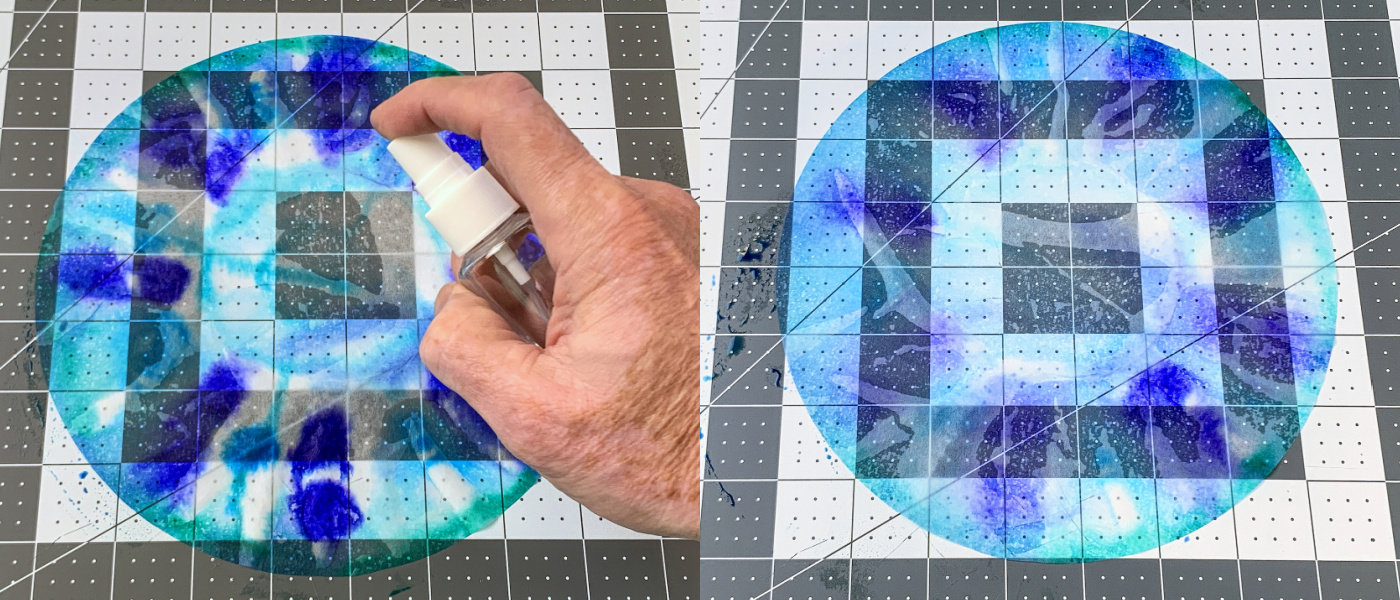
- Place the coffee filter down on a washable work surface. You can use a craft mat, silicone mat, or wax paper. Mist the paper with 4 – 5 sprays of water and you will start to see the markers bleed. This is what you want.
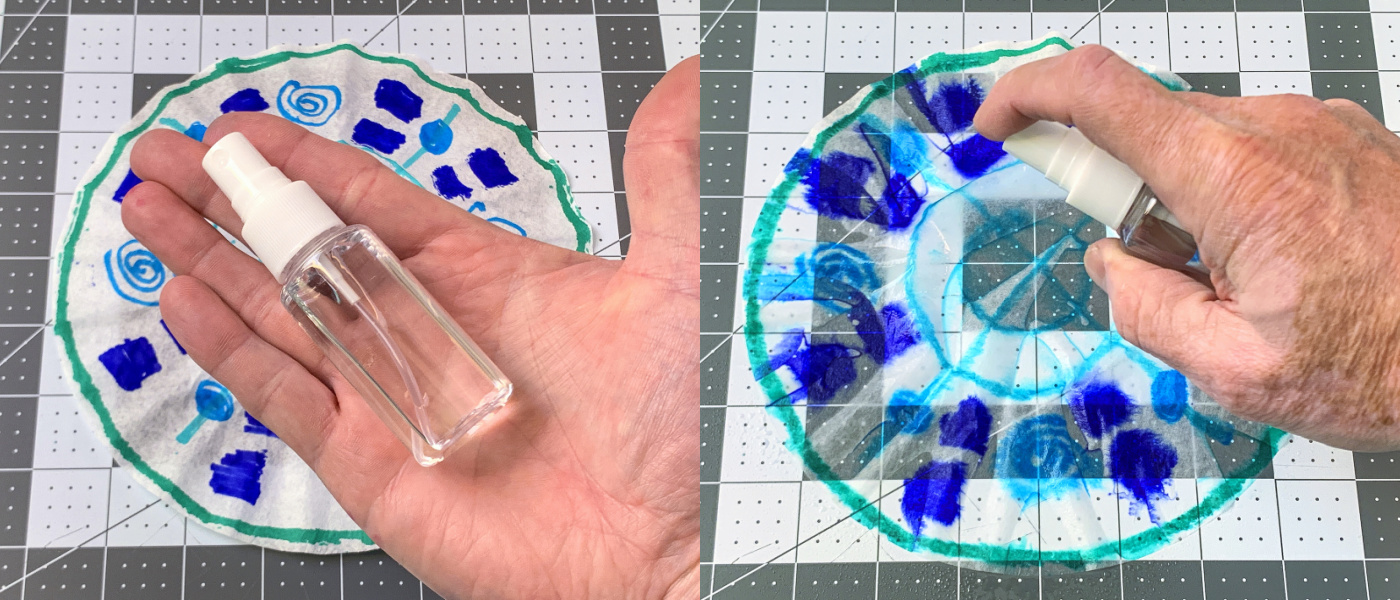
- If the markers didn’t bleed enough, add additional sprays of water. Don’t add too much water. You want to just saturate the filter, otherwise all the water will drip off the filter and take the color with it.
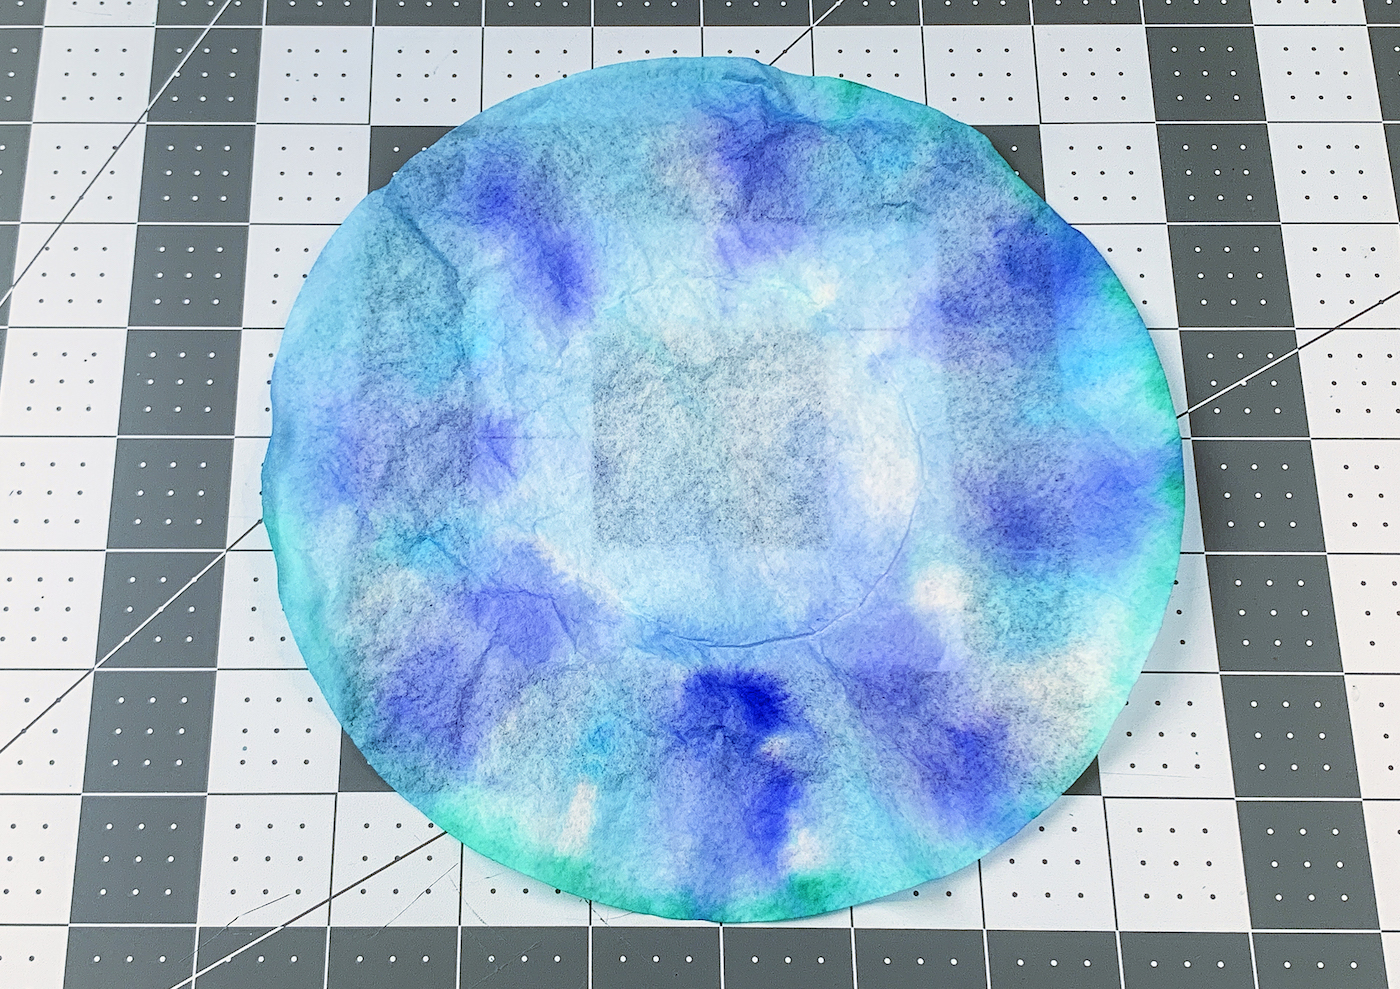
- Leave the coffee filter on your work surface to dry. Additionally, you can take a hairdryer and dry the filter, or place in the oven for a few minutes at the lowest heat (watching the entire time).
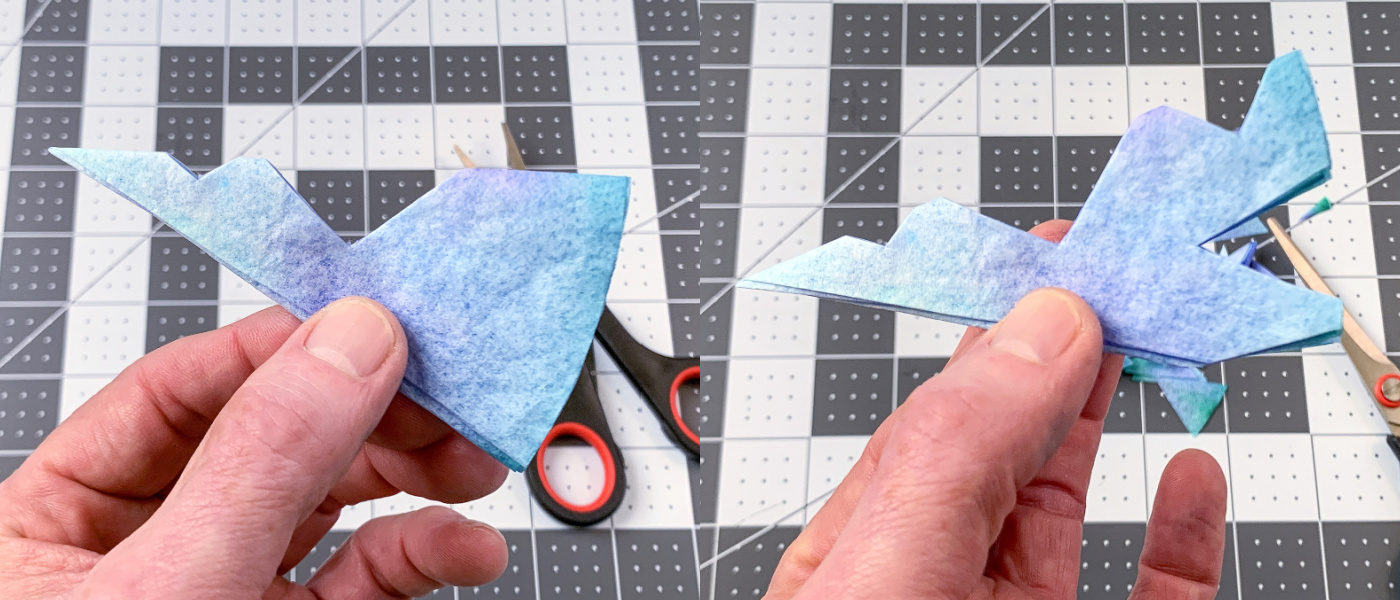
- To turn the filters into a snowflake, you'll cut it for folding. Fold the coffee filters in half, and then into thirds. Then fold in half once again.
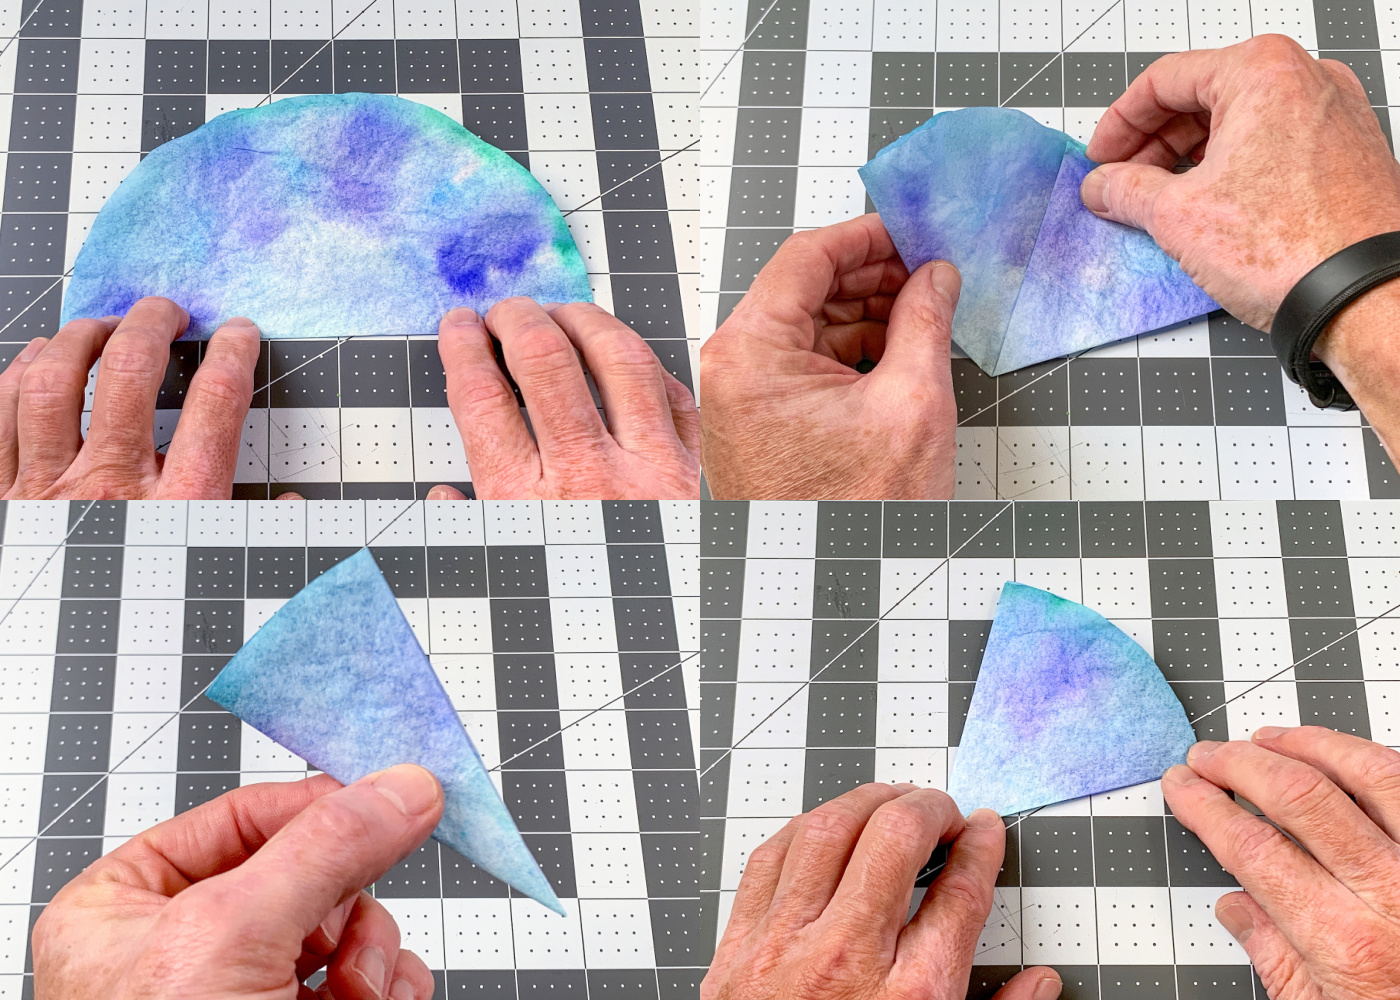
- On the folded filter, you're going to cut notches out on both sides and then the top. Make small cuts, both triangular and round. The more detailed the cuts, the more detailed the results.
- Carefully unfold the filter to reveal your finished snowflake.
Notes
If you enjoyed these paper snowflakes, I’d love for you to check out these other crafts with coffee filters:
Bats • Butterflies • Flowers • Turkey • Wreath

very nice
hi I love it