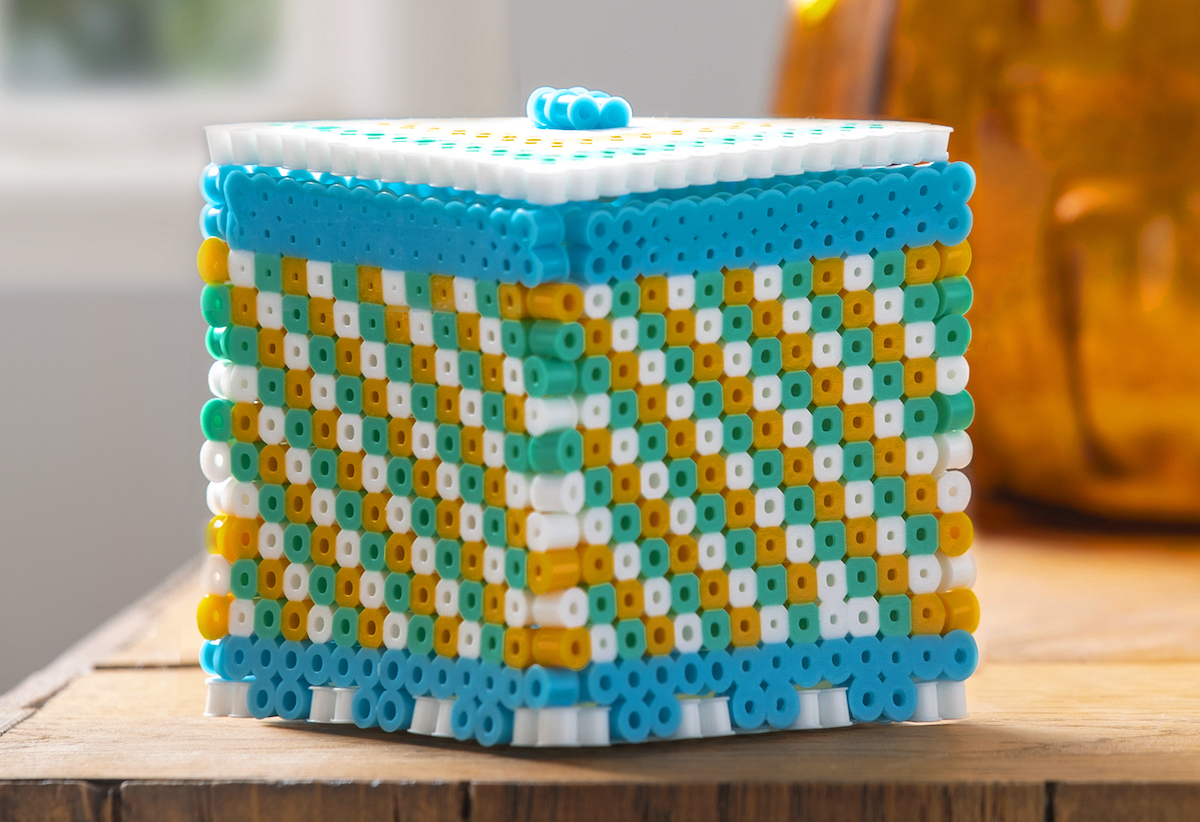
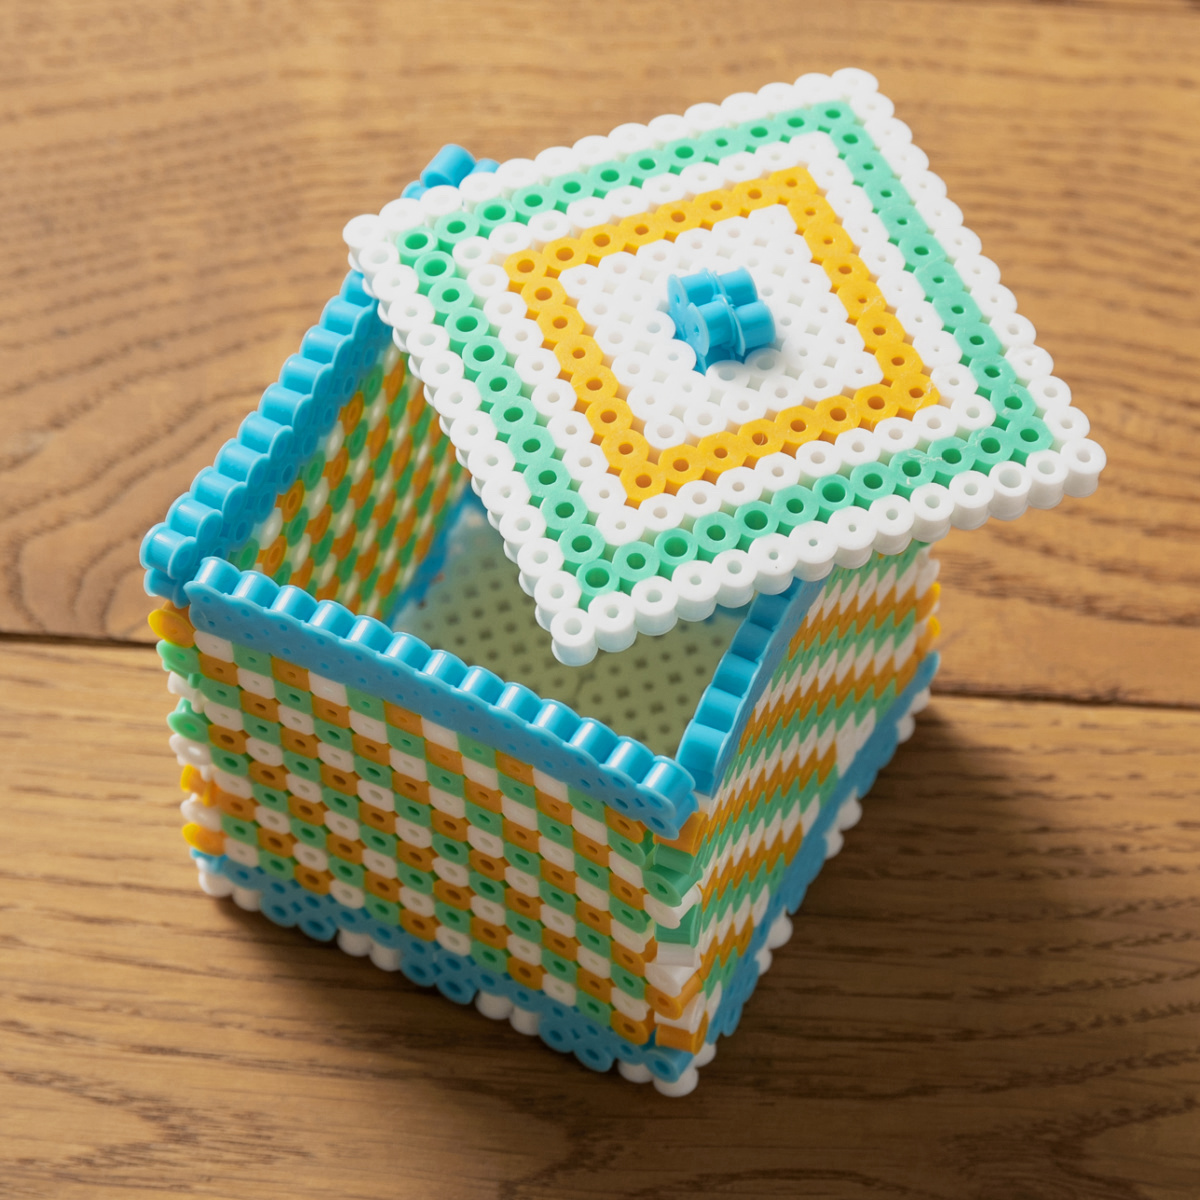
Perler Bead Box to Hold Your Treasures
Make a perler bead box to store your favorite treasures! Kids will love this simple craft idea, and the box is really easy to assemble.
Skills Required: None. You’ll be ironing the perler beads, and the box is easily assembled without adhesive. Perler beads are recommended for ages six and up.
I’ve been obsessed with perler beads for a long time. Okay, not just me, but my nieces as well. It’s a fun and easy kids’ craft that we like to do together!
The cool thing about perler beads is that they are no mess. It’s not even that bad when a pile of the lil’ guys rolls across the floor. And trust me – I know about this. My three year old niece doesn’t make any patterns, but she loves to sort them.
And SPILL them as well.
We just clean them up and keep on with the crafting! My older niece and I created a perler project that we are excited to share: a perler bead box.
We had never done a dimensional fuse bead project before and wanted to try something easy. We knew that instead of just ironing, we’d have to do some assembly too.
For this perler bead box, the assembly is easy! You can glue perler beads, but you don’t need to in this project. I know this sounds funny, but you’re going to be using box joints.
You’ll make tabs that fit together to create the finished project.
Are you ready for the perler bead box pattern? You’re going to need the following number of beads for this project:
- White – 468
- Blue – 180
- Green -216
- Honey – 200
Obviously you don’t need to choose the colors that I did, and can pick any you like. I think the four color combination is a nice one, but you could probably do more! And if you do, let me know in the comments.
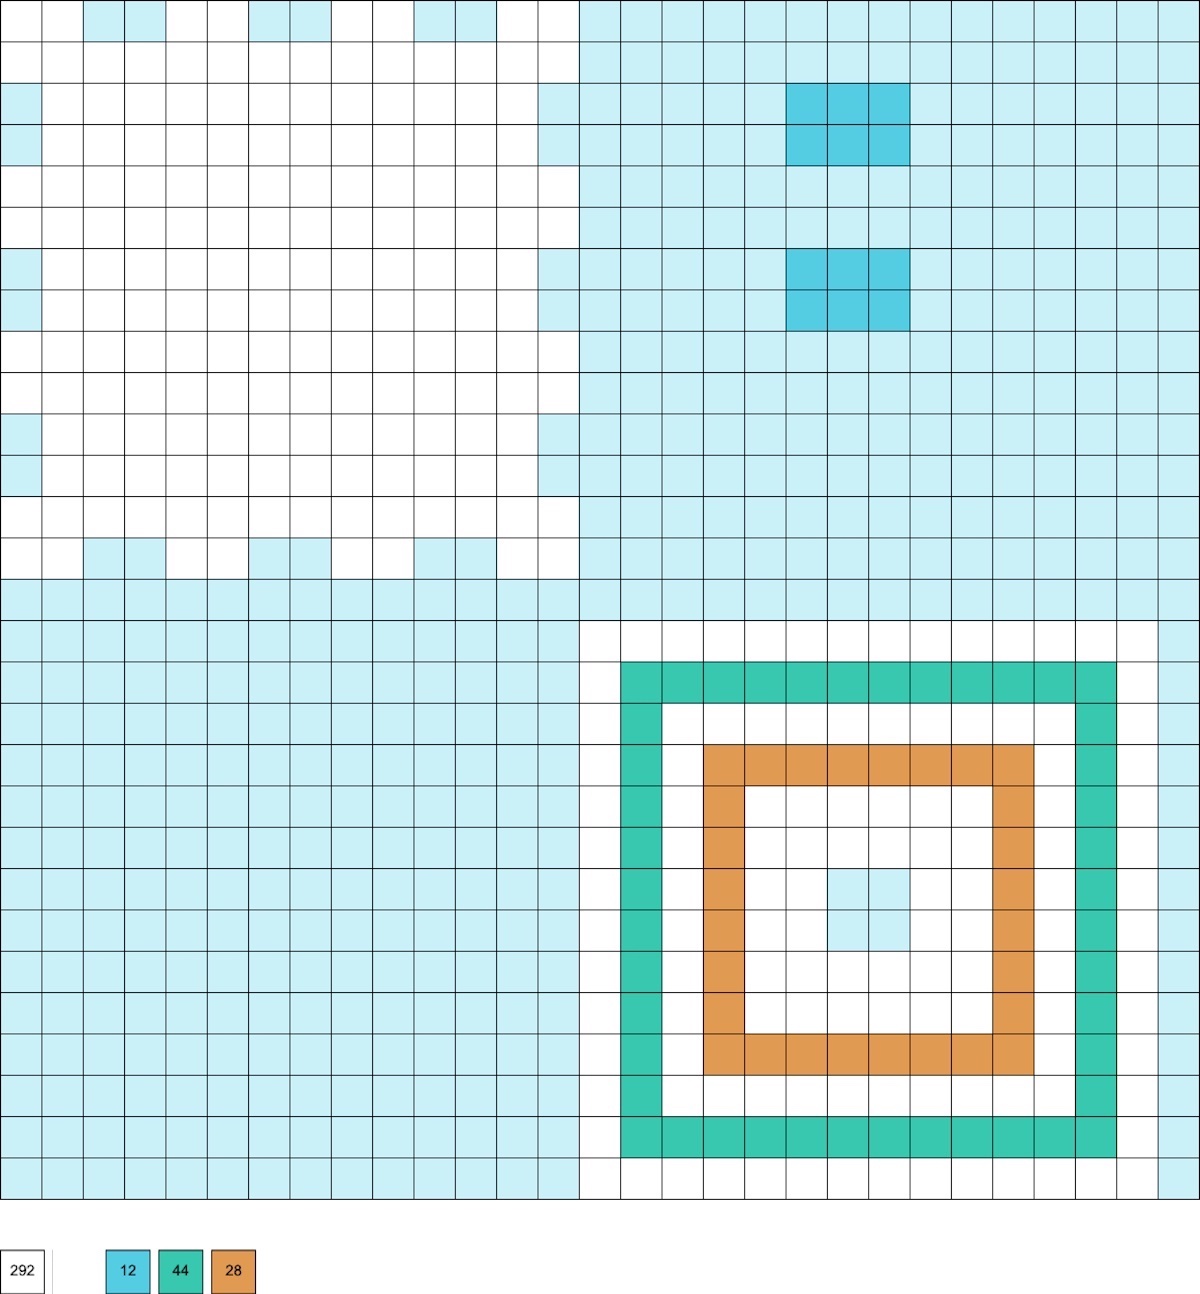
NOTE: the light blue backgrounds below are only to differentiate the white beads in the pattern. You will not be filling in the backgrounds with beads.
Here’s what you’re going to need to make.
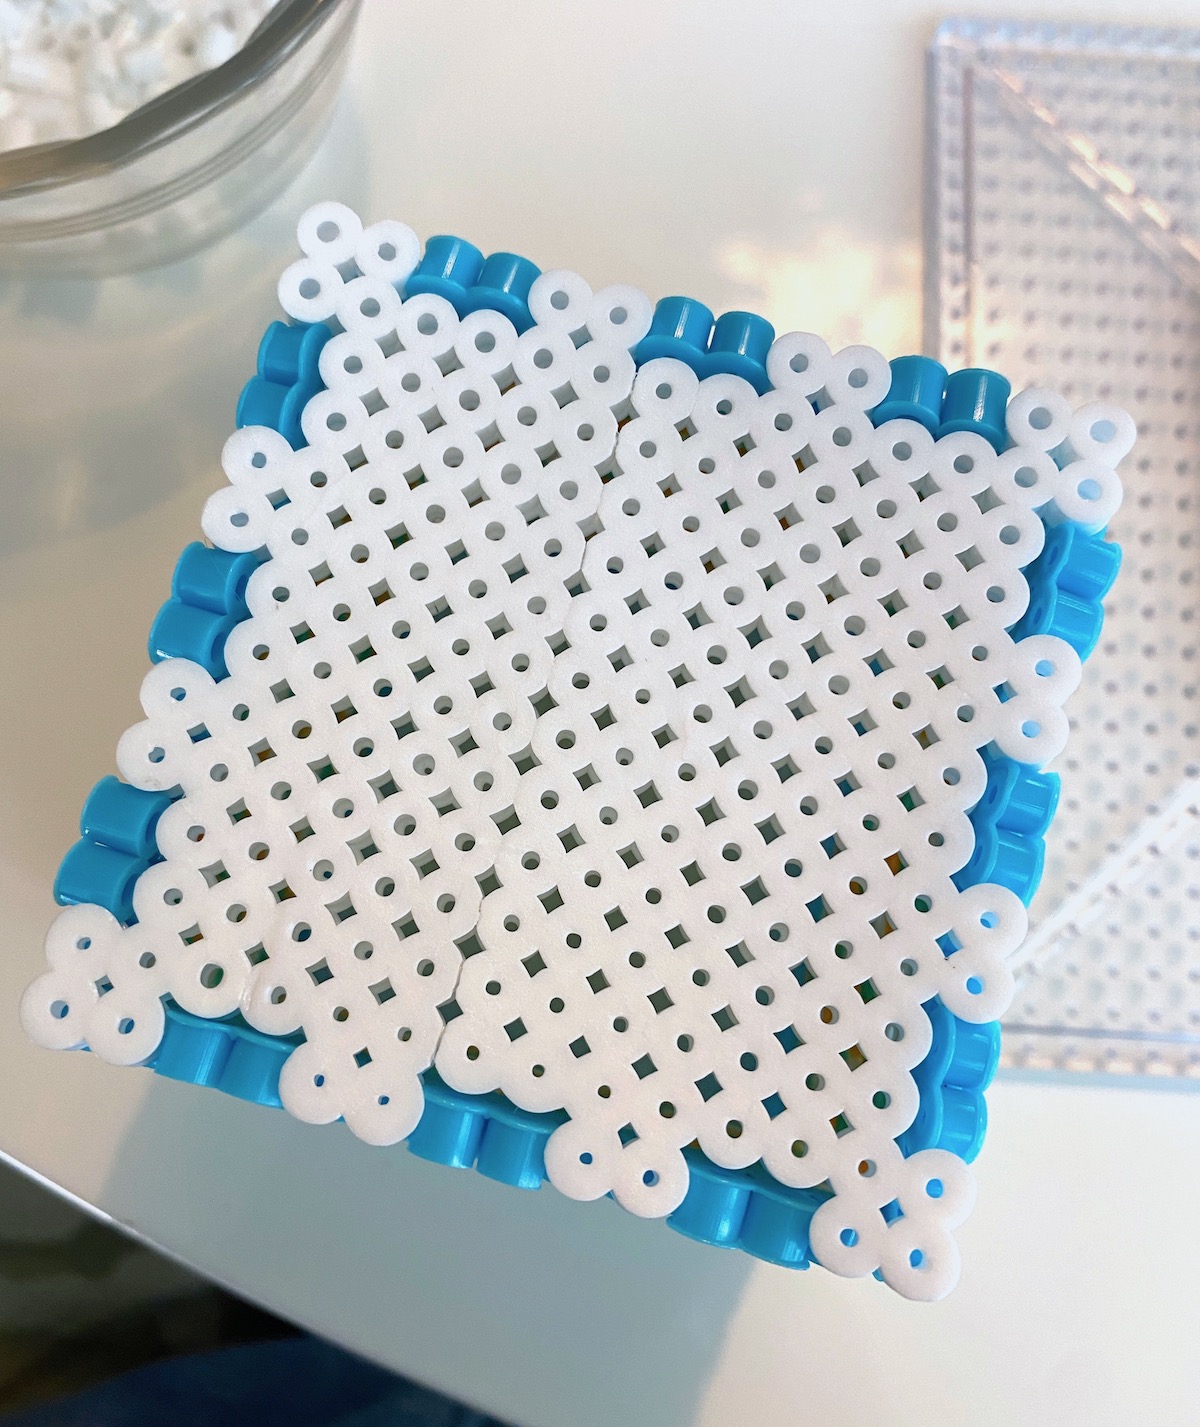
Top, Bottom, and Handle Parts – make once
Sides – Make Twice for Four Sides Total
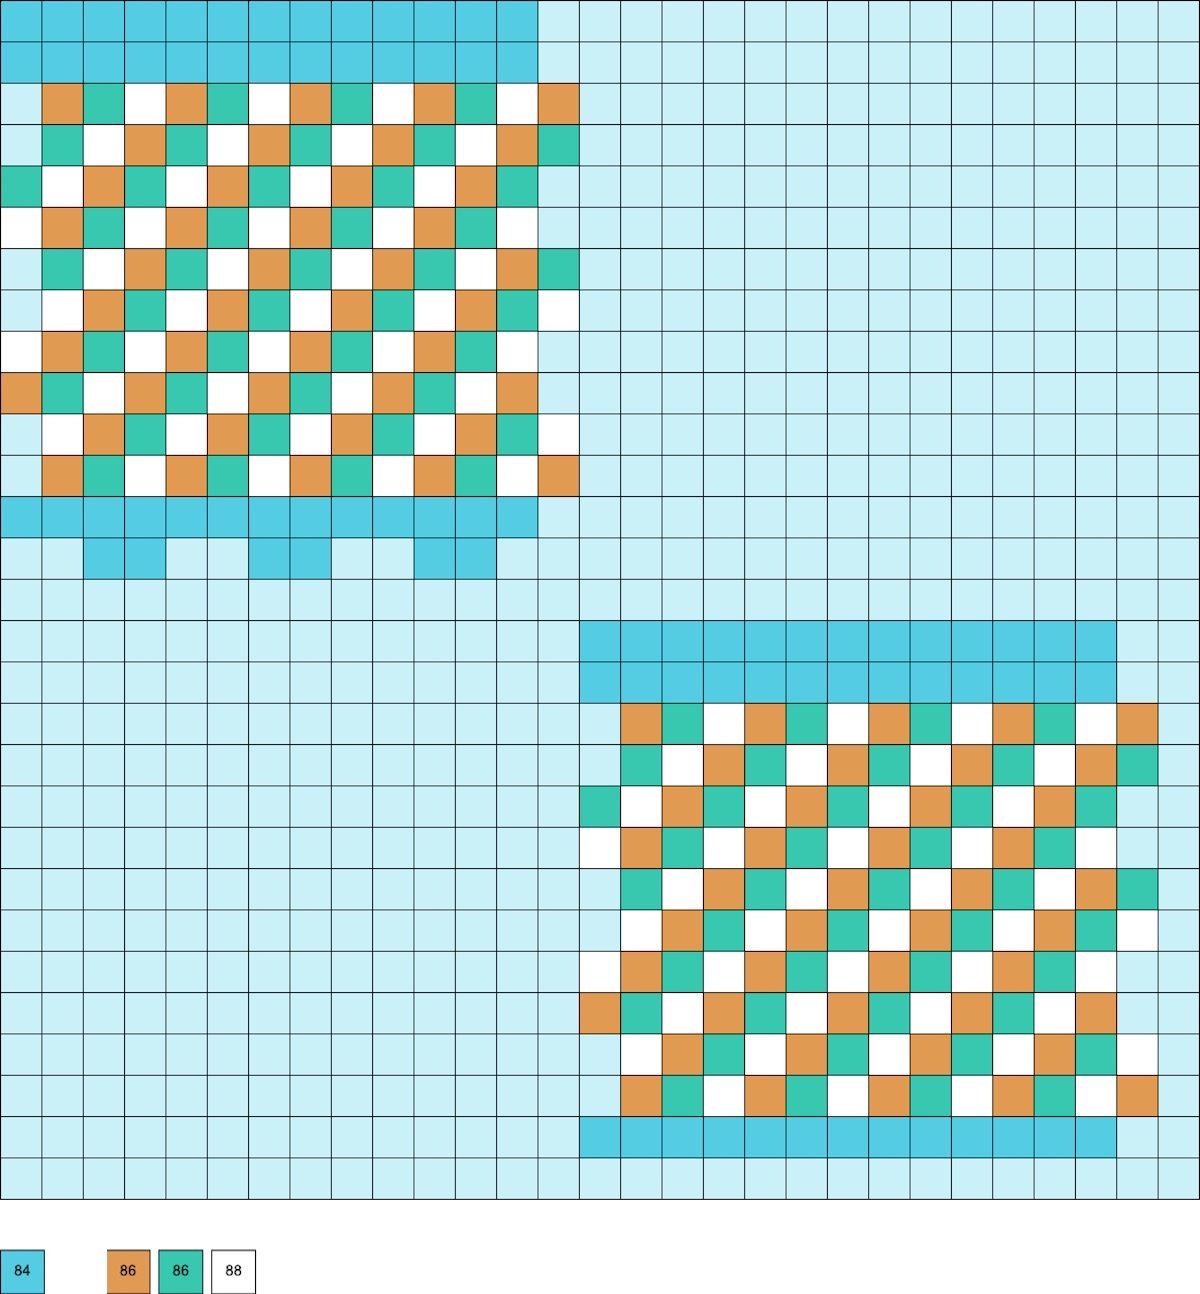
To assemble the sides, push the taps into the slots, aligning the borders of blue beads.
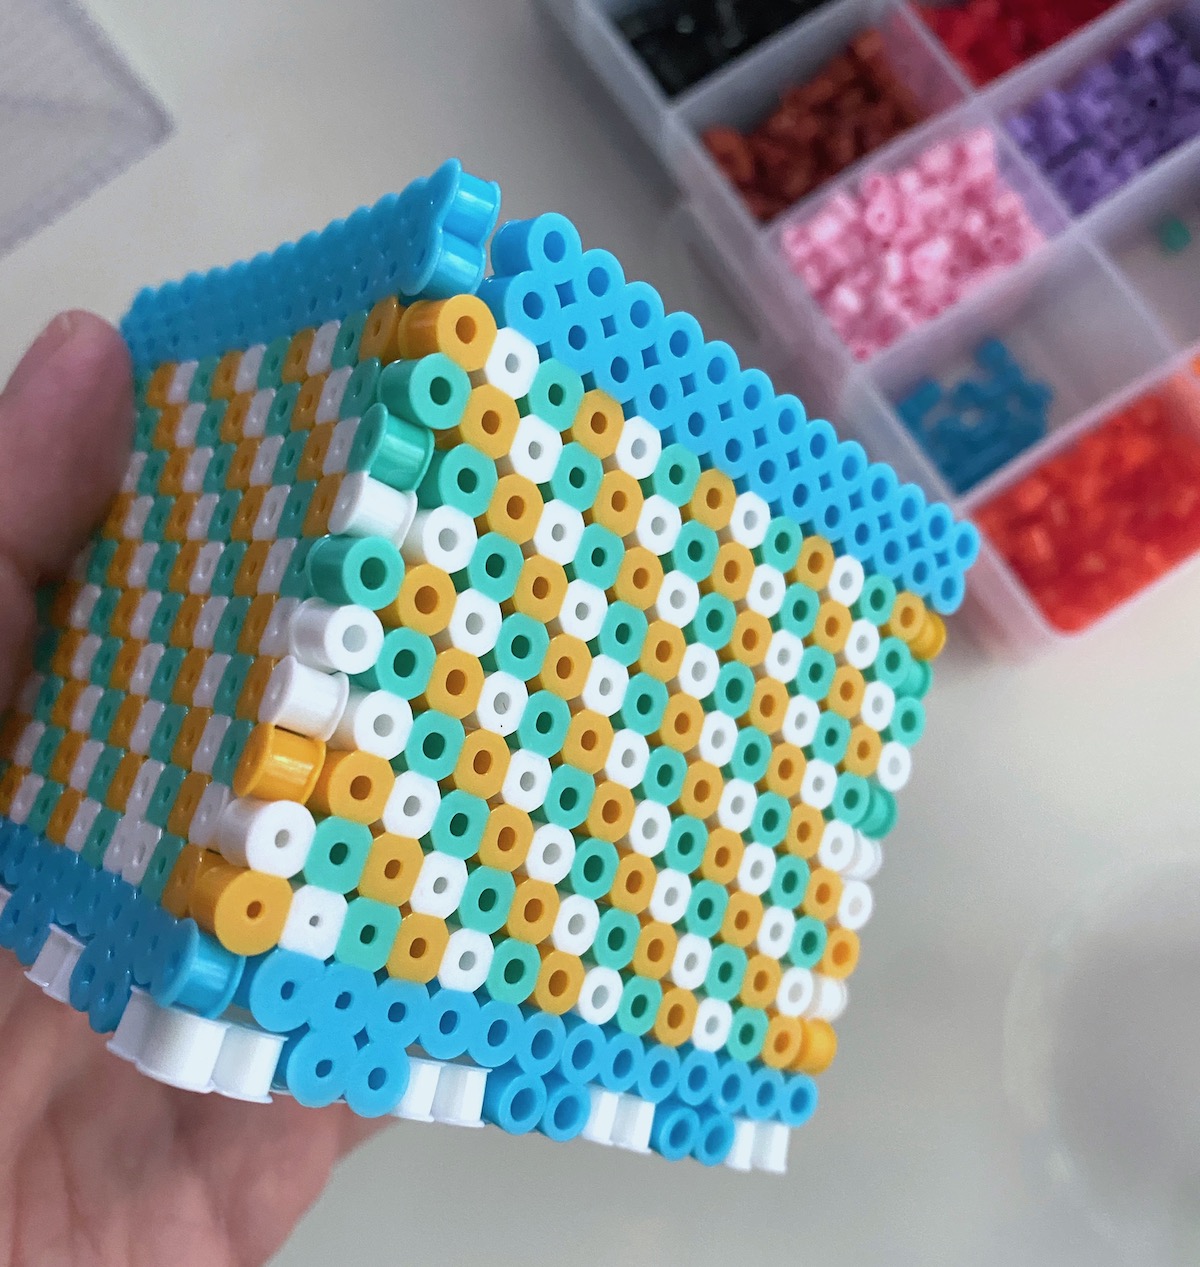
The bottom pieces pushes in easily as shown below.
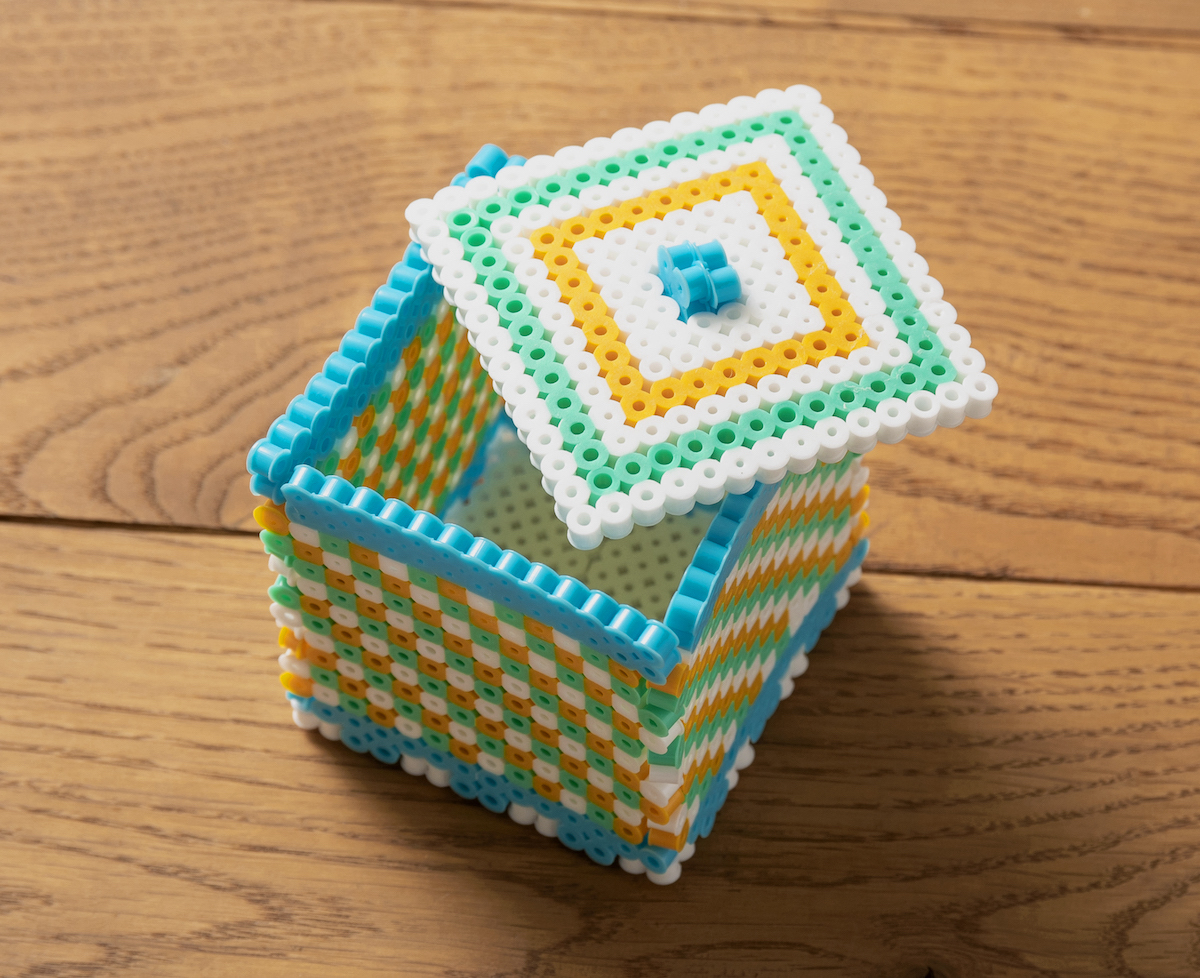
The final step is to place the two blue pieces into the lid as a handle. The lid can be placed loosely on top of the box!
The box isn’t designed to hold a lot of weight, but you can definitely use it to hold items on a kids’ desk. You can also use craft glue to glue the sides and bottom, giving the box additional rigidity.
If you enjoyed this perler bead project, let me know in the comments! I’d also love for you to check out these other ideas:
Bookmarks • Bracelets • Crown • Door Hanger • Drink Covers • Key Tray • Organizer • Tic Tac Toe Game

I think you right
Is there an error on one of the side templates? It does not have the bottom notches to fit into the base.