Hello Kitty Organizer (Made with Perler Beads!)
Learn how to make a Hello Kitty organizer using simple supplies! Kids will love this easy perler bead project they can use in their room.
Skills Required: None. Even if you’ve never crafted before, this organizer is easy to make. You’ll be melting beads with an iron and gluing them together. The patterns are at the bottom of the post.
If there’s anything we can all use a little bit more of, it’s organization! At least me, anyway. It’s one of my struggles. I always need places to put things. Including all my pretty trinkets!
The children of my family also have this same need, including my nieces. They love cute little knick knacks, jewelry, and other fun stuff. And they want to organize them as well.
We’ve been playing a lot with perler beads recently, and we pulled together some Hello Kitty perler bead patterns that were really fun!
After trying a Hello Kitty door hanger, we were ready to go a bit “dimensional.” I’d made a 3D kitty before, which is really easy. I figured we could tackle something a bit larger!
Once my niece Maria saw the this Hello Kitty organizer, she squealed. And she had to make it, including with her own color choices!
Not a problem, right? I mean, it’s only got multiple levels, drawers, and the beads have to be in all the right places for it to work. We accepted the challenge!
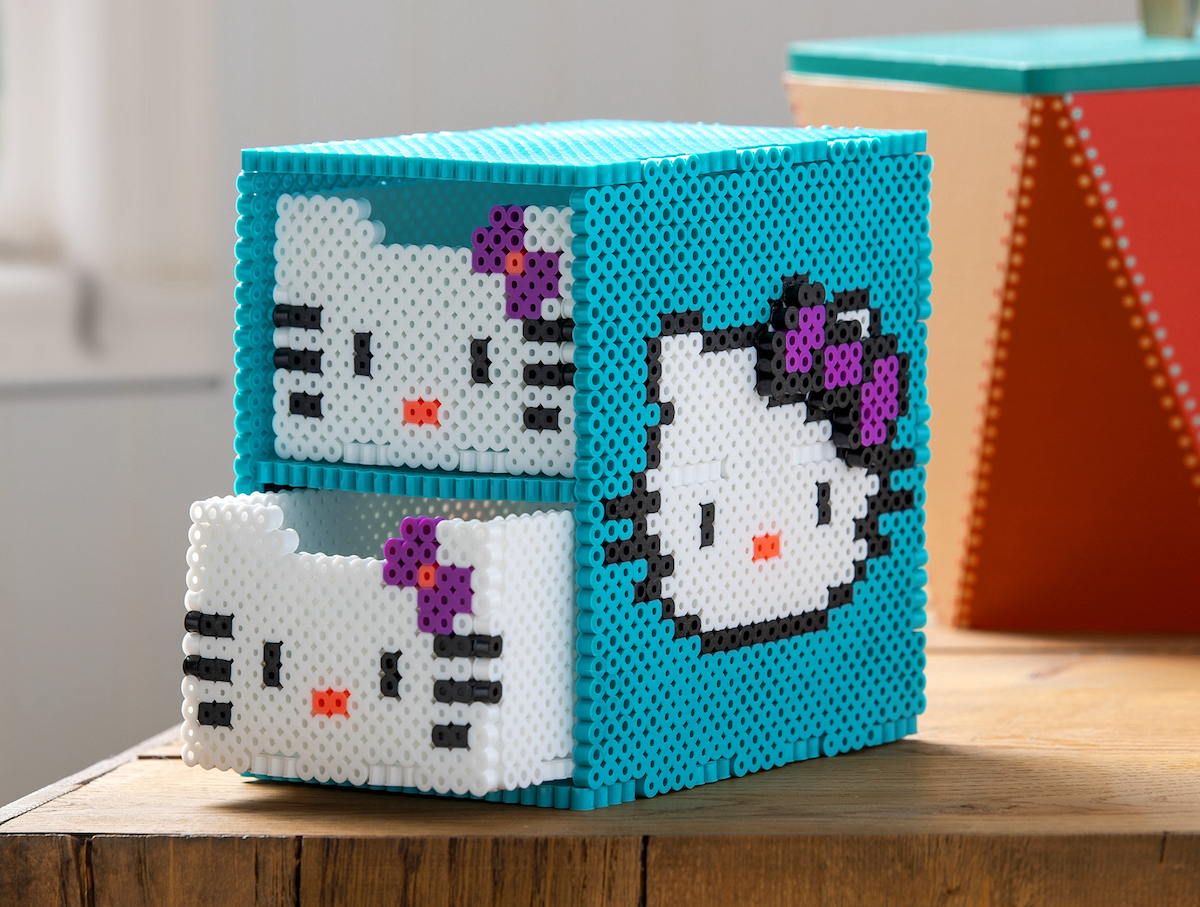
The drawers actually do go in and out, and hold stuff as well. Cute, right? What you should know is that this project uses quite a few perler beads. You’ll need approximately 3,000 of a primary color, about 300 black, and almost 4,000 white beads to make it.
This is a super easy summer craft or boredom buster that kids are going to love. Not that you can’t make it any time of year. It’s nice and time consuming!
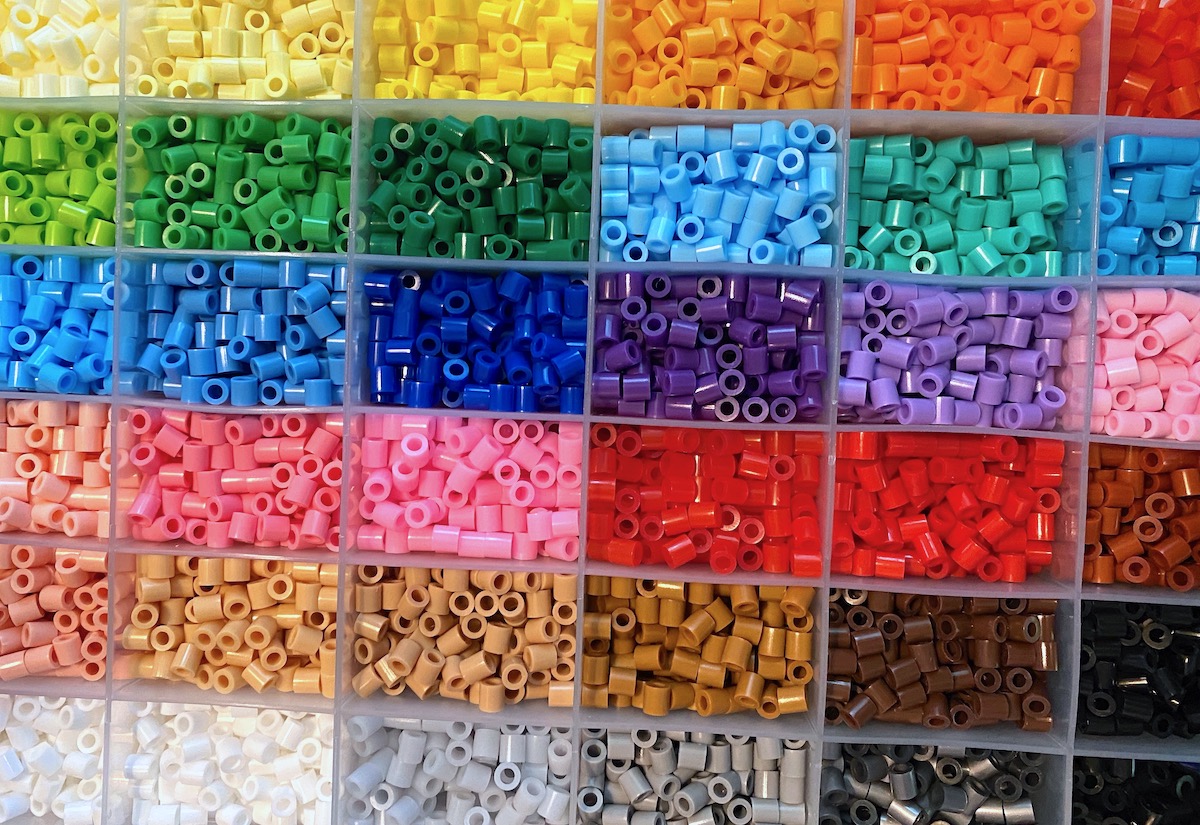
Perler beads are recommended for ages six and up, so this is a very fun craft to try with your elementary age kids (and up). All children seem to love perler beads (also known as hama beads, fuse beads, or melty beads). But don’t be shy – adults love them too!
And what adult doesn’t love Hello Kitty! I’m in my late 40s. No shame here.
Hello Kitty Desk Organizer
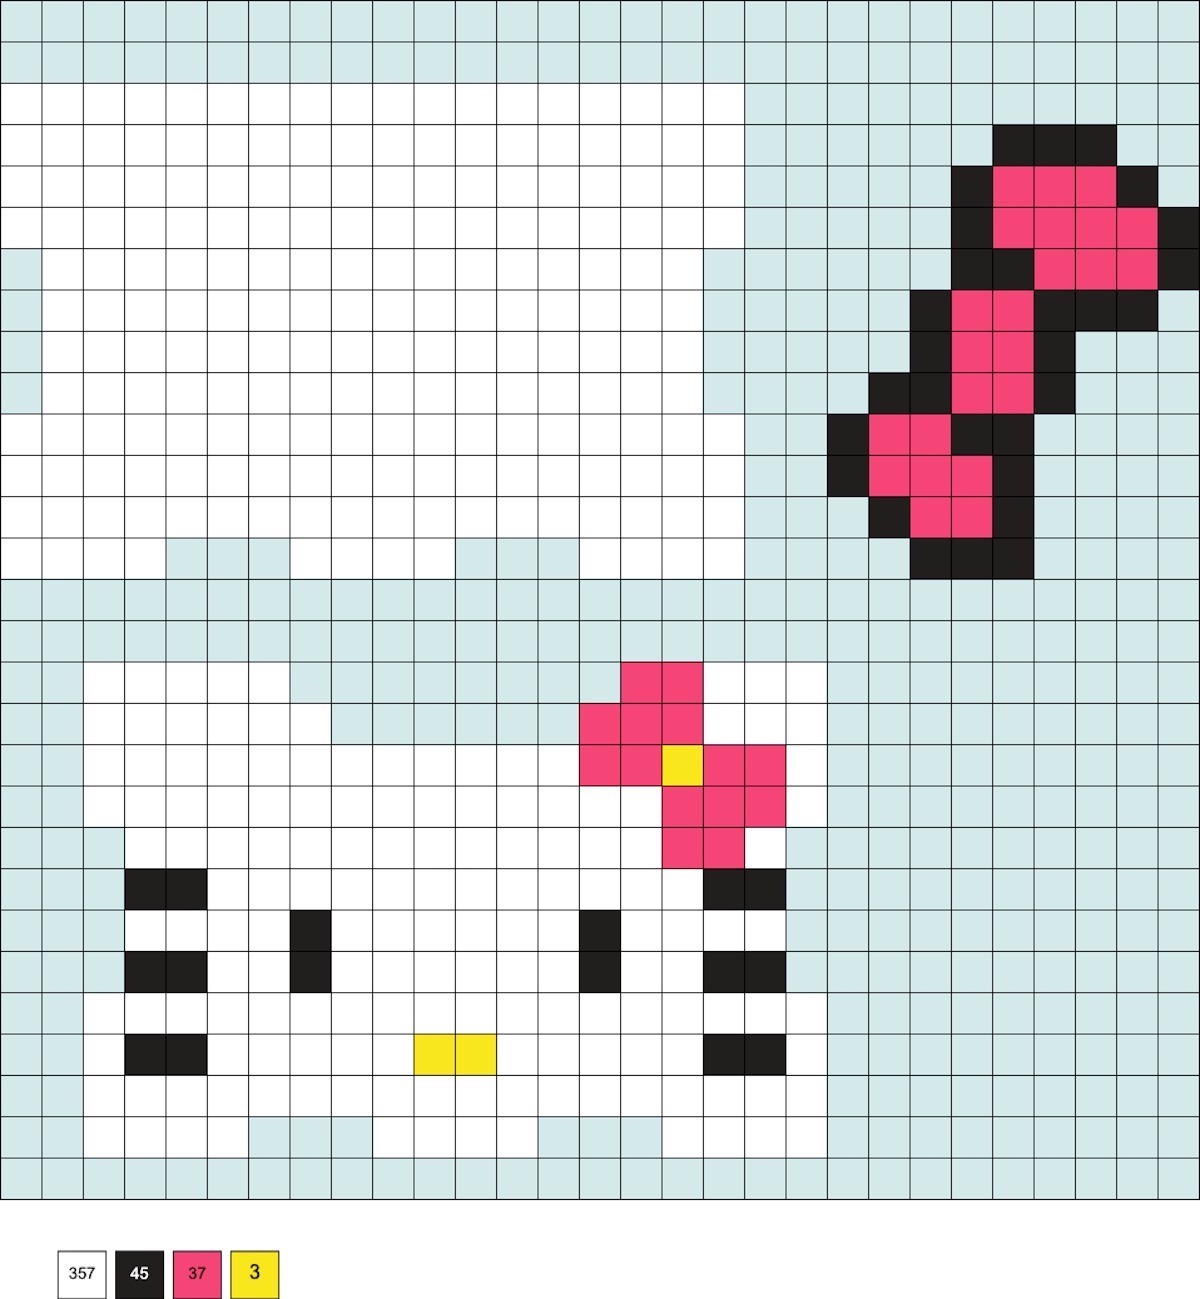
Now if you’re ready to make the project, here are the patterns! You’ll need to make a top and bottom, two sides, a middle shelf, and a back. Then you’re going to make the drawers (two of them!). There’s also a bow to embellish each side.
Once you’re done making all of the patterns, you’re going to assemble the organizer according to the photo at the top of this post. It’s pretty easy! Don’t forget to glue it together to make it stronger.
You’ll either need two 29 x 29 boards (and link them together) or an extra large pegboard to fit certain parts of the project. Let’s get started.
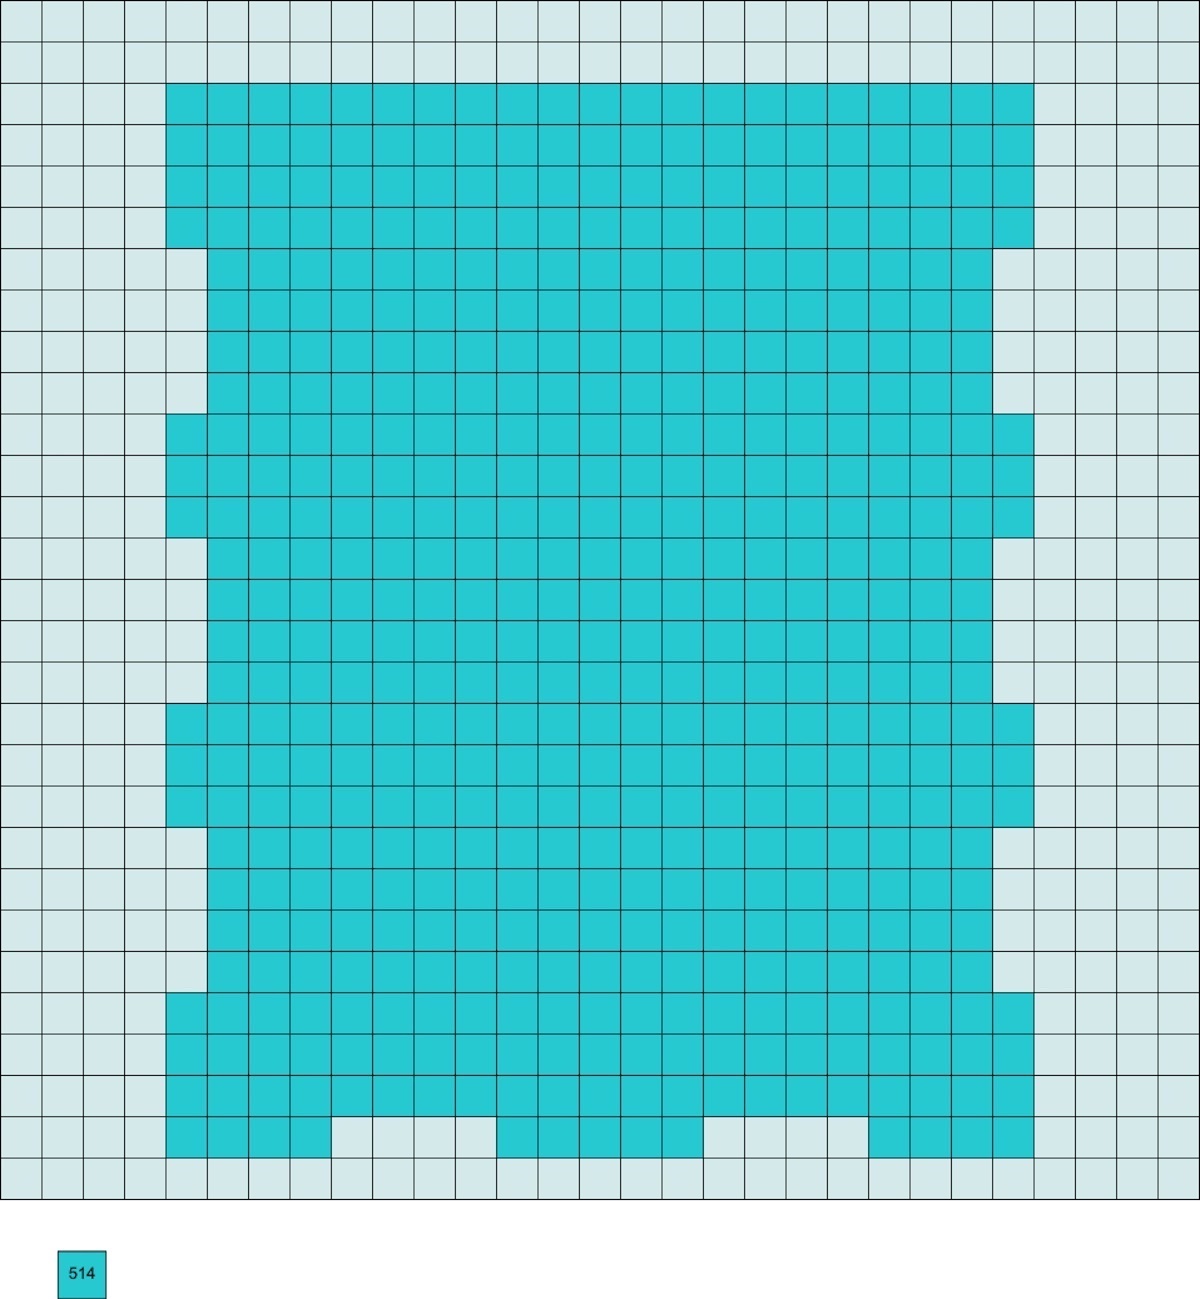
Top and Bottom
You’re going to make two of this pattern, one for the top and one for the bottom of the organizer. You’ll need a total of 1,028 beads in your primary color.
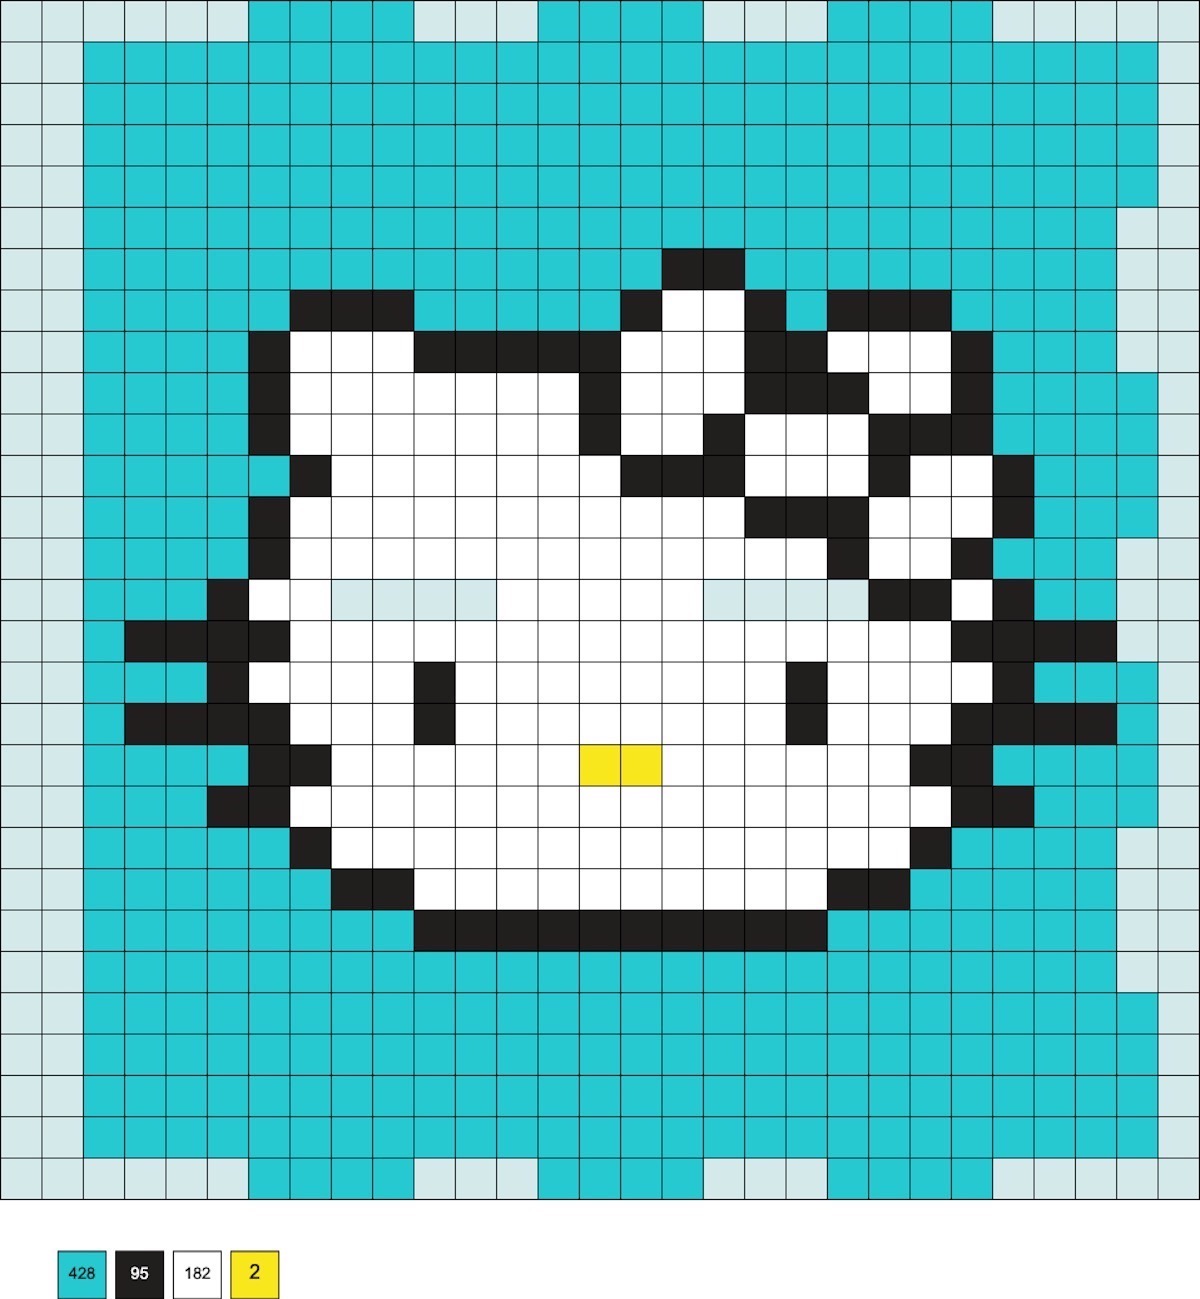
Organizer Sides
Make two of these sides. You can change the nose to any color you like. For both sides you’ll need 856 beads in your primary color as well as 190 black, 364 white, and 4 total for the nose.
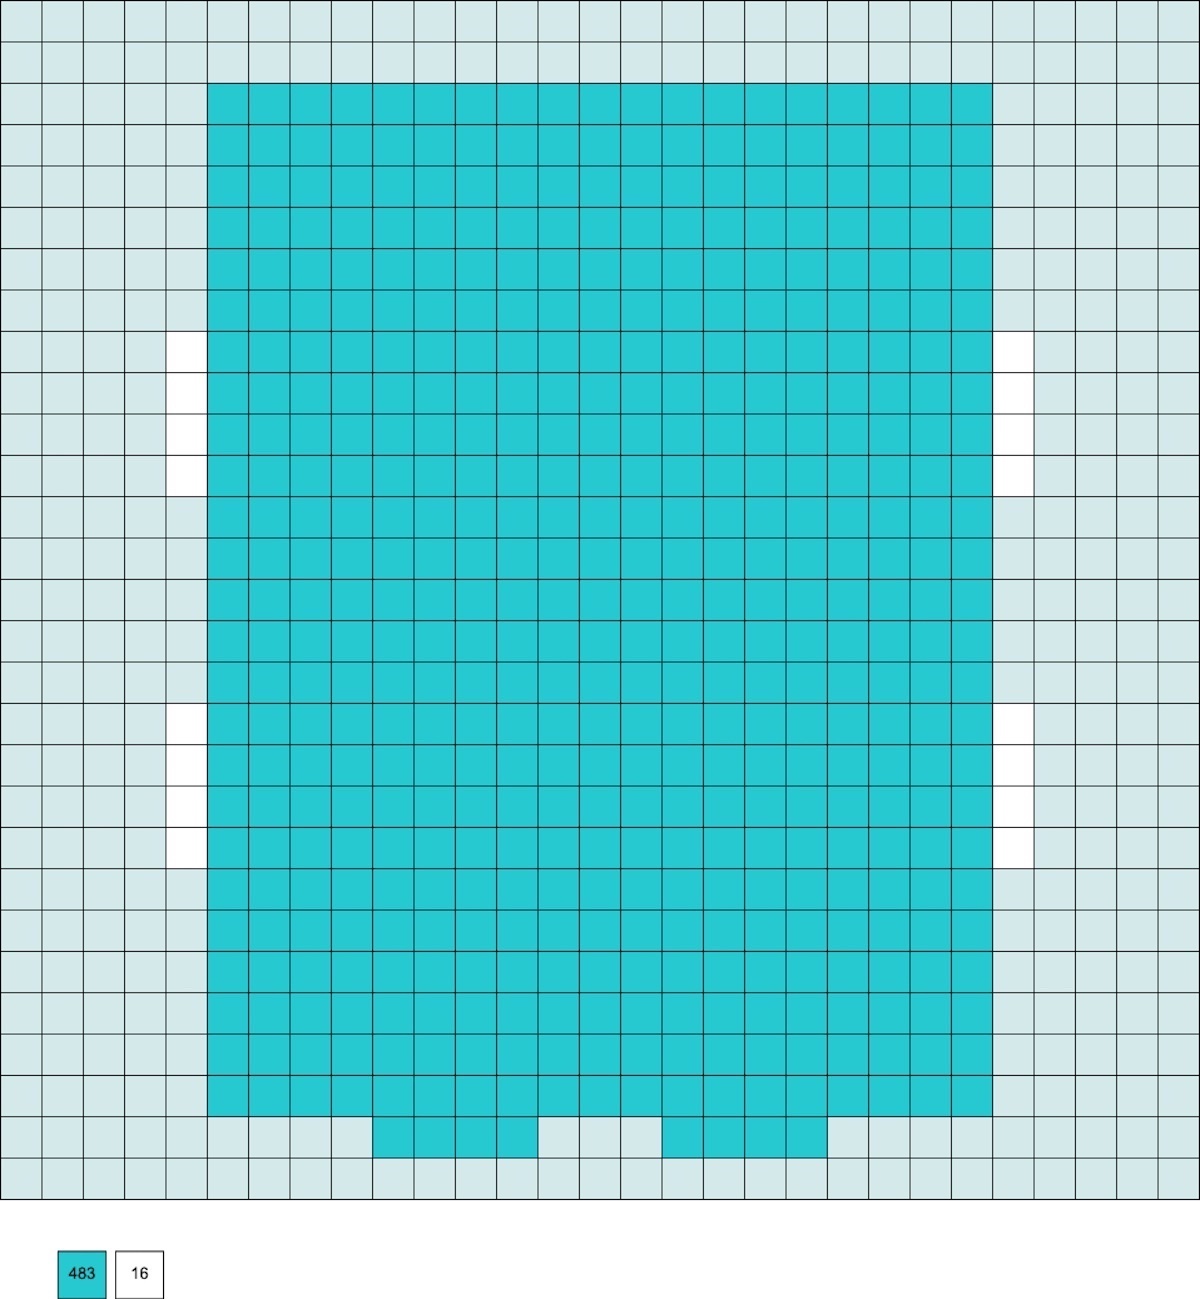
Middle Shelf
Make one shelf. You’ll need 483 beads in your primary color and 16 white. These tabs are attached through Hello Kitty’s face on both sides (with the tabs toward the back).
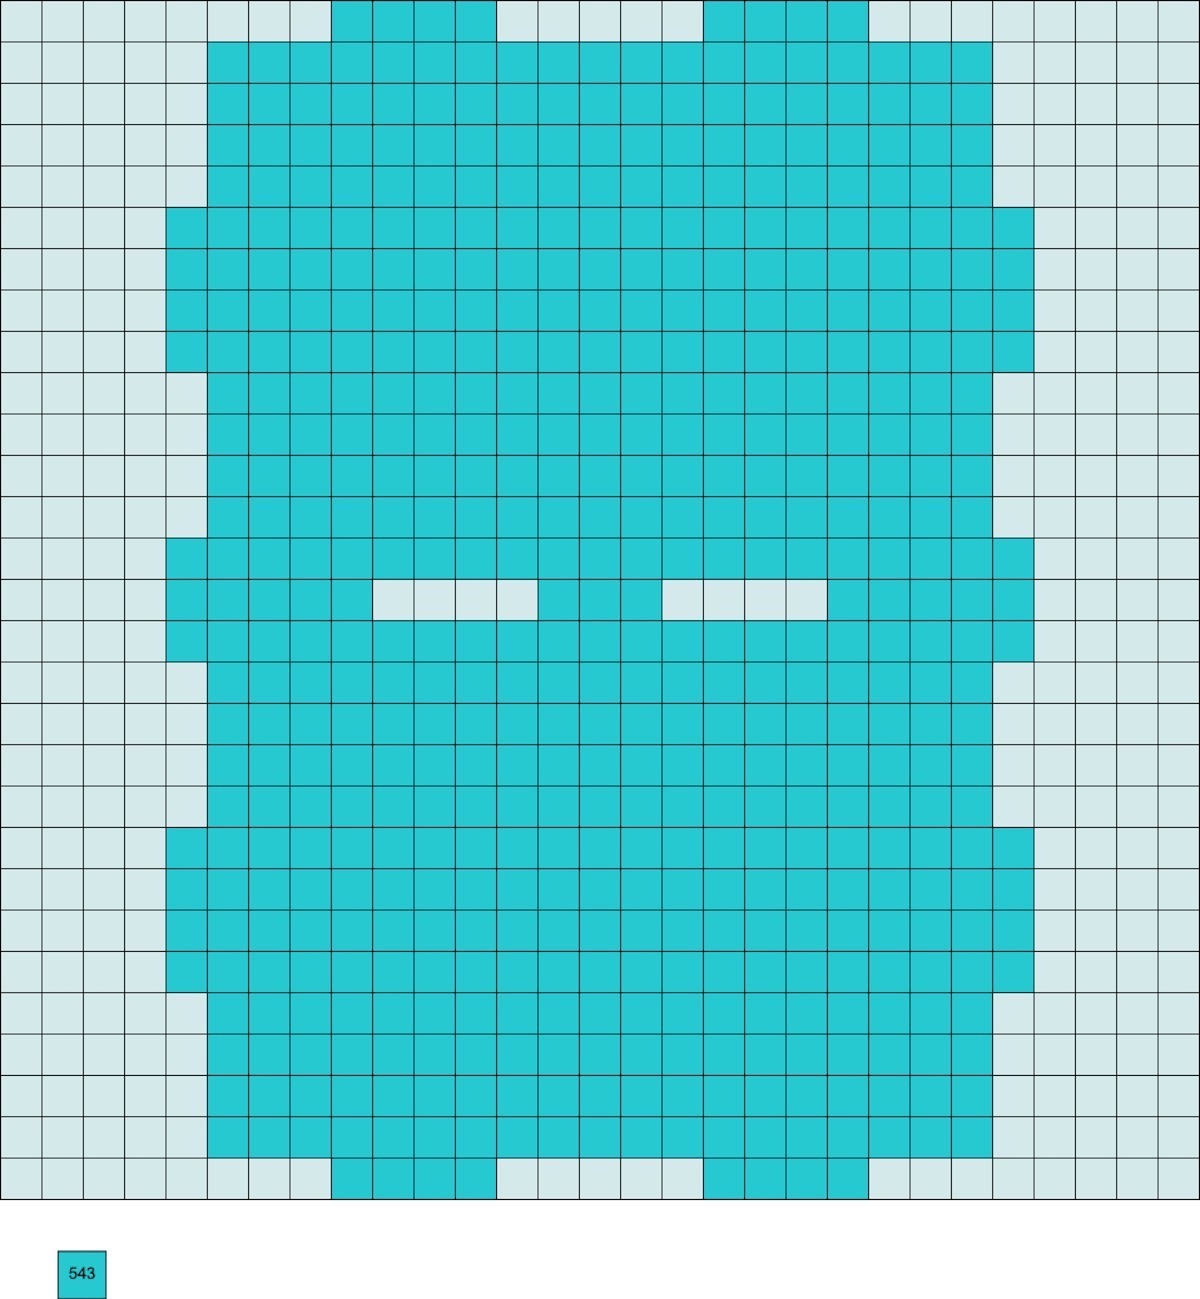
Organizer Back
Make one. You’ll need 543 beads in your primary color.
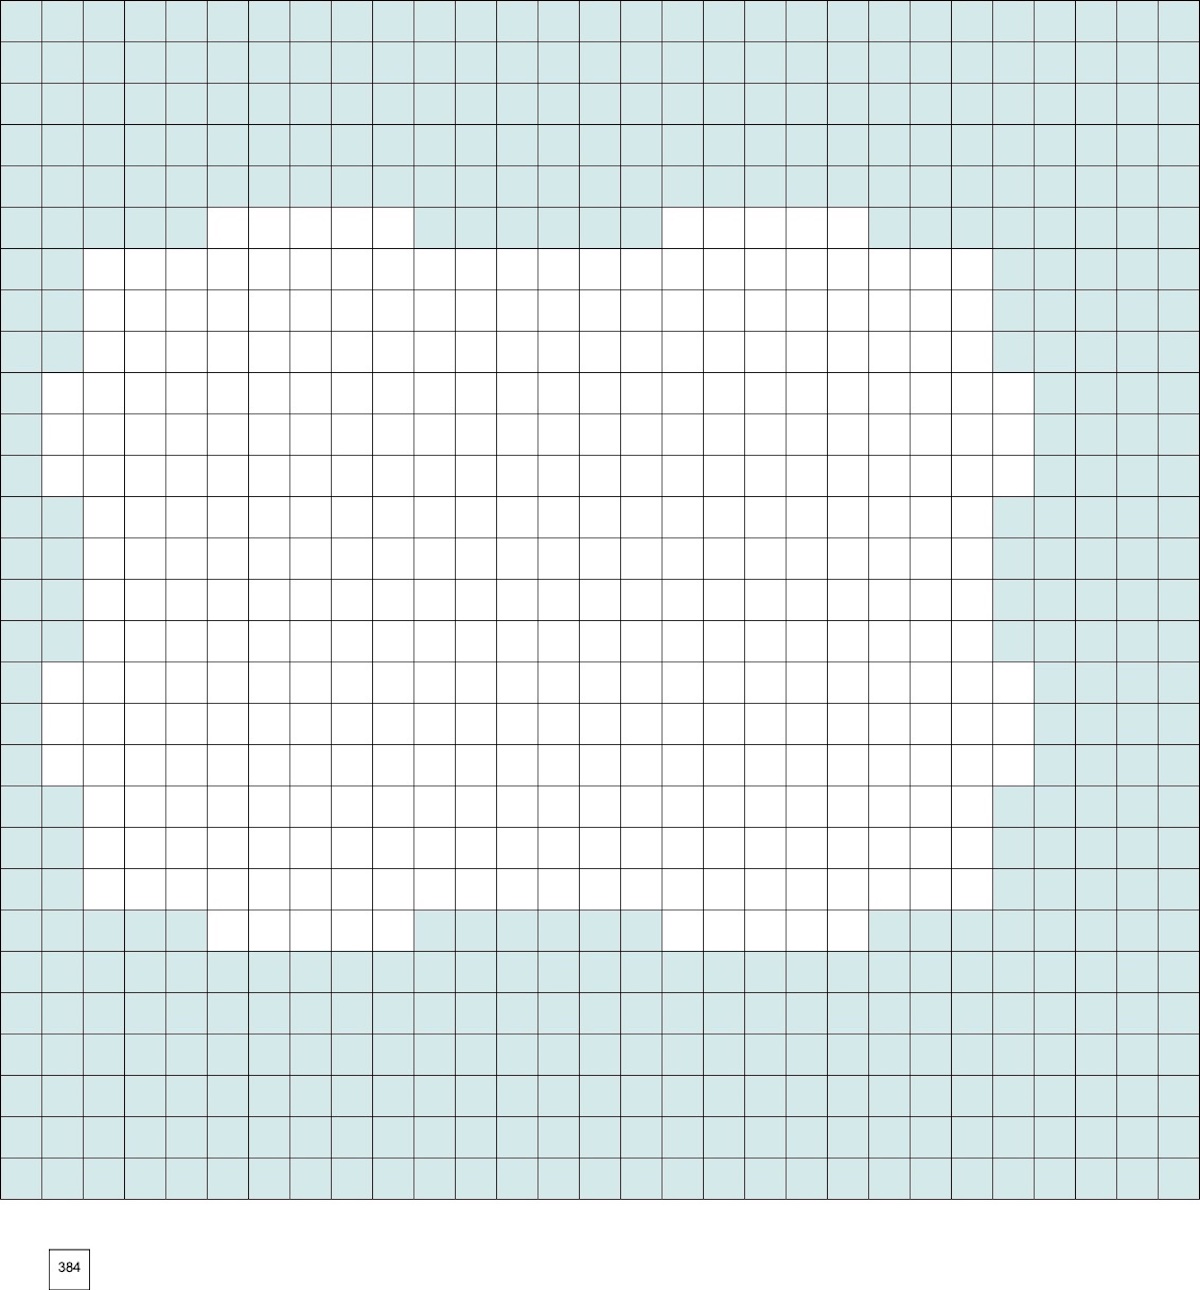
Drawer Bottom
Make two. You’ll need a total of 768 white beads.
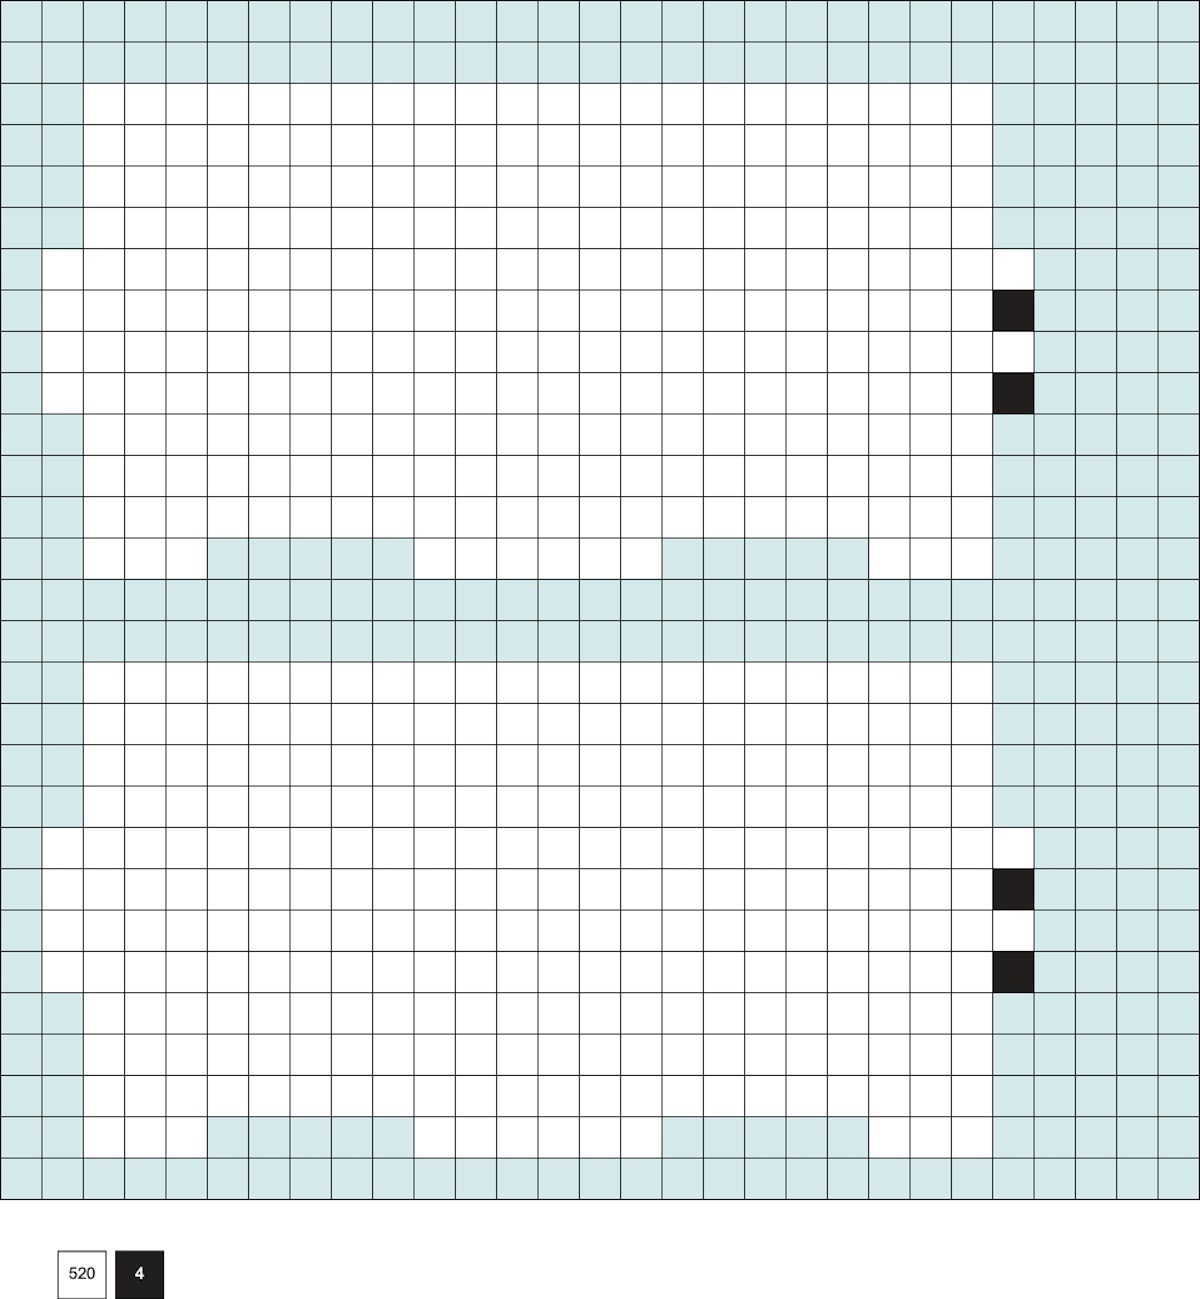
Drawer Sides
Make four sides total (so do this pattern twice). You’ll need 2,080 white beads and 16 black beads.
Drawer Front and Back, Plus Bow
Make two of each. You’ll need 714 white beads, 90 black beads, 74 beads for the bow color, and 6 beads for the nose.
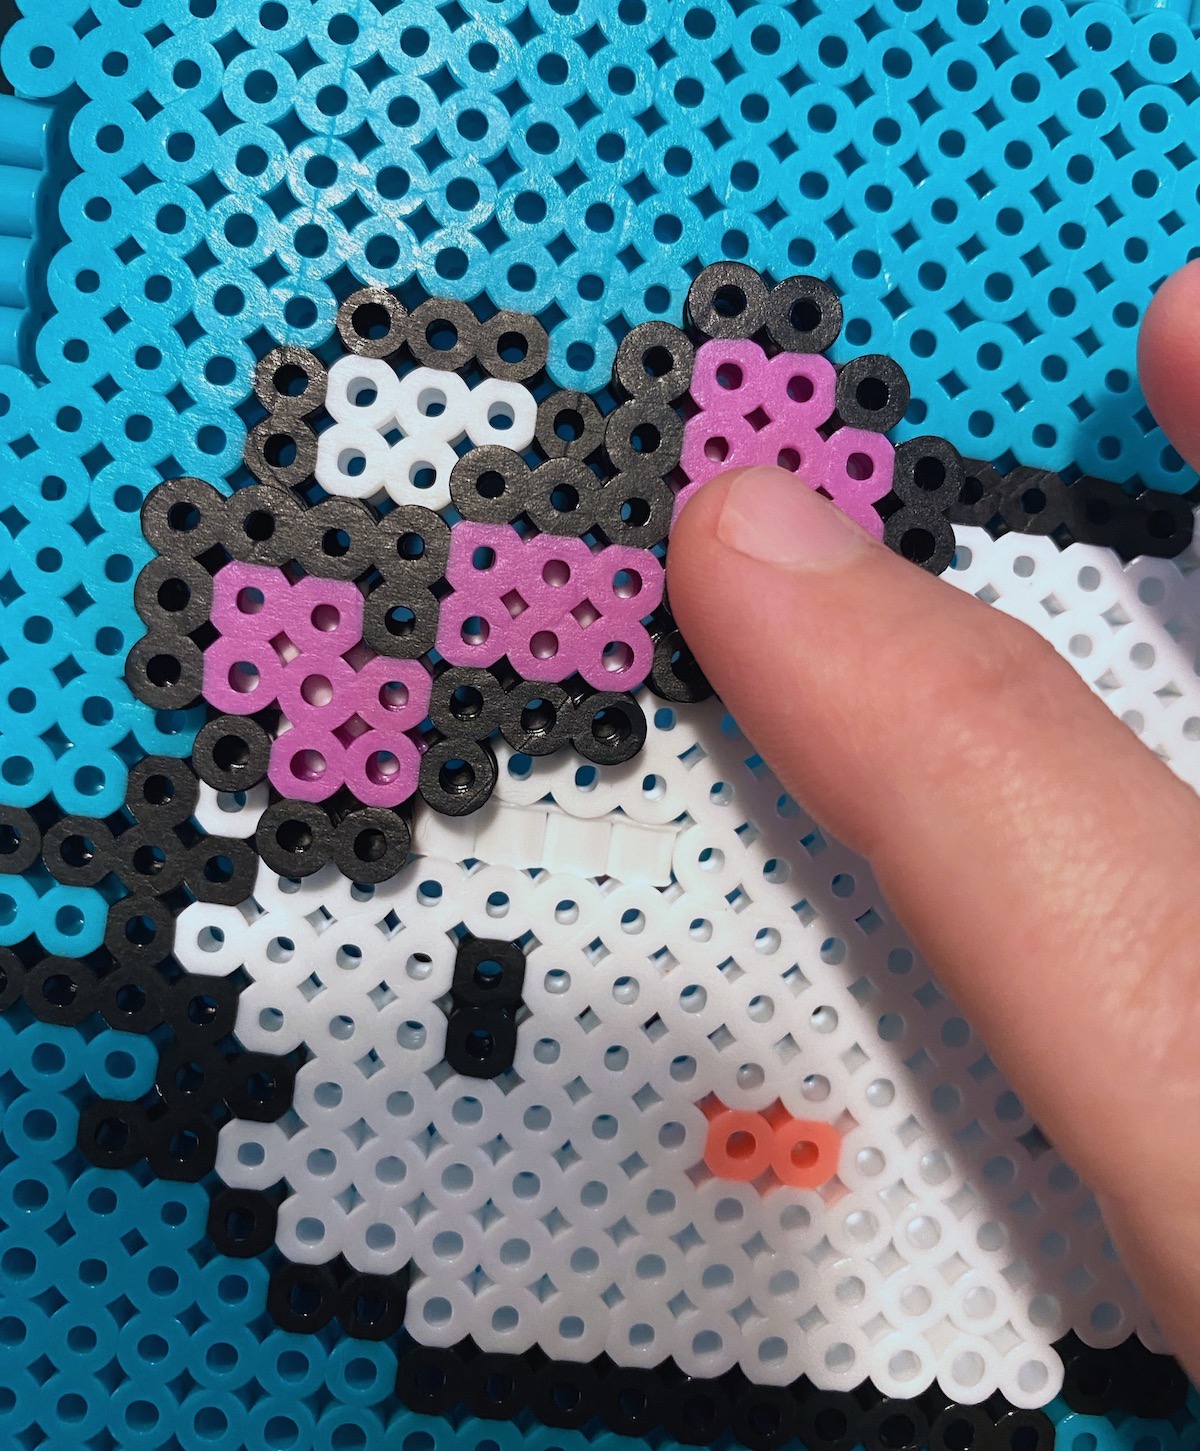
Note: There’s only one additional step you’re going to need to do to make the Hello Kitty desk organizer, and that’s glue the bows down on each side on top of the outline.
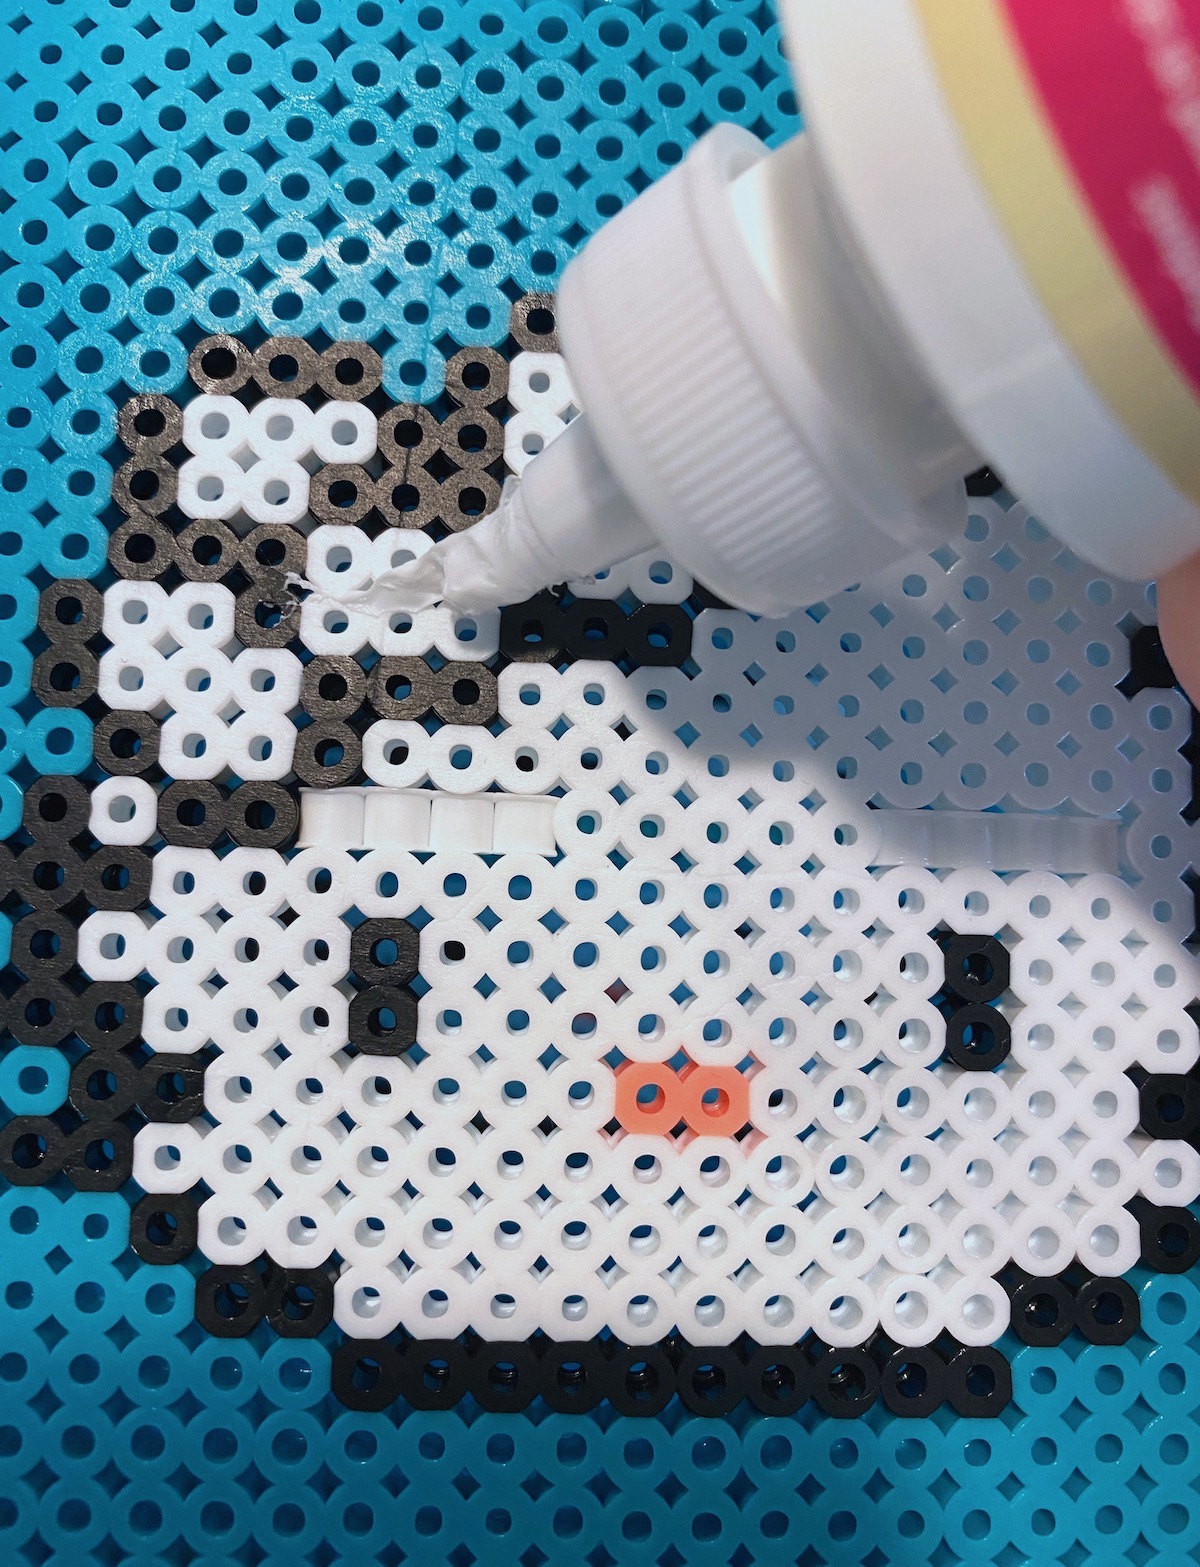
I used a dab of clear drying craft adhesive (Aleene’s works great) to attach the bows, and they were secure. They dried completely in about an hour. You could probably hot glue them as well.
Note: You CAN use glue to assemble the entire organizer and make it stronger. If you feel like it’s going to get regular use and it needs to be sturdy, I recommend gluing the beads at all the major intersections where you attach pieces.
If you try this Hello Kitty organizer, let me know in the comments! I’d also love for you to check out these additional ideas:
Box • Bookmarks • Bracelets • Crown • Drink Covers • Key Tray • Tic Tac Toe Game