Perler Bead Tic Tac Toe Game
Learn how to make perler bead tic tac toe using simple supplies! Kids will love this easy project with beads that results in a game to play.
Skills Required: None. Even if you’ve never crafted before, this game is easy to make. You’ll be melting beads with an iron and gluing them together. The patterns are at the bottom of the post.

I come from a house of gamers – but I’m talking O.G. gamers, baby. Board games.
My four brothers and I didn’t have a ton of toys when we were young, and the toys we did have were all communal.
What we did have a lot of was books, blocks, and board games. Our uncle made the blocks, and board games (and books for that matter) were relatively cheap back then.
So it was a lot of entertainment with a low price per minute – for five kids especially!
In addition to board games we’d play cards, chess (which I guess is still a board game) and a lot of tic tac toe.
The concept of tic tac toe is simple and you probably already know it. There’s a grid of nine squares, and the goal is to cover the grid horizontally, vertically, or diagonally with a row of three.
And the great thing about that particular game for my family is that the concept was so simple, everyone could play it! I’m ten years older than my youngest brother, so for everyone to be able to play a game, it had to be simple.
And tic tac toe is very simple. In more ways than one. Not only is it simple to play, but it’s simple to make! And today I’m sharing a perler bead tic tac toe game!
This is a super easy summer craft. Not that you can’t make them any time of year.
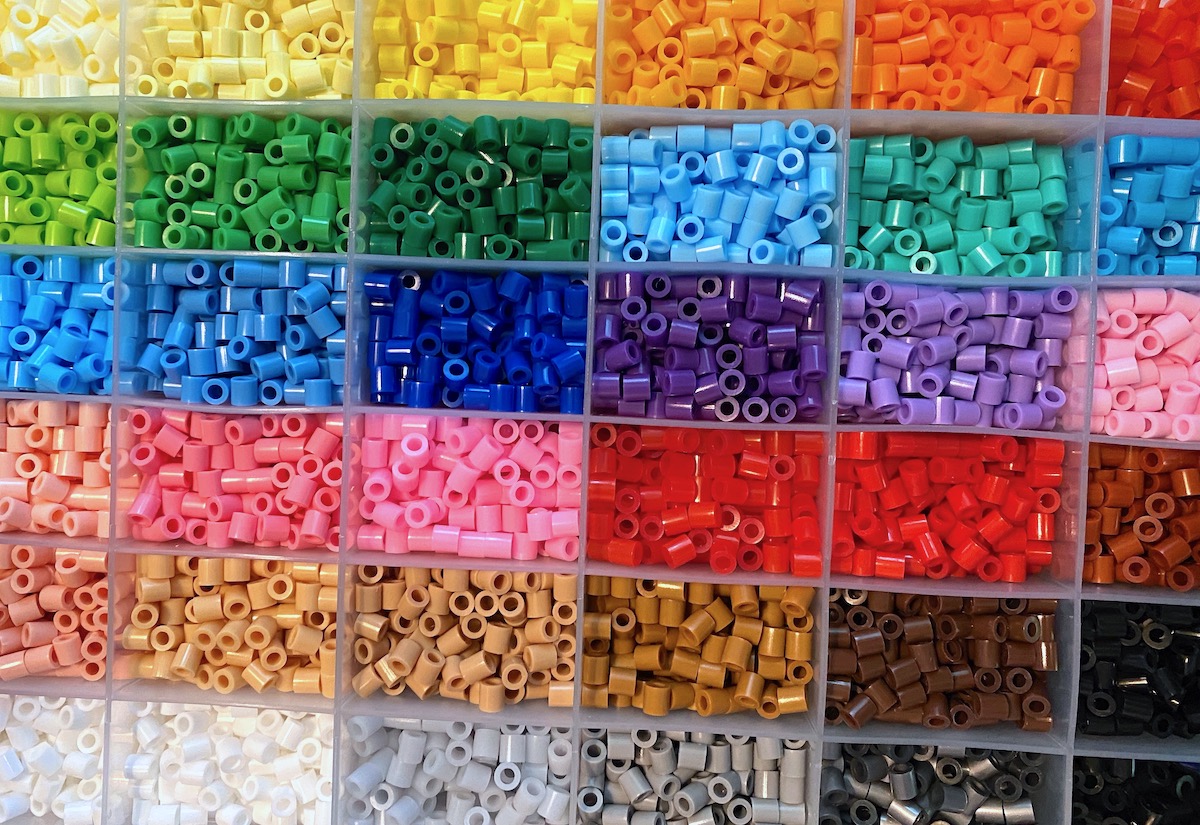
Perler beads are recommended for ages six and up, so this is a very fun craft to try with your elementary age kids. All children seem to love perler beads (also known as hama beads, fuse beads, or melty beads). But don’t be shy – adults love them too!
Tic Tac Toe Perler Beads
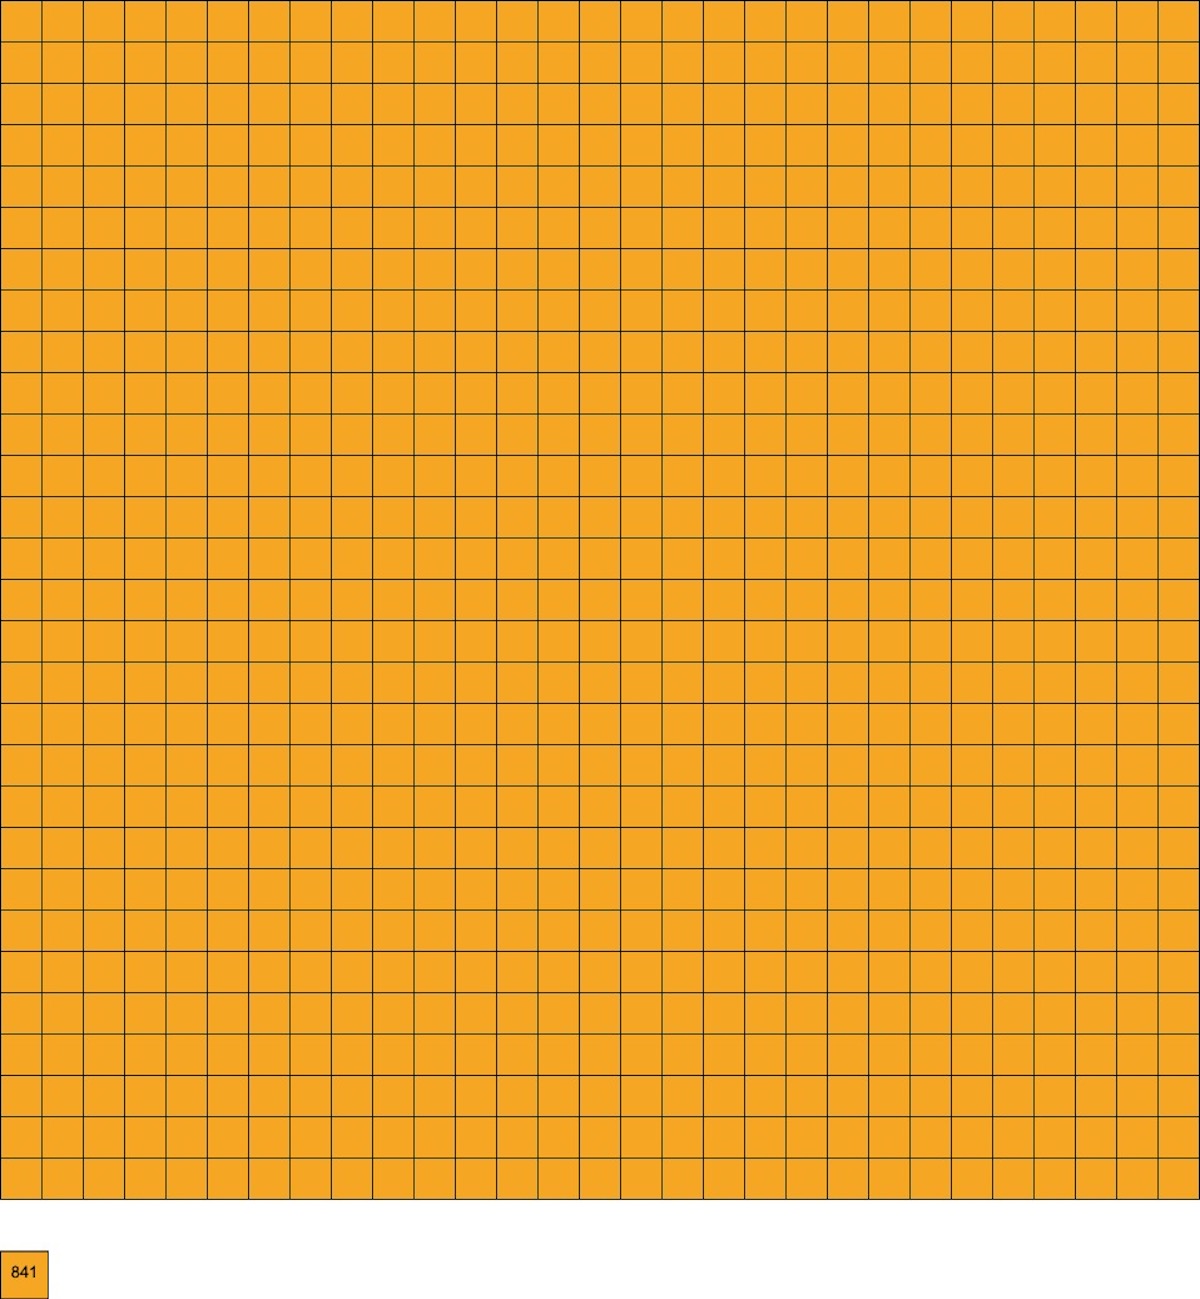
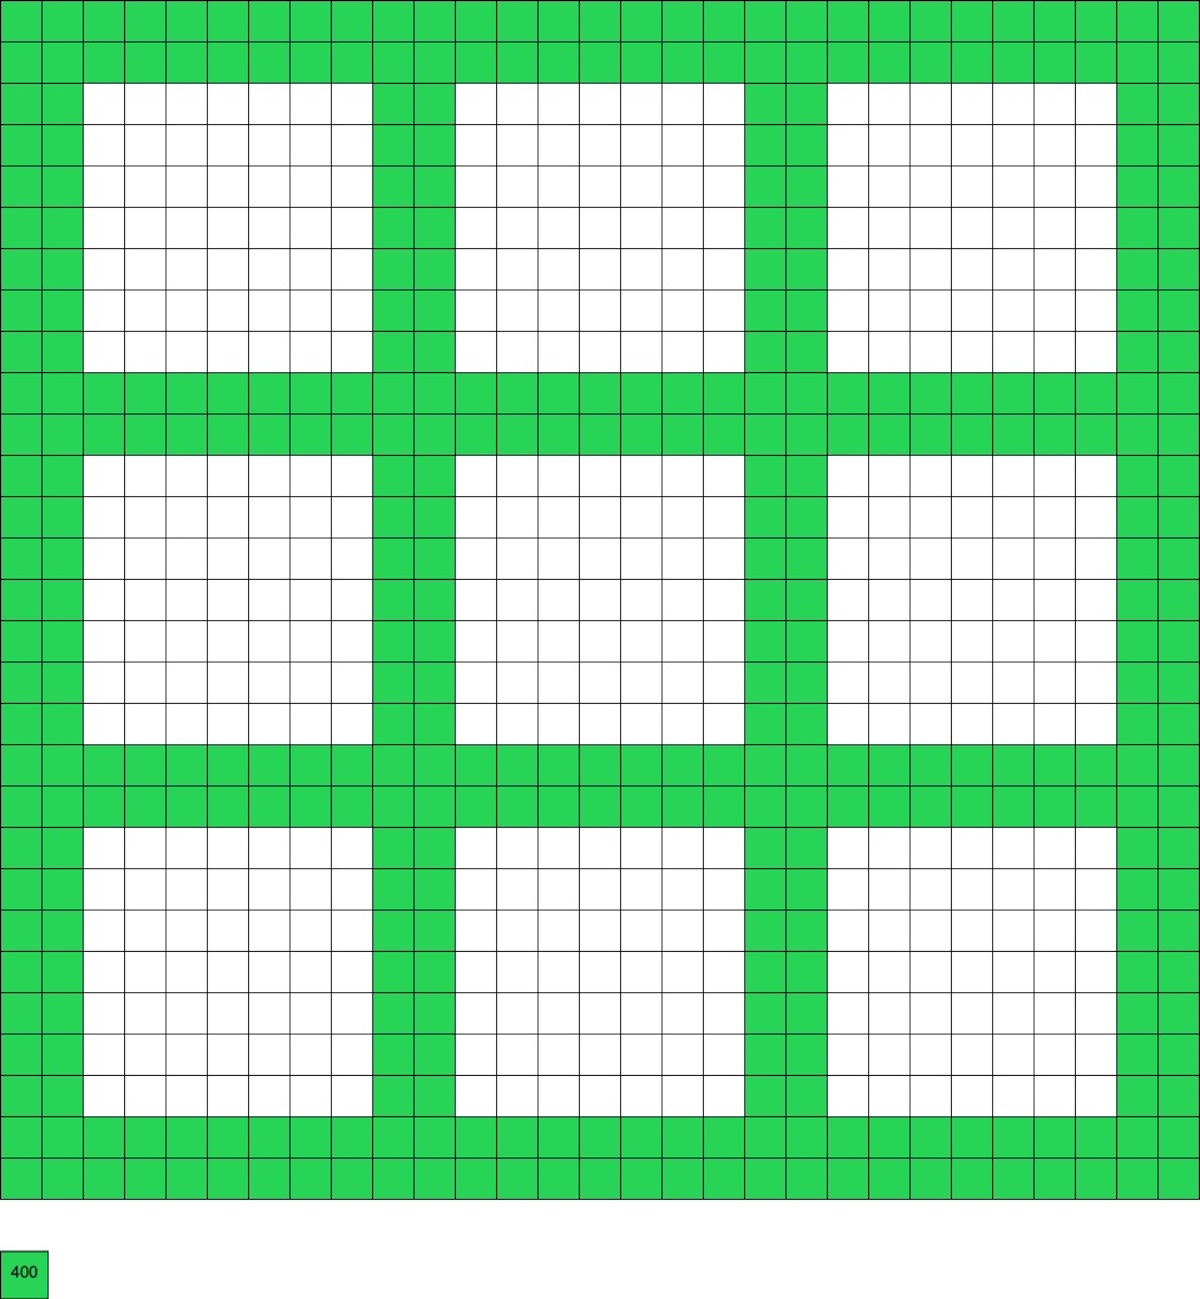
Now if you’re ready to make the game, here are the patterns! You’ll need to make the base, the grid, and then the pieces.
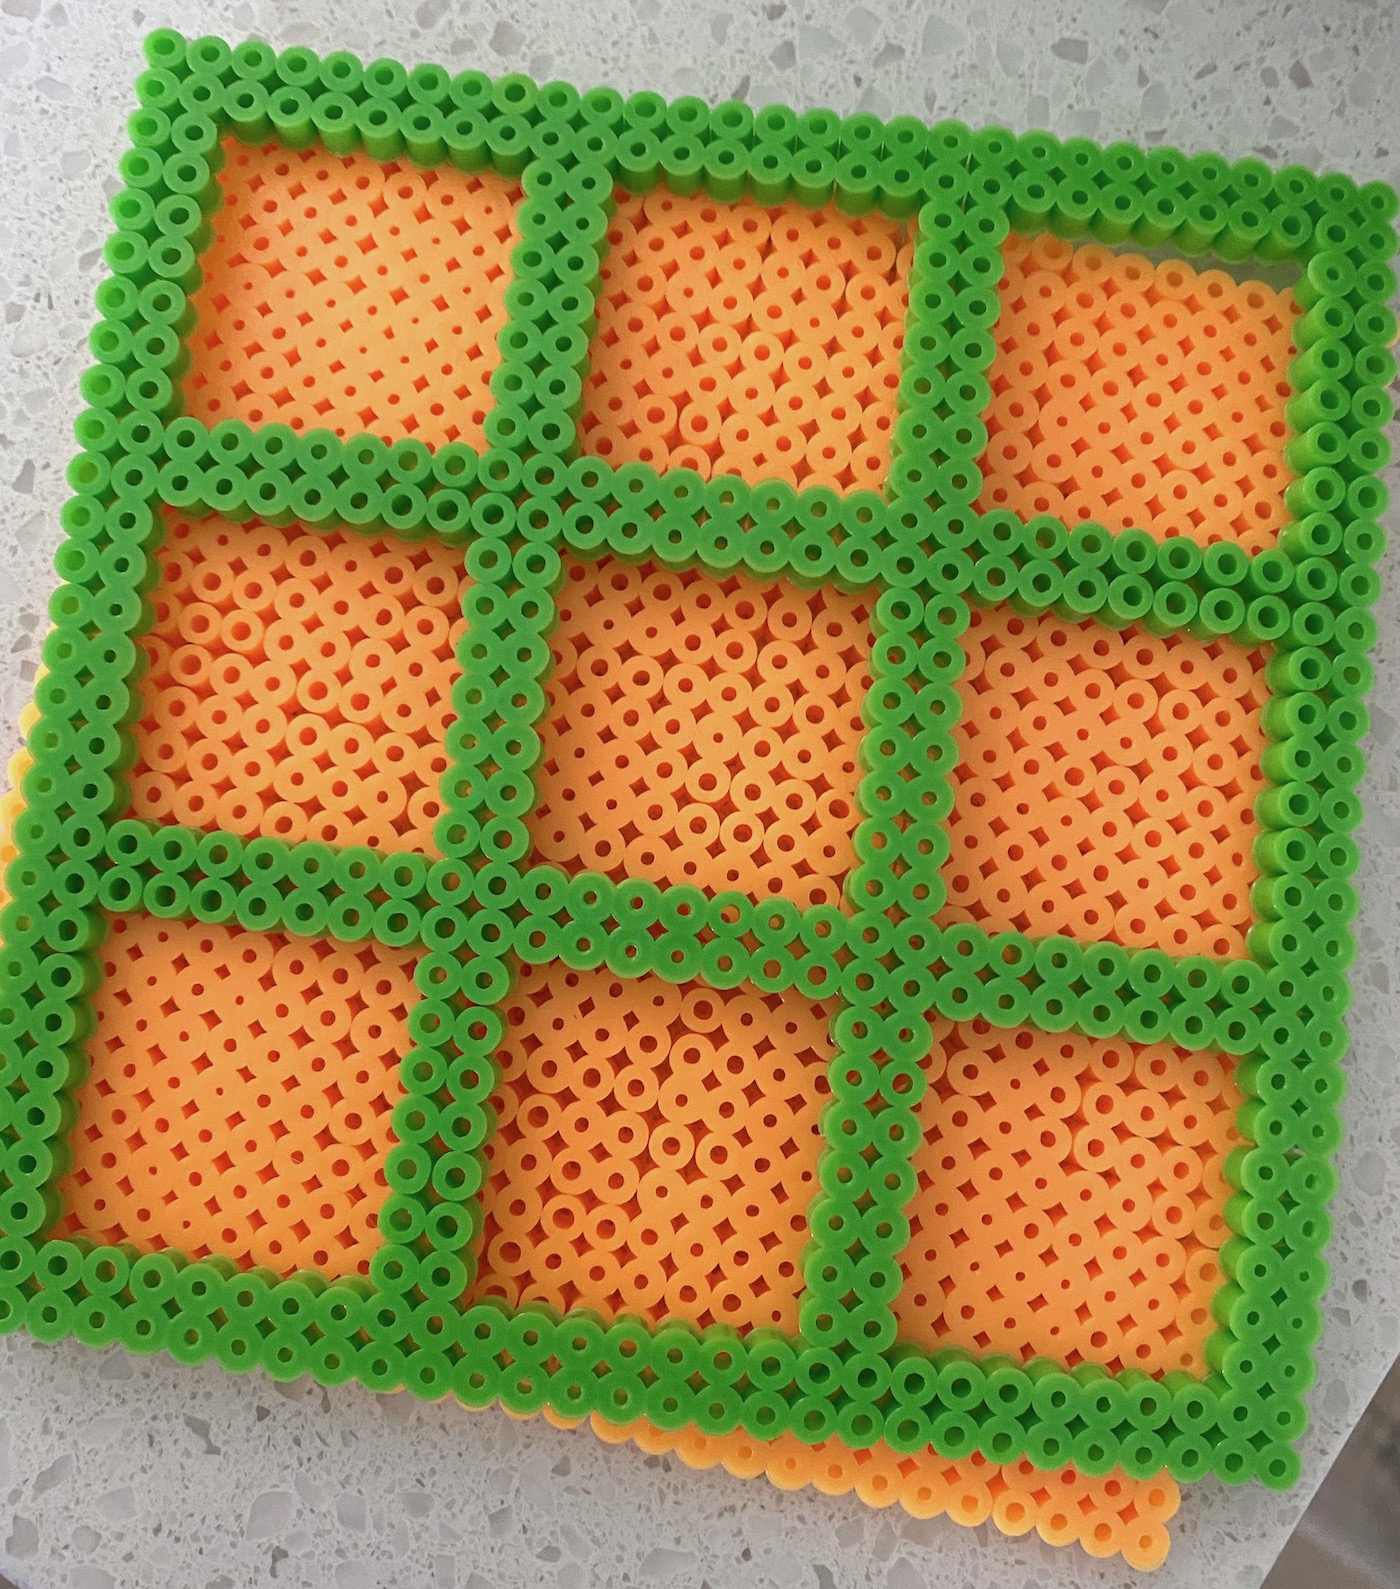
Tic Tac Toe Base
This fills an entire 29 x 29 square and uses 841 beads in the color of your choice.
Tic Tac Toe Grid
This pattern uses 400 beads in the color of your choice.
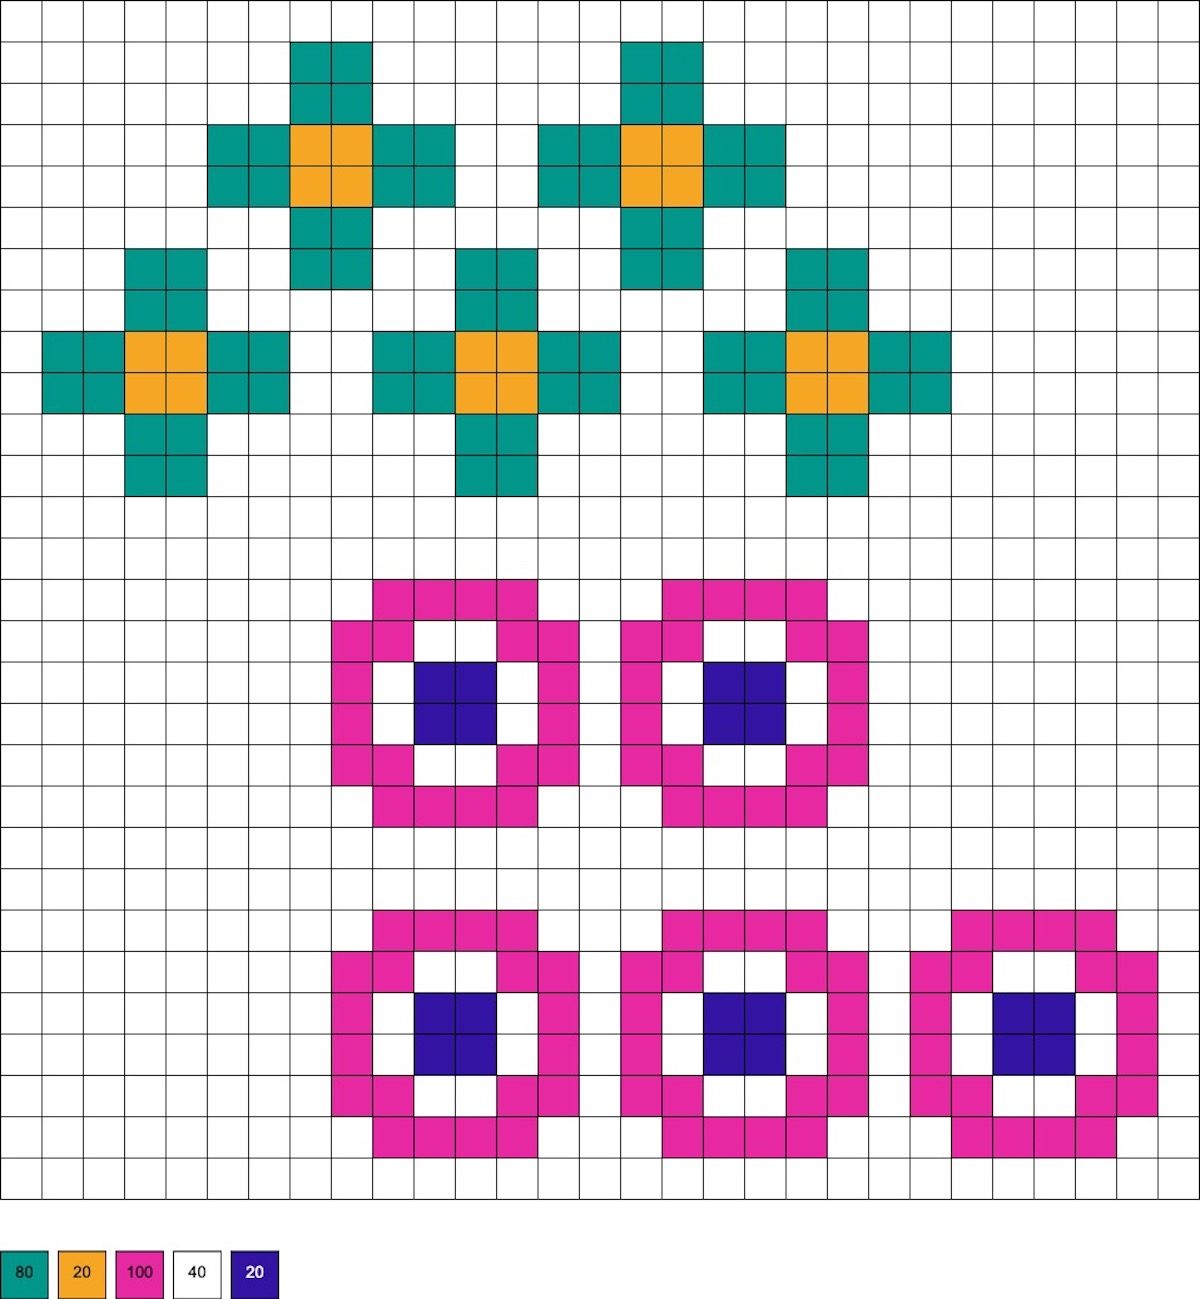
Tic Tac Toe Pieces
You’ll need five of each piece. I chose flowers for my game, but you can make any shape you like! If you choose my shapes, you’ll need 260 beads (you can use white or clear beads with the pink flowers).
Note: There’s only one additional step you’re going to need to do to make the perler bead tic tac toe game, and that’s glue the grid down on top of the base.
I used a dab of clear drying craft adhesive (Aleene’s works great) to attach the finished designs to the sticks. They dried completely in about an hour. You could probably hot glue them as well.
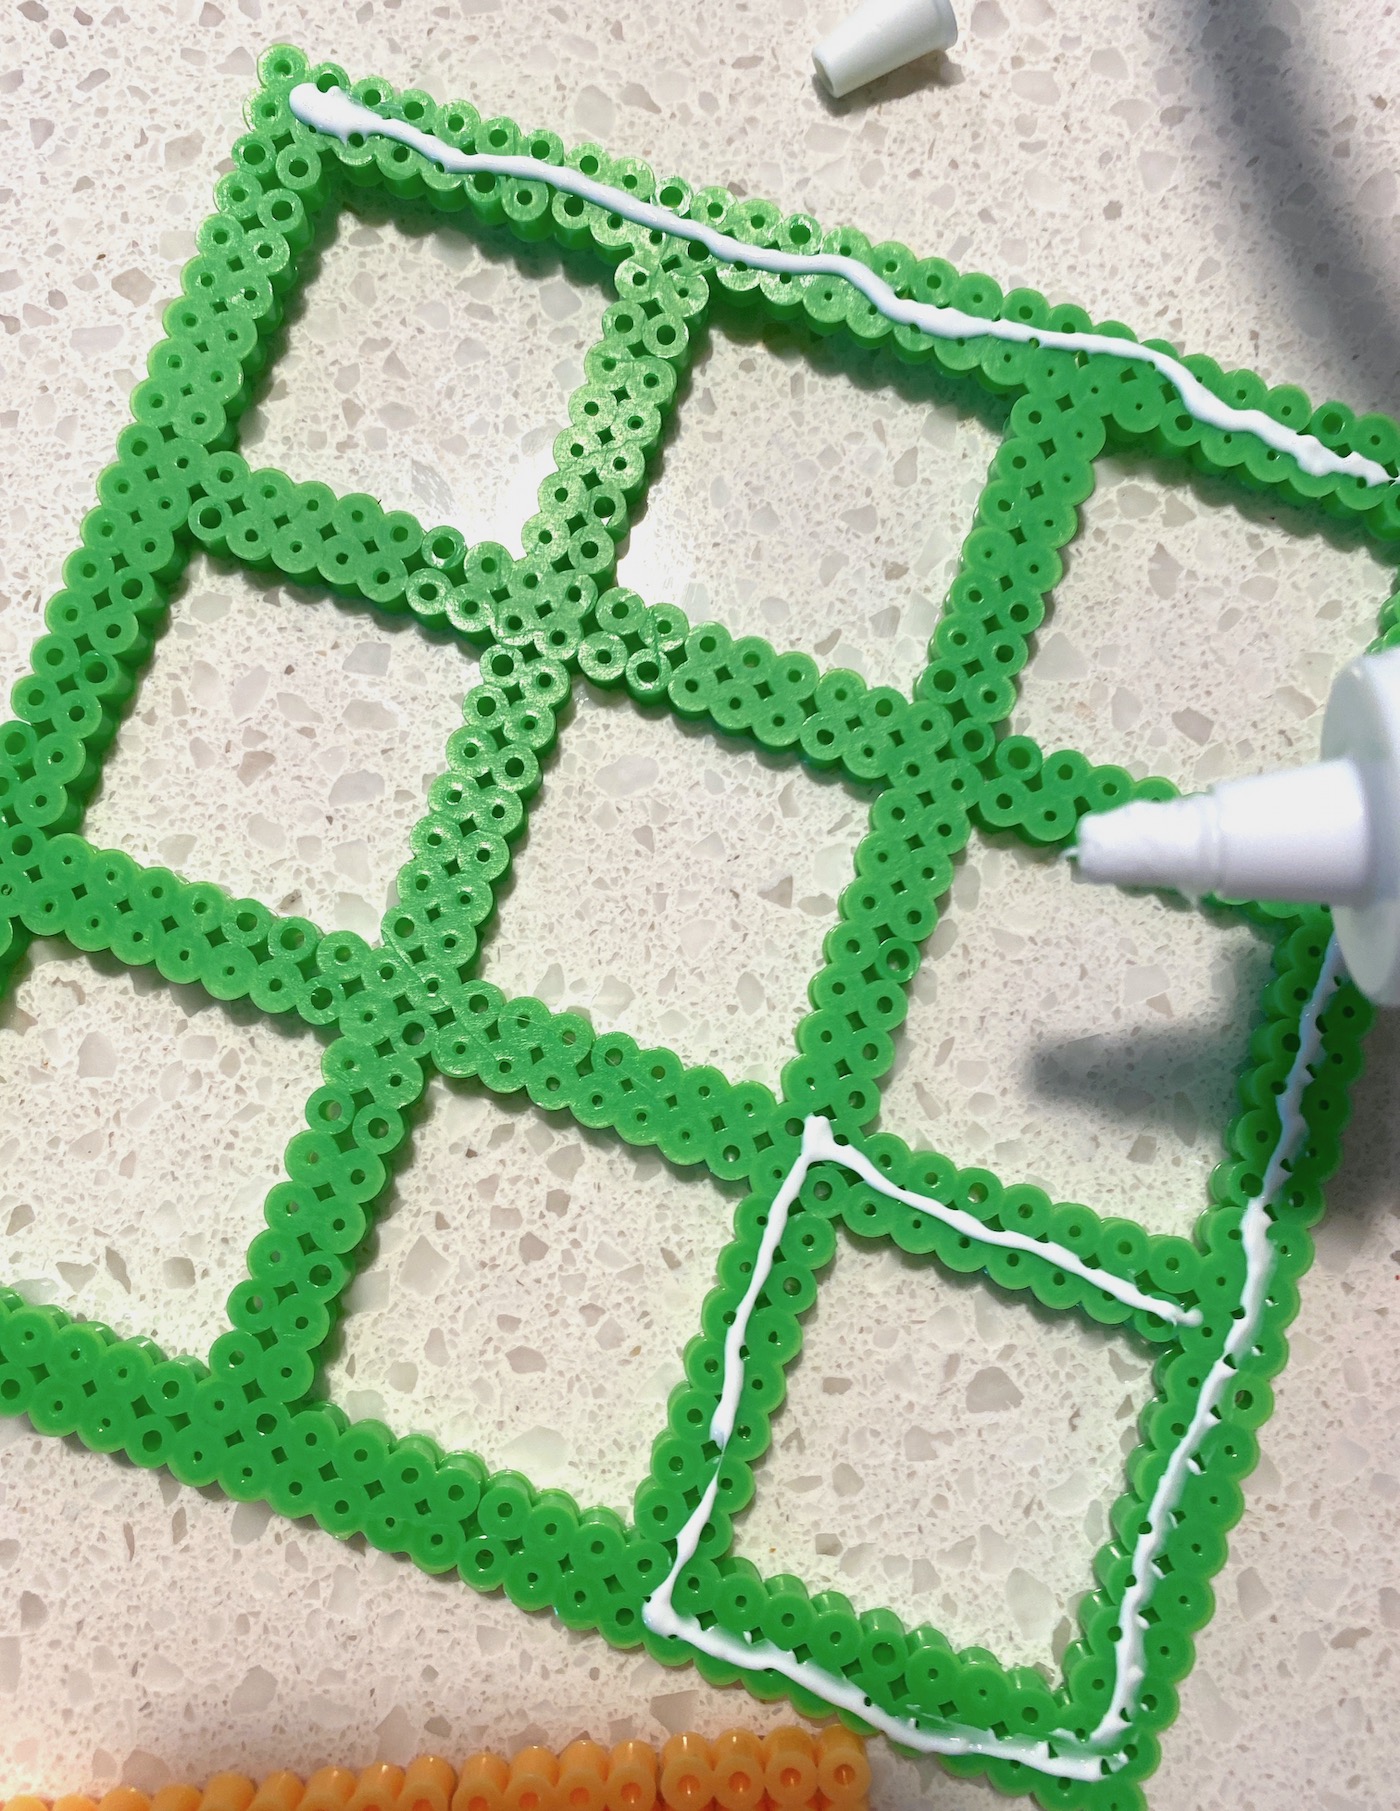
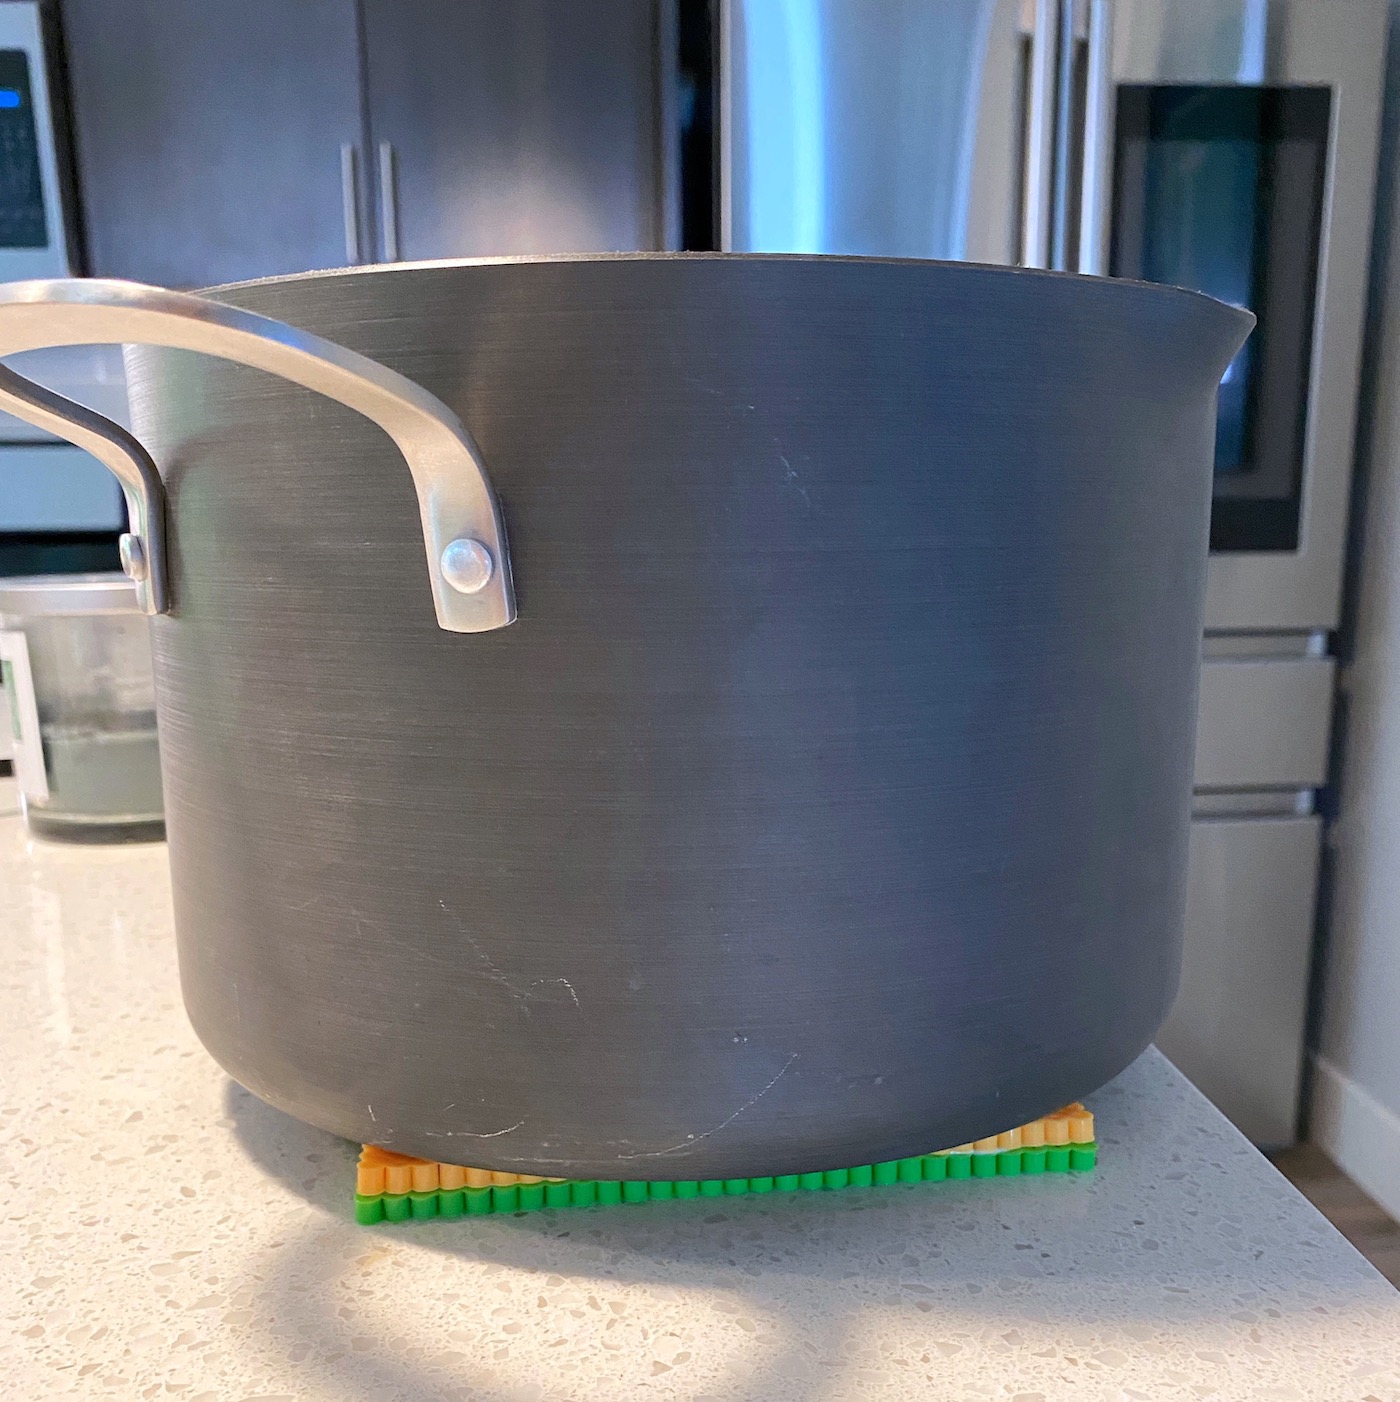
I let the glue dry a little bit, then I sat a big pot on top so that the game would dry flat. That’s really all you need to know to get this made!
If you try this perler bead tic tac toe, let me know in the comments! I’d also love for you to check out these additional ideas:
Box • Bookmarks • Bracelets • Crown • Door Hanger • Drink Covers • Key Tray • Organizer