DIY Photo Holders Made with Clay
Learn to make unique DIY photo holders in a fun, easy tutorial! Create eye-catching, marbled clay shapes to display your favorite memories.
Skills Required: None. If you’re just getting started with clay, this project is perfect for beginners.
Are you ready to add a splash of creativity and a dash of marbled magic to your living space? Let’s talk about making something truly unique – your very own DIY photo holders! Out of clay.
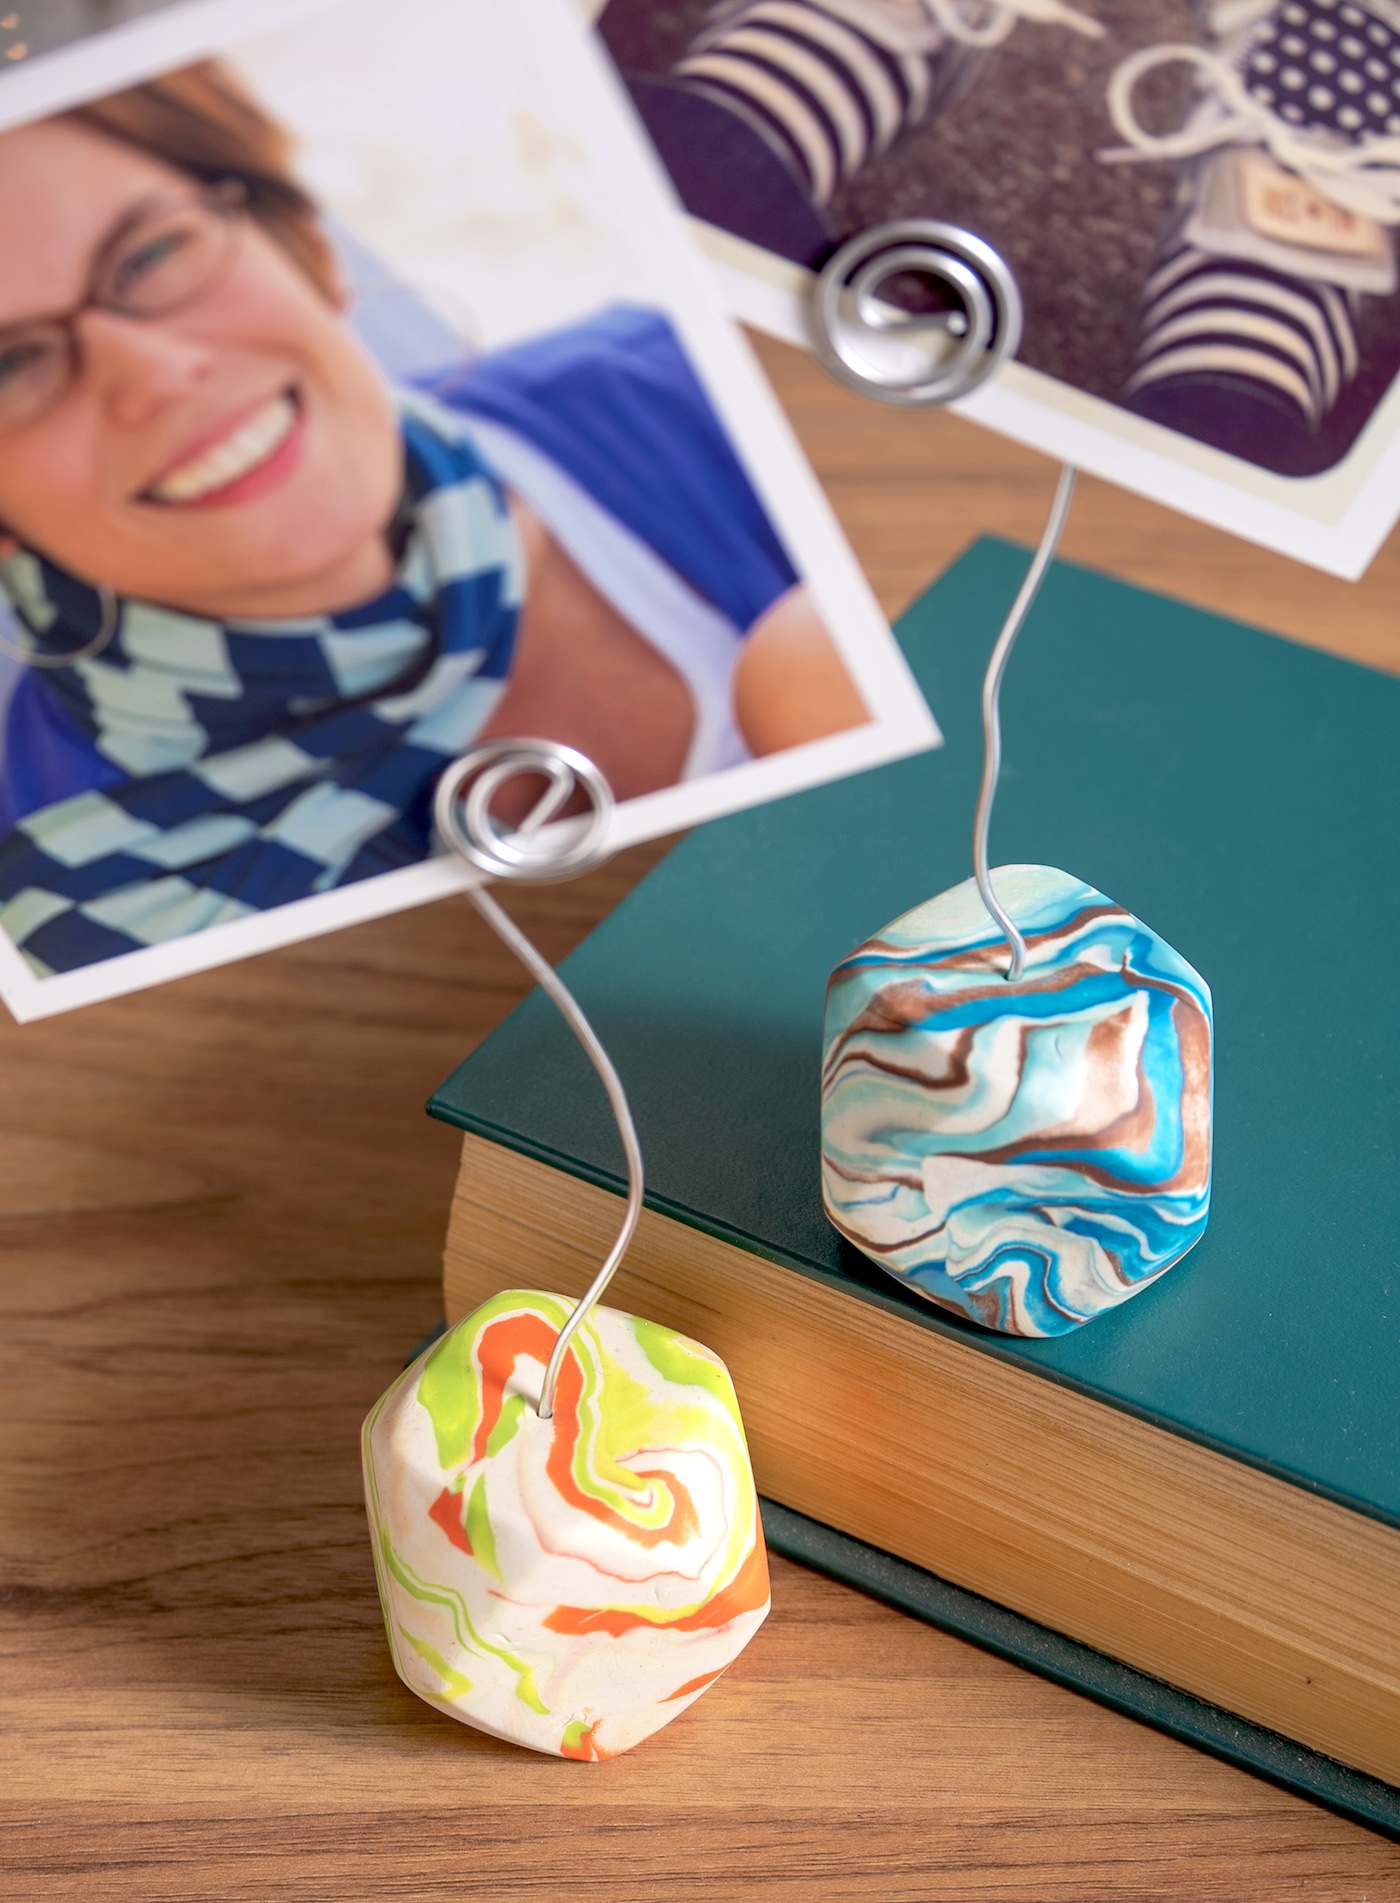
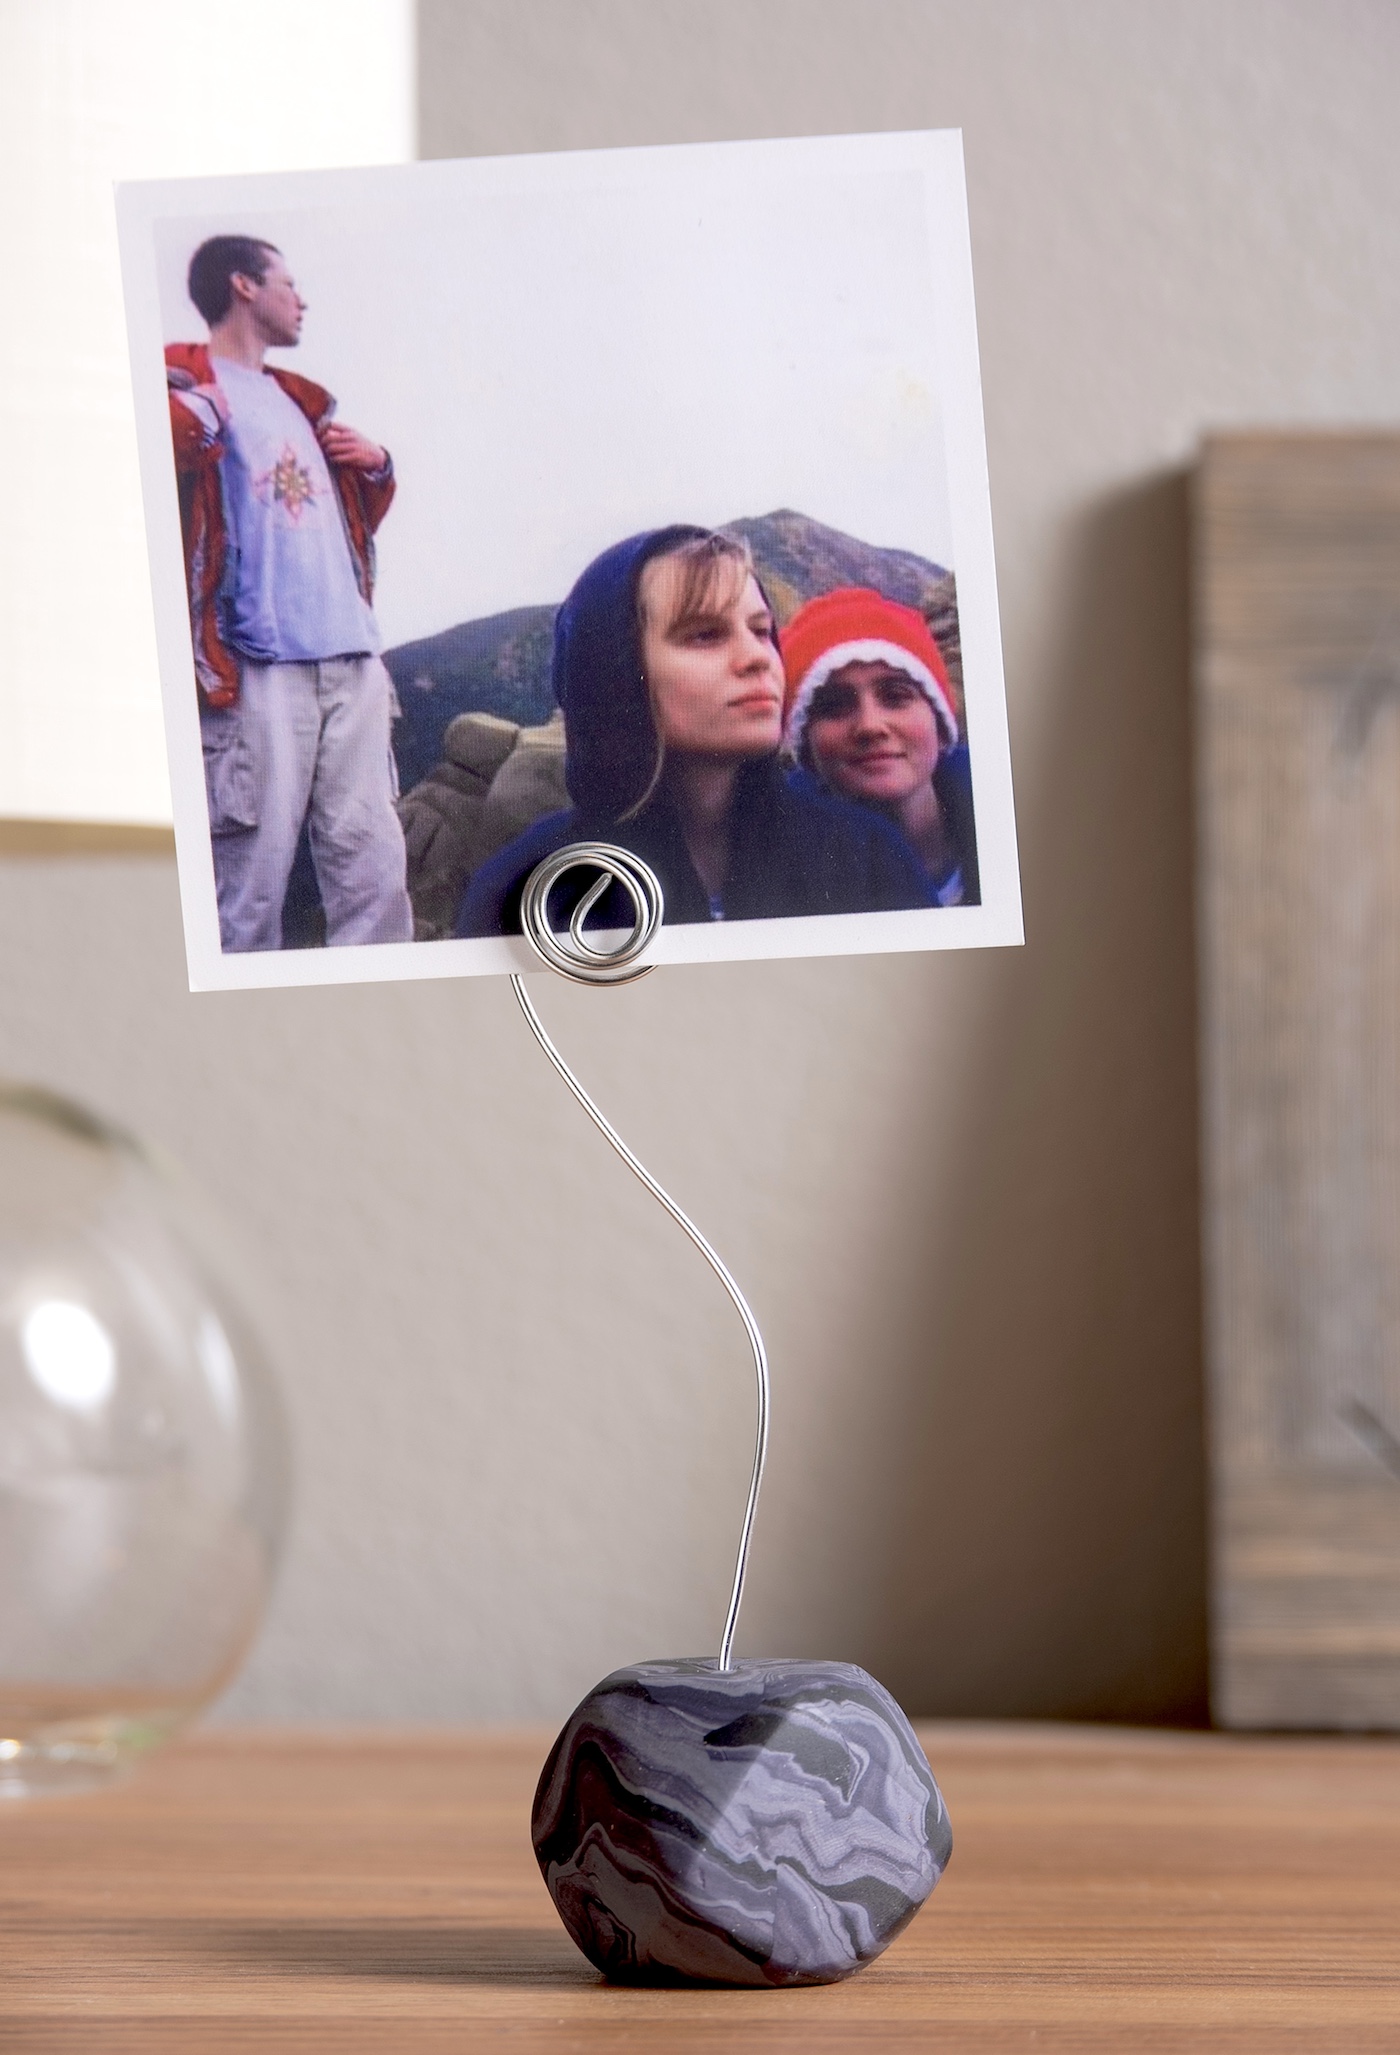
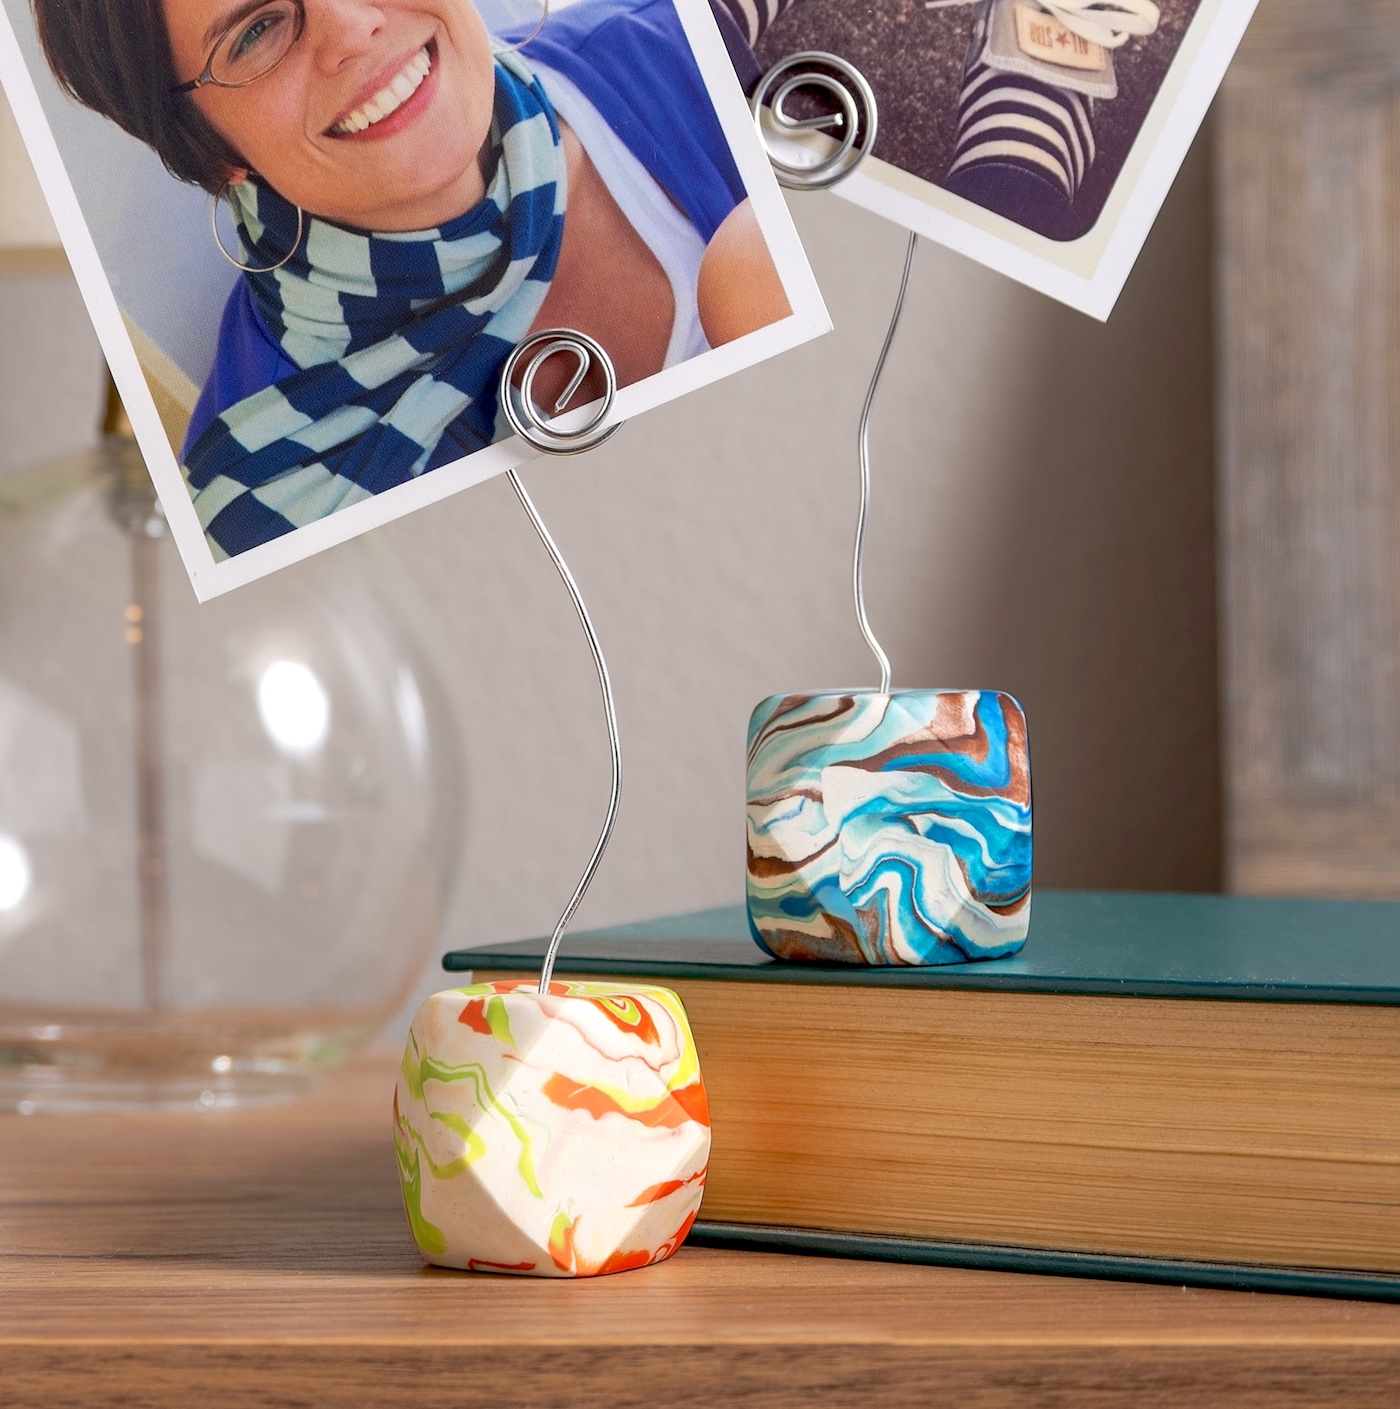
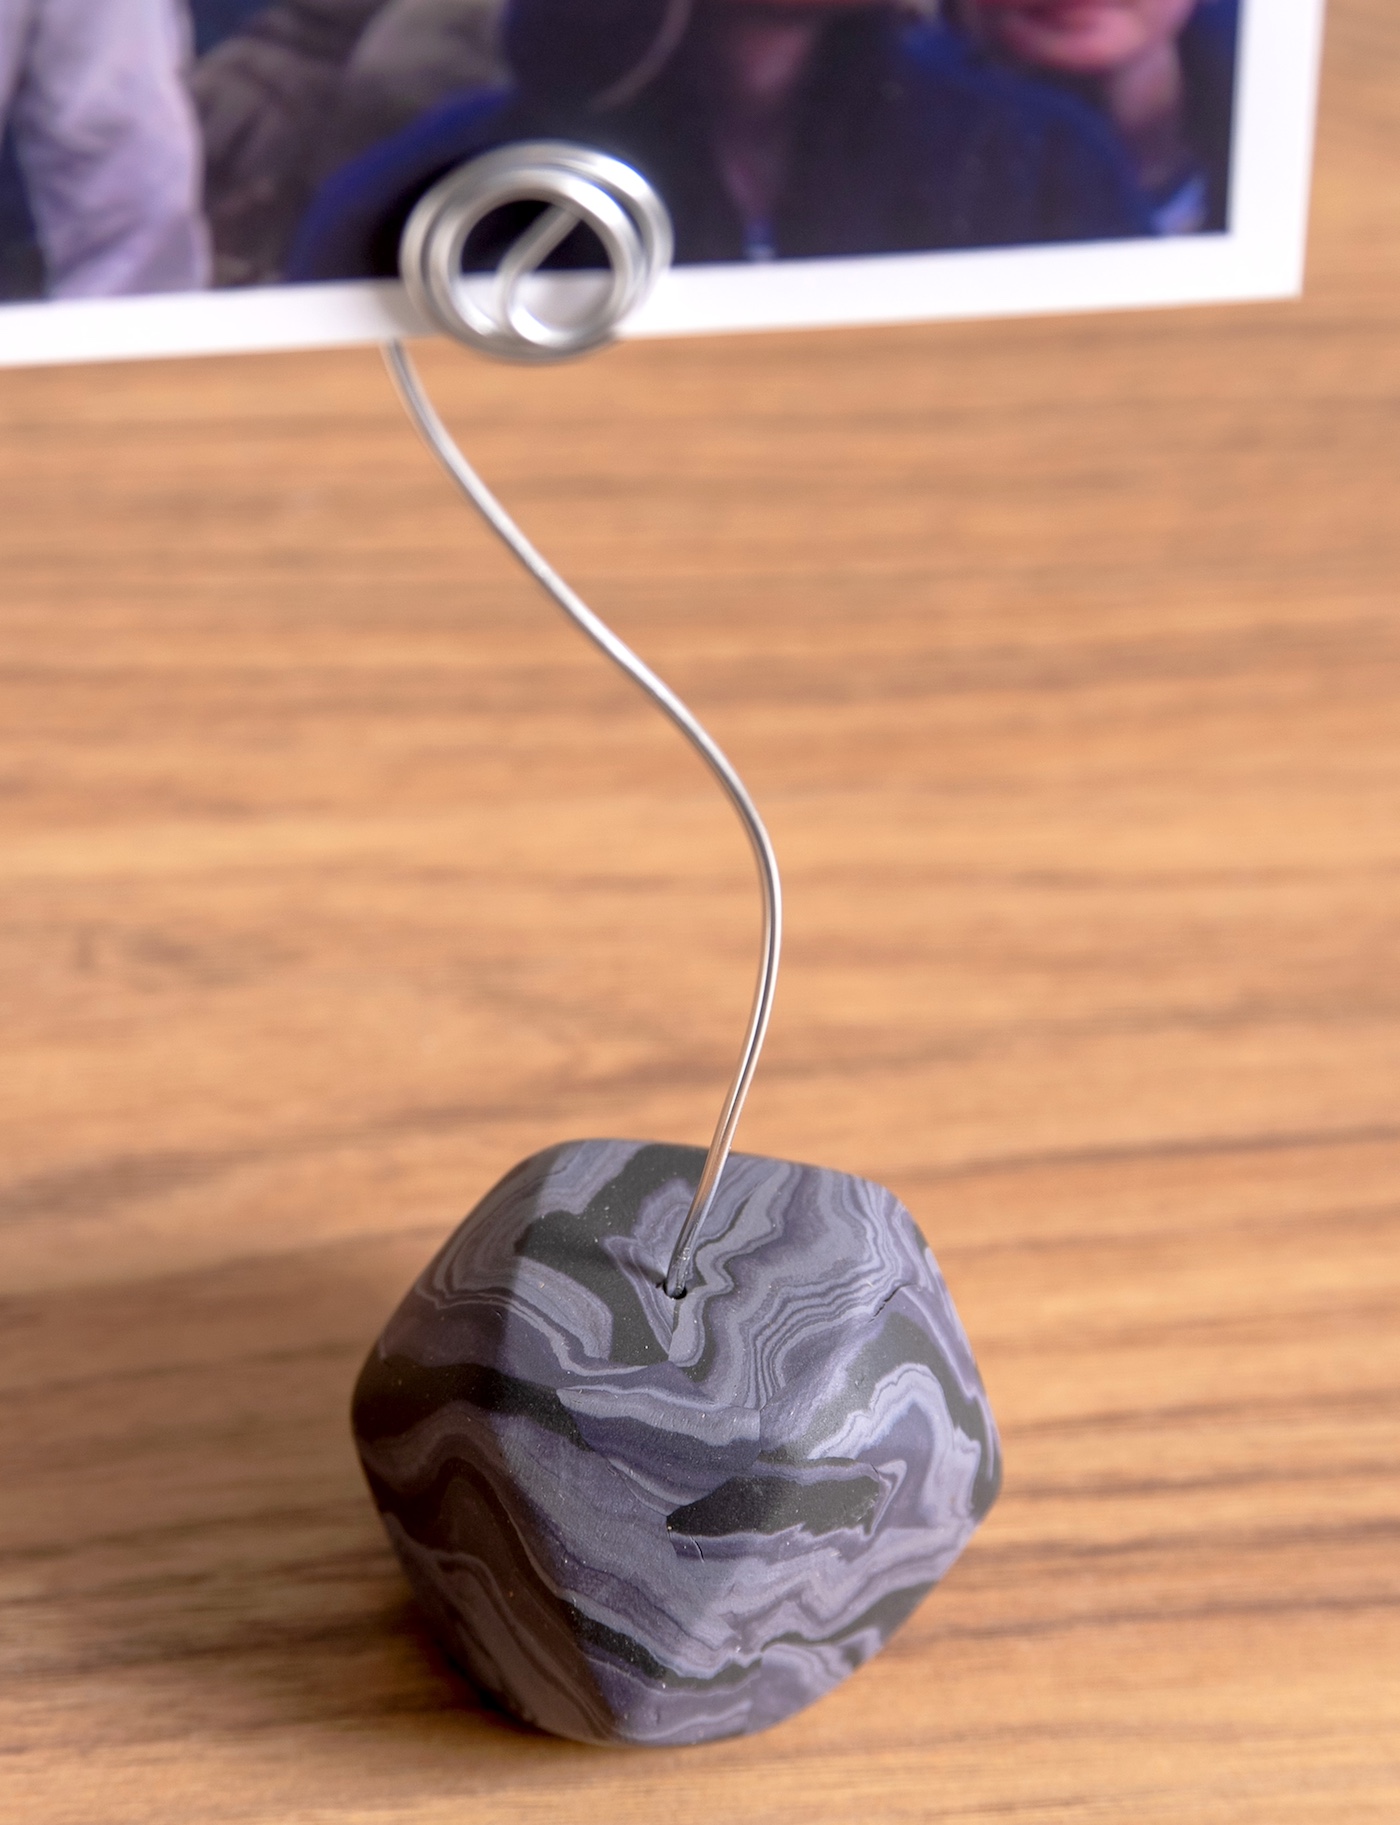
These picture holders are charming little showcases in the shape of a tetradecagon. Yes, you heard that right – a 14-sided geometric figure. And don’t worry, even if you’re not familiar with fancy geometric terms, this project is super easy and incredibly fun!
You can display your favorite memories in these stunning pieces, each marbled with colors of your choice, creating a personal touch that feels both chic and heartfelt. Which also makes them great homemade gifts.
And as far as the making part, don’t be intimidated by the materials list or the steps; it’s much easier than it sounds. You’ll need some basic supplies like polymer clay in a few colors (go wild with your choices here), some wire or a sturdy paperclip, and a few tools you can easily find around the house.
If you’ve never worked with polymer clay before, you’re in for a treat. It’s like adult Play-Doh, but even better because you can bake it into permanency.
But the craftiness doesn’t stop there. Once your piece has cooled, you’ll transform a simple piece of wire into the holder for your pictures. It’s just a few twists and turns, and you have a bespoke photo holder that’s all set to cradle your cherished memories.
So why not take a little time this weekend to try something new? Roll up your sleeves and let’s mold some memories into something tangible. Whether you’re crafting a gift, personalizing your workspace, or just looking for a fun project to share with friends or family, these DIY photo holders are perfect.
Not only will you end up with an adorable decor item, but you’ll also have the satisfaction of saying, “I made this!”
Ready to get started? Keep scrolling down, and let’s turn those ordinary supplies into extraordinary memories with our step-by-step tutorial. Trust me, you’re going to love how these turn out!
Gather These Supplies
- Polymer clay (3 to 4 colors)
- Heavy gauge wire or a paperclip
- Craft glue (something that dries clear)
- Wire cutters
- Oven
- Baking sheet
- Rolling pin
- Knife
- Pliers (optional)
Tips and Thoughts for This Project
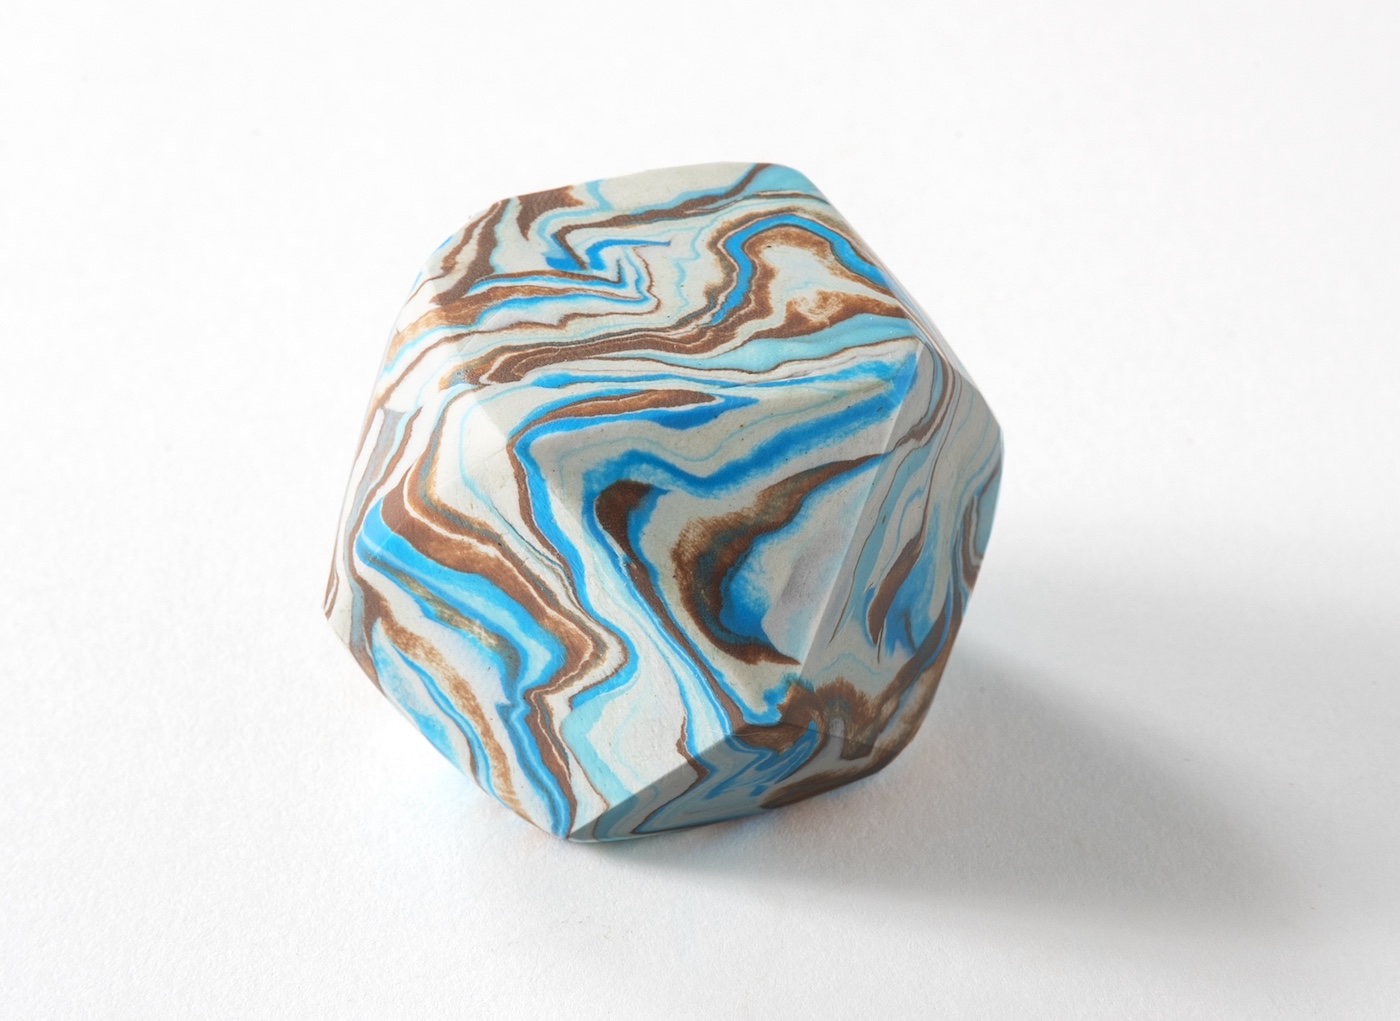
Note that the finished size for the clay cubes – for my project – are about 2 5/8″ square. They aren’t “perfect” cubes . . . but with the marbling, you don’t need to be exact.
Some people bake the clay with the wire, but I don’t. I don’t want to worry about coatings on the wire or any fire risks, so I poke a hole and only bake the clay. Then I glue the wire in afterwards.
As a twist on what I’ve done, I’m thinking you could add a few pieces of wire to one cube to display multiple photos . . . show me your variations!

Get the printable how to card below:

DIY Photo Holders
Equipment
- Wire cutters
- Oven
- Rolling Pin
- Knife
- Pliers (optional)
Materials
- Polymer clay 3 to 4 colors
- Heavy gauge wire or a paperclip
- Craft glue
Instructions
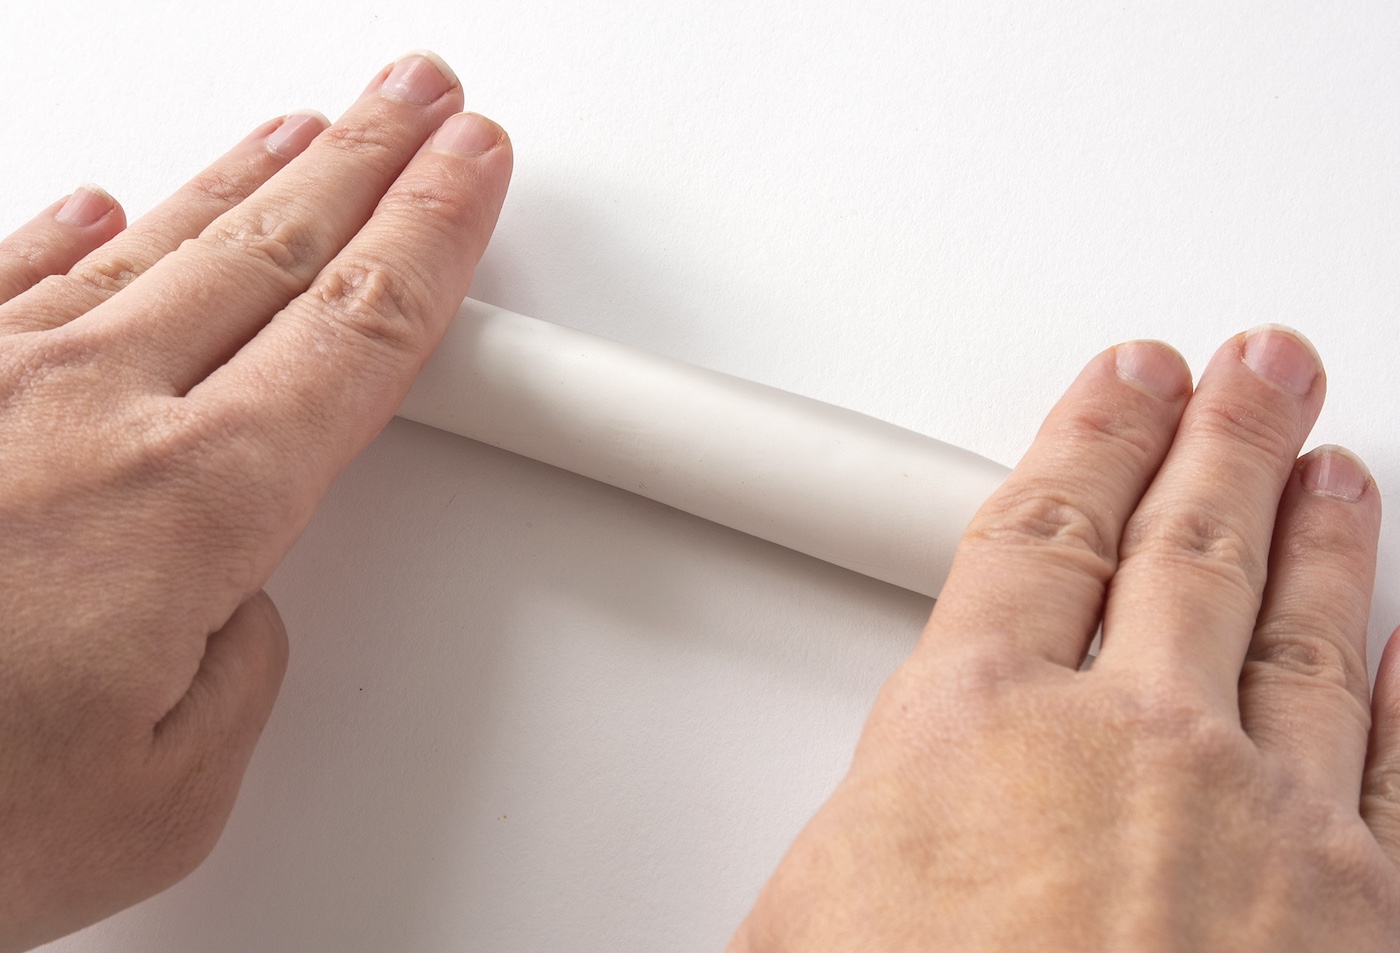
- Choose one color to be your main clay color – usually it is the lightest or white, but it can be any color you like. Roll the entire piece into a tube on your work surface.
- Choose 2 to 3 other clay colors and break off smaller pieces. Roll into small tubes and then wrap around the larger tube from step one.
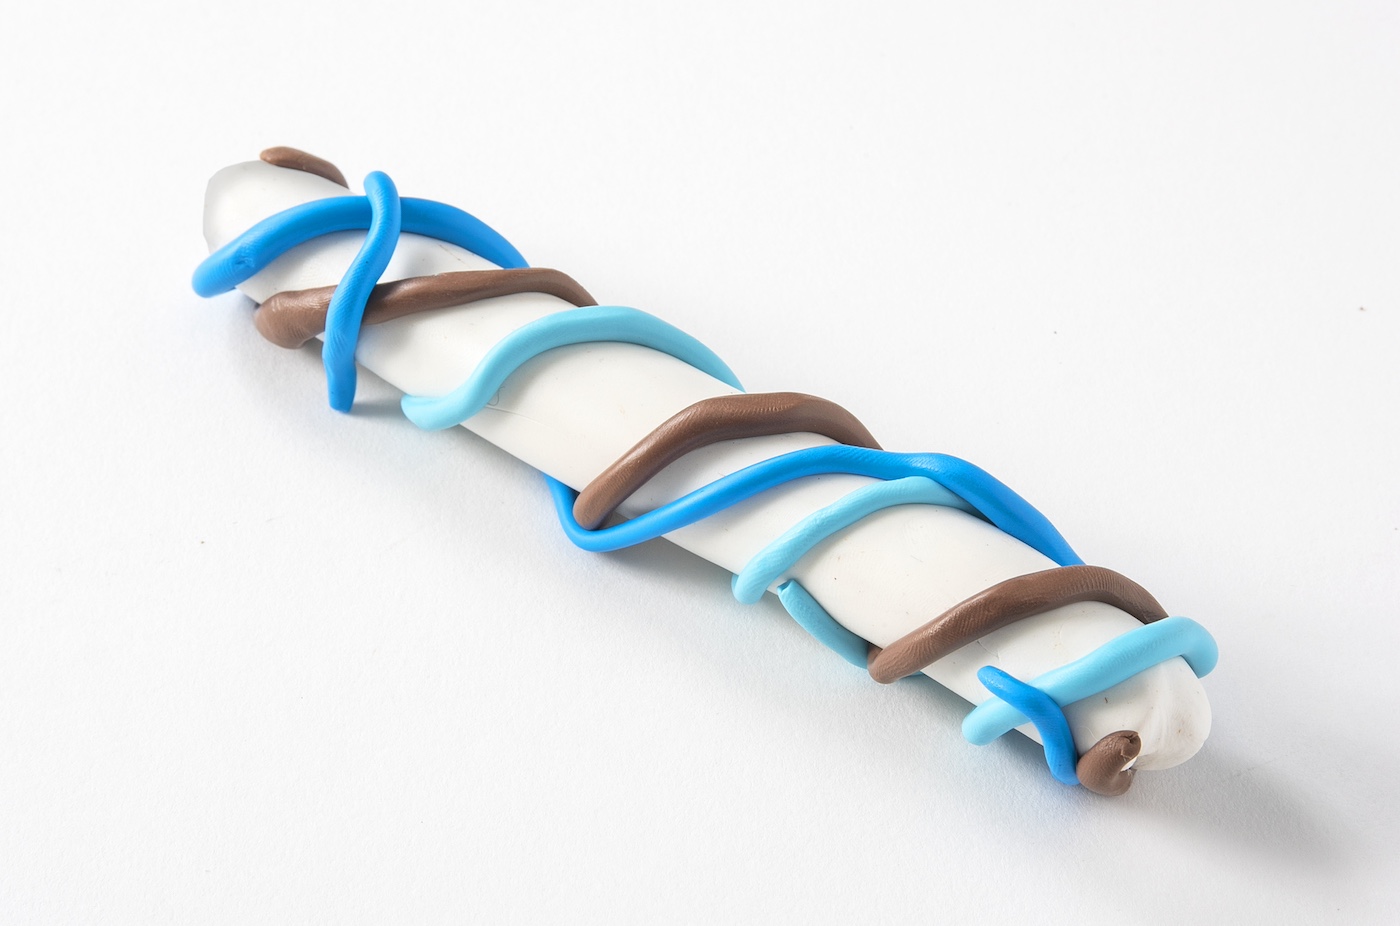
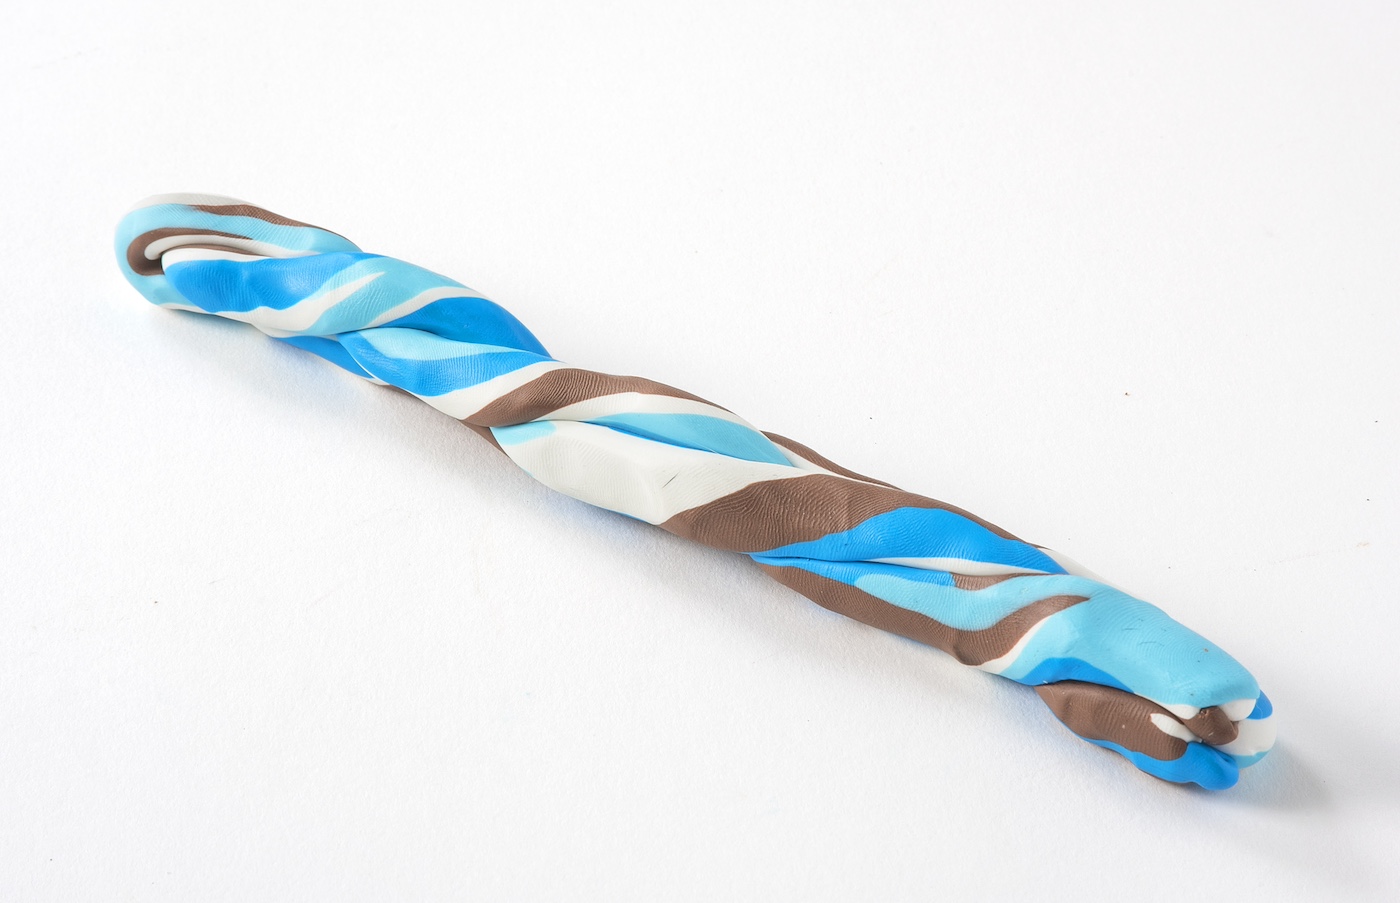
- [mv_schema_meta name=""]Roll on the work surface until all of the colors are combined and you have a flat tube.
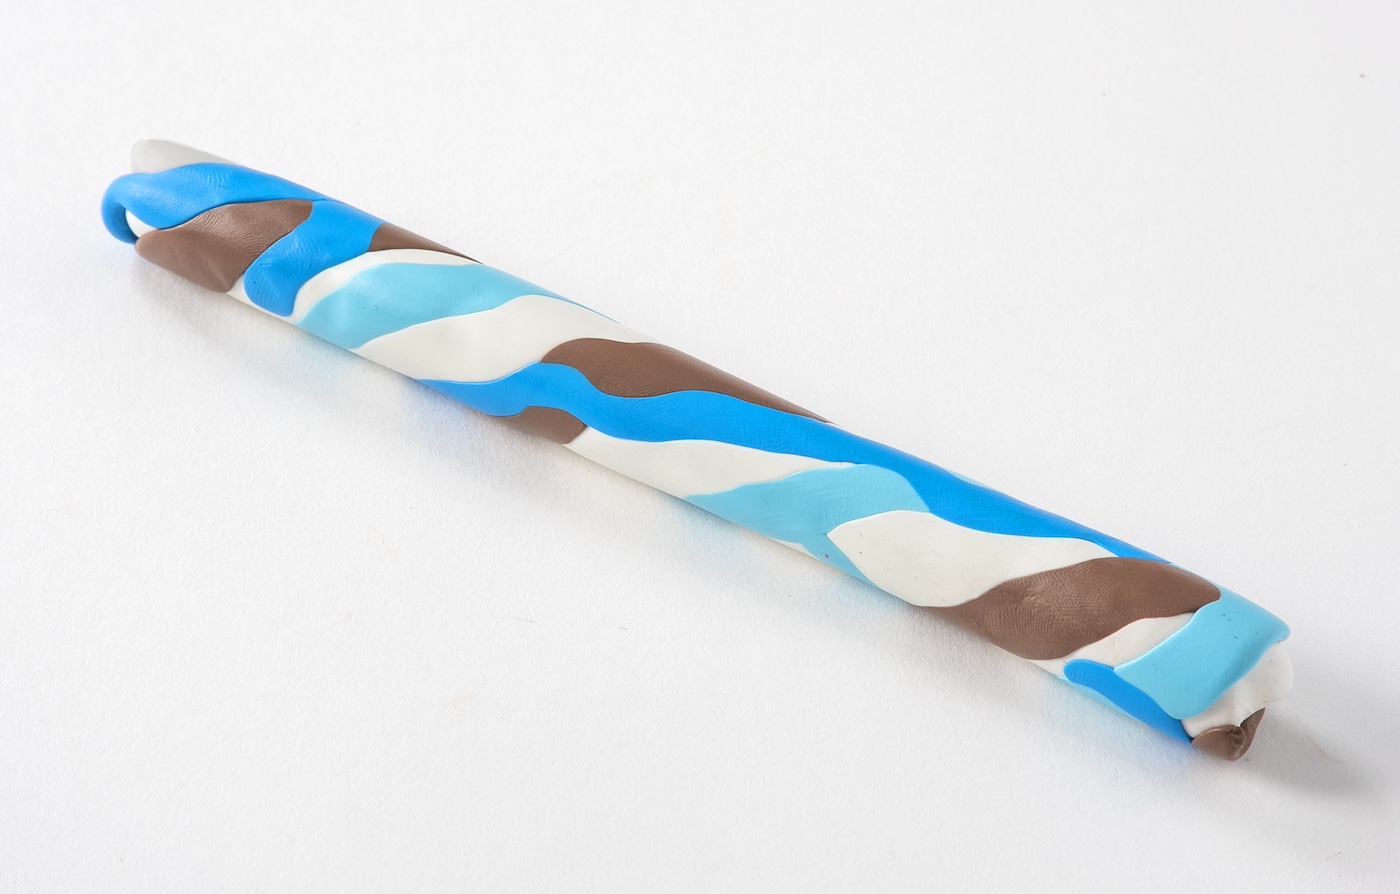
- Twist the tube and bend that twisted tube into a “U” shape.
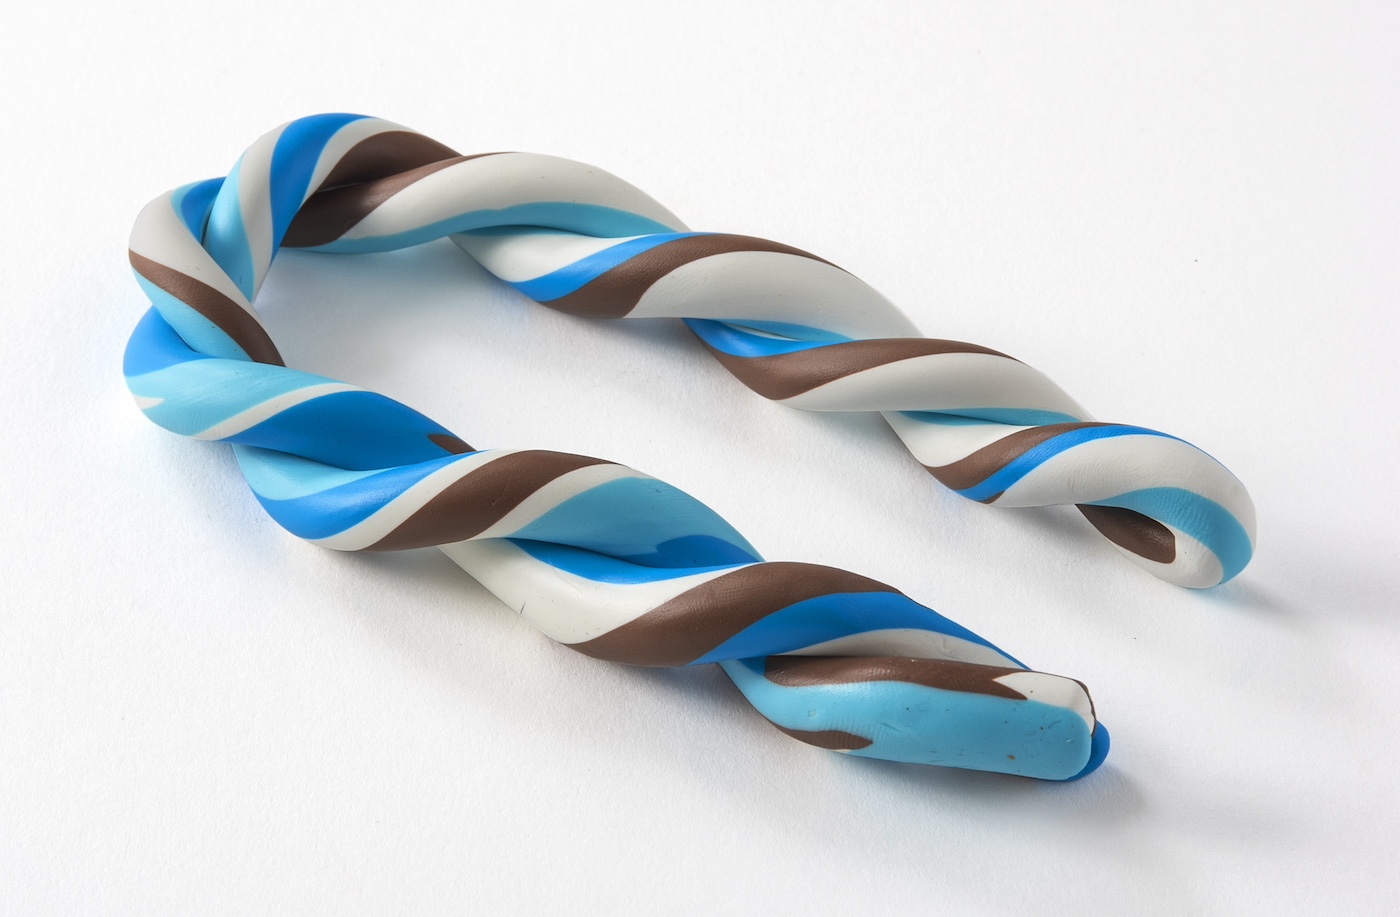
- Roll the U shape together into one tube again, and watch as the colors combine. Repeat step 4 and 5 a few more times.
- Form the piece of clay into a cube shape, or the shape of your choice.
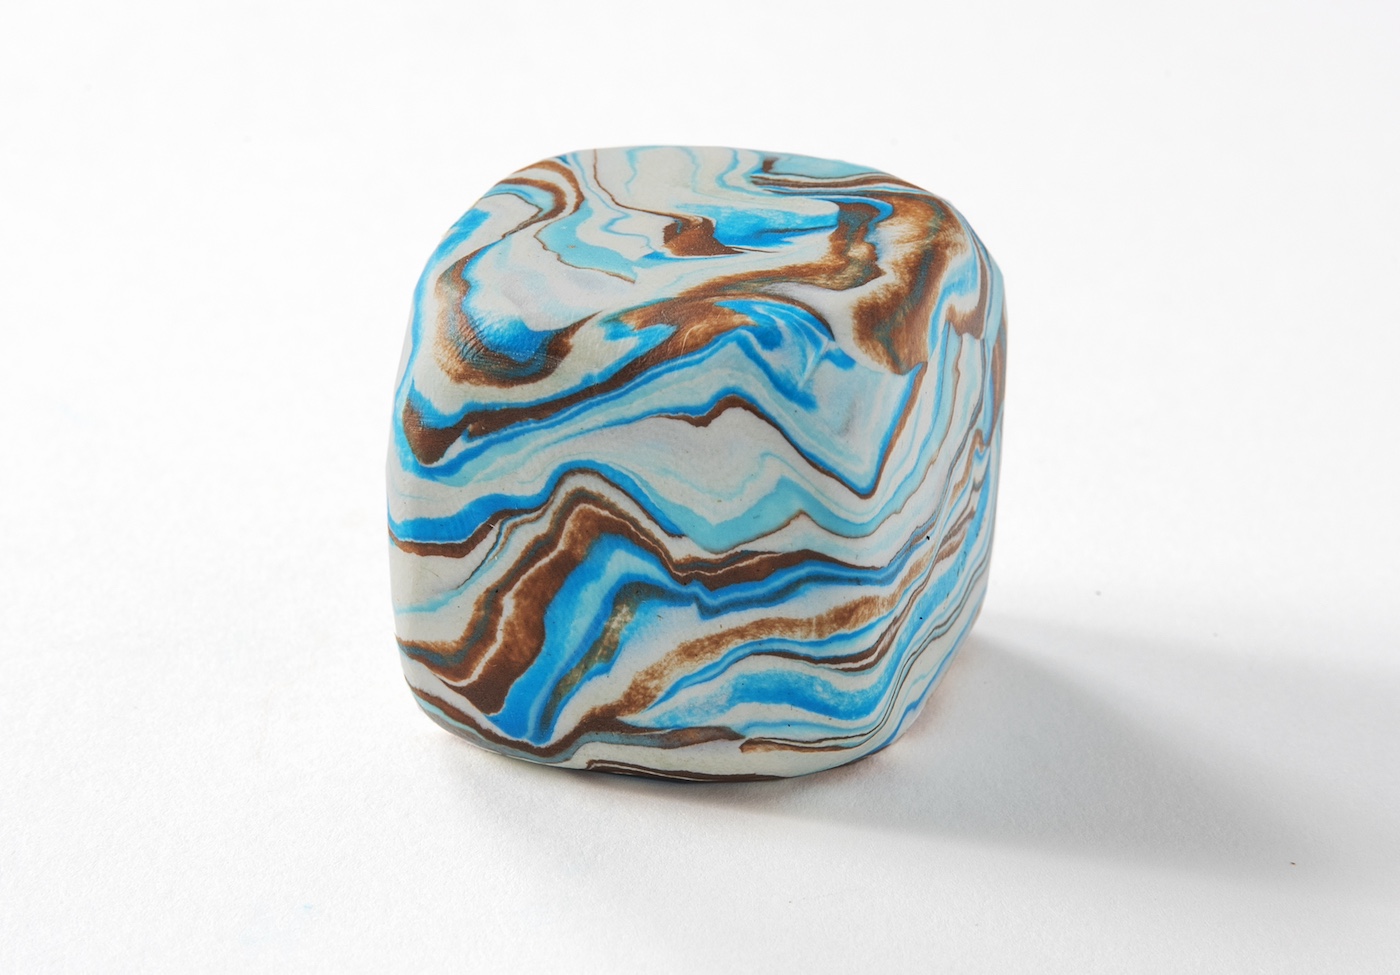
- Use the knife to trim the sides into a more clean cube shape. You can cut off the four corners to make your shape more interesting. Use the wire or a paperclip to place a hole in the top before baking.
- Add to a non-stick baking sheet and bake the clay according to package instructions (usually 250 degrees for several hours). Once baked, removed from the oven and let cool completely.
- While the block is cooling, use a piece of jewelry wire to form a photo holder. You’ll do this by cutting a length, then wrapping the end of a wire into a loop with pliers. You can also use a large paper clip, bending out one of the ends.

- Add a dab of glue onto the end of your wire or paper clip, and then insert into the hole on top of the photo holder. Let dry completely before using.
If you enjoyed these clay picture holders, let me know in the comments! I’d also love for you to check out the following posts: