Skip to Content

Hello Kitty Door Hanger (Perler Beads!)

Learn how to make a Hello Kitty door hanger using simple supplies! Kids will love this easy perler bead project they can hang on their bedroom door.

Skills Required: None. Even if you’ve never crafted before, this door hook is easy to make. You’ll be melting beads with an iron. The pattern is at the bottom of the post.

Hello Kitty door hanger

I don’t know if you know this, but Hello Kitty was initially known as “the white kitten with no name.” Because the brand Sanrio had a motto of social communication, they decided to name her Hello Kitty!

And you have to admit, her face is very friendly.

I learned an additional fact about her recently which is that she is British! I never thought about her being from a specific country, but apparently she is.

We love our readers from Great Britain! And obviously, we love Hello Kitty.

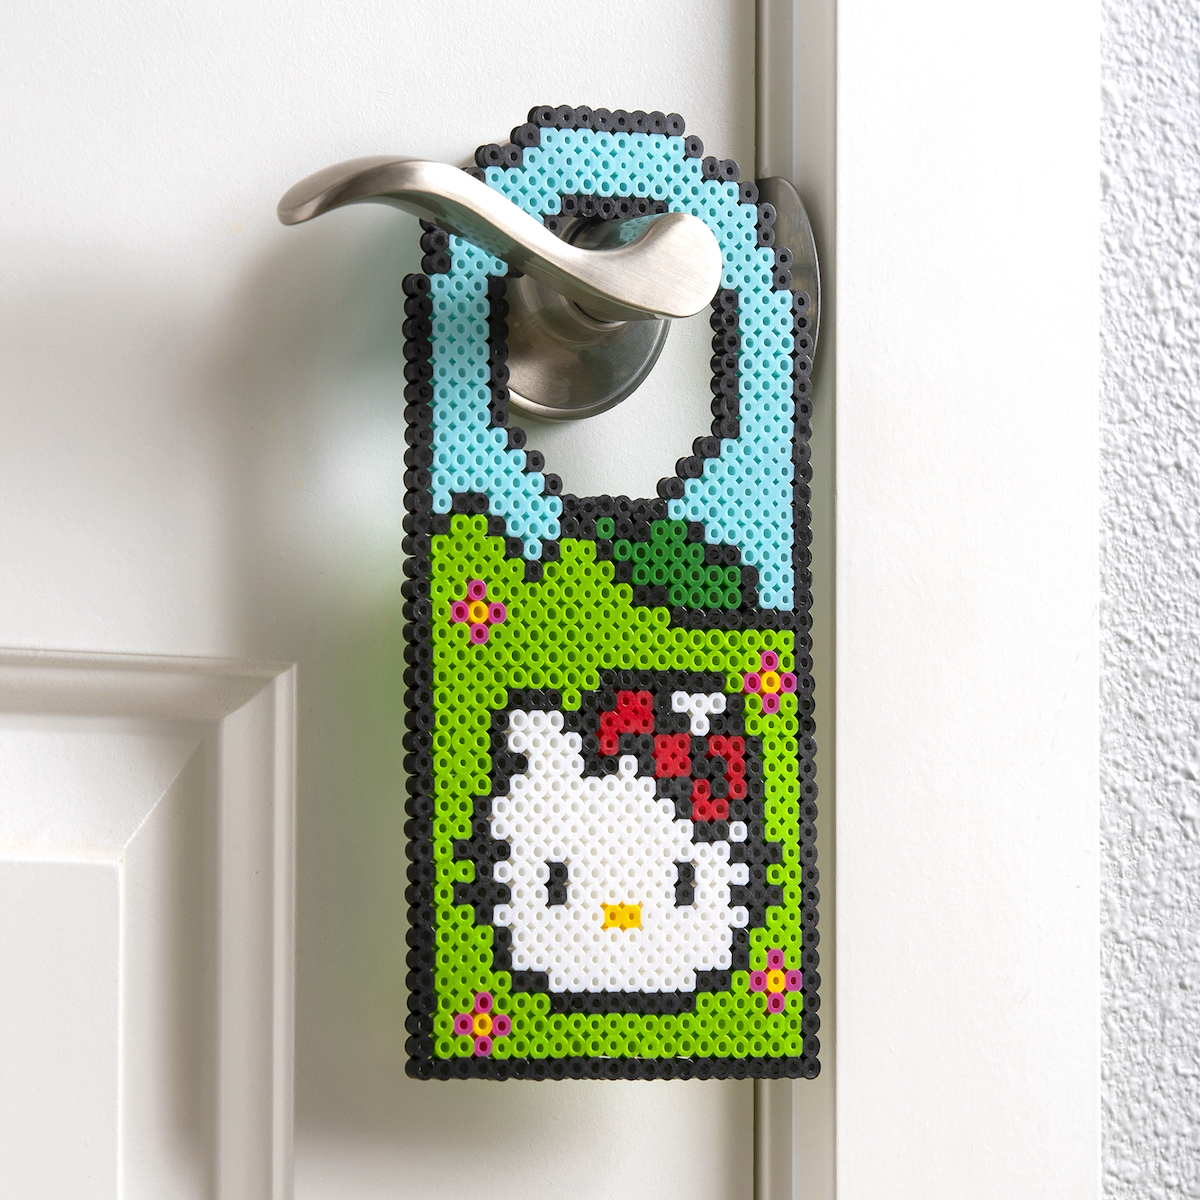
After doing some Hello Kitty perler beads, a 3D kitty, and a Hello Kitty organizer recently, my niece and I decided to take our love to the next level by making a Hello Kitty door hanger!

And it’s made out of perler beads! It’s super durable and easy to make, which is great. You can also customize the colors with any that you like.

This is a super fun summer craft or boredom buster that kids are going to love. Not that you can’t make it any time of year!

Tray of a variety of colors of hama beads

Just so you know, perler beads are recommended for ages six and up. So this is fun to make together with the littles. All children seem to love perler beads (also known as hama beads, fuse beads, or melty beads). But don’t be shy – adults love them too!

Tips for Using Perler Beads

Before we get into the pattern, I want to review a few basics of using fuse beads to make sure you get the best results. If you don’t want the tips, scroll down to the bottom to get the pattern.

Remember that the overall goal is to melt the beads together on both sides while still leaving the holes open. Here’s how you get the best results (with a rainbow as an example).

Use Ironing or Parchment Paper

Place ironing paper or parchment paper over the beads on the pegboard. Be gentle so you don’t disturb the beads underneath.

Ironing paper laid over the beads

Heat your iron to the medium setting (no steam). In a circular motion, begin to iron the project. Don’t press down too hard with the iron. When ironed properly, the beads will still have an open center. Check and make sure your edges are melted. Let the design cool on the pegboard.

Ironing the beads with a mini iron

Note: BE CAREFUL about lifting up the paper while you’re ironing! If you want to check, carefully peel back paper around the edge of your design and see if all the beads are melted.

If you lift the paper up quickly and there are a lot of unmelted beads, they will easily fall off or go flying and you may be forced to start over. Sometimes the edges need more time so when you check, just check the edges and peel paper back slowly.

Peeling back the paper to check if the beads are melted

Another Note: some beads melt faster than others (clear melts faster than white, for example). So some holes might be larger than others. It’s okay! That’s part of the look of the project.

Iron the Other Side

Remove the bead design from the pegboard. Flip it over to the non-melted side and repeat the fusing process.

Ironing the other side of a fuse bead design

Remove the Paper

Let cool completely and remove the paper again (which is reusable). Some people pull the paper off after they iron the first side, but I just wait until the end and peel off both pieces. It’s up to you!

Peeling the ironing paper off the finished project

Hello Kitty Door Hook

Now if you’re ready to make the hanger, here’s the pattern! You’ll either need two 29 x 29 boards (and link them together) or an extra large pegboard to fit this.

This pattern uses 268 black, 163 robin’s egg, 195 bright green, 18 dark green, 16 pink, 6 yellow, 17 red, and 123 white beads.


hello kitty door hanger perler bead pattern

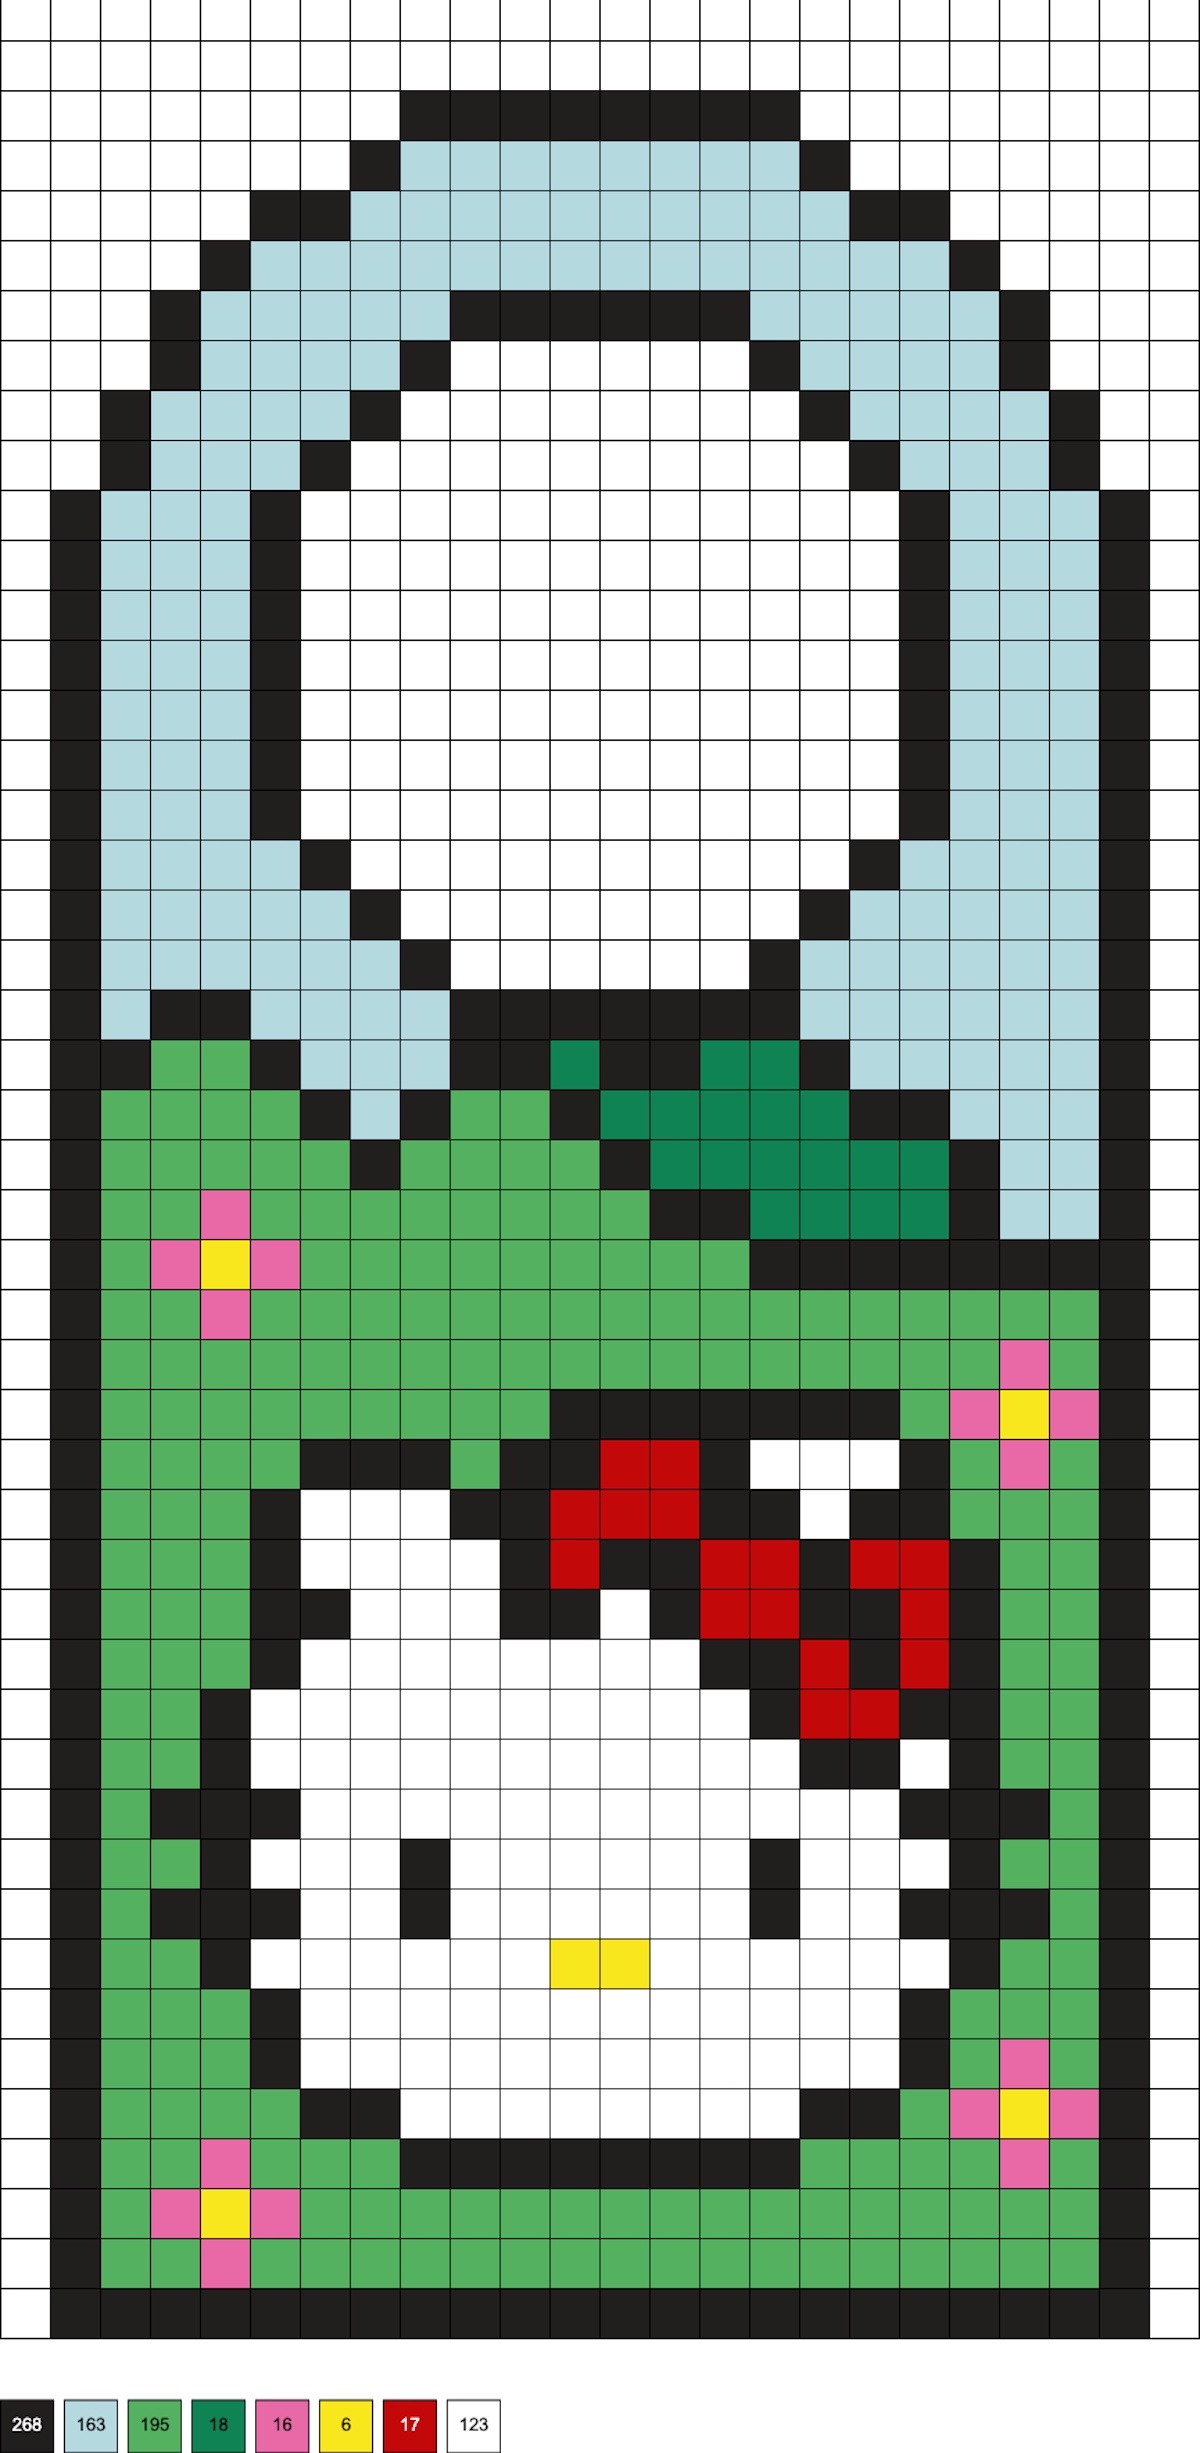
Since this is going to be hanging on a door knob or handle, make sure to fuse both sides of the beads really well. You don’t want the project to fall apart with opening or closing of the door.


If you try this Hello Kitty door hanger, let me know in the comments! I’d also love for you to check out these additional ideas:

BoxBookmarksBraceletsCrownDrink CoversKey TrayTic Tac Toe Game