
DIY Clothespin Butterflies That Brighten Any Day
Learn how to make adorable clothespin butterflies with simple craft supplies. This easy butterfly craft is perfect for kids, spring, and classroom fun.
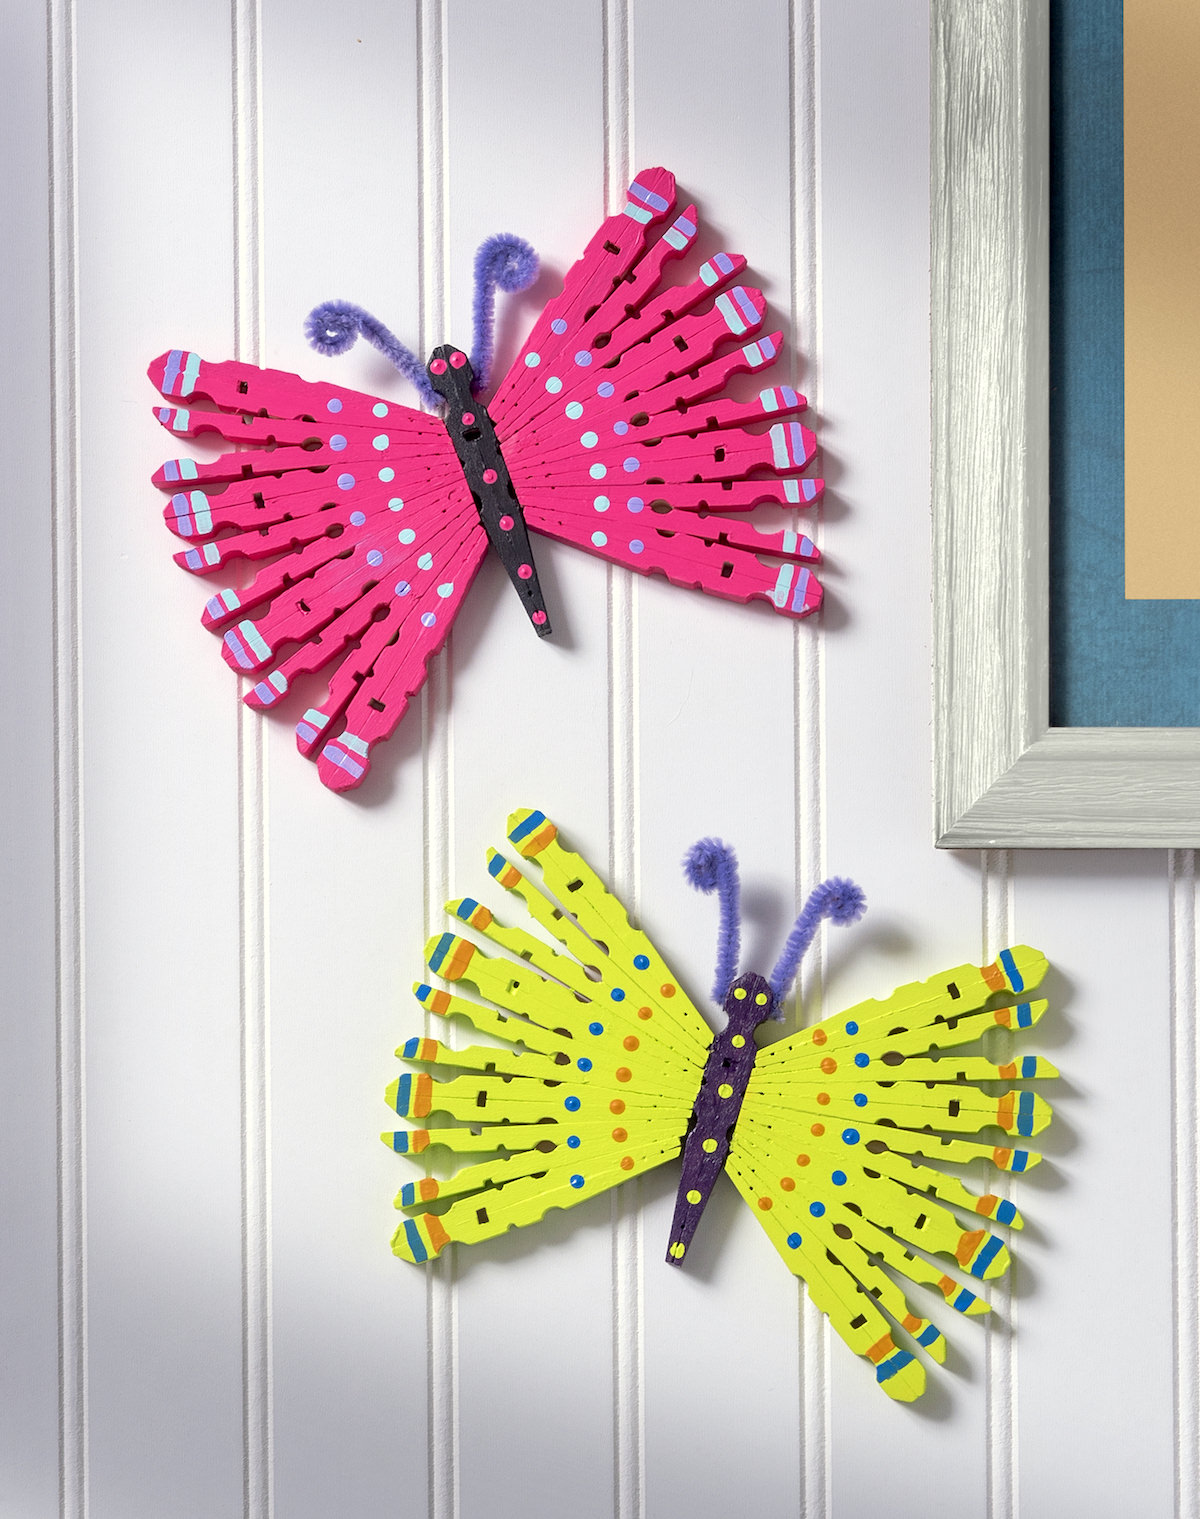
There are some people in my family that really love butterflies! My mother, who made this butterfly coloring page box, has a butterfly tattoo. My niece loves making butterfly crafts . . . for example, she loves making butterflies with coffee filters.
As an homage to my friends and family who are big butterfly fans, I decided to do some wooden clothespin butterflies that were a little different than the ones I’ve seen before.
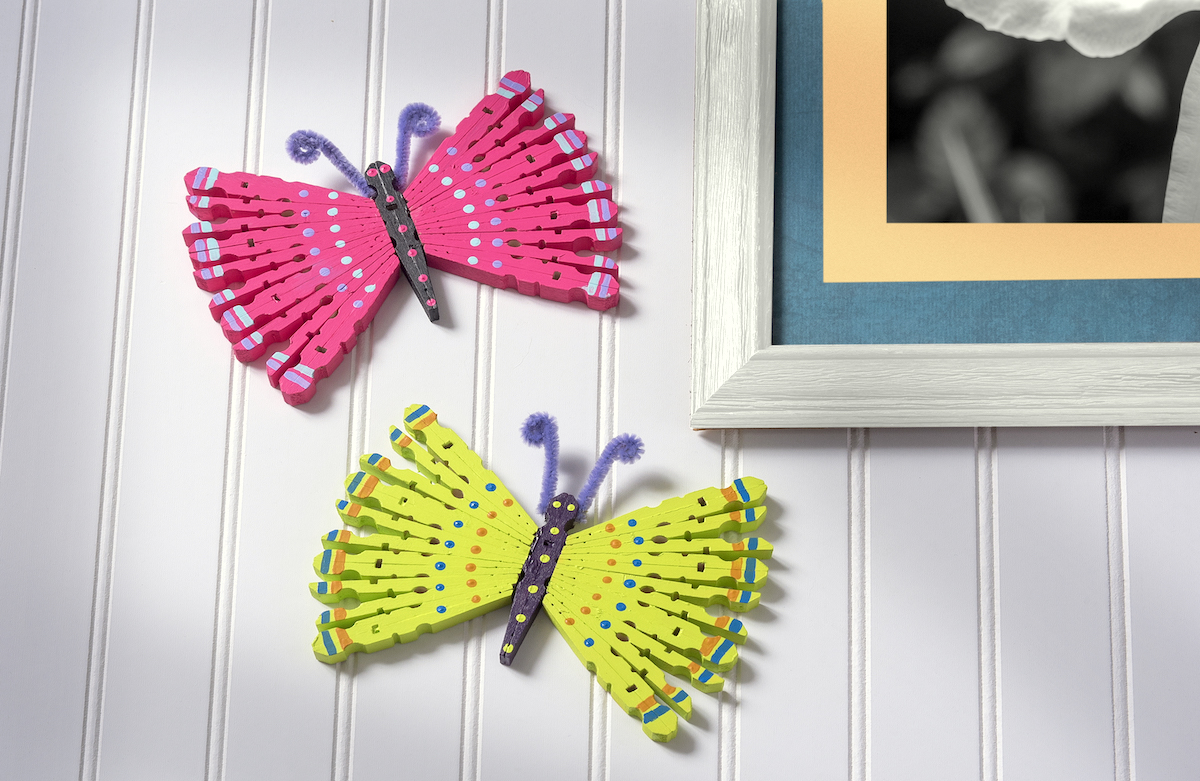
If you like clothespin crafts, you’re going to love this project. It’s kind of ridiculous how much personality you can squeeze out of one little craft supply. I already have a growing list of ideas—but let’s not get ahead of ourselves.
You can make these butterflies with just a few simple supplies! The main ingredients beyond clothespins are glue and paint (the Mod Podge is optional).
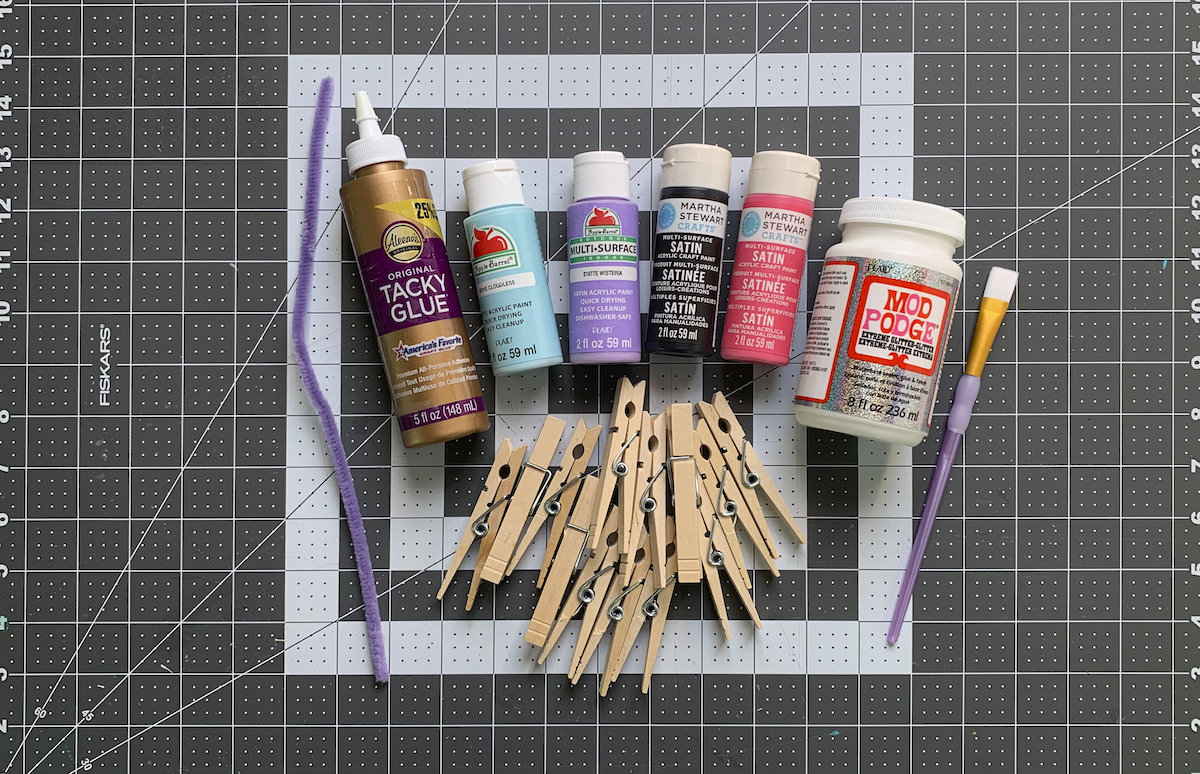
These butterflies are made in four simple steps: separating the clothespins, gluing them together, painting and gluing, and then finishing with accents. Let’s get started.
Get the printable how to below:

Clothespin Butterflies
Equipment
Materials
- 30 Wood clothespins 15 per butterfly
- Acrylic paint I used regular craft paint
- Extreme Glitter Mod Podge optional
- Craft glue
- Pipe cleaners
- Googly eyes optional
Video
Instructions
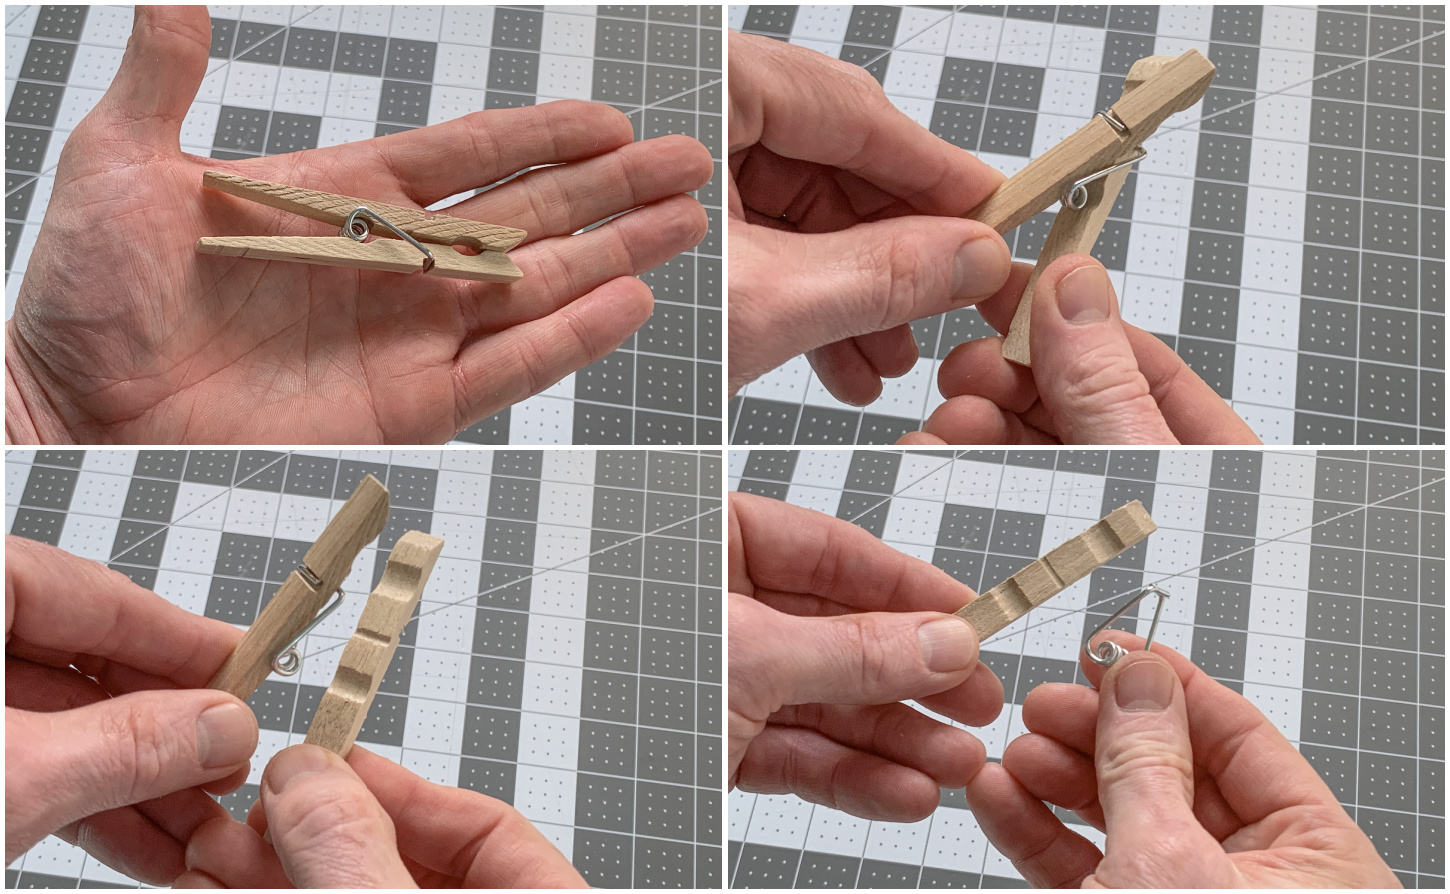
- You’re going to use the clothespins without the springs – so the first thing you need to do is remove them! Begin by twisting the two halves and removing one side. Then you’ll easily be able to remove the clip from the other half. Do this with 15 clothespins (per butterfly).
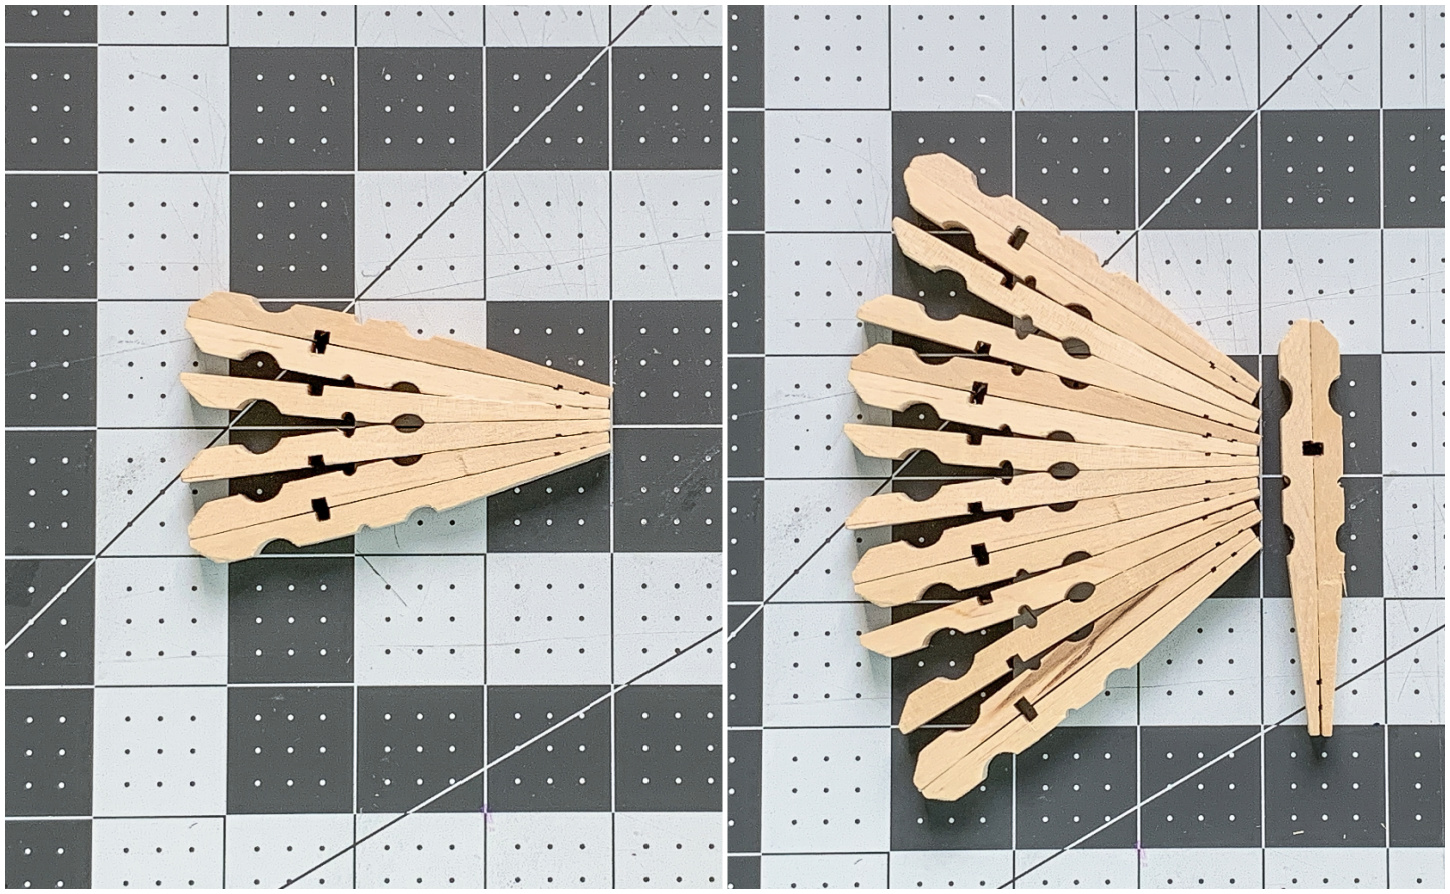
- Before you start gluing, lay the clothespins out on the work surface so that you know how you want to glue them.
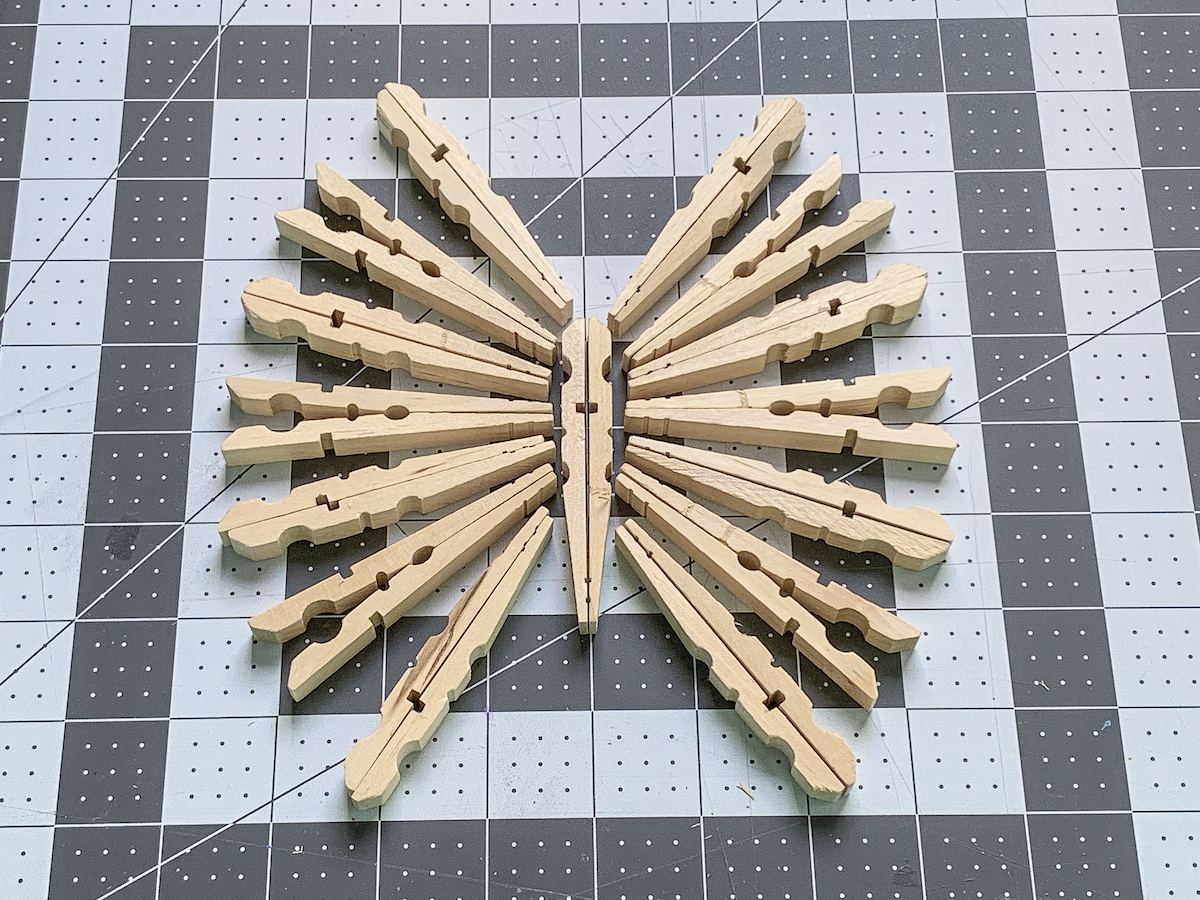
- Once the butterfly is laid out, you'll use the craft glue to begin adhering the pins together. Start with the body in the center. Hold them together for a moment to make sure they are secure, then let them dry.
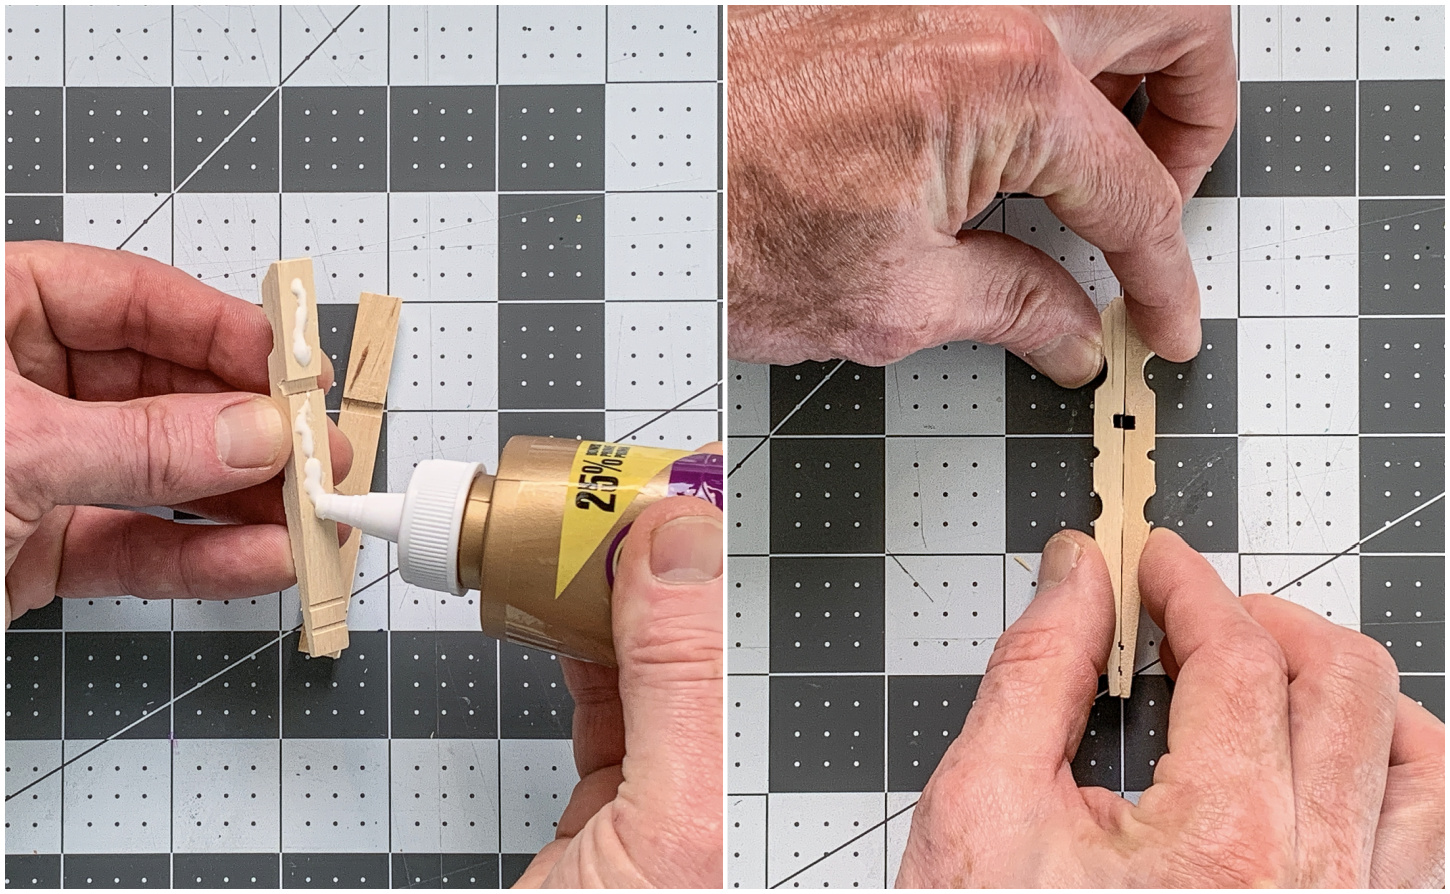
- Once the body is glued, begin gluing the wings. Again, place the glue down, hold the pins together, and then let them dry.
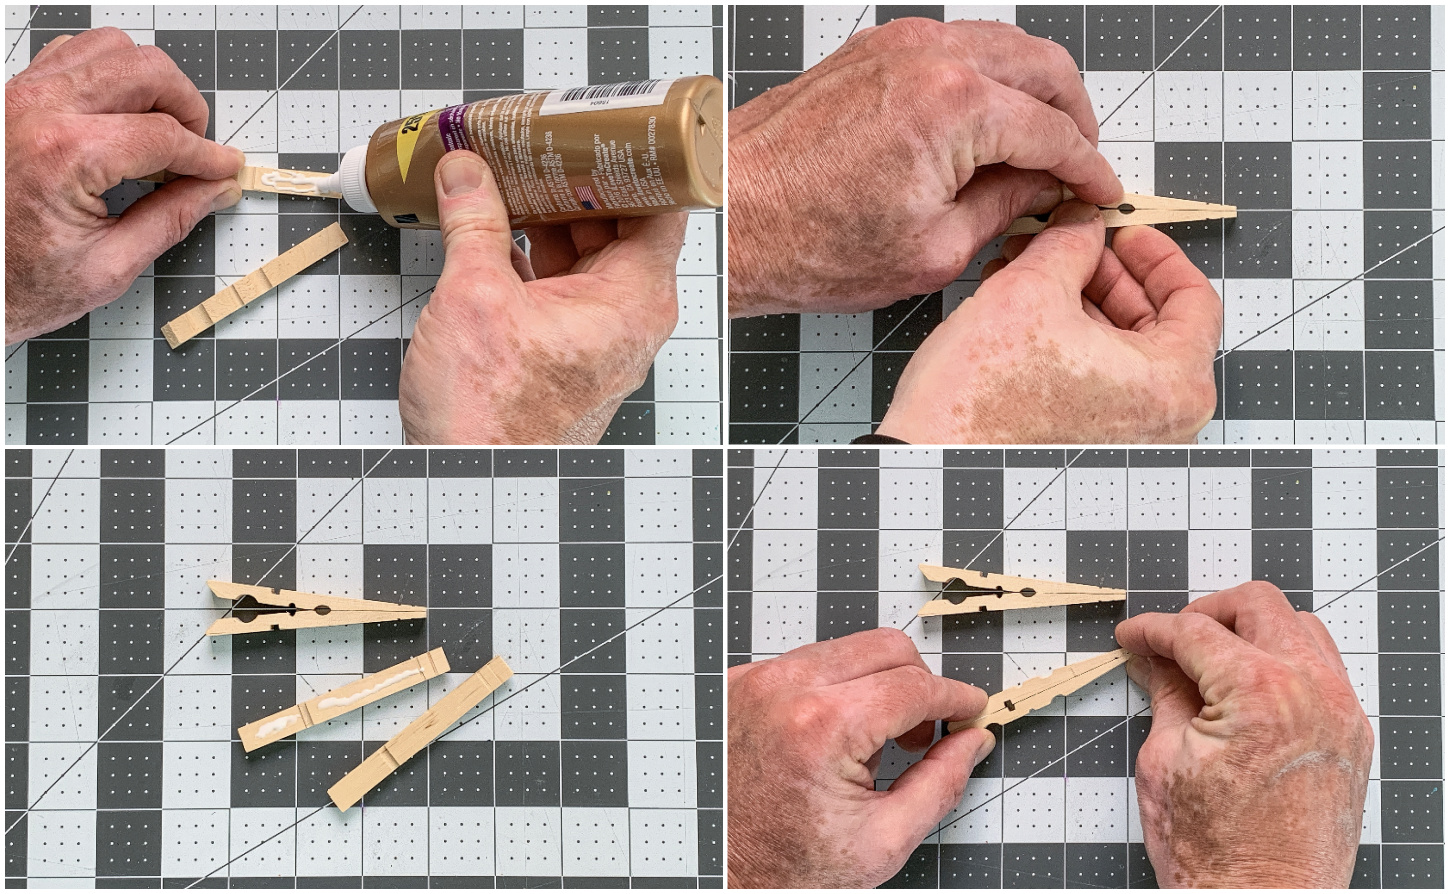
- Glue them two at a time, and then glue the pairs together as shown. Your butterfly is coming together!
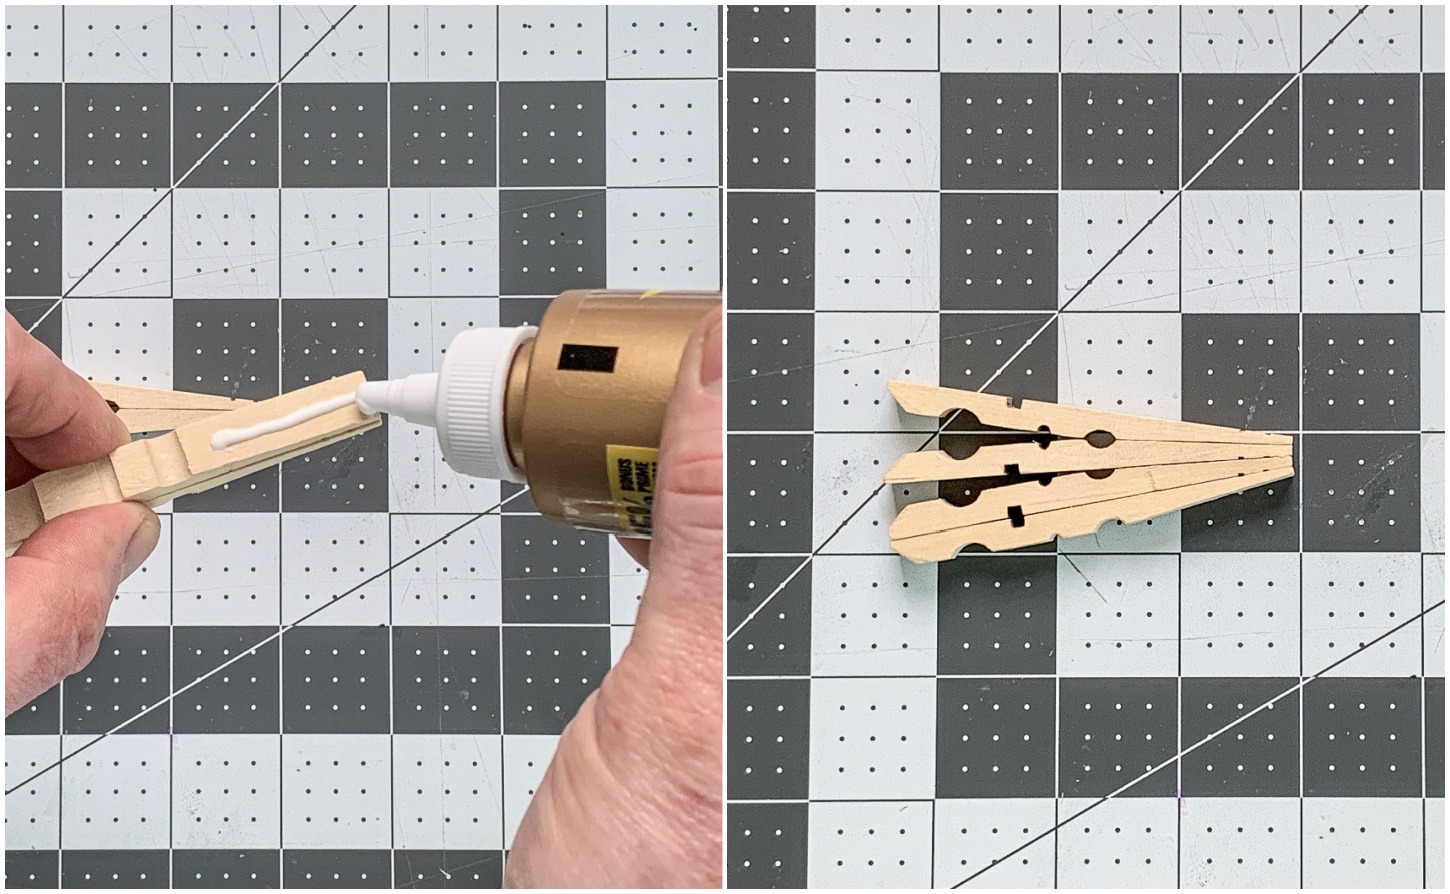
- Continue assembling the wings until you have a wing on each side. Don't glue the wings to the body yet.
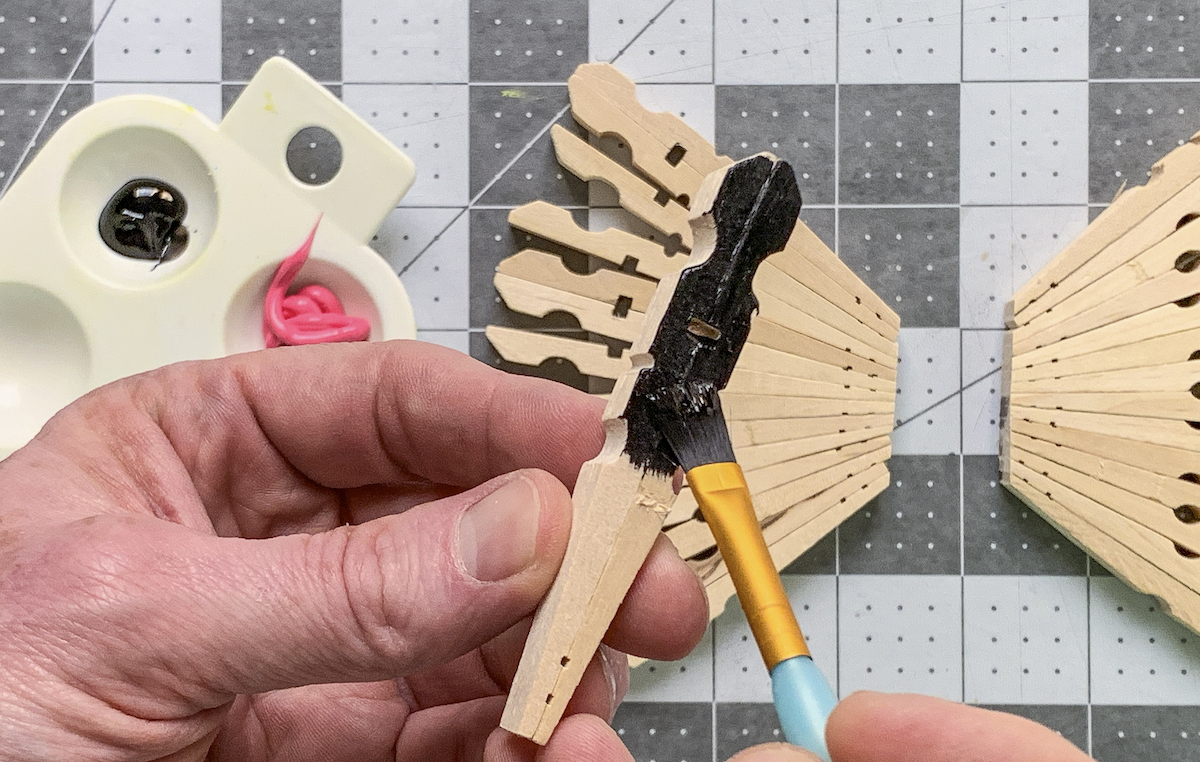
- Select paint colors for the wings, bodies, and accents. I chose four colors total for each butterfly. Paint the body with one of the acrylic paint colors.
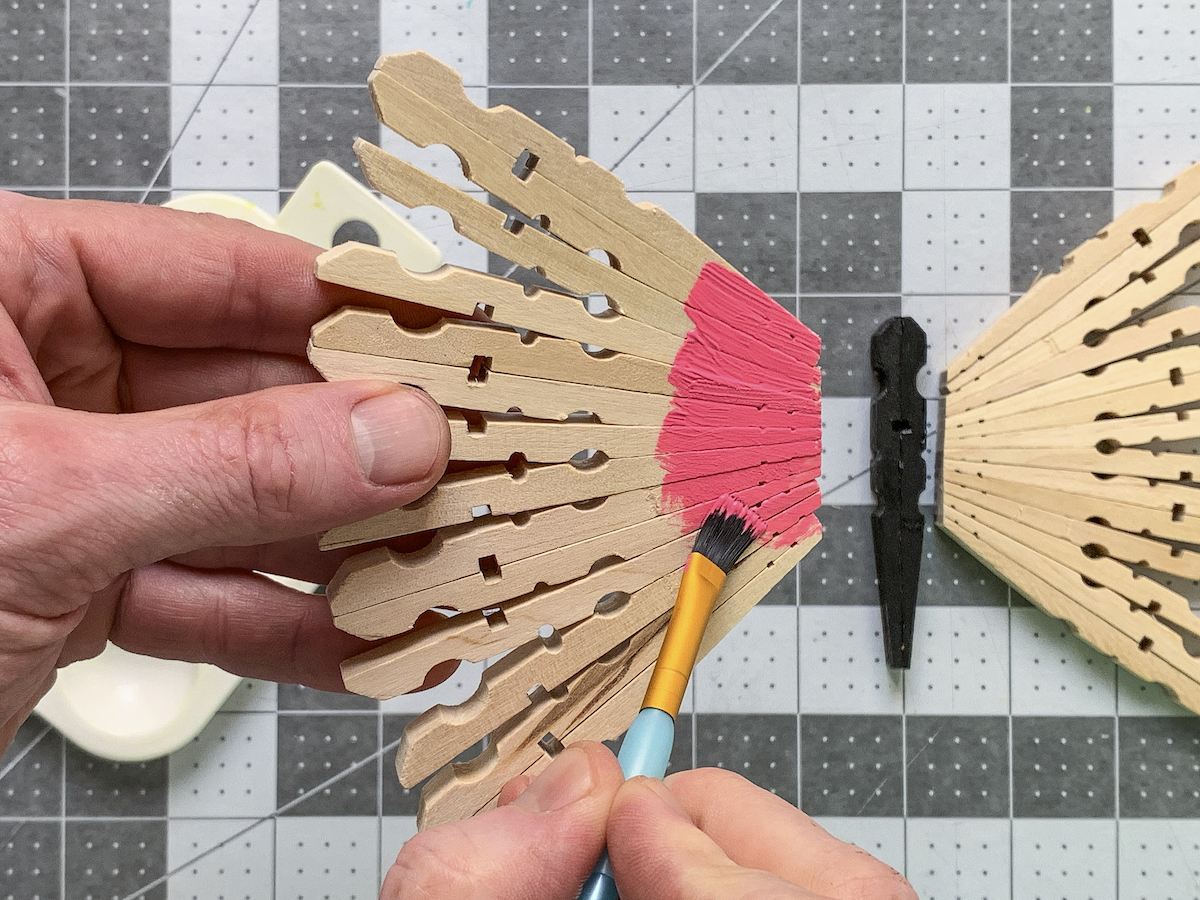
- Use a complimentary color to paint both of the wings. Let dry.
- Add accent colors to the ends of both of the wings with smaller brushes. Let dry.
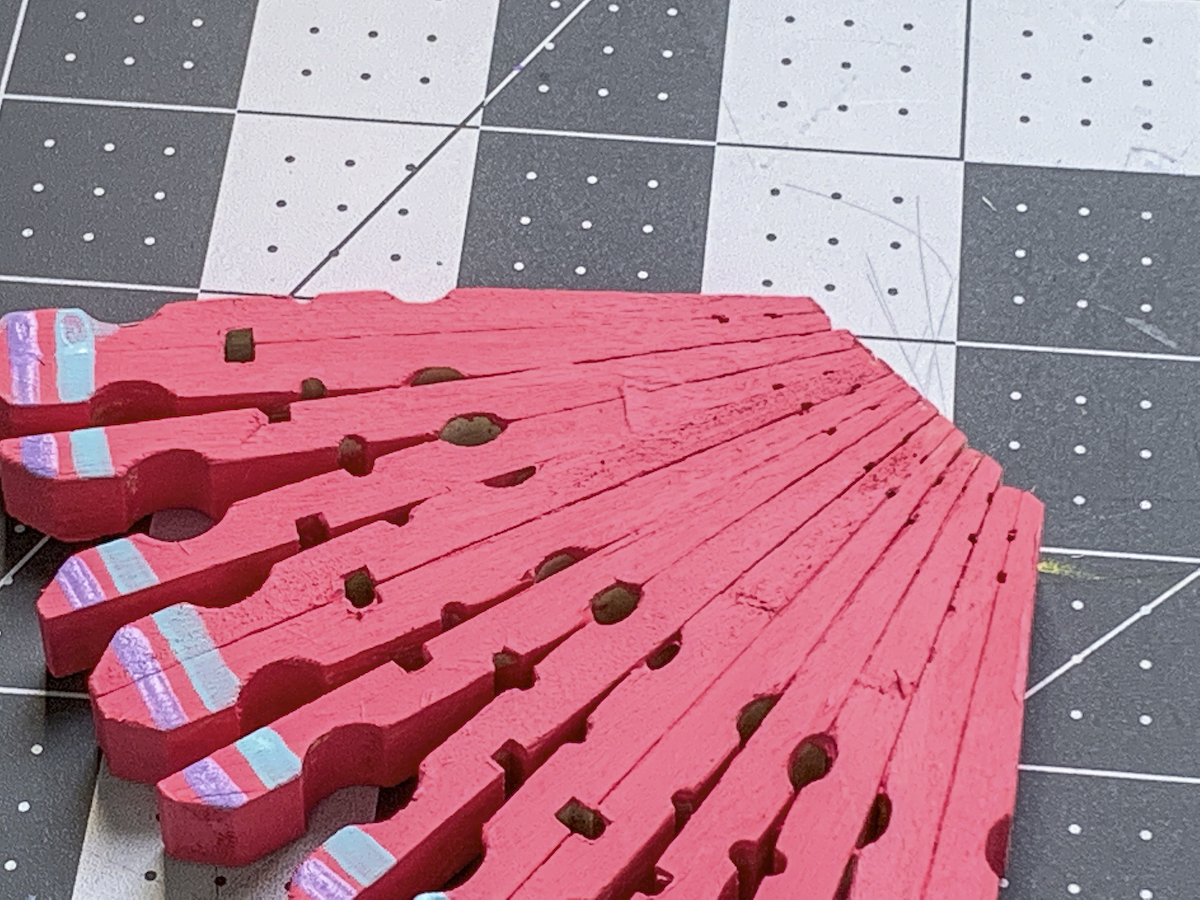
- Have you ever made dots with the end of a paintbrush? It's so easy! You'll dip in the paint and press down onto the surface. Then repeat (practice if you've never done it before). Add dots to the bodies as well (you can see what I did in the photos).
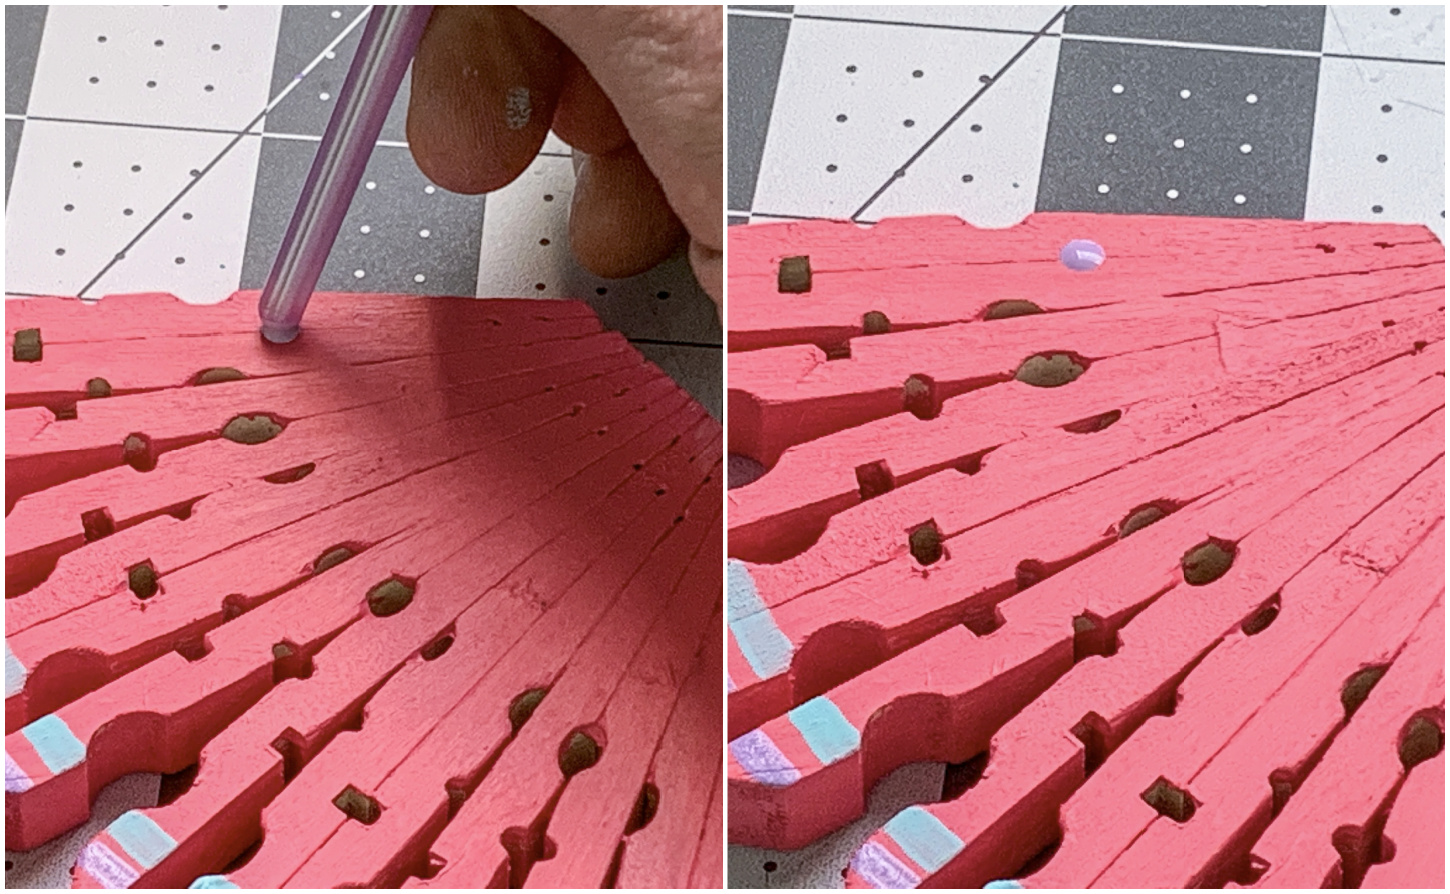
- Glue the wings to the bodies using craft glue. Let dry.
- To finish, cut pipe cleaners into halves and turn them into antennae. Use craft glue to adhere them to the side of the body at the head.
Notes
Now that your project is complete, you can do whatever you like with them. They look great on the wall, I have to say. Kids can make them for their own rooms. If you try this craft, I’d love to know in the comments!
Plus I’d love for you to check out these other craft ideas:
Beaded Suncatchers • Bean Art Mosaics • Blow Painting • Borax Crystals • Bubble Wrap Painting • Cat Bookmarks • Cloud Dough • Coffee Filter Flowers • Duct Tape Bracelets • Felt Mushrooms • Food Coloring Art • Homemade Playdough • Paper Chain • Pencil Toppers • Perler Beads • Sidewalk Chalk Paint • Silly Putty • Spin Art • Weaving for Kids • Wine Cork Stamps


Love the butterflies thankyou for sharing
Hello, I just have a couple of questions. How did you mount the butterflies to the wall? How did you keep the clothespins straight so they all would fit closely to the body? Mine became uneven as the wings spread out. Thank you.
Hi Mary! We used Command Strips to mount them so they wouldn’t come down but also wouldn’t mar the wall. Ours didn’t have that issue so much although we didn’t have to push them together and snug them up a bit. They don’t all have to touch though.
Thank you for sharing. Very pretty. Just one question. How did you attach the wings to the body. I have my guess but since you’ve already finished it I’d like to know how you did it. Thanks.
Hi Kim! The wings were glued with craft glue. Applied, pushed to the body, and allowed to dry. You could also use hot glue or wood glue.
I love making anything out of clothes pins and these butterflies are some of the cutest I have seen.
Thank you so much for sharing your wonderful talents with us.
Thank you so much for the kind comment!
GREAT JOB MY FRIEND
I LOVE DOING THINGA LIKE THAT AND OTHER EXAMPLES LIKE WITH LOTHES PINS