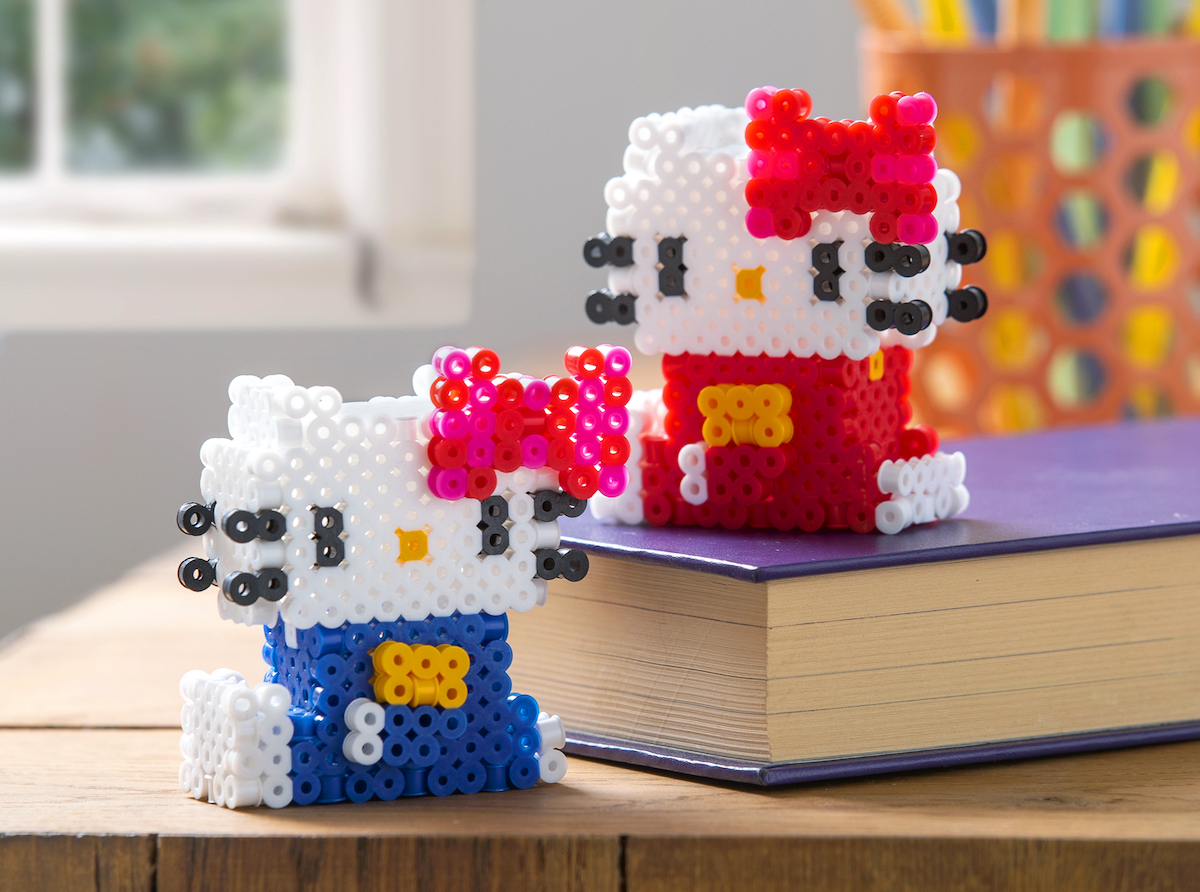
3D Hello Kitty Characters (Perler Beads!)
Learn how to make a 3D Hello Kitty using simple supplies! Kids will love this easy perler bead project they can play with or display in their room.
Skills Required: None. Even if you’ve never crafted before, these kitties are easy to make. You’ll be melting beads with an iron. The patterns are at the bottom of the post.
Hello friends! I’ve noticed something this year – and maybe you have too – Hello Kitty is having a little bit of a comeback.
She’s always popular, as are most Sanrio characters, but this year is particularly special. It’s her 50th anniversary (birthday)! She’s only a little bit older than I am, and I can say, she’s aging beautifully.
I’ve loved Hello Kitty since I was little, and we’ve done lots of perler bead projects with her cute face around here. To celebrate the 50th anniversary, I made these little characters for my craft room!
These 3D Hello Kitty characters are easy to make with two fuse boards, and sit on a surface all by themselves. You can change the outfit and the bow to be any colors you like.
Just so you know, perler beads are recommended for ages six and up. So this is fun to make together with the littles. All children seem to love perler beads (also known as hama beads, fuse beads, or melty beads). But don’t be shy – adults love them too.
3D Hello Kitty
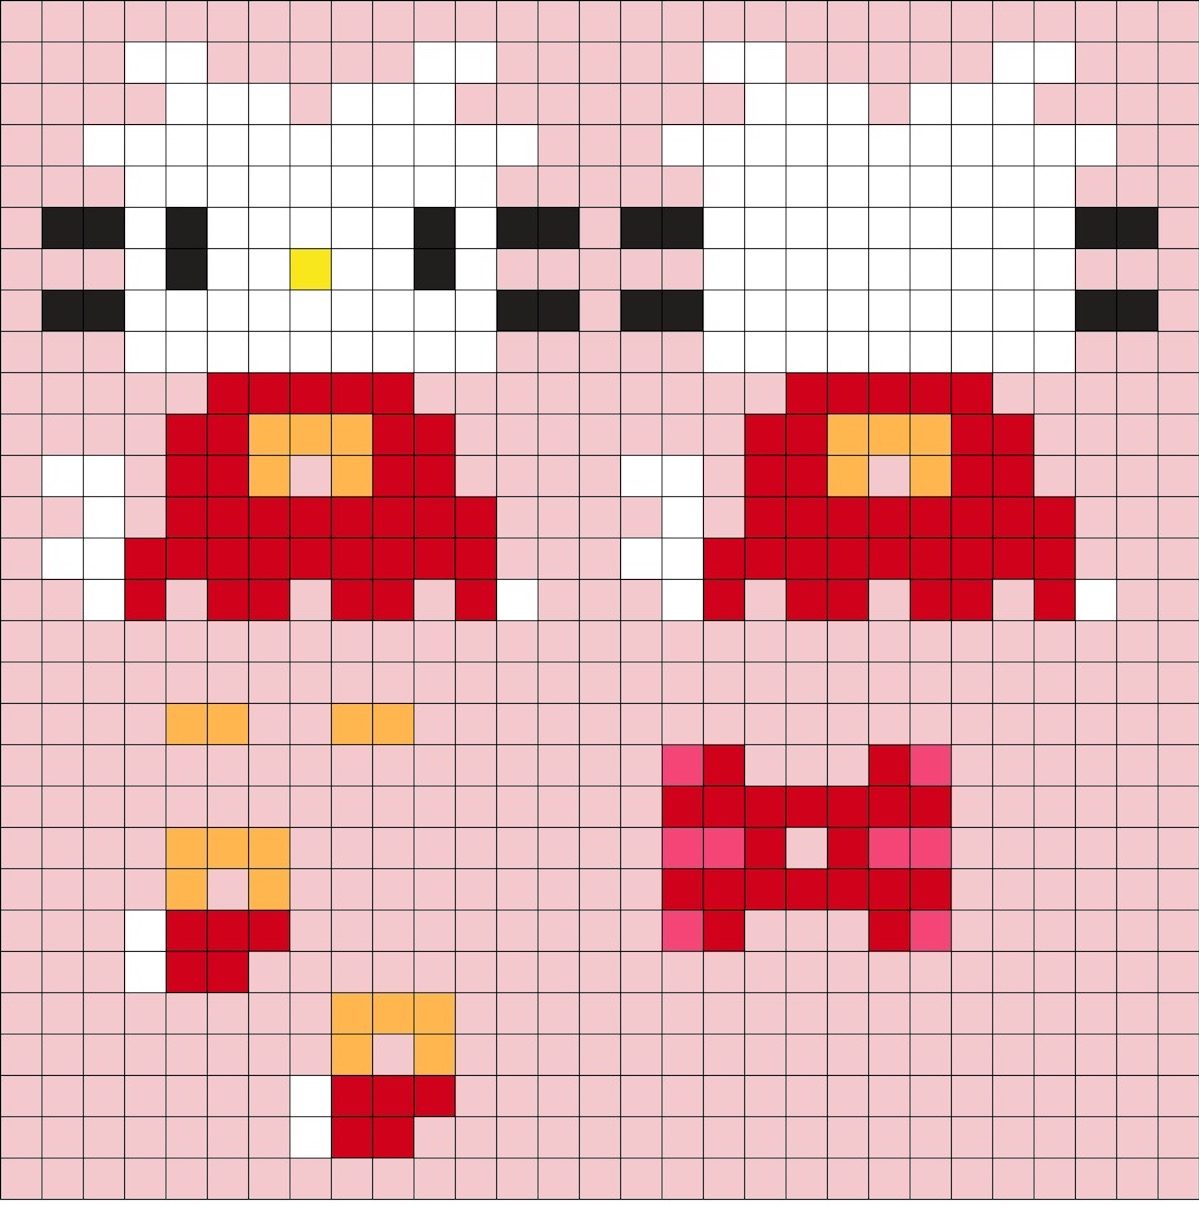
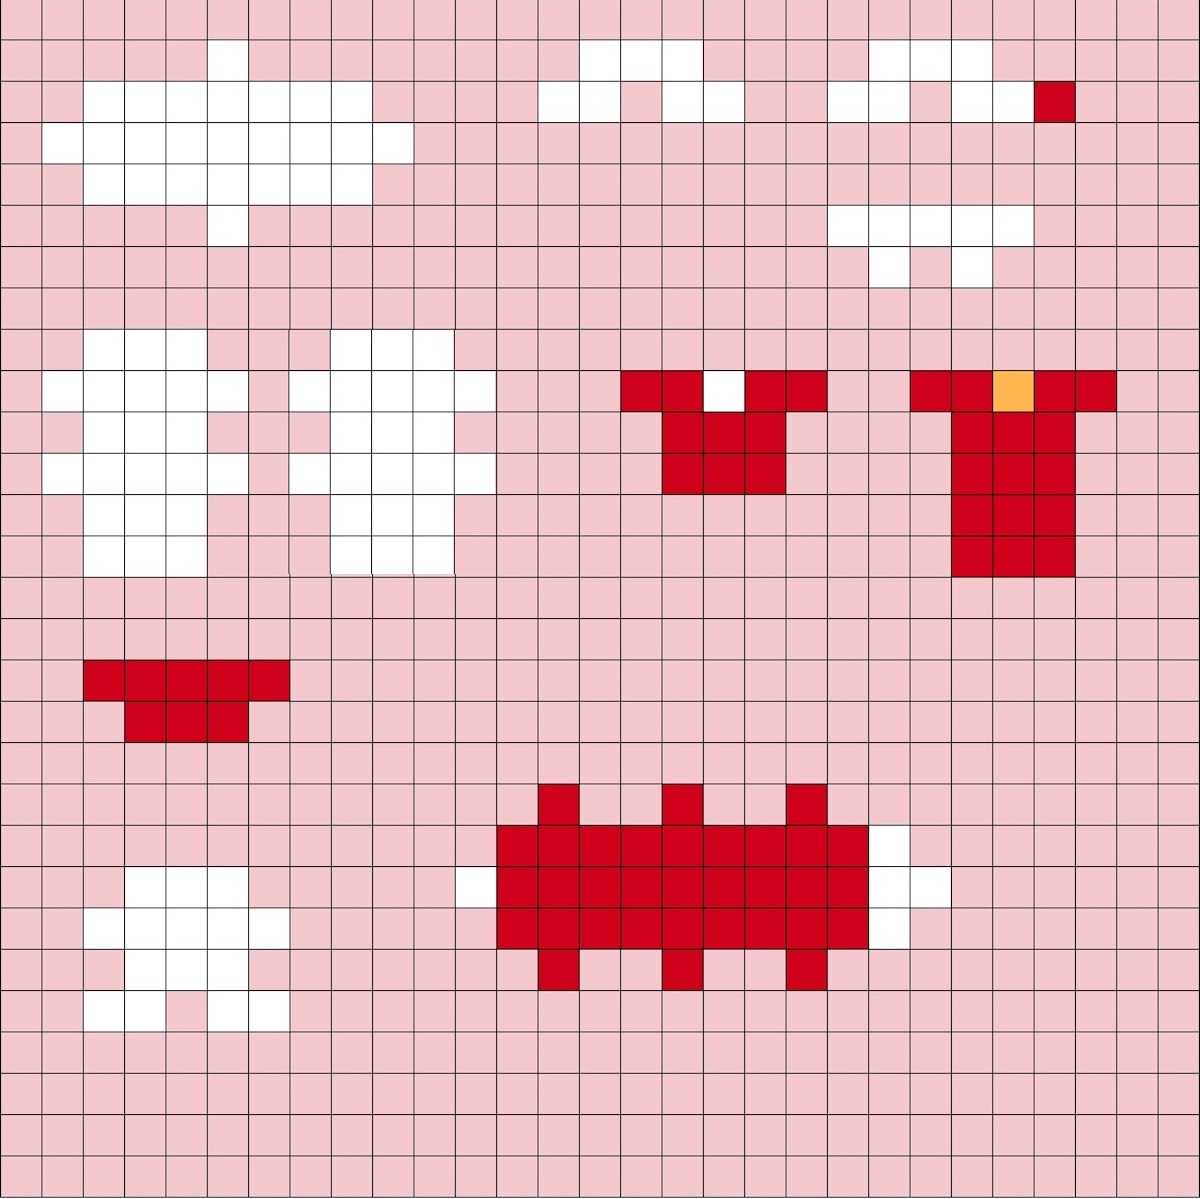
To make one 3D Hello Kitty, you’ll need 256 white, 20 black, 1 yellow, 82 beads for the overalls (red below), 20 red for the bow, 8 pink for the bow, and 25 cheddar beads. You’ll either need two 29 x 29 boards or an extra large pegboard to fit this.
There are some delicate parts on this project, so I would make sure to fuse the beads together well.
Iron the pieces as usual, then you’re going to assemble them.
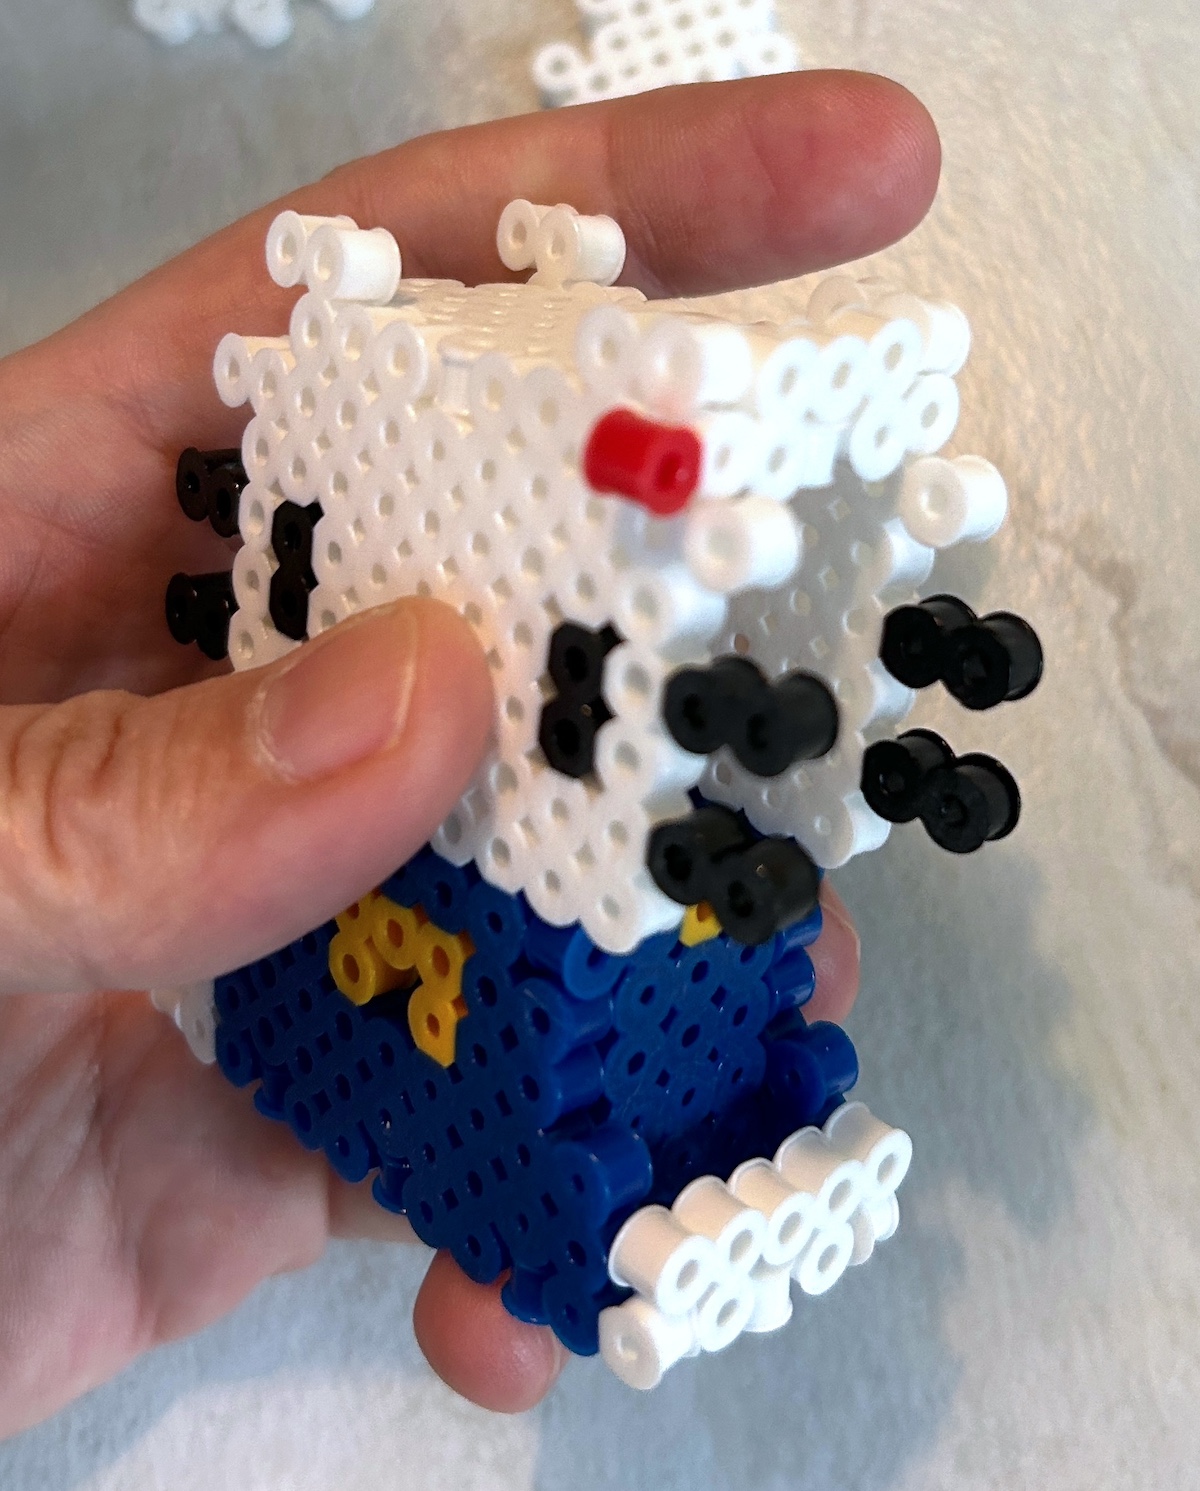
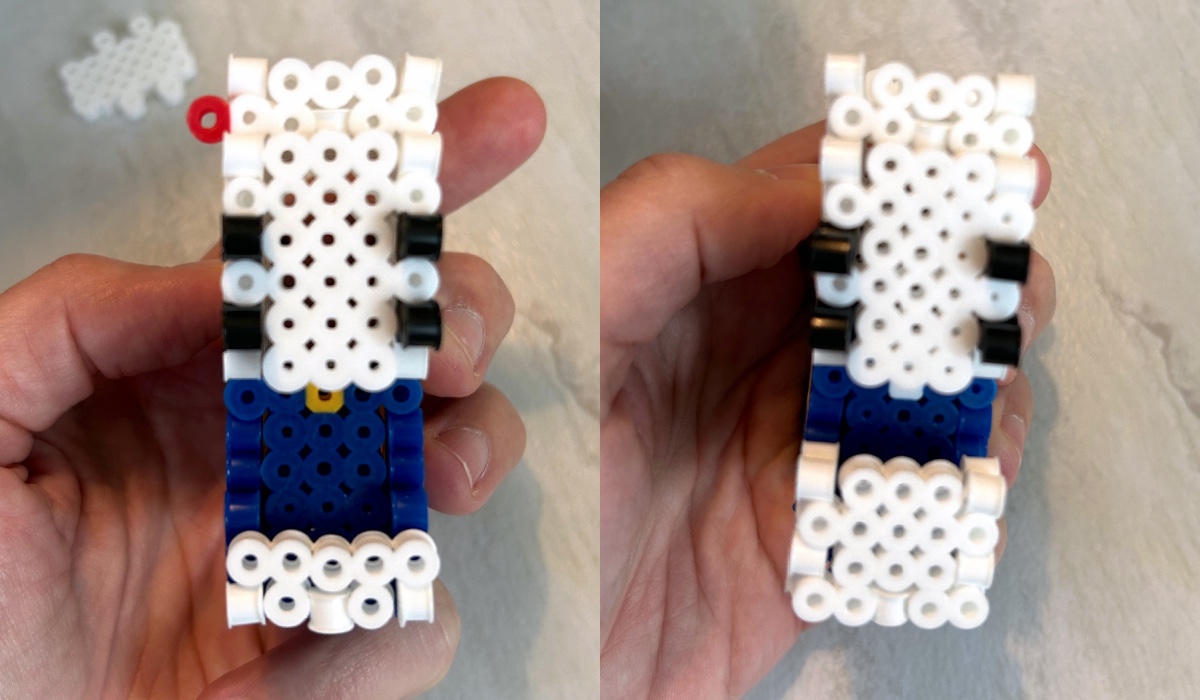
Attach the two main body pieces at the bottom using the long blue piece with white ends.
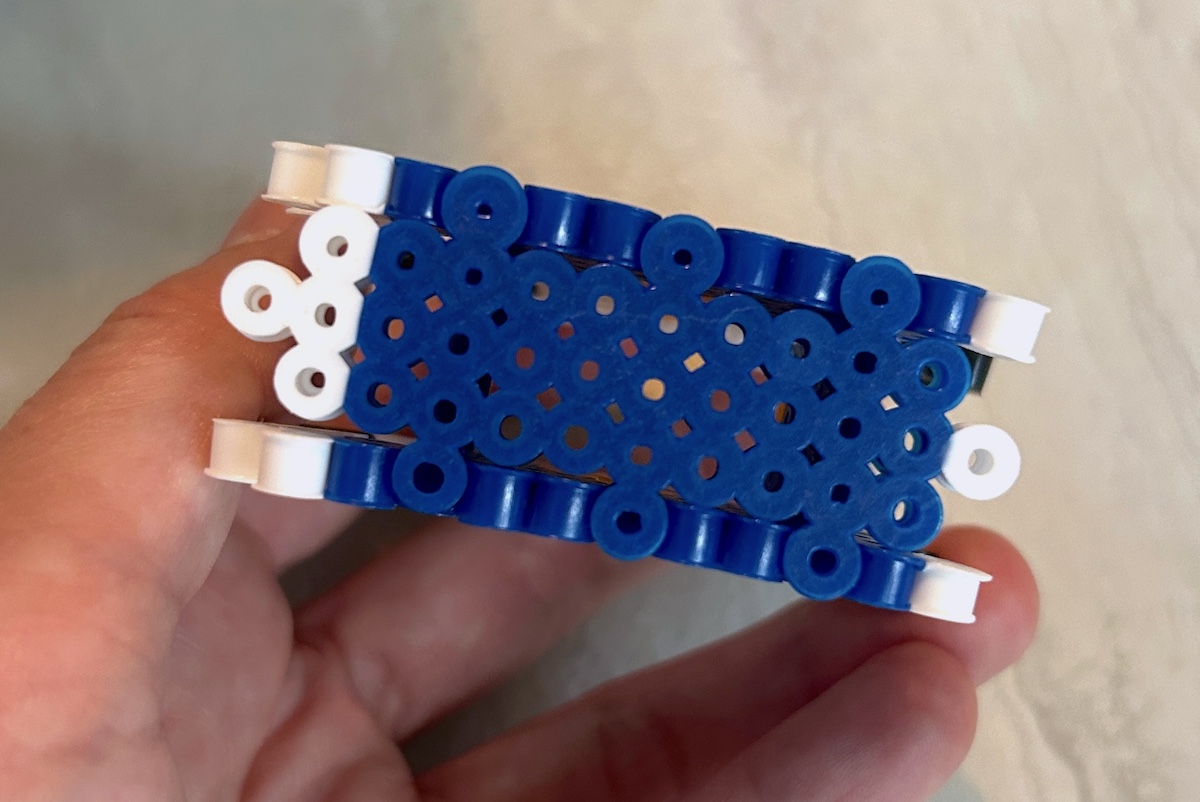
To finish Hello Kitty’s outfit, you’ll put a solid blue piece on the tail end . . .
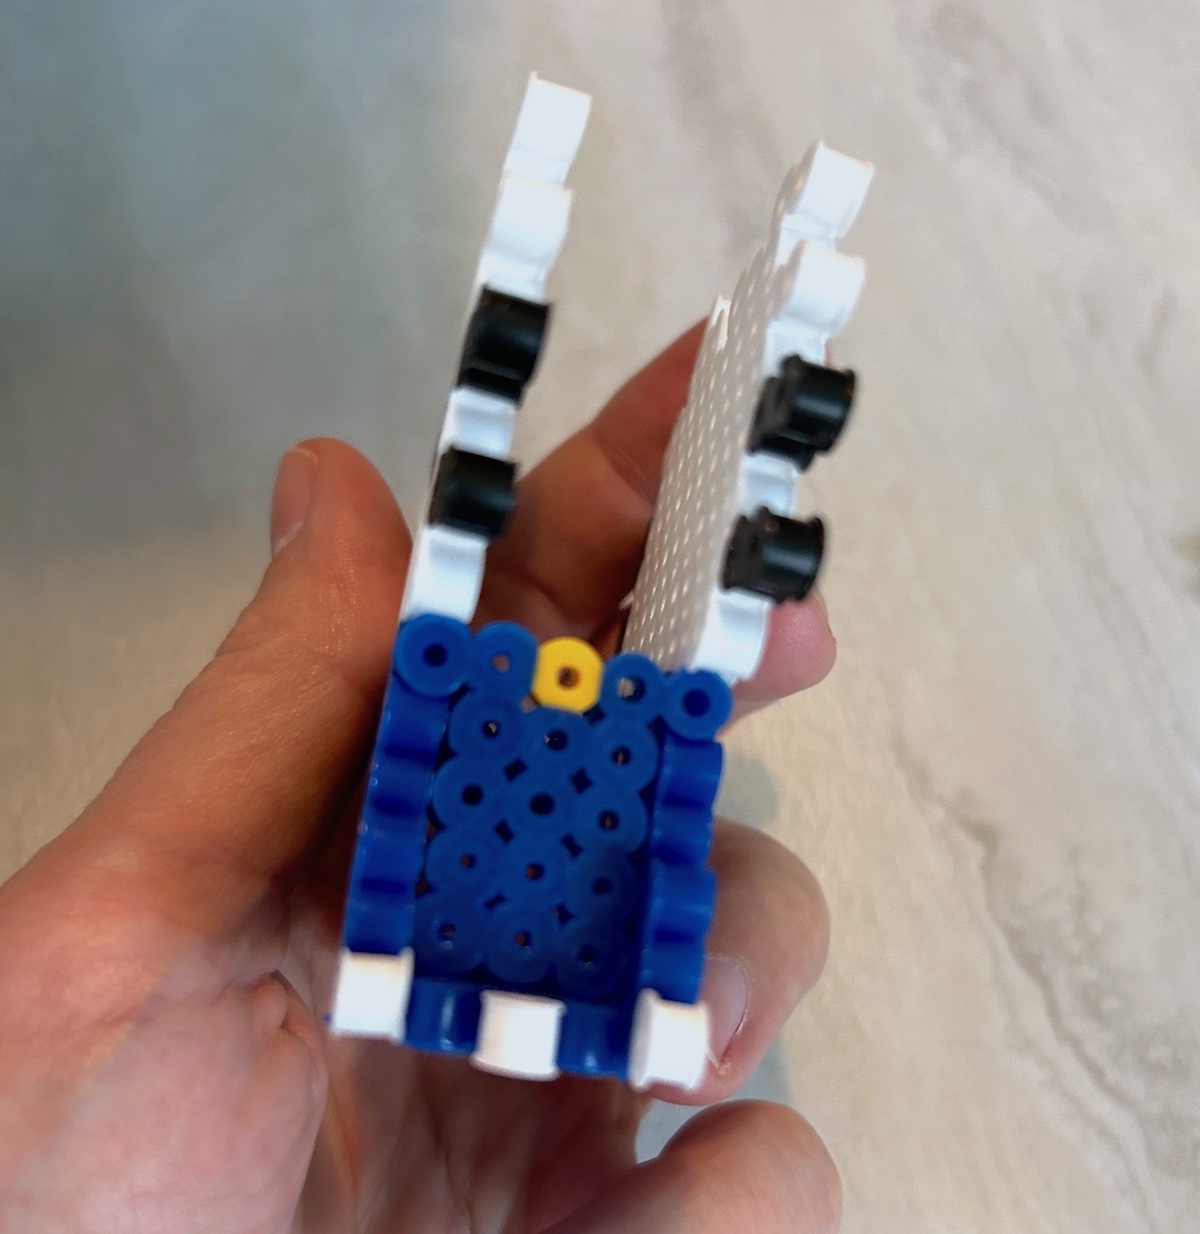
. . . and on the other side with the feet sticking out, you’ll add the remaining two clothing pieces.
On the feet end, add a white piece. Do the same on the tail end.
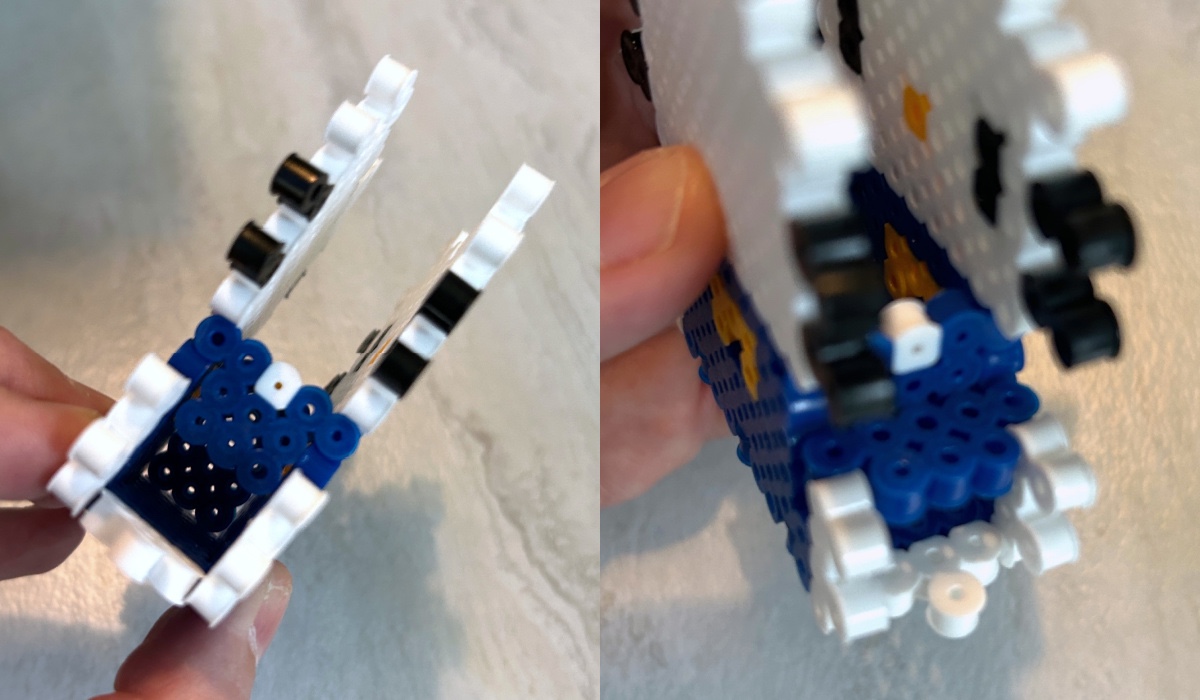
Add the largest white piece to the top of the head.
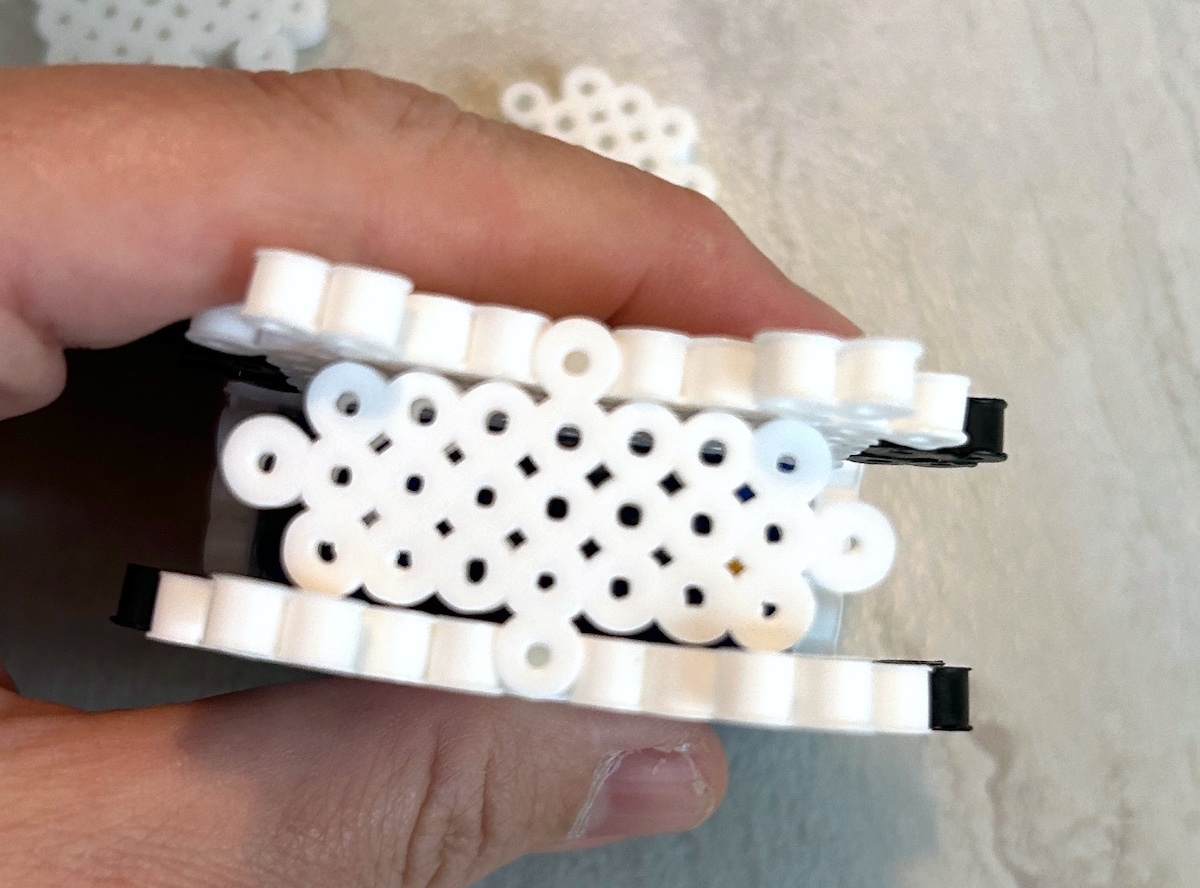
The two small white pieces go on either side of Miss Kitty’s head. The piece with the red bead sticks out to the front so you can attach the bow.
Add both white matching side pieces for the head.
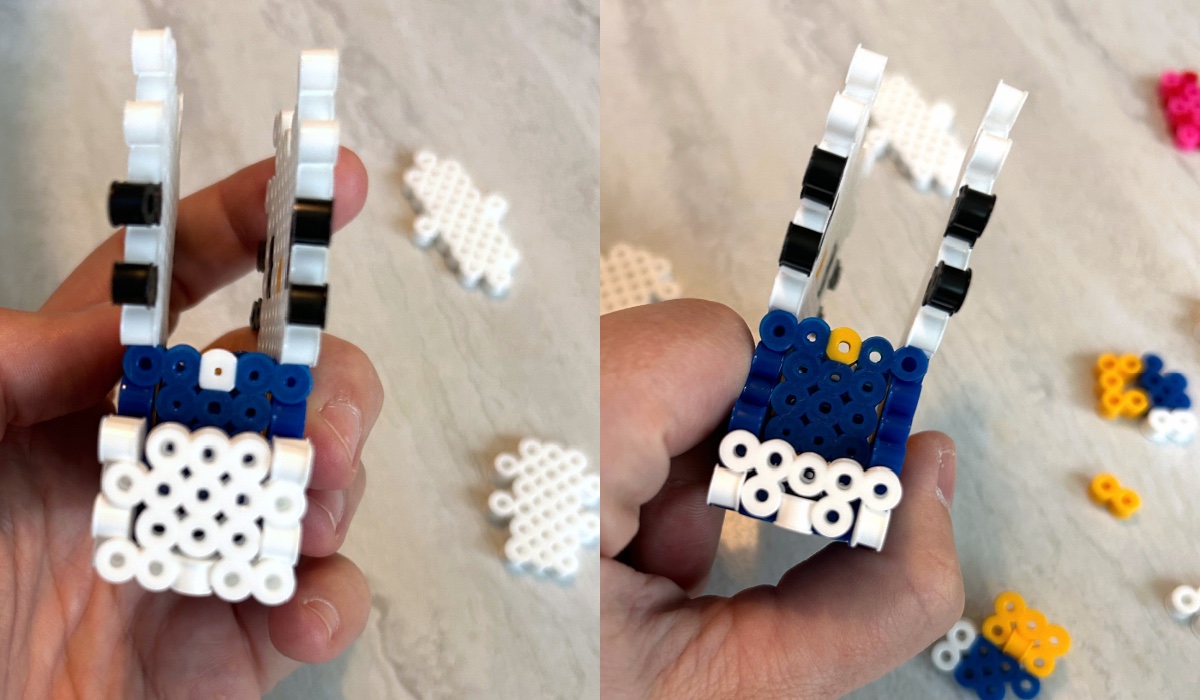
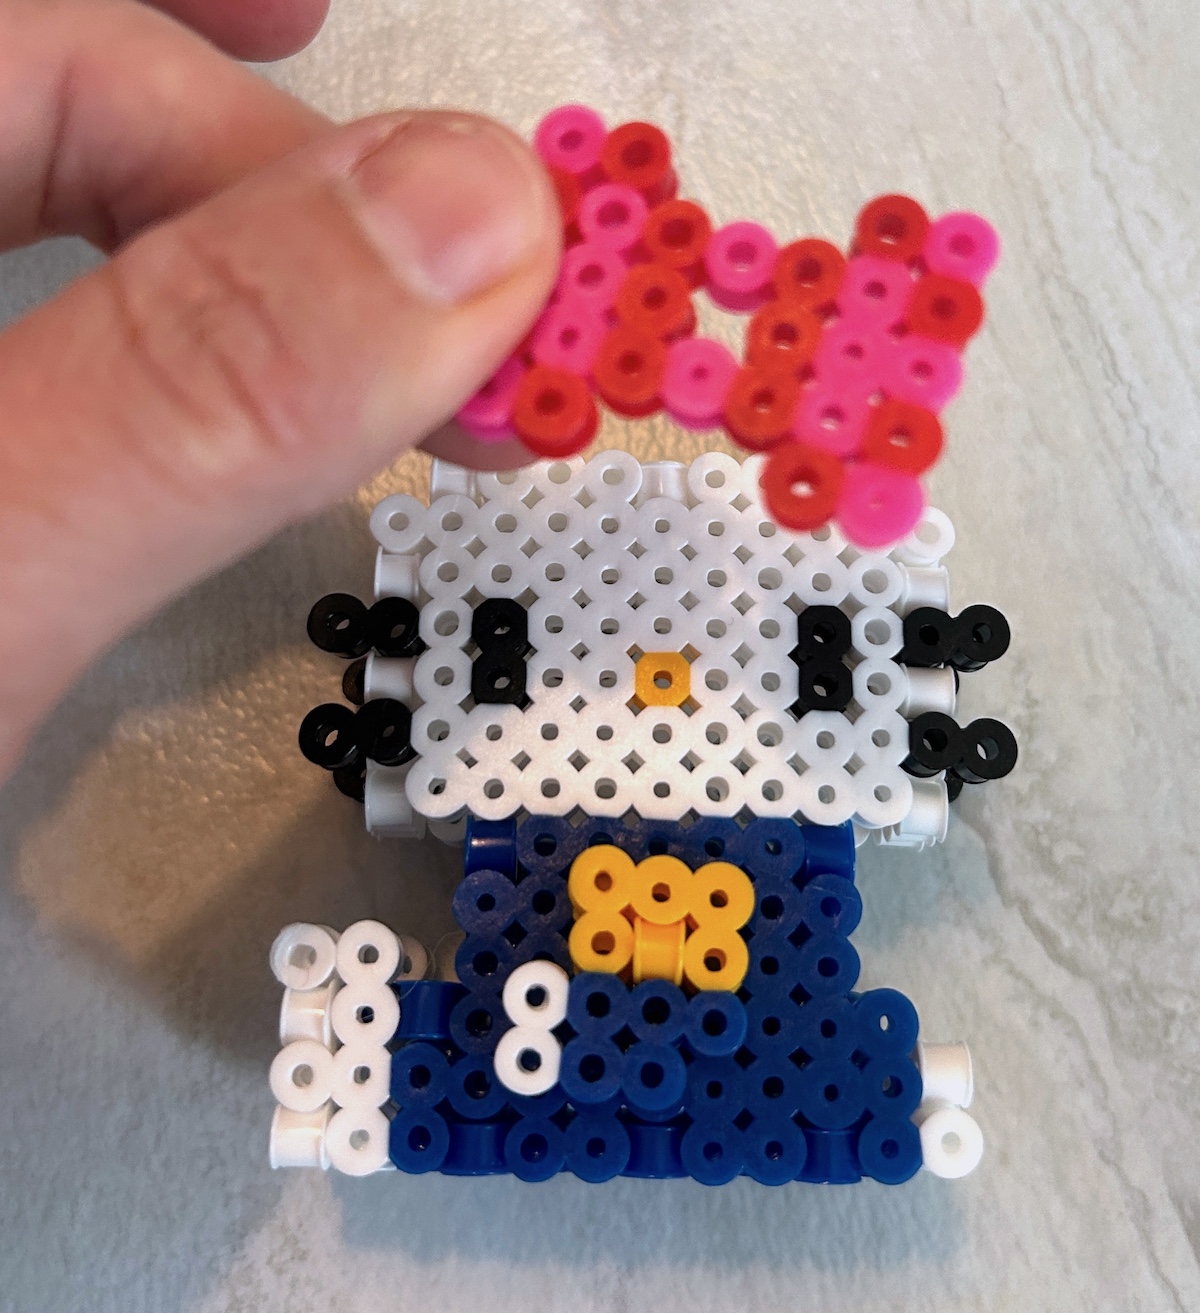
Attach the arms on either side with the cheddar pieces.

Then you’ll add the bow – slowly working it onto the red bead.
Then of course, once you make one Hello Kitty – you’re going to have to make more than one.
If you try this perler bead Hello Kitty, let me know in the comments! I’d also love for you to check out these additional patterns for 3D perler items:
Box • Bookmarks • Bracelets • Crown • Door Hanger • Drink Covers • Key Tray • Organizer • Tic Tac Toe Game