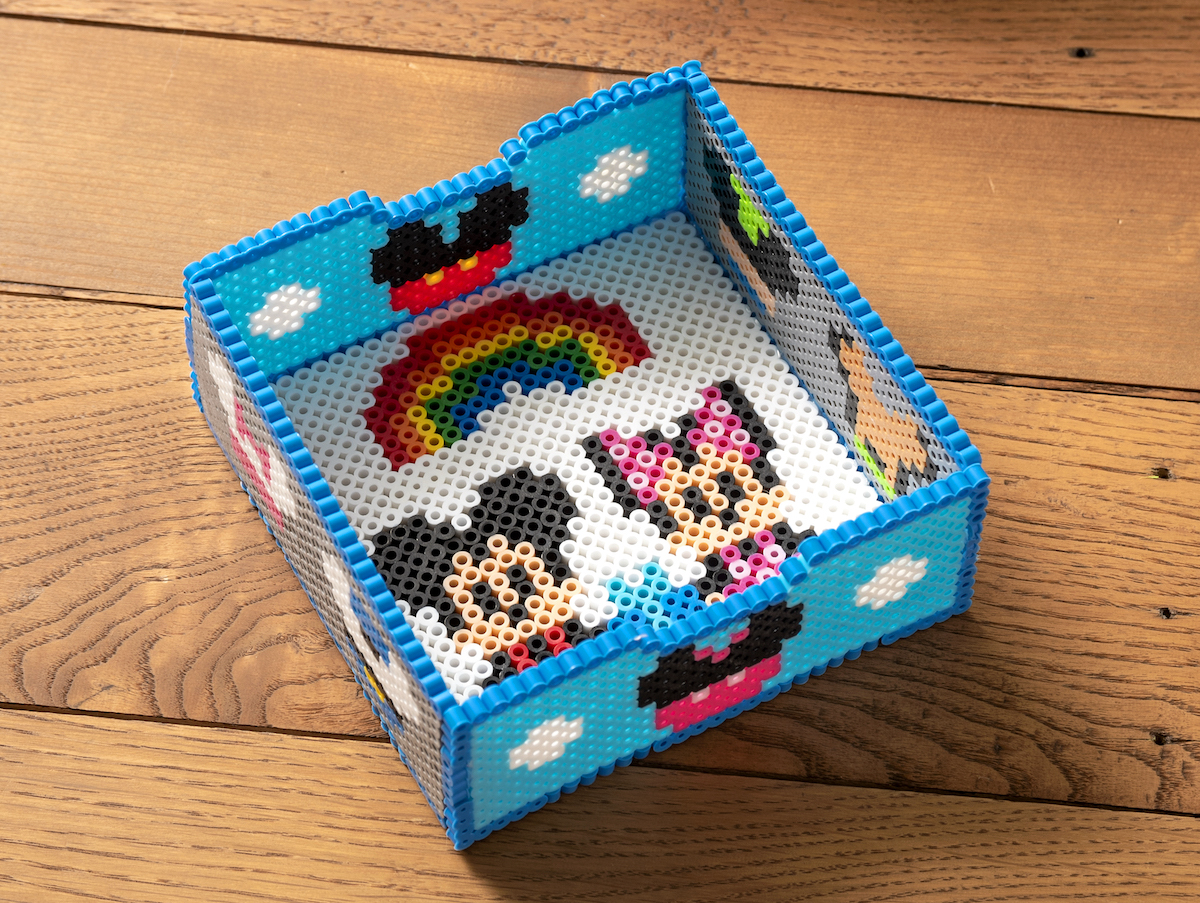
Mickey Mouse Tray (Made with Perler Beads!)
Learn how to make a Mickey Mouse tray using simple supplies! Kids will love this easy perler bead Disney project they can display in their room.
Skills Required: None. Even if you’ve never crafted before, this tray is easy to make. You’ll be melting beads with an iron. The pattern is at the bottom of the post.
When was the first time that you went to Disney? For me it was when I was 4 years old, and my mom and younger brother and I went to visit my aunt in California.
So they took the littles to Disneyland in Anaheim, and we got the ears with our names embroidered upon them. It was 1981 and there’s a picture of my wearing them, standing next to my cousin and brother in their strollers.
My cousin is wearing sandals with socks, which makes me giggle.
While we may not have been the most stylish, it doesn’t matter because the photos are still awesome. Mostly because of the Disney flowers! So many beautiful, colorful flowers in the background.
Apparently Walt brought in a special team in 1955 to landscape the park.
Fast forward ahead to 1986, and I had acquired two more brothers (plus my mom was pregnant). That year my family of six with a baby in my mom’s tum headed to Disney World in Florida!
The best part of the trip involved my brother Kevin, who had been so excited to meet Donald Duck (who he called “Dickey Duck.”). Well, when he met Dickey . . . he ran away screaming and crying. Classic amusement park trip, right?
Honestly I didn’t go back to Disney until I was an adult. But it’s pretty dang fun, and you should go if you’ve never been!
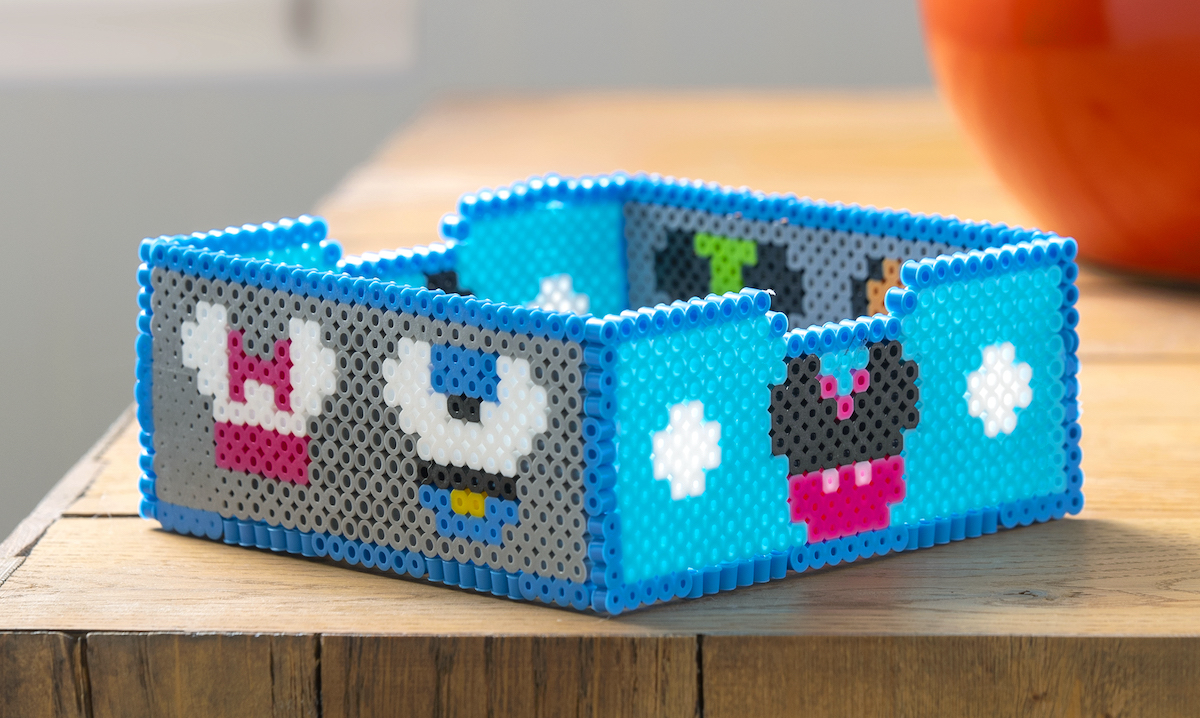
After doing some Mickey Mouse perler beads recently, I decided to kick it up a notch and try something fancy. Again with perler beads. That’s how this Mickey Mouse tray was born!
There was the perler bead box and the Hello Kitty drawer set that inspired me to try dimensional perler projects. Because I know creating a tray that actually holds things out of beads seems a little . . . sketchy.
But it works! You can make this Mickey Mouse tray with perler beads, and it will stay together. You can also customize the colors with any that you like.
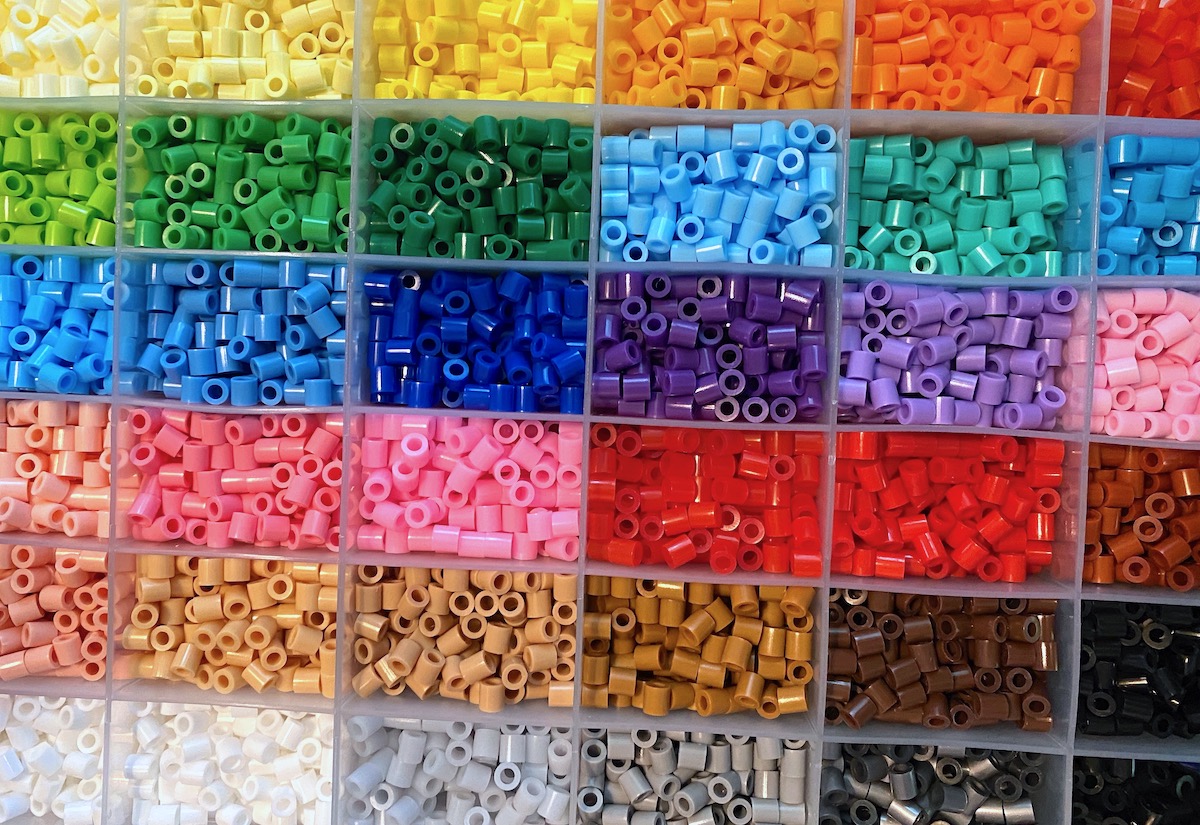
Just so you know, perler beads are recommended for ages six and up. So this is fun to make together with the littles, while parents operate the iron. All children seem to love perler beads (also known as hama beads, fuse beads, or melty beads). But don’t be shy – adults love them too!
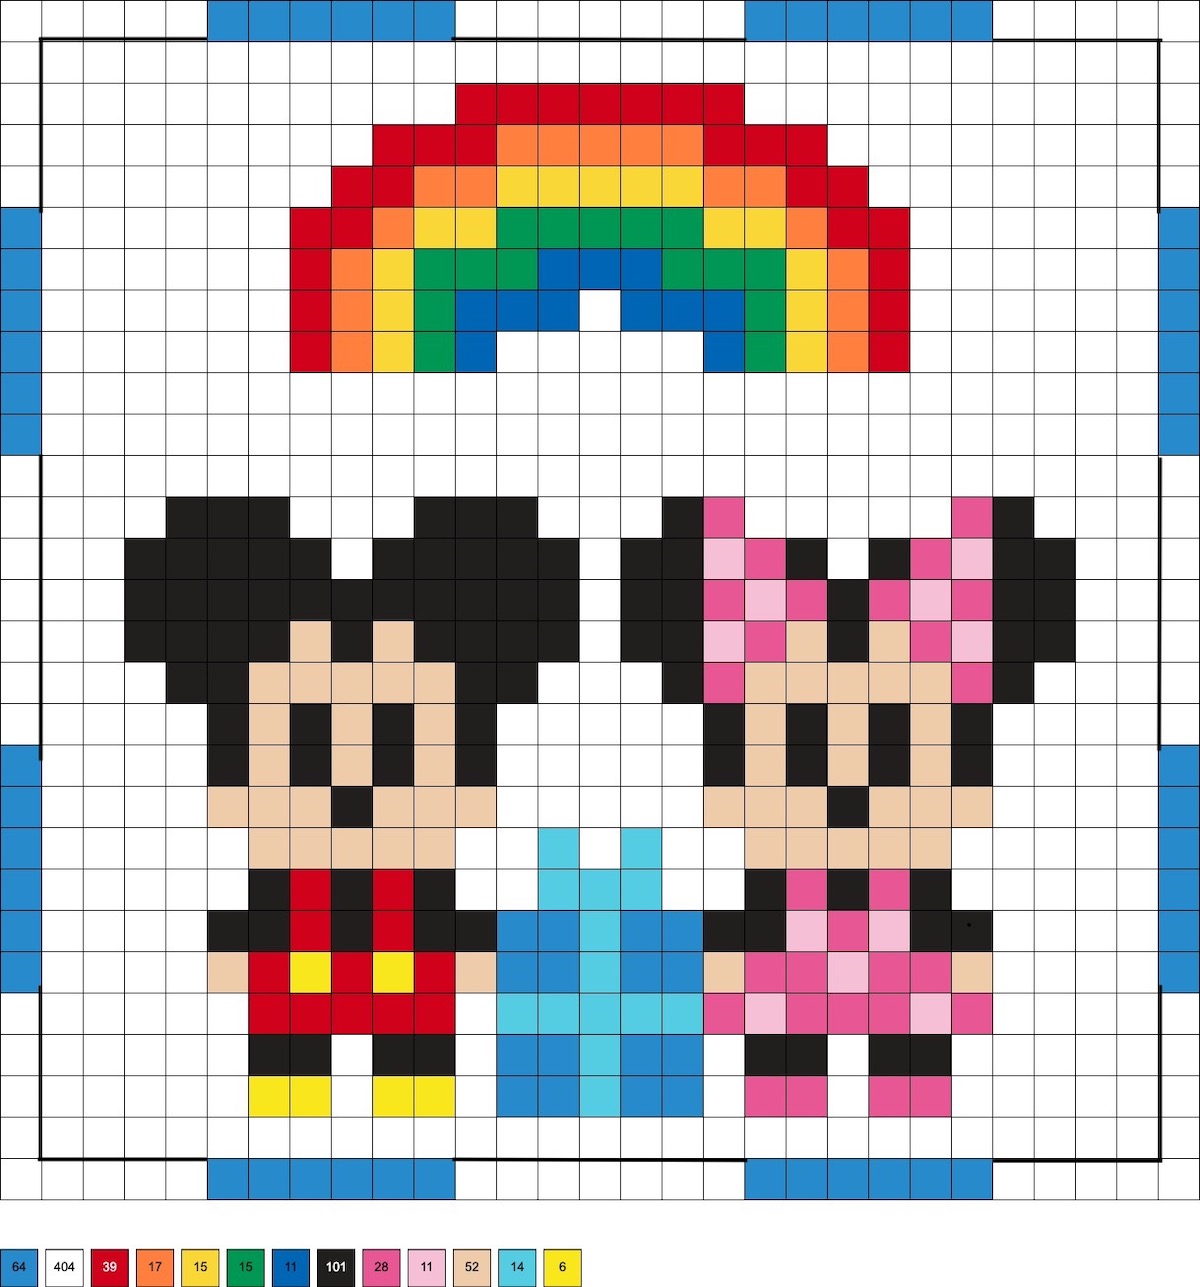
Now if you’re ready to make the tray, here’s the pattern! You’re going to make the base first, then two sides, then two more sides.
Mickey and Minnie Base
This bottom uses 64 light blue, 404 white, 39 red, 17 orange, 21 yellow, 15 shamrock, 11 cobalt, 101 black, 28 pink, 11 light pink, 52 sand, and 14 sky beads.
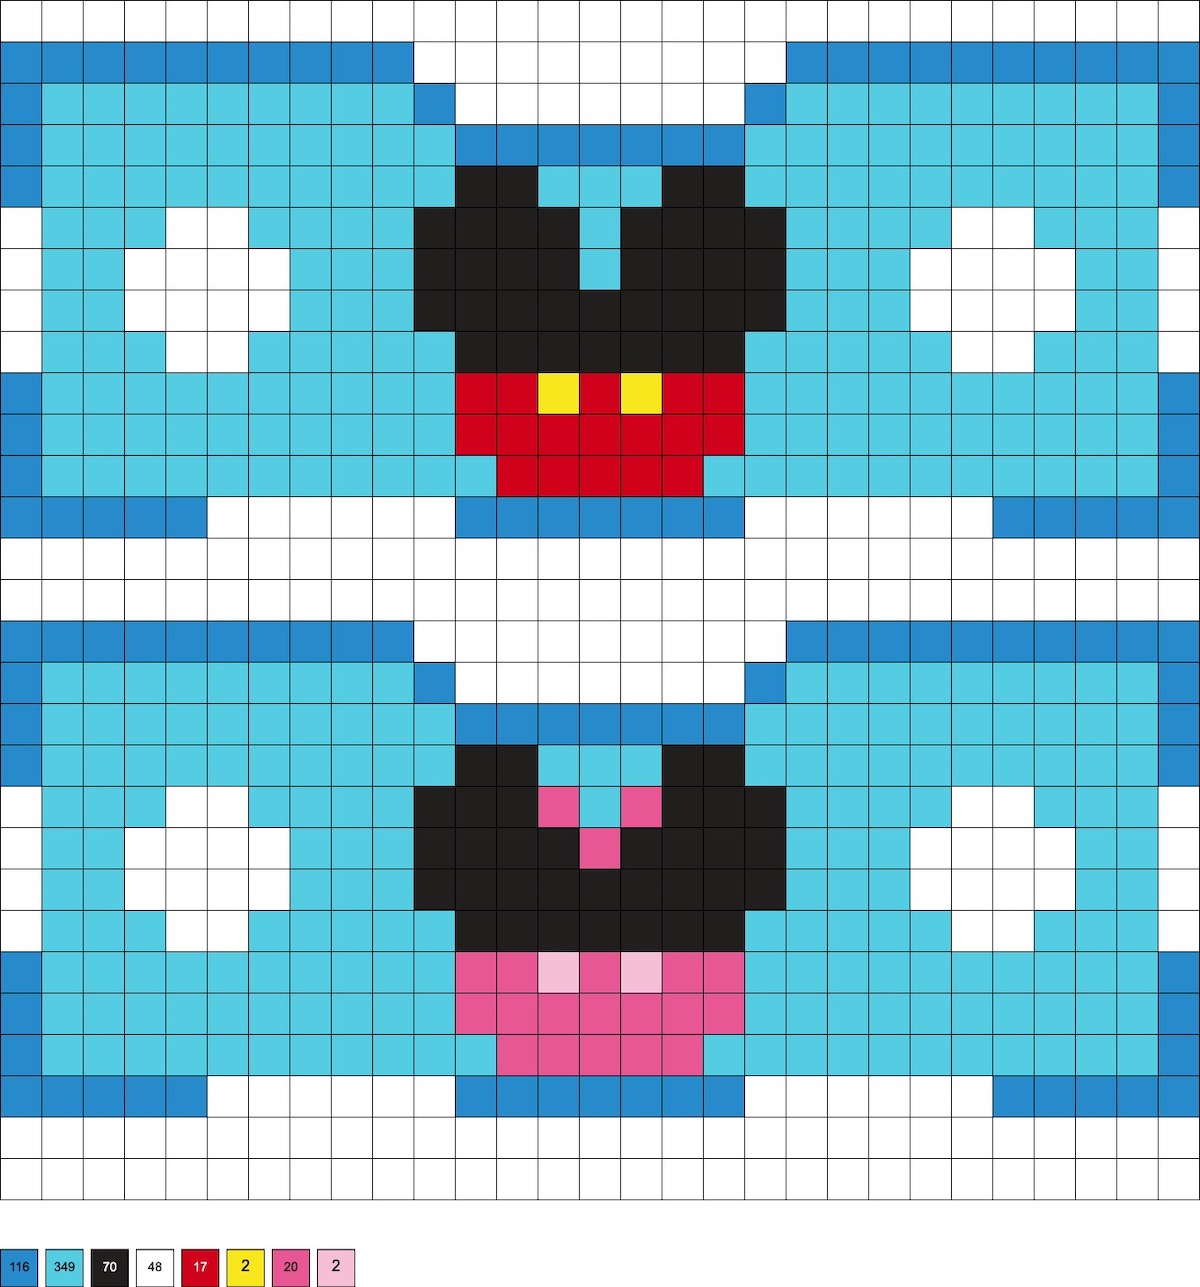
Mickey and Minnie Sides
These sides use 116 light blue, 349 sky, 70 black, 48 white, 17 red, 2 yellow, 20 pink, and 2 light pink beads.
Mickey Friends Sides
These sides use 120 light blue, 320 gray, 60 white, 58 black, 24 pink, 12 sand, 12 bright green, 32 honey, and 2 yellow beads.

Since this is going to be a tray, make sure to fuse both sides of the beads really well. You don’t want the project to fall apart while using it. And as I said earlier, you can use craft glue or hot glue to keep it together.
If you try this Mickey Mouse tray, let me know in the comments! I’d also love for you to check out these additional ideas:
Bookmarks • Bracelets • Crown • Door Hanger • Drink Covers • Tic Tac Toe Game