DIY Cork Trivets That Look Boutique-Made
Some DIY projects exist because they’re practical.
Others exist because they’re pretty.
These DIY cork trivets somehow manage to be both.
They protect your table from hot dishes, but they also look like something you’d stumble across in a little boutique and immediately convince yourself you needed. The best part? They’re surprisingly easy to make.
Unlike many tutorials, you don’t need a Cricut, vinyl, transfer tape, a stencil, or even a wood-burning tool. All you need is sheet cork, my free printable pattern, a craft knife, and a hot glue gun.
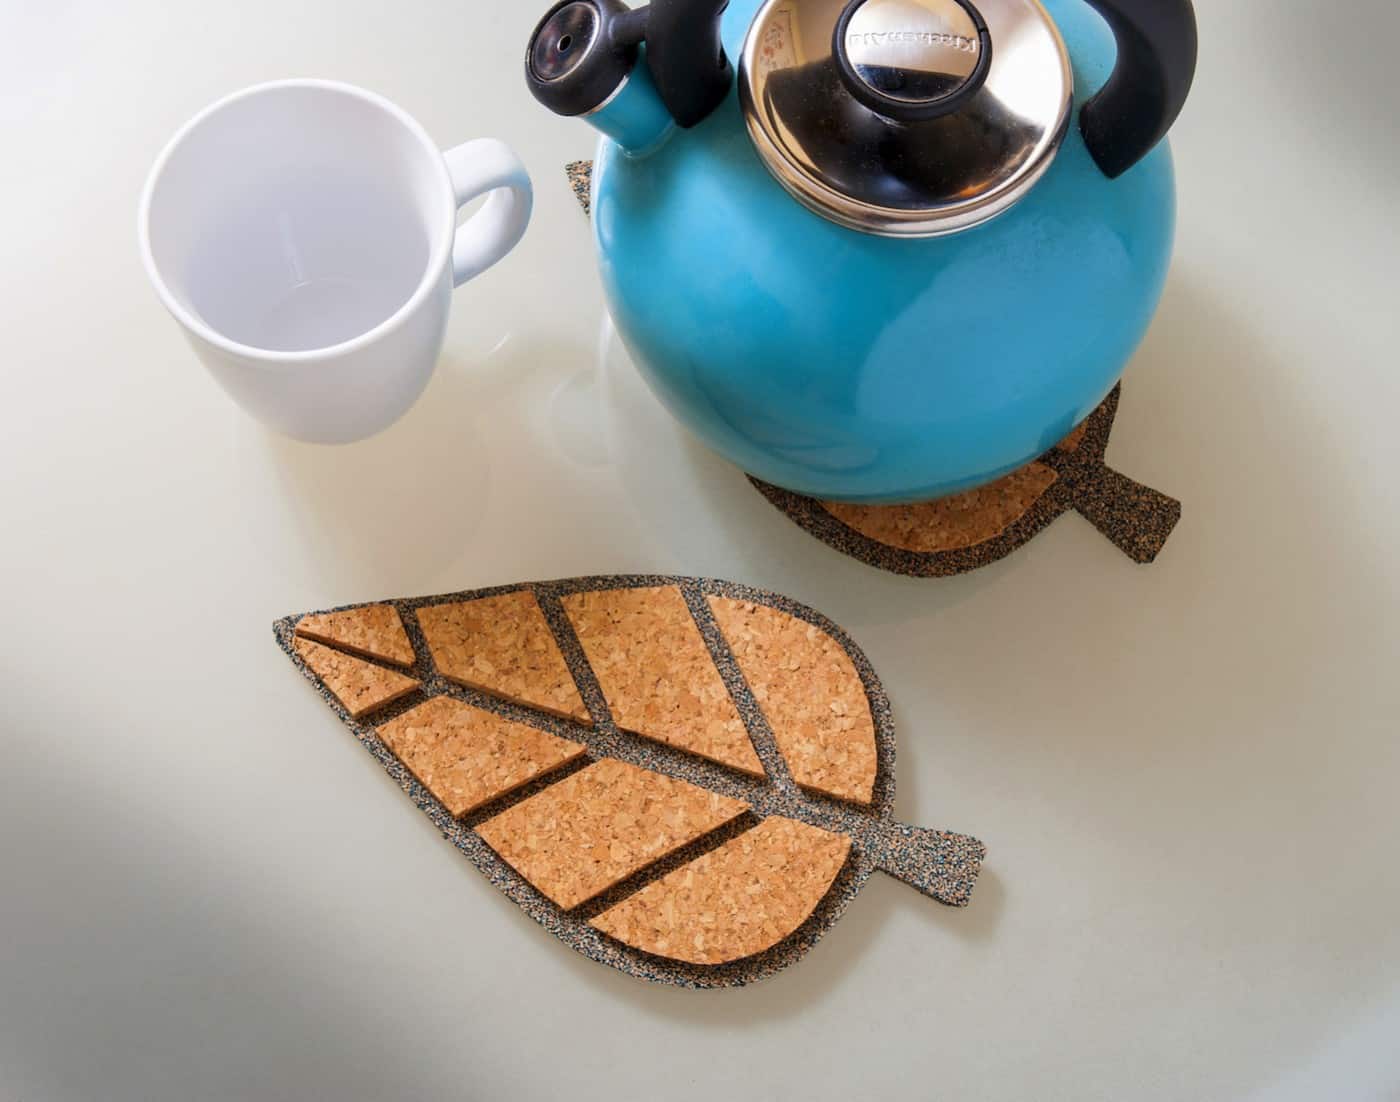
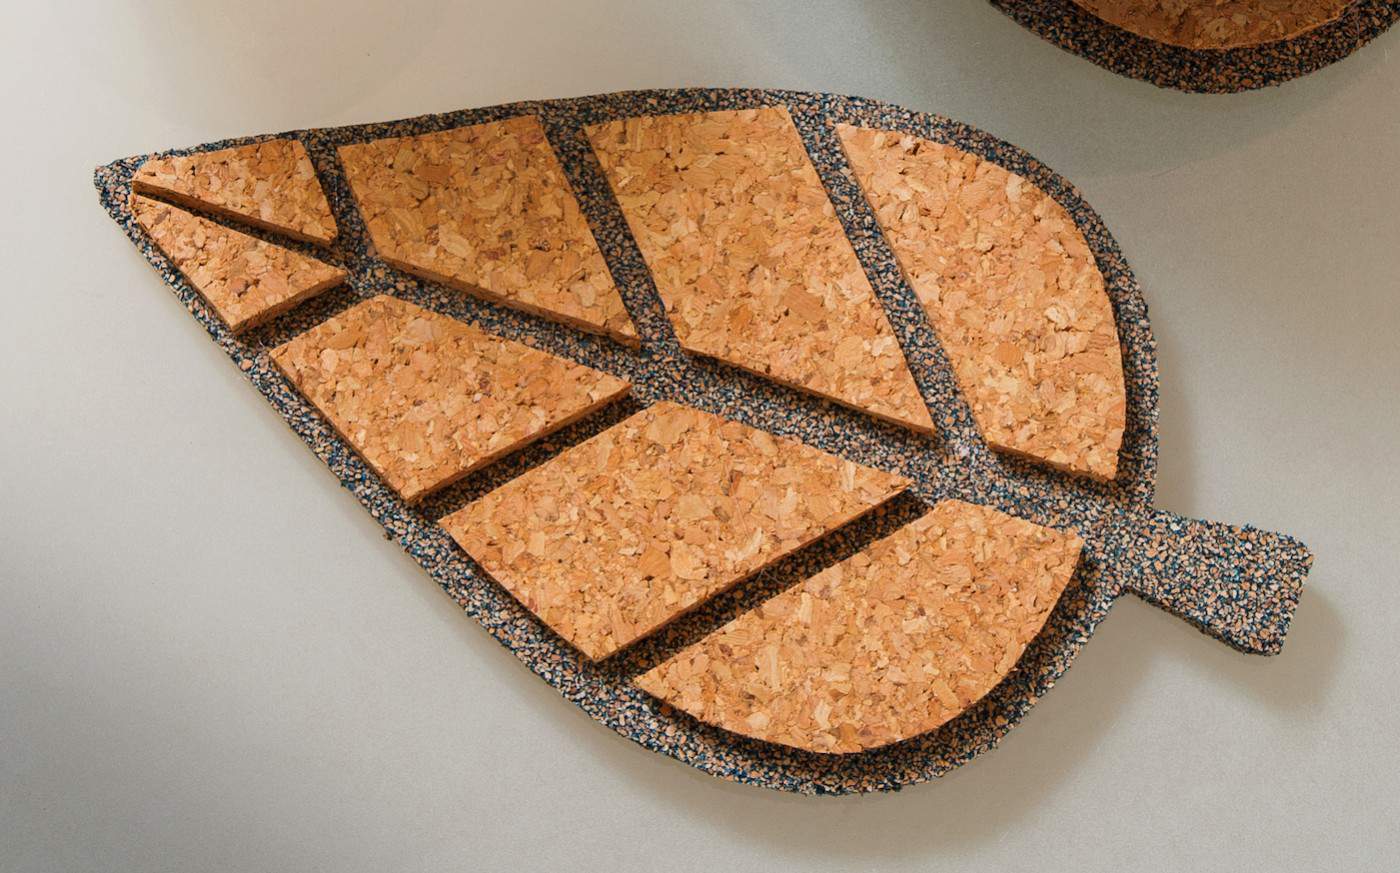
If you’ve been around DIY Candy for a while, you might remember my wine cork coasters. That’s a fun way to upcycle saved wine corks into something useful. This version takes a completely different approach by layering sheets of cork to create modern leaf designs that feel clean, simple, and a little bit Scandinavian.
I especially love projects like this because they actually earn their spot in your kitchen. Every home needs somewhere to set a hot tea kettle, casserole dish, Dutch oven, or serving bowl, so why not make something that protects your table and looks good doing it?
Why You’ll Love These DIY Cork Trivets
One thing I noticed while researching this project is that many tutorials rely on specialty tools. They have you design artwork, cut vinyl, apply transfer tape, place a stencil, trace everything with a pen, and then carefully burn the design into a premade cork trivet using a wood-burning tool. The results are beautiful, but they’re also more involved than many people want.
This project keeps things refreshingly simple.
Print the pattern.
Cut the pieces.
Glue the layers together.
Done.
That’s one of my favorite kinds of crafts. You spend your time creating instead of learning new equipment or wondering whether you bought the right supplies.
A Few Tips Before You Start
The craft knife is really the star of this project, so give yourself the best chance for success by using a fresh, sharp blade. It makes cleaner cuts, follows curves more easily, and is actually safer than trying to force a dull blade through the material.
I also recommend making several light passes instead of trying to cut all the way through at once. It takes a little longer, but the edges look much cleaner.
Work on a cutting mat if you have one, and don’t be afraid to take your time around tighter curves. This isn’t a race.
Side note: if you happen to own a Cricut or another cutting machine, you could certainly experiment with creating your own stencil or cutting designs from vinyl. But honestly? I think there’s something satisfying about making these with just a printed template and a craft knife. Sometimes the simplest method really is the best one.
Are Cork Trivets Heat Resistant?
This is probably the biggest question people have before making them.
The answer is yes.
Natural cork is an excellent insulator, which is why it’s been used for trivets and hot pads for decades. It easily handles everyday kitchen jobs like protecting your countertop or table from hot mugs, teapots, serving bowls, and baking dishes.
If you’re removing something directly from a very hot oven—especially above 450°F—I like to let it sit on the stovetop for a minute or two before placing it on any handmade trivet. That’s simply being cautious and helps your project last even longer.
Make Them Your Own
The leaf pattern is perfect for fall, but once you learn the technique, you can create almost anything.
Pumpkins for autumn.
Snowflakes for winter.
Hearts for Valentine’s Day.
Monograms for housewarming gifts.
Simple geometric shapes for a modern kitchen.
One of the things I enjoy most about working with cork is that it has enough texture to feel warm and natural, but it’s neutral enough to fit almost any decorating style. Whether your kitchen leans farmhouse, Scandinavian, modern, or somewhere in between, these DIY cork trivets fit right in.
They also make a great addition to a thoughtful handmade gift. Pair a set with a favorite cookbook, homemade bread, specialty olive oil, or a pretty kitchen towel, and you’ve got something that feels personal without spending a fortune.
Get the printable how to below:

Make a Cork Trivet
Equipment
- Printer
- Tape
Materials
- 1 piece Cork tile dark brown, 12” x 12”
- 1 piece Cork tile light brown, at least 6” x 6”
- Leaf image template
Instructions
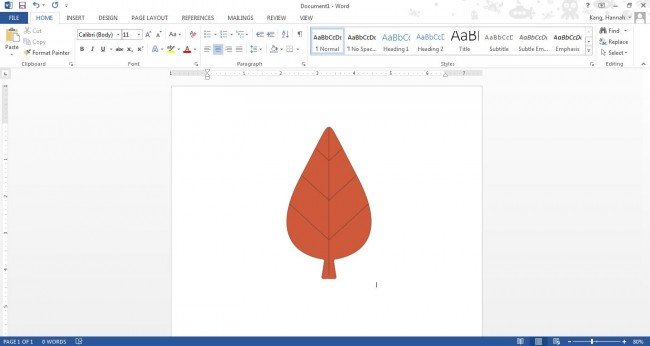
- Download the leaf image and insert into a word processing program. Enlarge to approximately 5” wide and then print. Enlarge that same image again to approximately 6.5” wide and print a second time.Leaf image template
- Trim the excess paper from the outside of your larger leaf, but leave a white edge around the design for now.
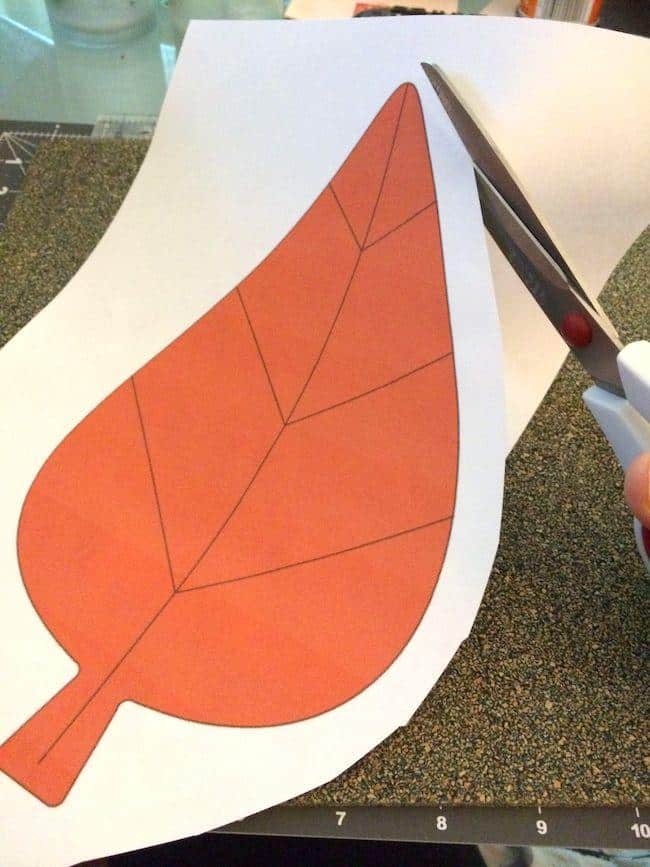
- Tape the LARGER leaf shape(s) down to the darker, larger piece of cork using your tape.
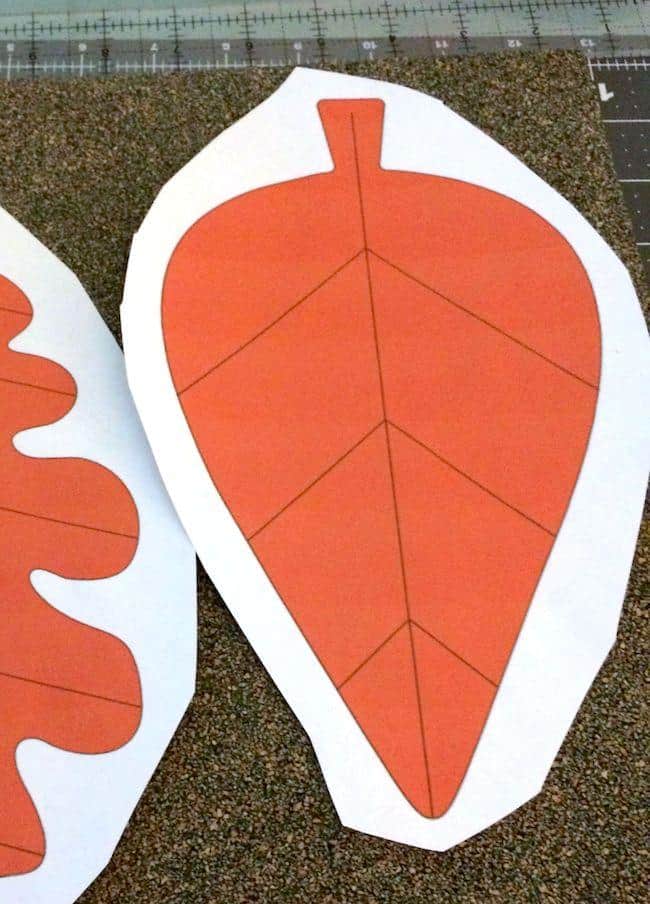
- Trim all the way around the edge of the larger leaf template using a craft knife (on top of the mat). As you trim away the white part of the paper, you will also be cutting through the cork. Now onto the smaller piece.
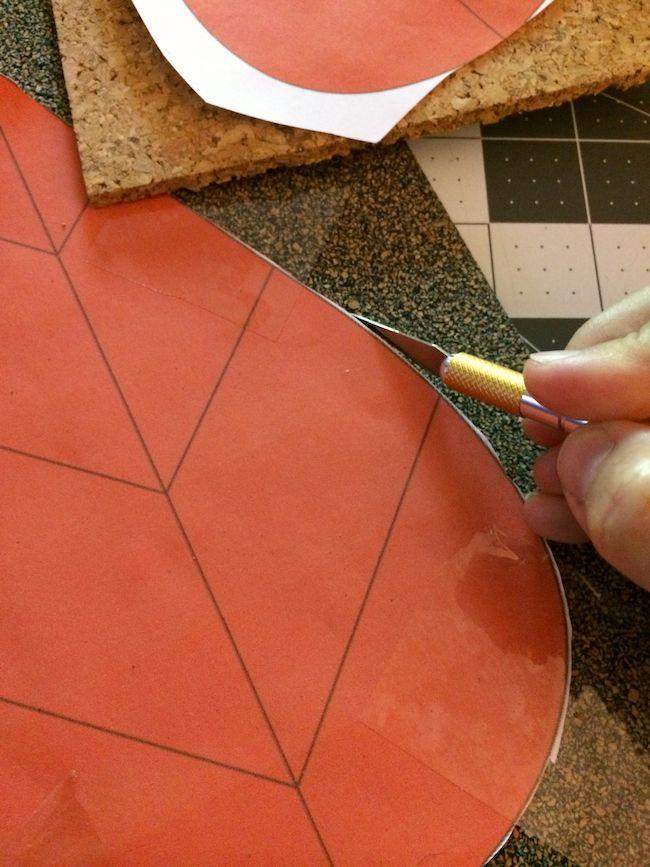
- For the smaller leaf print out, cut it into two pieces so that you fit it on the smaller, lighter cork sheet. Tape the pieces to the cork and cut out each portion of the leaf individually using the craft knife.
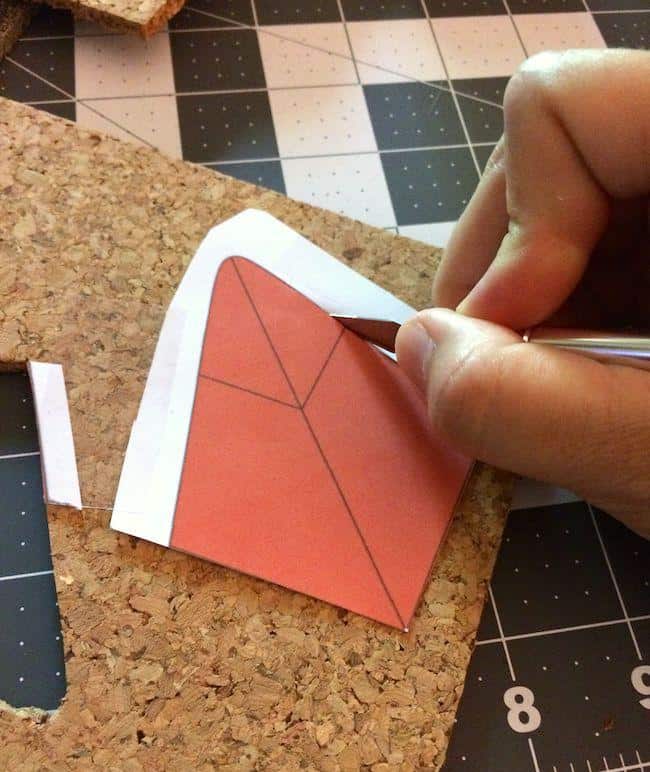
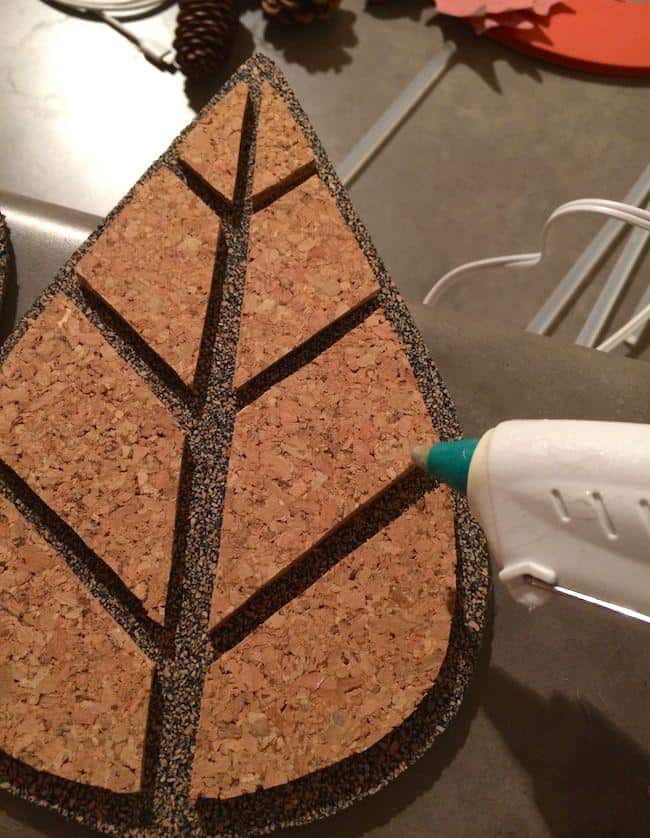
- Organize these smaller pieces on top of the darker piece, making sure they are in the right position to glue.

- Hot glue each piece down – make sure to use quite a bit of glue to secure the pieces well. Let cool.
Notes
- A sharp craft knife makes the cleanest cuts.
- Use several light passes rather than one deep cut.
- Always cut on a protected work surface.
- These are ideal for hot mugs, teapots, serving dishes, and everyday cookware. For extremely hot pans straight from a very hot oven, allow them to cool briefly before placing them on the trivet.
If you make these, I’d love to hear in the comments. Plus I have clothespin trivets you’ll probably want to check out. They’re kinda cool!
And if you love working with cork, I’ve got some tips for you. I’d also love for you to check out these other fall crafts and posts:
Book Page Pumpkin • DIY Fall Wreath • Pumpkin Garland • Fall Gnomes • Mini Fall Banners • Mini Pumpkin Vases • Mini Pumpkin Wreath • Scrapbook Paper Leaf Decor • Twig Votives • Toilet Paper Pumpkins • Wine Cork Pumpkins


Hello! Love this idea but the link to download the leaf cutouts isn’t available.
I fixed it! https://www.dropbox.com/scl/fi/cf2ru0hawro2vb5r7npvd/Leaf-Trivet-Template.jpg?rlkey=7nfj0q1lap3i6t6v1kpm3zf16&st=ui5gqi90&dl=0
You can resize when you print to the size you want.
So cute! Could you tell me how thick the cork tiles were? They seem to vary in thickness. ~ Thanks!
I’m having a hard time remembering but I believe 1/4″ thick. If you use 1/4″ thick with 1/2″ or 1/8″ with 1/2″ etc you should be fine (even if they aren’t the same thickness).
@Amy,
Thanks so much! I just love your tutorial, and can’t wait to try it!
Where did you buy the cork tiles? I’m looking for dark cork and so far have only found tiles where the cork has large chunks and breaks apart and sheds easily.
Hi Amie! I believe I bought them at Hobby Lobby years ago. You could try Amazon – there were a few that looked promising under “dark cork tiles.” But also you can paint cork if you want to! With acrylic craft paint. And you can add a little bit of water if you still want the cork to show through a bit.
@Amy, Thank you! Would painting the bottom layer lower the heat rating?
Are there more patterns available ? I’d love to make another one!
Bevvy just try googling leaf silhouettes and find one you like. There are so many cute ones! You can pick your favorite!!