How to Stencil a Clay Pot the Easy Way
Learn how to stencil these pretty distressed clay pots for your front porch! These is a great craft for beginners, and easily customized.
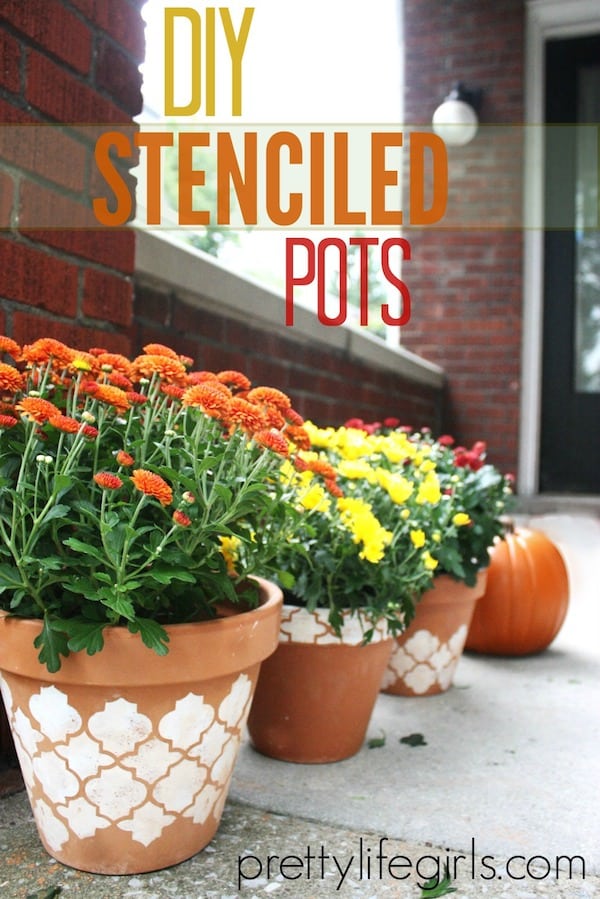
Happy (almost) fall, DIY Candy friends! This is Liz again from The Pretty Life Girls and today I’m going to show you how I glammed up some plain pots to make room for one of my favorite treasures of the fall season, MUMS!
I love those suckers. They are hearty, they are colorful, and it doesn’t take many of them to make a big impact. So, since I love my mums I decided that they needed pots that deserved their loveliness.
Here’s how to stencil clay pots using my famous (okay, not really) method!
Stenciling Clay Flower Pots
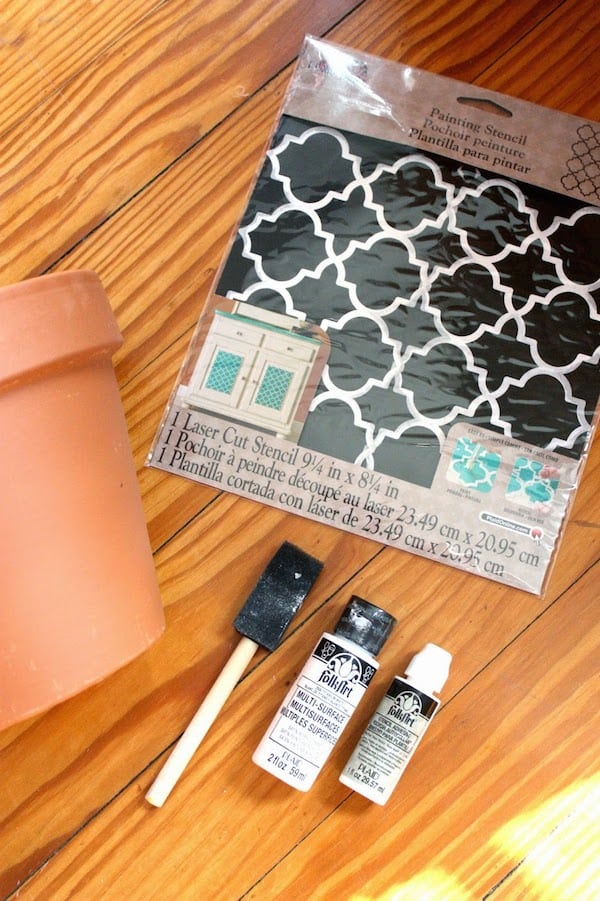
Gather These Supplies
- Garden pots (I used terra cotta clay from Home Depot)
- Craft paint
- Stencil (mine is FolkArt, which you can find at any craft store)
- Stencil glue
- Stencil brush or foam brush
- Clay pot sealer
- Sandpaper (optional)
Note: the type of paint you use depends on where these are going. If your pots are going to be indoors or in a very covered area where they won’t be exposed to the elements, you can use regular craft paint. If they are going to be outdoors and exposed to rain and sun, you should use either multisurface or outdoor craft paint. It’s in the same section of the craft store as the regular paint.
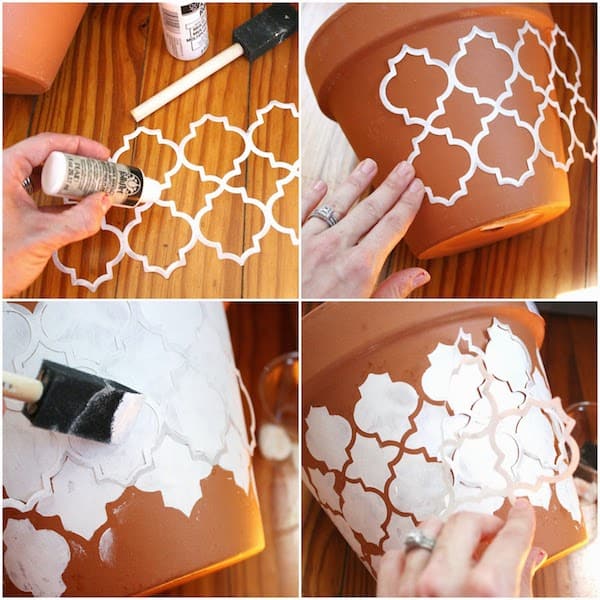
Apply the Stencil
Apply stencil glue to the stencil. You can try doing this project without stencil glue but I wouldn’t recommend it. Those stencils can be slippery and you have to be fairly precise for them to look good.
Press stencil on pot. My glue said to wait 10 minutes for it to dry, but I found that I could paint the pots just fine after about a minute. If you are instruction follower, that’s probably good.
Paint and Remove Stencil
Paint! Now – I’d advise you to use a stencil brush for this part, but some people don’t mind using a foam brush. Stencil brushes are made to be used by tapping the brush on the surface with the stencil applied, so you get clean lines.
With the stencil glue, you’ve helped yourself out so that the paint isn’t going to get under the stencil as easily because the glue keeps it adhered to the surface. So you can probably use a foam brush to apply the paint. Apply it lightly either way. Globbing the paint on will be noticeable.
Once you’re done painting, remove the stencil! Be very careful and gentle, and let that section dry before moving onto and painting the next section.
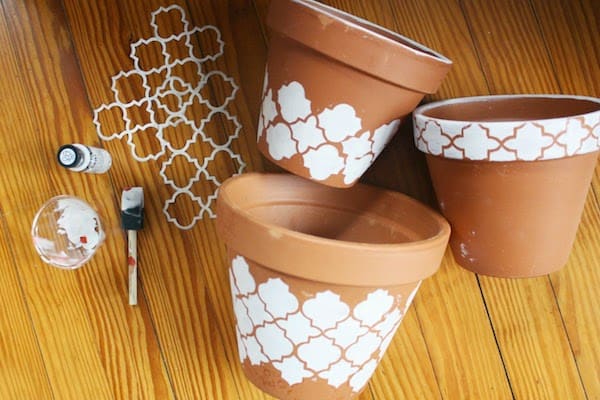
Sand the Pots
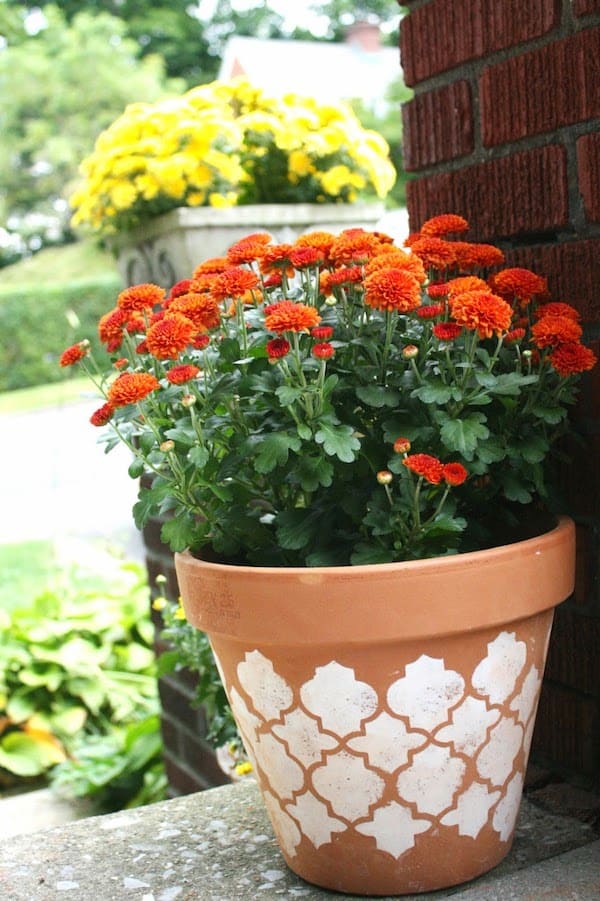
Once my pots were completely painted, I decided I wanted them to look a little more weathered so I busted out the sandpaper and roughed them up a bit. I love the worn look this gave the design.
Seal the Insides
Once you’re done painting, let dry completely. THEN seal the inside of the pot with clay pot sealer. You’ll want to do this so that water (when watering the plants) doesn’t seep through and ruin your design. Especially if it’s white! There is an actual clay pot sealer available on the market, but you can also use just a regular acrylic sealer.
Spray the inside lightly a few times and let dry. No, it won’t kill your plants. It should be fine. Just let dry completely before adding anything.
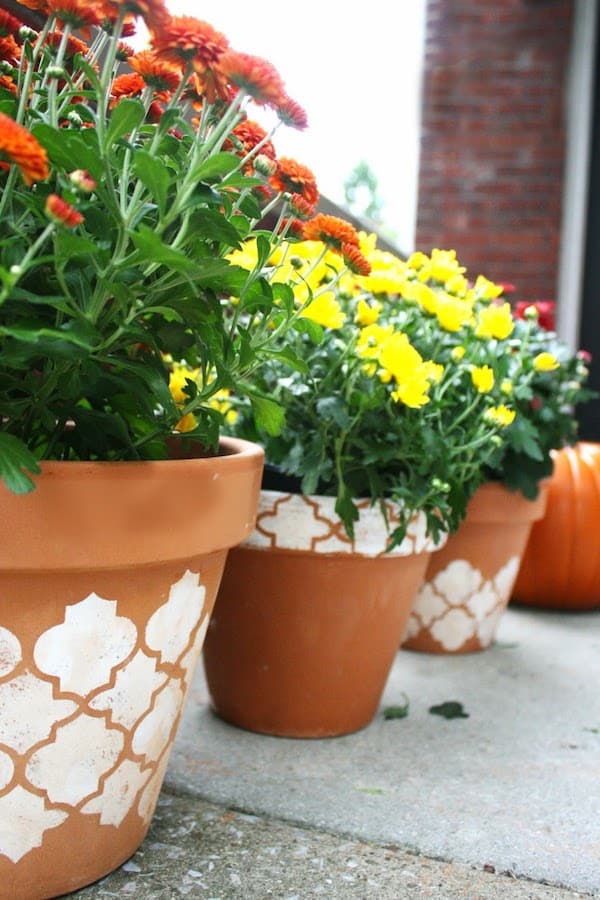
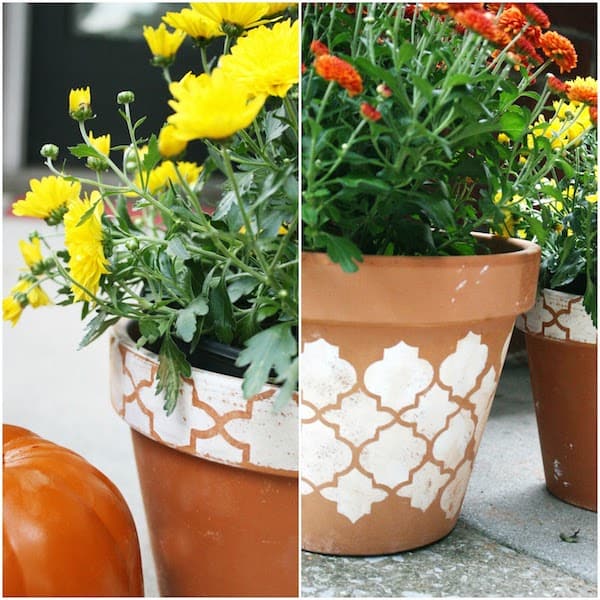
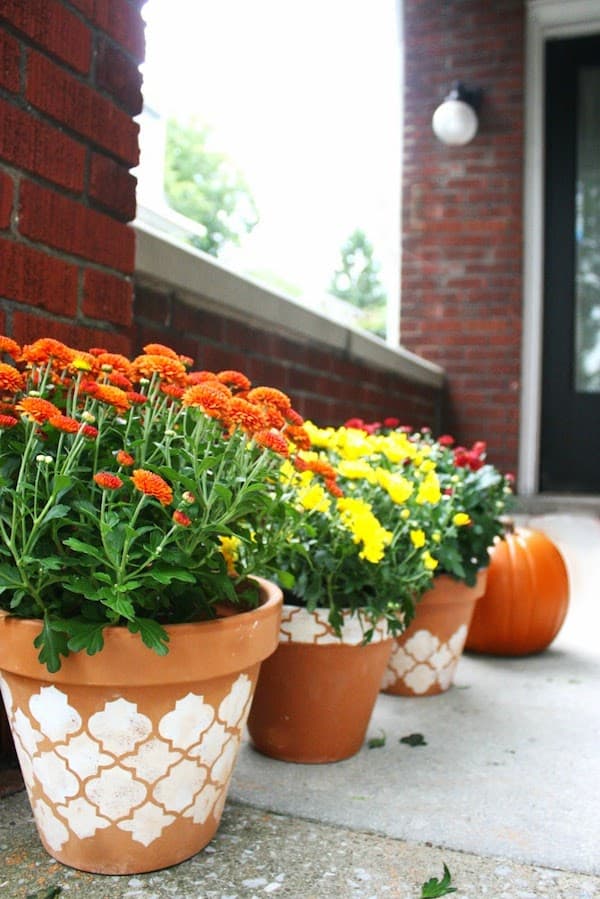
THEN plant your flowers, admire your lovely pots, and dream of crisp fall days! They’re coming soon.
I’d love to know if you try this to stencil clay pots! What stencils did you use? Do you have any tips or tricks you found useful? Let me know in the comments!
For more DIY crafts, fab recipes, and personal style inspiration, be sure to visit my sister over at The Pretty Life Girls! I’d also love for you to check out the following posts and projects:


Love these ideas! Re the filigree stenciling shown on your post, the paint is very textured. Did you use molding paste? Or?
Thanks!
Your pots are awesome. Depending what you want your pots to look like after you put soil and plants in the pot, if you don’t seal the inside of the pot with a water proof sealant, moisture will seep through to the outside making them look really weathered and water stained. If that’s not the look you’re after, seal the inside of the pot and the outside stays clean and pristeen.
Very nice and easy!