Make an EASY DIY Bird Feeder: Two Ways!
Learn how to make a bird feeder the easy way! This DIY bird feeder tutorial offers two options: one hanging and one for a planter pot.
Skills Required: Advanced Beginner. You’ll need to have used a drill (you’ll be drilling through plastic; technique below). You also may be operating a Dremel tool or metal saw to cut through a metal rod.
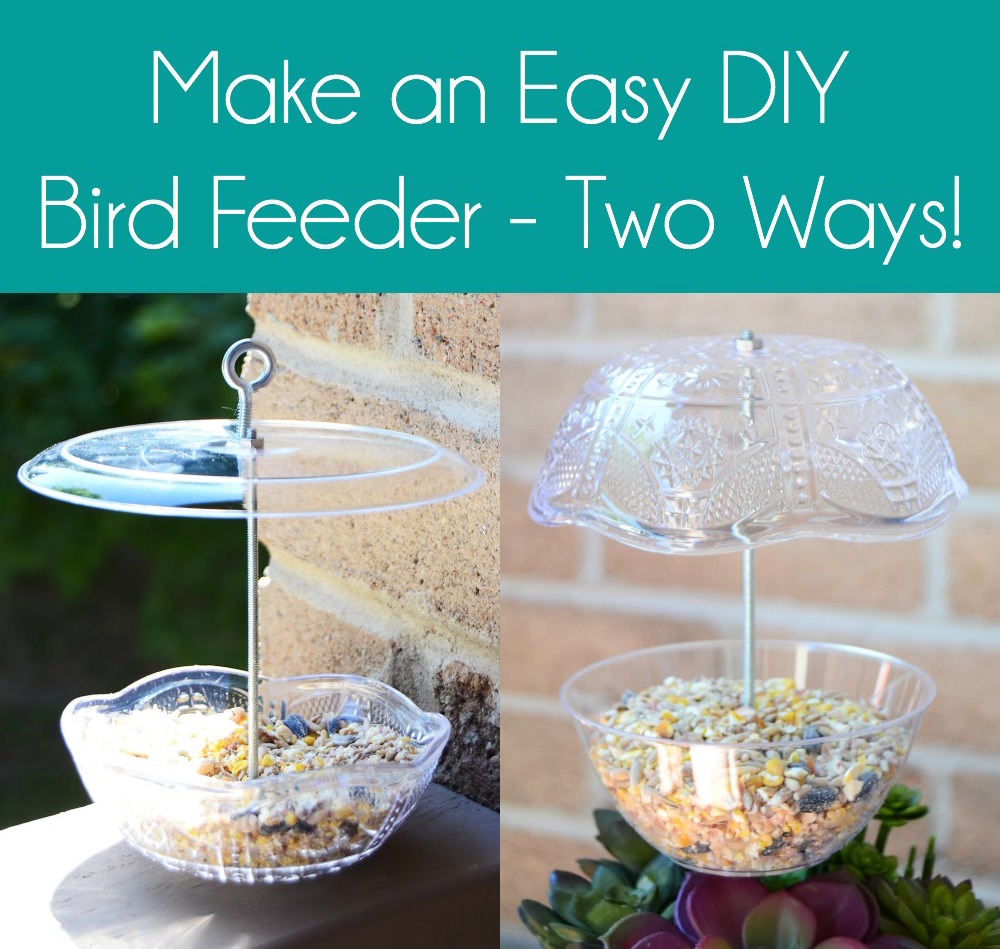
Did you know that you can make a bird feeder for just a couple bucks – with plastic dishware? It’s true!
You can purchase plastic dishware from the dollar store and I’m going to show you how to turn it into TWO versions of a DIY bird feeder: one that hangs and the other that can be stuck into a planter if you have nowhere to hang a feeder.
Both of these versions are relatively easy and have simple steps. Yes, you can make a bird feeder with ease! The hanging DIY bird feeder has 5 steps, and the plant pot version has 3 steps. Before you take a peek at the tutorial, I want you
How to Drill Through Plastic
I’ve got three secrets that I always use for drilling through plastic and I think they’re going to help you in this project and beyond. They are as follows:
- Use a piece of painter’s tape. Painter’s tape is my favorite tip for keeping a variety of surfaces from cracking while drilling!
- Put a wood piece below the plastic. Let the drill bit go into the wood so that you don’t go into the surface below (your table, etc.).
- Drill slowly. This is so the plastic doesn’t
I’ll be honest – these steps don’t guarantee success. If the plastic is really thin, it could crack anyway. But I’ve drilled through many a plastic dish from the dollar store and it’s worked just fine. Generally speaking, you’ll be able to do this with most plastic dishes you buy!
Are you ready to make a bird feeder?? Keep reading!
Make a Bird Feeder Two Ways
Gather These Supplies
- Drill with drill bits
Hanging Bird Feeder
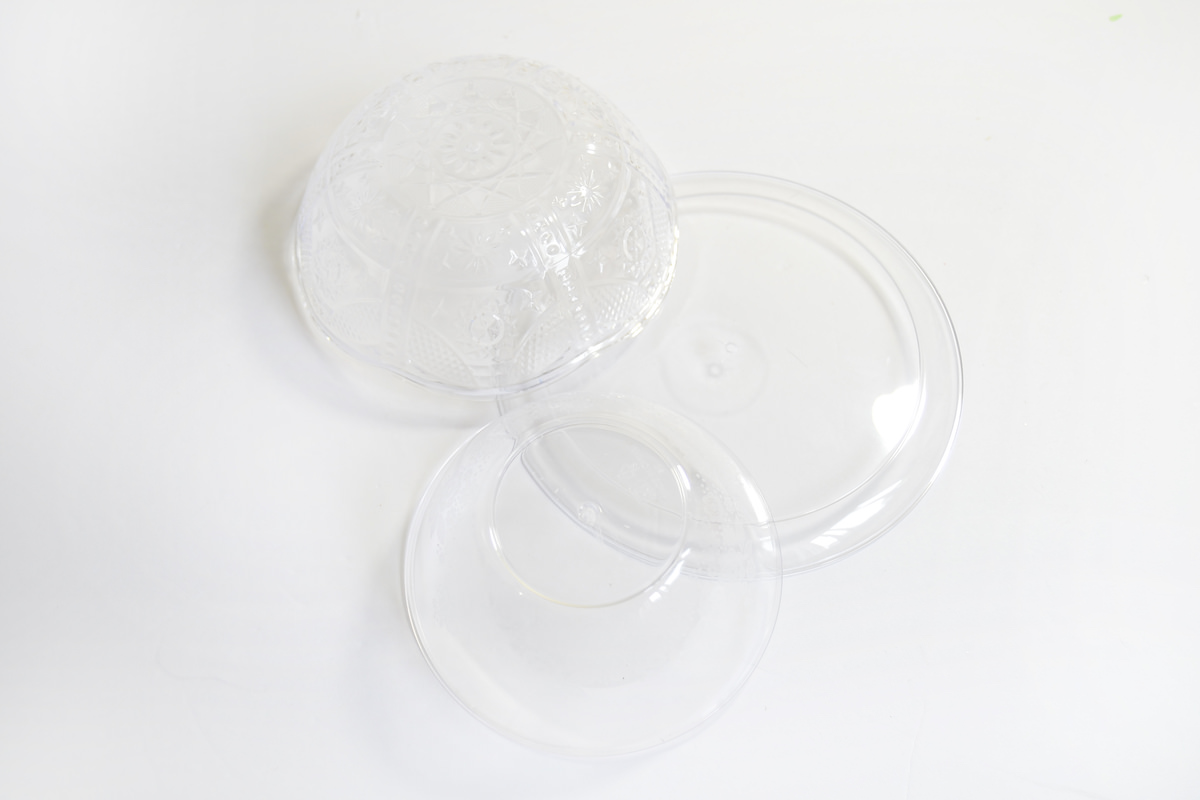
- Plastic bowl
- Plastic plate
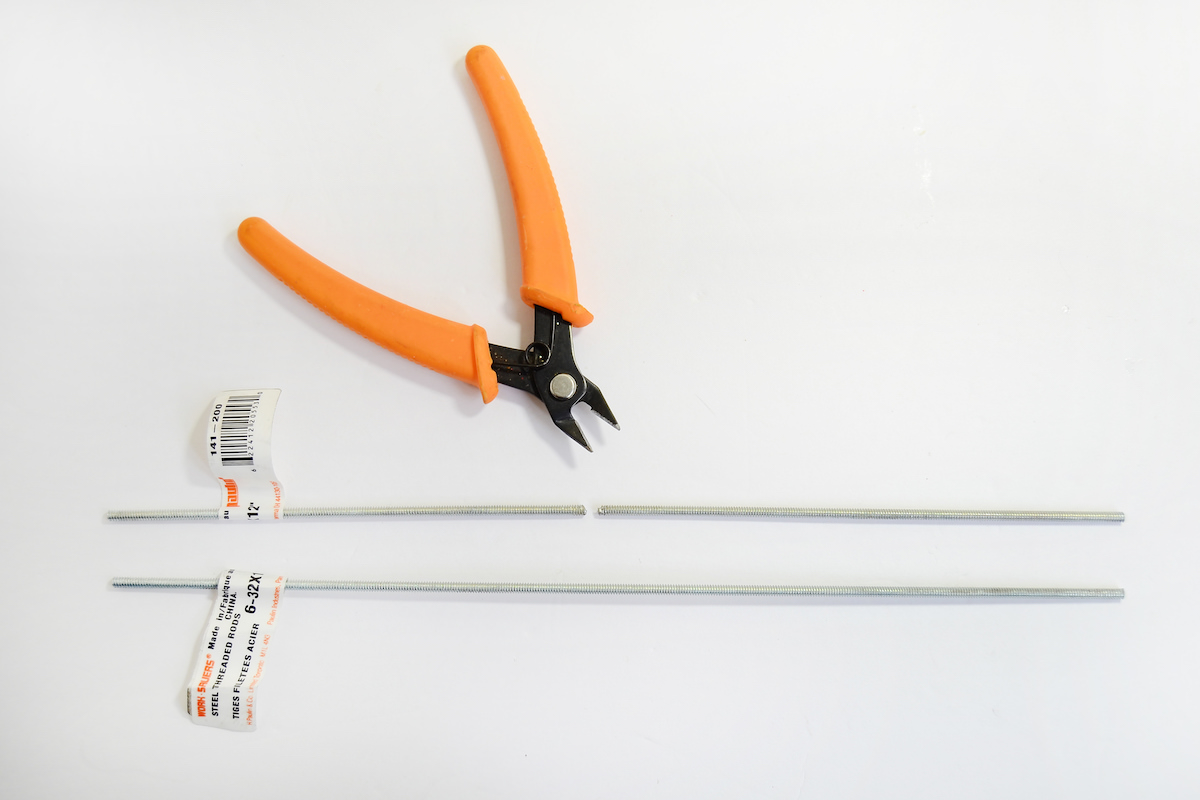
- 6/32” threaded metal rod
- 6/32” hex nuts – 4
- Dremel tool, metal saw
- Eye bolt with a nut
Planter Bird Feeder
- Plastic bowl
- Plastic saucer
- 6/32” Threaded metal rod
- 6/32” hex nuts – 4
Instructions for the Hanging DIY Bird Feeder
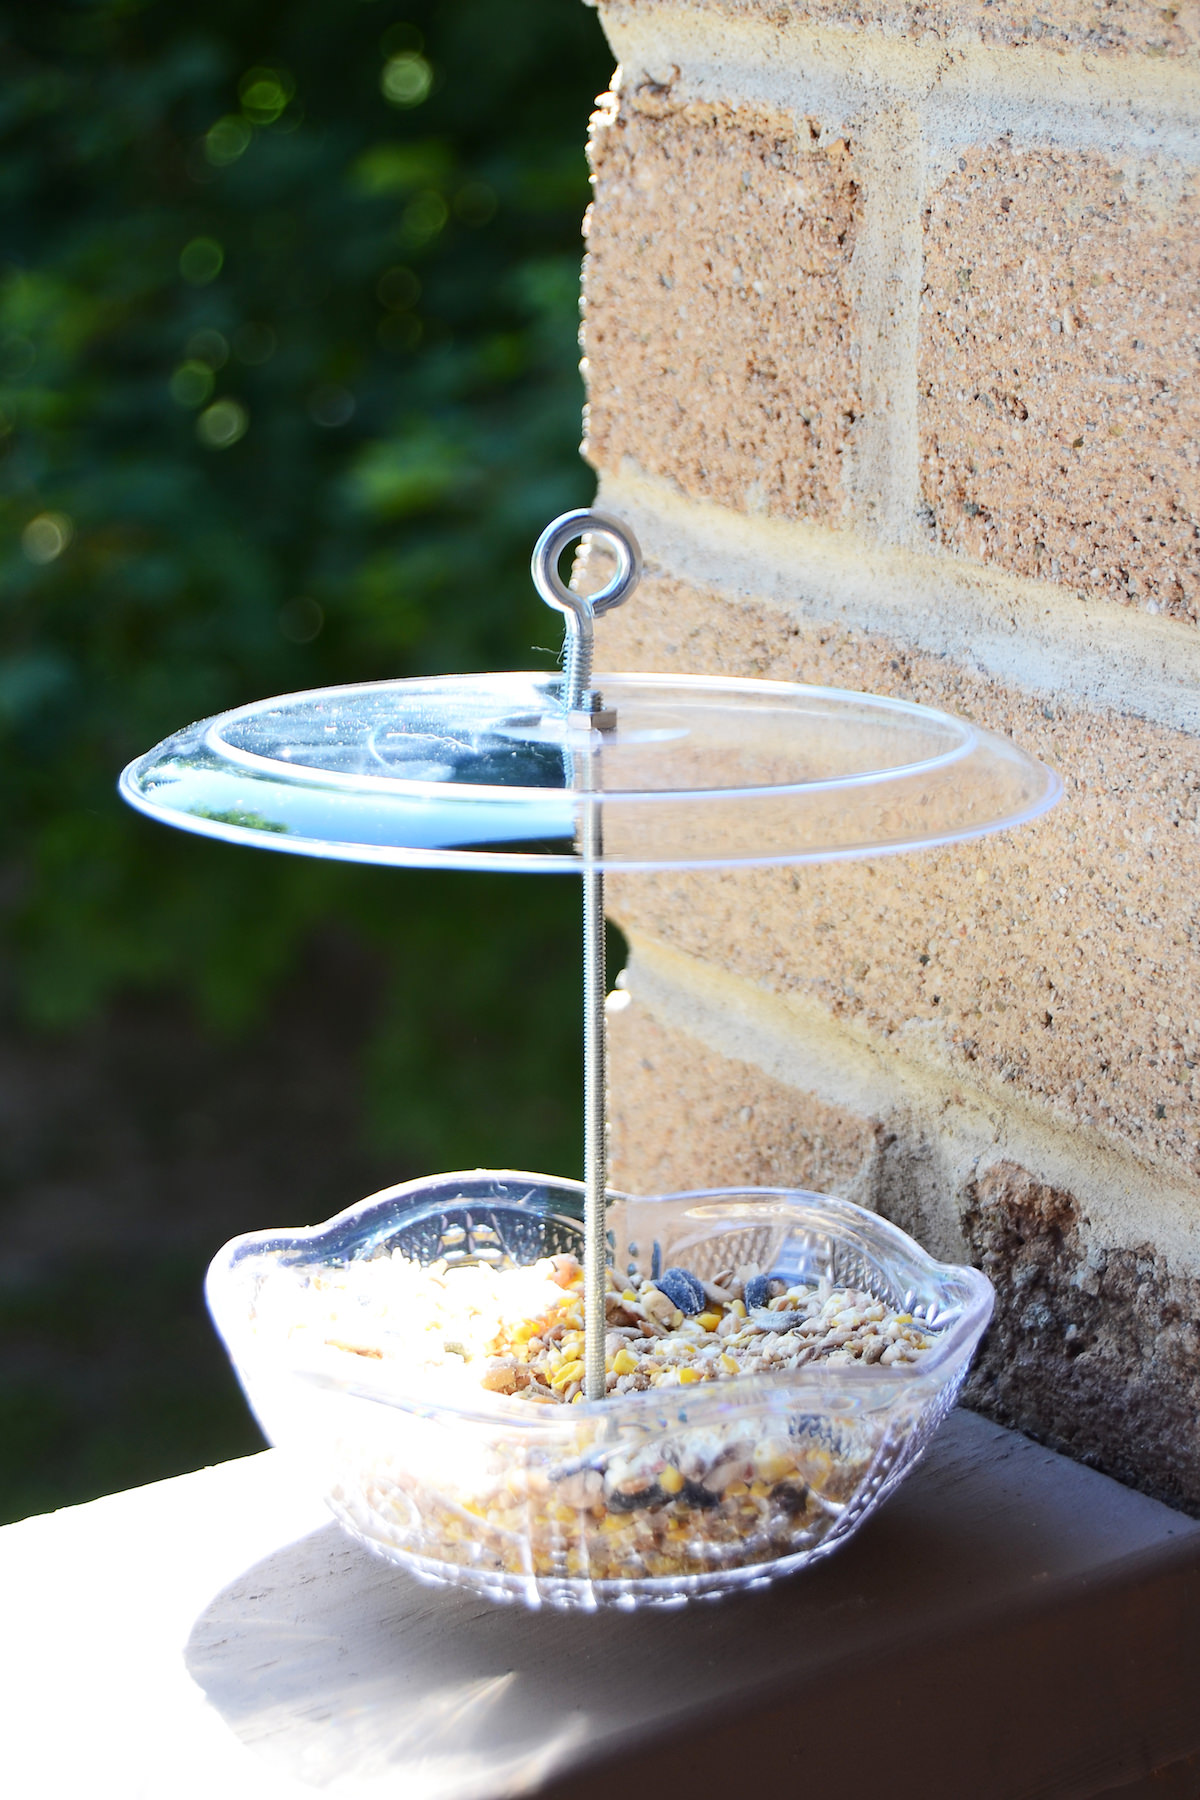
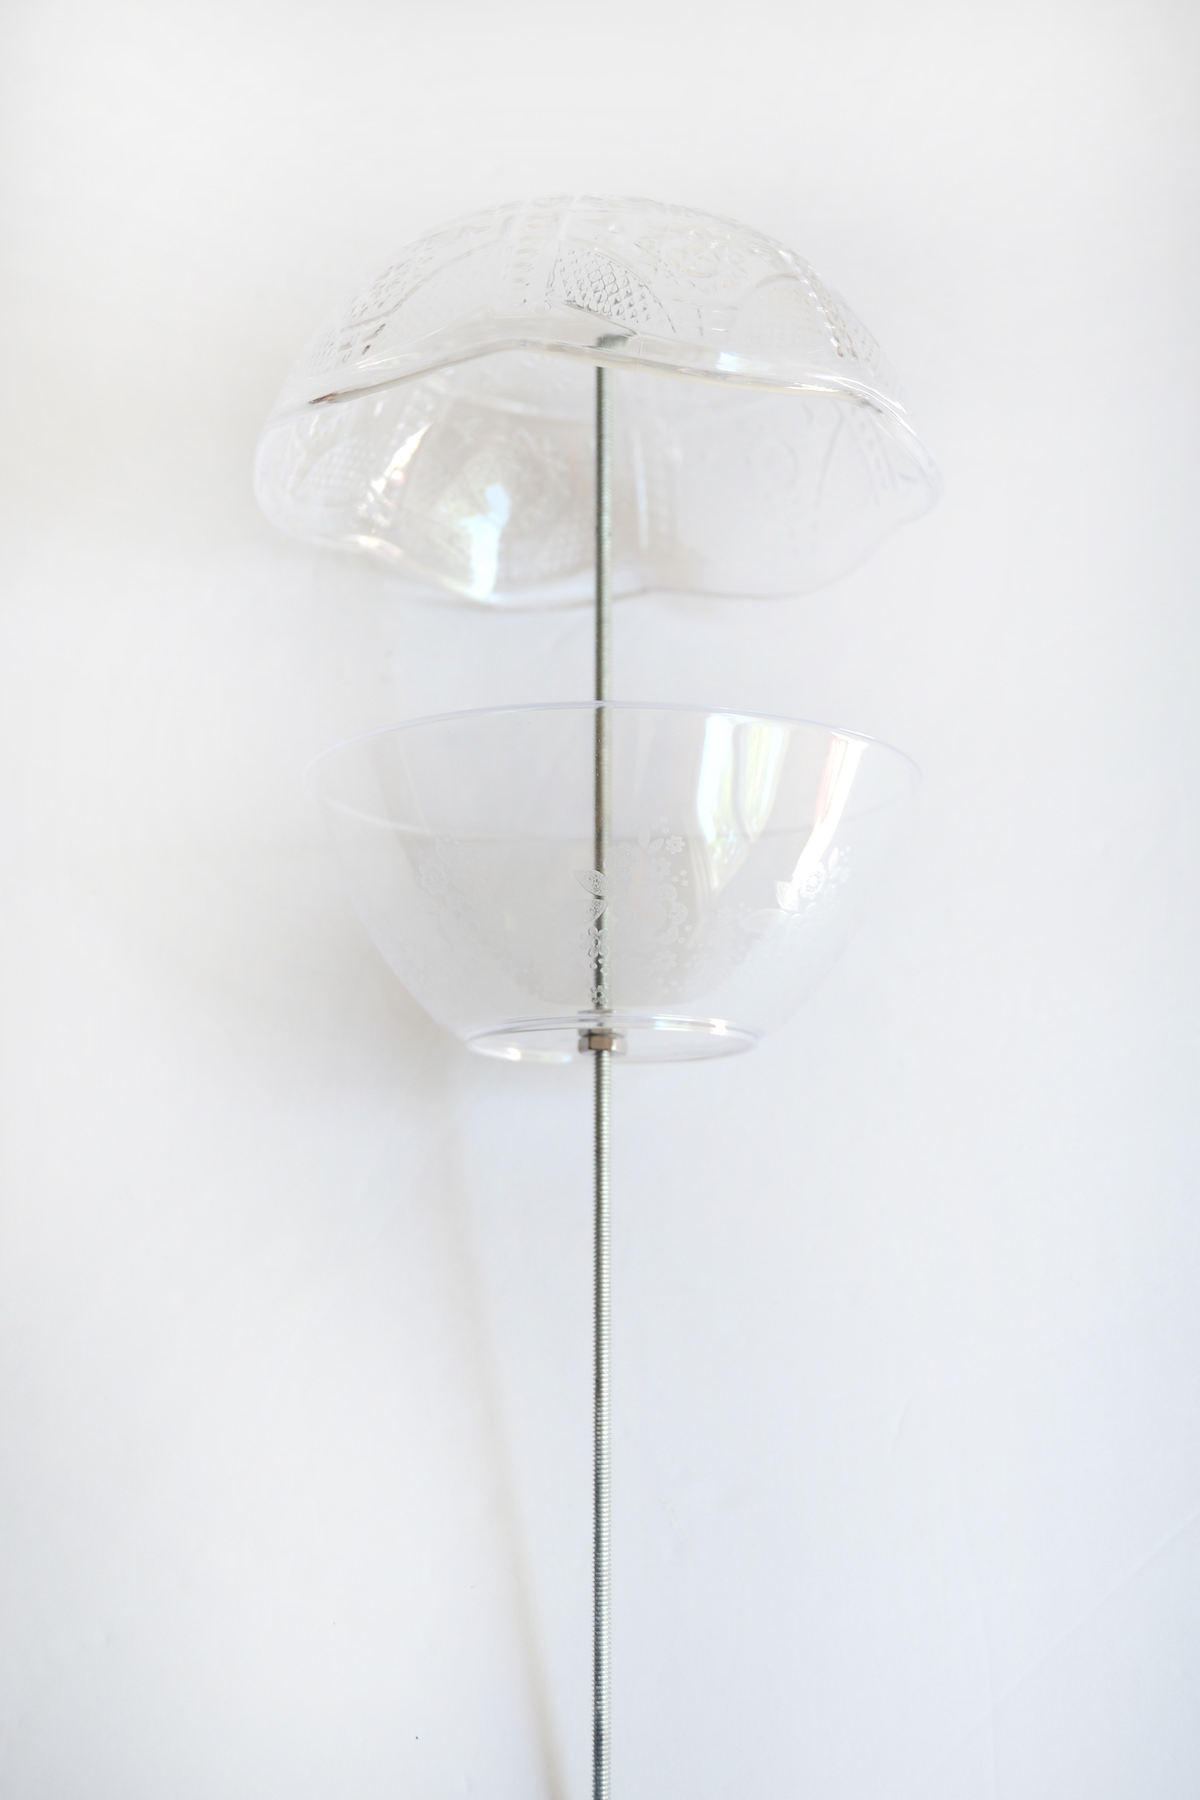
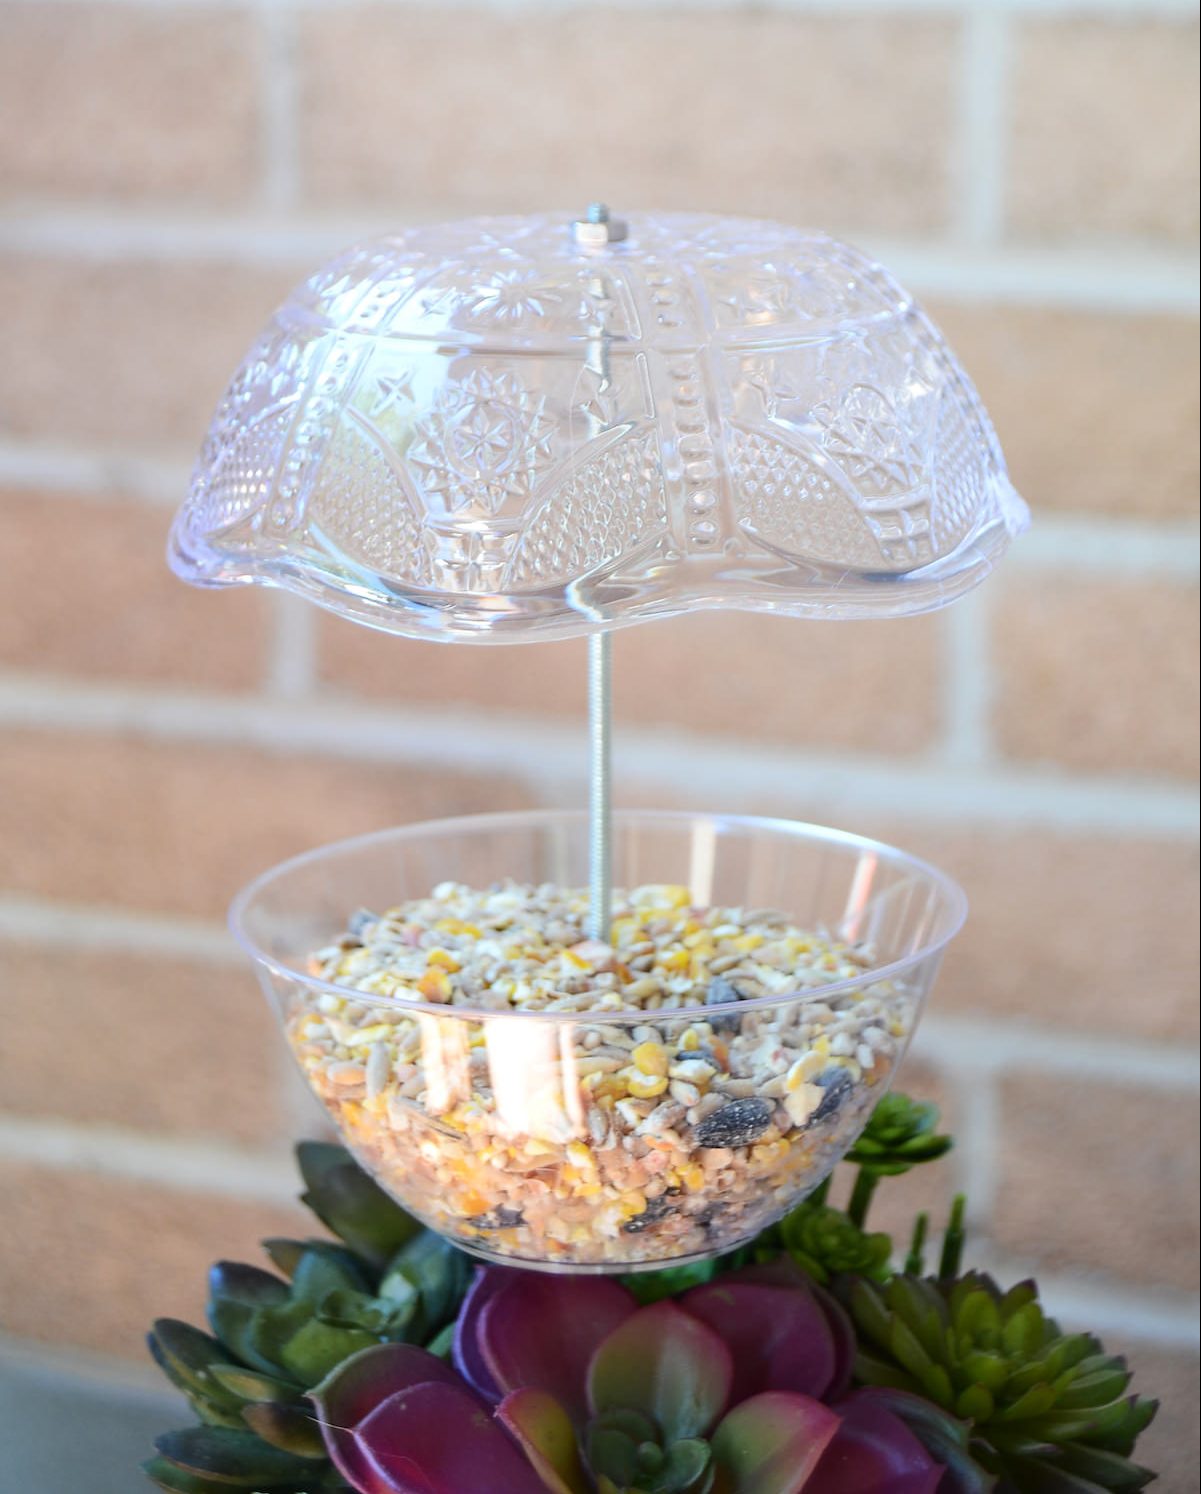
Step 1. Measure how long you want your threaded metal rod to be. The length is really up to you – you’re going to secure a plate upside down at the top with two hex nuts, and the bowl at the bottom (to hold the seed) with two additional nuts.
When you decide on the length, cut the rod. I used a Dremel tool to cut through it, however, you can also use a metal saw.
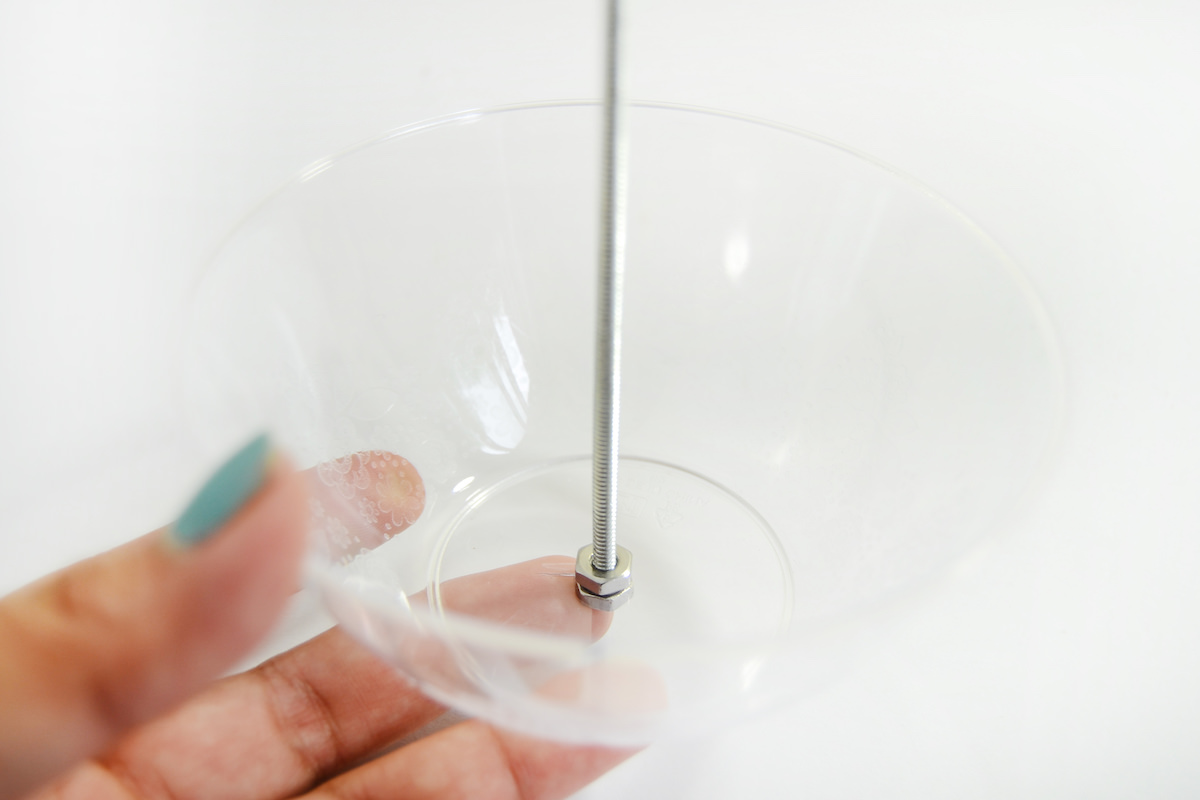
Step 2. Drill a hole in the middle of the plastic bowl and saucer that you will be using. Remember to be careful and apply minimal pressure so you don’t crack while drilling.
Step 3. Thread the metal rod onto the bottom bowl, and secure each side of the bowl with hex nuts. Use a tool to tighten the hex nuts so the bowl doesn’t move around. You can also use washers to secure it as well (but I didn’t).
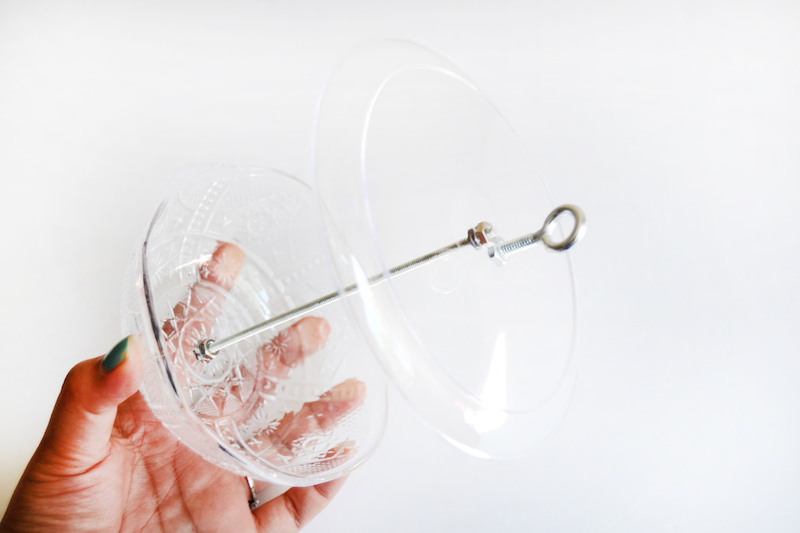
Step 4. Drill a second hole on the top portion of your feeder (either a saucer or bowl) close to the middle hole (about 1″ away). Make sure to go extra slow to minimize any cracking on the plastic saucer.
Step 5. Once you have drilled a hole, secure the top part on the other end of the metal rod with two hex nuts. Secure the eye bolt through second hole to use for hanging.
You can string your hanging DIY bird feeder up in a tree with just about anything. Just make sure that where you place it isn’t too windy – it’ll blow all over the place and so will your seed!
Instructions for the Planter DIY Bird Feeder
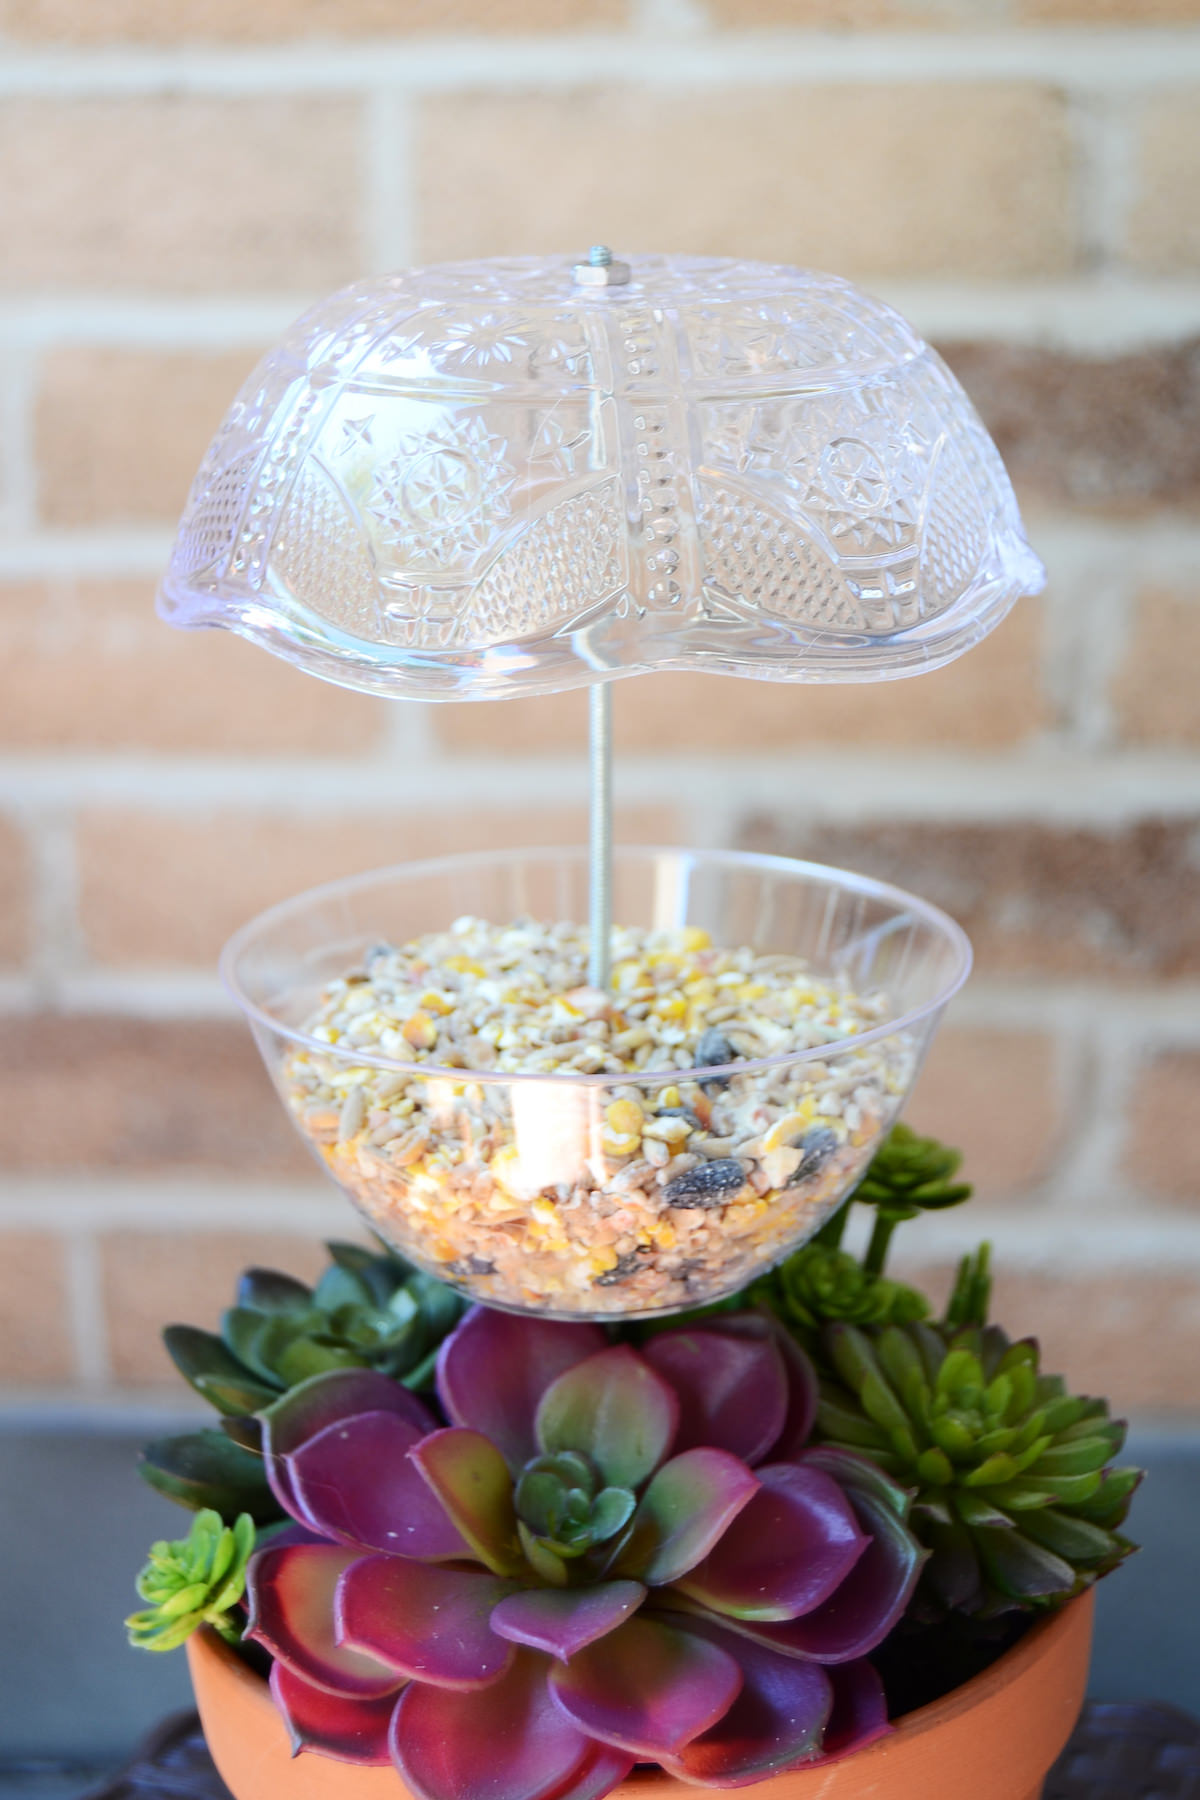
For this style of DIY bird feeder, you do not need to cut your rod to size.
Step 2. Drill a hole in the middle of the plastic bowl and saucer that you will be using. Remember to be careful and apply minimal pressure so you don’t crack while drilling.
Step 3. Secure both top and bottom plastic bowls on the metal rod, spacing as needed (make sure you have enough space between the top and bottom bowls for the birds to perch) and secure with hex nuts.
The plant pot bird feeders are perfect for apartments or other residences that don’t have areas to hang feeders – they look just as good as the hanging feeders!
You can make a bird feeder out of clear plastic plates and bowls, but you can also use melamine or colored plastic plates as well. There’s no limit to the color or pattern combinations. If you make a bird feeder of your very own, I’d love to hear in the comments!
If you enjoyed this project, I think you’re going to love these other ideas from my blogging friends:


These are really cute! I love the one with the planter at the bottom but I don’t understand how you fasten it to the feeder—or do you? You wouldn’t want to drill a hole in the bottom of the clay saucer as the rod sticking through wouldn’t let it sit level, right? So, what’s the secret? I really want to make one of these. They look as if they would keep the seed pretty dry in rainy or snowy weather. Have you had any experience with that?
Then there are the squirrels! Haven’t figured out how to deter them yet.
The terra-cotta plant pot already has a drain hole in it. So purchase a washer a size or two larger, also make sure your rod screw nut is bigger than hole in washer, if not use a smaller washer as well. Tighten up nut to make entire units the length you want it. Remove excess bolt if desired.