Valentine Pom Pom Garland with Hearts
Learn how to make a valentine pom pom garland with hearts to decorate your holiday home! This is SO easy to make, even for beginning crafters. The heart pom poms are very simple.
Skills Required: None. Even if you’ve never crafted before, you can do this project. You’ll be wrapping yarn on a plastic tool and then trimming. I’ll show you how to make the hearts using a template, and then you’ll be stringing the poms onto yarn to hang.
It was JUST last year that I learned to make a pom pom garland. How did it all go down? Well, not long before the garland, I used a pom pom maker to create a wreath with some leftover yarn.
I found it SO easy to make pom poms that I got hooked.
I learned quickly that I can cuddle up on the couch with a Lifetime movie or my favorite reality show and just bang out yarn pom poms, one after the other.
And once I realized THAT, I got cranking. The first garland looked great and added some much needed color to my mantel (which honestly is pretty neutral and boring).
I decided that a Christmas pom pom garland was in order after that. I was really happy with how that one turned out. So happy in fact that I knew there was another garland challenge ahead of me. Valentine’s Day.
That’s how this valentine pom pom garland was born!
Now, I use the word “challenge” loosely. The challenge ahead of me was how to make heart pom poms, which I quickly figured out. Turns out it’s a pretty simple process.
The rest of the garland is the same as the others made of yarn. It’s a lot of wrapping and a lot of fun!
I also just found out that pom pom makers are recommended for ages 5 and up. SO technically it’s a great Valentine’s Day craft for kids. If your littles like that sort of thing. Learn how to make it below.
Gather These Supplies
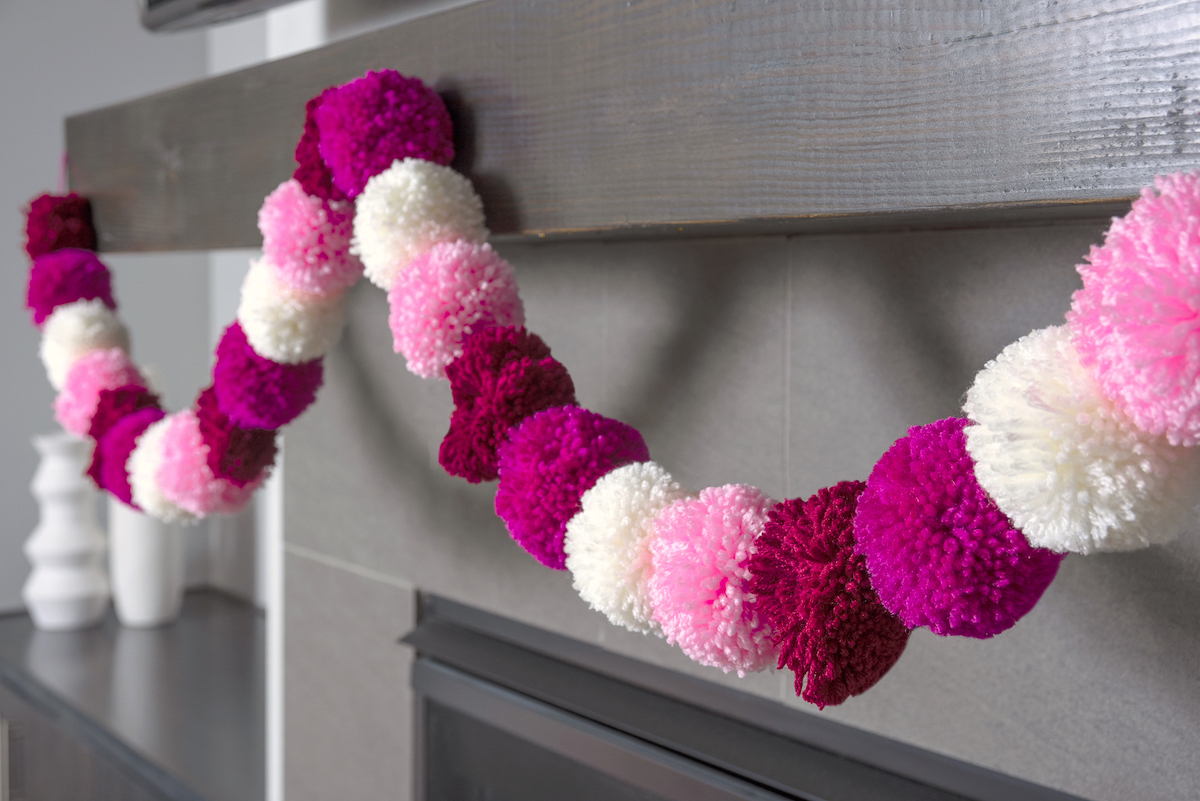
- Yarn – about 4 – 5 skeins (I used four different colors including red, pink, magenta, and white)
- Pom pom makers – 2 1/2″ or 3 3/8″
- Scissors
- Cardboard (from a cereal box or similar)
- Pencil
- Needle (that fits the yarn, tapestry weight is recommended)
Tips and Thoughts for This Project
I found the heart shapes looked best with either the 2″ or 3″ poms. Any larger or smaller and it was harder to see the shape on the garland.
You can make adjustments as needed with the scissors to get more of a definitive heart shape if you so choose.
You can easily slide the poms along the yarn to get them where you want them, so your decor is hanging just perfectly.
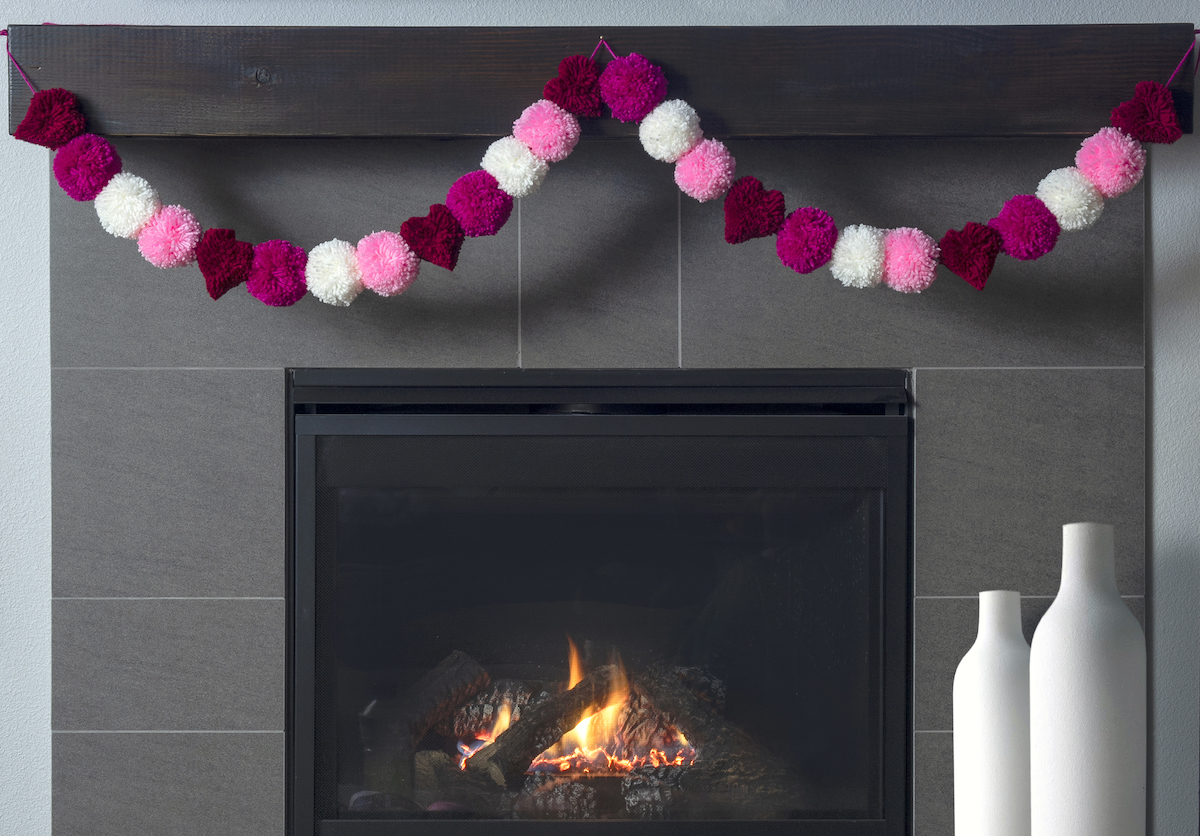
I absolutely LOVE my bright and cheery holiday garland! Get the printable how to card for this craft below.

Valentine Pom Pom Garland
Equipment
- Pencil(s)
Materials
- 4 skeins Yarn pink, red, dark red, white
- Thin cardboard
Video
Instructions
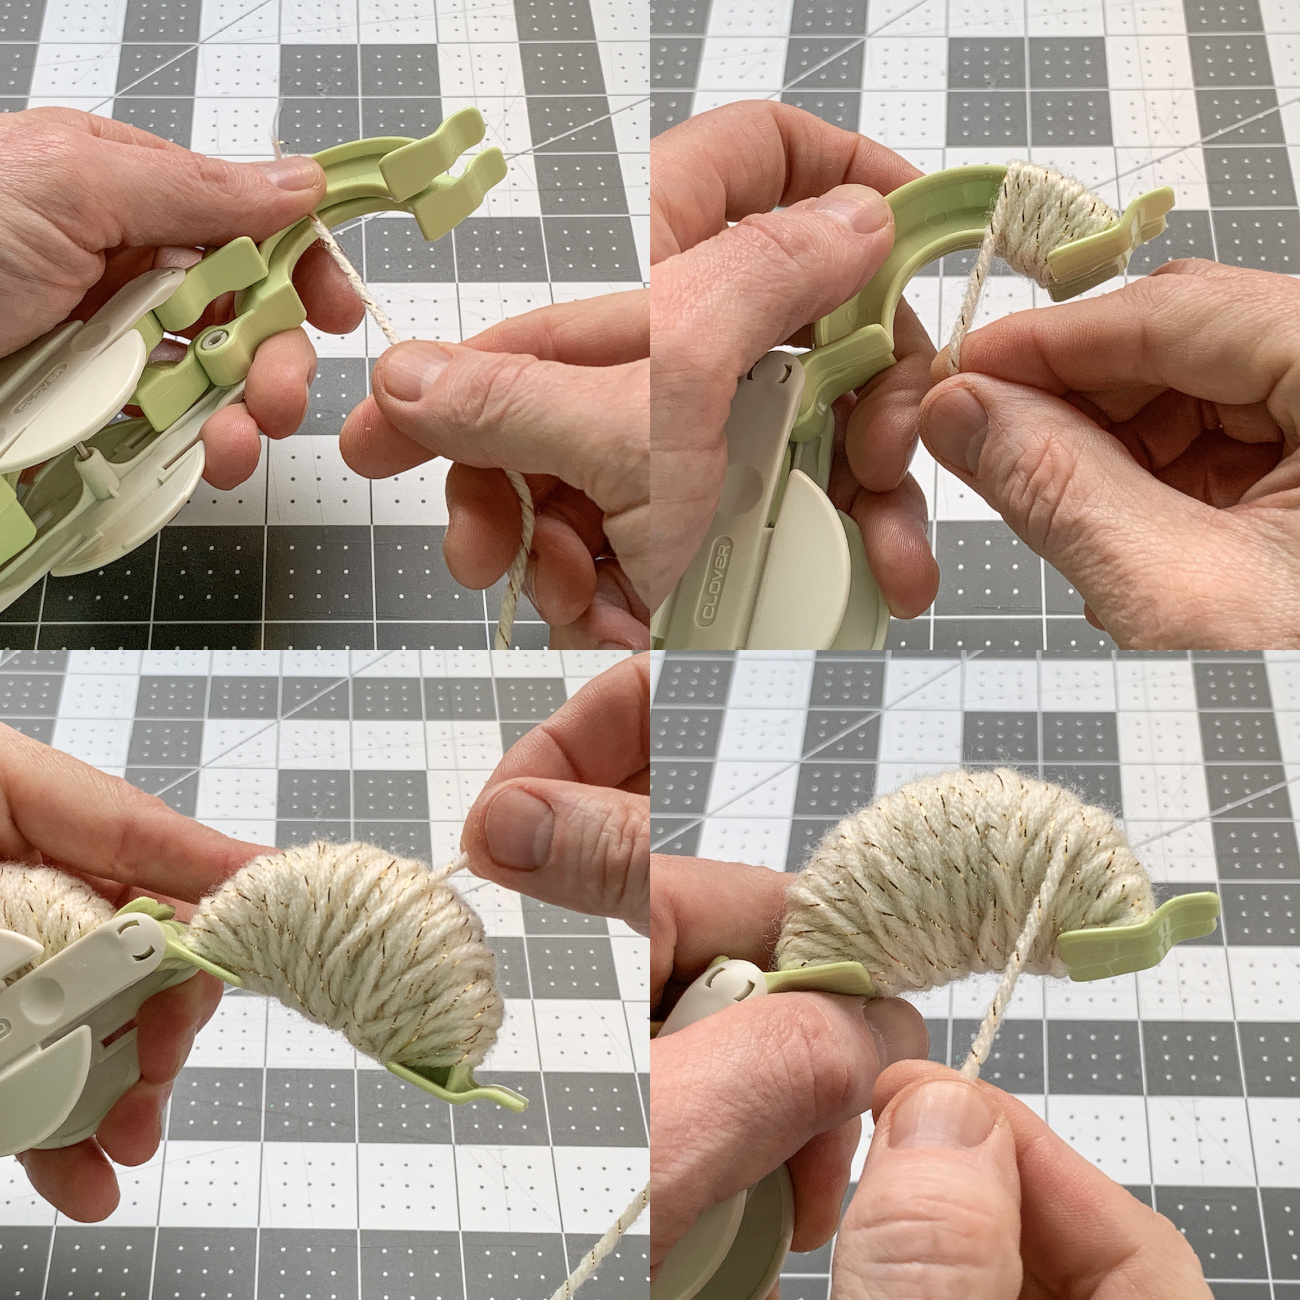
- Pick up the pom pom maker. Open one side of it (both pieces) and begin wrapping the yarn as shown (while holding one of the yarn). You're going to keep wrapping the yarn until you have completely filled one side of the tool, including filling the "U" shape with yarn.
- When you are finished wrapping one side, close it and feed the yarn over to the other side as shown below. You're going to undo the other side of the pom pom maker, and wrap the yarn just as you did. Then you will close the tool.
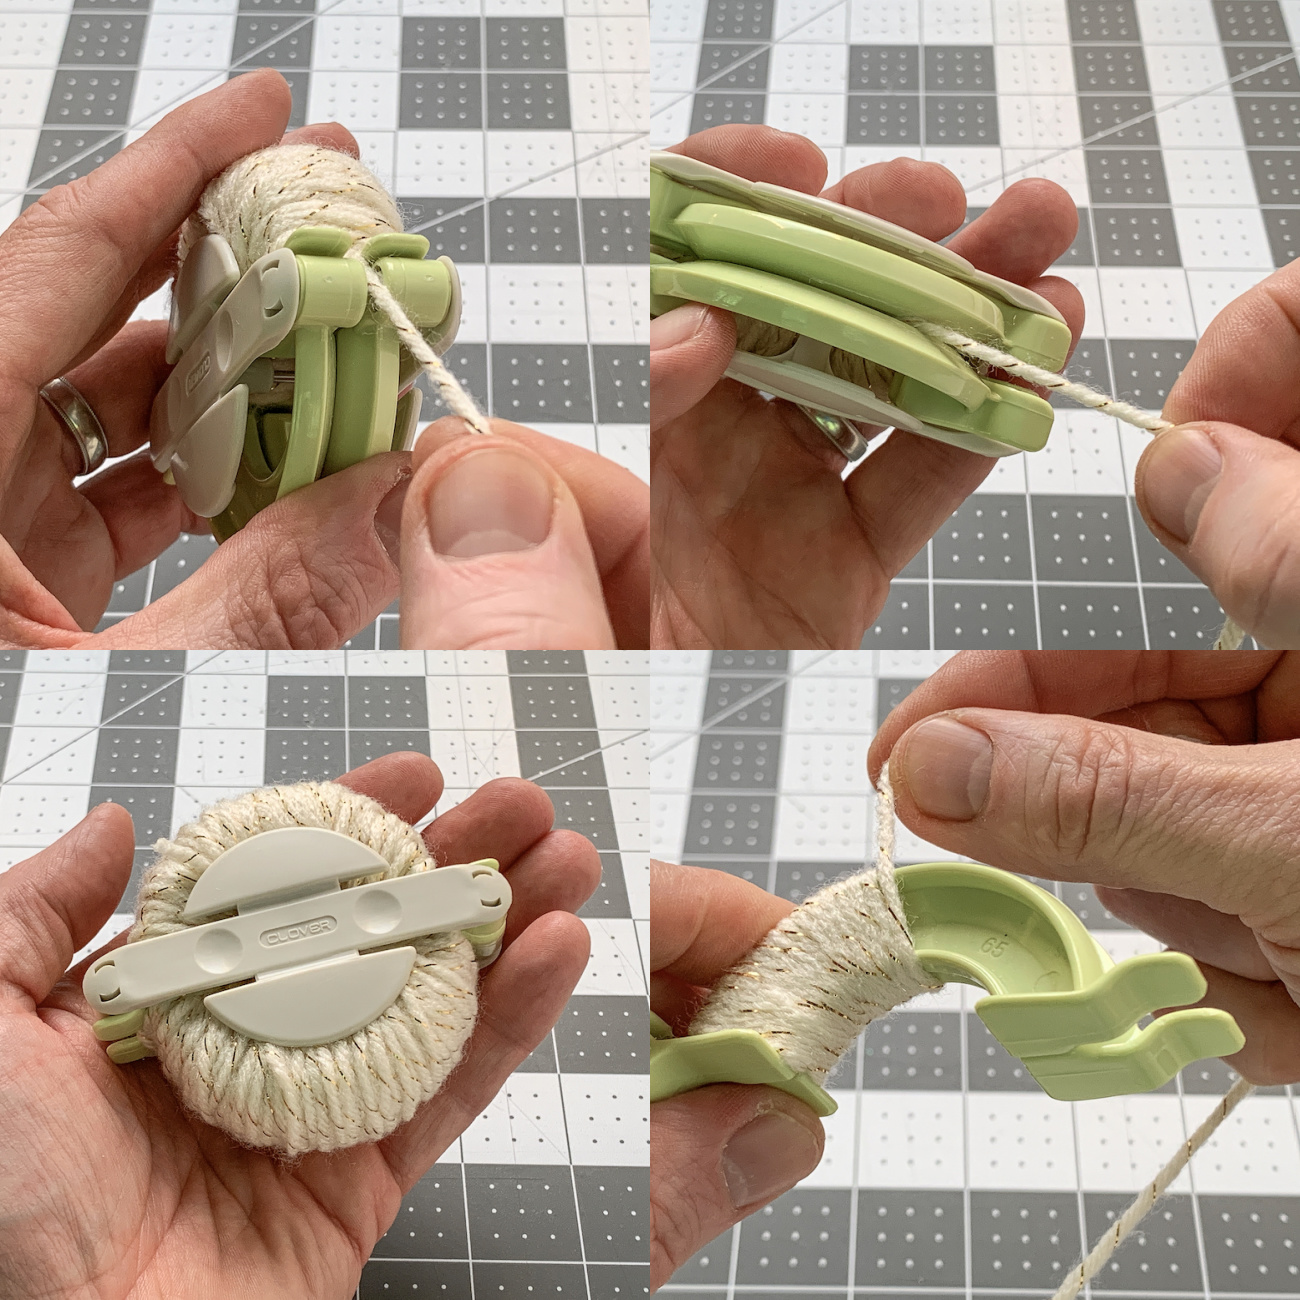
- Use the scissors to cut the yarn on each side of the pom pom maker, while still keeping it closed.
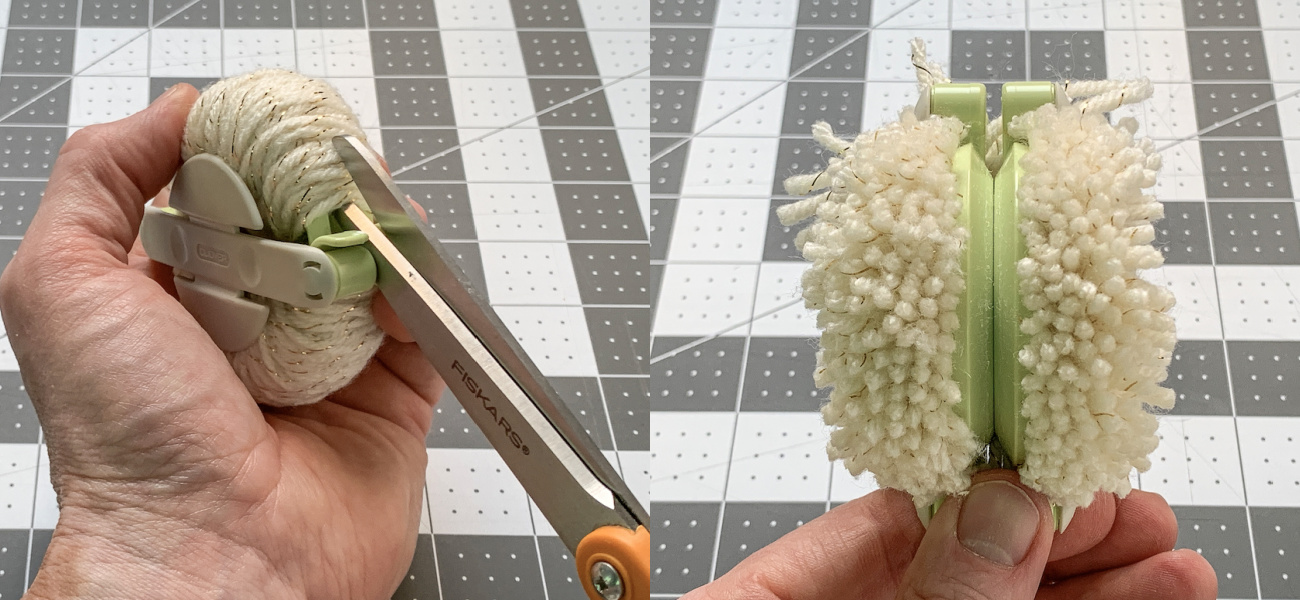
- Cut a scrap piece of yarn, and tie it around the center of the tool tightly. You're going to make a knot by double tying. You want to make sure it's tight enough so that when you remove the pom pom, it doesn't come apart. You don't need to pull so tight that you break the yarn, but you do need to make it snug.
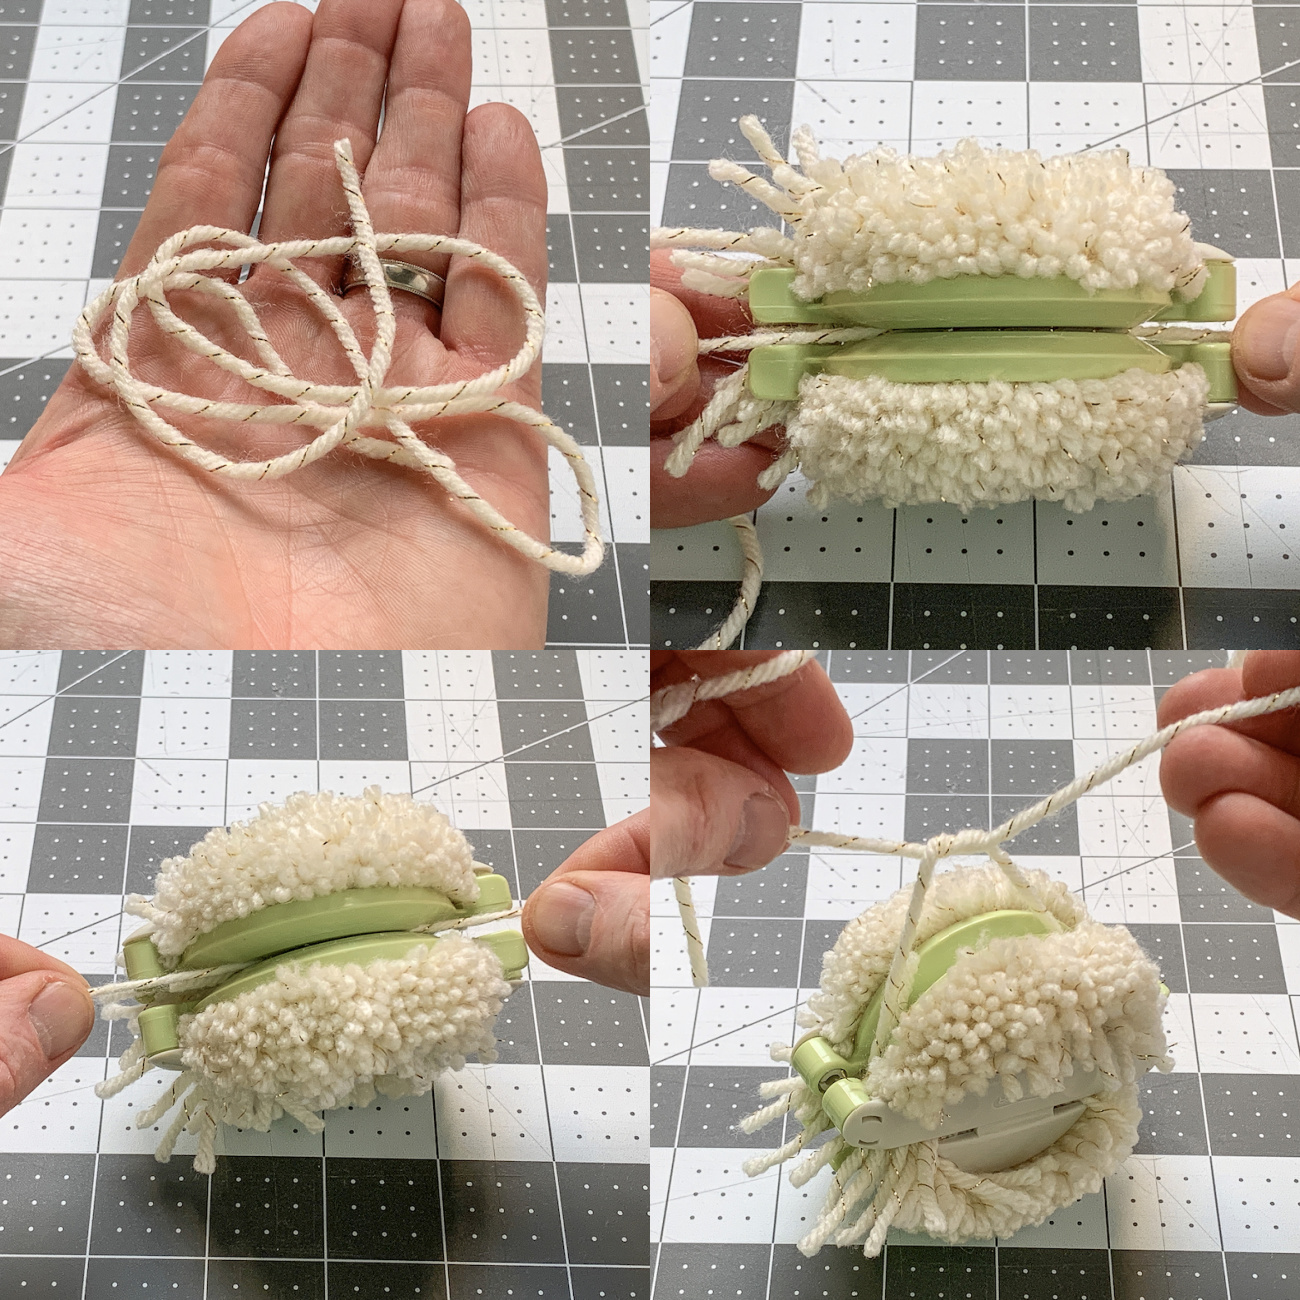
- Open both ends of the tool and pull apart to remove the pom pom.
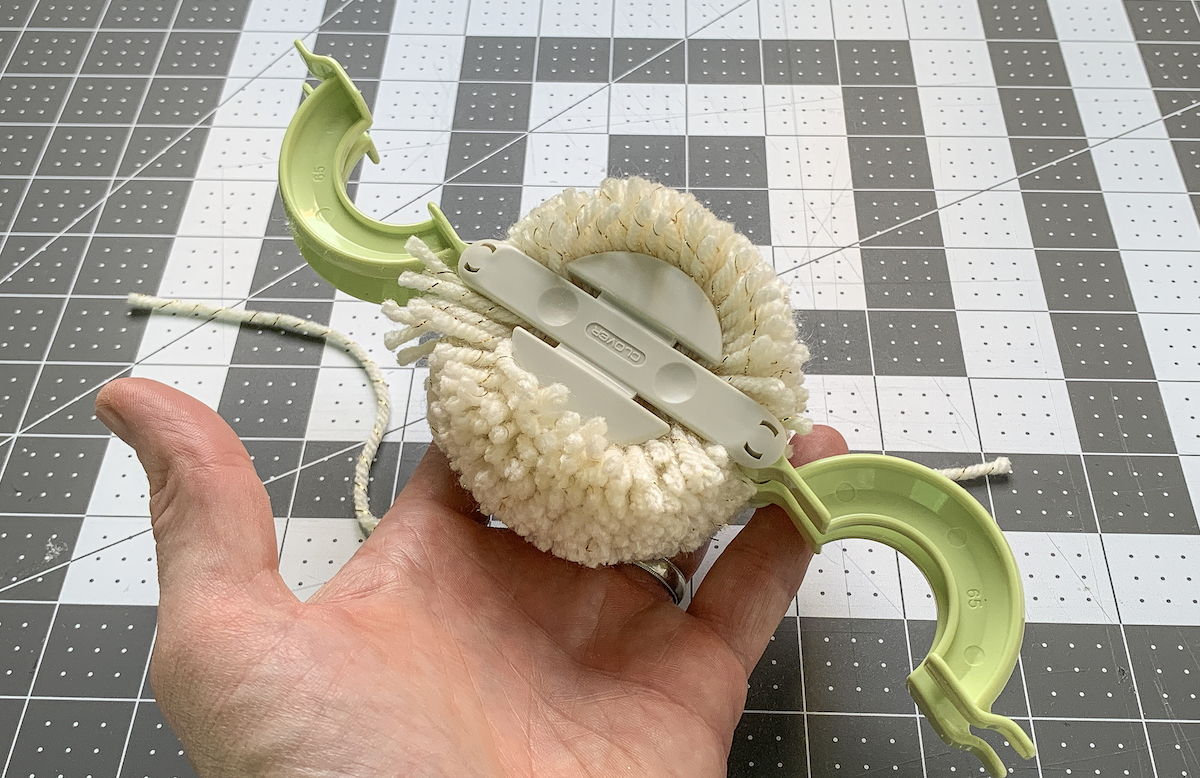
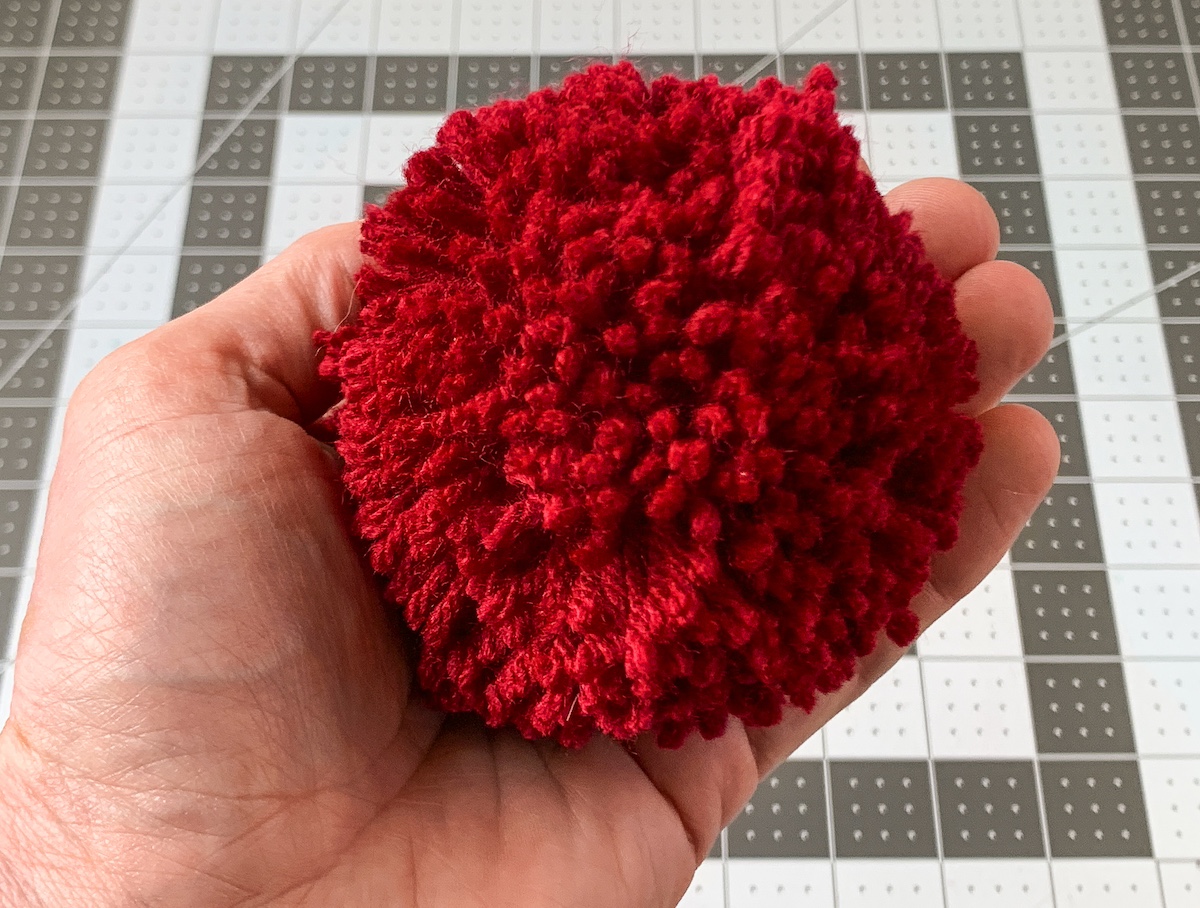
- The pompom will come out very shaggy, so you'll want to trim it up with the scissors, plus the excess yarn from tying.

- Repeat the process, making six pompoms with each color except red. You'll make seven of those.
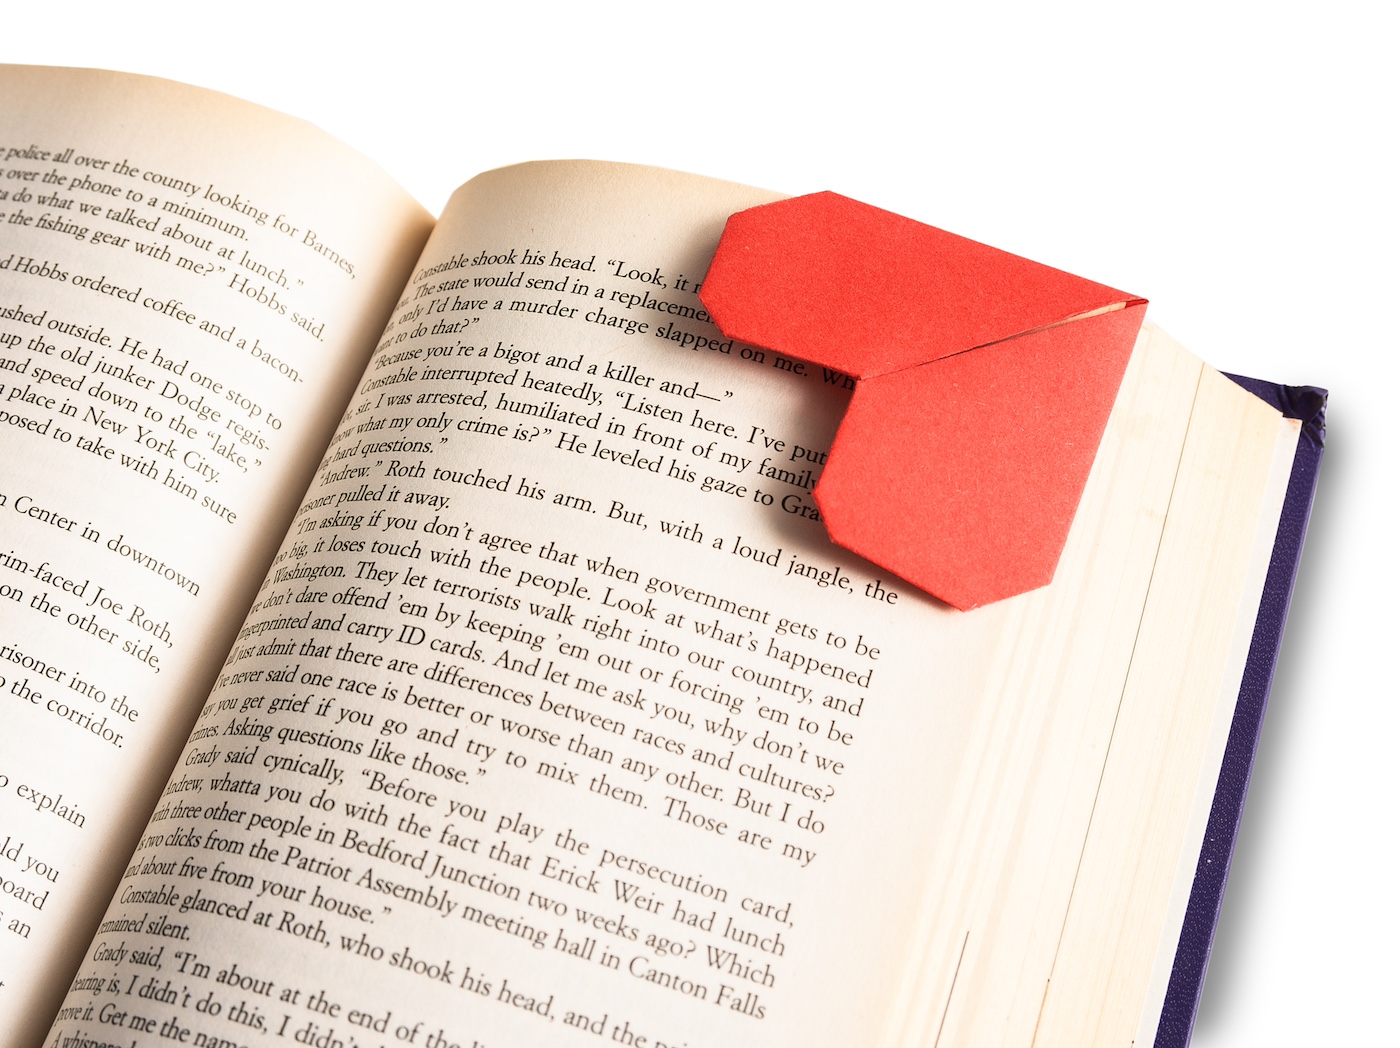
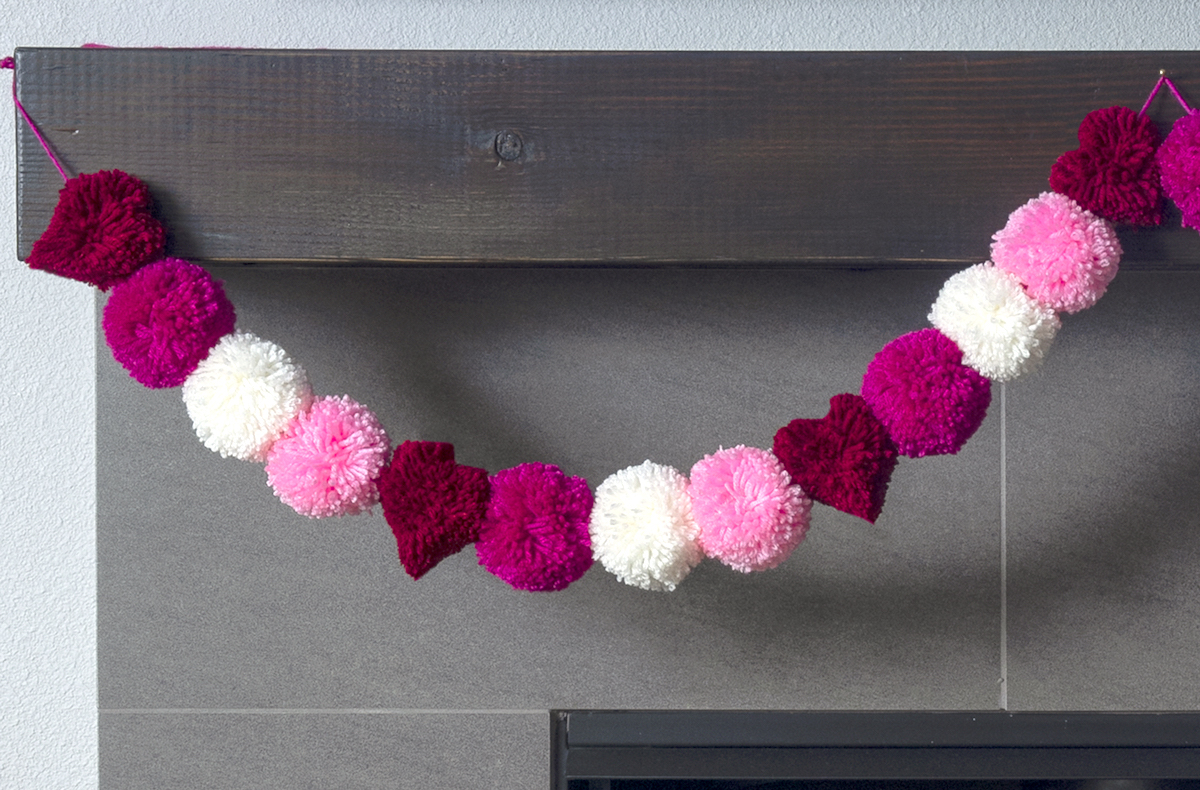
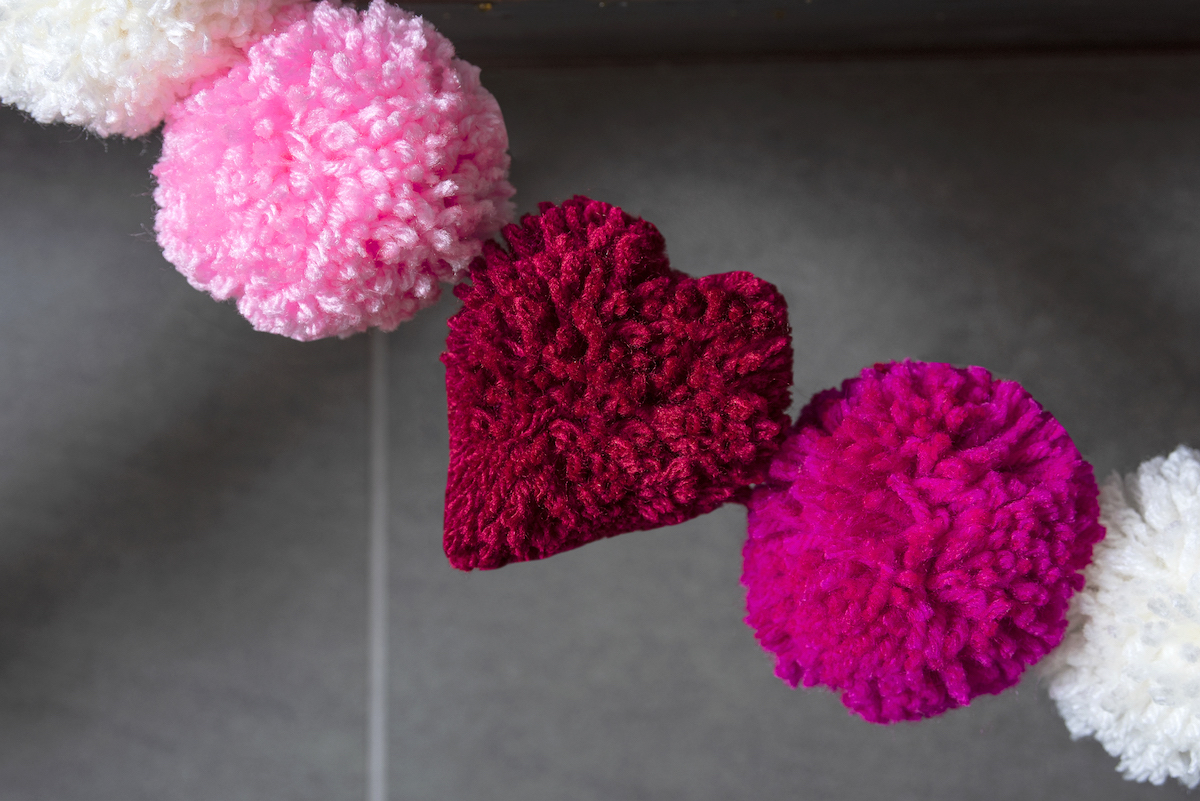
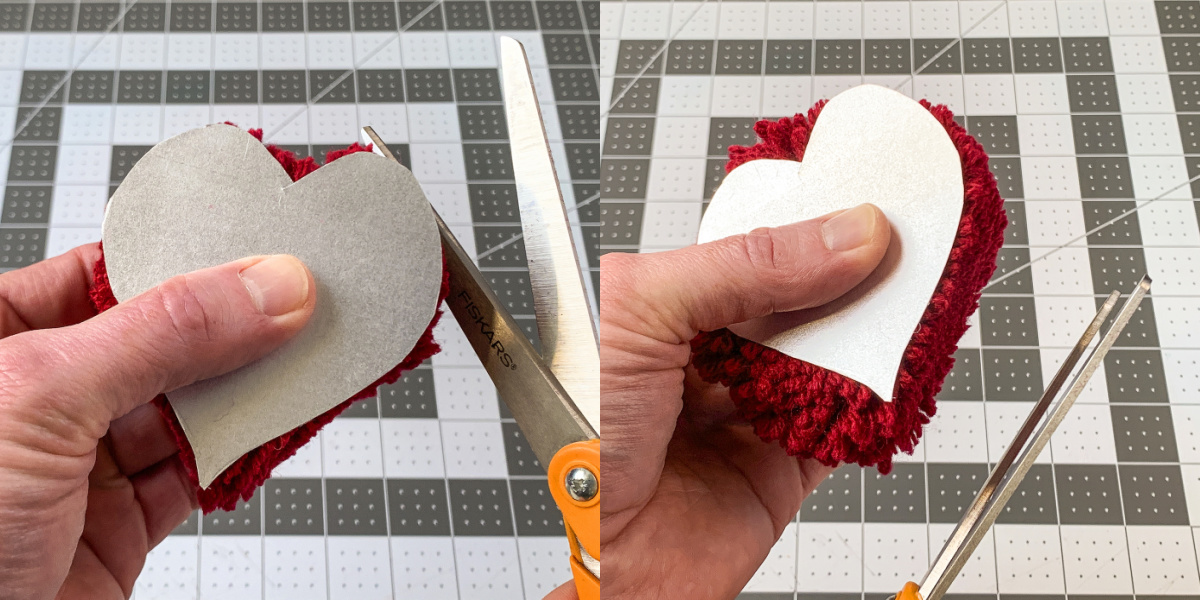
- Make a heart template that fits your red pom poms. Draw the template on the thin cardboard and cut out with scissors.
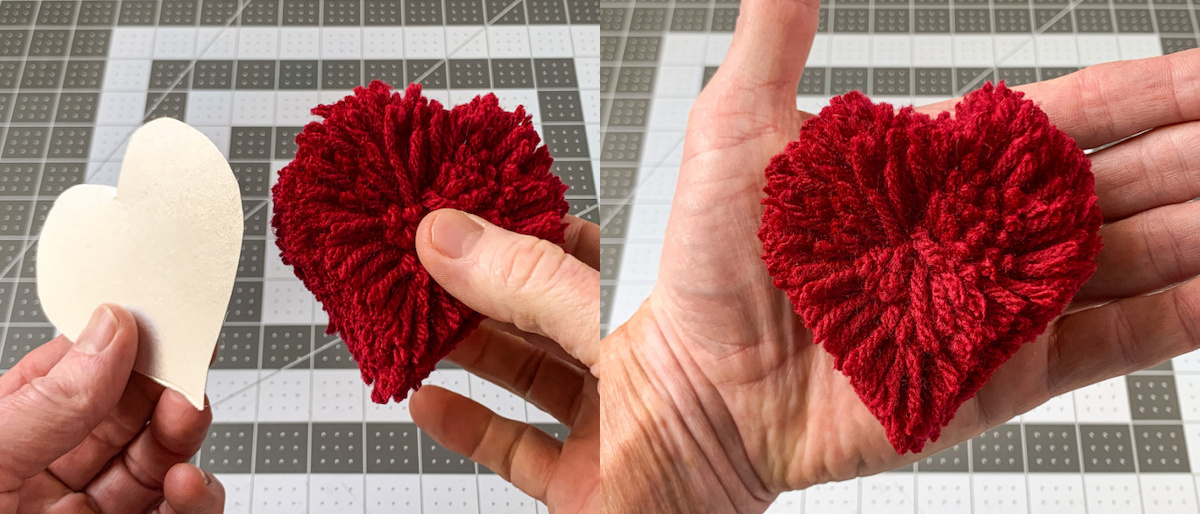
- Hold one red pom pom in your hand and smooth the yarn out from the center. Place the template down and cut the heart shape with scissors..
- Repeat with each red pom pom until you have all the hearts you want.
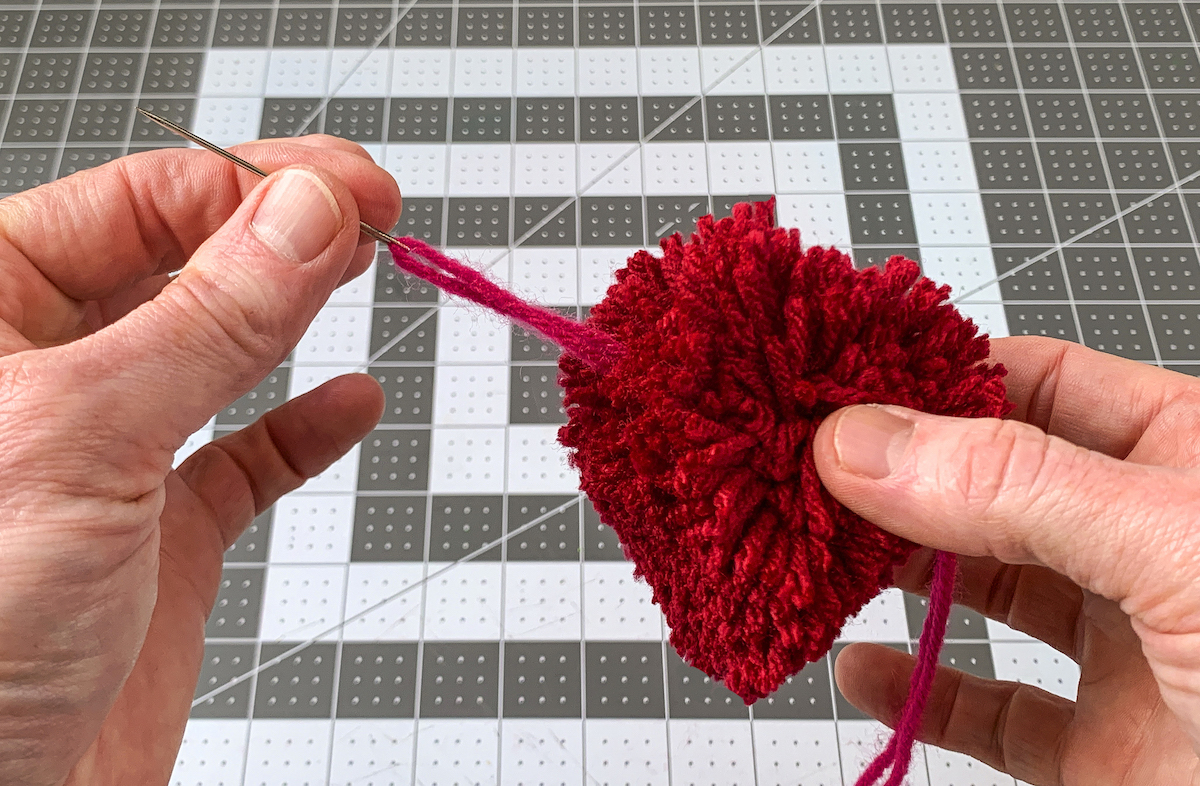
- Thread the yarn onto the tapestry needle, then thread the pom poms onto the garland through the centers. Start with a heart, then rotate through the colors.
- Hang the garland. Space the pom poms out to desired length apart.
Notes
Did you enjoy making this Valentine’s Day pom pom garland? If so, I’d love for you to check out these other ideas: