How to Use a Pom Pom Maker (Step by Step with Video!)
Learn how to use a pom pom maker with this tutorial! Get easy steps to create colorful and fluffy pom poms of all shapes and sizes for your DIY projects and decorations.
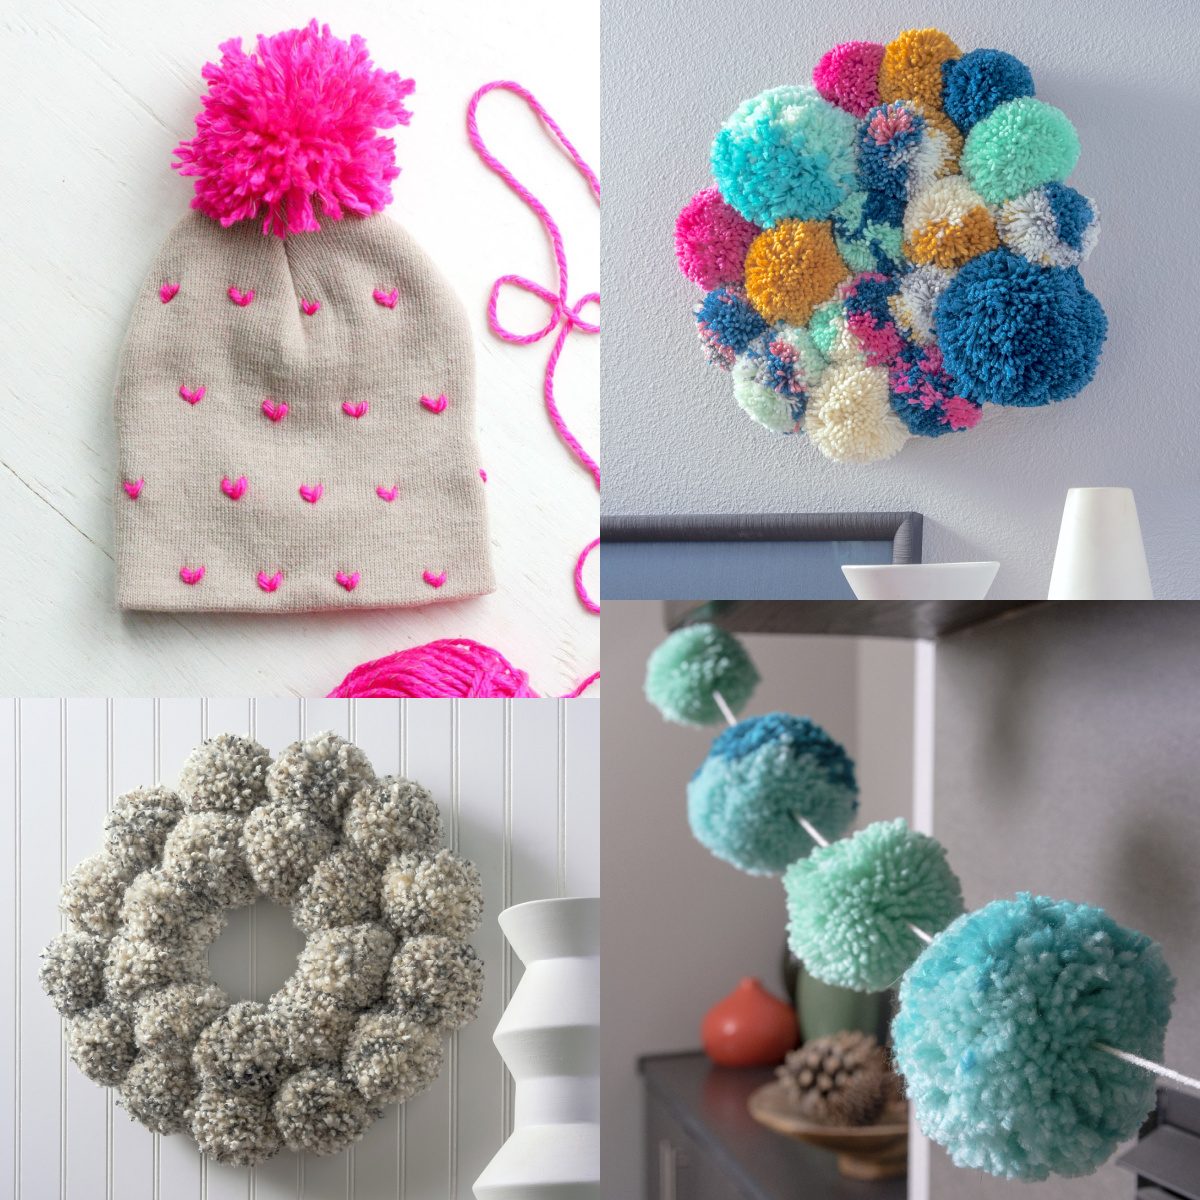
If you’ve ever admired fluffy pom-poms on hats, scarves, garlands, or party decorations and wondered how people make them look so perfect, I’ve got good news: it’s much easier than you think.
Years ago, I used cardboard circles to make pom-poms. They worked . . . sort of. There was a lot of cutting, a lot of frustration, and let’s just say the results weren’t always Instagram-worthy. Then I discovered the pom pom maker, and I’ve never looked back.
A pom pom maker takes most of the guesswork out of creating pom-poms. Instead of wrestling with homemade templates, you simply wrap yarn around the tool, cut, tie, and fluff. That’s it.
Once you learn how to use the tool, you’ll be able to make pom-poms in all kinds of different sizes for craft projects, home decor, gifts, seasonal decorations, and more.
In this tutorial, I’m showing you exactly how to use a pom pom maker step by step. I also included a video so you can watch the entire process from start to finish. Sometimes seeing the tool in action makes everything click a little faster than reading instructions alone.
One thing I love about these tools is that they come in different sizes. Tiny pom-poms are adorable for garlands and embellishments, while larger poms make a statement on hats, pillows, wreaths, and wall hangings. Once you get comfortable with one size, you’ll probably want an entire collection.
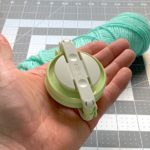
The funny thing is that when a pompom maker is completely closed, it looks a bit like a plastic doughnut. Open it up, wrap your yarn, and that little doughnut-shaped tool suddenly becomes a pom-pom-making machine.
Whether you’re making one or a whole basket full, this is one of those crafting skills that’s surprisingly satisfying to learn. Grab your yarn, watch the video if you’d like, and let’s get started.
Tips and Thoughts for Making Pom-Poms
The yarn you choose will make a huge difference in how your poms look. While you can use almost any fiber, wool yarn tends to create the fluffiest pom-poms because it expands nicely after trimming. Acrylic yarn works too and is often less expensive, especially if you’re making lots of them.
Pay attention to yarn weights as well. Thicker yarn generally fills the tool faster and creates fuller pom-poms, while thinner yarn may require more wrapping to achieve the same effect. If you’re not sure where to start, a medium-weight wool yarn is usually a safe choice.
Don’t be afraid to mix colors. Some of my favorites combine two or three yarn shades wrapped together. It’s an easy way to create striped, marbled, or speckled poms without any extra work.
You’ll also notice that fuller pom-poms come from wrapping more yarn around the tool. If your first pom-pom looks a little sparse, simply add more yarn the next time. Most crafters find the sweet spot after making just a few poms.
When it’s time to secure the center, use a strong piece of yarn and pull it tight before tying your knot. In fact, I like to wrap the center with a second piece of yarn and tie another knot for extra security. A loose center tie is one of the most common reasons pom-poms fall apart.
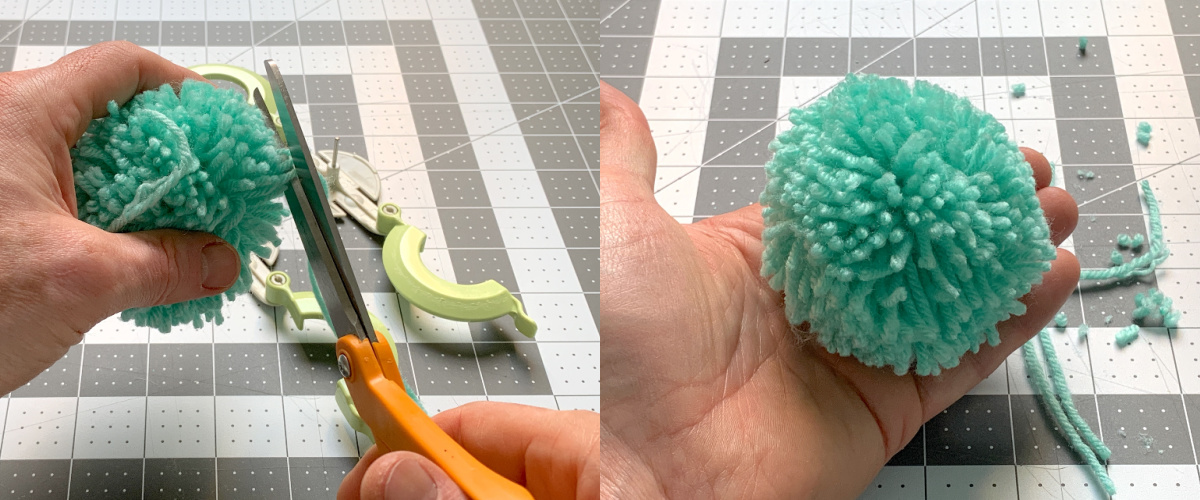
Finally, don’t skip the trimming step. They’ll definitely need a haircut. A pair of sharp scissors will help you shape your poms into neat, round balls. Trim a little at a time and rotate the pom-pom as you work. It’s amazing how much difference a few careful snips can make.
After you’ve mastered this tutorial, you’ll be ready to use pom-poms on everything from fashion to ornaments to home decor projects. Get started below.
How to Use a Pom Pom Maker
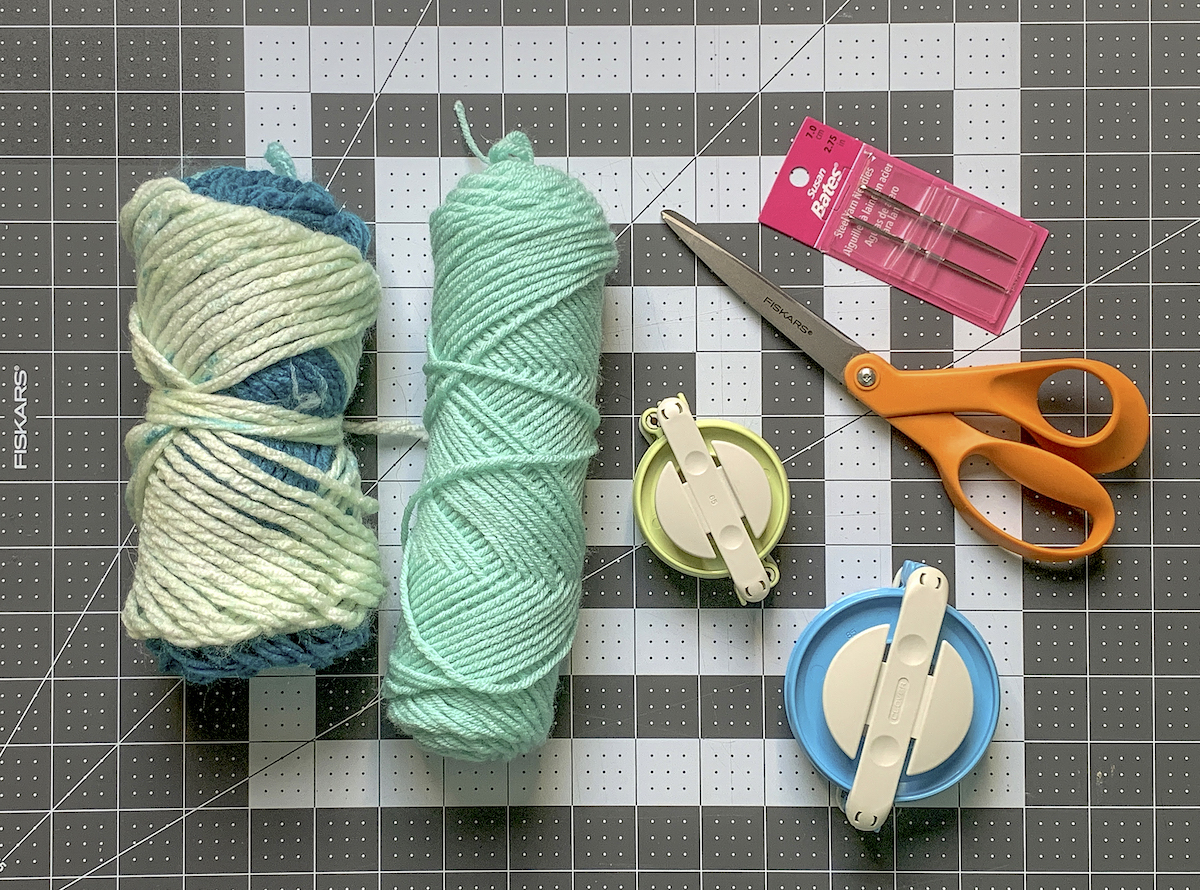
Equipment
- 1 Pompom maker(s)
- 1 Scissors
Materials
- Yarn
Video
Instructions
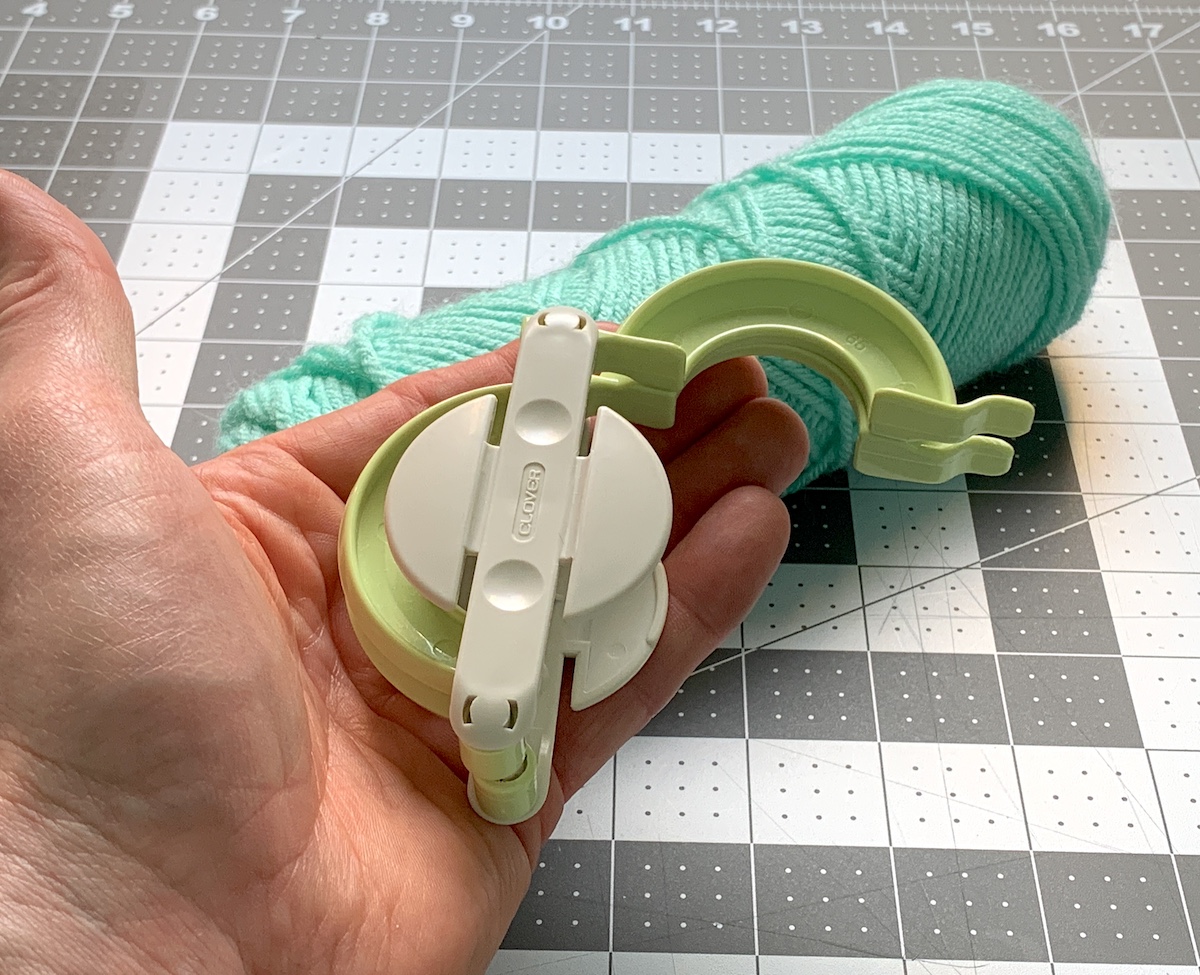
- Open one set of the plastic arms of your tool to the right.
- Begin wrapping the yarn around the arms of the tool. Hold the yarn down anywhere and start wrapping. Work back and forth across the arms, as evenly as you can.
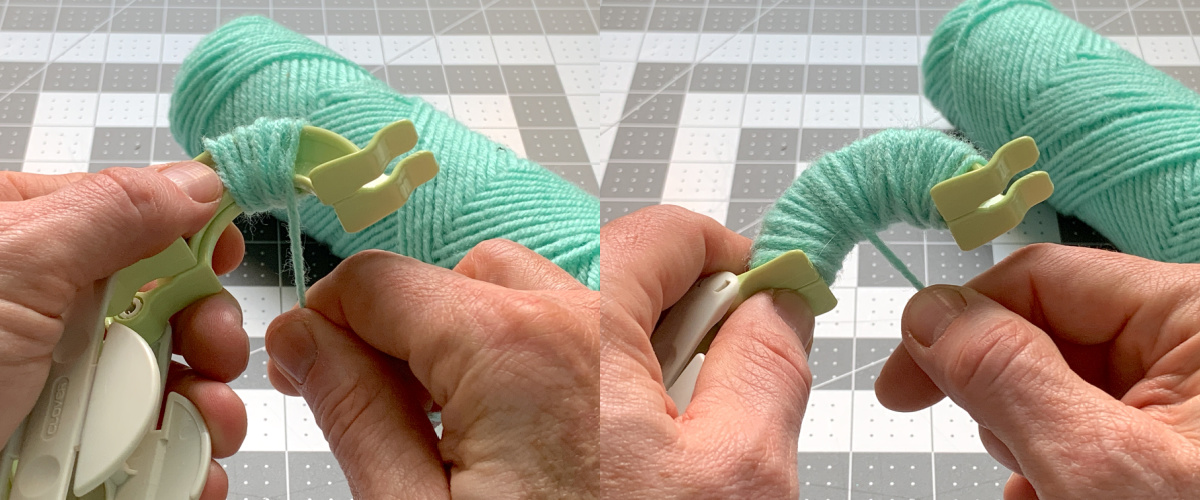
- Keep wrapping until you fill the “U” of the plastic arms. Once you’ve wrapped enough yarn, bring it out on the right between the two arms and close the tool.
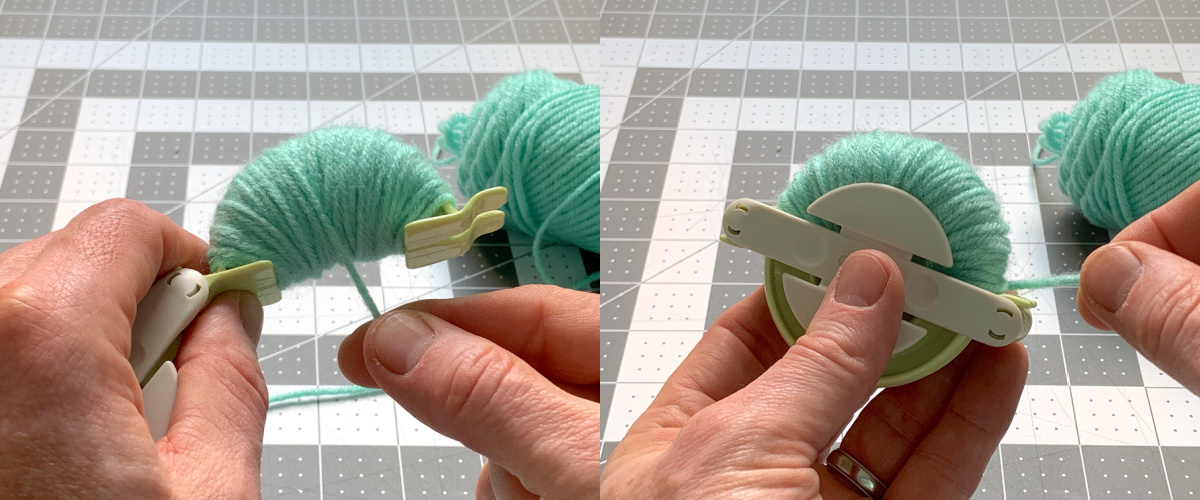
- Turn the tool over and bring the yarn down between the two arms on the right.
- Wrap the yarn around the two open plastic arms as you did the first time, filling the “U” with yarn.
- Trim the yarn with scissors, leaving a little bit of an end. You can close the tool.
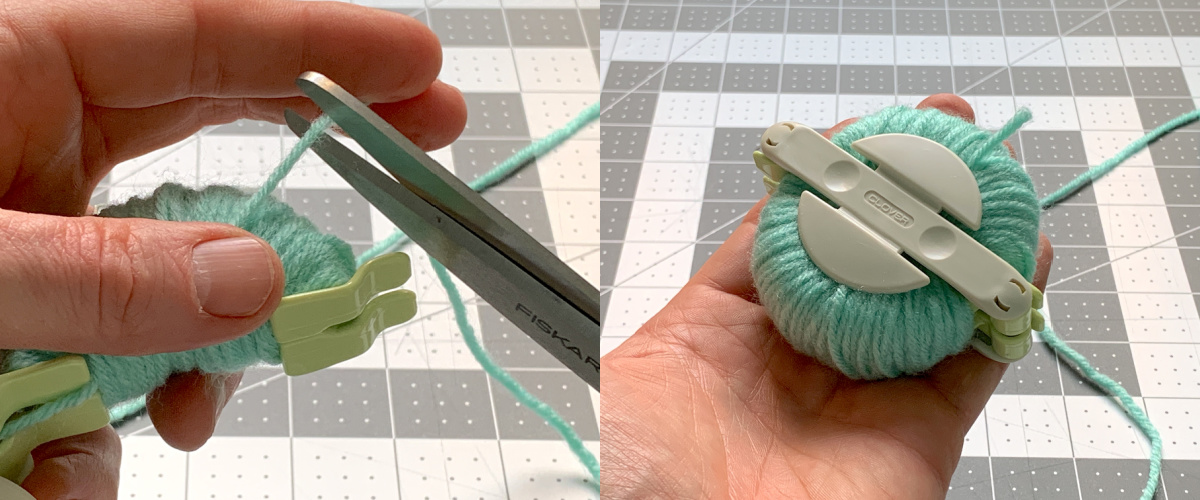
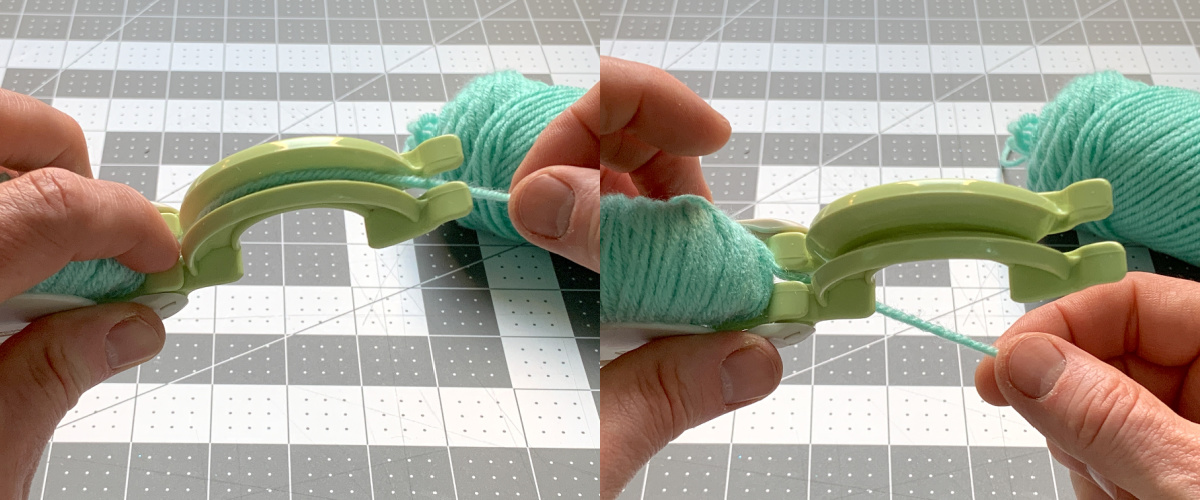
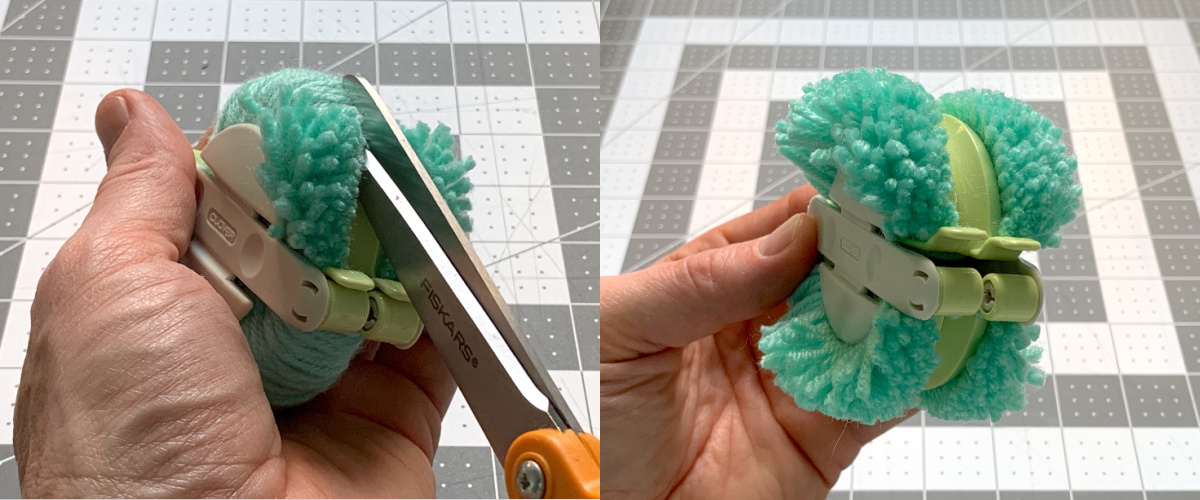
- With the tool closed, you’re going to cut the yarn on both sides, down the arms. Keep the tool closed so the yarn doesn’t fall out.
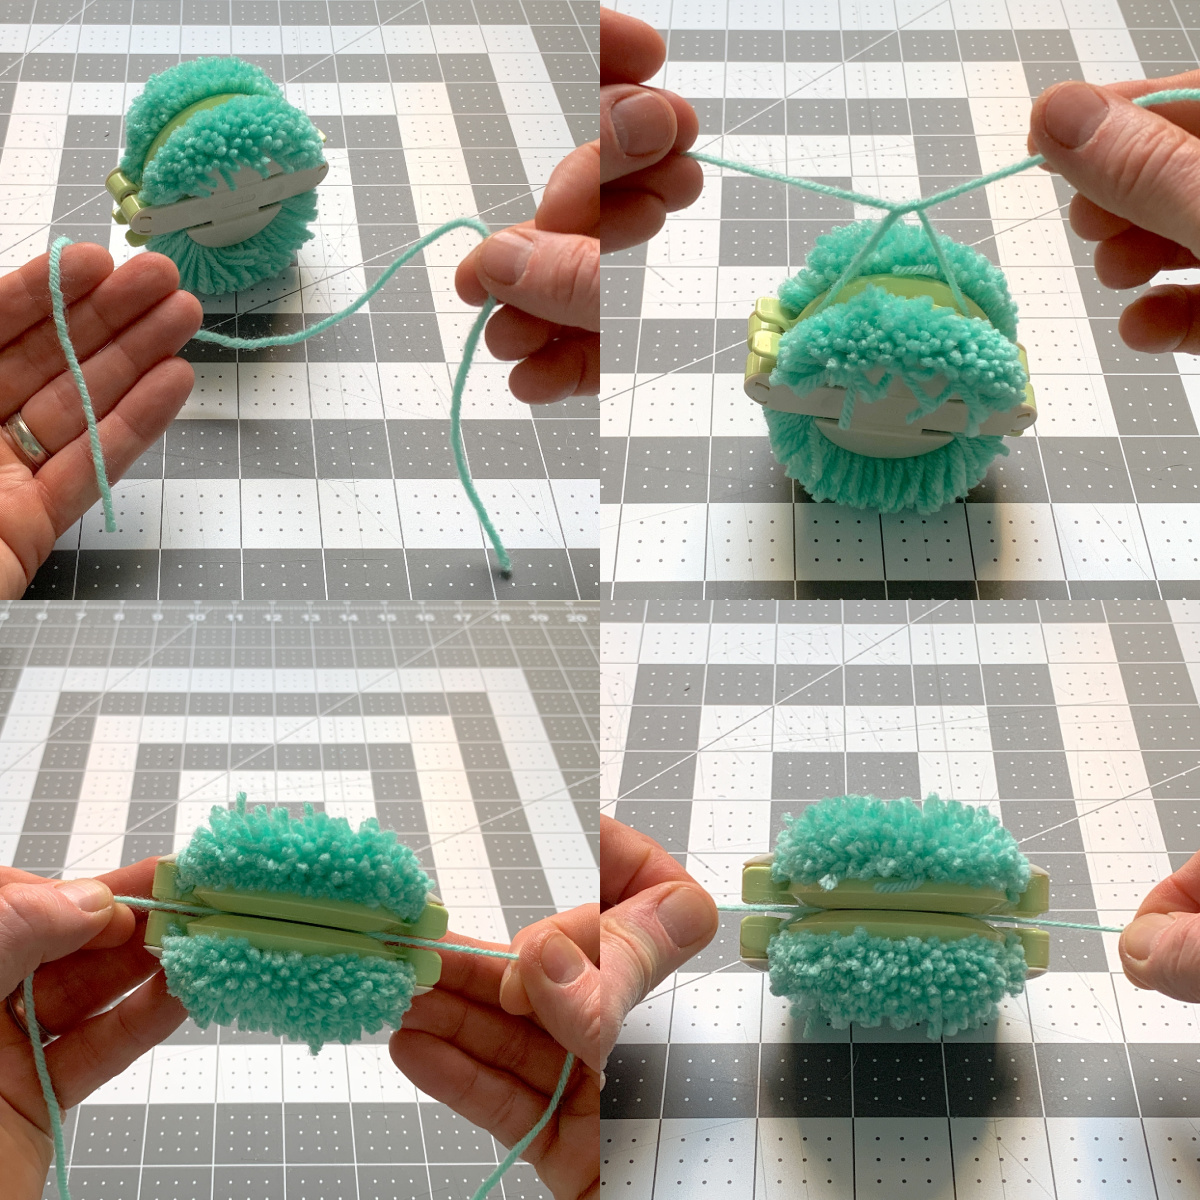
- Cut a long length of yarn. Wrap the yarn around the middle of the tool, through the gap between the two. Tie a knot in your yarn, as tightly to the center as you can without breaking your yarn. Wrap the yarn around again, and tie another knot to secure it.
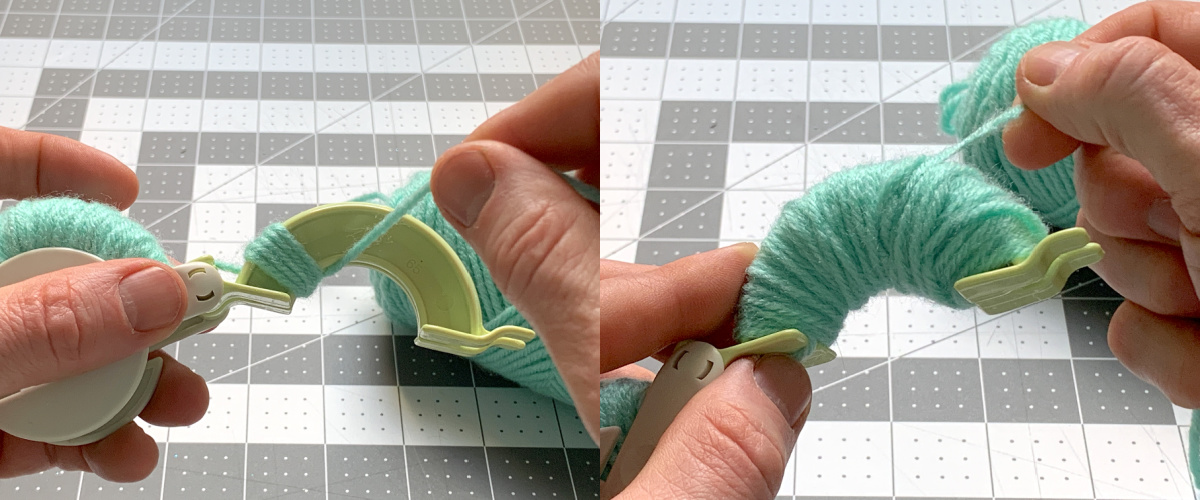
- Now you can remove the yarn from the tool without it falling apart. Open both arms on both sides, pull the tool apart, and remove the pom pom.
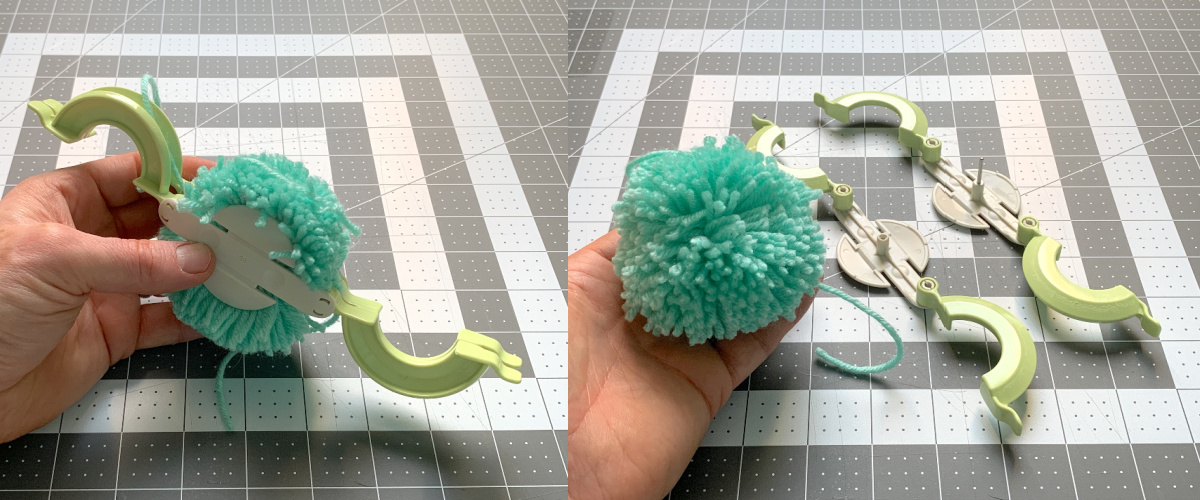
- Using your scissors, trim the yarn all over the pom to even the surface. You can cut off the tails, or use them to tie the pom pom onto something.
Notes
Now that you know how to use this cool tool, I’d love for you to let me know your experience in the comments! Please other check out these other crafts that use this tool:
Basic Garland • Basic Wreath • Christmas Garland • Christmas Wreath • DIY Owl • Valentine Garland • Wall Hanging