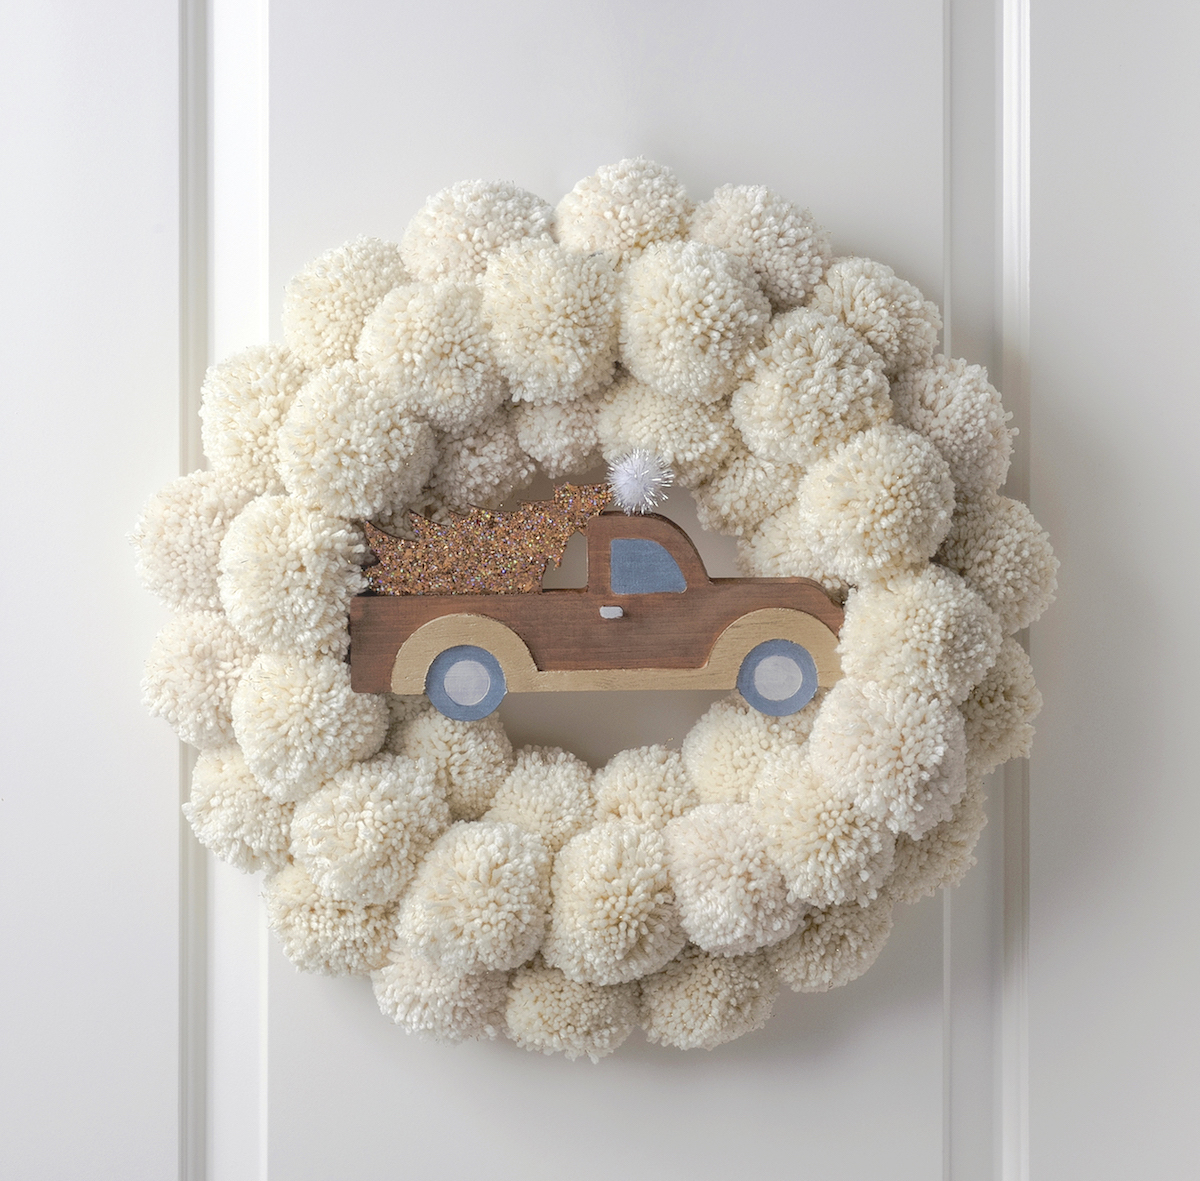
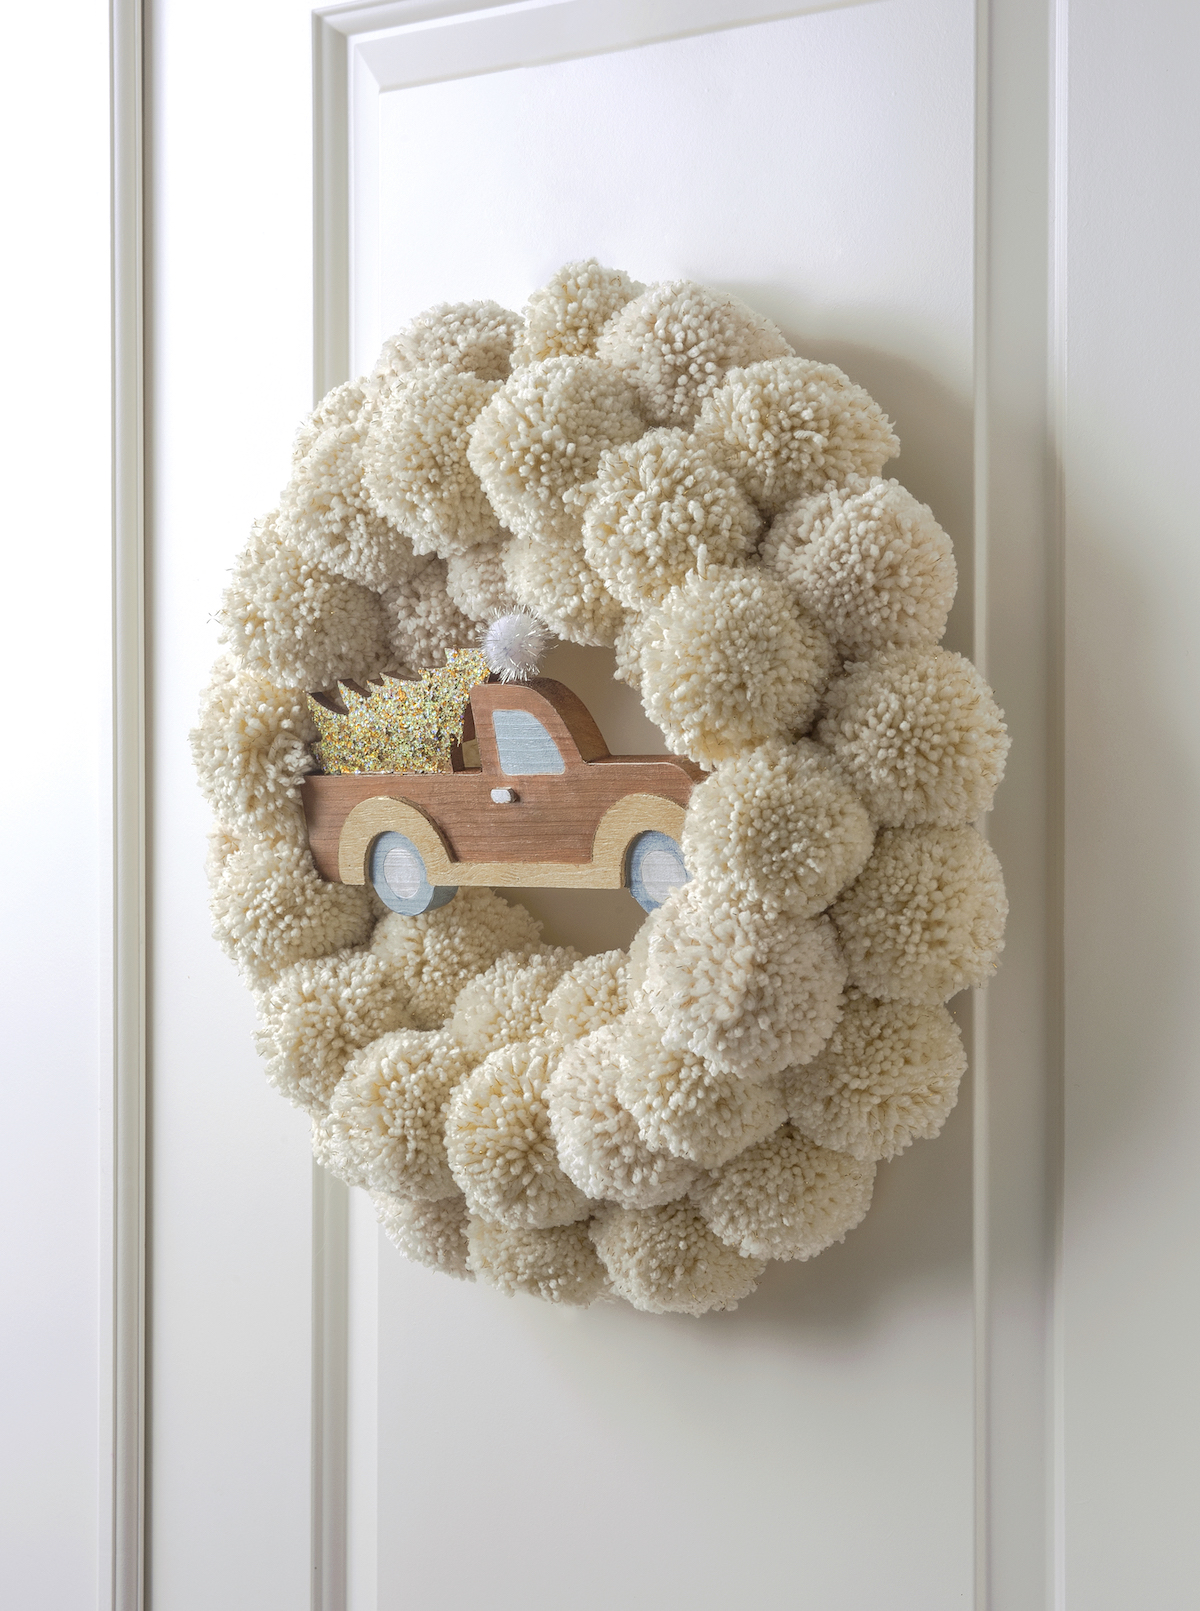
DIY Pom Pom Christmas Wreath for Festive and Cozy Decor
Learn how to make a simple pom pom Christmas wreath using a few skeins of yarn – then add your own holiday themed decor in the center.
Skills Required: Beginner. This is a great craft idea for newbie crafters. You’ll be using a pom pom maker to create your poms – then painting a wood shape with some various paints and adding to the front. It’s pretty simple!
I’ll fully admit it – I’m on a big pom pom craft kick lately. I don’t know if you’ve ever experienced the glory that is making a cute pom pom, but it’s really fun. Not only that, but they are extremely easy to make for beginners. That’s why I’m excited to share this pom pom Christmas wreath with you today!
You’re going to love it for a variety of reasons. You can customize the size – the yarn color – the wood shape that goes in the center. If there ever was a wreath you could make your own, it’s this one.
It’s not only great for the holiday, but you can keep it up all through winter with the colors. Gotta love that! While it certainly has a Christmas feel, it’s not the standard red and green!
This Christmas wreath is made in four easy steps. You’re going to make the poms, then you’ll glue them to the form. Then you’ll paint the wood shape, and finally attach it to your finished project. It’s a relatively simple process!
You’re going to use a foam wreath form, make pom poms, and hot glue them to the form. Then add embellishments of your choice.
I didn’t want to use a wire wreath form because I wouldn’t easily be able to attach the poms. However, you can tie them on one at a time if you choose to. It’s just going to take a little longer.
How many pom poms do you need for a wreath?
I used 45 on this wreath! With the pom pom maker I used, I produced 2 1/2 inch poms. If you use a different sized tool (or wreath form), you are going to use a different number. This is an estimate for a good place to start though.
Are you ready to learn how to make this Christmas wreath? Continue reading below!
Gather These Supplies
- Foam wreath form – 12″
- Yarn – four large skeins
- Pom pom maker – 2 1/2″
- Wood shape
- Acrylic paint – variety of metallic colors
- Paintbrush
- Scissors
- Hot glue gun and glue sticks
It’s really hard to estimate how much yarn you’ll need. That’s because different yarns have different thicknesses, which affects how much you need for the pom pom maker. Plus the size of your wreath form matters.
I recommend purchasing 4 – 5 of the larger skeins that are ~350 yards. Keep your receipt, and then bring back what you don’t need if you don’t end up using it all. This ensures you have enough.
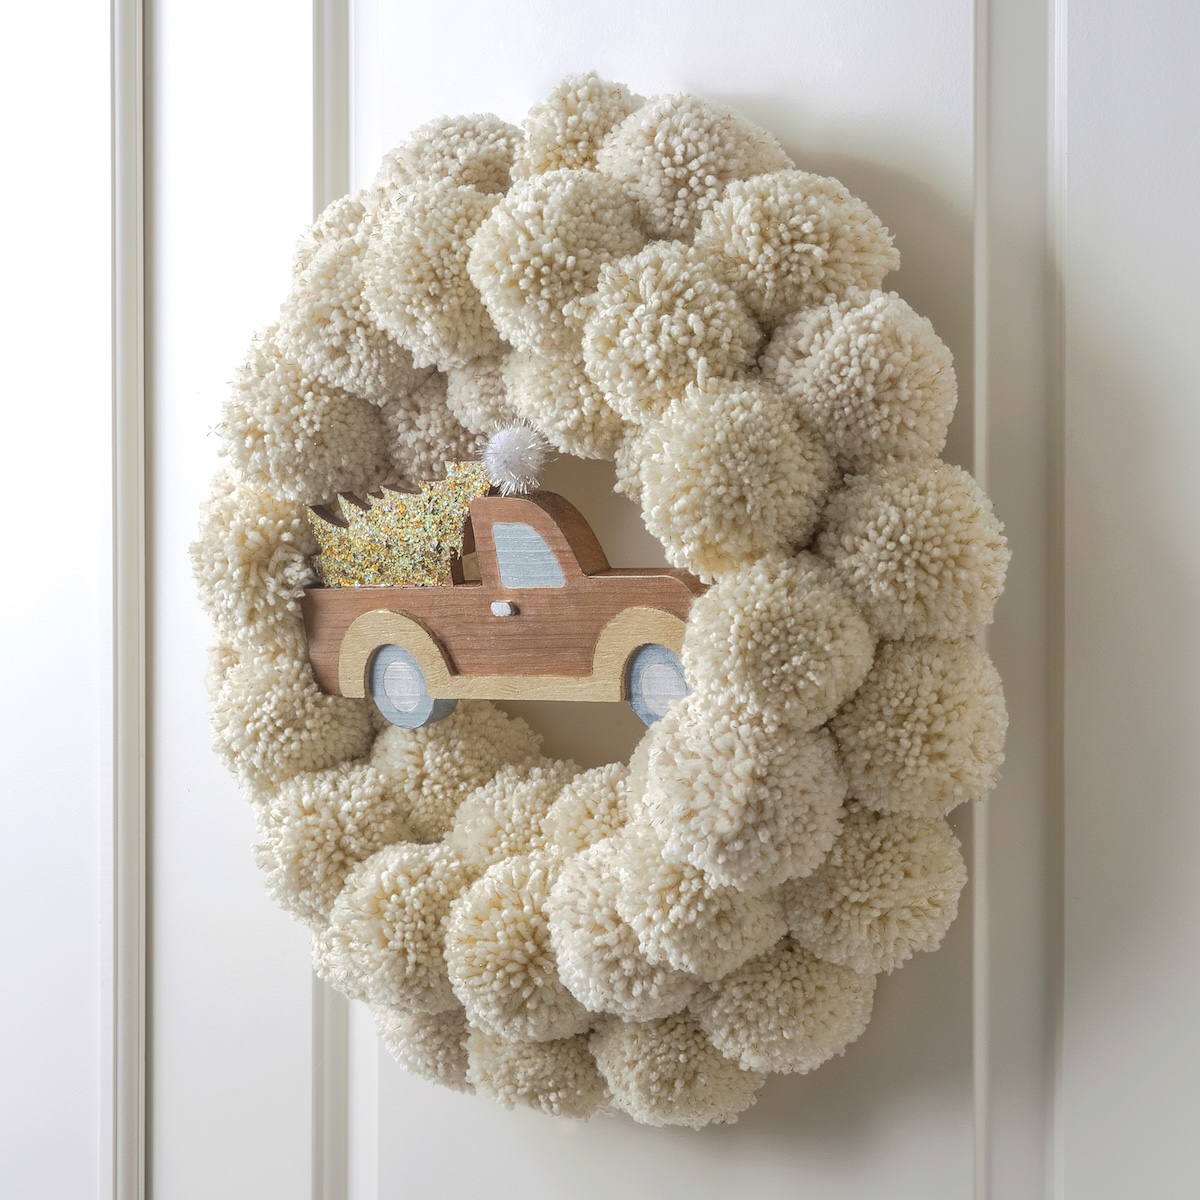
I’m really happy how it turned out, and how easy the process was! Hang it on a wall, interior door, or front door (if covered). I love that this color palette can stay up for winter decorating. Get the printable how to below:
Christmas Pom Pom Wreath
Materials
- 1 Foam wreath form 12"
- 4 skeins Yarn
- Wood shape holiday themed
- Acrylic paint variety of metallic colors
Video
Instructions
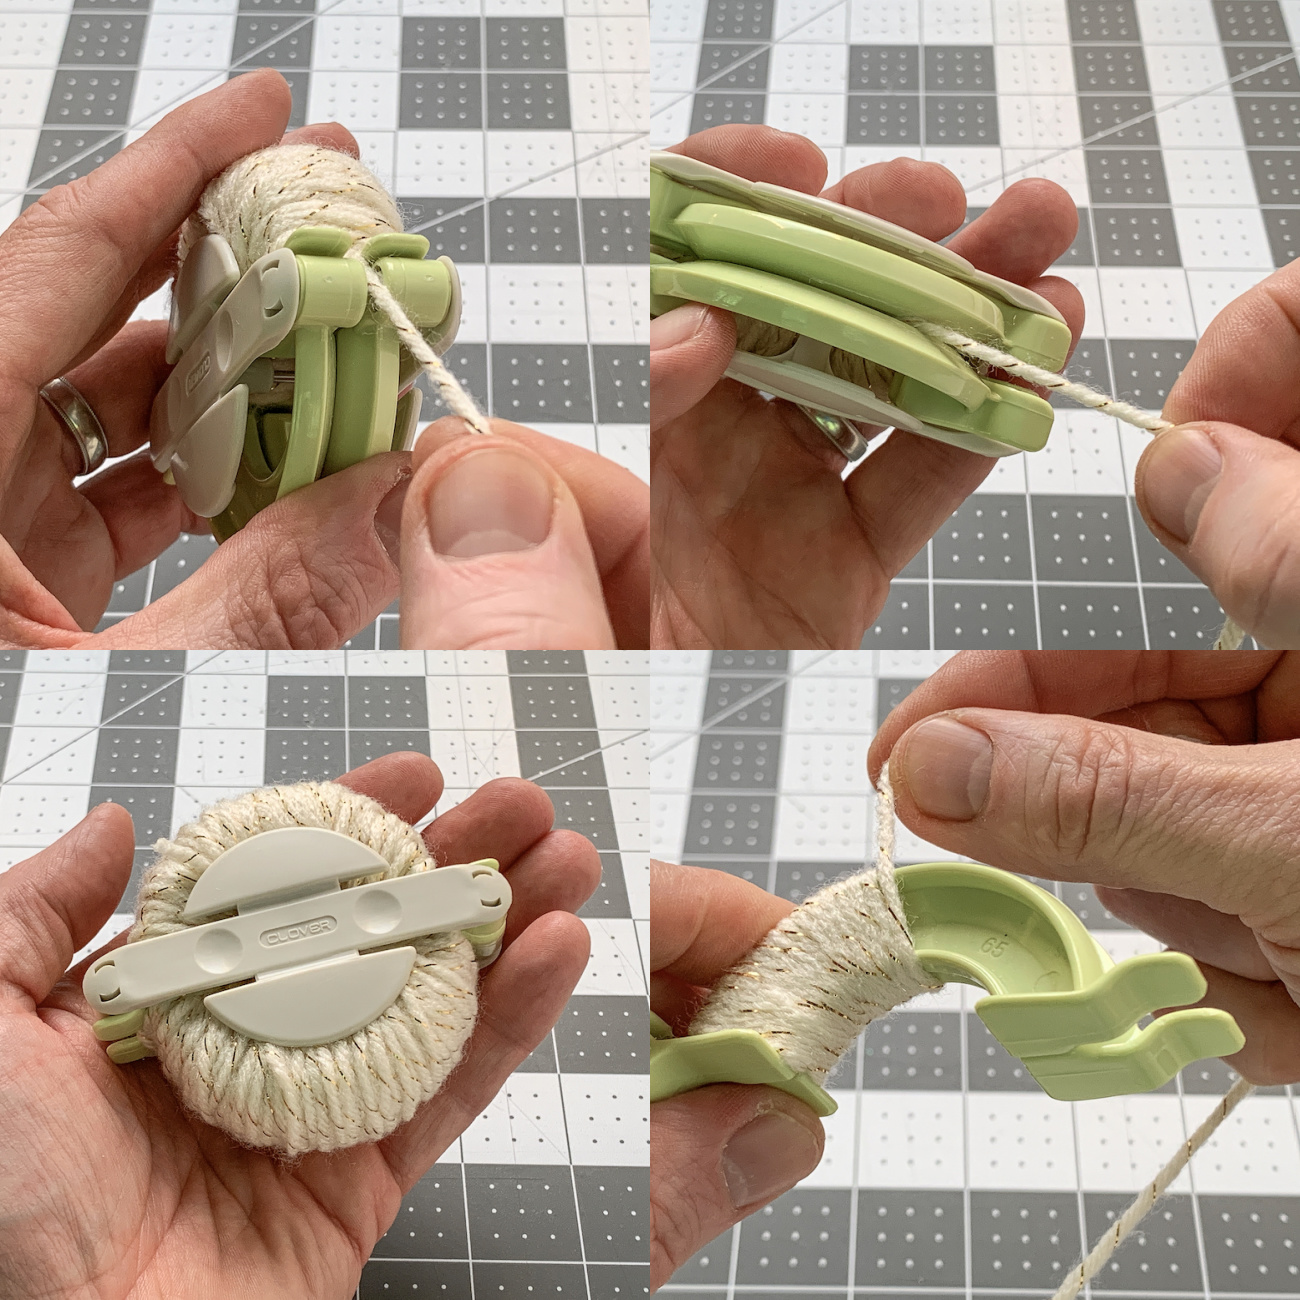
- Pick up the pom pom maker. Open one side of it (both pieces) and begin wrapping the yarn as shown (while holding one end of the yarn). You're going to keep wrapping the yarn until you have completely filled one side of the tool, including filling the "U" shape with yarn.
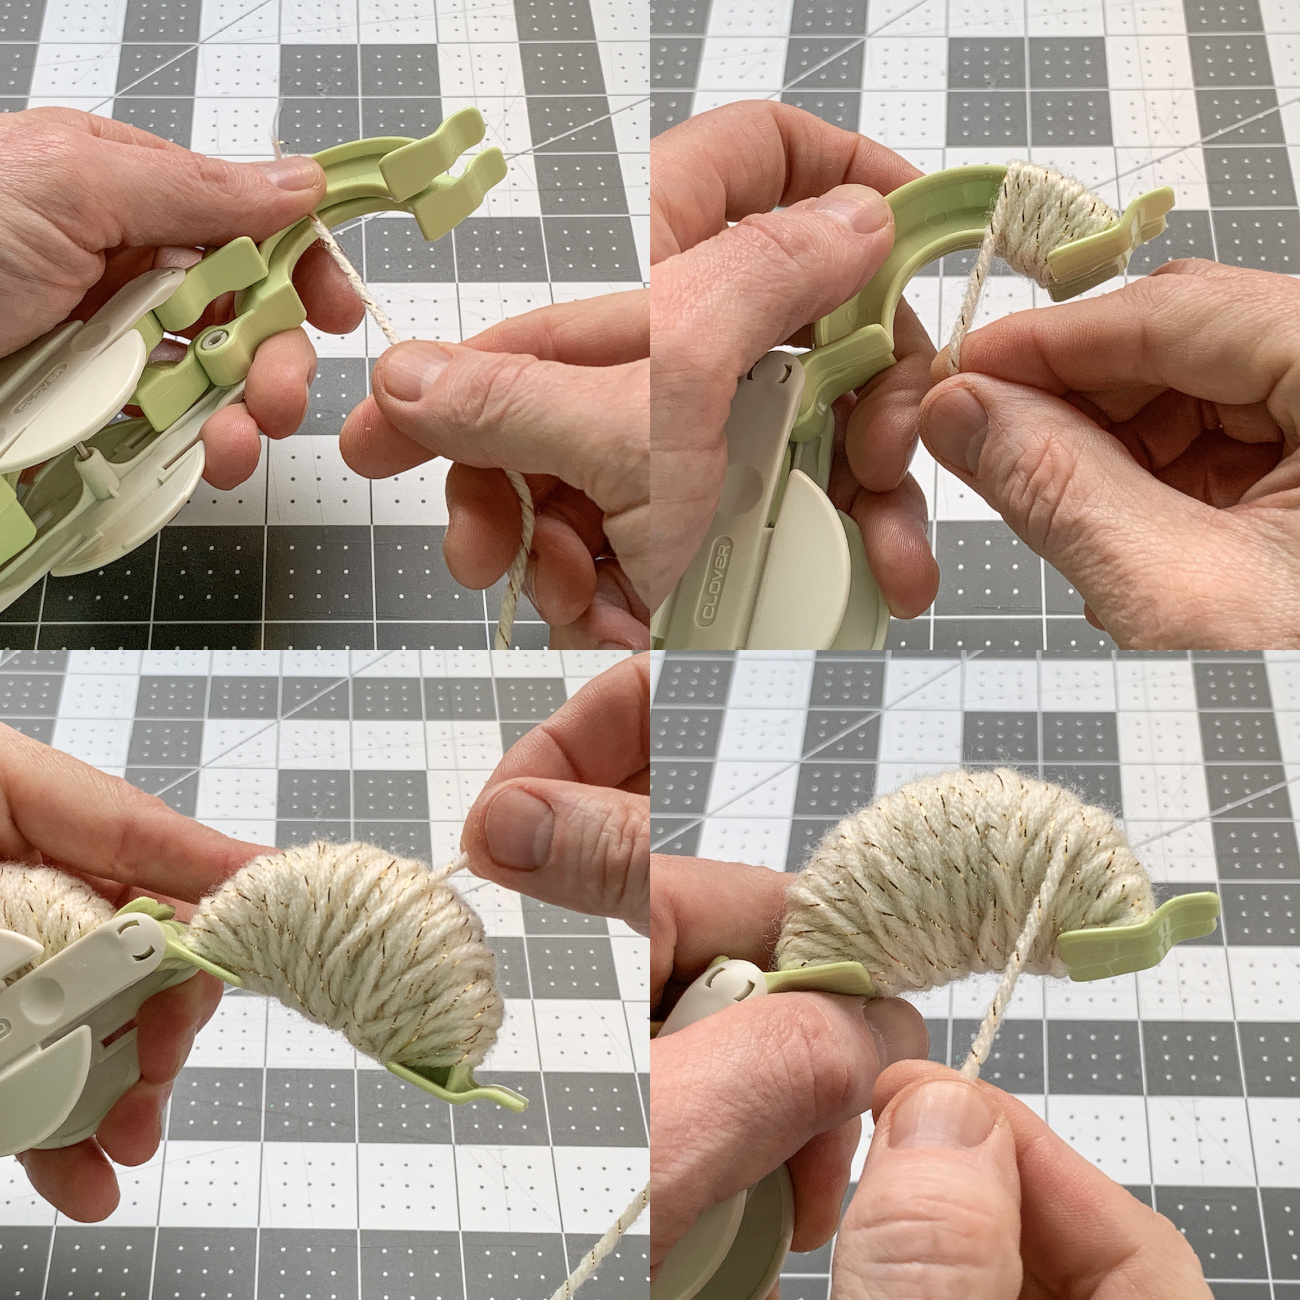
- When you are finished wrapping one side, close it and feed the yarn over to the other side as shown below. You're going to undo the other side of the pom pom maker, and wrap the yarn just as you did. Then you will close the tool.
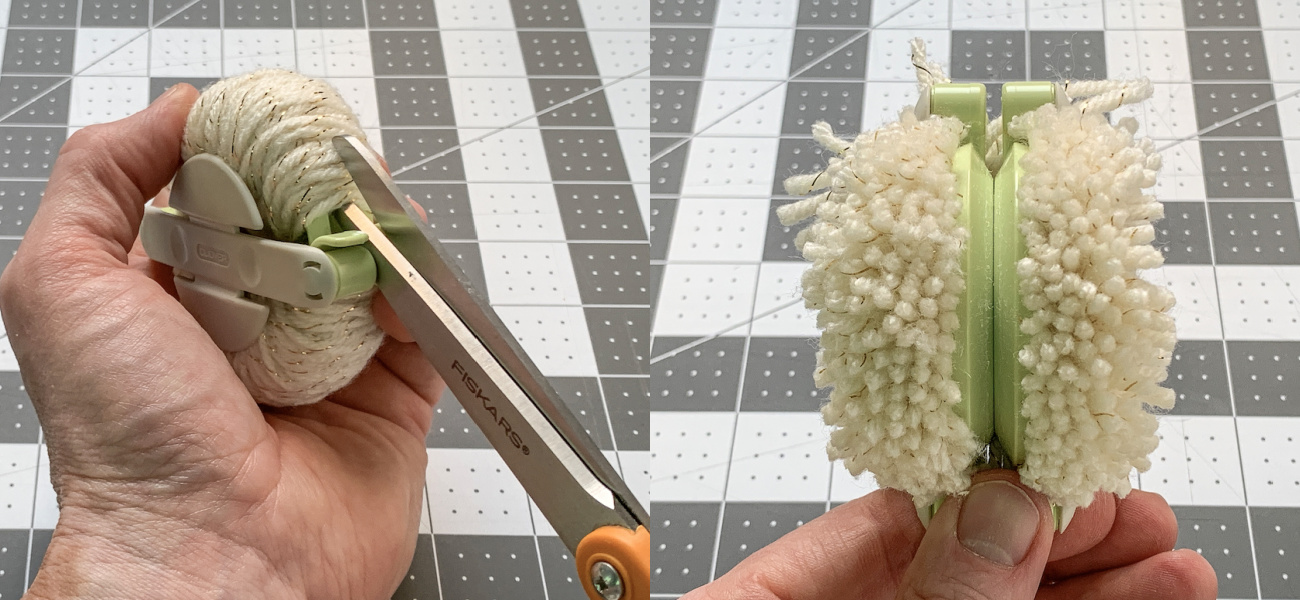
- Use the scissors to cut the yarn on each side of the pom pom maker, while still keeping it closed.
- Cut a scrap piece of yarn, and tie it around the center of the tool tightly. You're going to make a knot by double tying. You want to make sure it's tight enough so that when you remove the pom pom, it doesn't come apart. You don't need to pull so tight that you break the yarn, but you do need to make it snug.
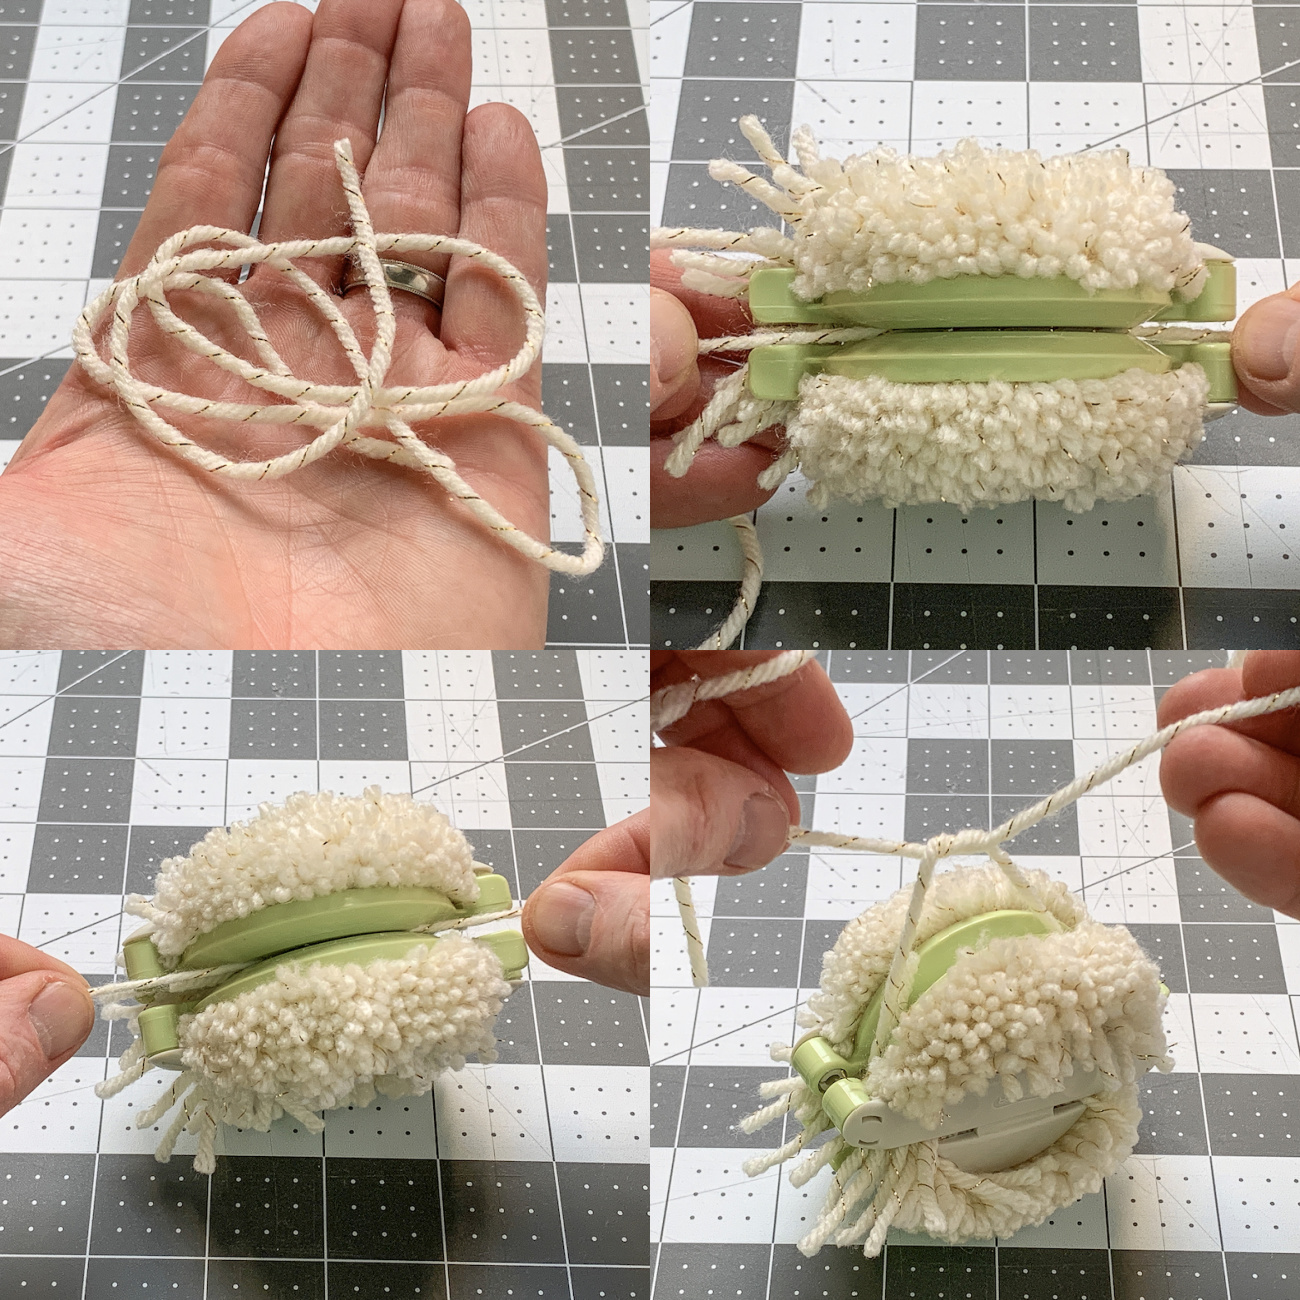
- Open both ends of the tool and pull apart to remove the pom pom.
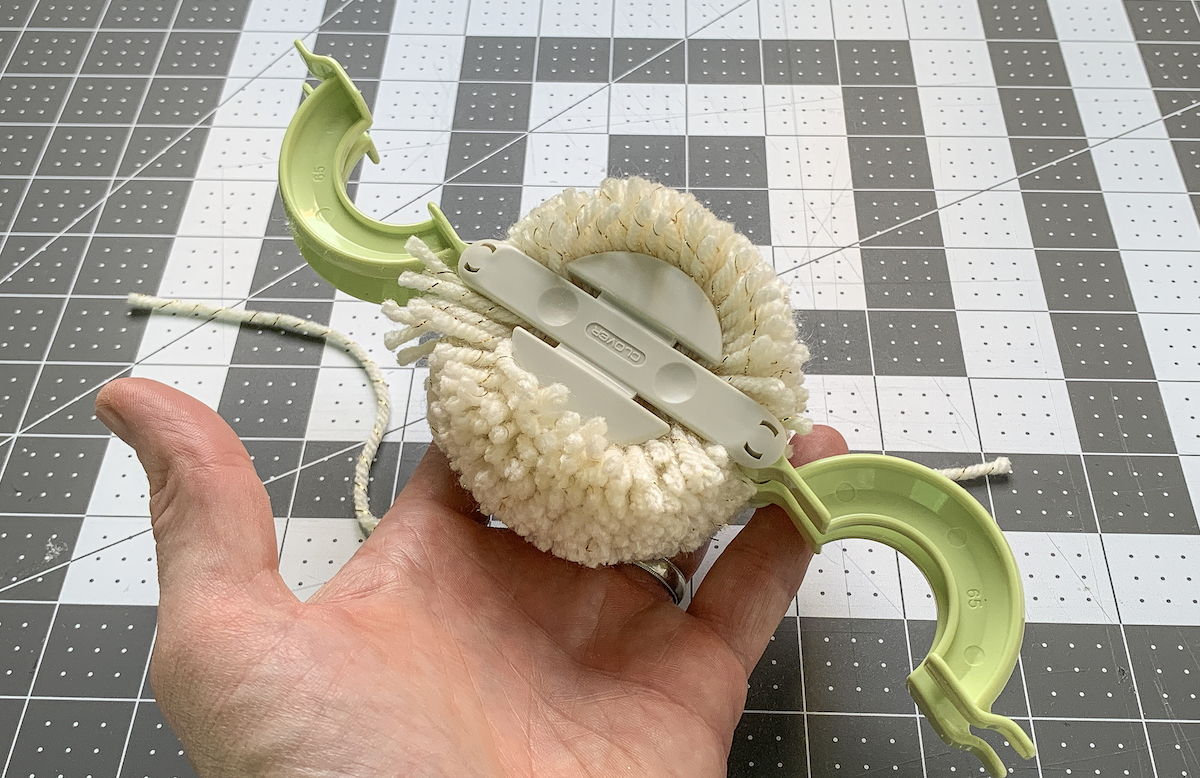
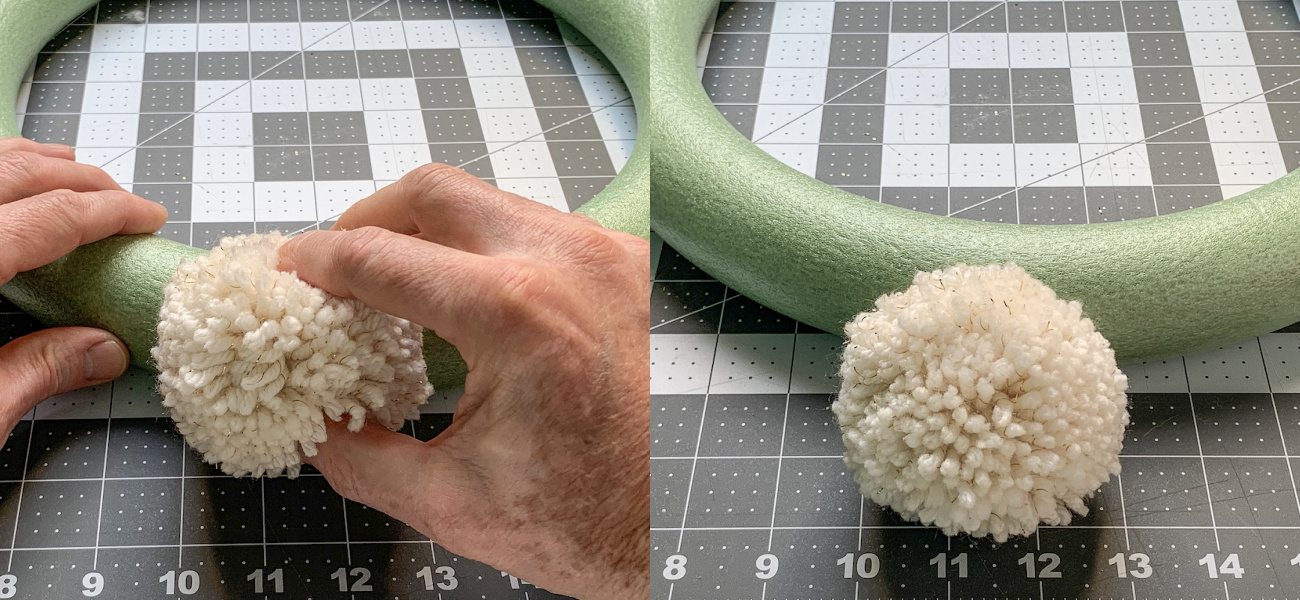
- The pompom will come out very shaggy, so you'll want to trim it up with the scissors, plus the excess yarn from tying.

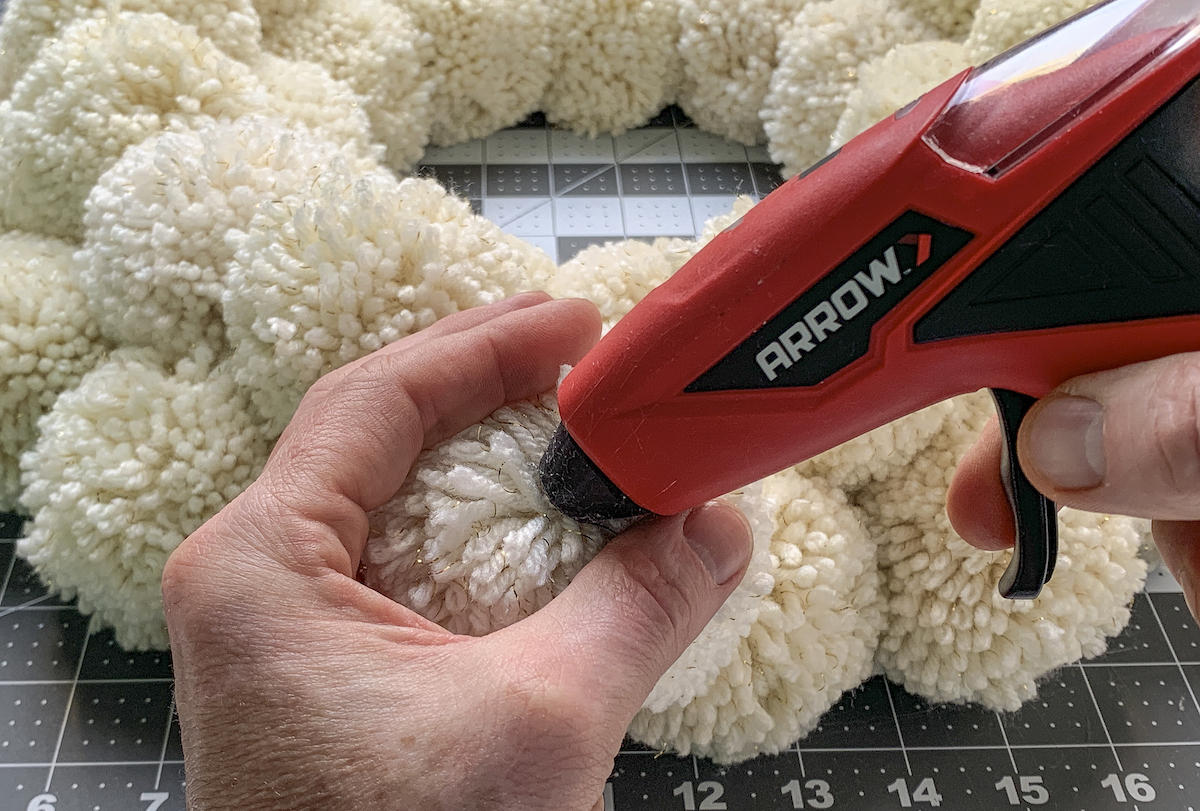
- Spread the yarn out on one pom pom with your fingers and place some glue down on the yarn.
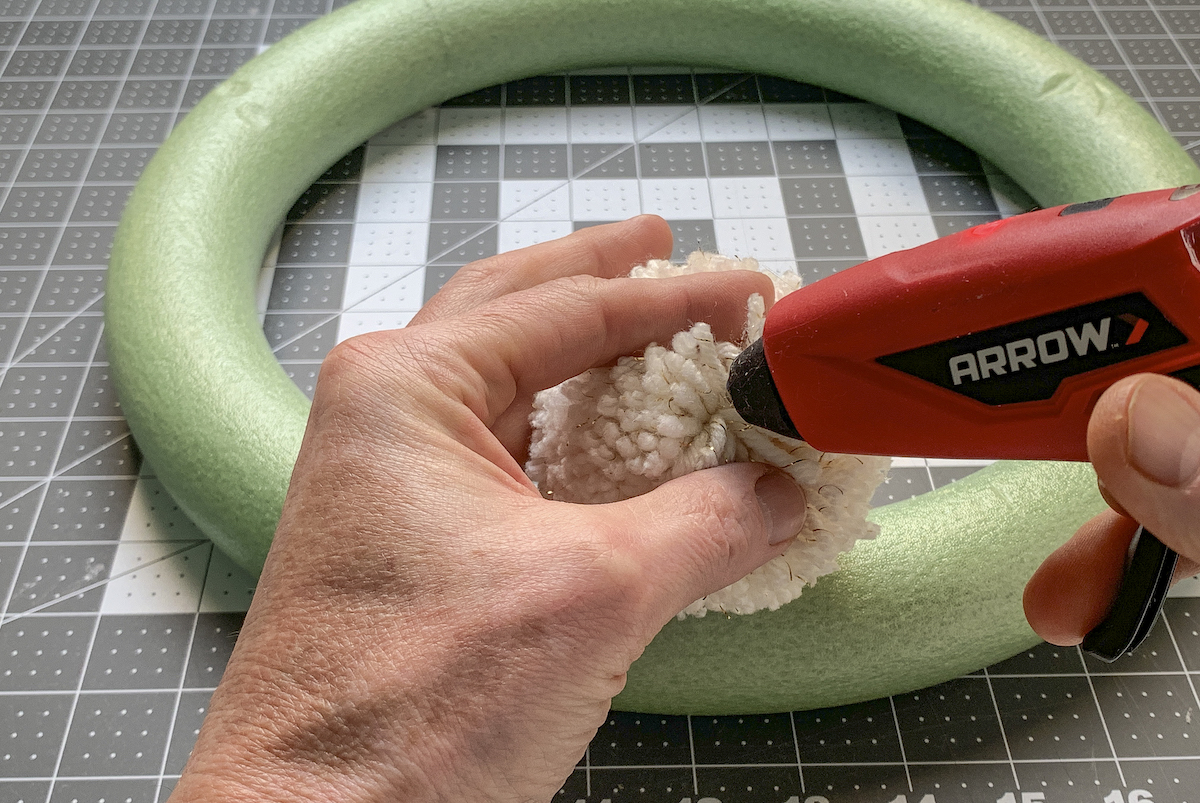
- Press the hot glue portion down onto the wreath form and hold in place until it sets (a few seconds).
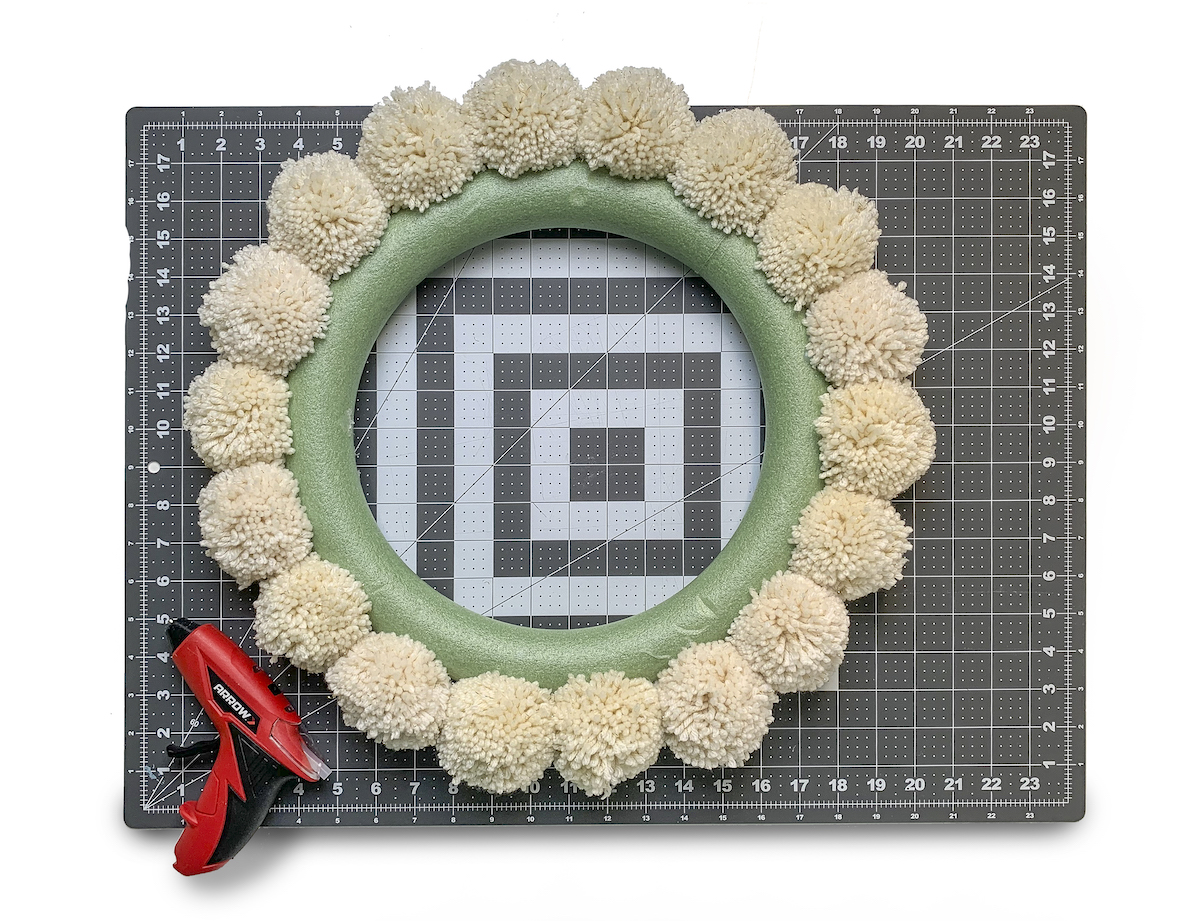
- Continue gluing the pompoms around the ring as shown. You're going to glue all the way around the form.
- Repeat hot gluing, this time on the inside of the ring. You don't have to shove the pom poms down very far – just keep them toward the inside.
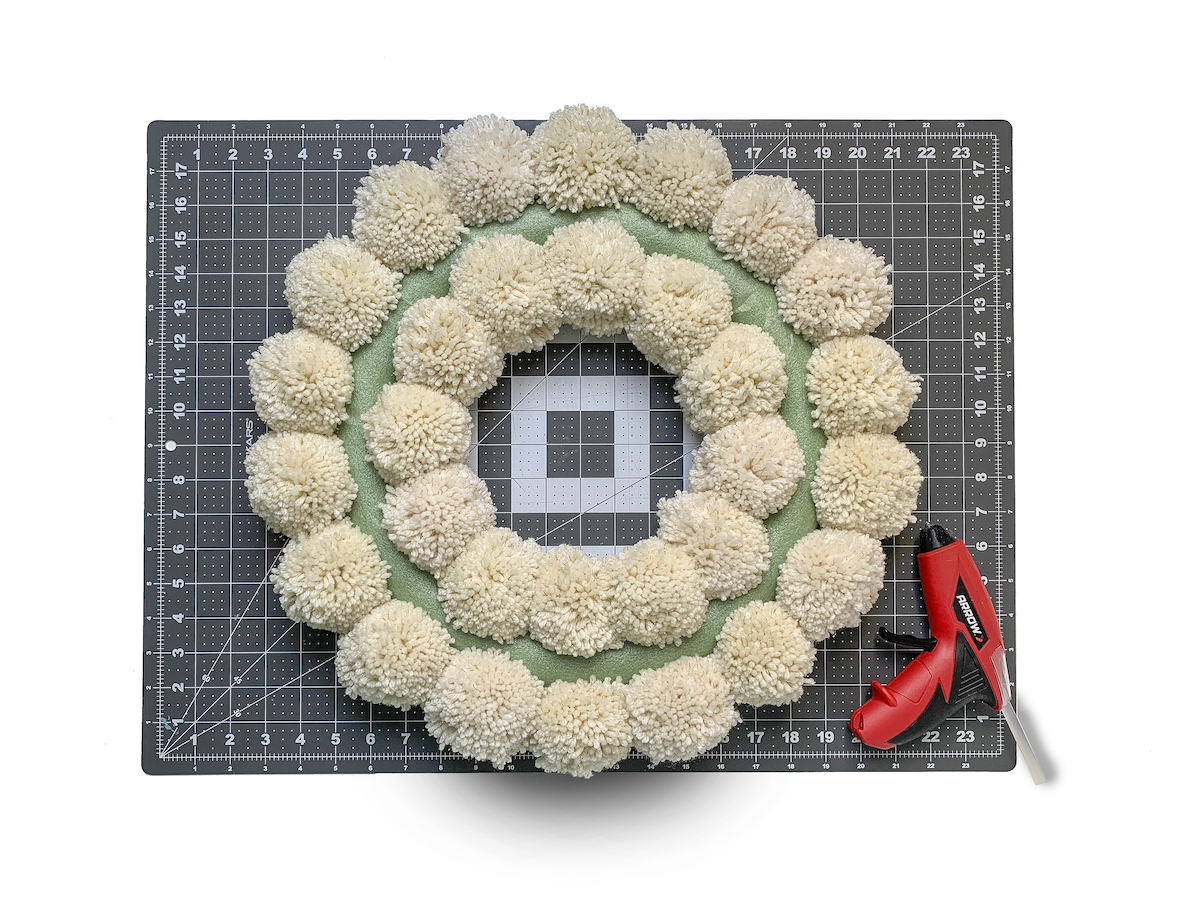
- Finish your wreath by adding a ring of poms around the front facing portion of the form, again with hot glue.
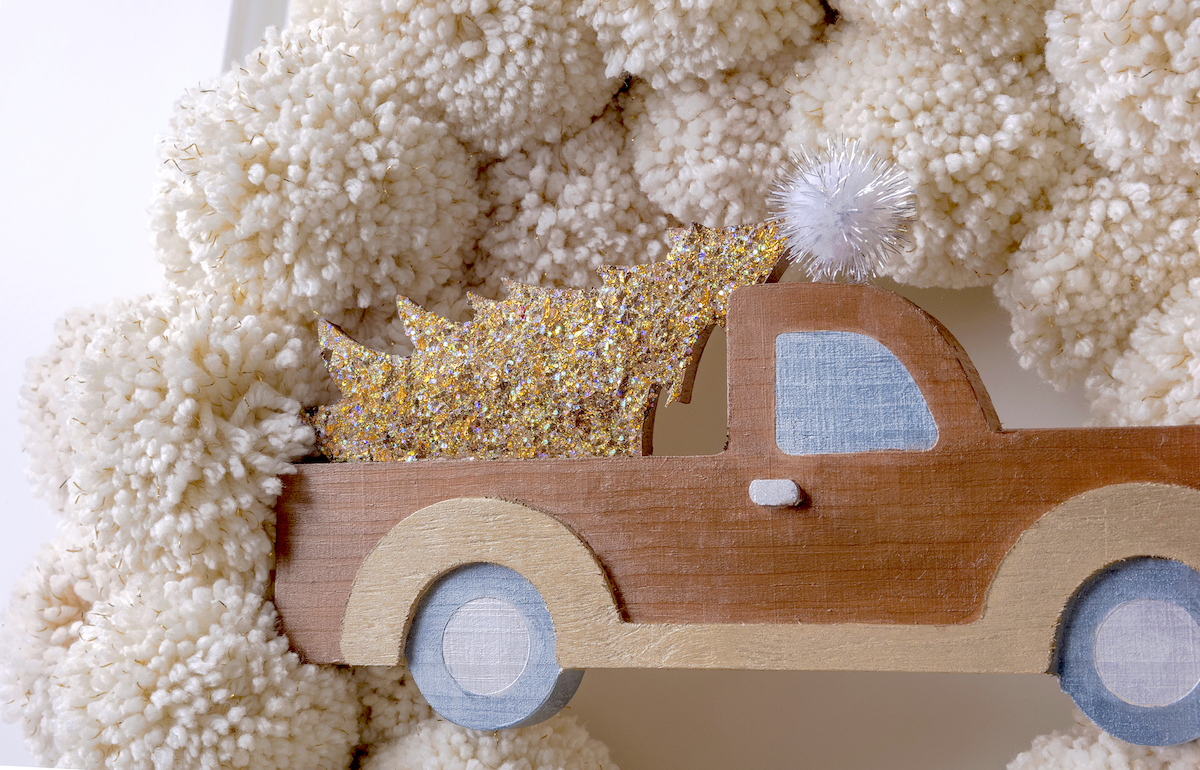
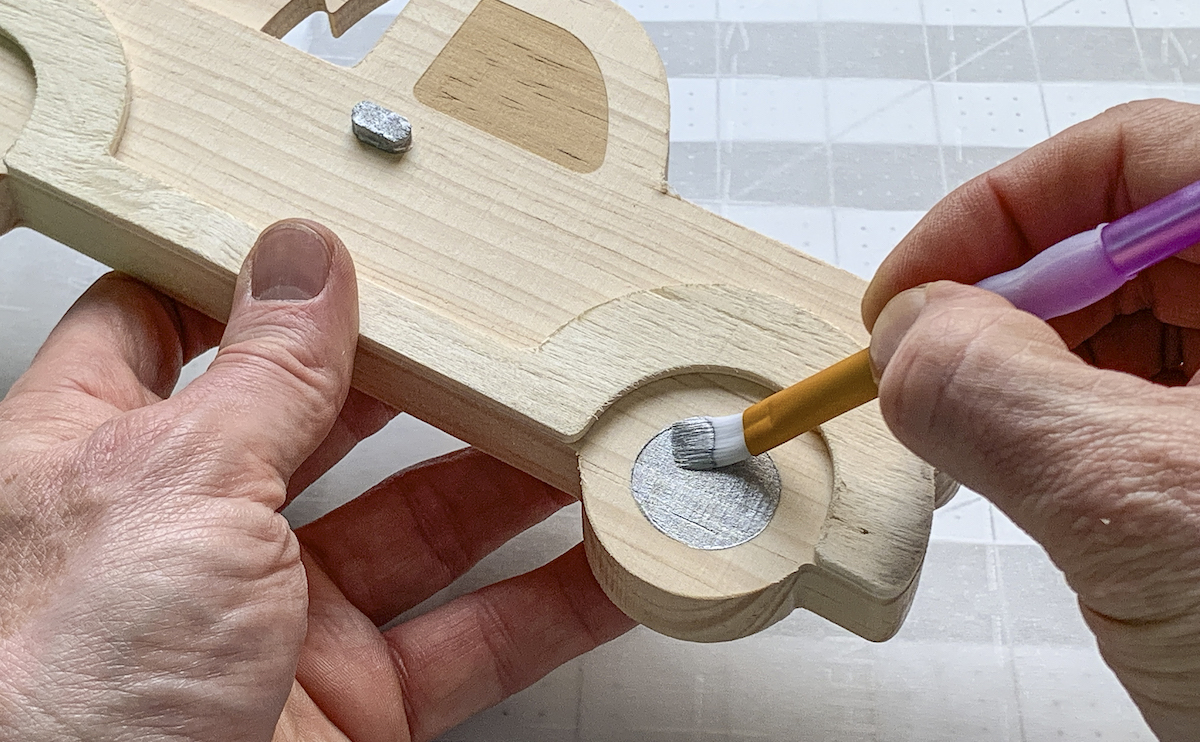
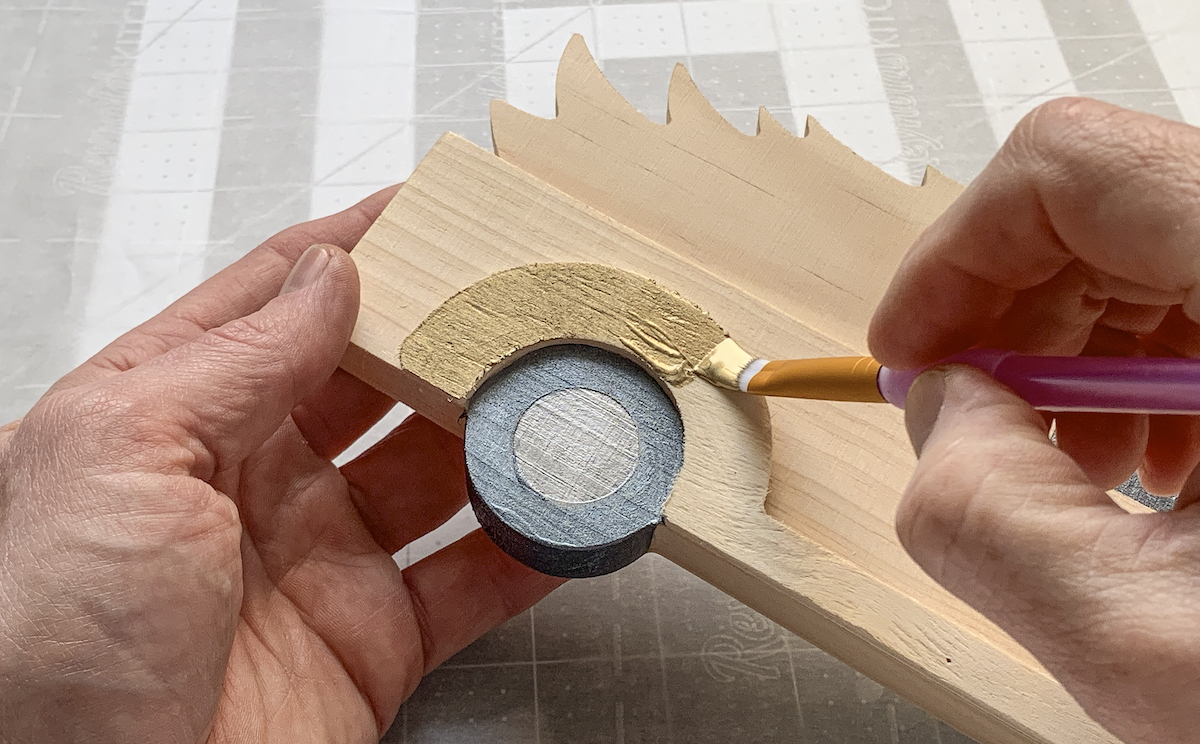
- The inside hubcaps of the truck were painted silver, along with the handle – and the wheels were painted metallic black.
- The fender flares were painted gold and the truck itself, bronze. The tree was basecoated bronze as well.
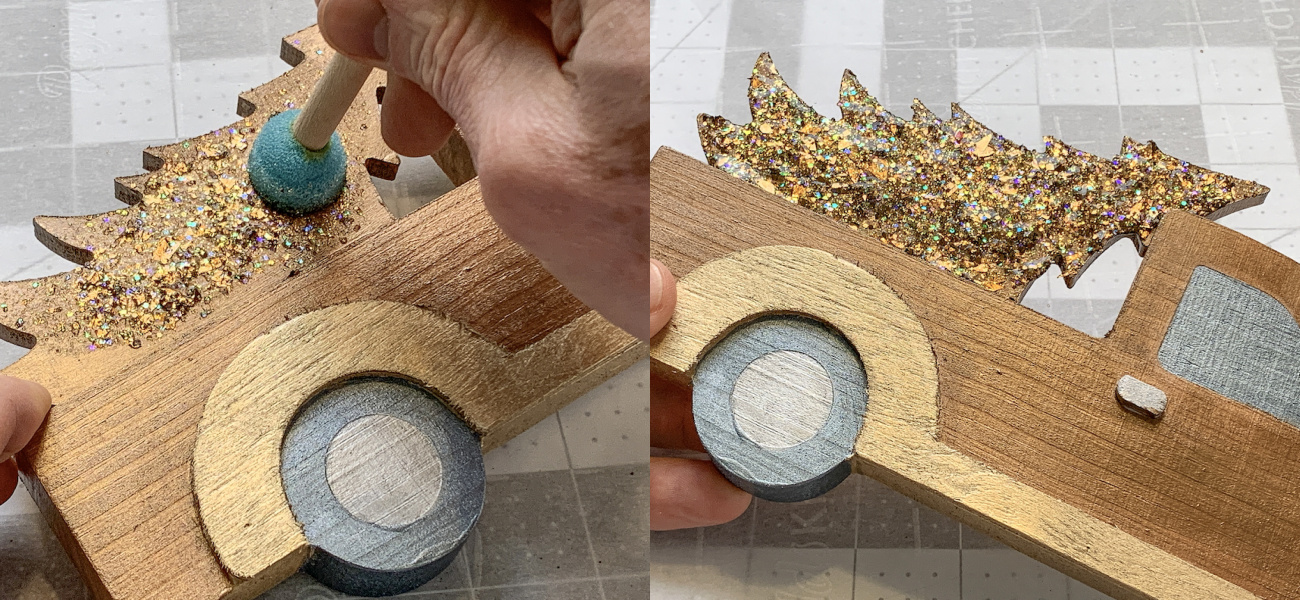
- Add a layer of Glitterific to the top of the tree with a spouncer. Let dry and touch up areas that need more. Let dry completely.
- Attach the wood shape to the wreath with hot glue, and attach a hanger on the back with yarn and glue.
And now that you are an expert making pompoms, I’d love for you to check out these other wreath, winter, and Christmas decorating ideas:
Candy Cane Mesh • Christmas Garland • Christmas Mesh • Coffee Filter • Easter Mesh • Fall • Felt • Halloween Mesh • Halloween Ornament • Pinecone • Mini Pumpkins • Pool Noodle • Pool Noodle Floral • Pom Pom • Ribbon • St. Patrick’s Day Mesh • Valentine Mesh • Wine Cork • Witch Hat