Wine Cork Skeleton for Halloween Decorating
Learn how to make a wine cork skeleton craft that is perfect for your Halloween decor! It’s an easy and budget friendly holiday project.
Skills Required: Beginner. It helps to have experience with crafting including painting, but this is a pretty simple project. You’ll be gluing and painting corks, as well as cutting a popsicle stick and attaching screw eyes. This skulligan is pretty simple if you work slowly and follow the steps.
We’ve done a lot of wine cork crafts around here, and the truth is, they are really fun. And by that I mean, once you get started crafting with corks, you’re not going to want to stop. They’re very versatile as a crafting supply.
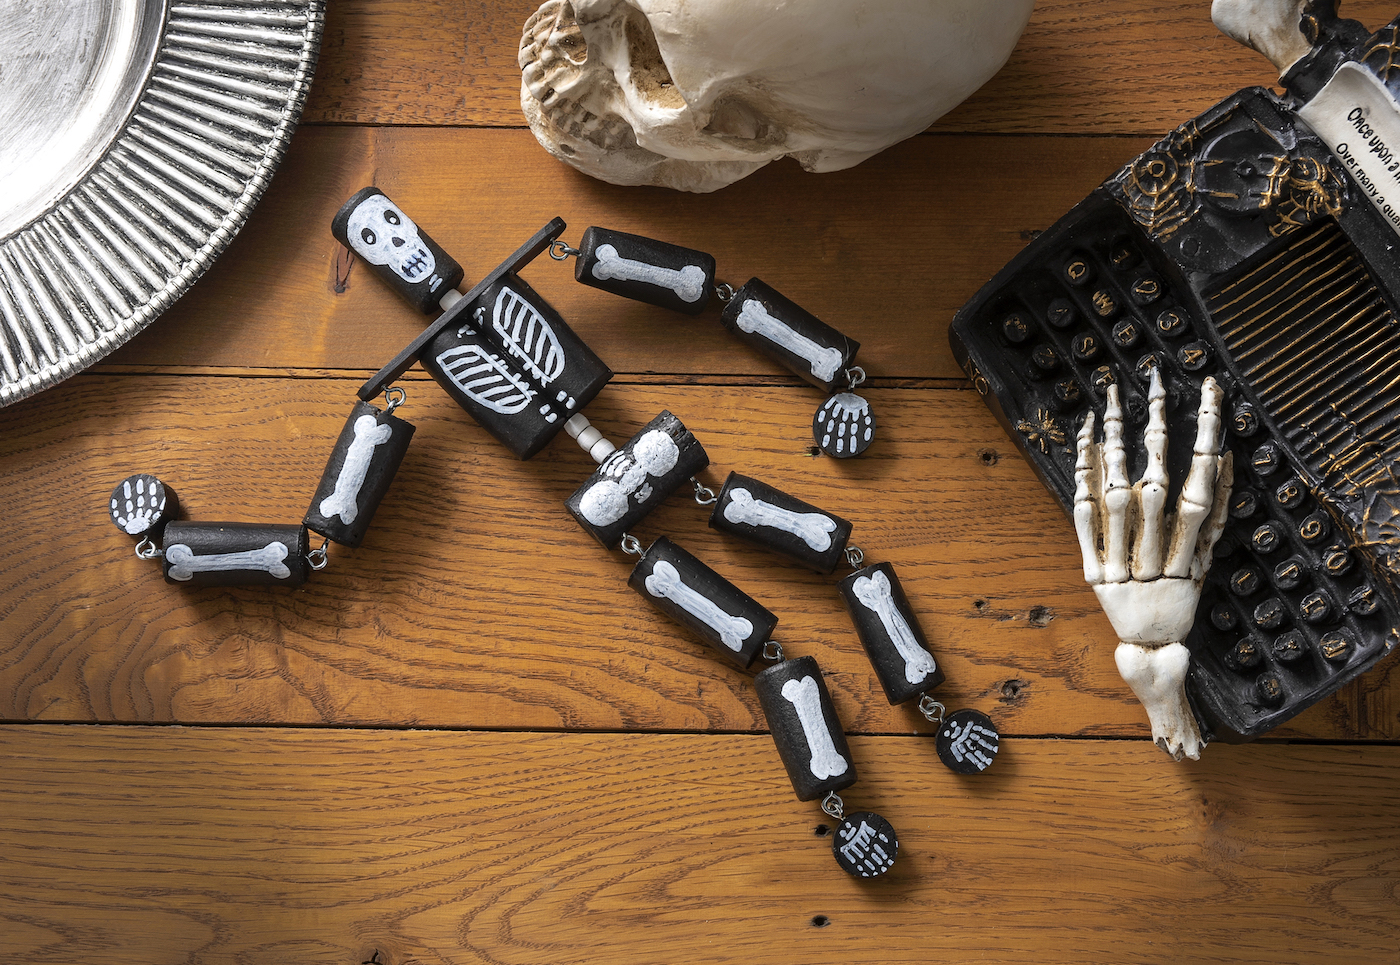
There was the wine cork wreath, and then the wine cork pumpkins for fall. And since I love skeletons, it was time to take that love of cork into a Halloween decor project. And that’s how this wine cork skeleton was born!
After the skull bean art and the milk jug skeleton, I was really excited to try out a skully using yet another medium. This guy is very casual and just loves to hang out anywhere you put him. He’s an awesome recycled Halloween craft!
Not only does he use wine corks, but he also has popsicle stick shoulders. This is actually a really budget friendly craft! I had everything but the screw hooks on hand, which I got in about two seconds at Lowes.
This happy Halloween dude is made in a reasonable amount of steps. You’ll have to do some gluing, cutting, and assembling with the screw hooks. It’s pretty easy. I’m excited to show you how it’s made below.
Wine Cork Skeleton
Gather These Supplies
- Wine corks – 13
- Craft paint – black
- Paint pen – white
- Popsicle stick – 1
- White pony beads – 5
- BBQ skewer or thin wood dowel rod
- Screw hooks (1/2″) – 24
- Strong scissors
- Paintbrush
- Hot glue gun and glue sticks
- Sandpaper
- Pliers
- Dremel tool (optional)
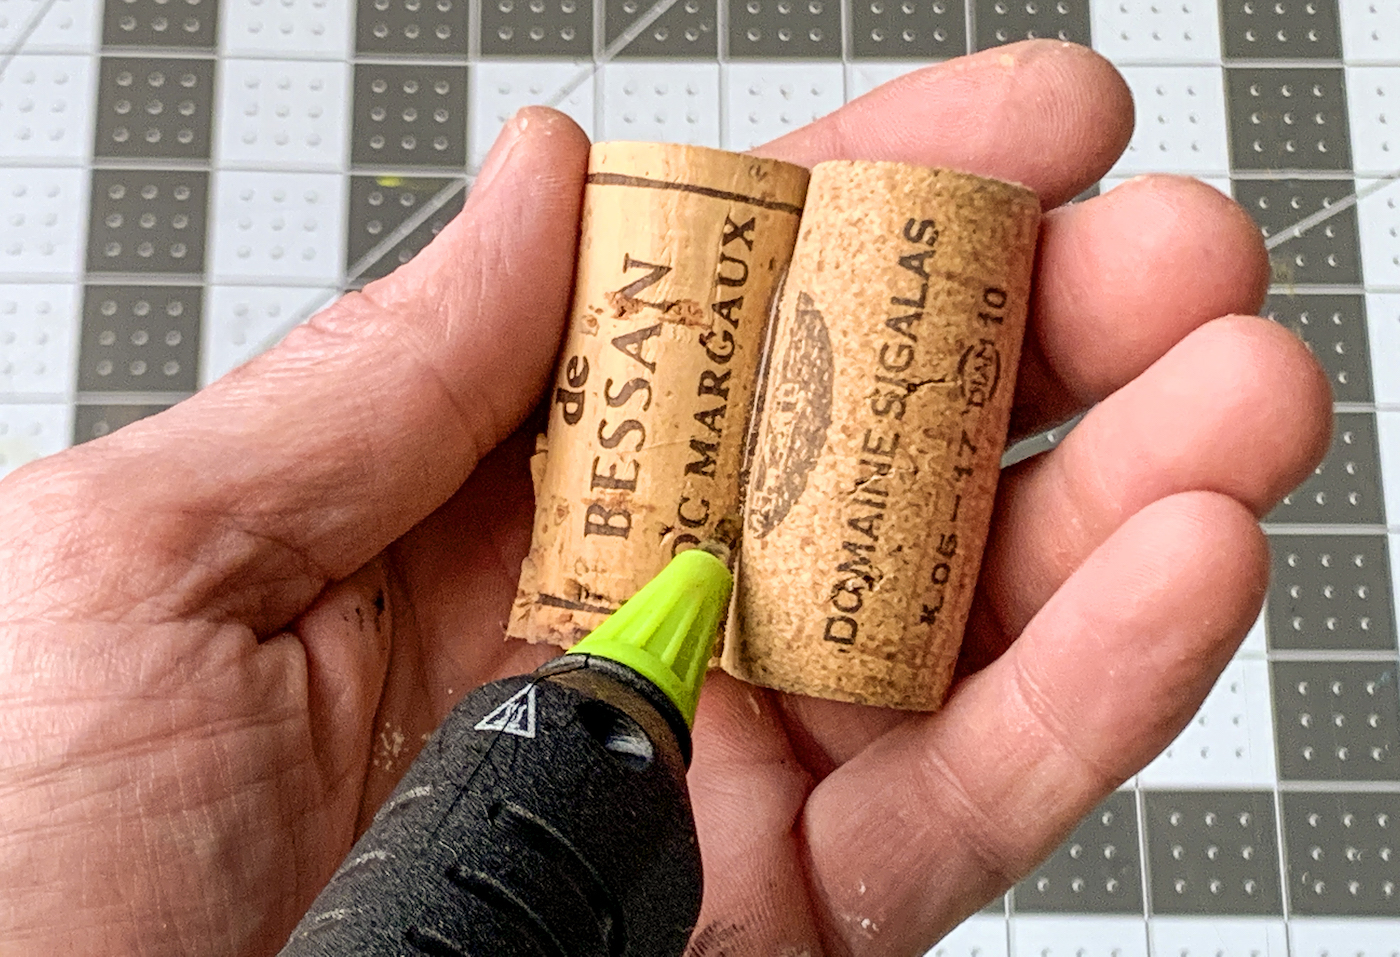
Cut One Cork
Before you start assembly, you need to cut one of the corks into four pieces that will make up the skeleton hands and feet.
The easiest way to do that is to put one cork in a boiling pot of water for ten minutes. Then cut with a knife into four equal pieces (it will cut very easily). Set the pieces aside to let cool and dry.

Glue and Paint the Corks
Hot glue two corks together to act as a rib cage. Place a line of glue down the side of one and press the corks together and hold. Let cool.
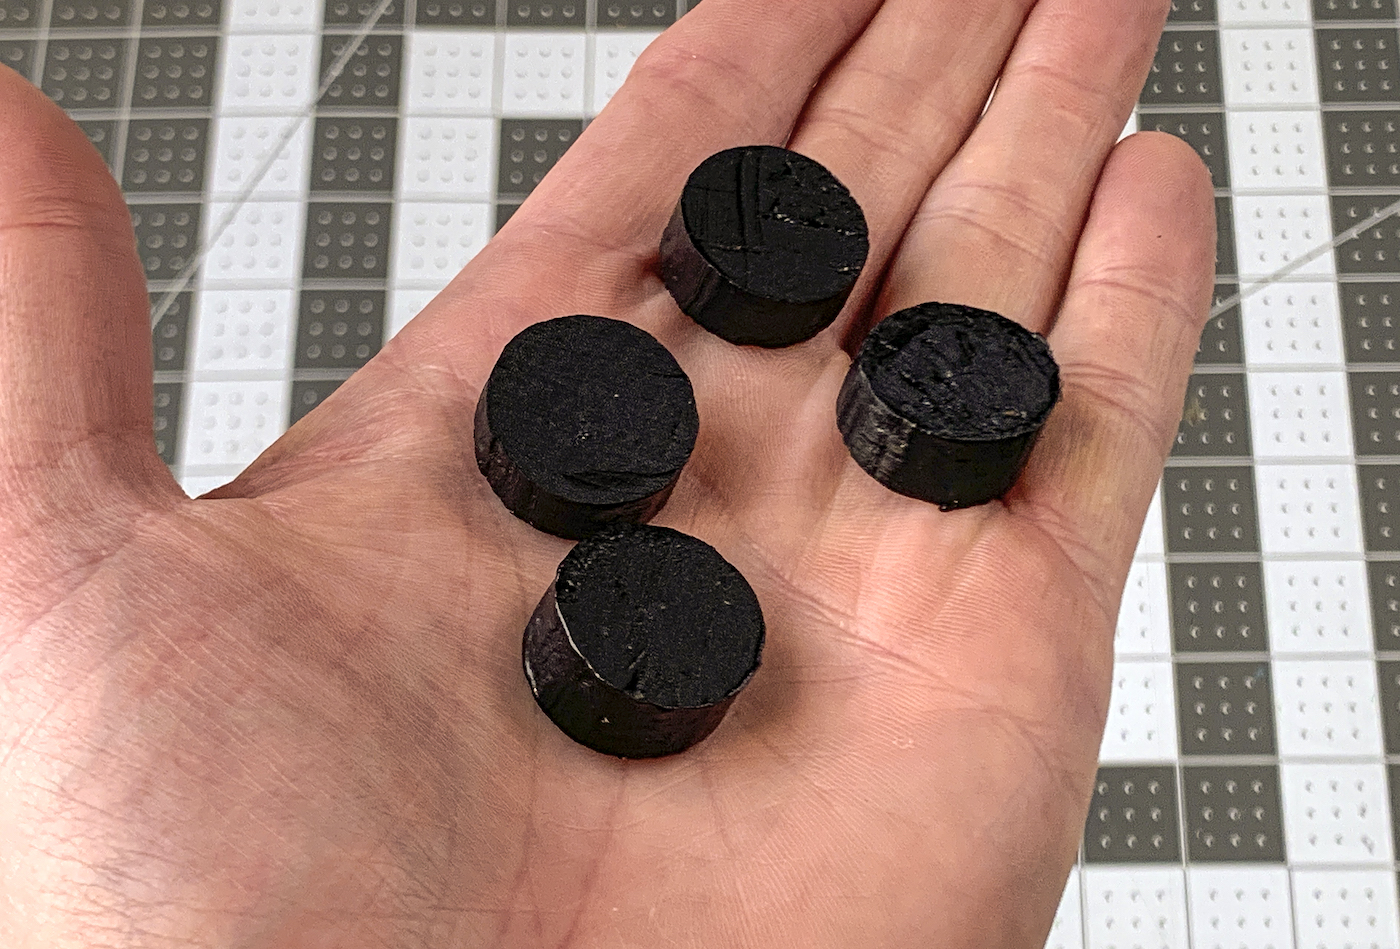
Paint the rib cage with black craft paint. You’re also going to paint all of the corks with the black craft paint. The easiest way to do this is to place a cork on the end of a pin and paint.
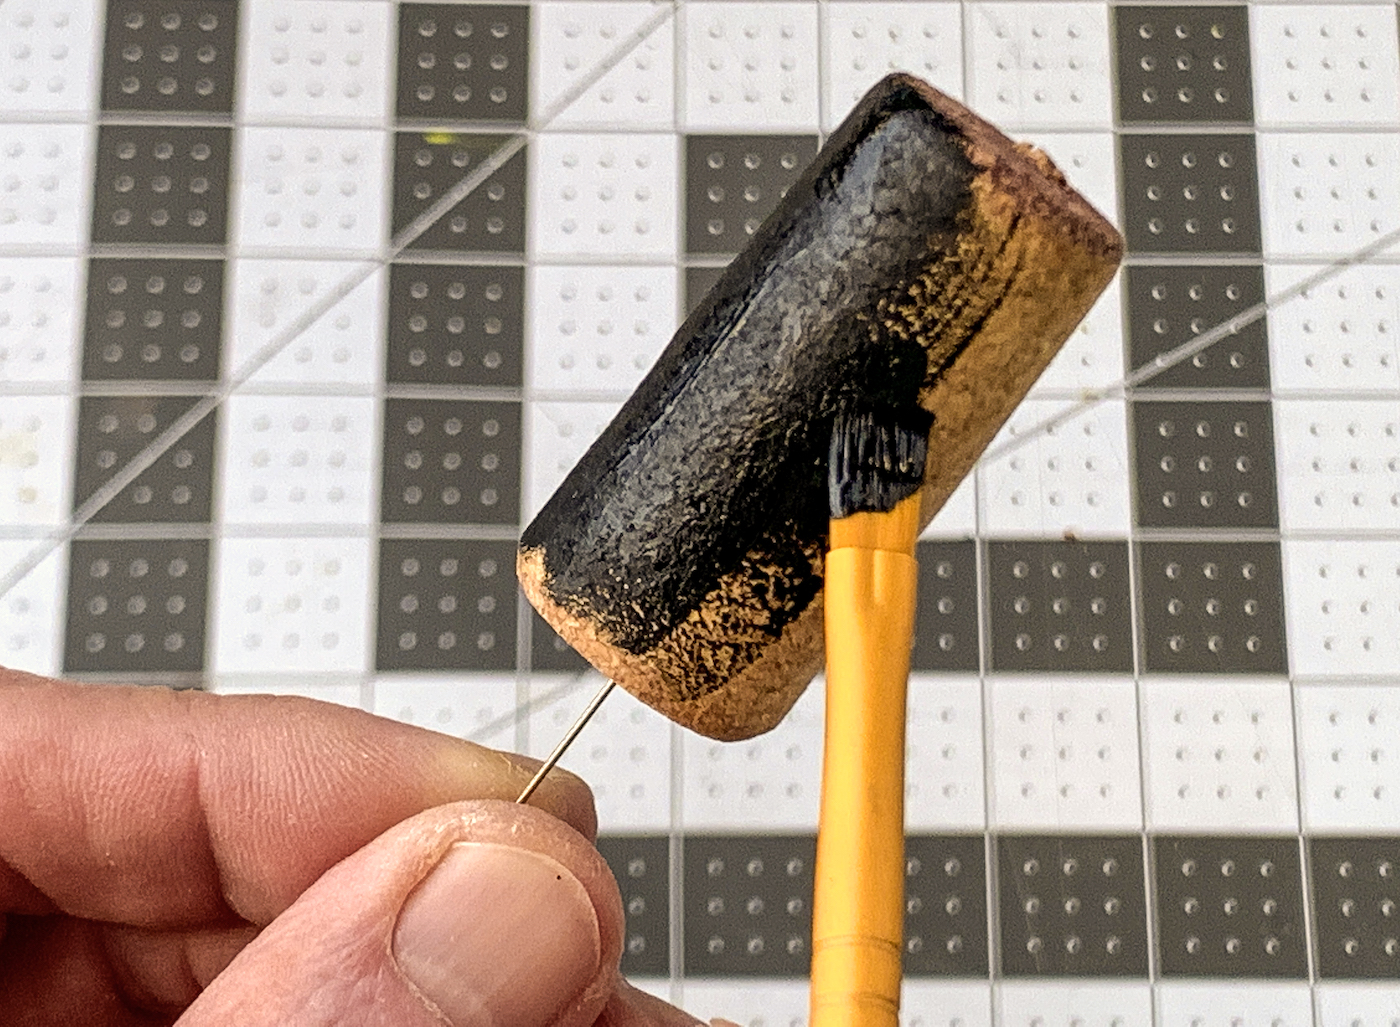
You’ll need about two coats per cork. Let everything dry. Be sure to paint the four pieces as well.
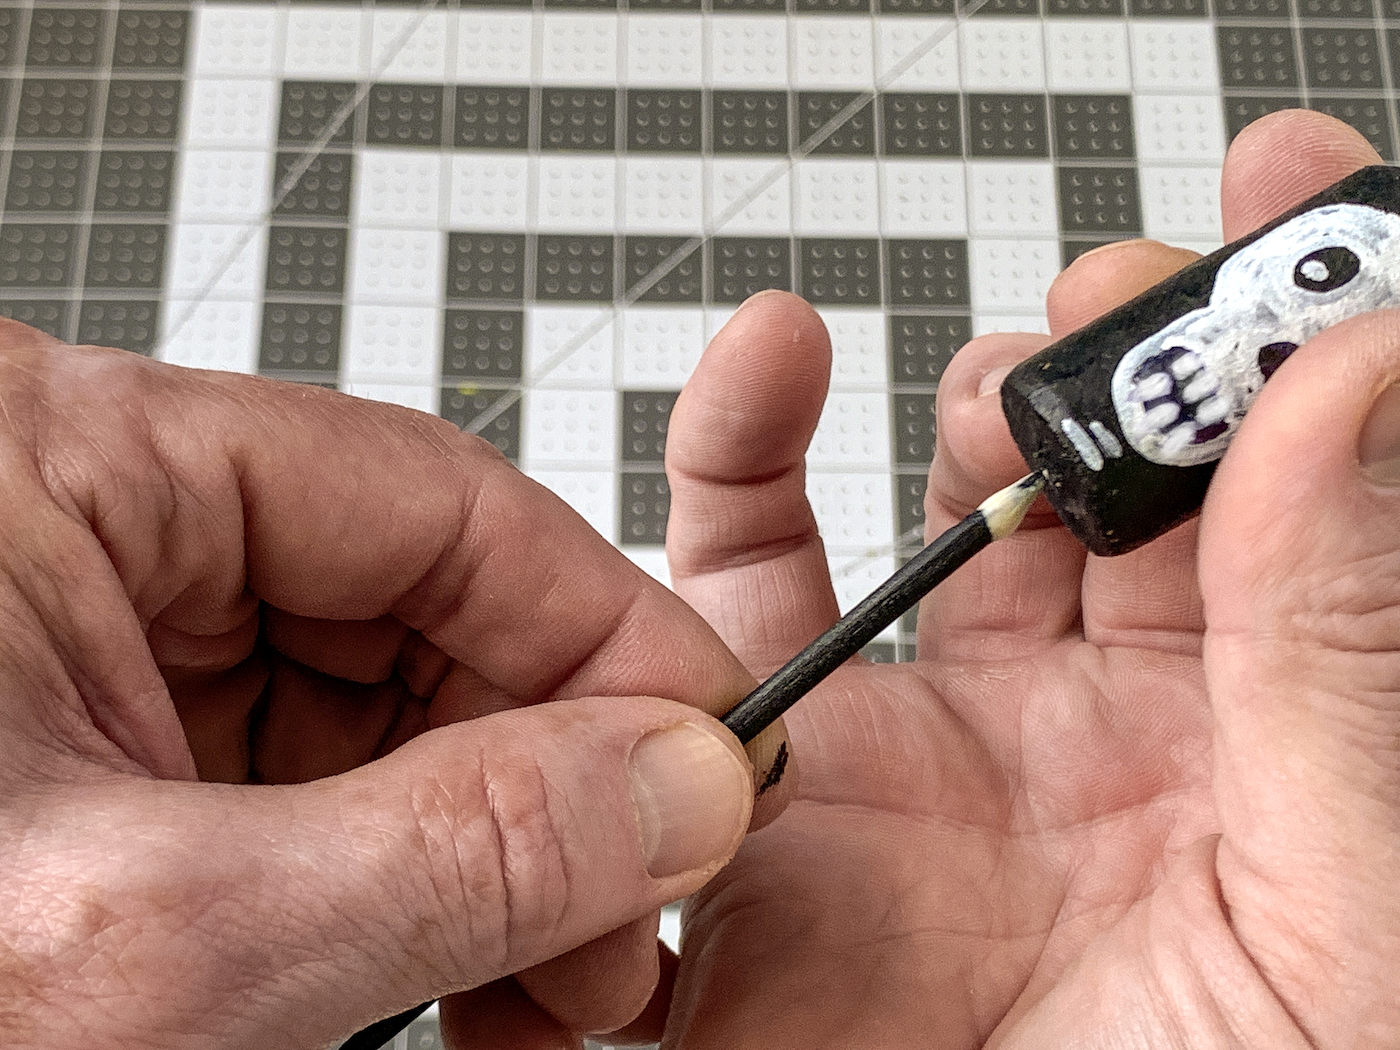
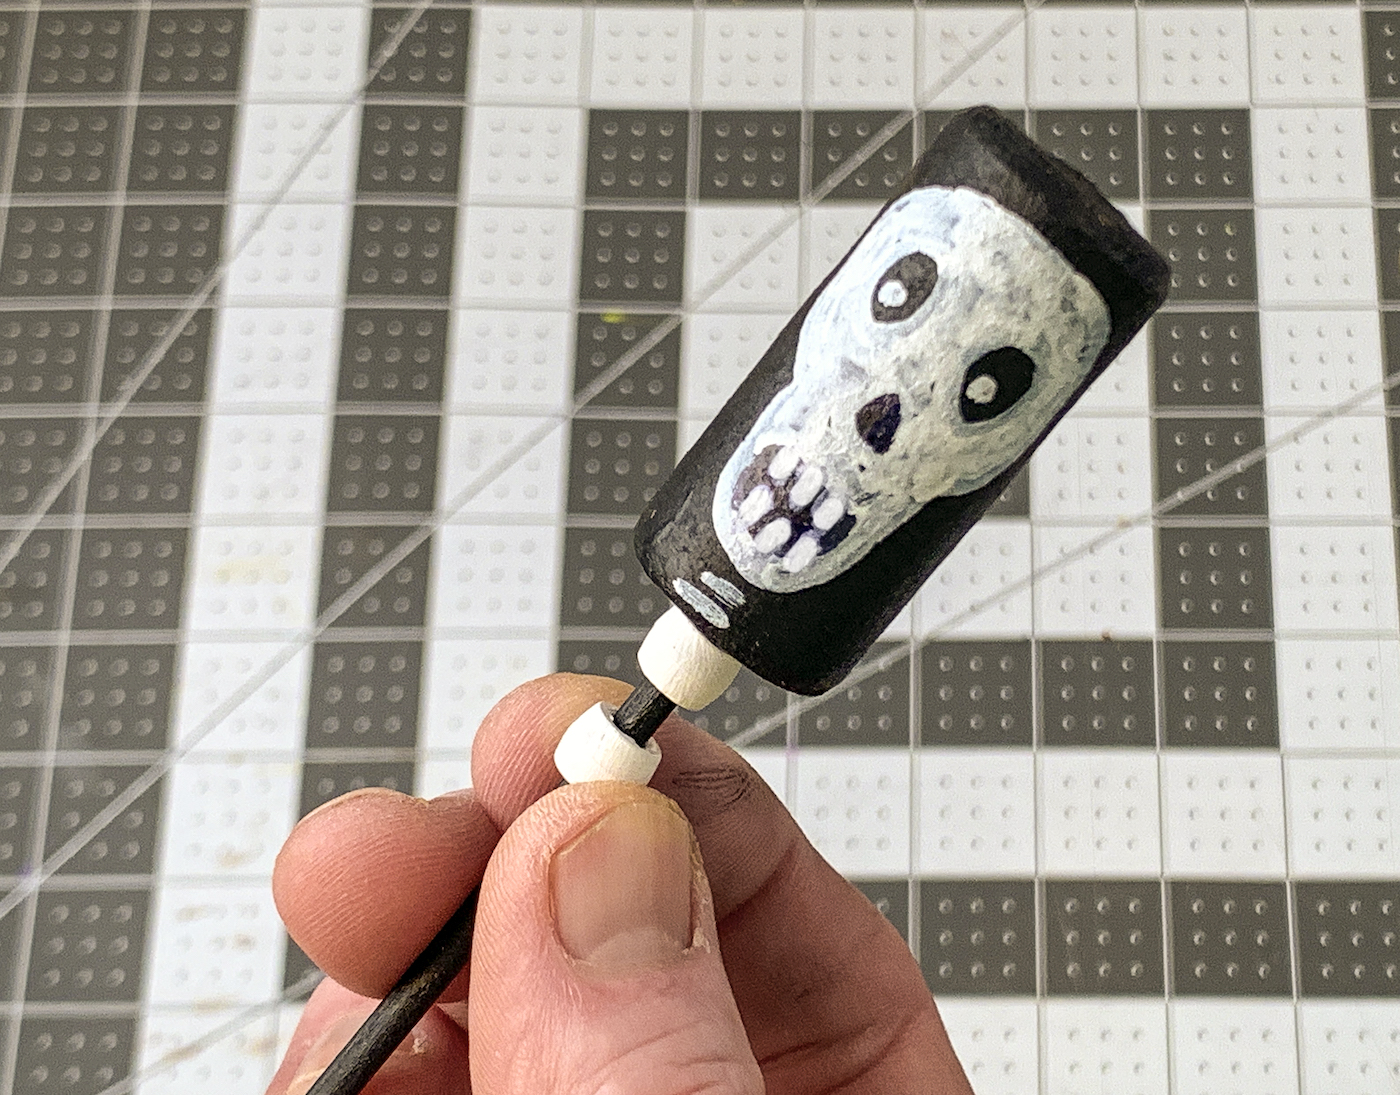
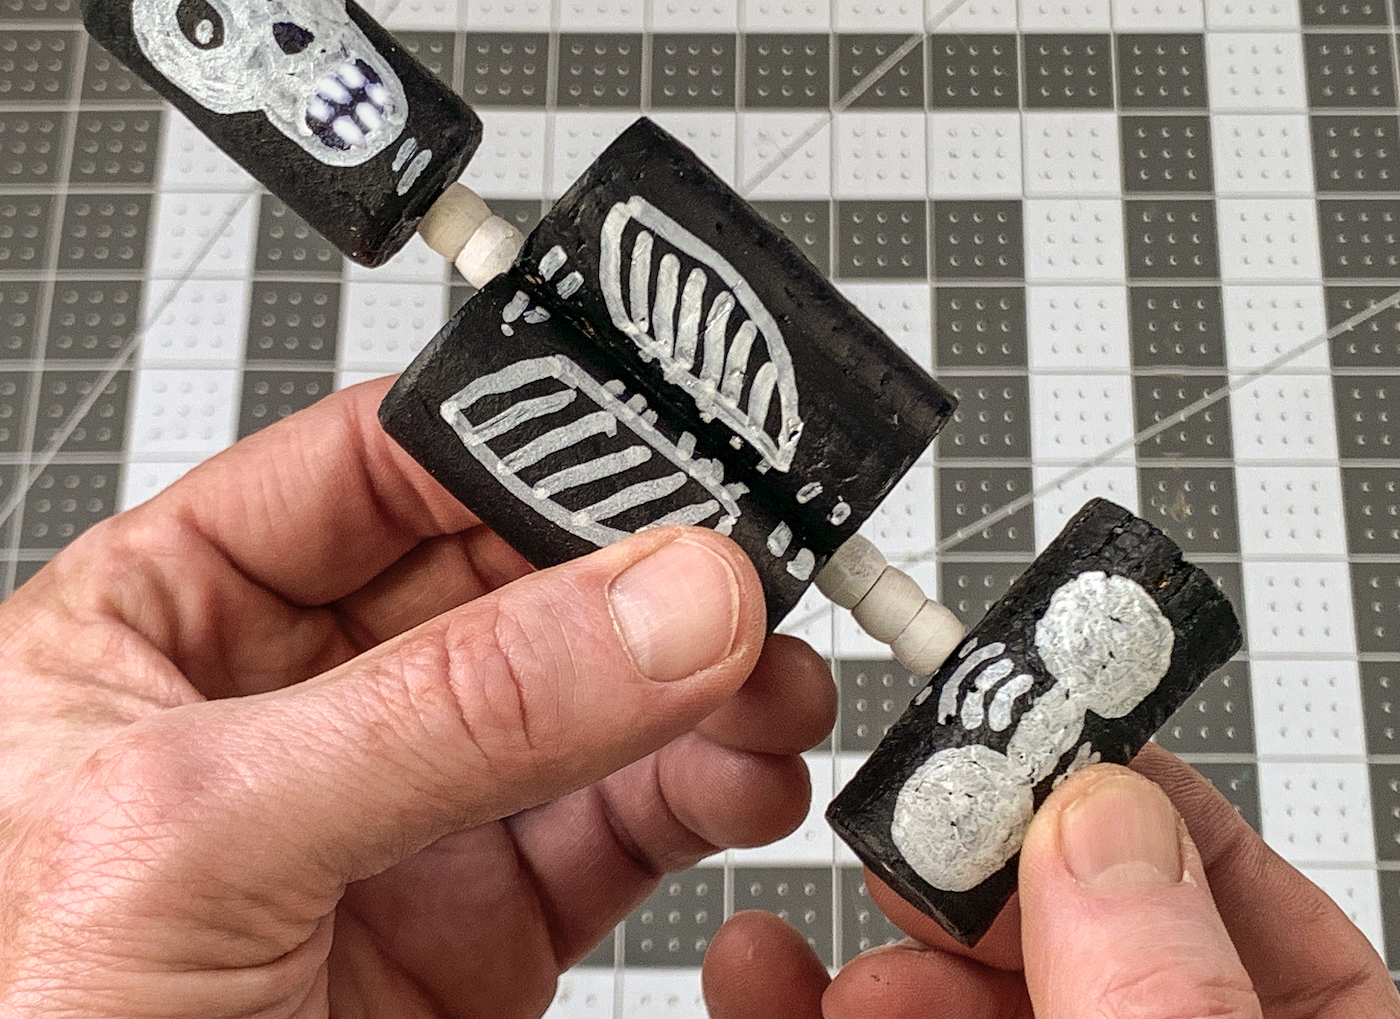
Draw on the Bones
Once the corks are dry, you’re going to draw bones on the corks with a white paint pen. Prep the pen following the instructions on the package.
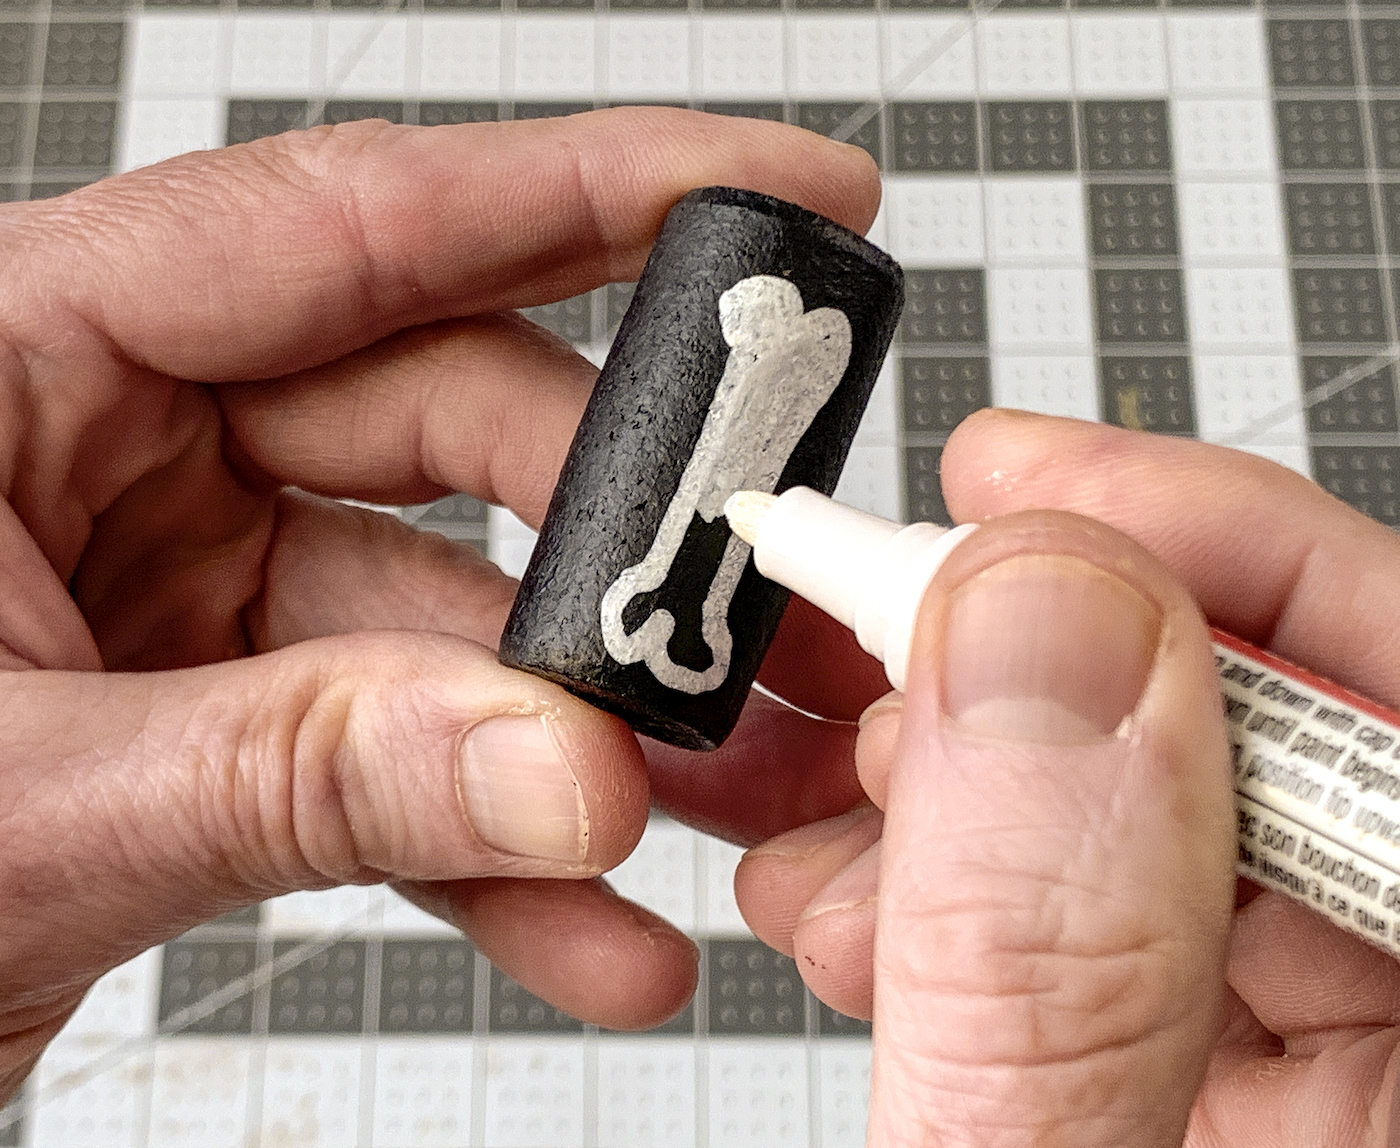
Then you’re going to need to draw the following things onto the corks with the paint pen:
- Rib cage onto the two corks glued together
- Face onto one cork
- Individual bones to make arms and legs with eight corks
- Hip bones onto one cork
- Hands on two round cork quarters
- Feet onto two round cork quarters
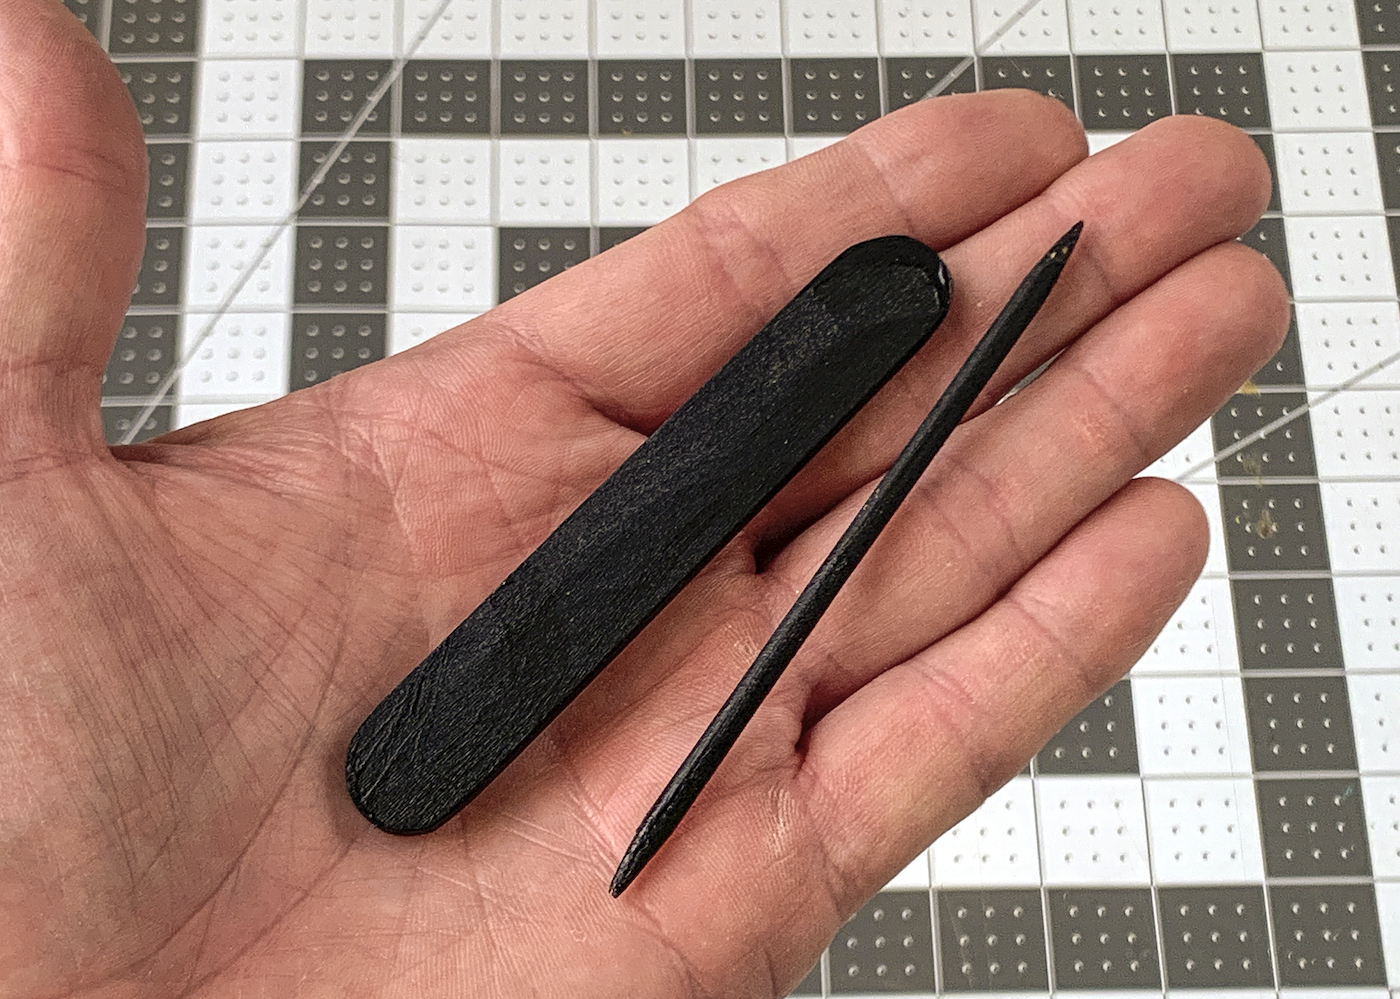
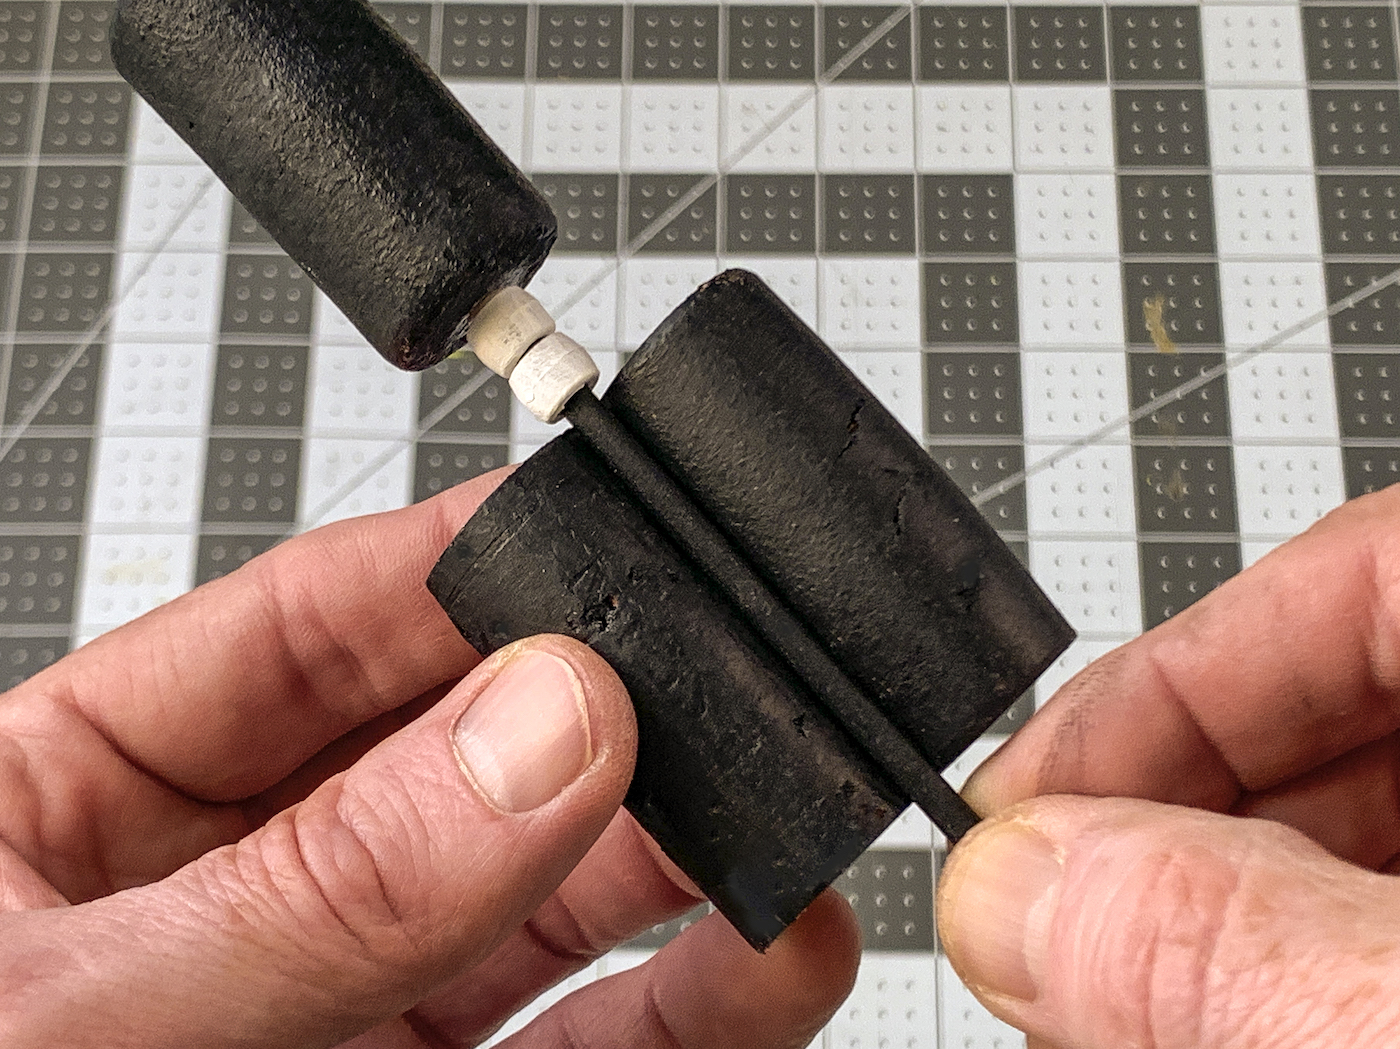
Make the Shoulders and Spine
Both the popsicle stick and skewer (or dowel rod) need to be cut down to 3 1/2″ – 4″. The reason I’m not giving you an exact length is because you need to determine the length based on the wine corks you are working with.
Lay the corks out and decide how long you want the shoulders, and do the same with the rib cage, etc. so you know how long to make the BBQ skewer.
Cut them with the strong scissors (or a Dremel, or a sharp knife) and then sand the rough edges with sandpaper. Then paint both of these items with black paint and let dry.
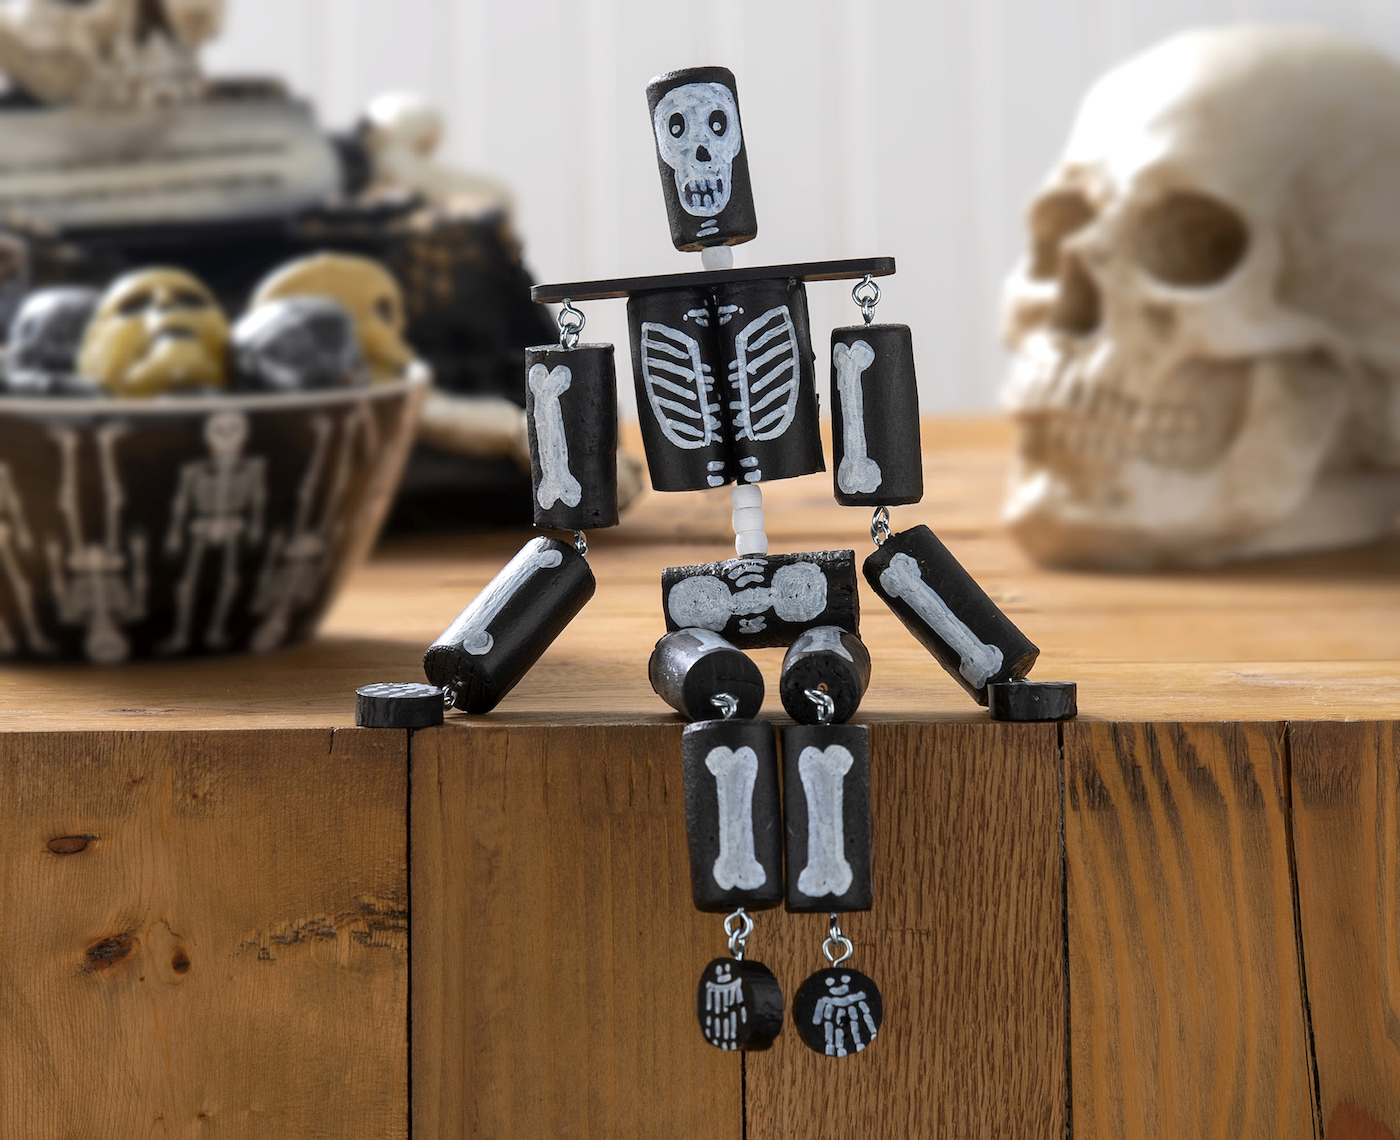
Assemble the Body
Now that you have all your parts ready, you’re going to start assembling your wine cork skeleton. Slide the head down onto the skewer.
Add two pony beads onto the neck to act as vertebrae. If you didn’t take anatomy, don’t worry – neither did I. We’re making a spine, people.
Use the hot glue gun to glue the cork ribs onto the skewer, right below the vertebrae.
Add three more beads to the skewer below the ribs, and then slide the hips onto the bottom of the skewer.
The base of the body is now assembled, and the rest is easy!
Add the Arms and Legs
The last step is to begin attaching all the corks – the arms and legs – with the screw hooks. They screw easily into the cork. Then you’ll use the pliers to open them . . .
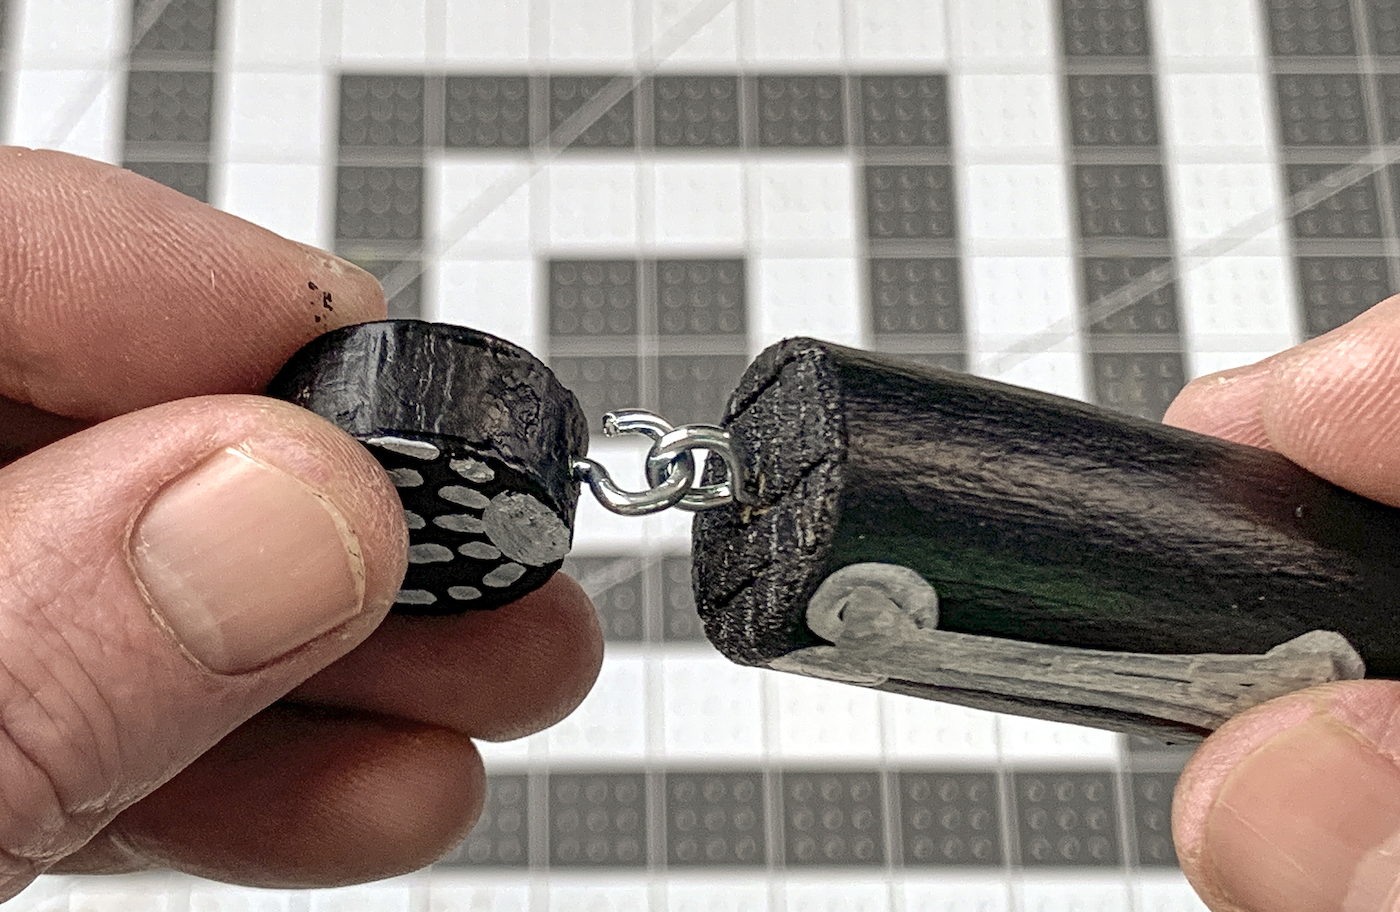
You’ll attach, and then close the screw hooks with the pliers.
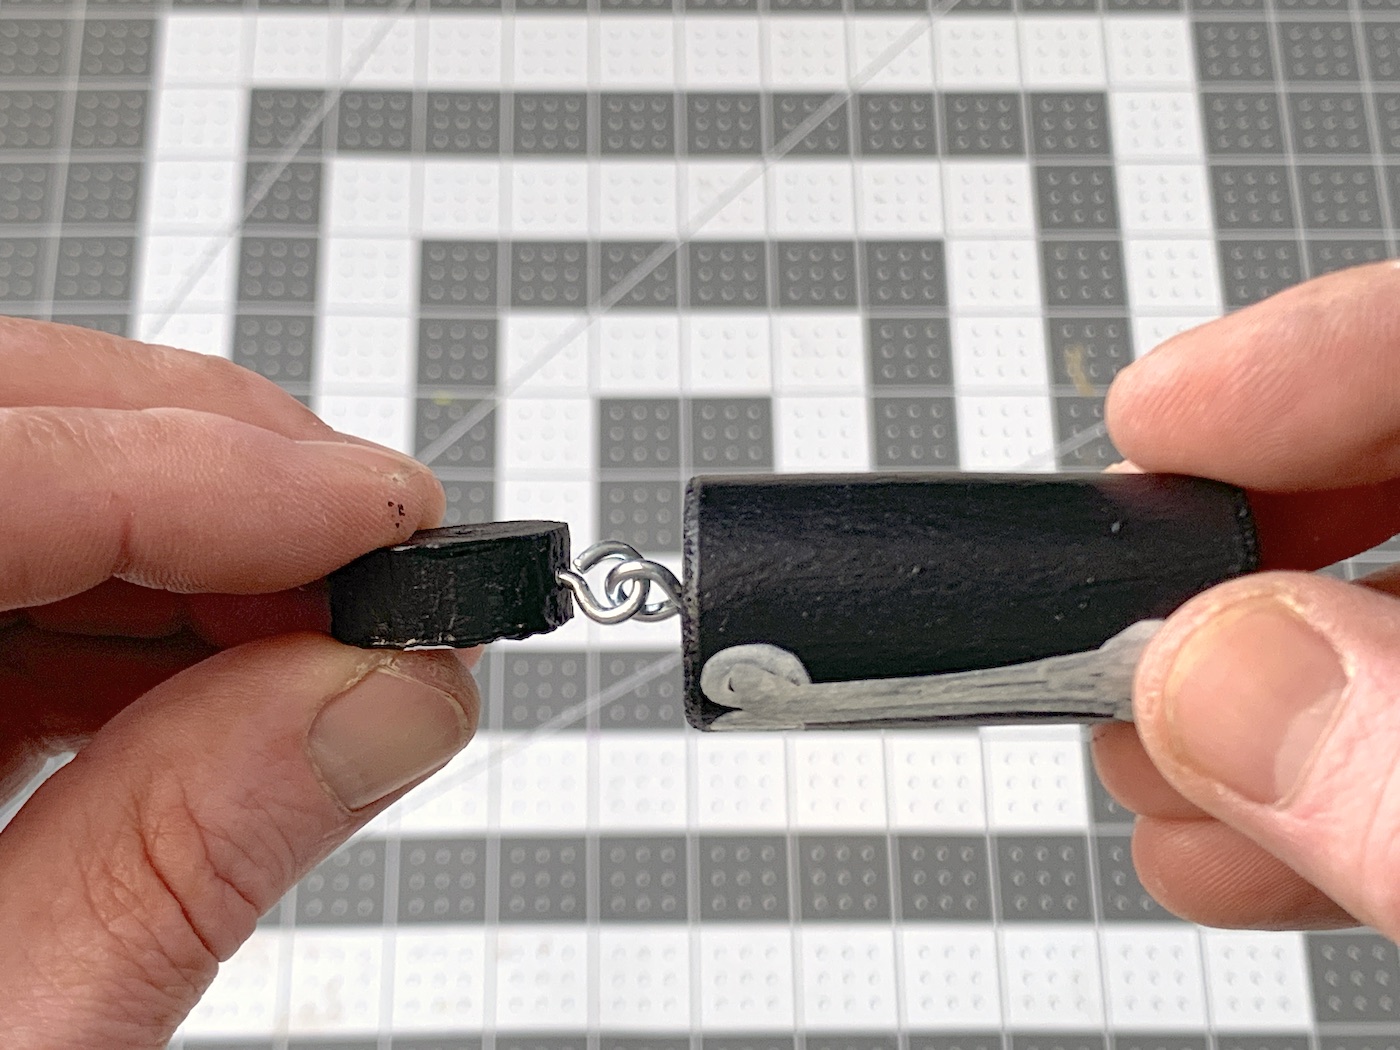
Once all the appendages are attached, there’s only one last step. It’s optional, but I think you’re going to want to do it. You’re going to screw the arms into the bottom of the popsicle stick shoulders, and the screw hook might cut out the top.
You can cut the ends of those screws off with a Dremel! To make the shoulders flat on top. If that isn’t appealing to you, you can glue the upper arm wine corks directly to the popsicle stick shoulders with hot glue. There’s less movement, but it’s easier. Look how cute my cork friend is!
I hope you’ll try him and let me know in the comments! If you enjoyed this wine cork skeleton, I hope you’ll check out these other ideas:
Borax Crystal Skull • Cross Stitch Canvases • DIY Halloween Doormat • Felt Ball Garland • Home Sweet Haunted Home • Lighted Pumpkin Topiary • Jack O’ Lantern Jars • Mesh Halloween Wreath • Pumpkin Terrarium • Shrunken Apple Heads • Skulls Makeover • Spooky Apothecary Jars • Spooky Skull Decor • Witch Hat Wreath • Witch Mask
You did show how you did the popsicles stick. Did you drill a hole and attach through the spine stick
This is adorable.