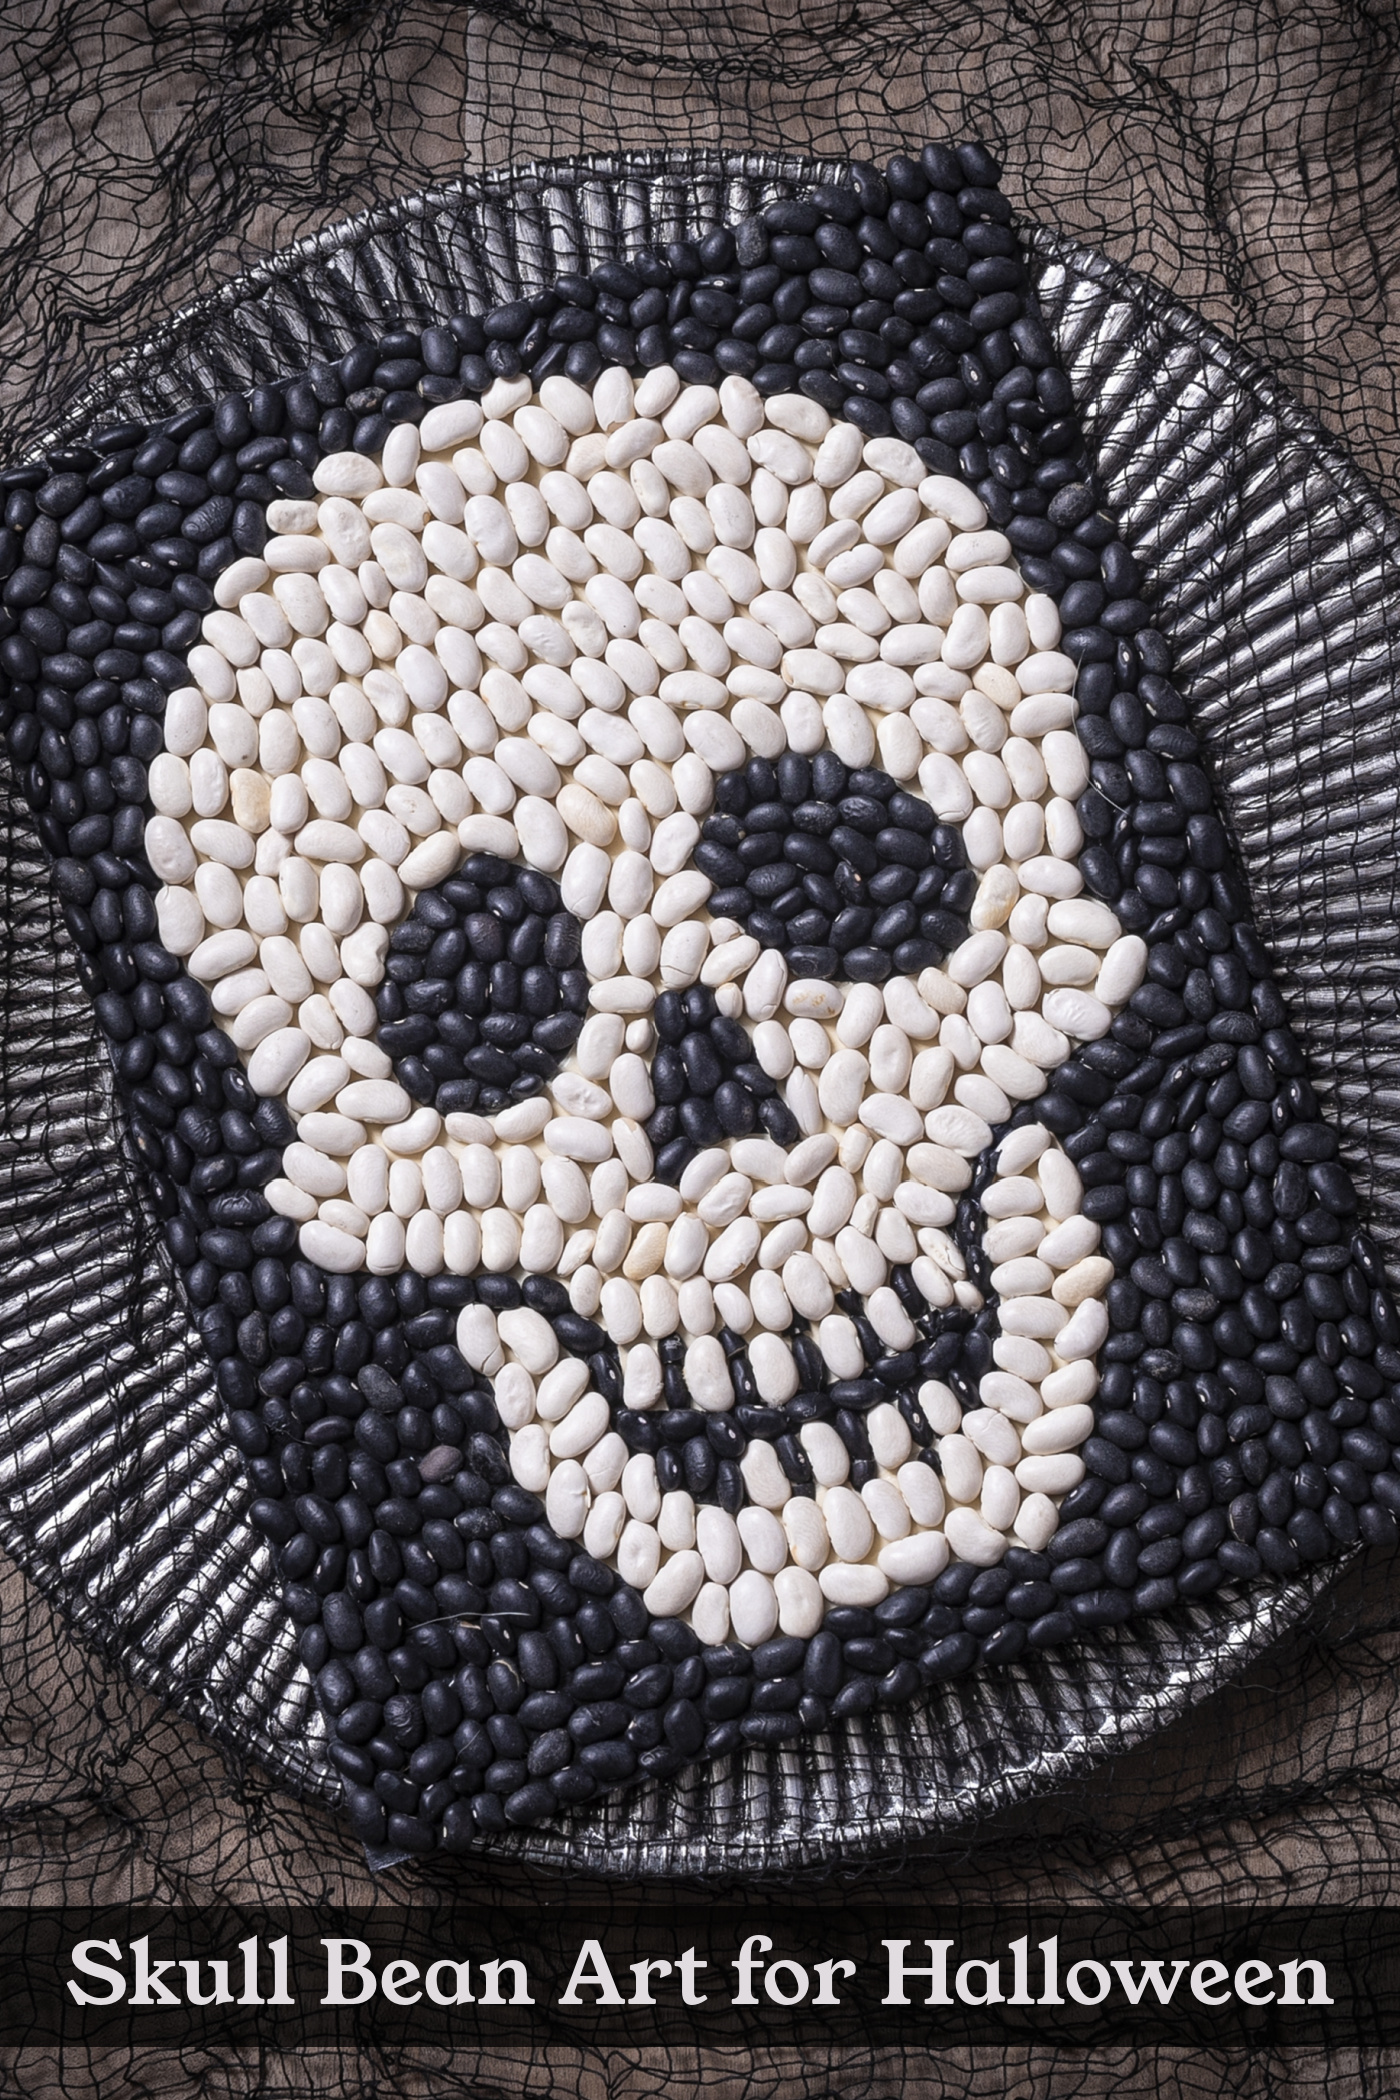
Skull Bean Art for Halloween Decor
Learn how to make the coolest skull bean art for Halloween decorating! It’s made with real beans and is easy for both kids and adults. There’s a free template included!
Skills Required: None. Even if you’ve never crafted before, this is a relatively simple project. You will be transferring a pattern (or drawing your own), painting, and then gluing beans onto the surface.
If there’s one thing I love for Halloween decorating, it’s skeletons and skulls. I don’t know why I like them so much, but I do. I wear them all year ’round, and not just for the holidays (like these skull earrings)!
In reality, they’re a really easy and appealing shape to draw. Just an oval with a few bumps, eyes, nose, and some teeth. I might be oversimplifying it a little but you know what I mean.
Anyway, after trying some kids’ bean art with an everyday theme, I decided that I want to do some for Halloween. I decided that I want to try some skull bean art!
When I mentioned that a skull is easy to draw, I guess what’s important for this project is not that you can draw one (because I provide a free printable). What’s important is that it’s REALLY easy to fill in the shape with beans.
Which makes this a great Halloween craft not only for adults, but also for kids!
Here are the few, very easy steps to make this project. You’re going to cut the cardboard, then trace the pattern. Then you’ll fill in the pattern with paint and glue down the beans.
That’s it.
It’s only slightly “harder” than our spooky skull display. And that project is very, very easy. Learn how to make this unique Halloween project below!
PS – don’t be afraid to change the paint or bean colors. Or draw your own skull. That’s the beauty of this project. You can personalize it any way you like.
Halloween Skull Bean Art
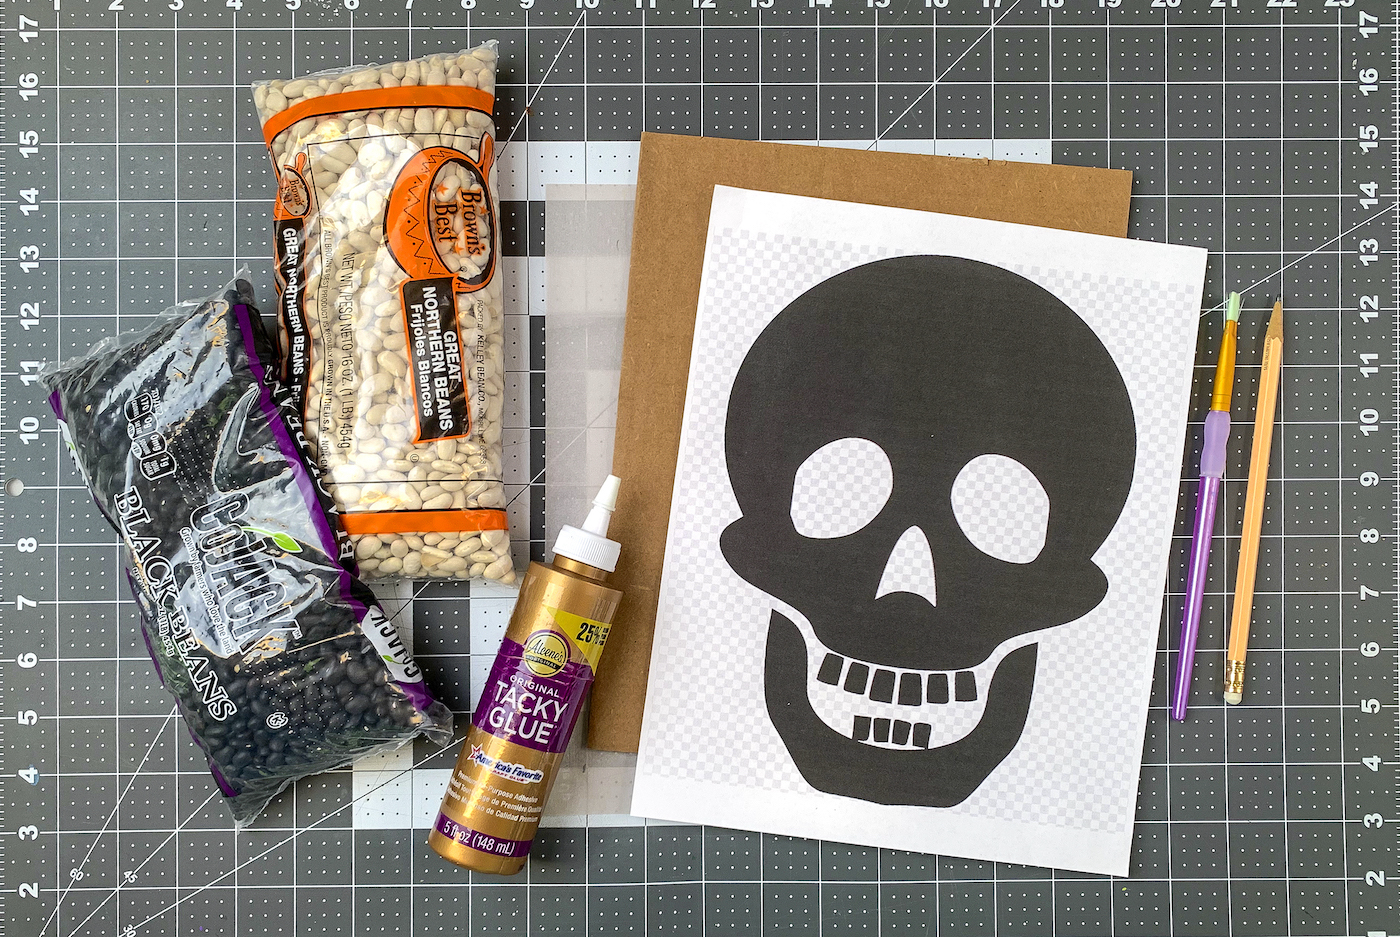
Gather These Supplies
- Cardboard – sized 11″ x 14″
- Craft paint – black and cream (or colors to match your beans)
- Beans – black and great Northern (or beans of your choice)
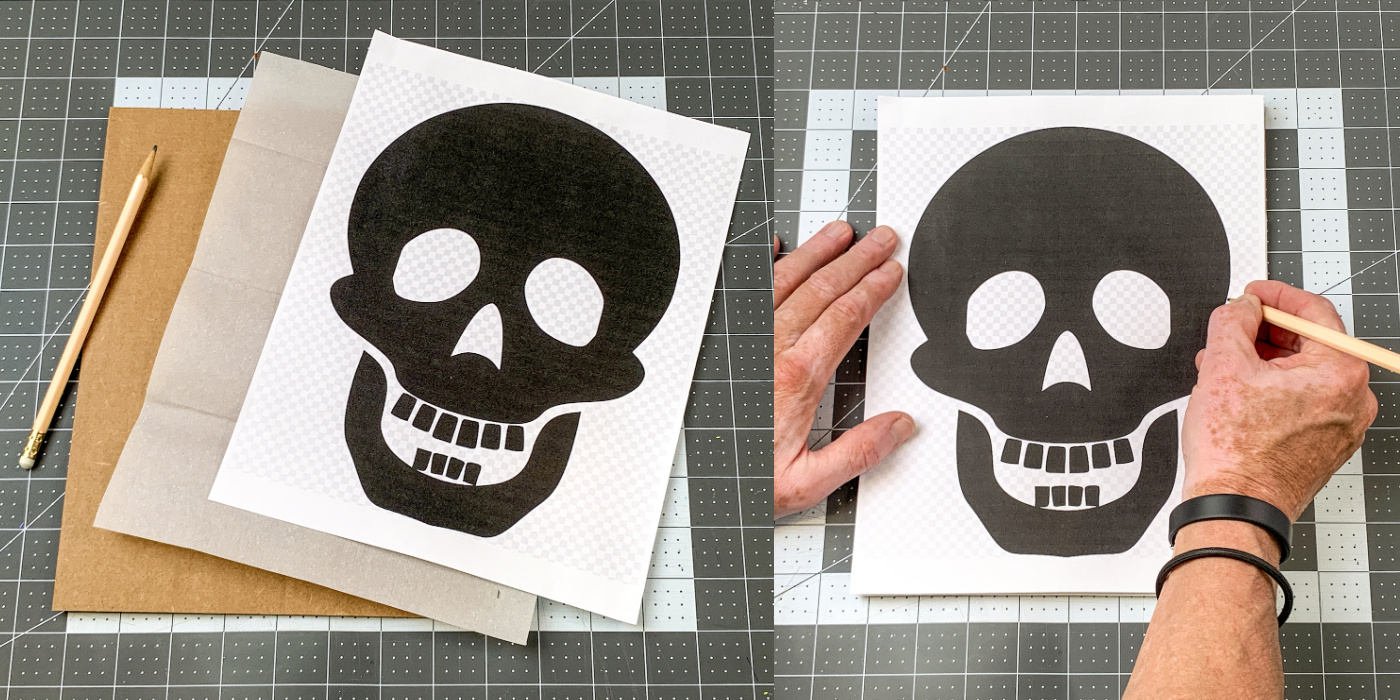
- Skull pattern (or draw your own)
- Craft glue
- Transfer paper
- Pencil or pen
- Paintbrush
- Ruler
- Scissors
- Knife (optional)
Cut the Cardboard
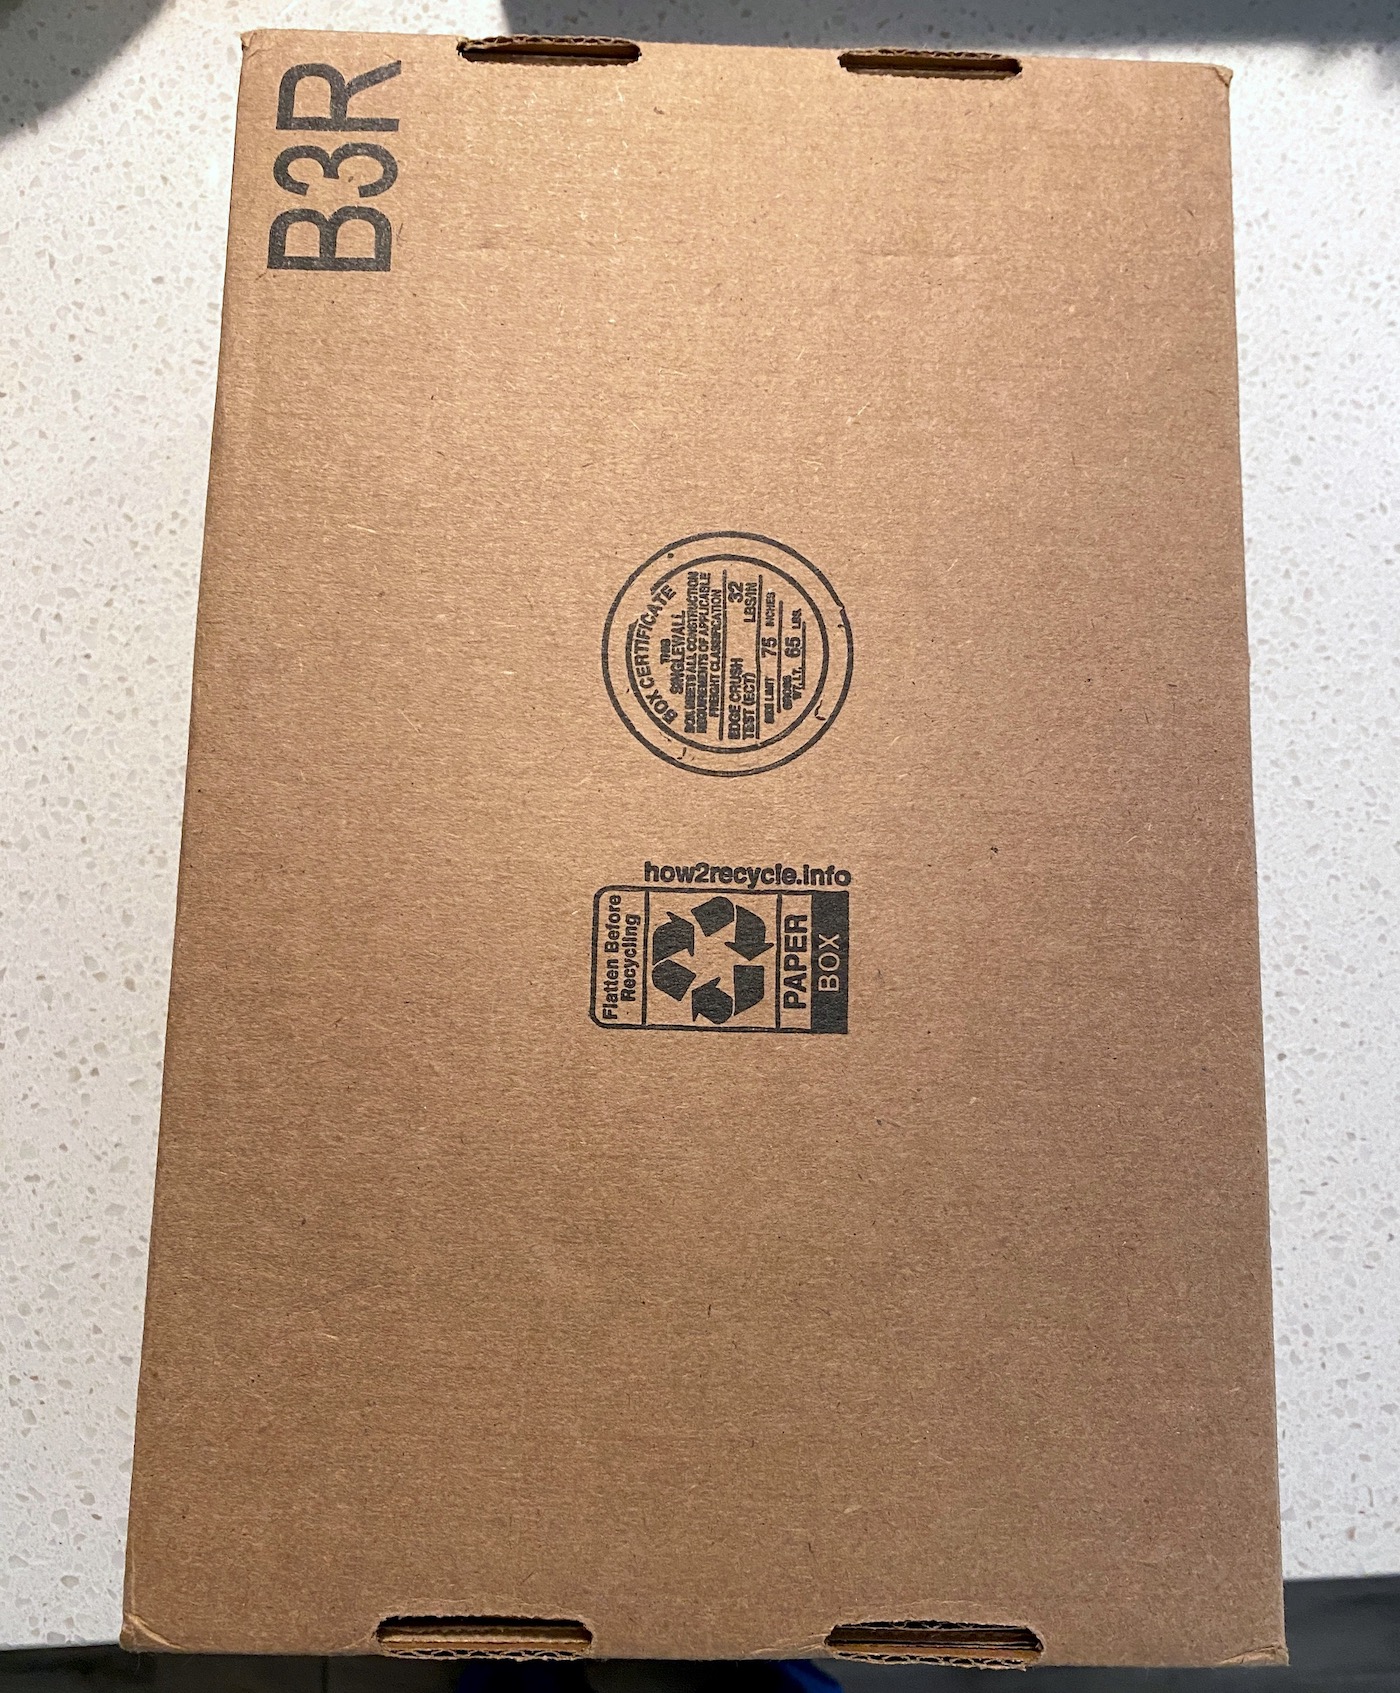
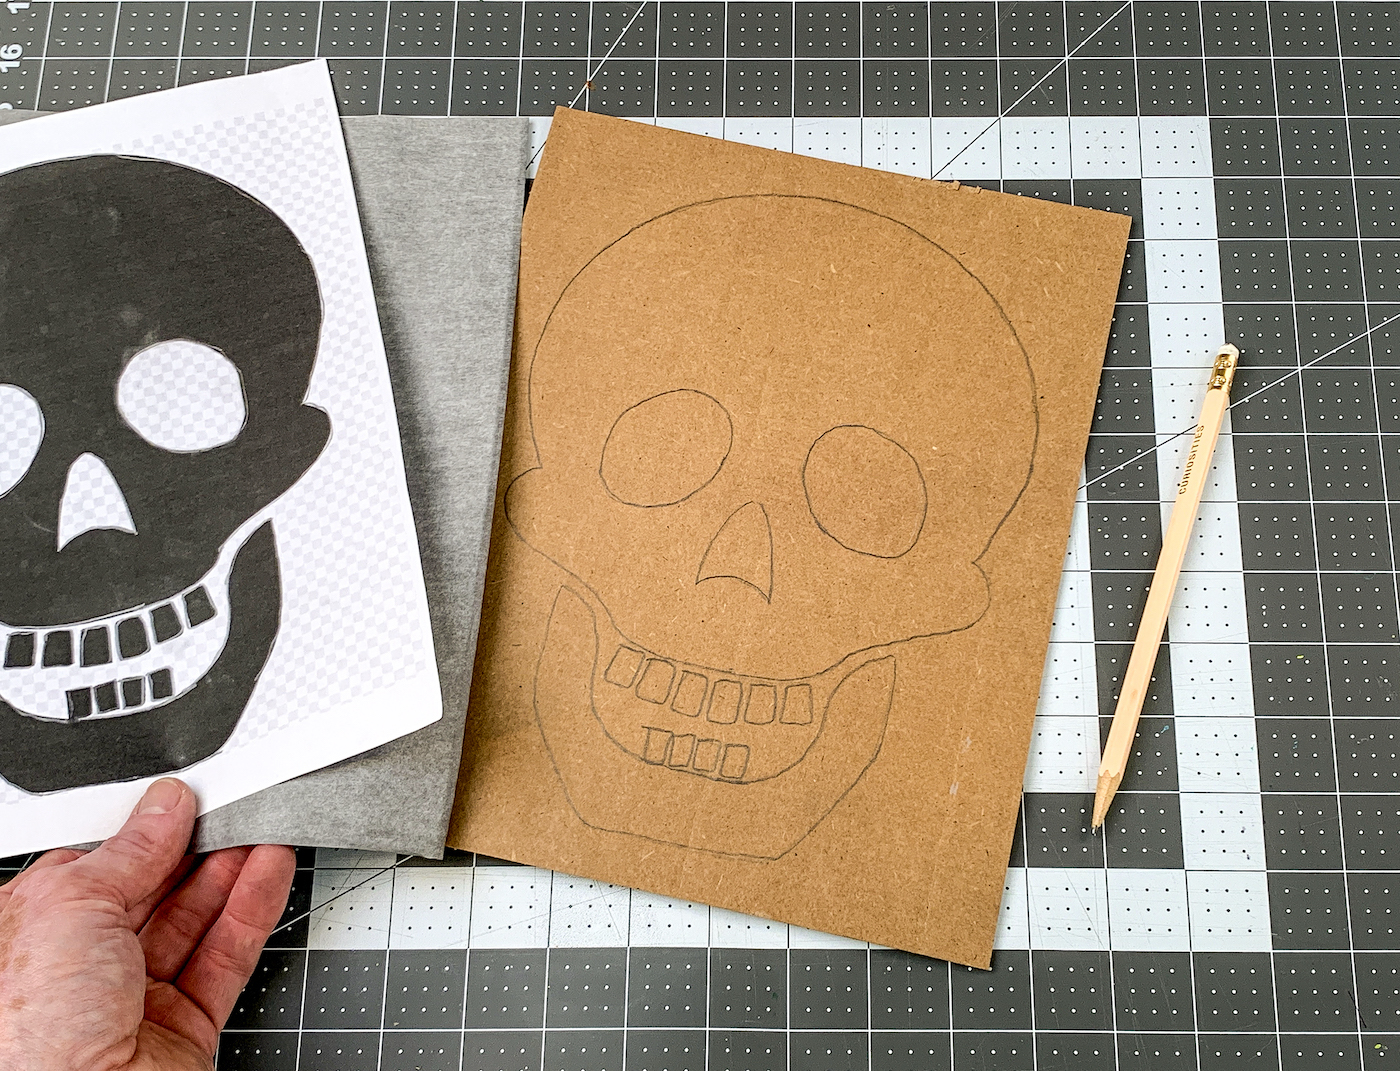
The first thing you’ll need to do is cut the cardboard to size. The pattern I created for you is 8.5″ x 11″ so I cut the cardboard a bit larger than that. You can cut any size you like or resize the skull.
You’ll want relatively stiff cardboard for this project. Since you’re painting and gluing on the cardboard, you don’t want it to warp or buckle under the weight of the beans. I just used part of a shipping box.
Draw a rectangle on the back of the cardboard using a ruler and scissors, and then cut it out. This will be your canvas.

Transfer the Design
Print out the skull pattern and trace it onto the cardboard using a piece of tracing or carbon paper and a pencil. All you need to do is put the tracing paper underneath the pattern and draw on top and it will transfer.
But what if you don’t have tracing paper?
You can use a black or dark colored crayon on the back of the paper – color it over the lines that you want to transfer.
Then place the pattern down onto the cardboard and draw on top of the lines, and you will see the crayon pattern transfer below.
Tracing paper is just really easy to use, and I happen to have some on hand.
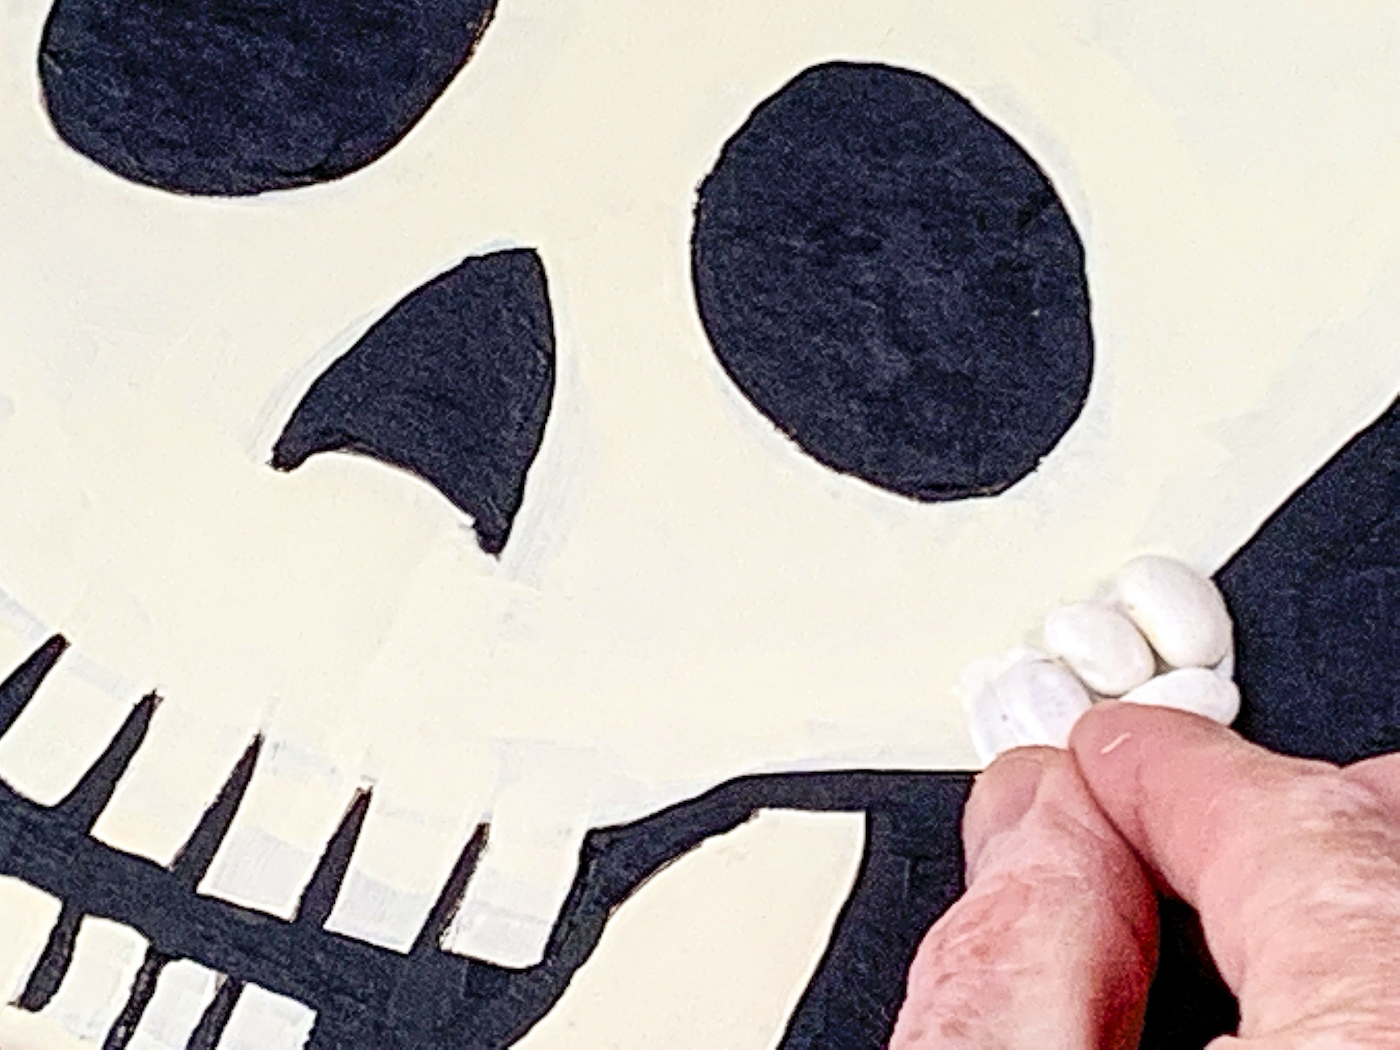
Paint the Pattern
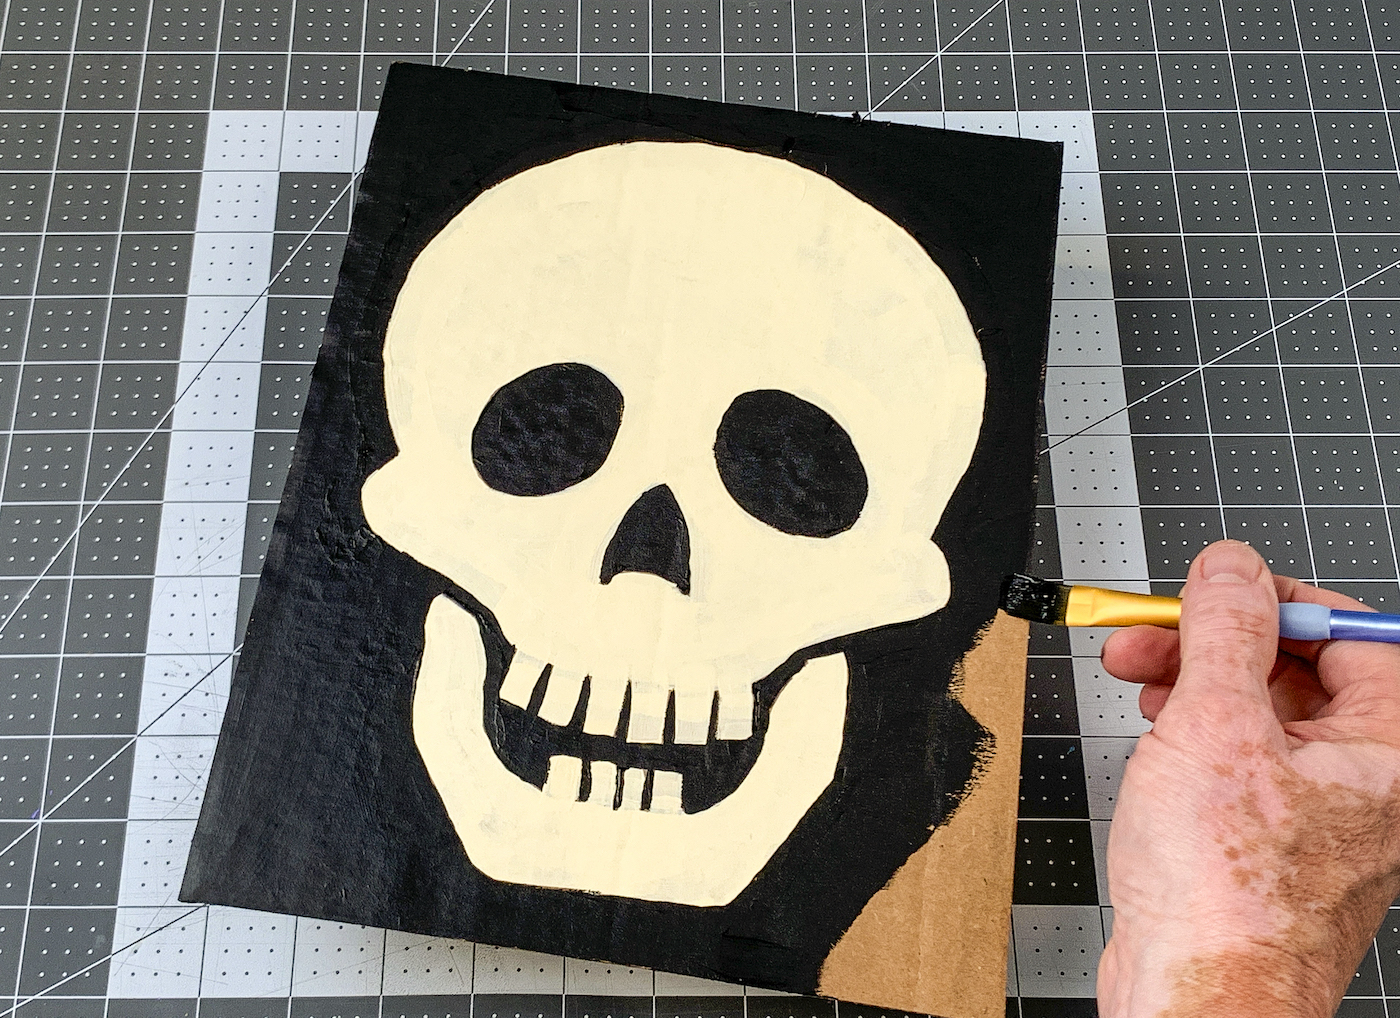
Use the paint to fill in the background of your design. The reason for this is so that when you glue the beans down, no cardboard shows through the gap between the beans. Everything blends together nicely.
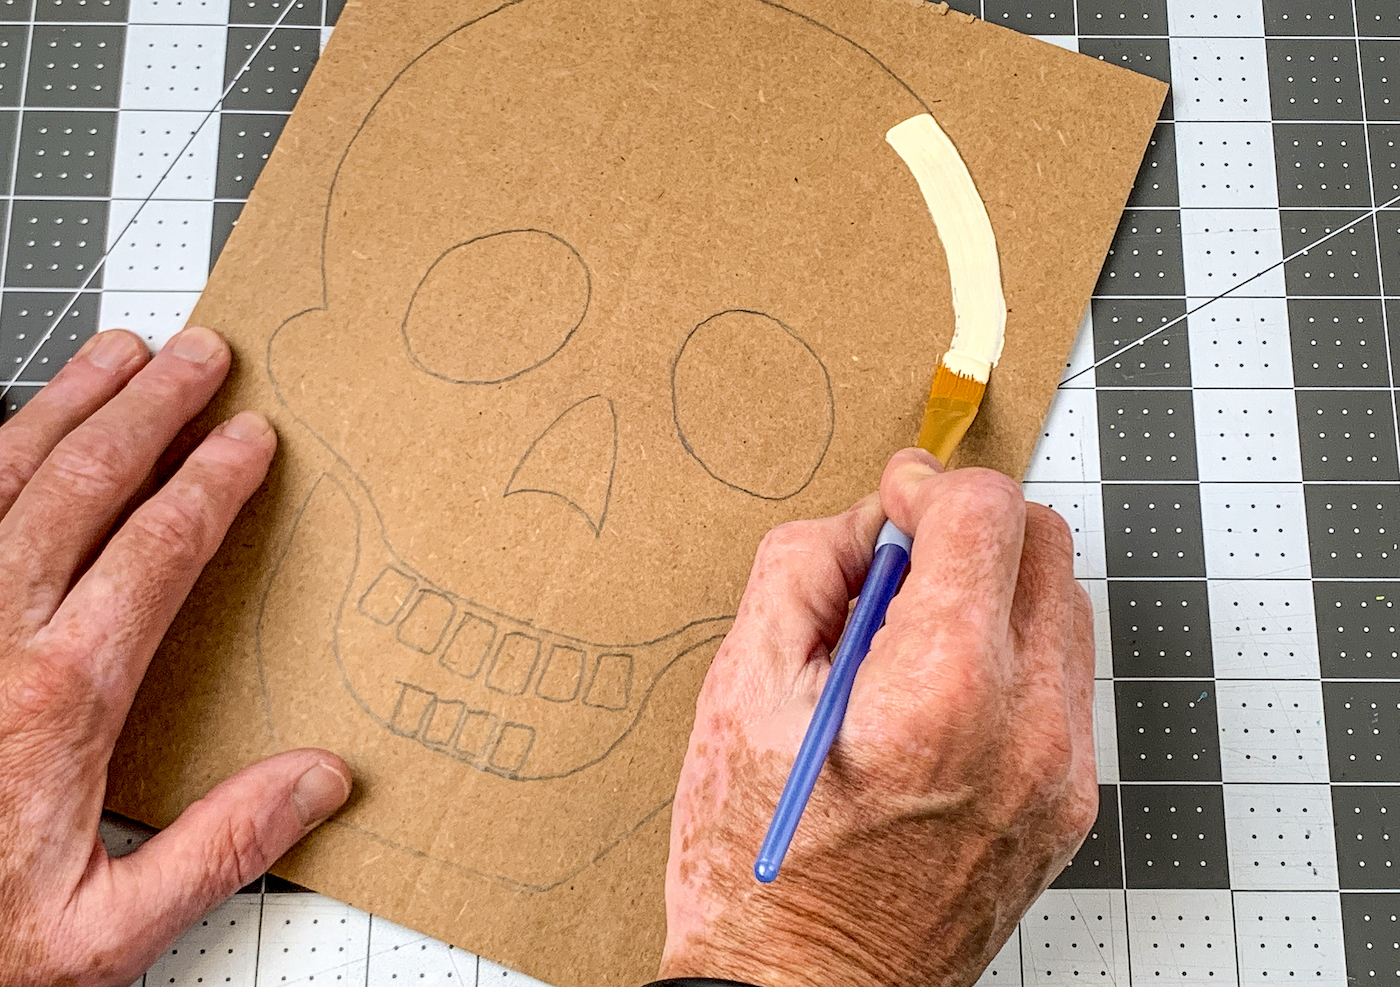
I filled in the skull with a cream color to match the beans, and painted the background in with black. Let dry.
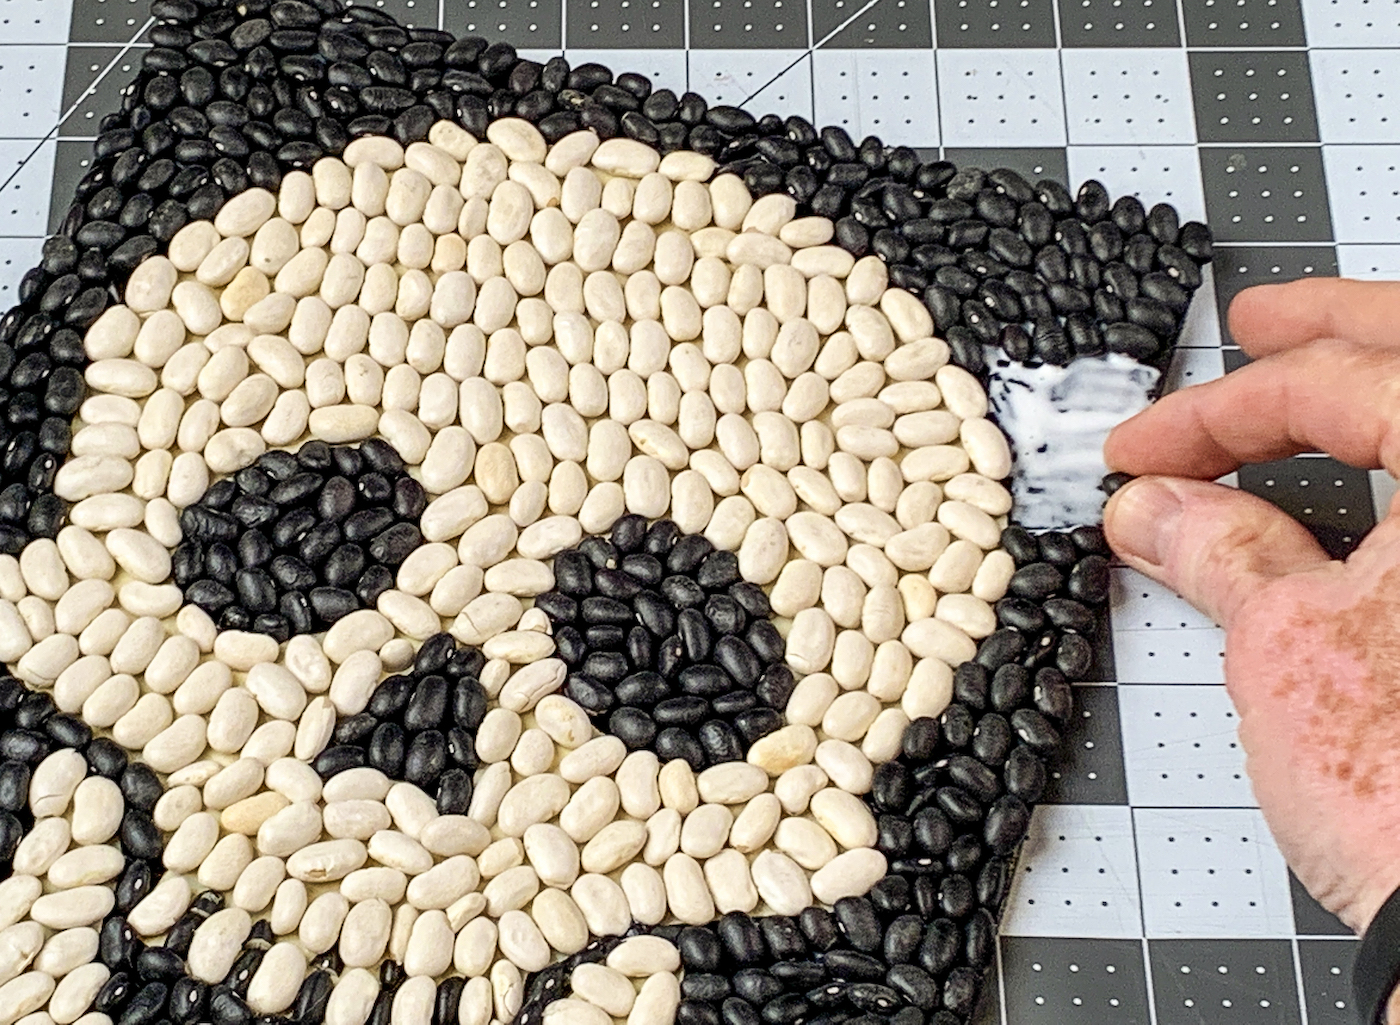
Glue Down the Beans
I wish I could give you more complicated instructions for this portion of the skull bean art, but it’s really simple. You’re simply going to glue down beans to fill in the design.
You’ll apply the glue a little differently though. You’re going to use a paintbrush to brush it onto the surface of the design. It’s just way easier to apply with a brush and use less when you have such a large design.
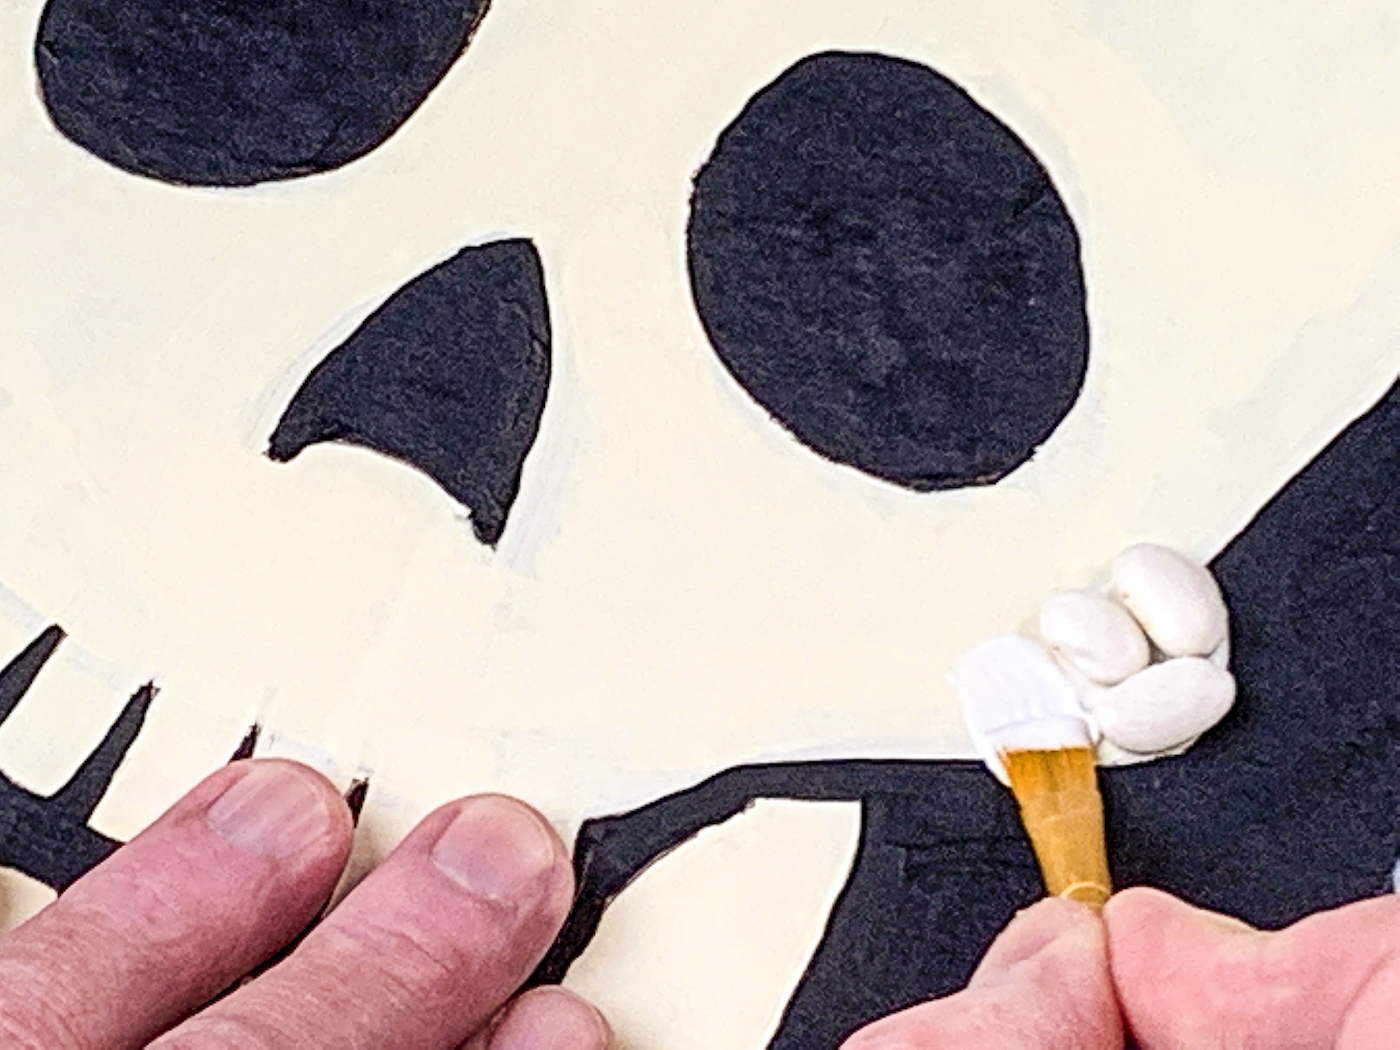
After the glue is down, you’ll place beans into the glue and let dry.
And you’re going to continue placing beads until the entire design is filled in! But what if you have smaller areas of the design?
Turns out that you can cut beans using a knife! That’s why I listed the knife in the supply list. You don’t have to cut any beans and can just use what you have to fill in the space.
However if you’re more particular, you can cut the beans in half and fill in smaller areas (like you’ll see below in between the teeth).
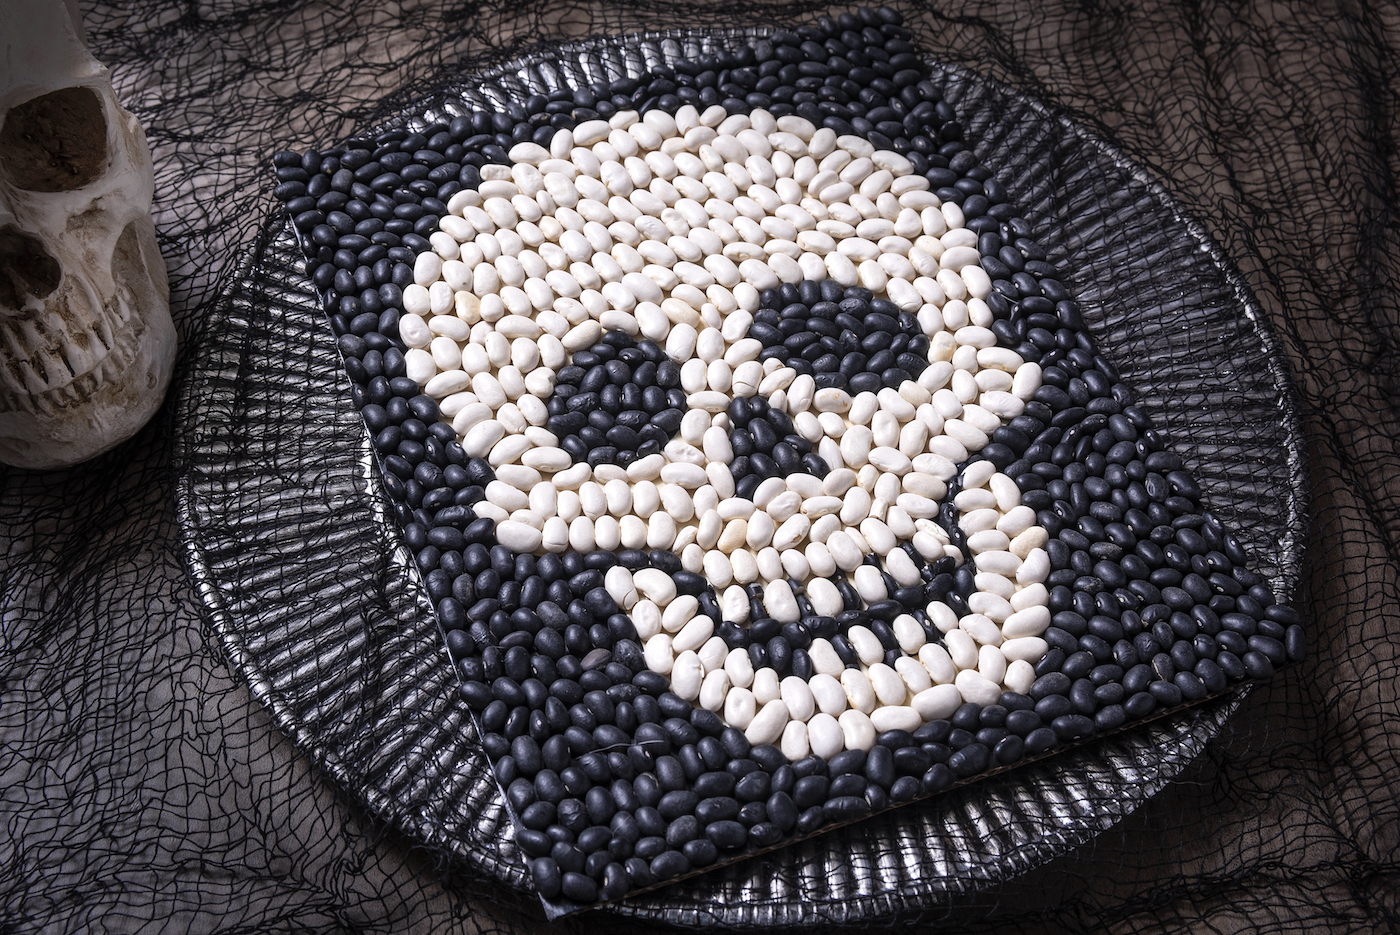
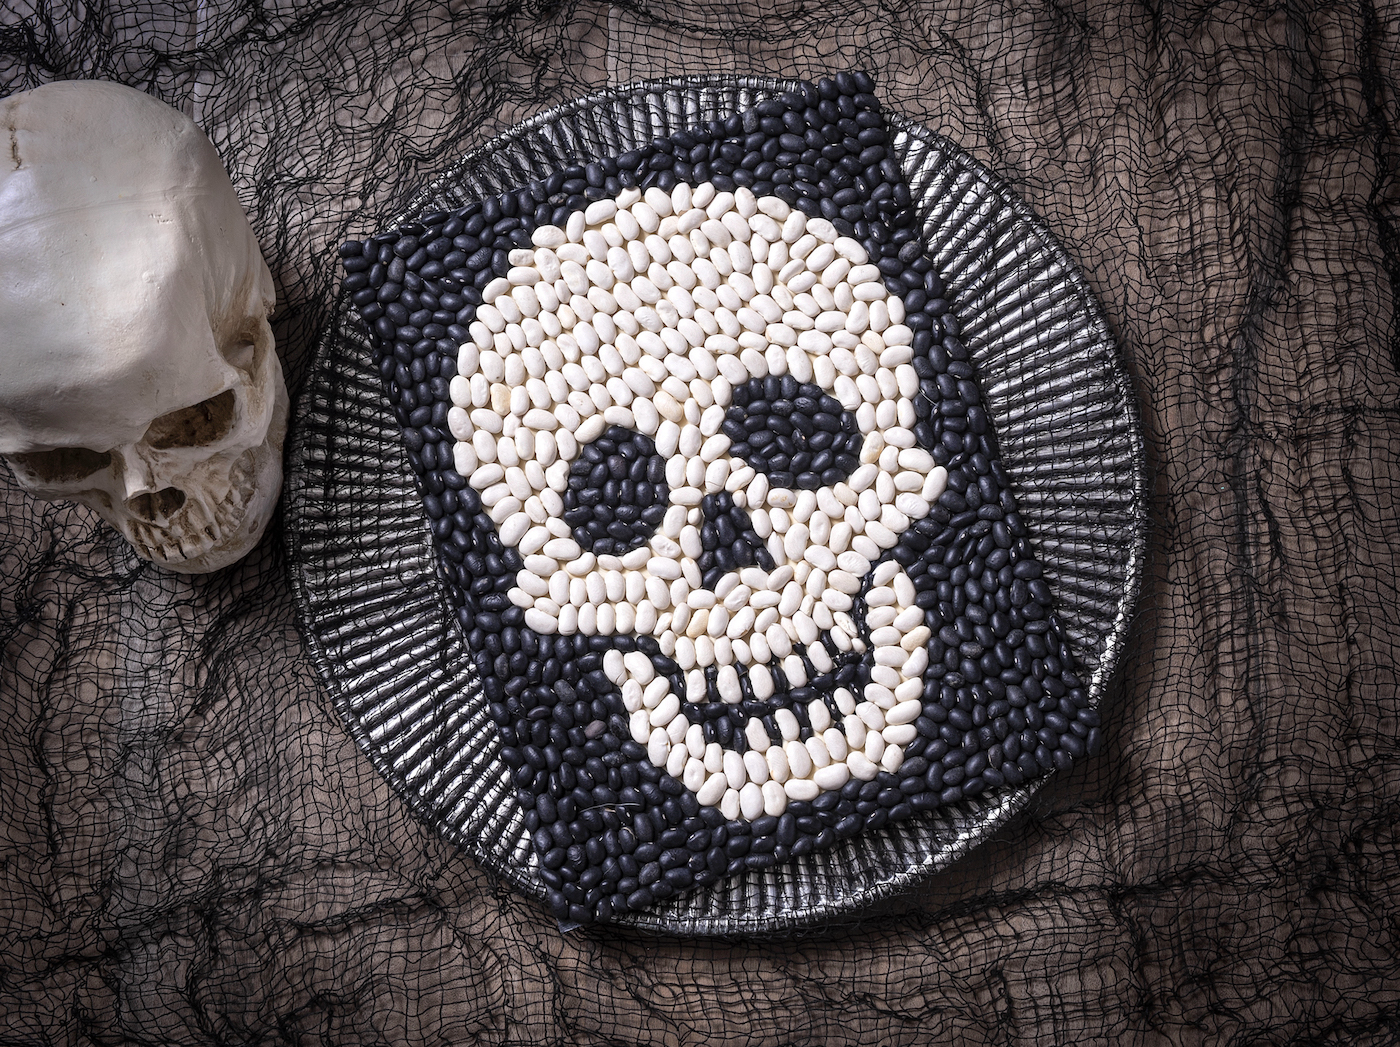
Once you’re done adding all the beans, let your Halloween craft dry completely before displaying. I absolutely LOVE how it turned out and I’d love to know what you think in the comments!
If you enjoyed this skull bean art, I’d love for you to check out these other Halloween ideas:
Borax Crystal Skull • Cross Stitch Canvases • DIY Halloween Doormat • Felt Ball Garland • Home Sweet Haunted Home • Lighted Pumpkin Topiary • Mesh Halloween Wreath • Pumpkin Terrarium • Shrunken Apple Heads • Skulls Makeover • Spooky Apothecary Jars • Wine Cork Skeleton • Witch Hat Wreath


This is the perfect Halloween craft for preteen grandkids on a camping trip. I will get everything done except glueing the beans.It reminds me of the 70’s. Thank you.
Thank you so much! 😀