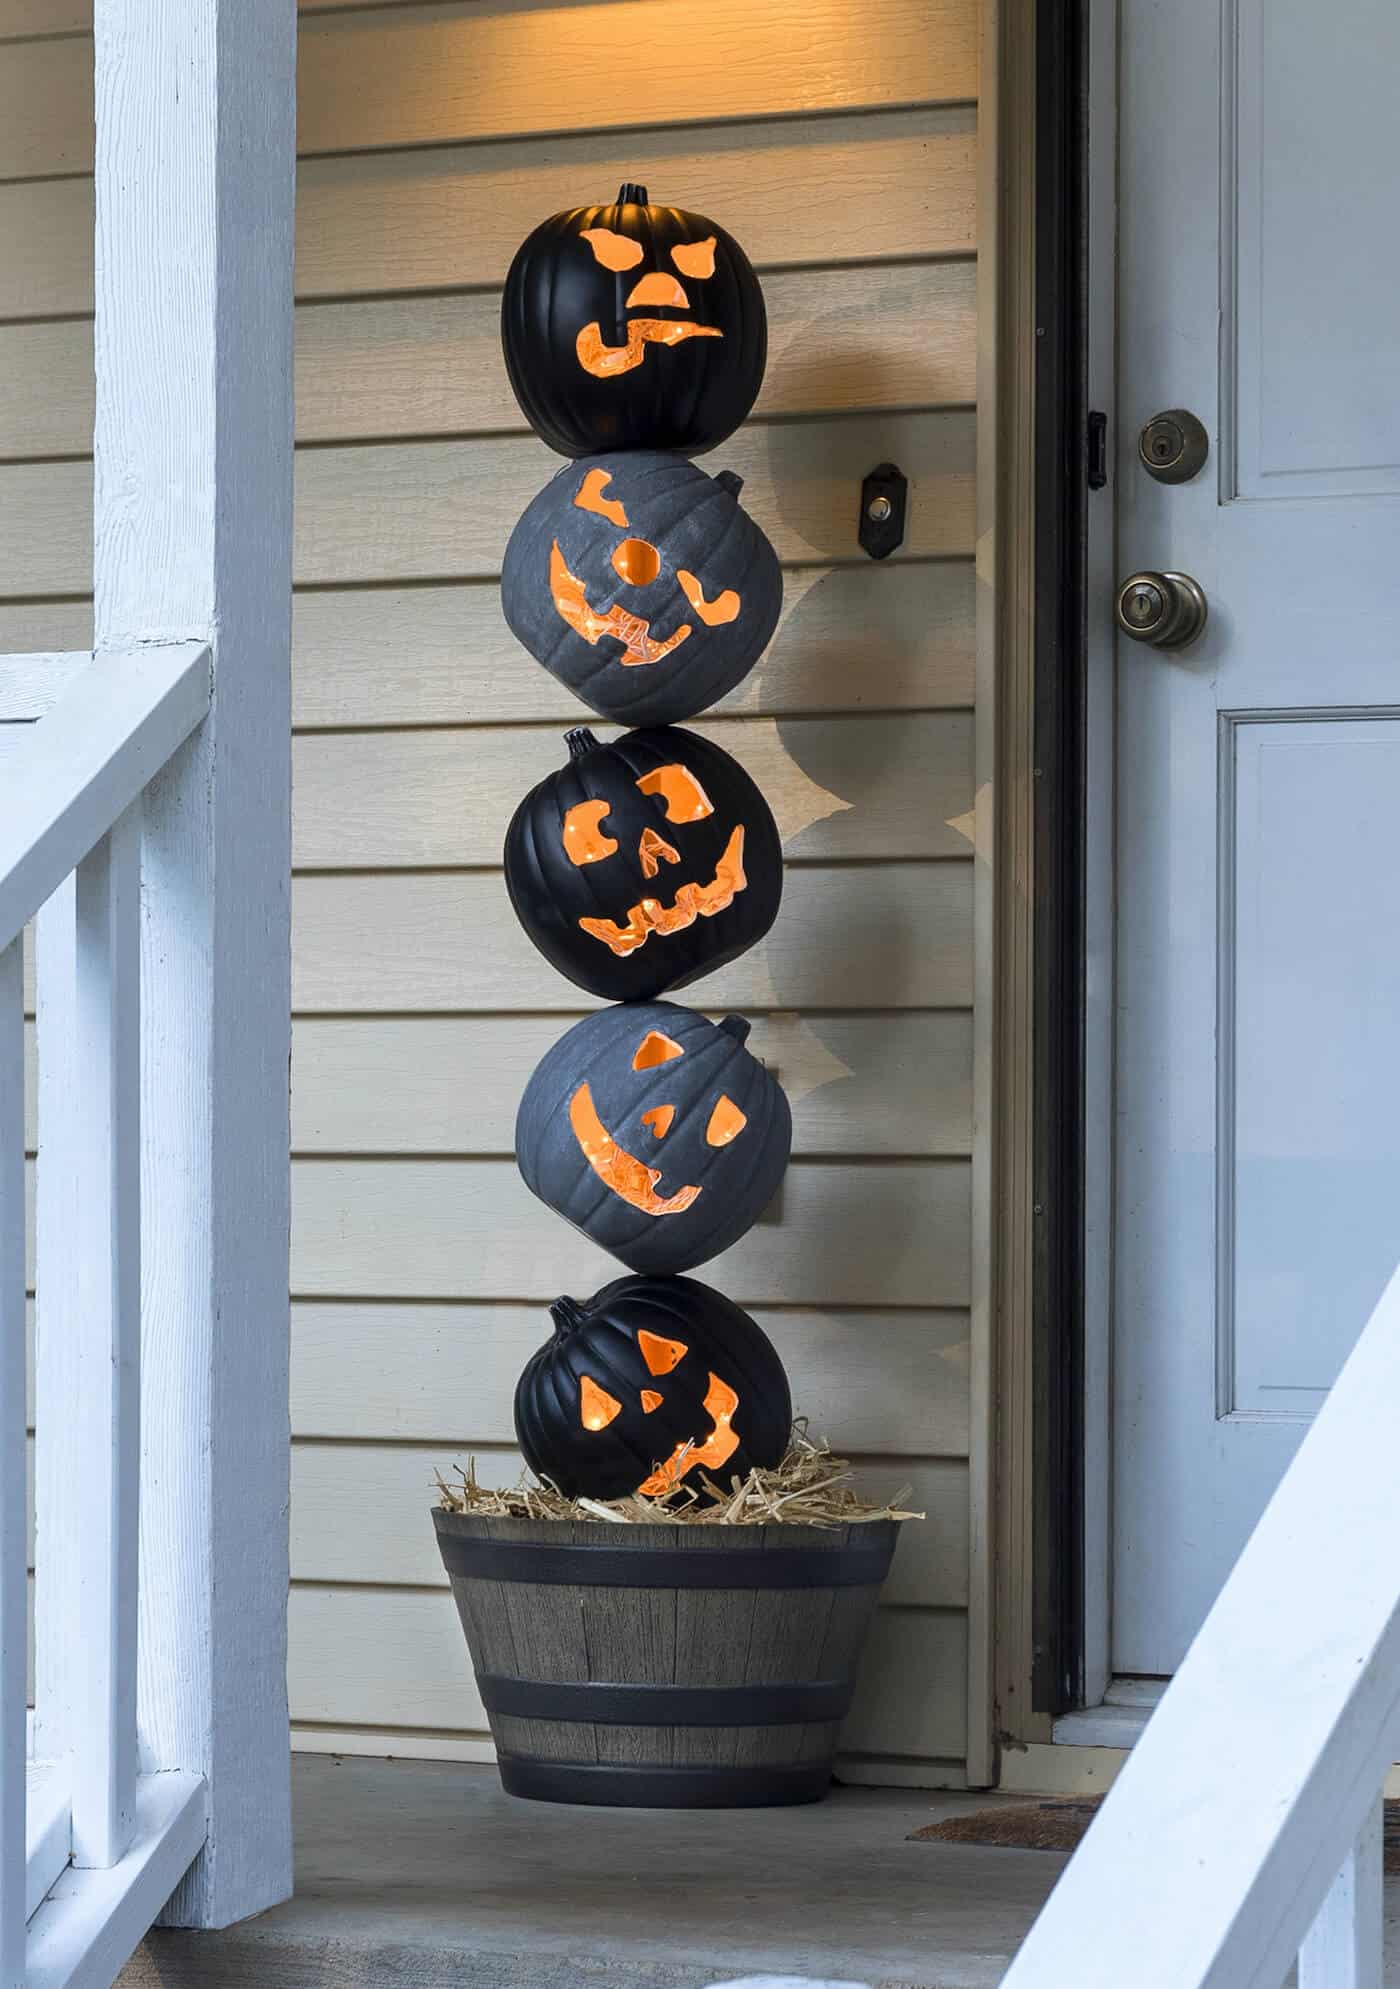
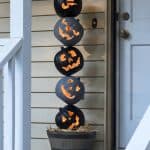
Lighted Pumpkin Topiary for a Halloween Front Porch
Grab some faux pumpkins from the craft store and create this unique Halloween pumpkin topiary! It will look perfect on your front porch. So festive!
Skills Required: Advanced Beginner. You’re going to be cutting faces out of craft pumpkins with a Dremel, but you can use templates. You’ll also be drilling into the pumpkins to add lights, then drilling into wood. It’s not that hard if you have used power tools before.
Sometimes you get a brilliant holiday DIY project idea – in this case it was Steve. I made the mistake (?) of dragging him a long to Michaels to grab some supplies, and I needed some craft pumpkins.
He spotted the black and concrete ones in the bin and declared “I’m going to make a pumpkin topiary!” So what’s a girl to do but support her man in his Halloween decorating endeavors? And that’s exactly what I did.
We worked together to design this fun pumpkin decor that could be put outside on a front porch for the holiday. There are some steps to it, but it’s not hard. Learn how to make it below.
Gather These Supplies
- Five faux pumpkins in various colors – we got ours at Michaels
- Dowel rod – 1″ diameter, 60″ long
- Brown plastic planter
- 5 strands of Christmas lights for outdoor use – we got these
- Pencil and eraser
- Potting soil
- Scrap 2 x 4s
- Hay
- Black Duck Tape
- Scissors
- Acrylic paint for touch up (optional)
Tools
- Dremel 4000 tool – with the tile cutting bit and sanding drum. You could also use this multi-purpose cutting bit instead of the tile cutting bit, but we had the tile cutting bit so we used it!
- Drill with 1″ spade bit
You can get the full tutorial at the bottom of this post, but I did want to share a few tips for you. Things that were learned through the process!
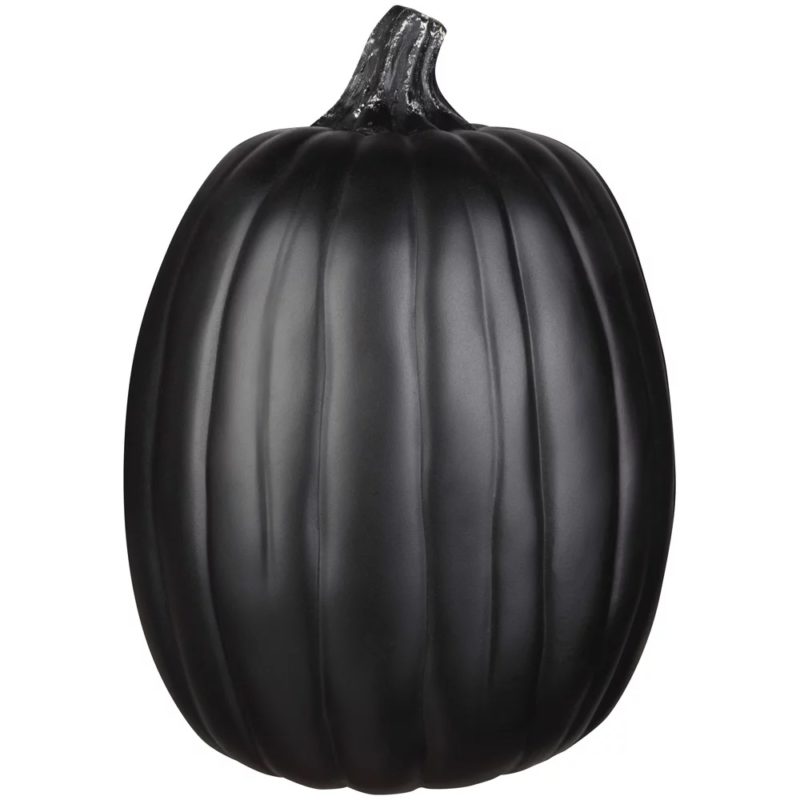
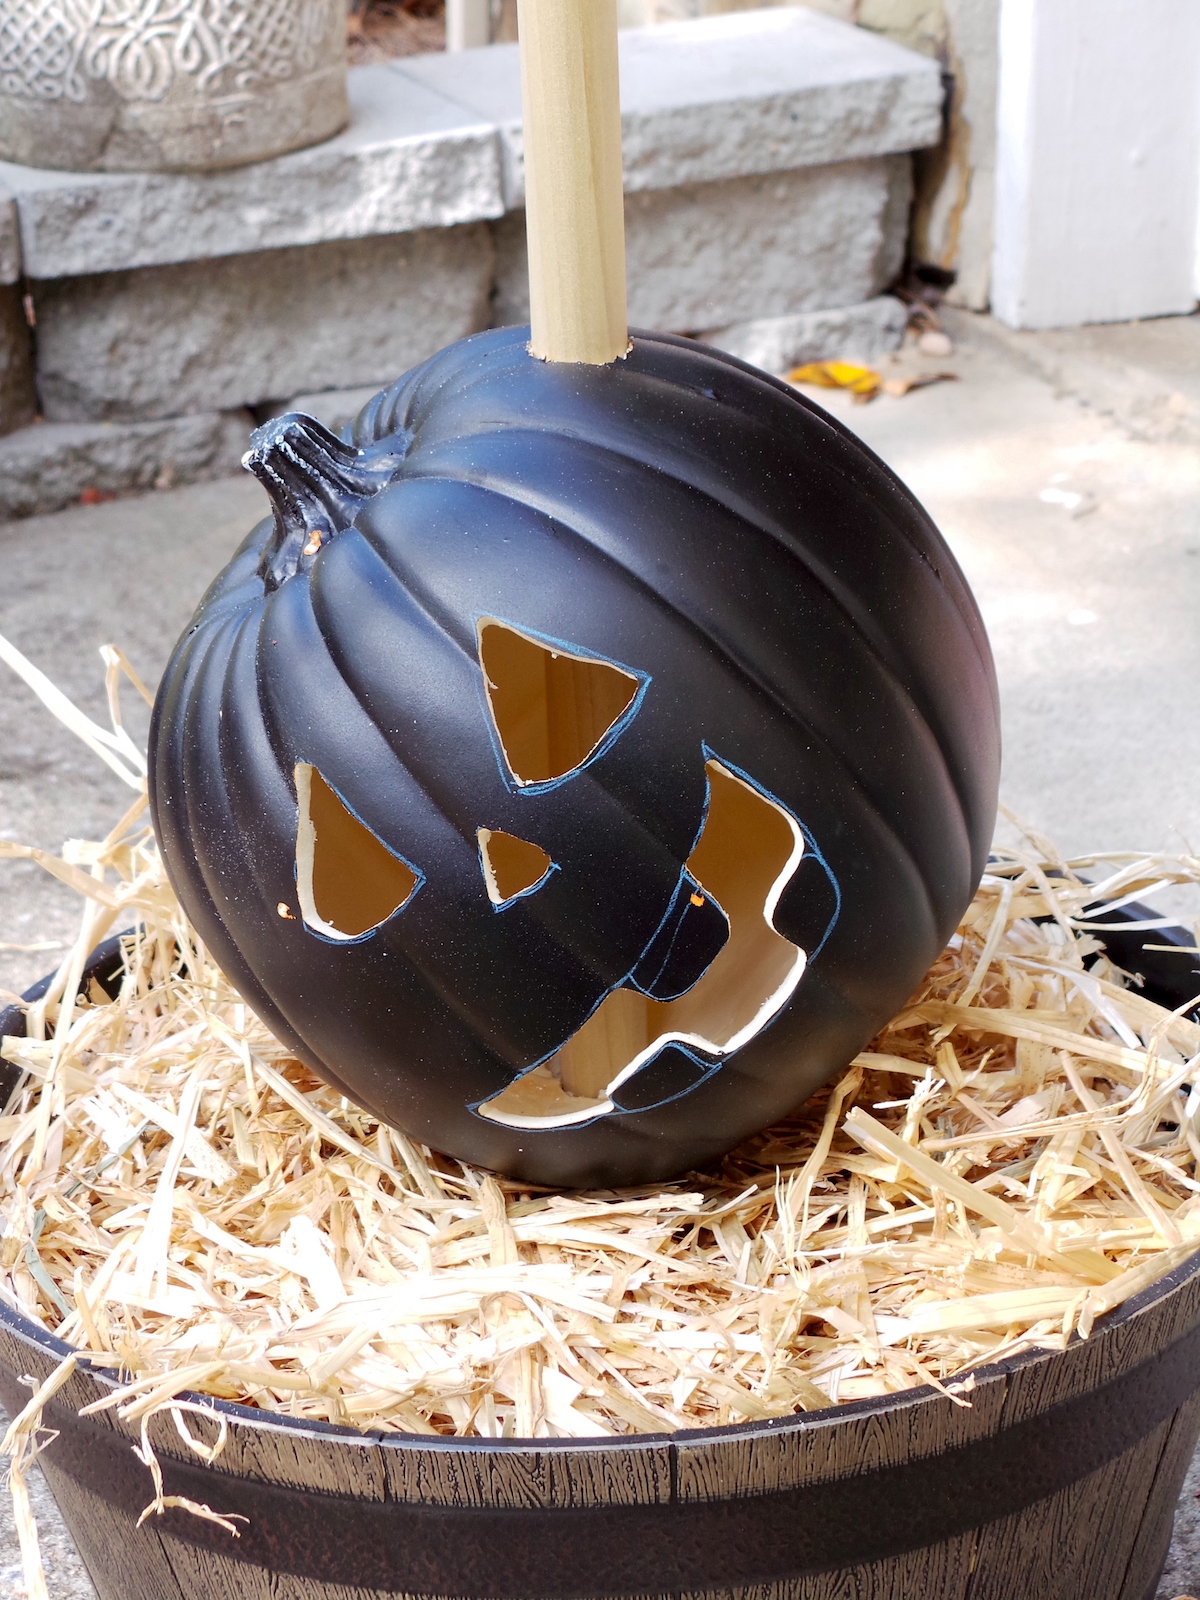
First you need to pick your pumpkins. These are the type of craft pumpkins we used. They were about 9″ each and we chose three black and two cement colored pumpkins.
Use your coupon for the craft pumpkins or grab them on a sale that happens frequently during the holiday season! I’d never pay full price for craft pumpkins (insider tip!).
NOTE: I haven’t found craft pumpkins with the concrete finish since this post was done. You can use any color faux pumpkins, or you can paint (with acrylic or spray paint) to be any color you like. You have a lot of options.
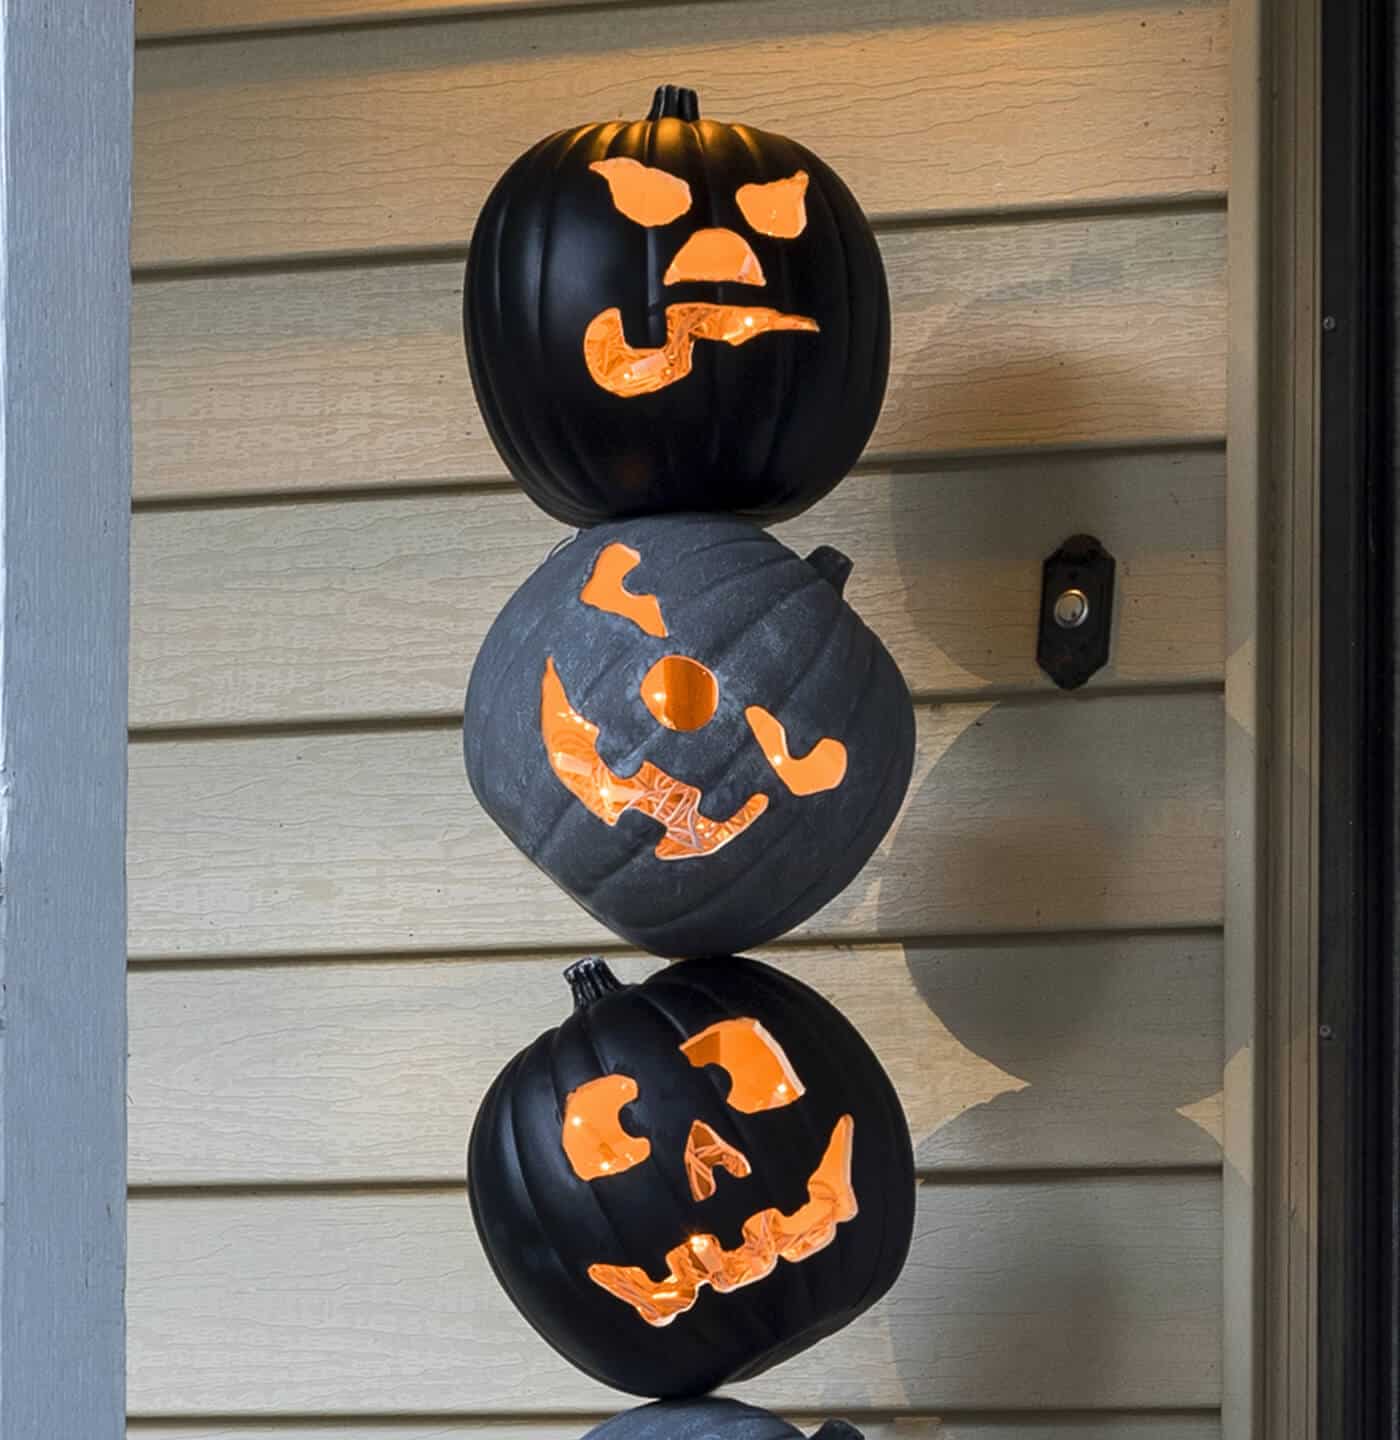
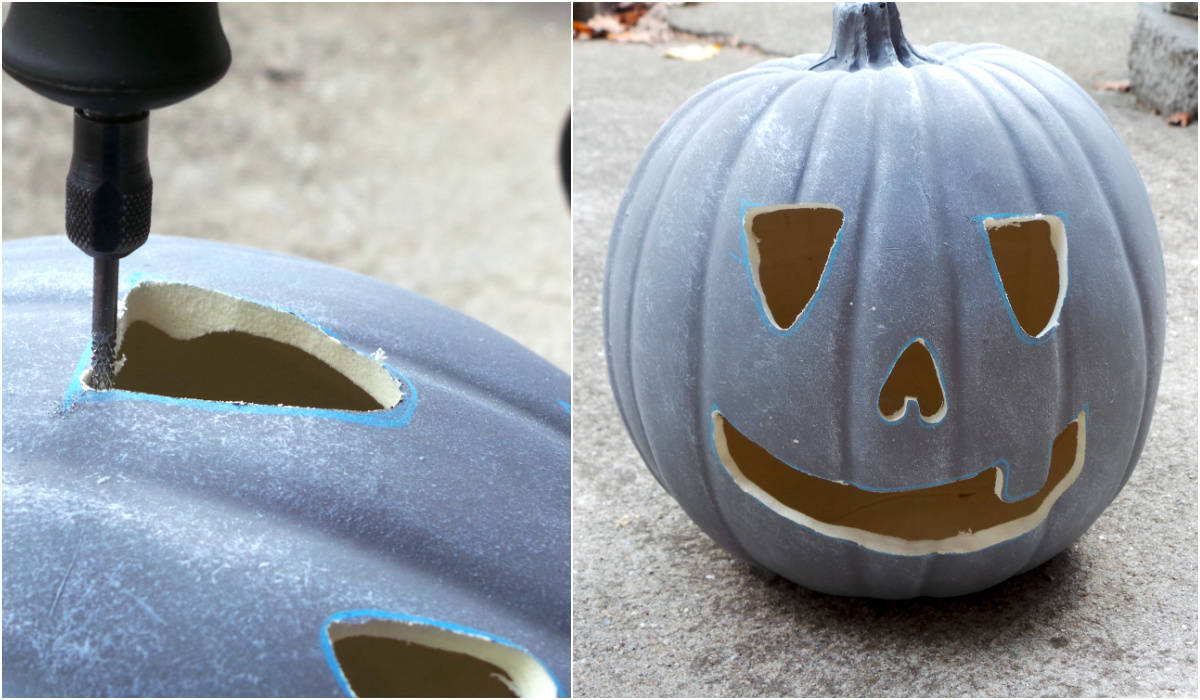
Once you’ve picked your pumpkins, choose your faces. We just picked five different templates for carving online; they are very easy to find by Googling. You can cut out the templates and trace them if you like, or hand draw like we did.
Cutting out the pumpkin faces is the most time consuming part of the process. Keep in mind it doesn’t have to be exact . . . you can see we didn’t quite cut on the lines. It’s going to look fine when it’s done.
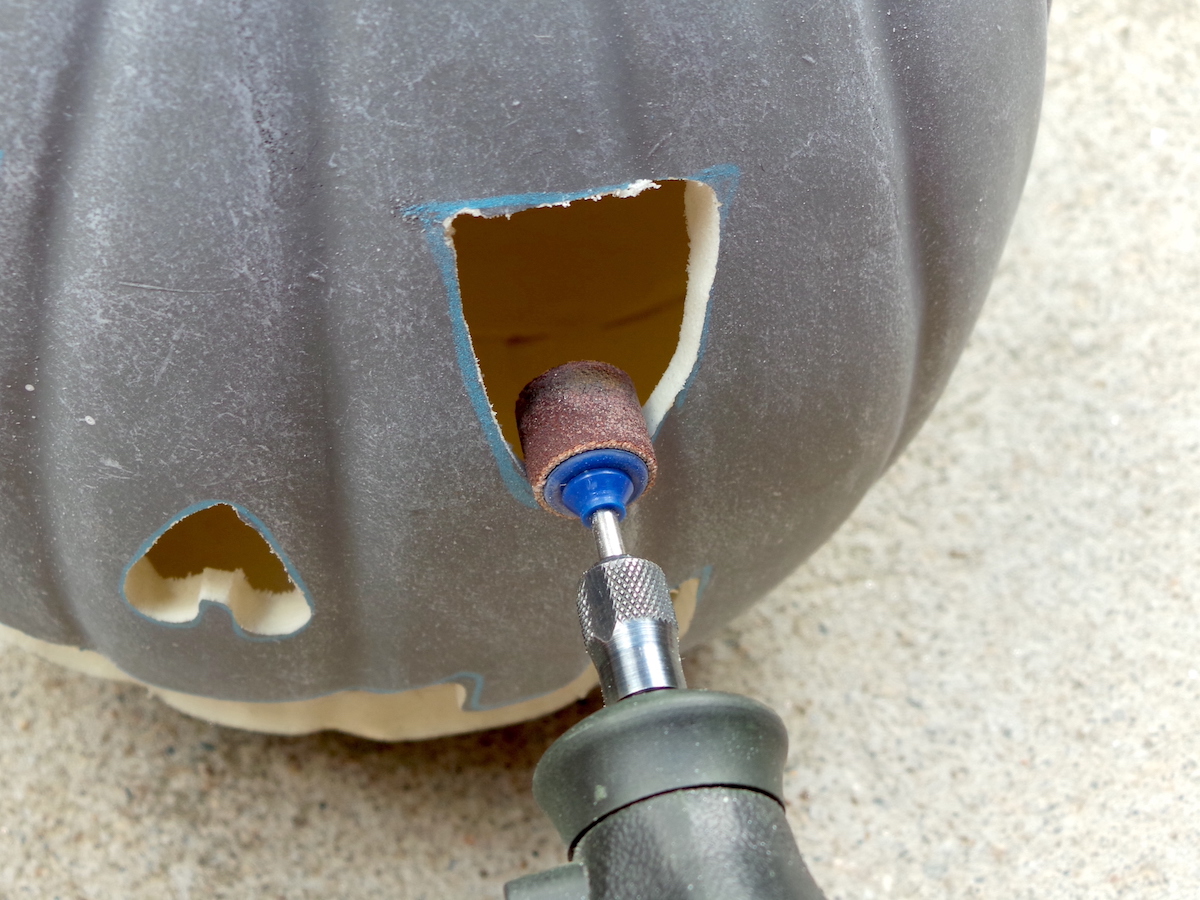
The cutting will have left ragged edges, and the sander smooths them out, which is why will use it.
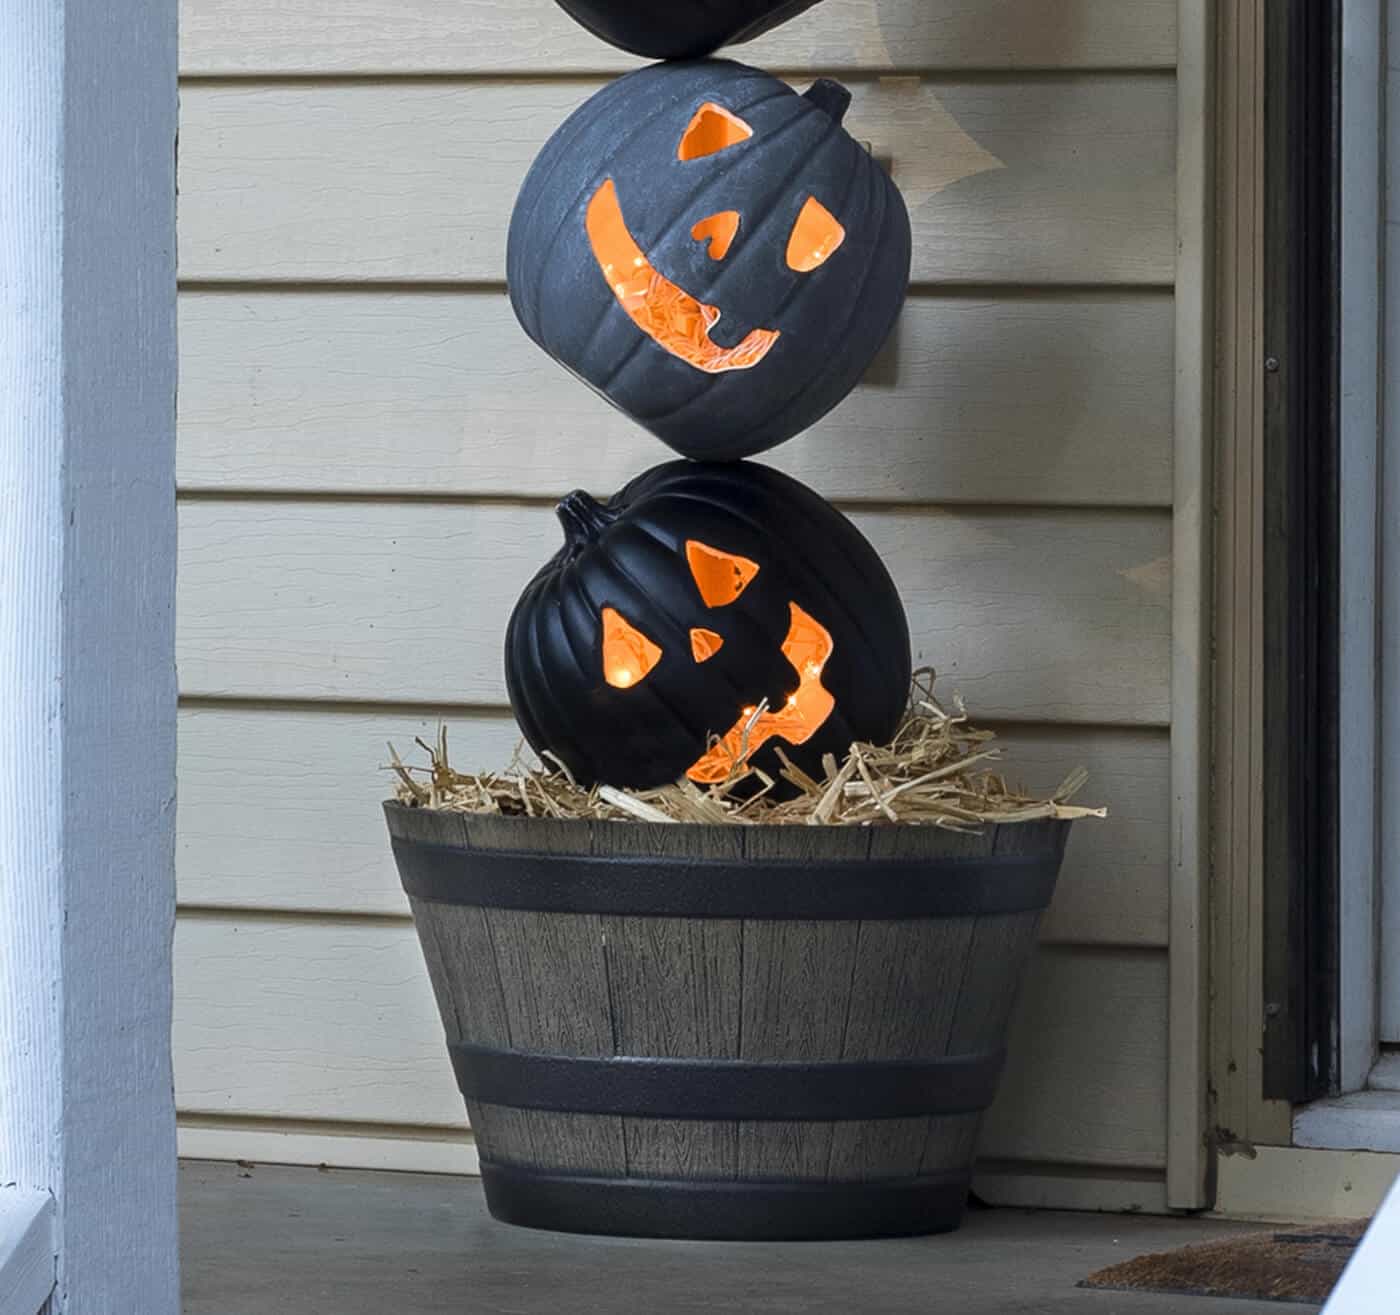
You’ll need to choose a planter for your Halloween topiary. Ours is about 12″ tall and 19 1/4″ wide at the top. It needs to fit wood at the base. If the wood splits a bit while you are drilling a hole into it, it’s fine. The soil stabilizes it. Pack it tightly.
If any of the pumpkins get chipped at all during the craft process, you can use acrylic paint to touch it up.
The bottom pumpkin will obviously go into a light plug. Place this Halloween topiary by an outlet or use an extension cord.
While these lights are fine for outdoor use and the project is pretty solid, it should stay under a covered front porch.
Also be safe and don’t leave it plugged in all night or unattended for too long.
Isn’t it fun? We are so happy with our finished pumpkin topiary! This is a holiday DIY project you’ll use year after year. Let us know your thoughts on our pumpkin topiary on in the comments; we’d love to hear!
Pumpkin Topiary
Equipment
- Pencil and eraser
- Dremel tool with a cutting bit and sanding drum
- Drill with drill bits with 1" spade bit
Materials
- 5 Faux pumpkins in various colors
- 1 Dowel rod(s) 1" diameter, 60" long
- 1 Brown plastic planter
- 5 strands Christmas lights for outdoor use
- 1 bag Potting soil
- Scrap 2 x 4s
- Hay
- 1 roll Duct tape black
- Acrylic paint for touch up, optional
Instructions
- Draw faces on each one of the pumpkins with a pencil. Cut into your pumpkins and cut out the faces using a Dremel tool.
- Use the sanding drum attachment to sand out the inside of the teeth, nose, and eyes. Erase any remaining pencil lines.
- Place two pieces of scrap 2 x 4s in the bottom of the planter in an "X."
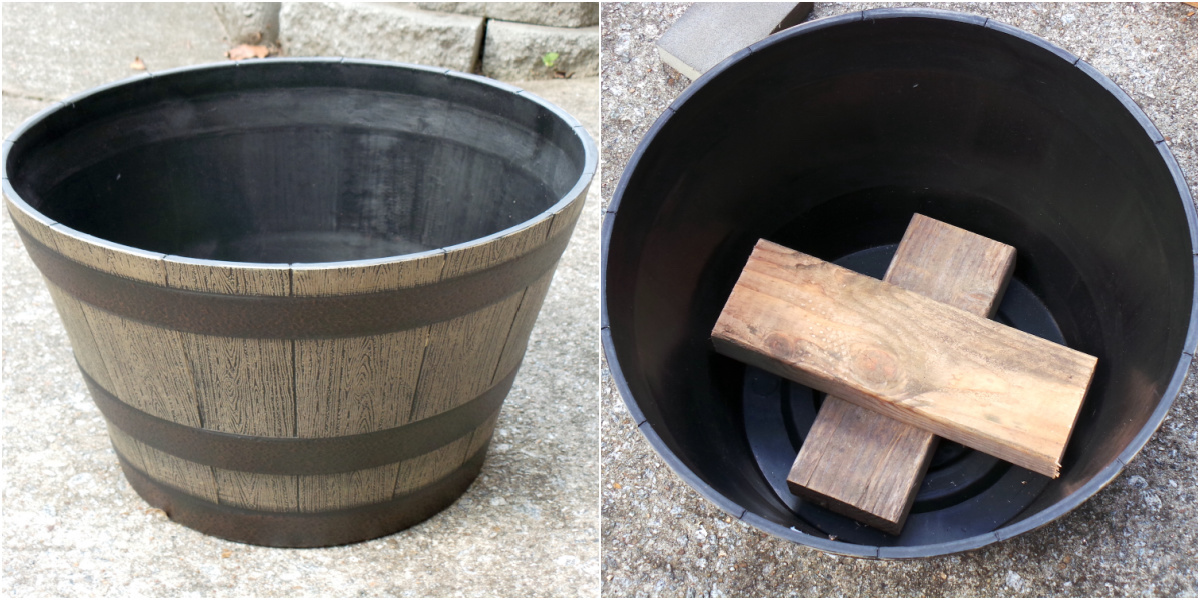
- Use a drill with a 1" spade bit to place two holes – one in each scrap on top of each other – into the wood. Stick the dowel rod through both pieces, down into the planter.
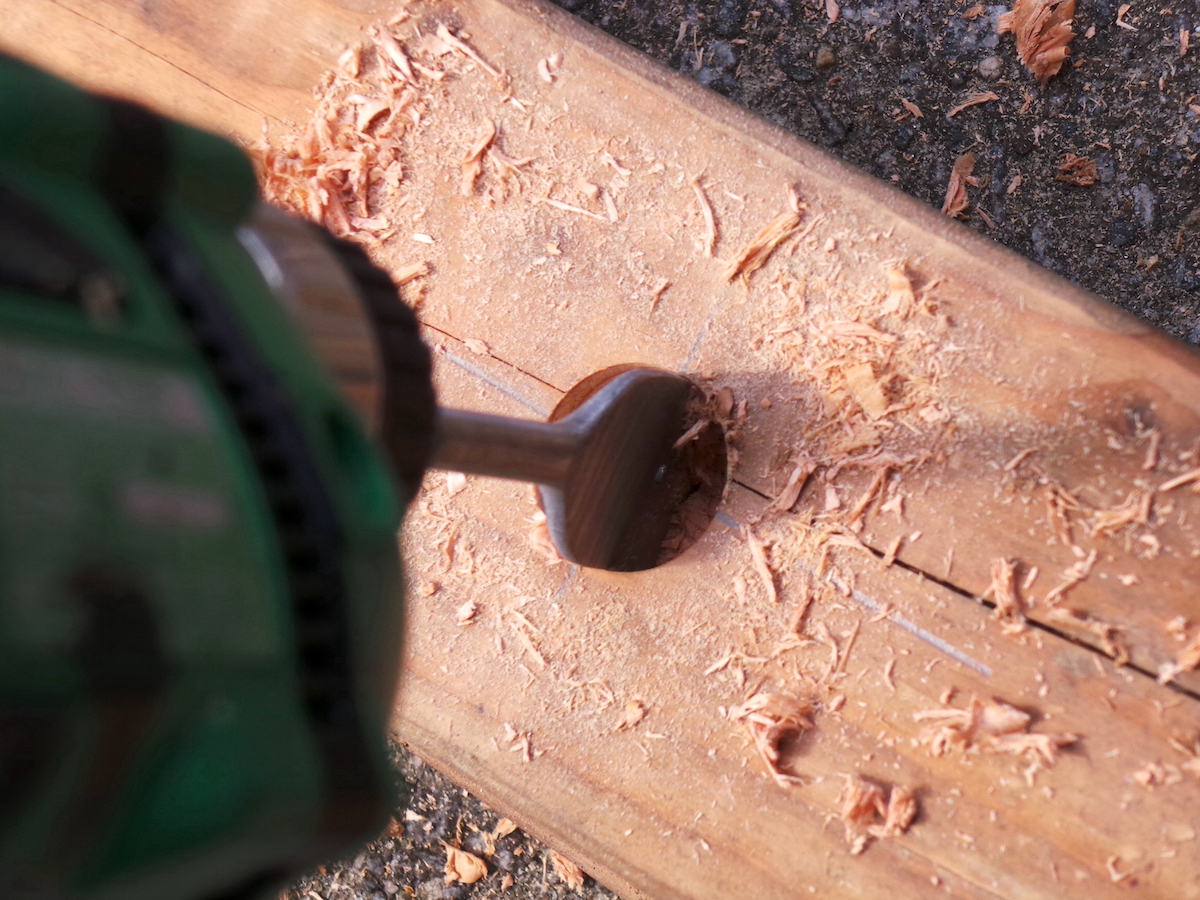
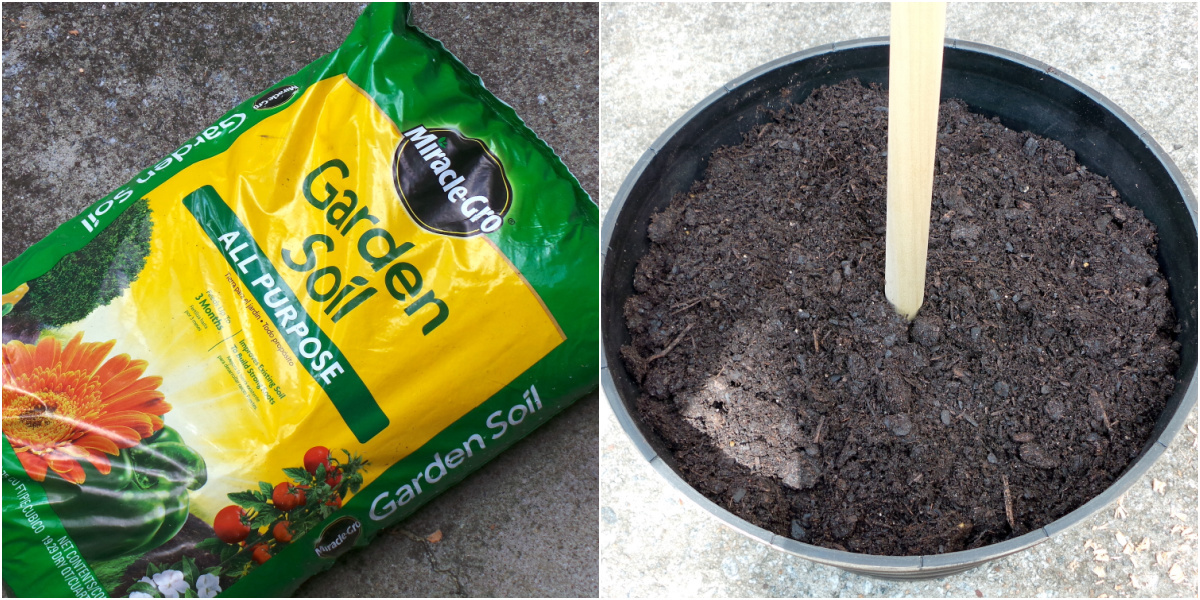
- Pack potting soil into the planter tightly, covering the wood and stabilizing the dowel rod.
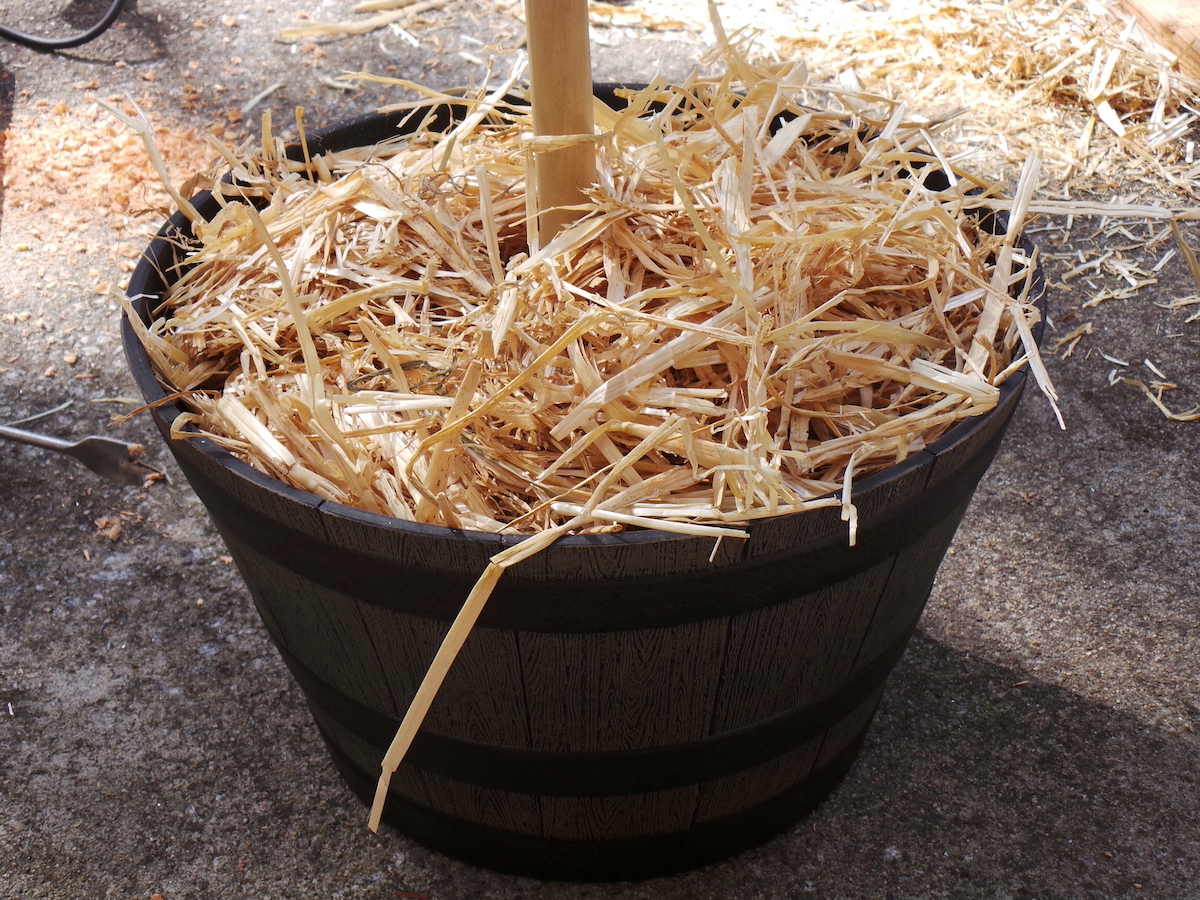
- Spread hay into the planter around the base for a fun fall look.
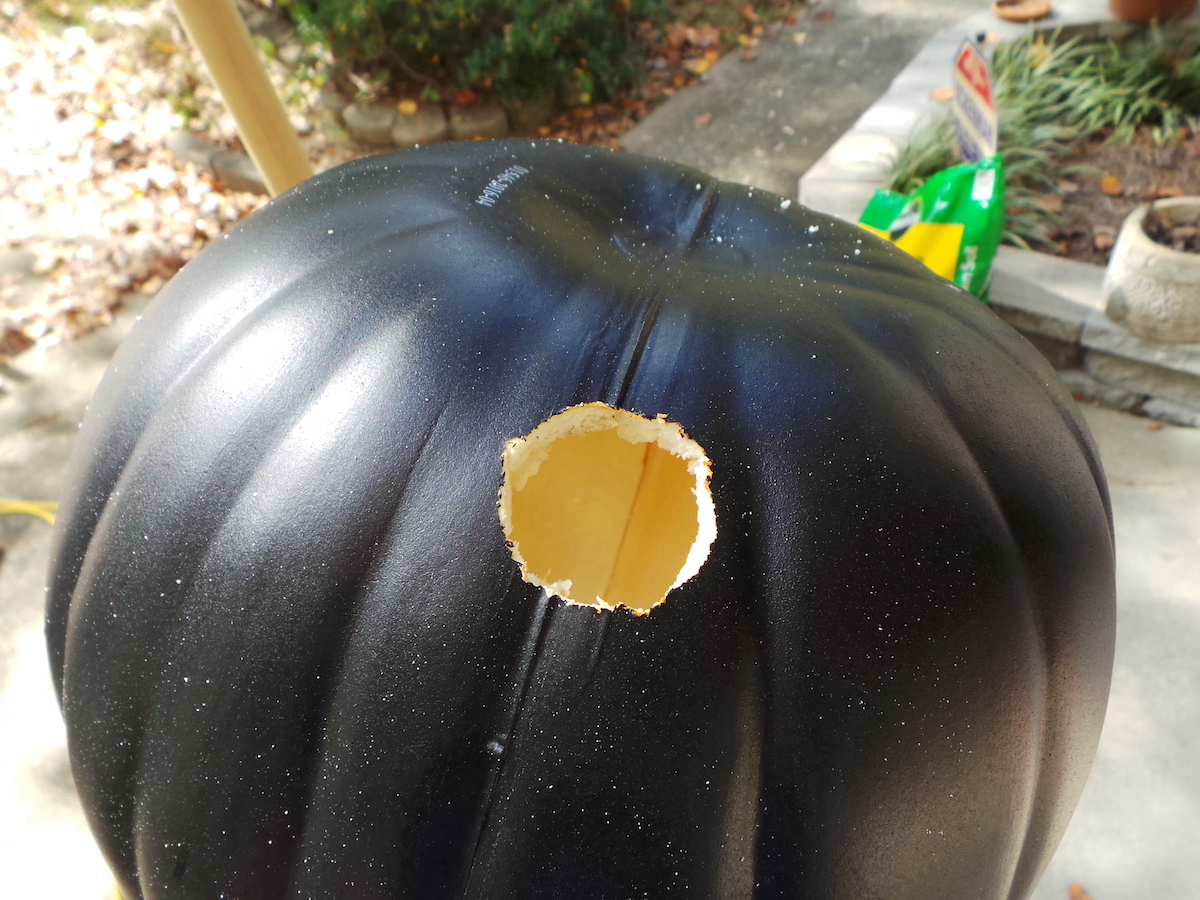
- Use the 1" spade bit to drill three holes in each pumpkin. Tilt them at angles and make a hole at the top and bottom for the dowel, then cut a hole in the back to insert the lights.
- Slide each pumpkin down onto the dowel rod.
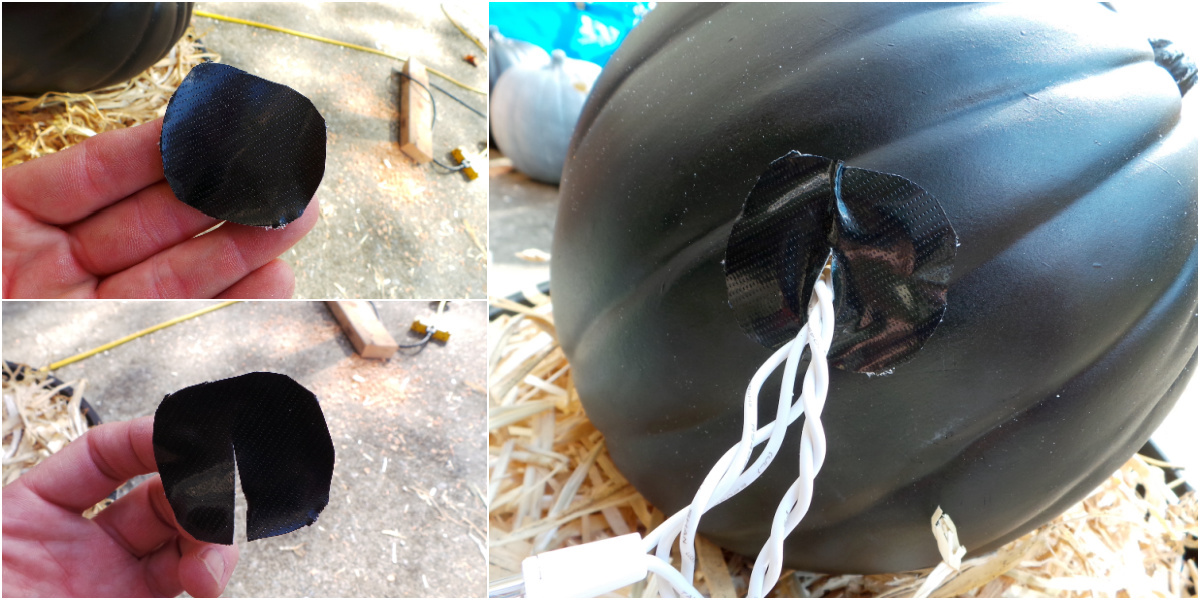
- Place one light strand in the back of each pumpkin, leaving both ends hanging out.

- Cut a circular piece of black Duck Tape with a slit in it. Place over the hole with the parts of the light strand hanging out that you want to attach.
- Place the topiary near a light outlet and plug in to light.
If you like these topiary pumpkins, you might also love the following projects for fall decor and Halloween – check them out:
Borax Crystal Skull • Cross Stitch Canvases • DIY Halloween Doormat • Felt Ball Garland • Home Sweet Haunted Home • Mesh Halloween Wreath • Milk Jug Skeleton • Pumpkin Terrarium • Shrunken Apple Heads • Skull Bean Art • Skulls Makeover • Spooky Apothecary Jars • Spooky Skull Display • Wine Cork Skeleton • Witch Hat Wreath


Excited to make this! l bought all the supplies this weekend and I will say it is much more than $40!! I spent $150 and everything was on sale at michaels !!
Hi Michelle! I gotta update the pricing on everything. It’s way off given inflation. Also I need to recommend searching for used, etc. on ebay, Etsy. Thank you!
Isn’t this your pictures? Is this your Etsy store and listing you’re selling? Was going to buy and got a little worried it’s not you/legit? https://www.etsy.com/listing/1310440515/
It’s not me! Thank you for letting me know. I’m reporting! Please don’t order from them.
I found the pumpkins on sale at Michael’s today for 70% off. I finally get to make this project…for next year.
That’s so cute! Definitely bookmarking to make for next year!