Make a Mesh Halloween Wreath in Three Simple Steps!
Learn how to make a mesh Halloween wreath for beginners. This holiday decor is done in three steps, and you can customize the colors!
Skills Required: None. You’ll be cutting mesh, rolling it, and attaching it to a wire form with pipe cleaners. It’s easy to put this Halloween wreath together because you’ll add the colors randomly.
Those who know me well know something about me: I’m passionate about Halloween. Halloweencrafts are my favorite! But I also love pumpkin carving, vintage Halloween decor, and . . . . making Halloween wreaths.
One of the reasons I love making wreaths so much is because they are relatively quick (at least the ones that I make). I’m really excited to share my process which is perfect for beginning crafters! If you’ve never made anything before, you’re going to be great.
And I promise you, you’re going to make many more mesh wreaths after this first one. I promise.
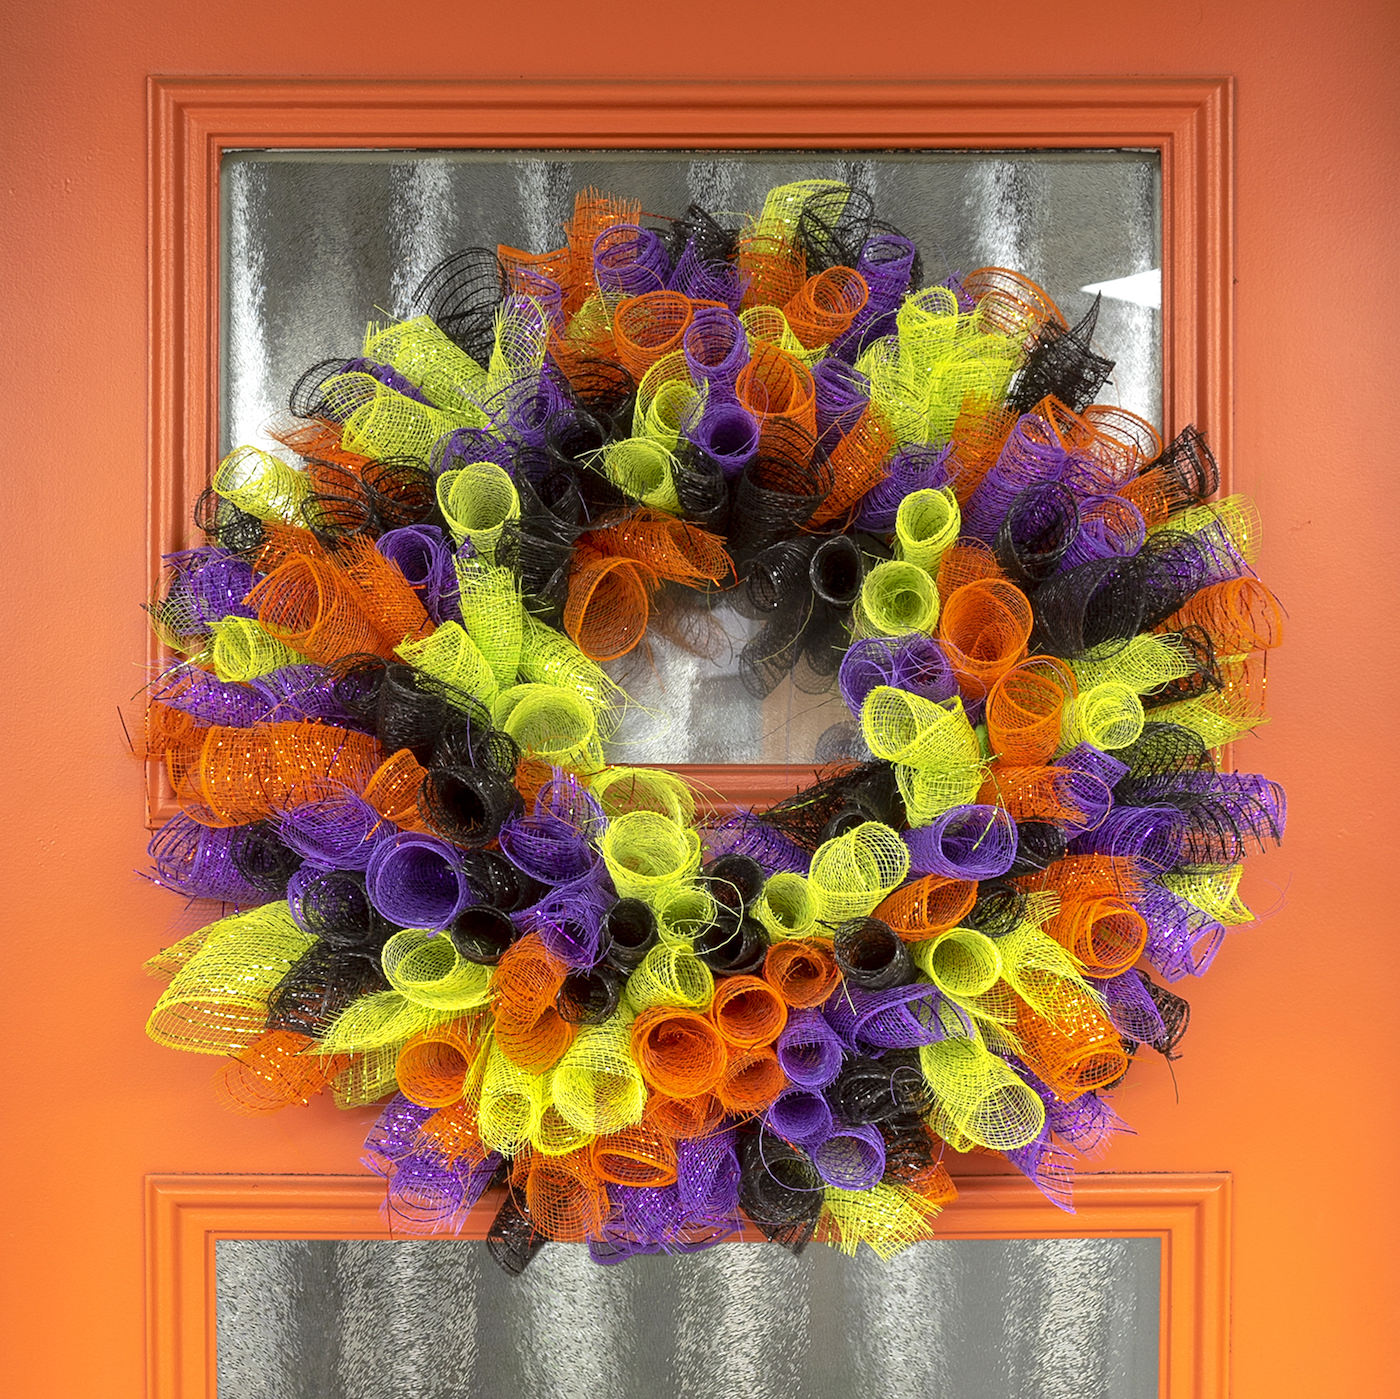
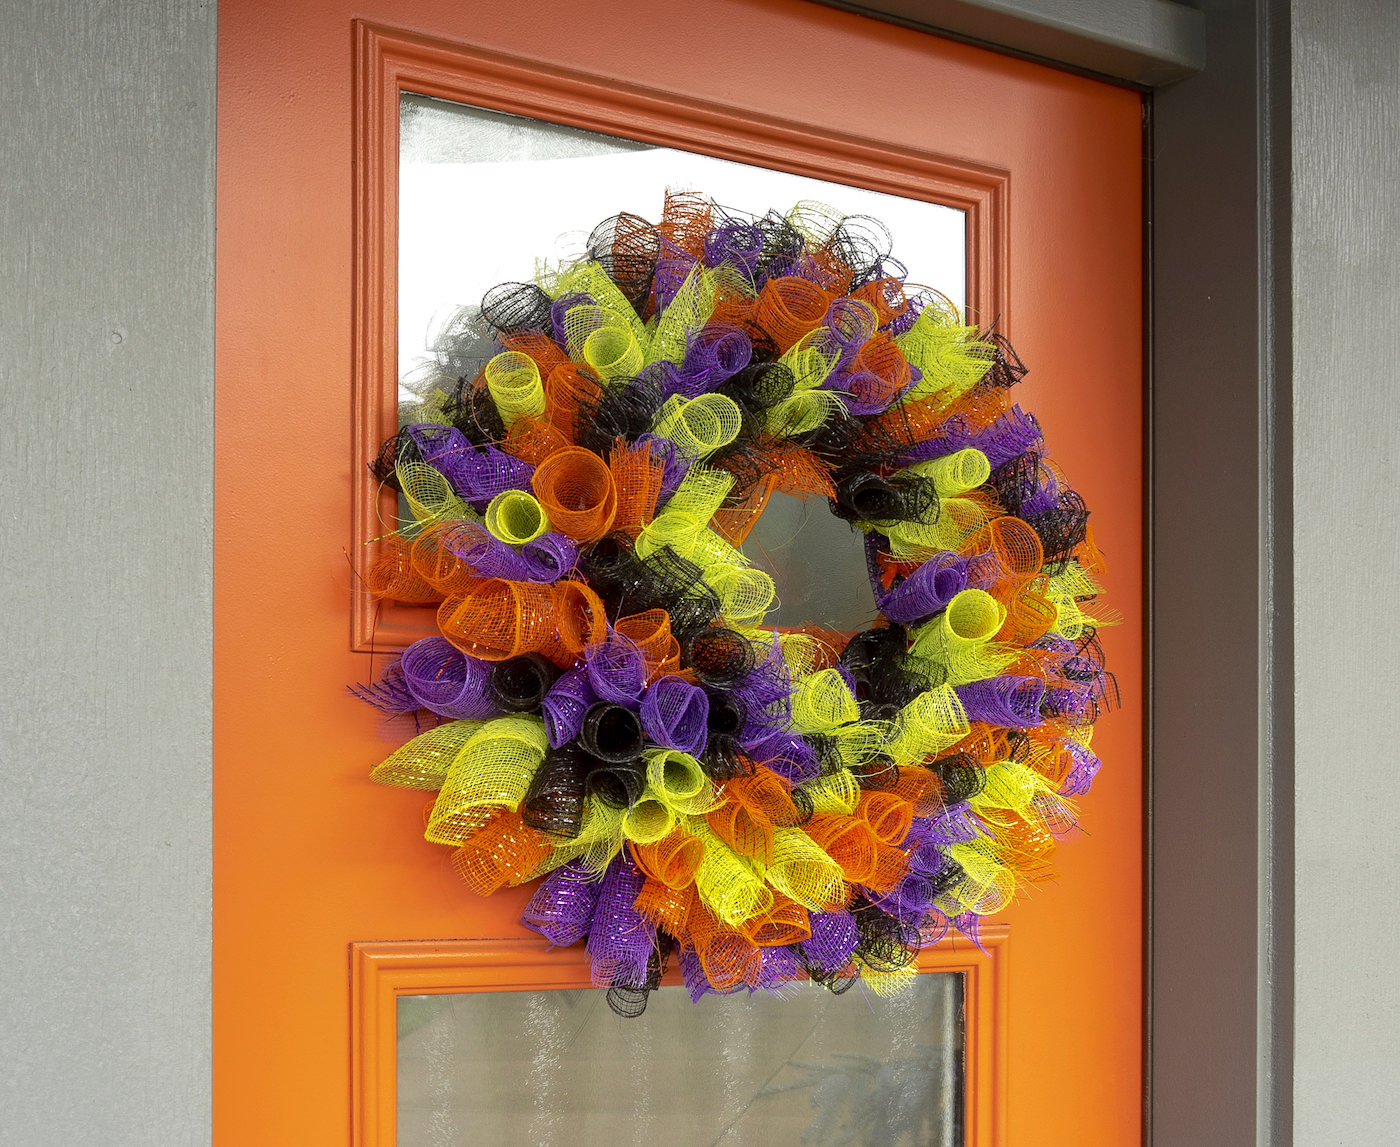
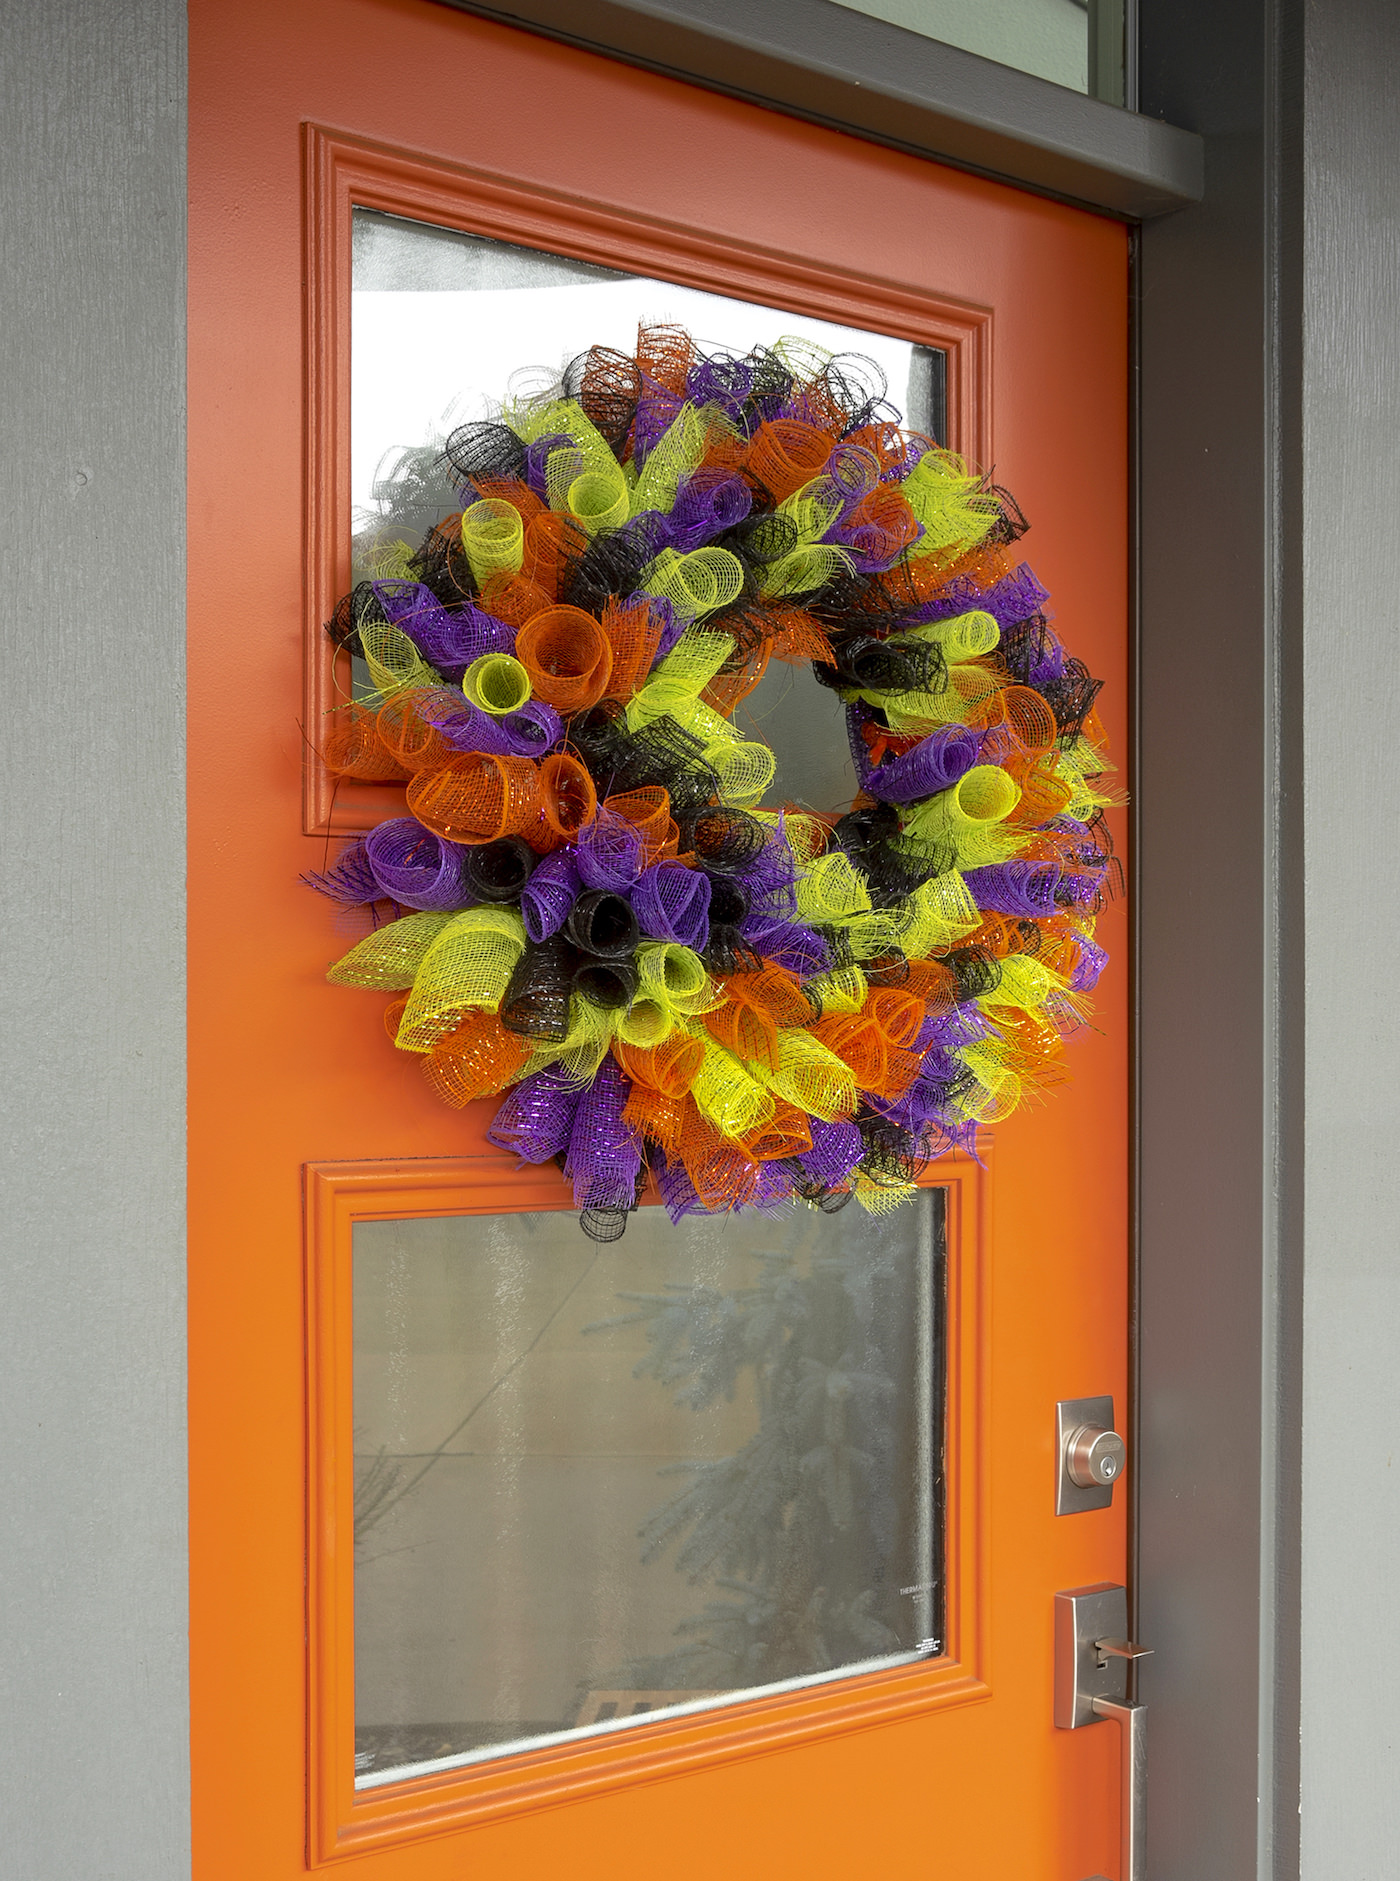
I’m very lucky in that I have an orange door, which actually wasn’t luck, because I had the door painted that color when I moved in. Yes – my love for Halloween is deep. And fall, honestly.
The front door goes well with all my autumn decorating, and I definitely wanted something glitzy and Halloween colorful. That’s how this wreath was born!
Tips for Making a Mesh Wreath
You’re going to make this project in three easy steps. You’re going to cut the mesh, then cut the pipe cleaners. Then you’re going to attach the mesh to the wire form. That’s it!
Mesh to Use
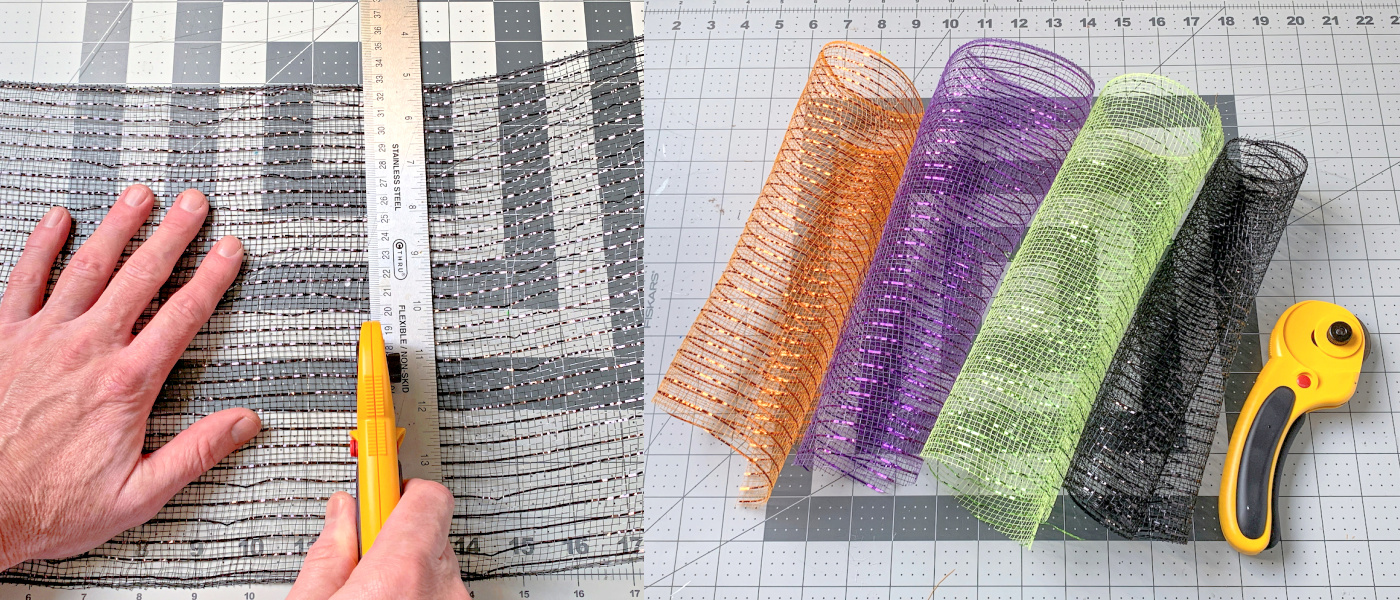
I wanted to discuss this because mesh comes in different widths: this wreath uses 6″ deco mesh. Depending on the craft store, you might only find 10″ rolls or wider (there are some good sets on Amazon).
If needed, you can cut down the mesh horizontally as well as vertically. The wreath does look a little bit more frilly if you trim the mesh. I would describe it as “hairy”. But it’s still cute, I just happen to like the crisp edges a bit better.
It shouldn’t take all of the mesh to make the Halloween wreath. There was a little bit left over from each of the colors. With the lengths they come in, it’s nearly impossible to *not* have some left over. Plus if you want to go a little larger on the wreath form, you can.
Where to Get a Form
You can get wire wreath forms at the dollar store if you’re lucky. They get sold out pretty quickly though, especially in the seasonal patterns like a witch hat or pumpkin (which, you can definitely use the same method as you see here).
These forms are also available at craft stores in the floral section (usually) OR you can get a wire wreath form on Amazon here.
Are you ready to make this Halloween deco mesh wreath? Here’s how it’s done below!
Gather These Supplies
- Wire wreath form – 12″ (you can also use a 14″ if that’s what you can find)
- 6” X 30 ft rolls of decorative mesh
- Black – 1
- Orange – 1
- Lime Green – 1
- Purple – 1
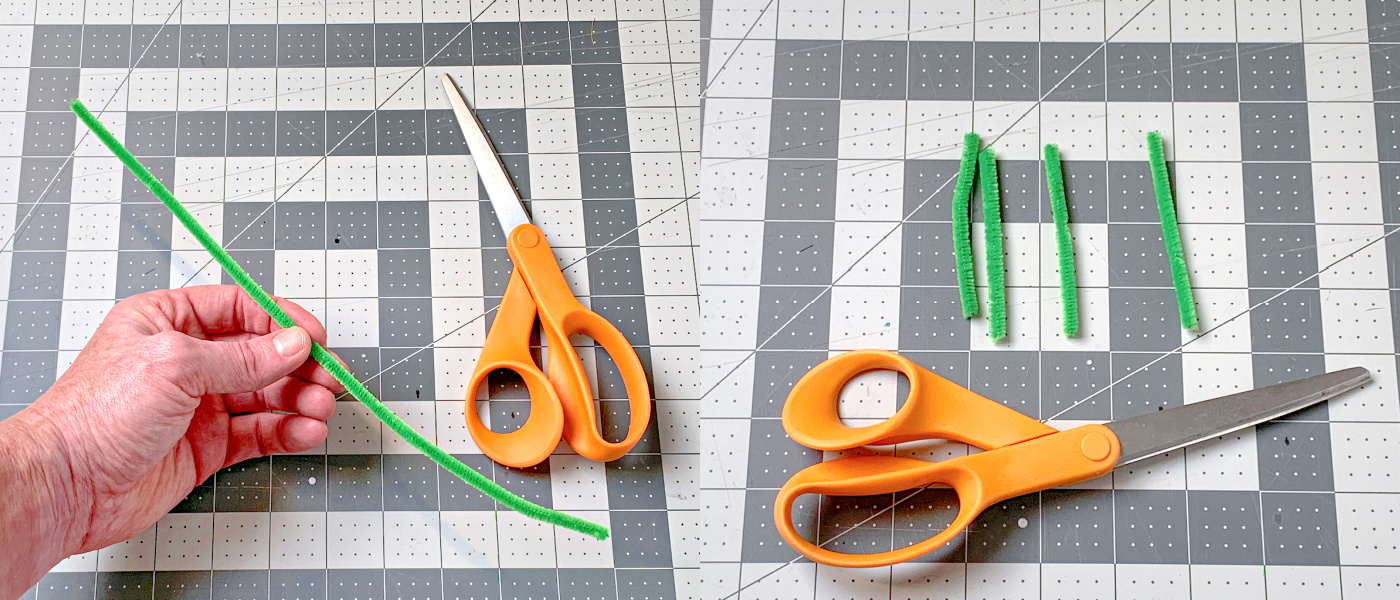
- Chenille pipe cleaners, 12″ – 1 package
- Heavy duty scissors or wire cutters
- Ruler
- Cutting mat
- Rotary cutter (scissors work too)
Tips and Thoughts for This Project
I found it easiest to use a rotary cutter for this project (with a ruler if you want to make sure the line is very straight). However, you can definitely use scissors. The rotary just sped up the process.
I usually start with about 15 tubes of each color because I know I’m going to need at least that many. Then I add as needed.
To be honest, you can use any color pipe cleaners – you won’t see them. I usually try to coordinate with one of the colors in my wreath or use white.
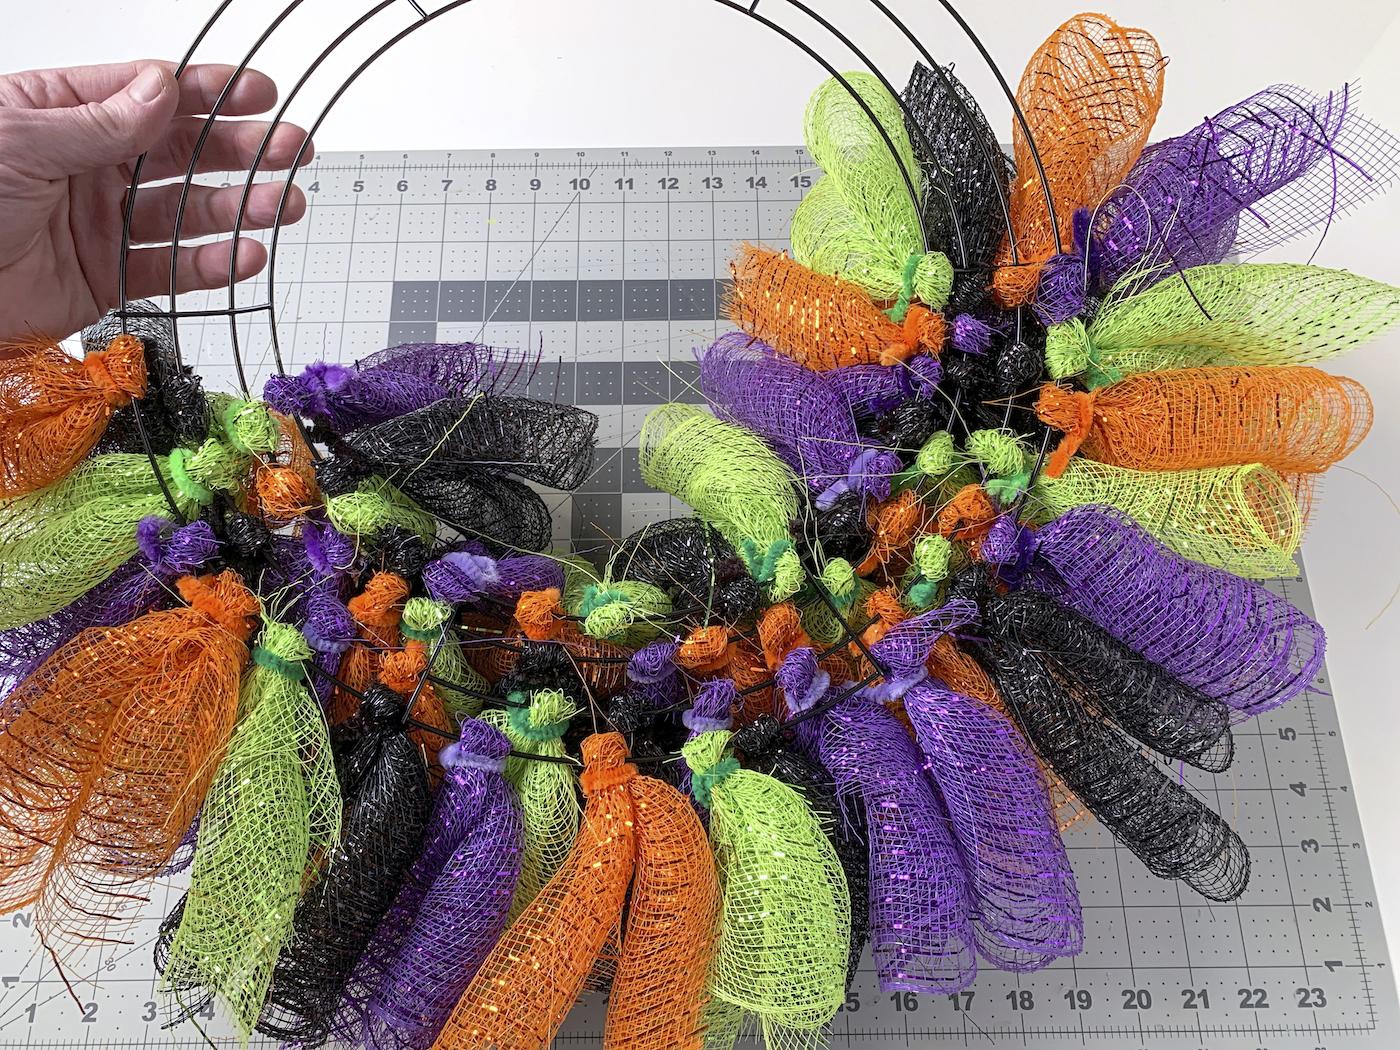
Just for reference, here’s how the wreath looks from the back. You can see how randomly I attached the tubes.
Find a special place on your wall or front door to hang for the fall and Halloween season! This wreath is really lightweight, so I hung it on my front door with a removable Command strip.
Get the printable how-to card below.

Halloween Mesh Wreath
Equipment
- 1 Heavy duty scissors or wire cutters
- 1 Ruler
- 1 Rotary cutter or scissors
Materials
- 1 Wire wreath form 14"
- 6 rolls 6” X 30 ft rolls of decorative mesh black (1), orange (1), lime green (1), purple (1)
- 1 package Pipe cleaner(s) 12″
Video
Instructions
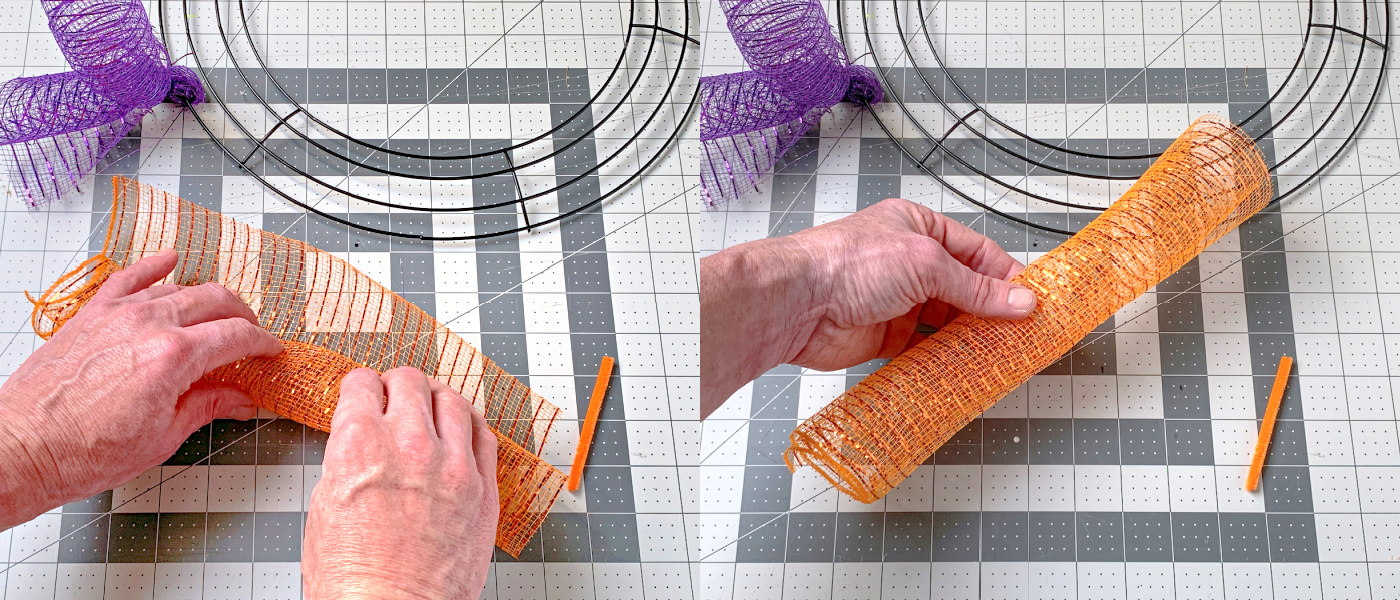
- Cut several 10" lengths of the mesh – all four colors – using the rotary cutter. You will cut additional pieces as needed.
- Take approximately ten pipe cleaners and cut them into four pieces each. You will cut additional pieces as needed.
- Take one of the lengths of mesh and roll into a tube (not too tight). Hold the tube in one of your hands and pinch and twist between your fingers.
- Start anywhere on the round wreath form. Bend the tube around a wire, bring the ends together, and secure by twisting a pipe cleaner around the mesh right by the wire.
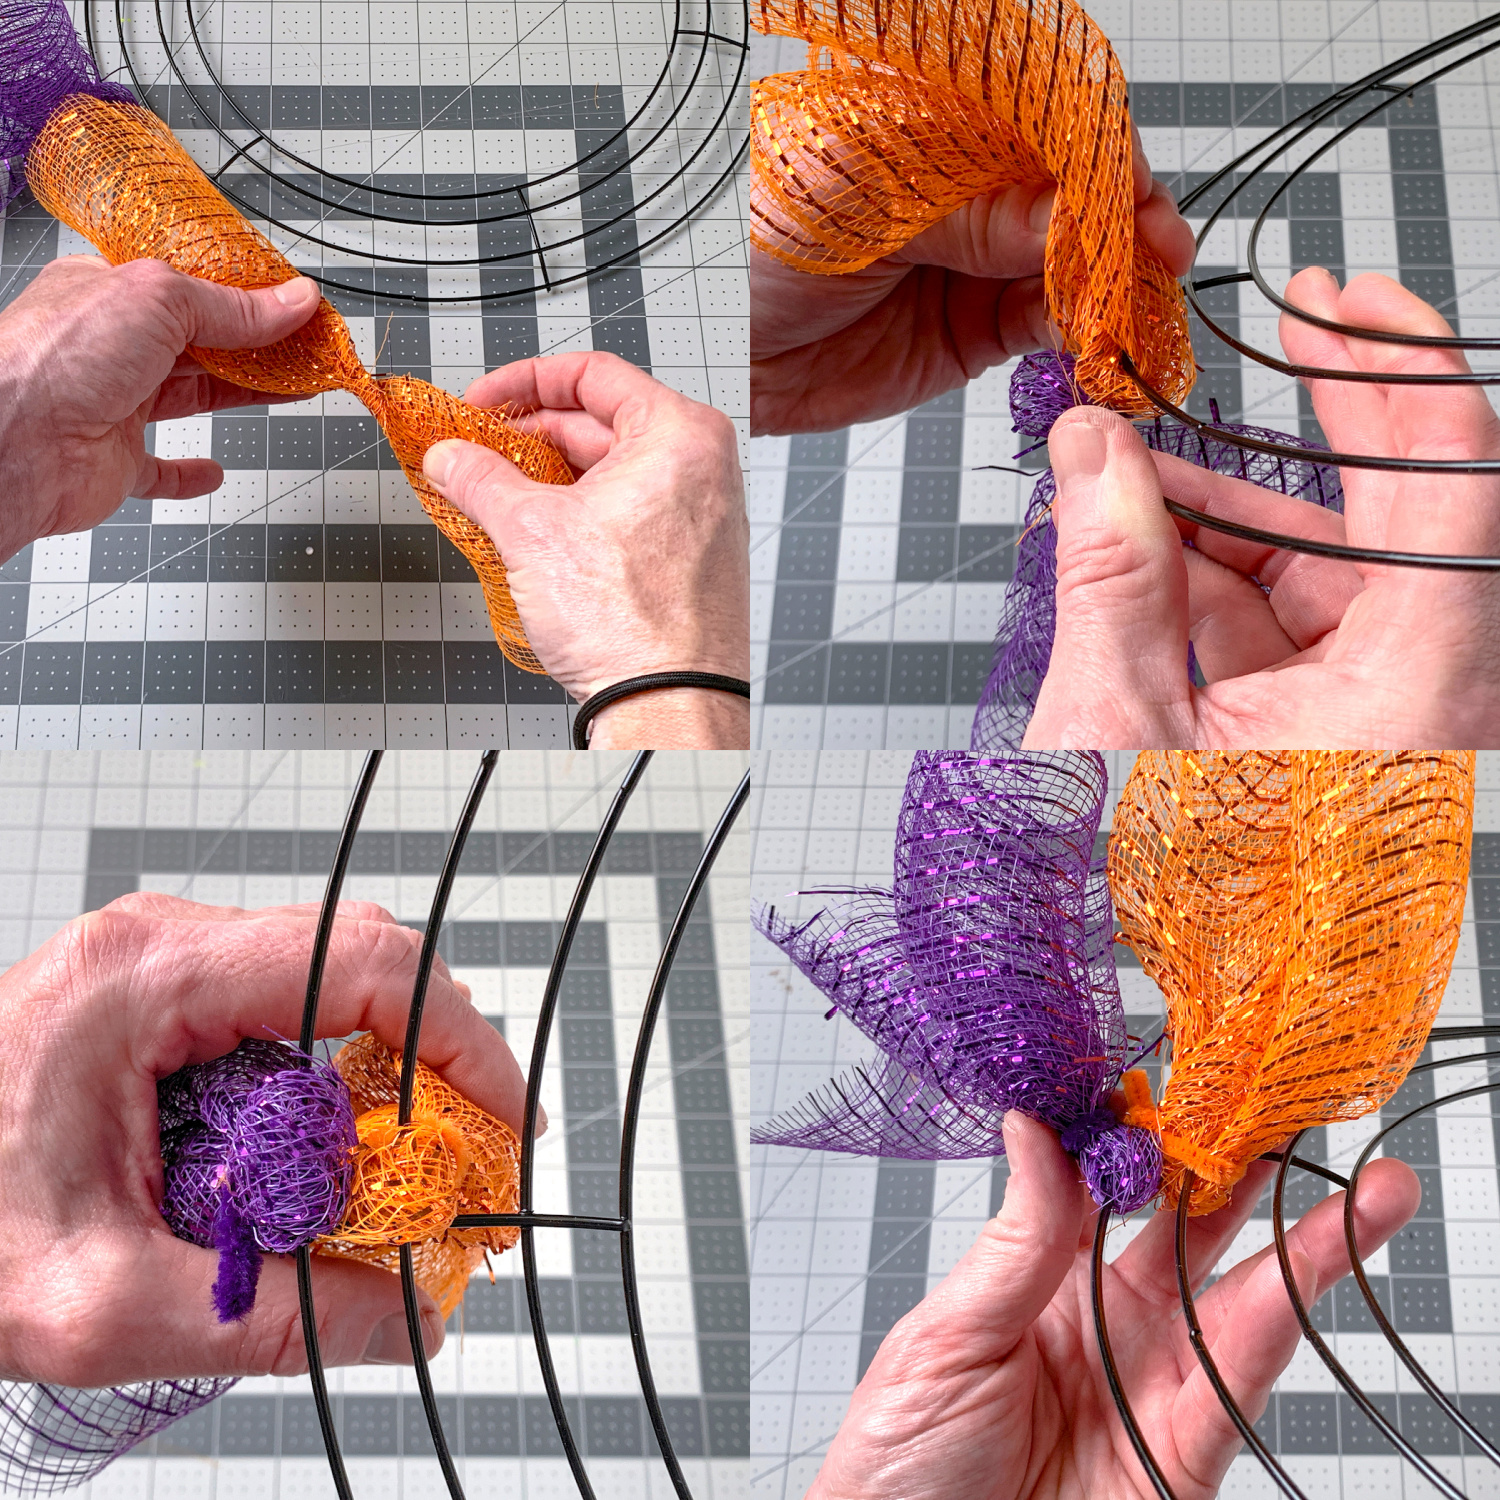
- Repeat this process with the rest of your mesh pieces, alternating colors to make it random.
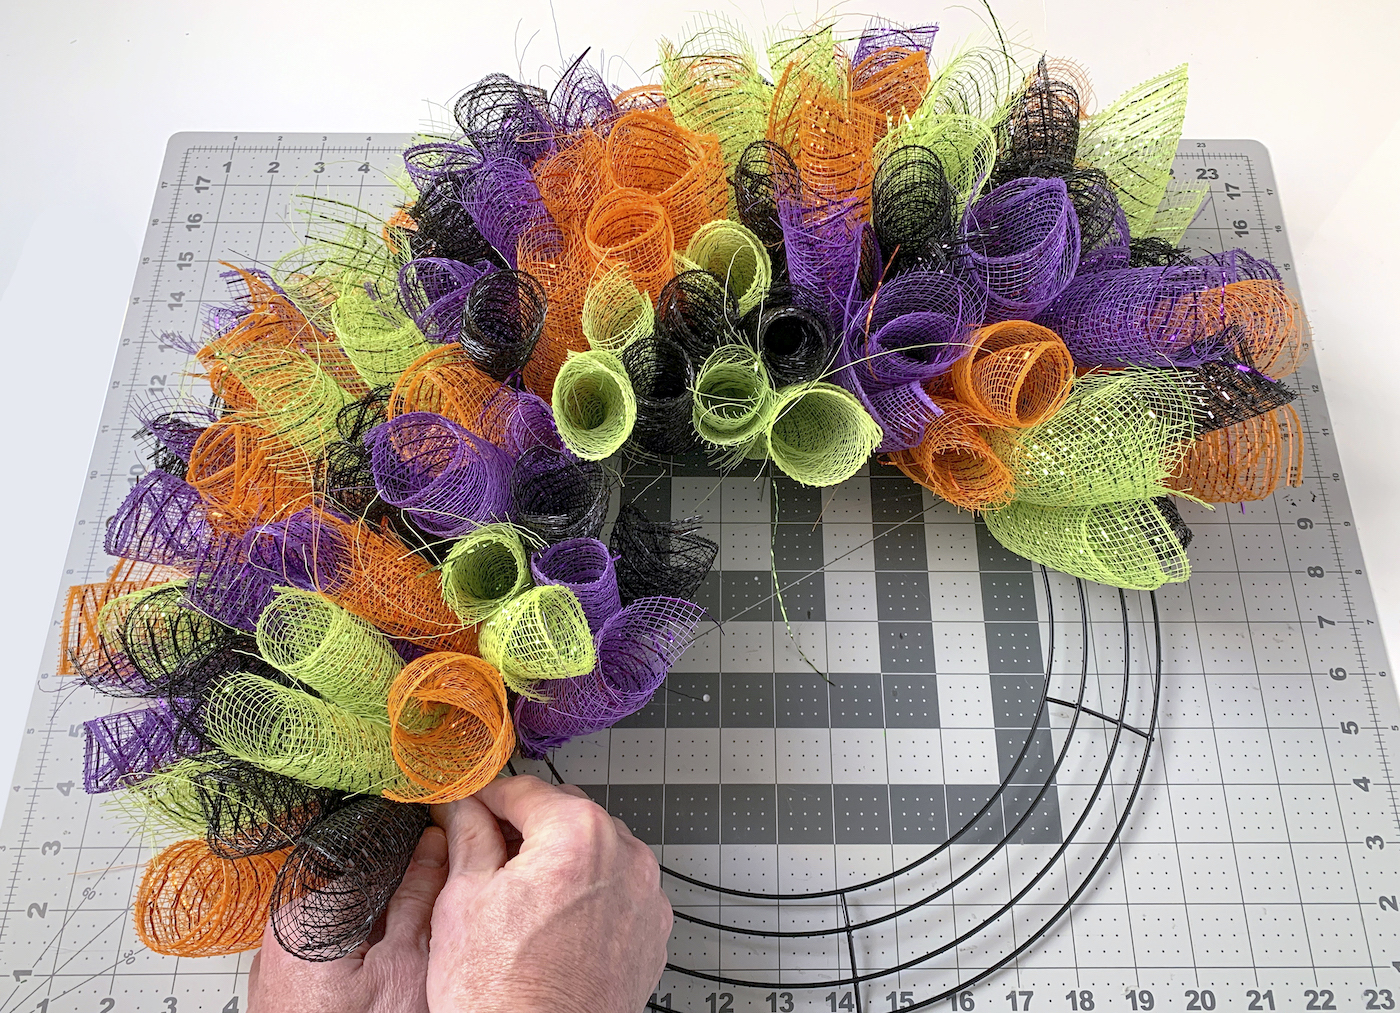
- Continue until you have covered the entire wreath form. You might need to push the mesh tubes up and away from the center so that you can add more. They really want to spread out, as you will see.

- Once all the tubes are attached, give your wreath a final "fluff" and hang.

Notes
Keep your eyes out for more mesh wreaths around here. Because if you think I’m done? I’m not! I love the texture and the sparkle that comes from the deco mesh! I’d love to know if you make this in the comments!
I’d also love for you to check out these other seasonal wreath ideas:
Fall • Felt • Halloween Ornament • Pinecone • Mini Pumpkins • Pool Noodle • Pom Pom • Ribbon • Witch Hat


It took 6 hours to do this? If that’s the case, it’s going to take me weeks to do it.😭
It won’t take you more than that! This is a high estimate and was done during a movie marathon lol. You can get it done 🙂
Your instructions say that the wreath is made using 6 in deco mesh, however, the video clearly shows the mesh is a 10 in roll. I started it with 6 in mesh (after reading the step-by-step instructions) but it wasn’t turning out so then I watched the video, only to find out I cut up 4 rolls of 6 in mesh in 10 in strips but couldn’t use them.