Pom Pom Wreath with Yarn in Three Easy Steps!
Learn how to make a pom pom wreath in three simple steps! You’ll only need a few basic supplies, and it’s perfect for beginning crafters.

I have a confession to make: I can never throw away leftover yarn.
It doesn’t matter if it’s half a skein, a random color I bought on clearance, or yarn from a project I abandoned three years ago. It all ends up in a basket in my craft room where it patiently waits for me to figure out what to do with it. Sound familiar?
If you’ve been staring at a growing collection of yarn and wondering how you’ll ever use it all, this pom pom wreath might be your new favorite project. It’s fluffy, cozy, surprisingly easy to make, and looks way more expensive than it actually is.
Best of all, it’s one of those crafts that feels relaxing instead of stressful. Put on your favorite show, grab your supplies, and start wrapping.
One of my favorite things about this pom pom wreath is how customizable it is. You can use bright colors for a playful look, soft neutrals for farmhouse style, seasonal shades for Christmas, or whatever random yarn happens to be hiding in your stash. No two wreaths ever look exactly alike.
If you’re new to making pom poms, don’t worry. A pom pom maker does most of the hard work for you. You’ll simply wrap yarn around the tool, create fluffy loops, trim everything into shape, and attach the finished pom poms to a wreath frame.
Before you know it, you’ll have a gorgeous pom pom wreath ready to hang on your front door, above a mantel, or anywhere that needs a little texture and charm.
The funny thing about pom poms is that once you start making them, you can’t stop. There are so many pompom uses beyond wreaths. I’ve used them for garlands, gift toppers, ornaments, hats, pillows, and wall hangings.
In fact, discovering new pompom uses is probably the number one reason my yarn stash never seems to get any smaller.
For this pompom wreath, you’ll make dozens of fluffy pom poms using yarn wrapped into thick loops on a pompom maker. The more loops you add, the fuller the finished pom poms will be. Once you’ve made enough pom poms, you’ll glue them onto a wreath frame until it’s completely covered in softness.
Whether you’re looking for creative pompom uses, trying to use up extra yarn, or simply want an easy home decor project, this pom pom wreath checks all the boxes.
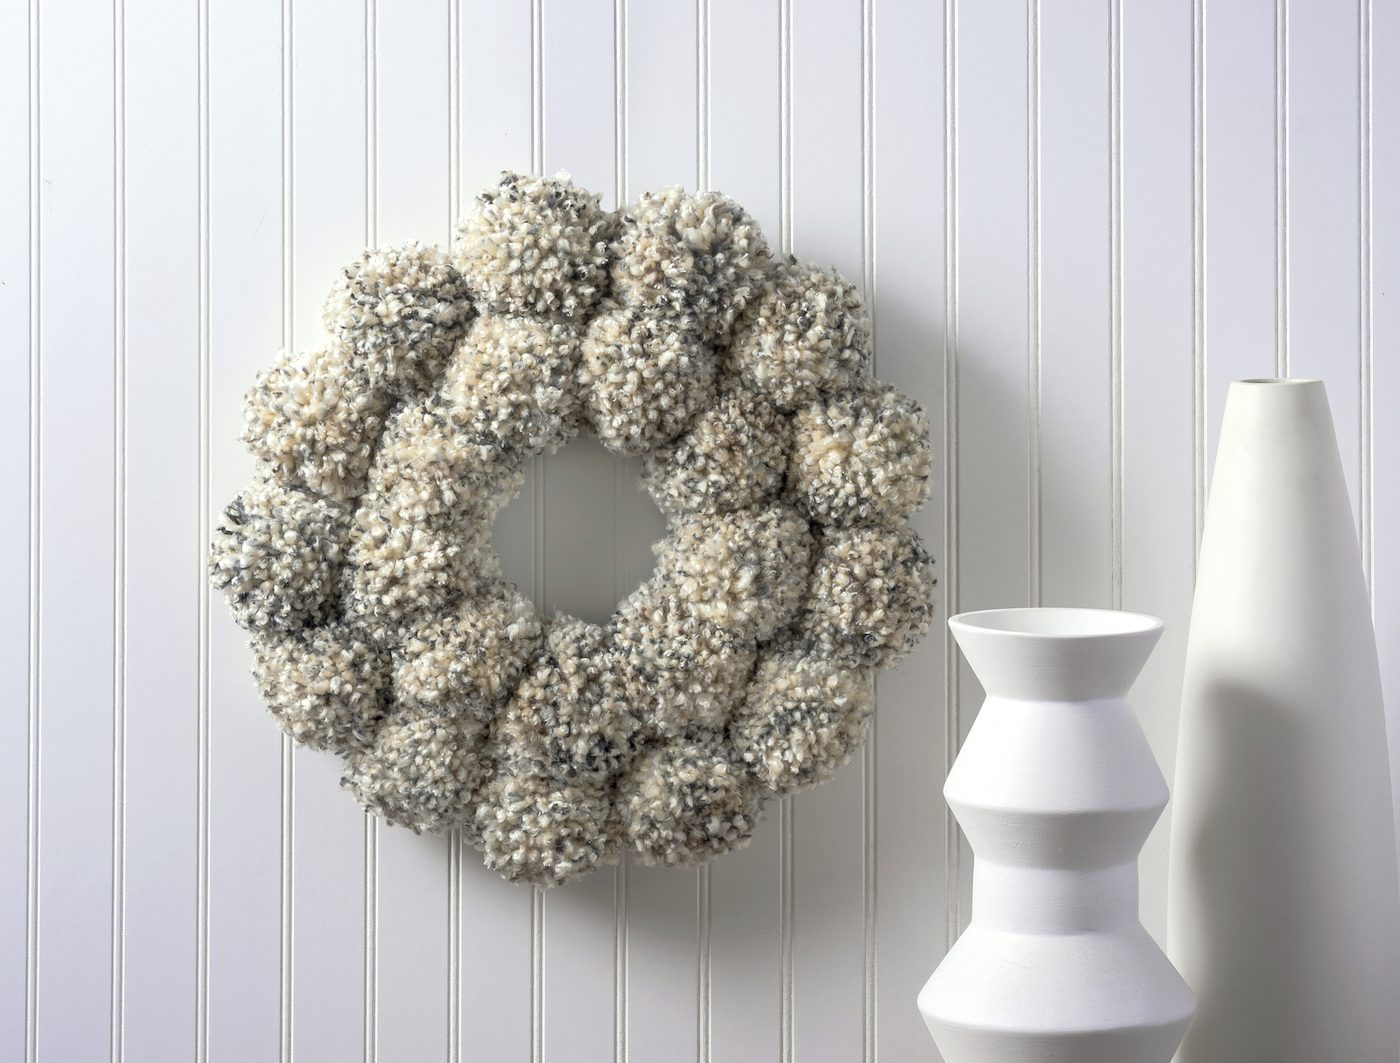
The finished wreath is warm, welcoming, and packed with texture. Plus, unlike a lot of seasonal decor, you can leave this wreath up all year long.
For this project, we used the Large Clover Pom Pom maker found here. You can use any size you like, or a combination of sizes.
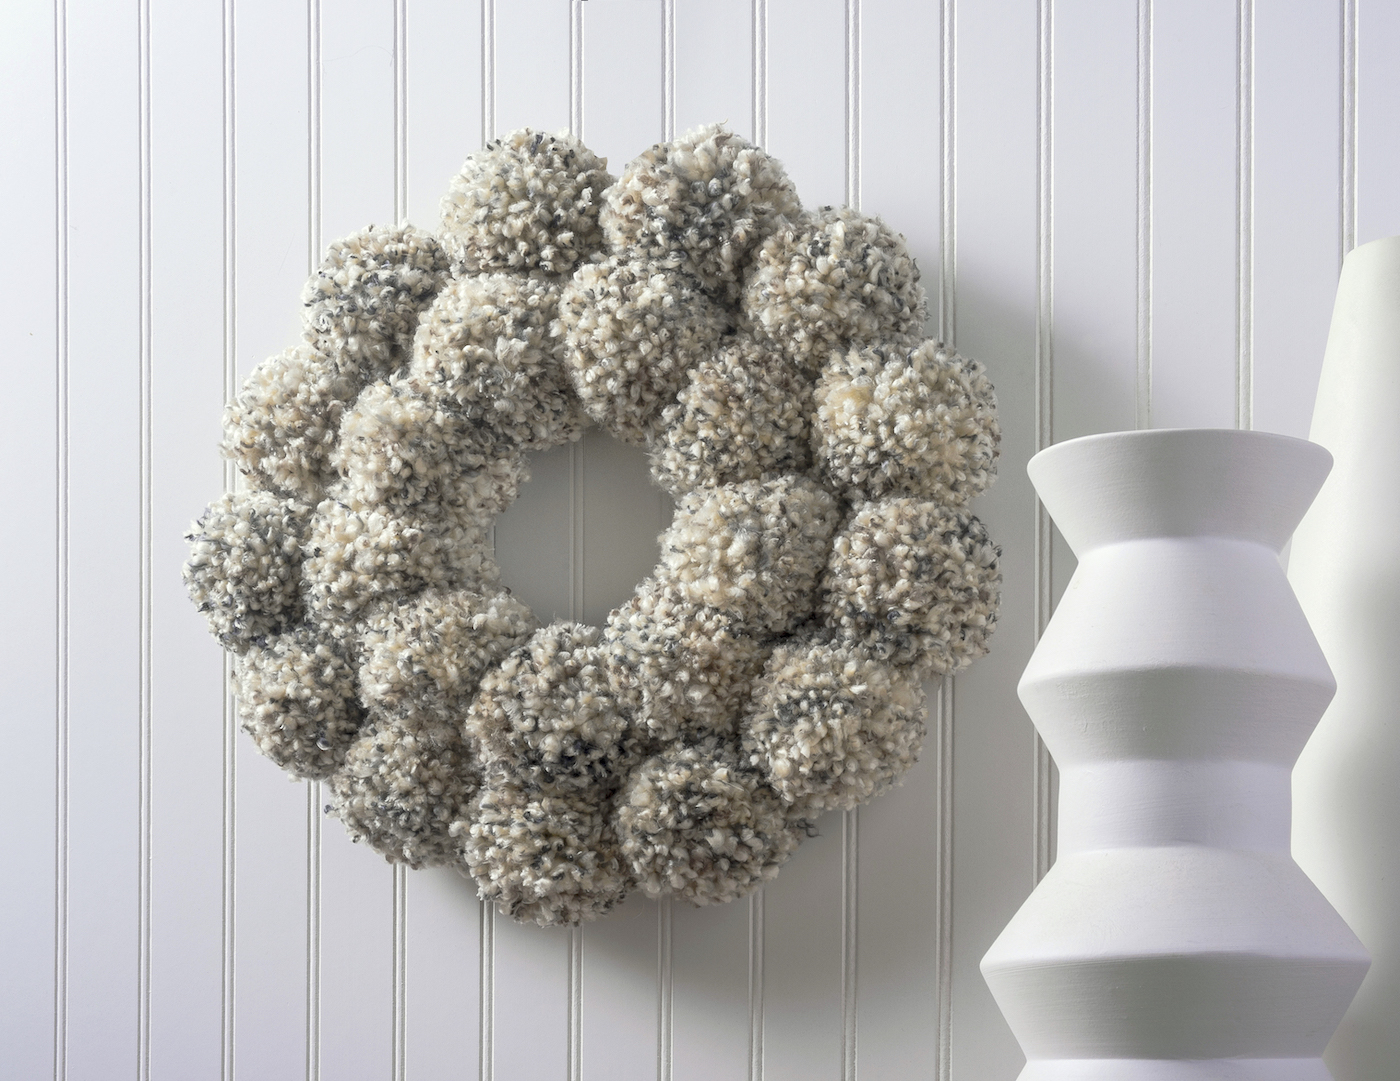
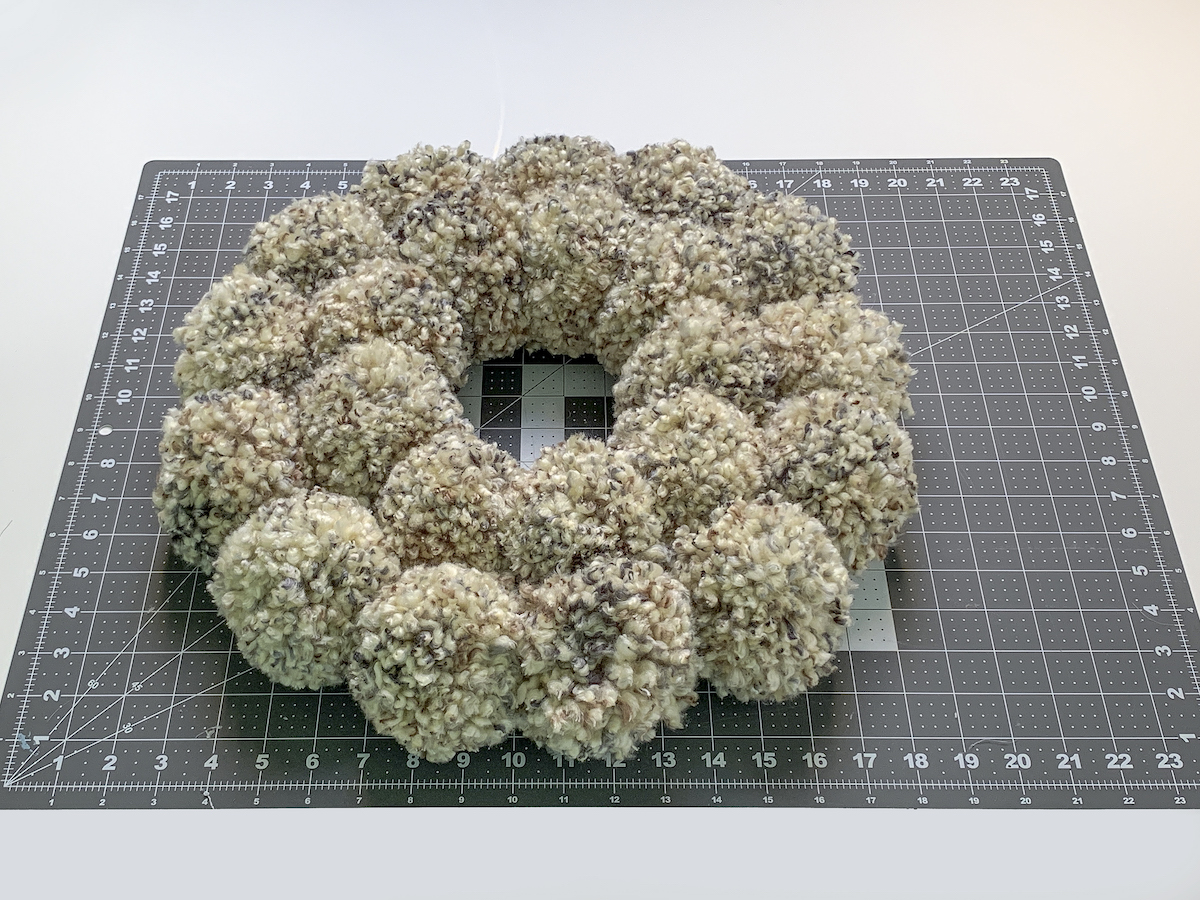
I really, really love the results. This pom pom wreath turned out exactly as I imagined it!
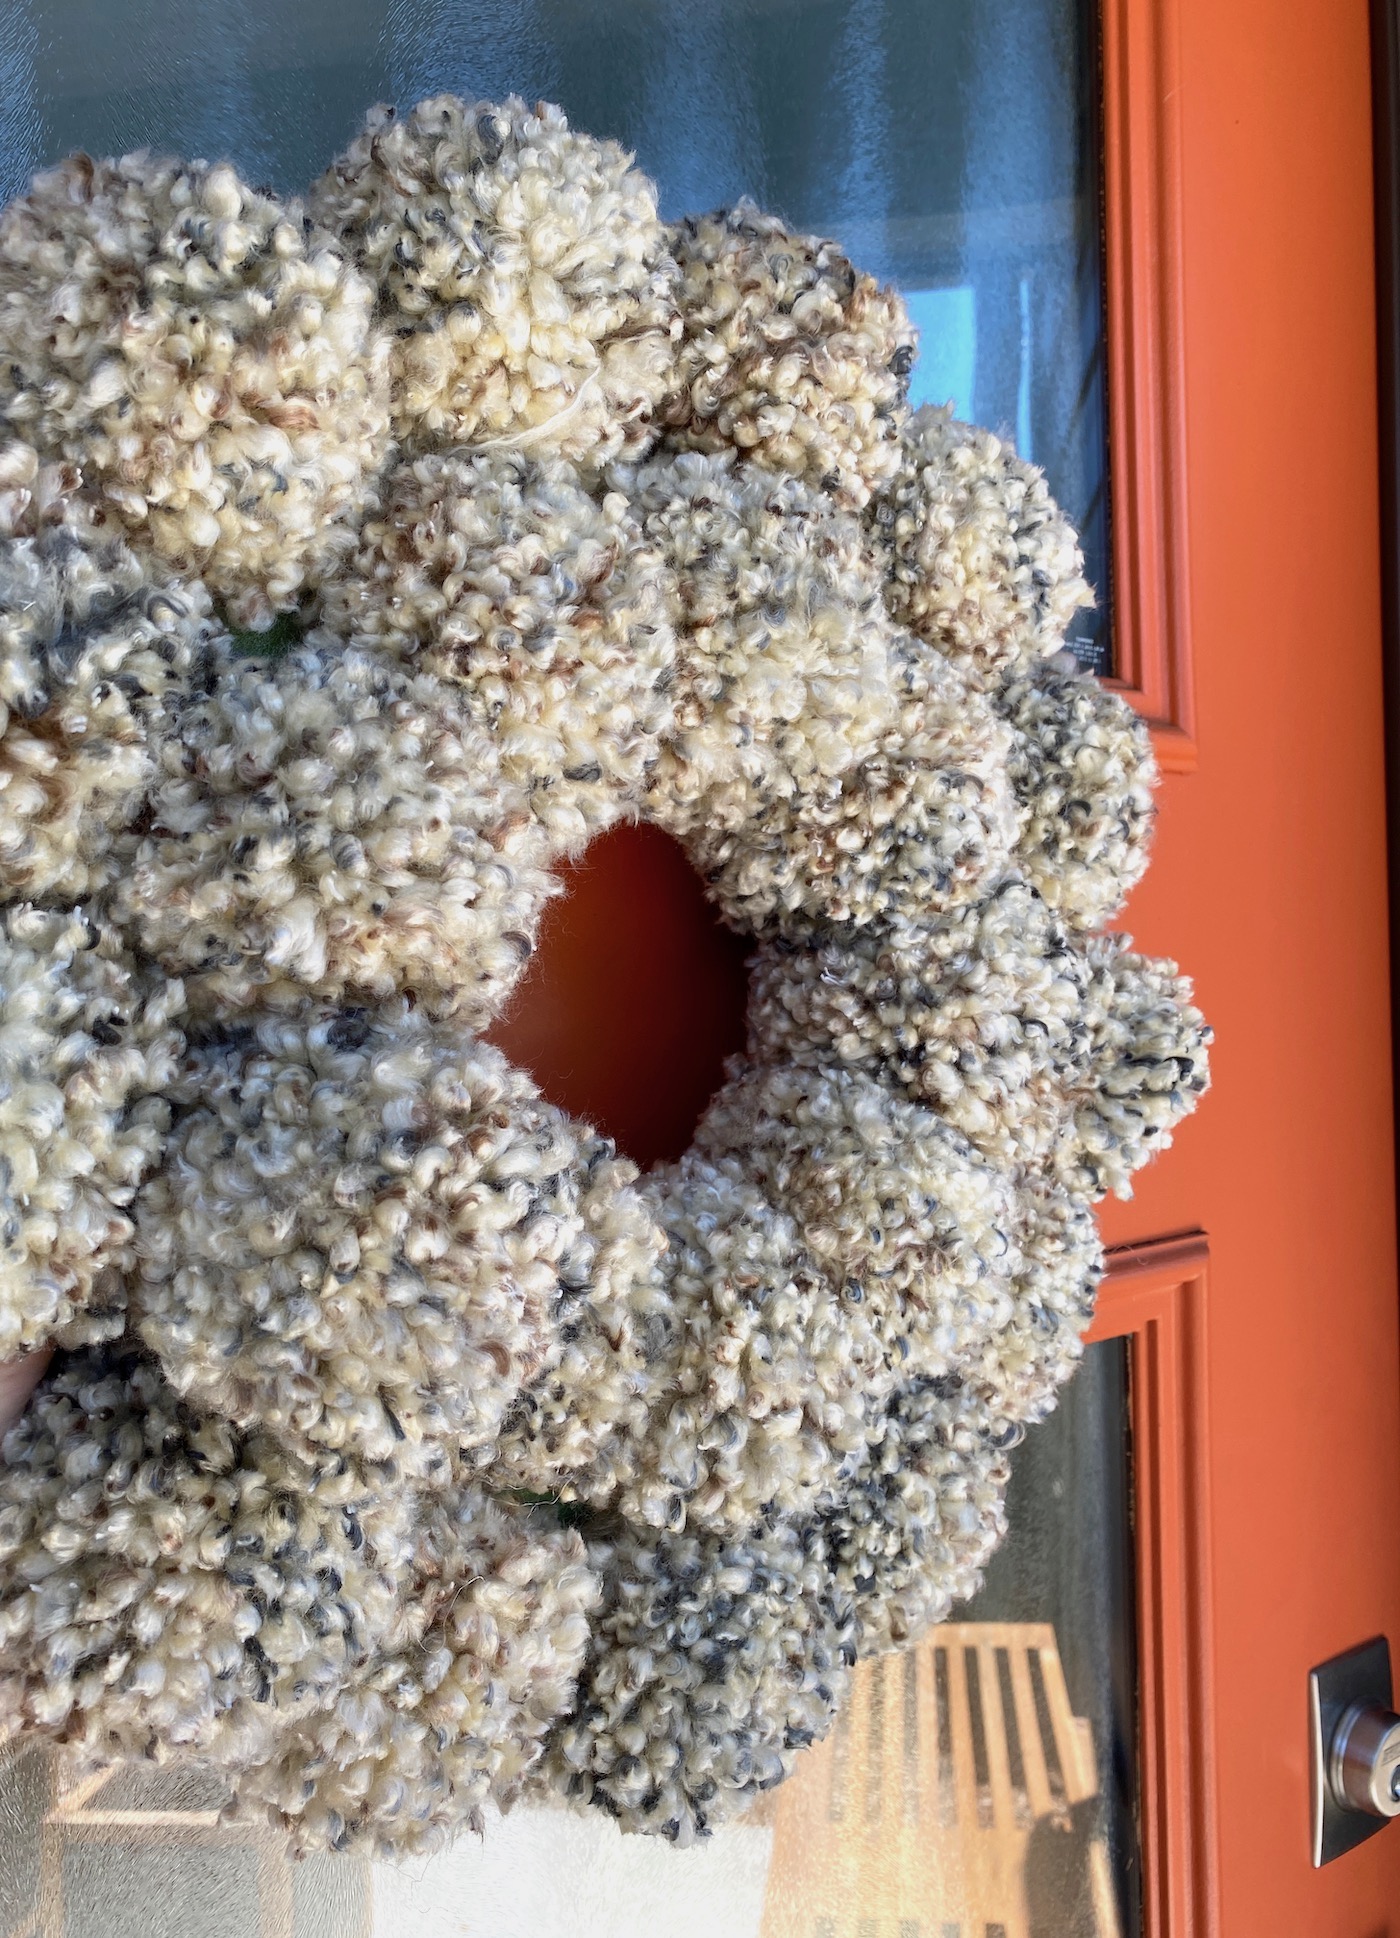
If you have a covered front porch, this bad boy looks awesome on a front door! It’s perfect for winter too, with the soft grays and browns.

Pom Pom Wreath
Materials
- Foam wreath form or a metal wreath frame
- 5-6 skeins Yarn
Video
Instructions
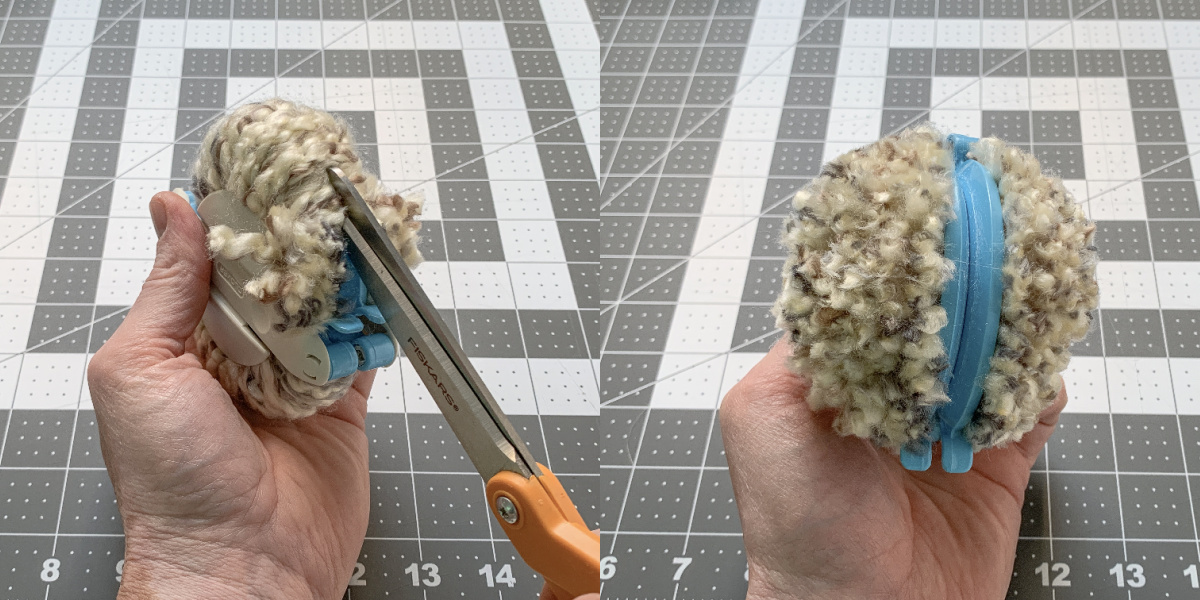
- Pick up the pom pom maker. Open one side of it (both pieces) and begin wrapping the yarn as shown (while holding one end of the yarn). You're going to keep wrapping the yarn until you have completely filled one side of the tool, including filling the "U" shape with yarn.
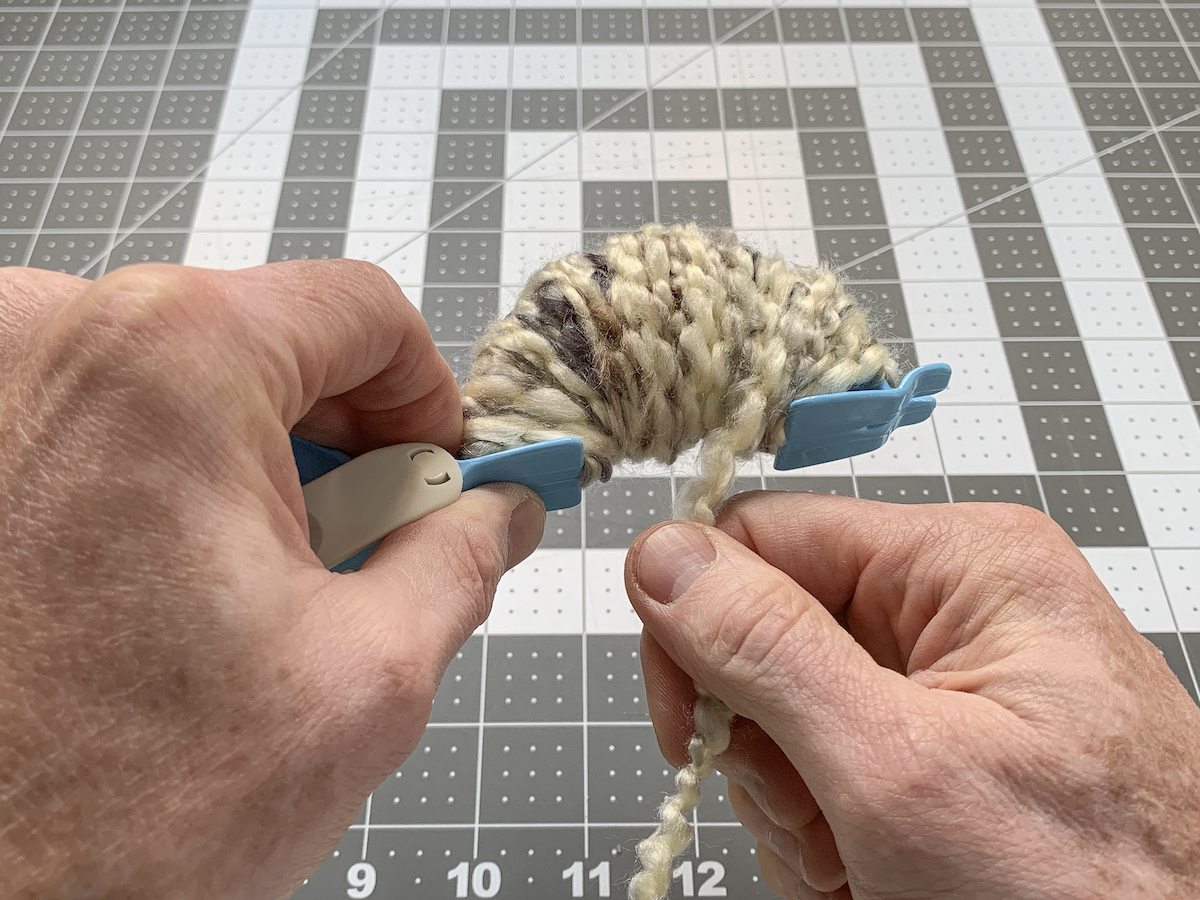
- When you are finished wrapping one side, close it and feed the yarn over to the other side as shown below. You're going to undo the other side of the pom pom maker, and wrap the yarn just as you did. Then you will close the tool.
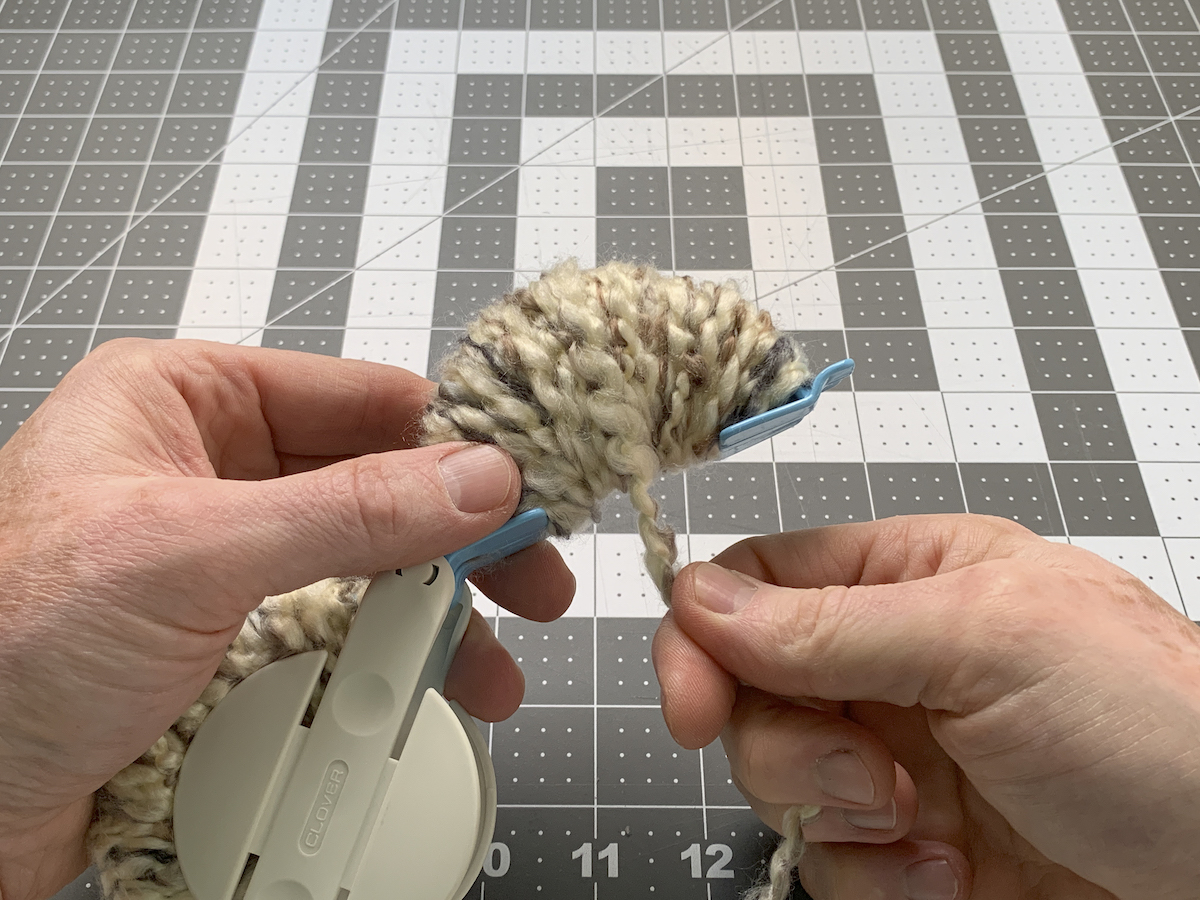
- Use the scissors to cut the yarn on each side of the pom pom maker, while still keeping it closed.
- Cut a piece of yarn about 12", and tie it around the center of the tool tightly. You're going to make a knot by double tying. You want to make sure it's tight enough so that when you remove the pom pom, it doesn't come apart. You don't need to pull so tight that you break the yarn, but you do need to make it snug.
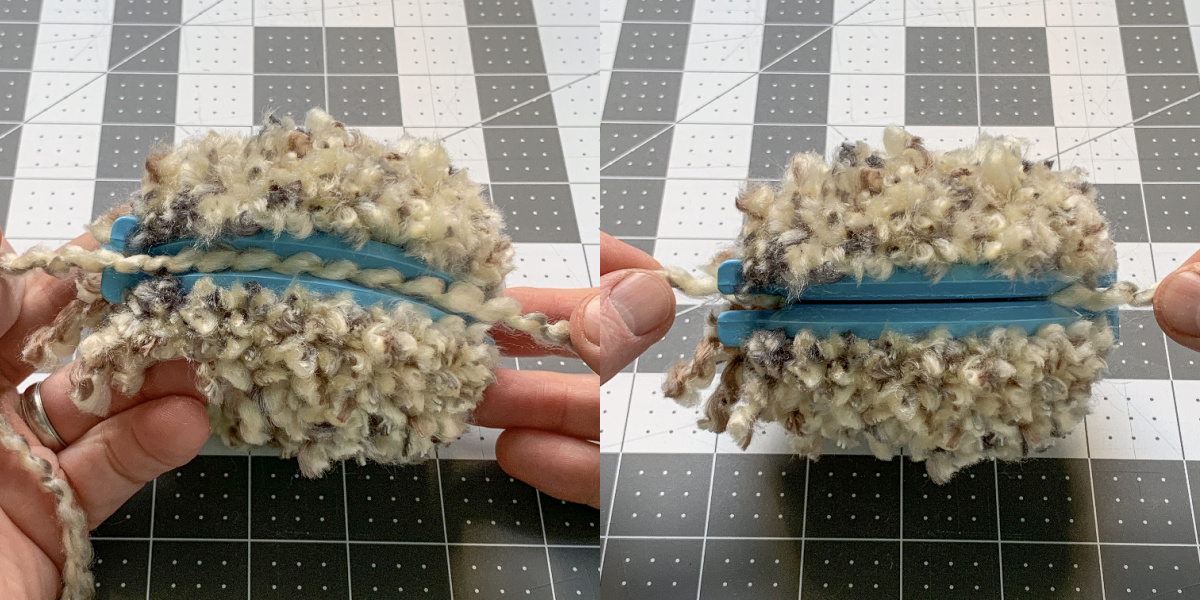
- Open both ends of the tool and pull apart to remove the pom pom.

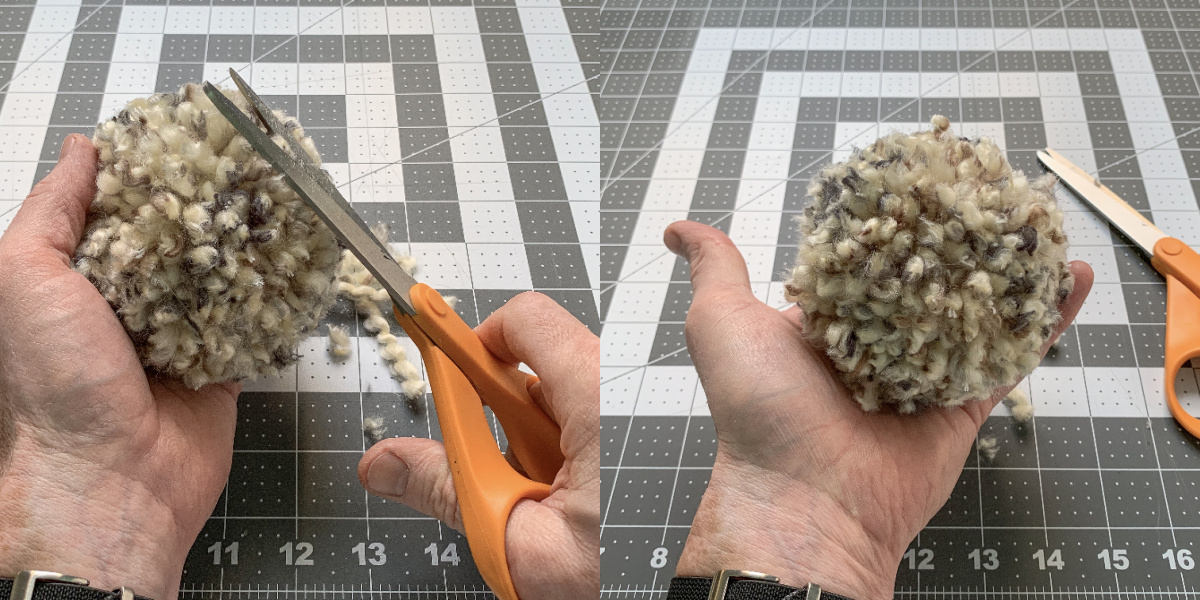
- The pompom will come out very shaggy, so you'll want to trim it up with the scissors, plus the excess yarn from tying.
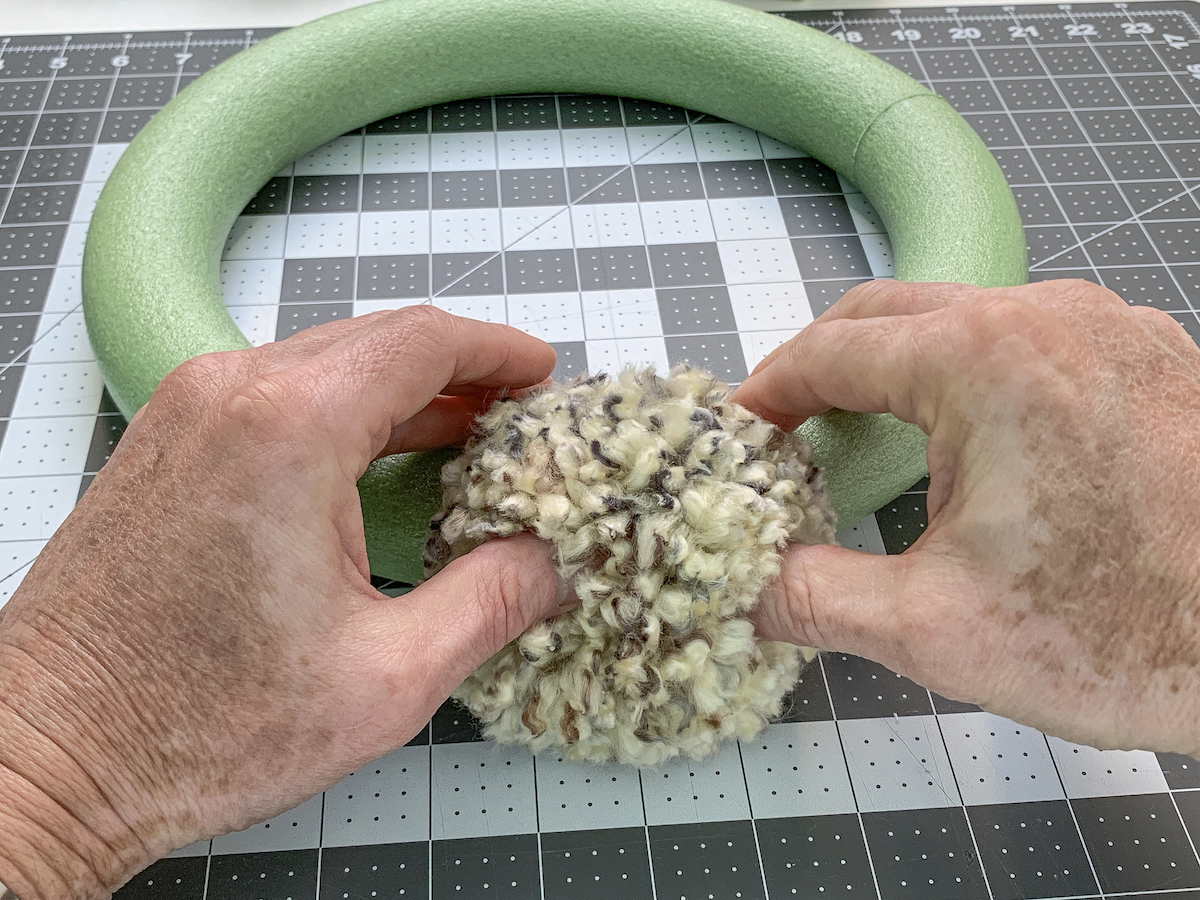
- Spread the yarn out on one pom pom with your fingers and place some glue down on the yarn.
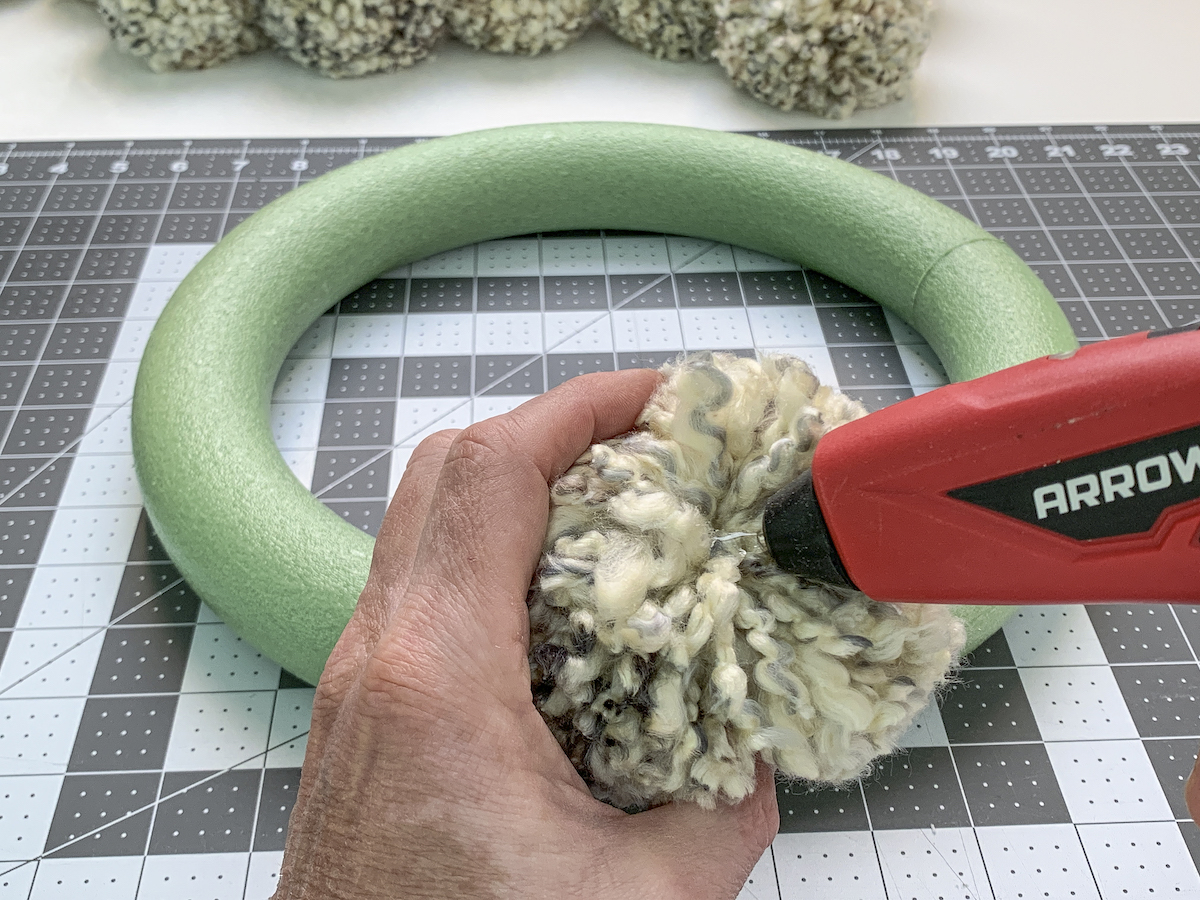
- Press the hot glue portion down onto the wreath form and hold in place until it sets (a few seconds).
- Continue gluing the pompoms around the ring as shown. You're going to glue all the way around the form.
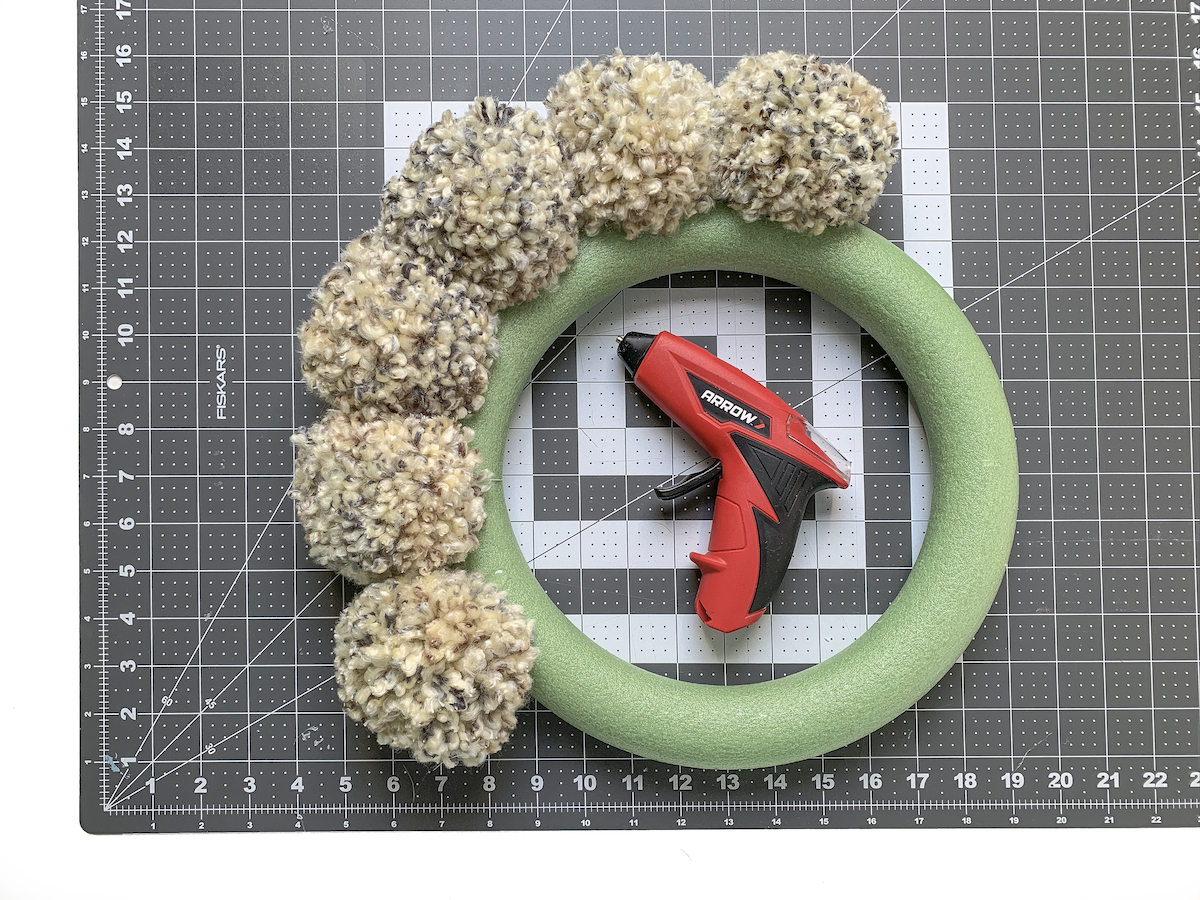
- Continue around the wreath form, doing the outside edge first. Then you're going to do the top. The gluing process is very quick compared to making the poms.
Notes
What do you think of this easy craft project? I’d love to hear in the comments! I’d also love if you’d check out these other DIY wreaths for various themes and holidays:
4th of July Door • 4th of July Fireworks • 4th of July Mesh • Candy Cane Mesh • Christmas Garland • Christmas Mesh • Christmas Pom Pom • Coffee Filter • Easter Mesh • Fall • Felt • Halloween Mesh • Halloween Ornament • Pinecone • Mini Pumpkins • Pool Noodle • Pool Noodle Floral • Ribbon • St. Patrick’s Day Mesh • Valentine Mesh • Wine Cork • Witch Hat