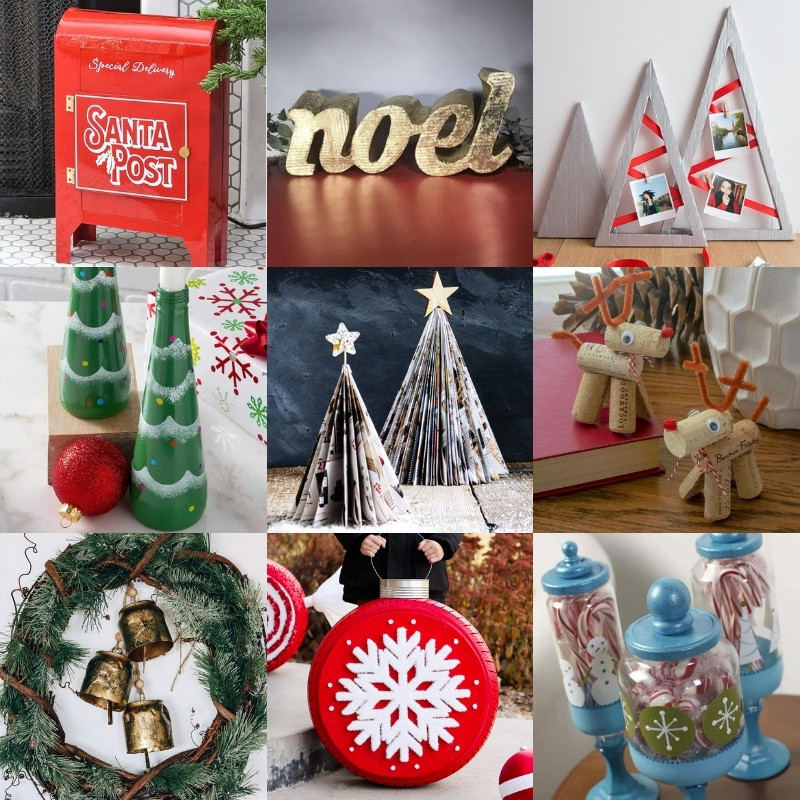
Unique Christmas Centerpiece Made from Bottles
Learn how to make this unique Christmas centerpiece using recycled bottles and Christmas ornaments! So cute and whimsical – like something out of Whoville!
Skills Required: Beginner. You should have prior crafting experience using acrylic paint, more importantly glass paint. It’s not hard but there are several steps.
I’m hosting Christmas this year and I’ll be honest – I’m apprehensive about it. There will be eight people total, and I know there are some out there who cook for that number of people every single day (and if you are one of those people, let me know in the comments).
I’m looking at decorating a table, and I decided to add a little something special: a DIY Christmas centerpiece. I wanted it be glittery because who doesn’t want glitter for the holidays? Normally I don’t use a lot of glitter in my decorating, but Christmas is an exception!
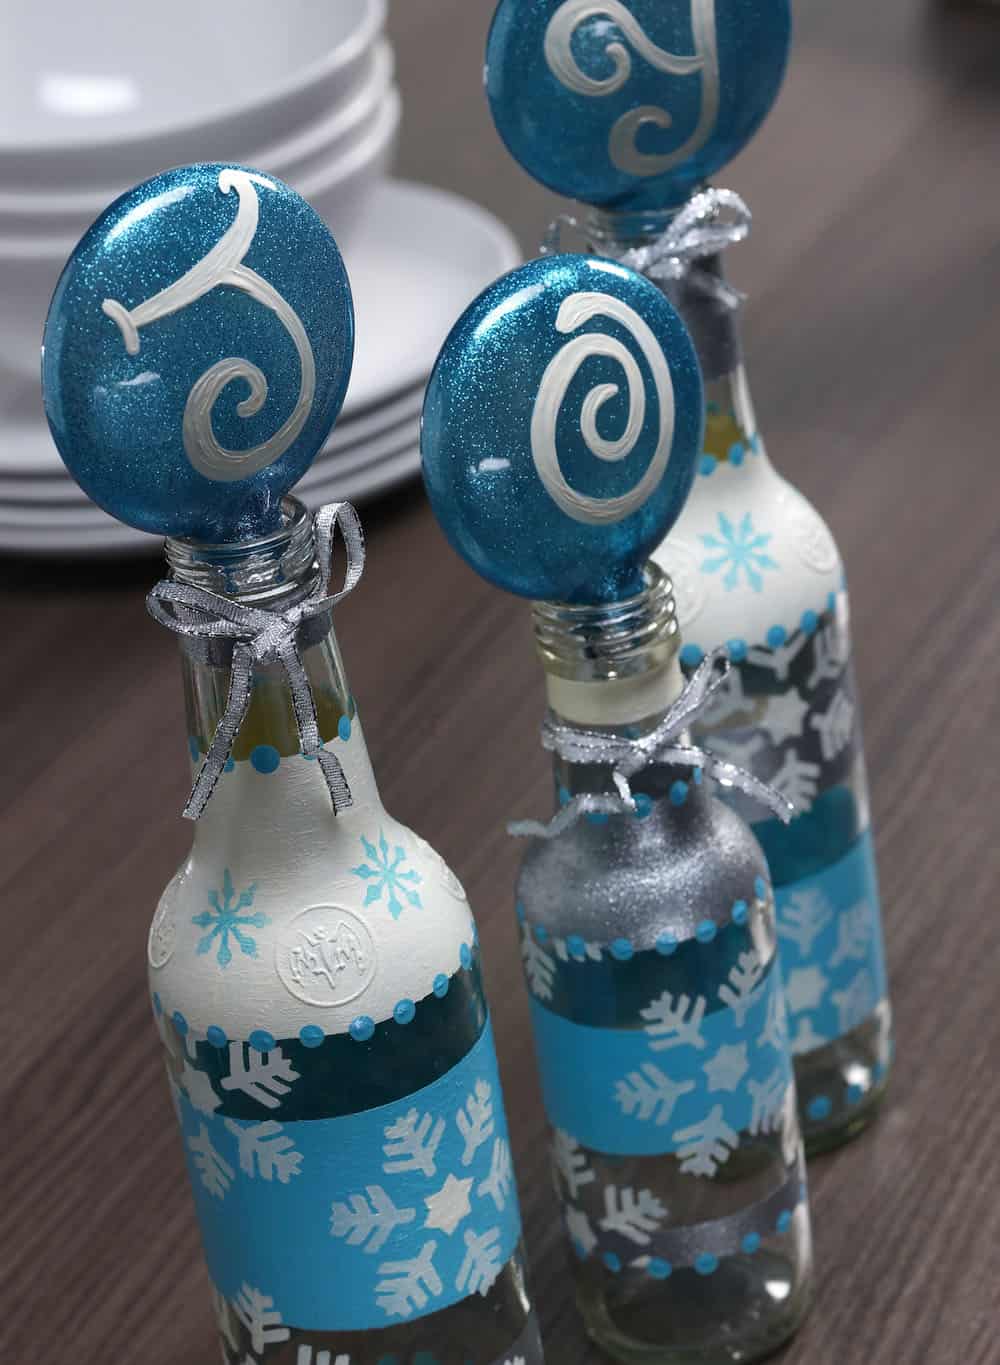
I’ve got a recycled Christmas craft that incorporates glitter along with paint, stencils, and bottles to make a “JOY” centerpiece.
And it’s not just for the table!
You can put this on the mantel or anywhere else you’d like a touch of festive! Not only is it great for Christmas, but depending on the colors you use (blue and silver and white in my case), you can keep it out throughout the winter. Nice, right?
DIY Christmas Centerpiece
You can make this easy craft in five easy steps. You’re going to paint stripes on the bottles, then add stencils on top, then dot on all the bottles with paint. You’re going to then paint the inside of the ornaments with glitter, and then paint letters on the outside.
It looks a bit more complicated than it actually is, and stencil or painter’s tape is going to be your best friend. Learn how to make this budget friendly Christmas craft below!
Gather These Supplies:
- FolkArt Enamels – Calypso Sky, Glitter Silver, Metallic Silver Sterling, Warm White
- FolkArt Extreme Glitter – Turquoise
- Adhesive stencils – winter
- Three repurposed clear glass bottles
- Three clear glass disc ornaments
- 1/4″ dauber
- 5/8″ dauber
- Stencil tape or painter’s tape
- Liner brush
- 1/8′ silver ribbon
- Scissors
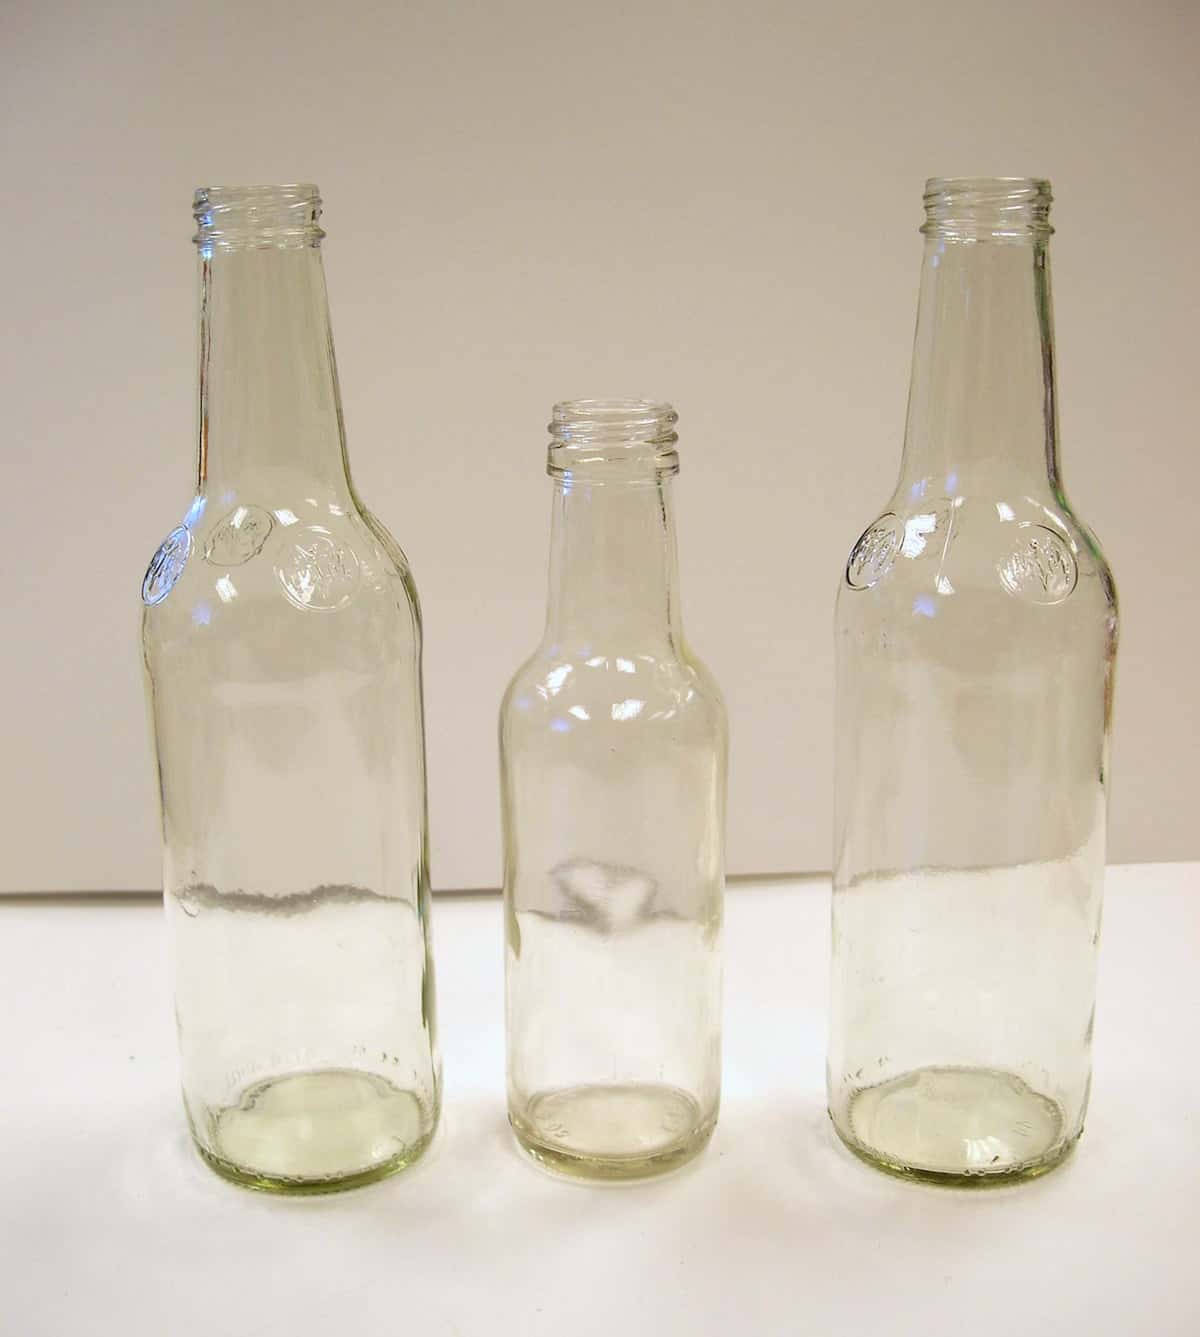
Before you begin, clean the outside of your bottles with mild soap and water or rubbing alcohol. You want to remove any fingerprints so that the paint sticks better to the glass.
You should, if possible, swirl rubbing alcohol around the inside of the ornaments too. This will help the Extreme Glitter stick a bit better. You don’t have to, but I recommend it if possible. Otherwise you might have to do some touch up!
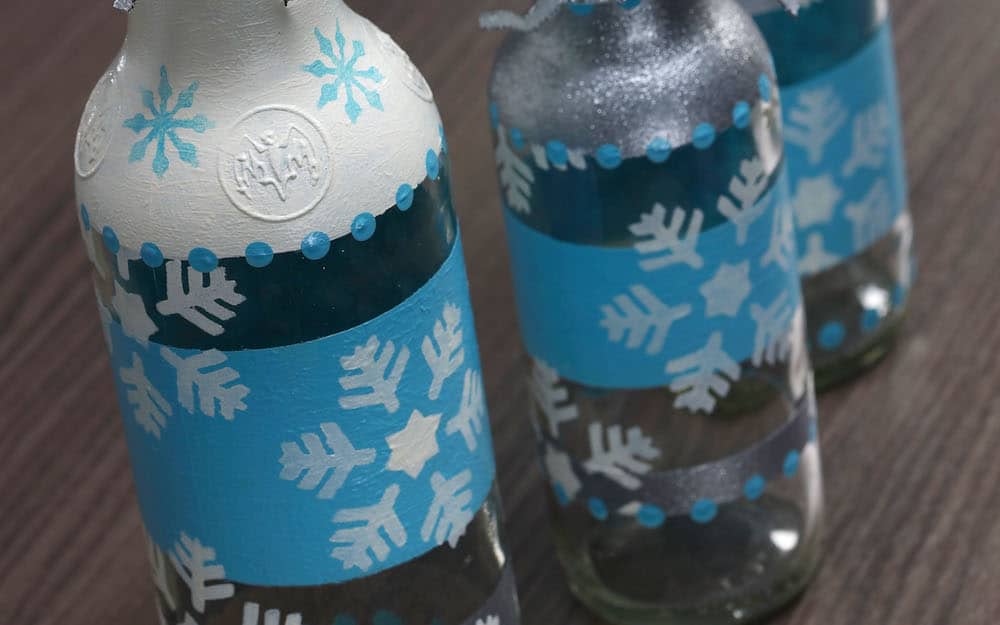
Paint the Bottles
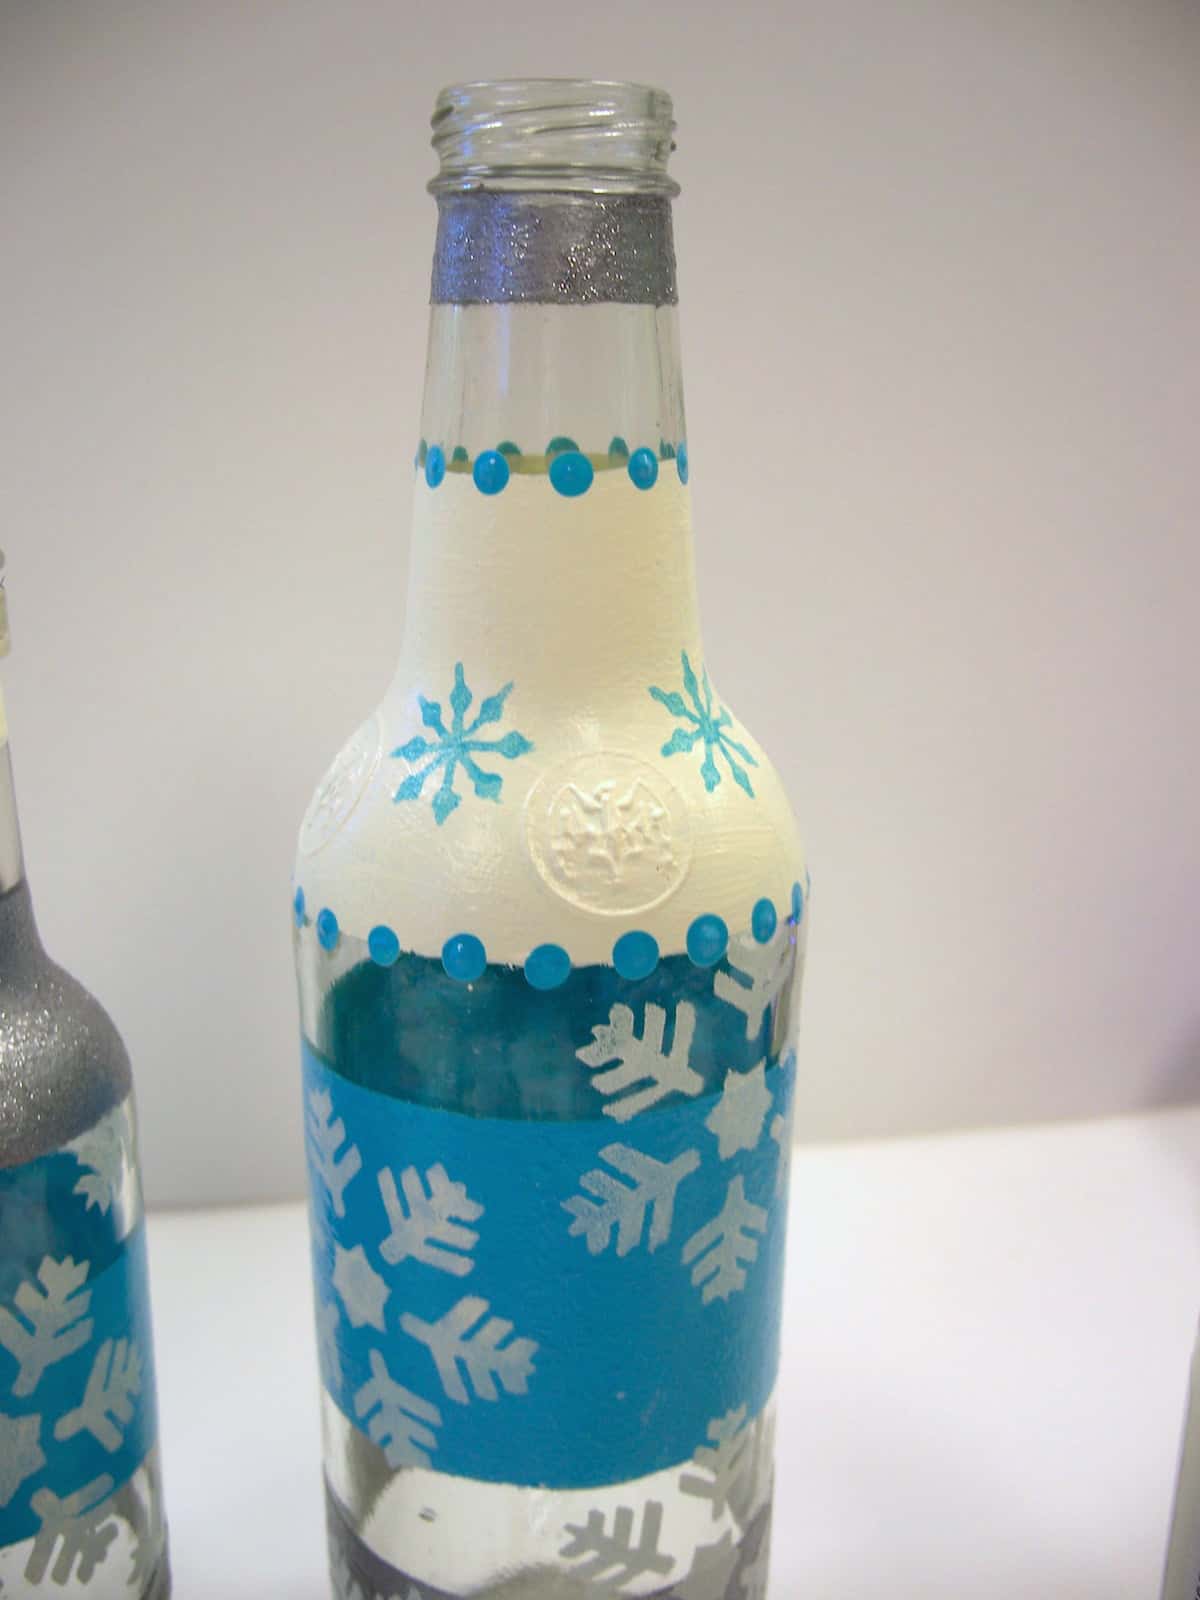
Start with plain glass bottles. These have been used, washed, and dried.
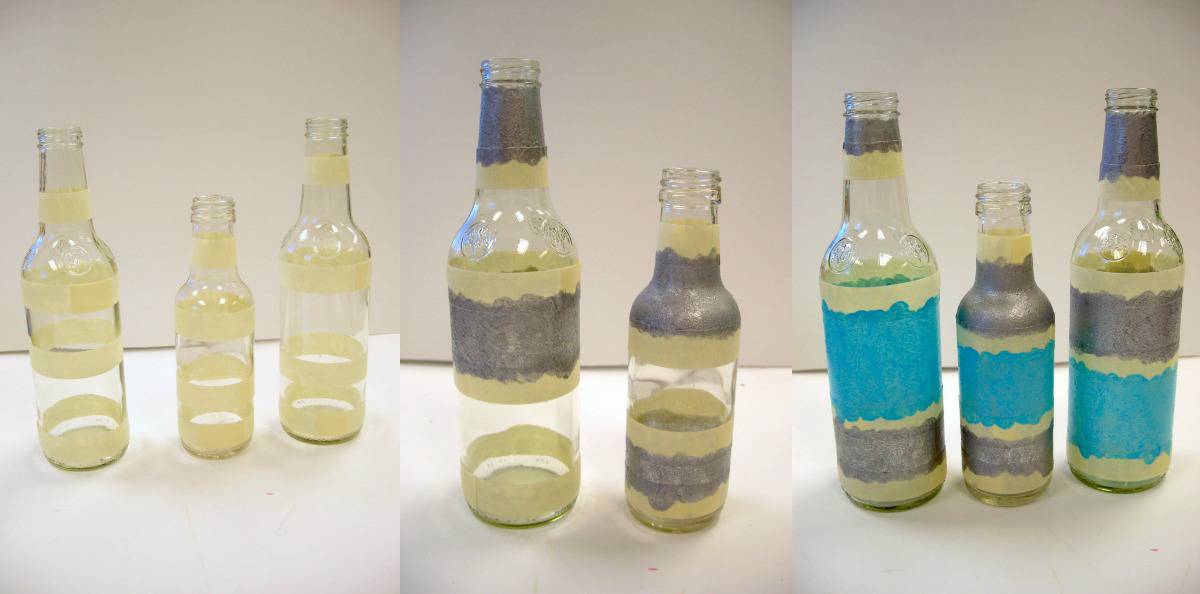
Tape off the bottles with masking tape to make random stripes. Using the 5/8″ dauber, paint the stripes with Silver Sterling. You’ll also paint Calypso Sky stripes and Warm White near the top.
Once you’re done painting, remove the tape immediately and let the paint dry. Paint the Silver Glitter Enamel paint over the top of the Silver Sterling paint and let dry.
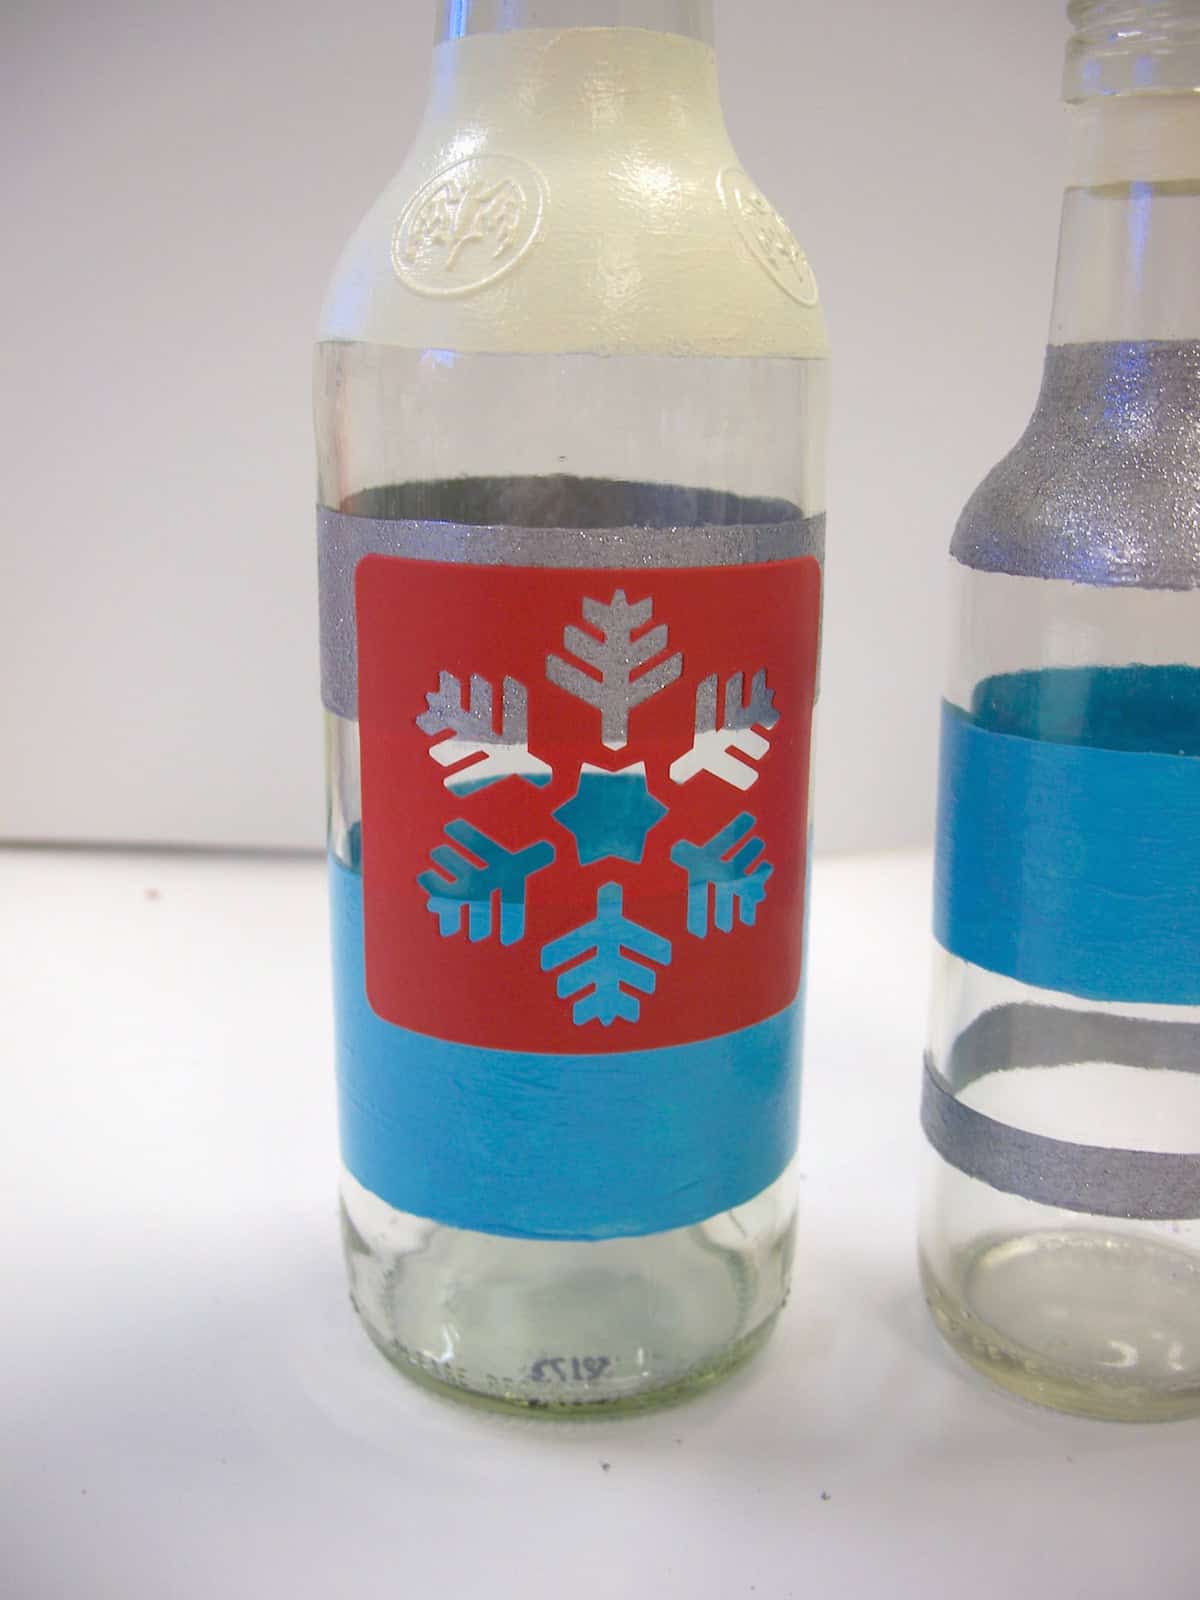
Stencil the Bottles
Add a snowflake adhesive stencil and stencil in Warm White using the 1/4″ dauber. Stencil small snowflakes with Calypso Sky.
Paint the Polka Dots
The next part is pretty fun! Add dots on the bottles as shown using Calypso Sky with the end of a paint brush. I love making polka dots! Let the bottles dry completely while moving onto the next step.
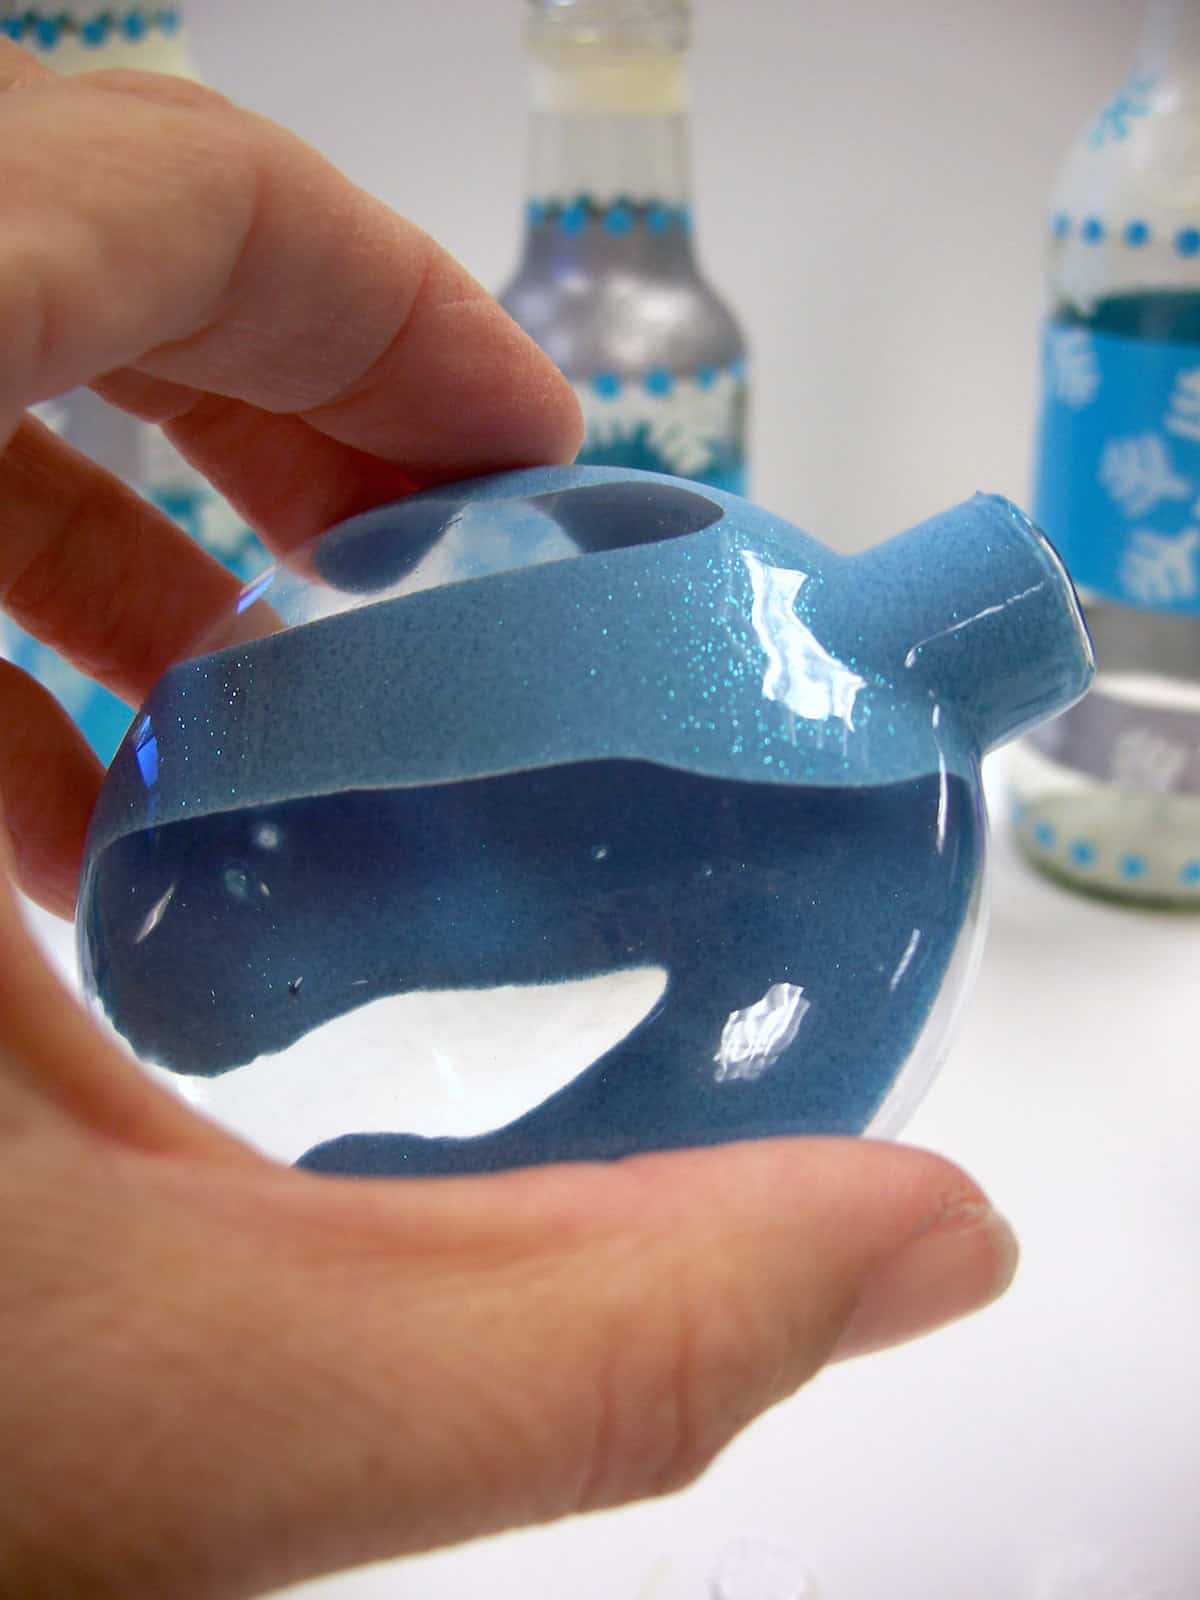
Coat the Inside of the Ornaments
These ornaments are going to be the “pièce de résistance” of your DIY Christmas centerpiece! They top off the bottles.
Fill the ornament with the Extreme Glitter. Shake until the inside of ornament is covered. Add more if needed.
Repeat with two other ornaments and then set all of them upside down to allow the excess paint to drain out. They will dry to a beautiful sparkle!
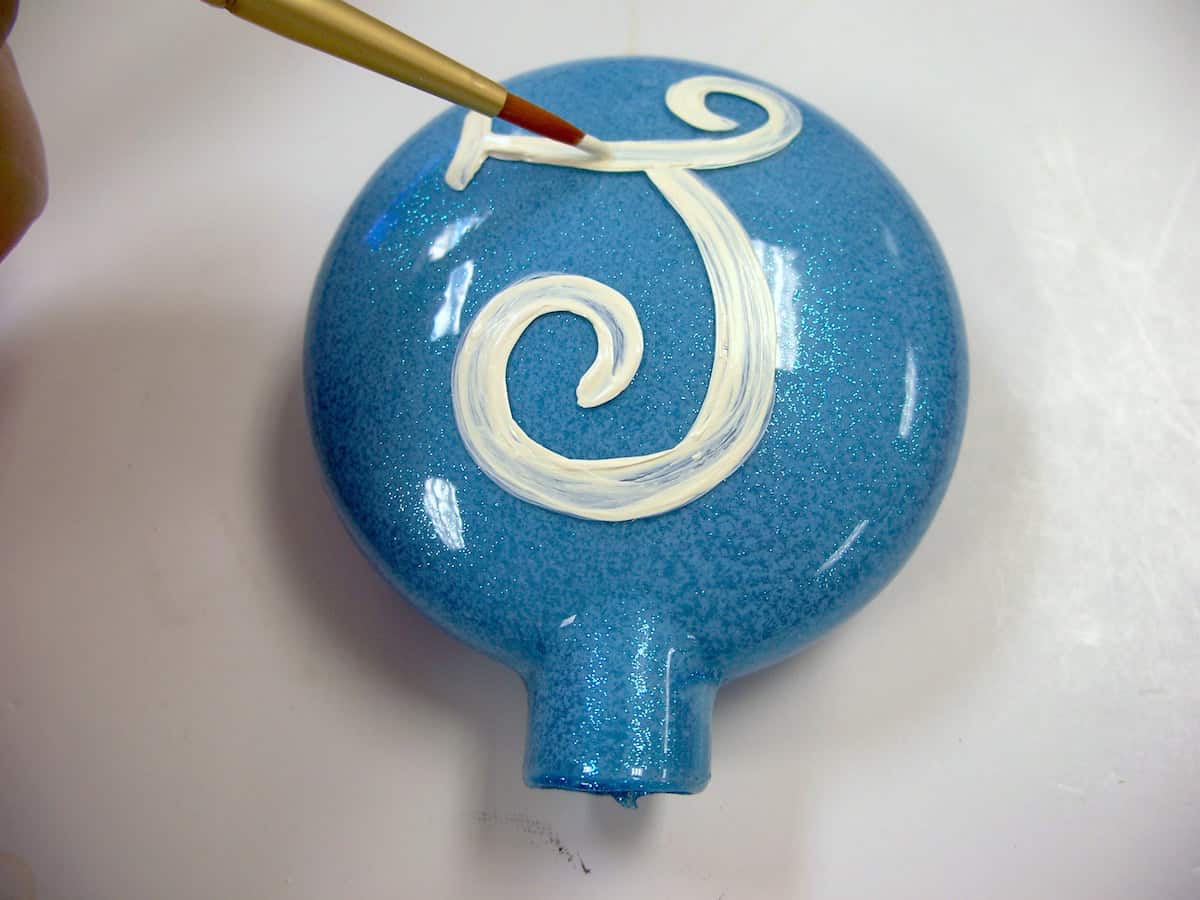
Paint the Letters on the Ornaments
Paint “JOY” on ornaments in warm white upside down, using the liner brush.
A little secret about Enamel paint – until it’s dry, you can wash it off and start over. Because you might mess up? You can also scrape paint off with a razor or craft knife. Not that I’m speaking from experience . . .
To finish, place the ornaments upside down in the bottles and then tie a 1/8″ silver ribbon to the top of bottles.
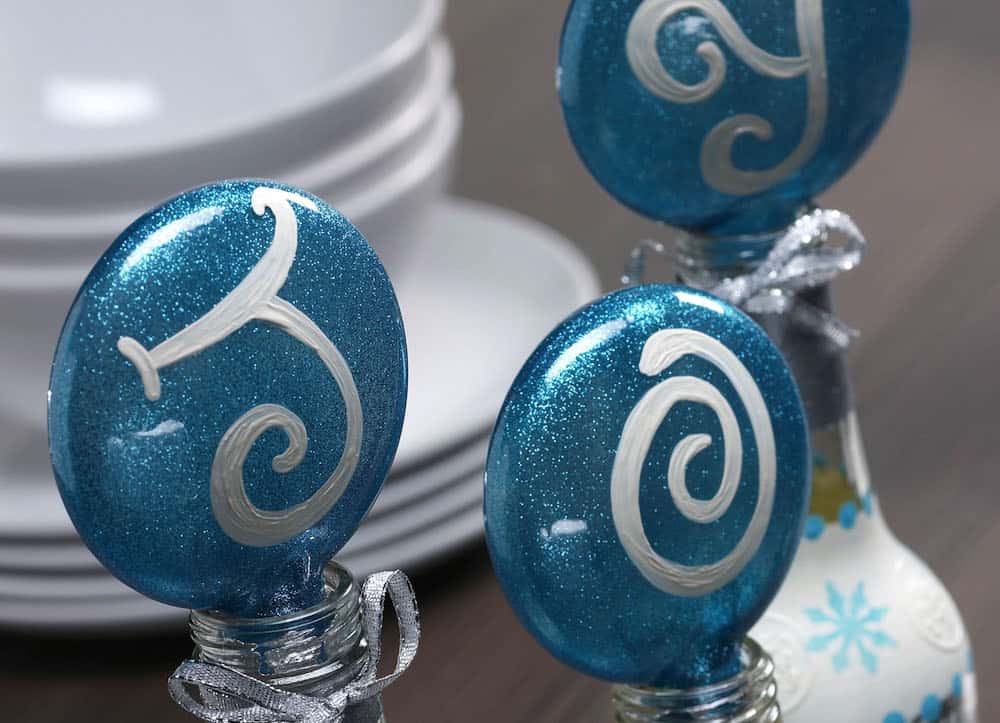
You can also add small silver ribbon around the lips of the bottles. It’s just another cute touch.
Your DIY Christmas centerpiece is complete, and guess what – it’s super cute!
I love the pretty blue, white, and silver result – and as I said, I can keep it up the entire winter. Booyah!
What do you think about this DIY Christmas centerpiece? Let me know in the comments! I’d also love for you to check out the following craft ideas: