Thanksgiving Gnomes Make Cute Holiday Decor
Learn how to make Thanksgiving gnomes to accent your holiday decor! These are such an easy autumn project – great for kids or adults.
Skills Required: Beginner. Even if you’ve never crafted before, you can easily make a gnome using a paper cone. You’ll be doing some cutting (using templates), painting, and attaching things using adhesive.

Poor Thanksgiving. Sandwiched in-between Halloween and Christmas, it hardly ever gets the attention it deserves.
And this year? I’ve noticed that people are bringing out their Christmas decor earlier than ever! No judgements here, but I just don’t think I’m ready to give up my fall decorations. After all . . . I do love me some brown and orange.
What I’m saying is I want to keep the harvest mood going just a bit longer.
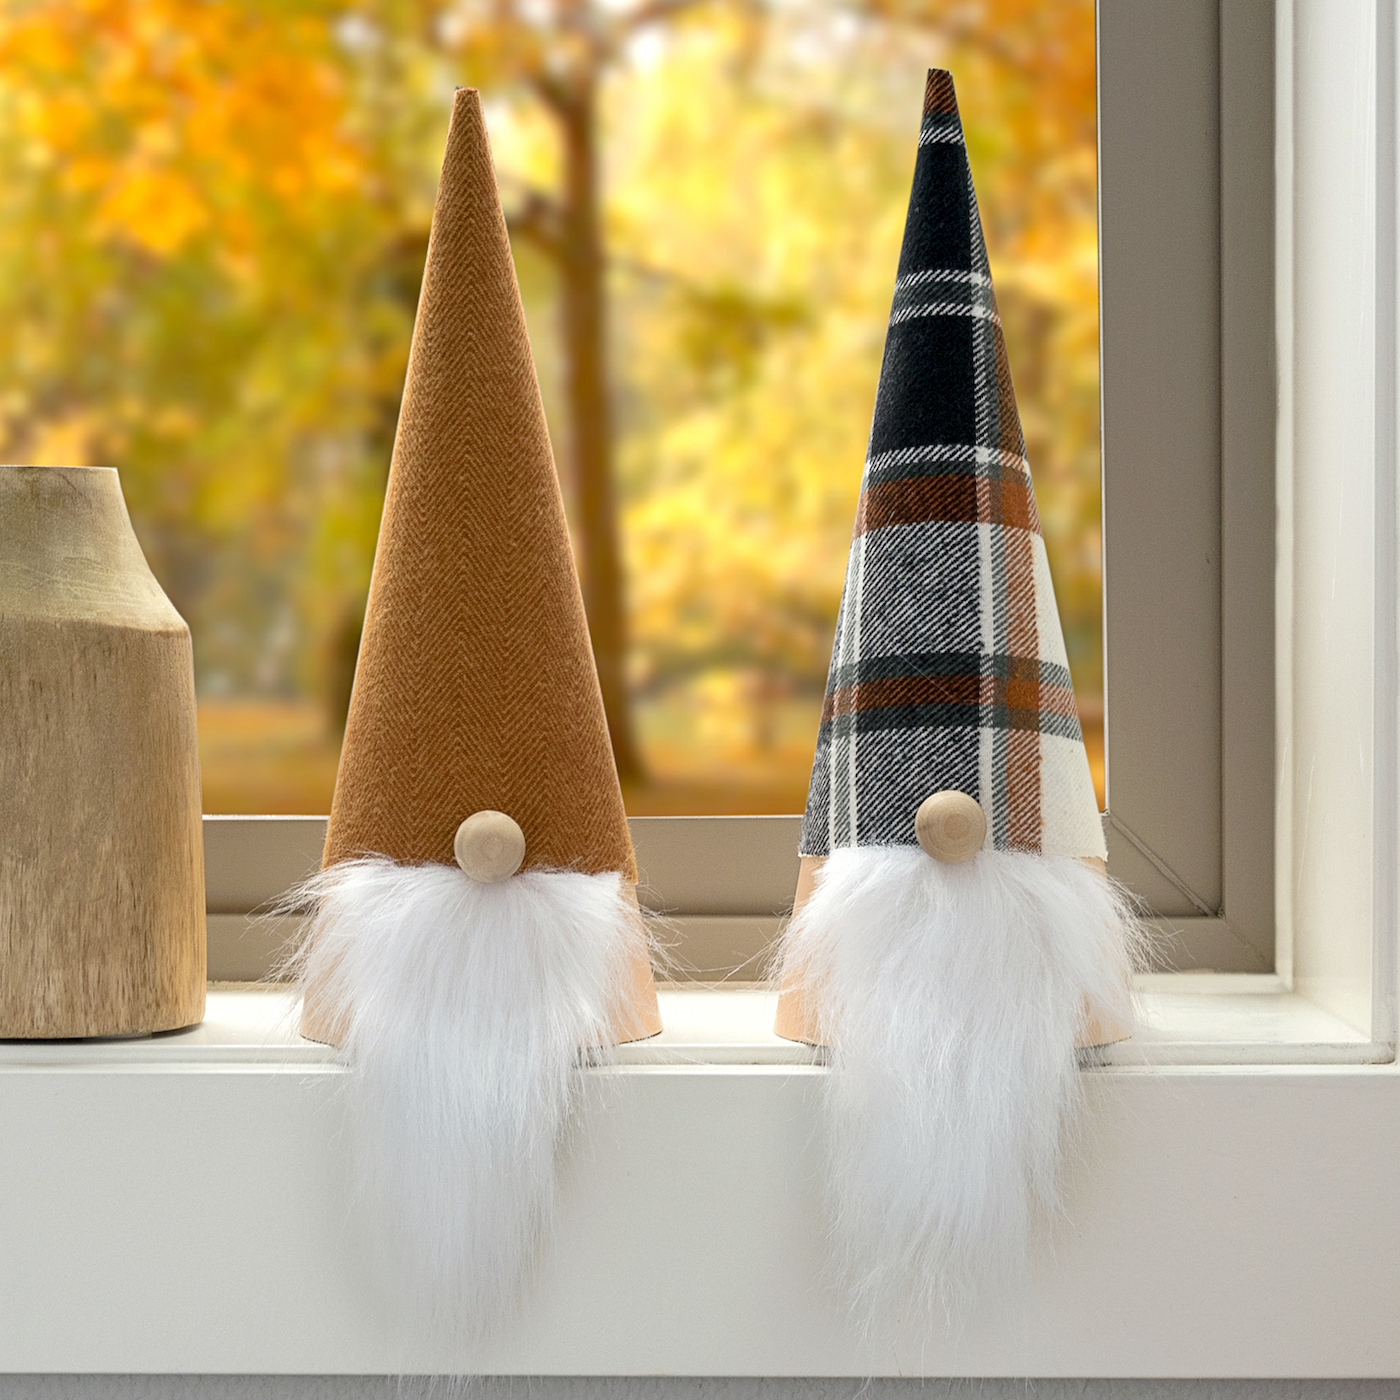
I made some fall gnomes, and I love them, but I wanted to make some gnomes specifically for Thanksgiving, so that’s what I’m showing you here today.
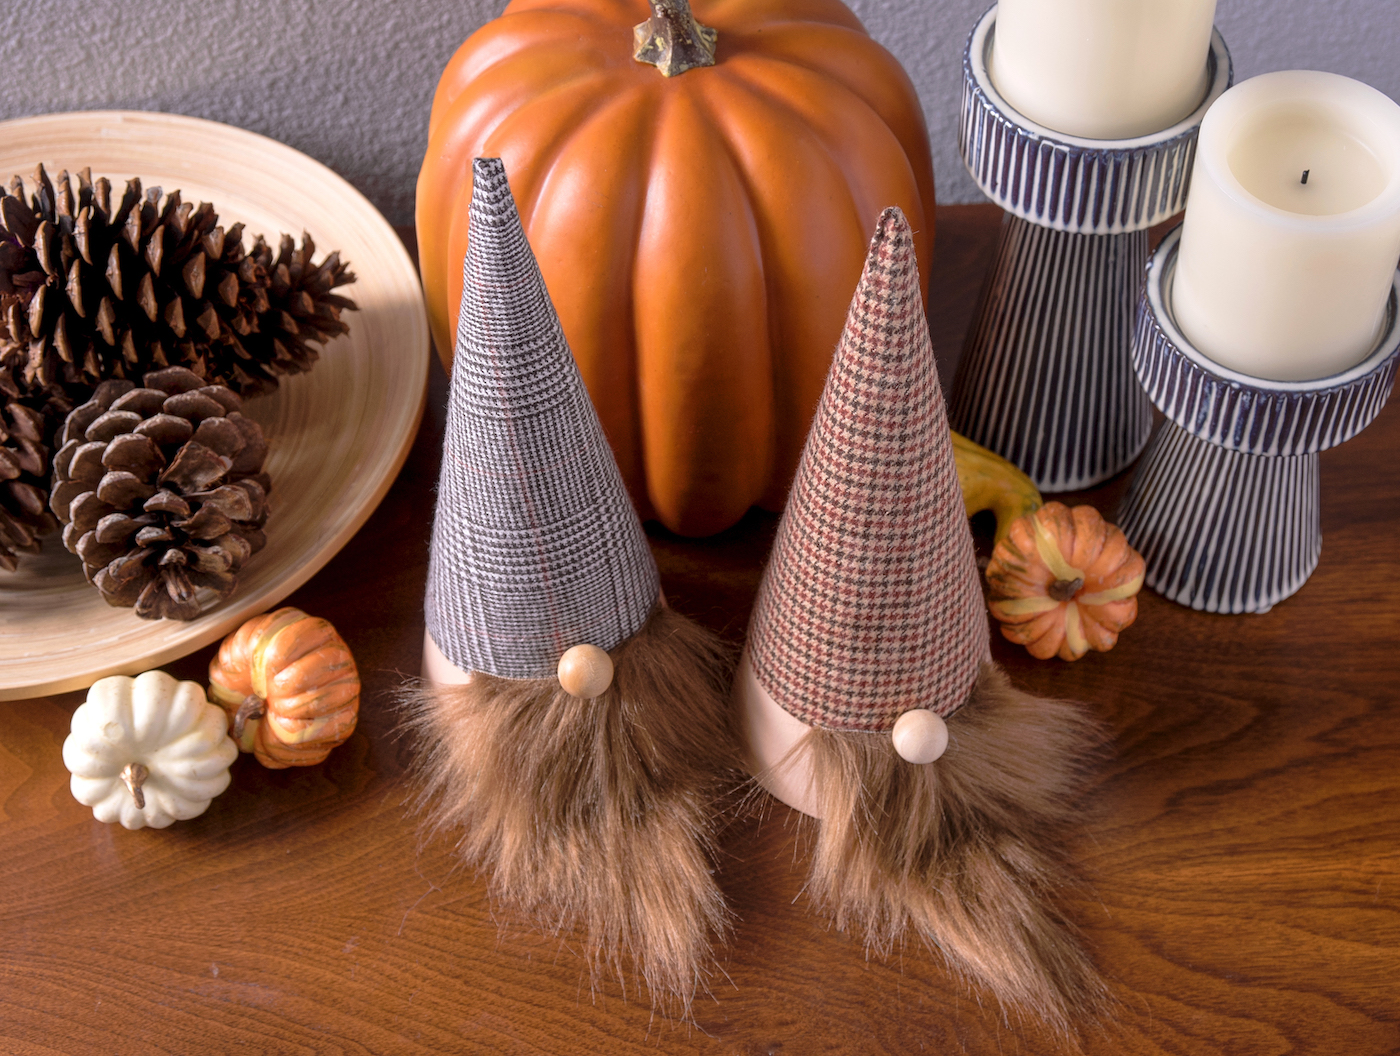
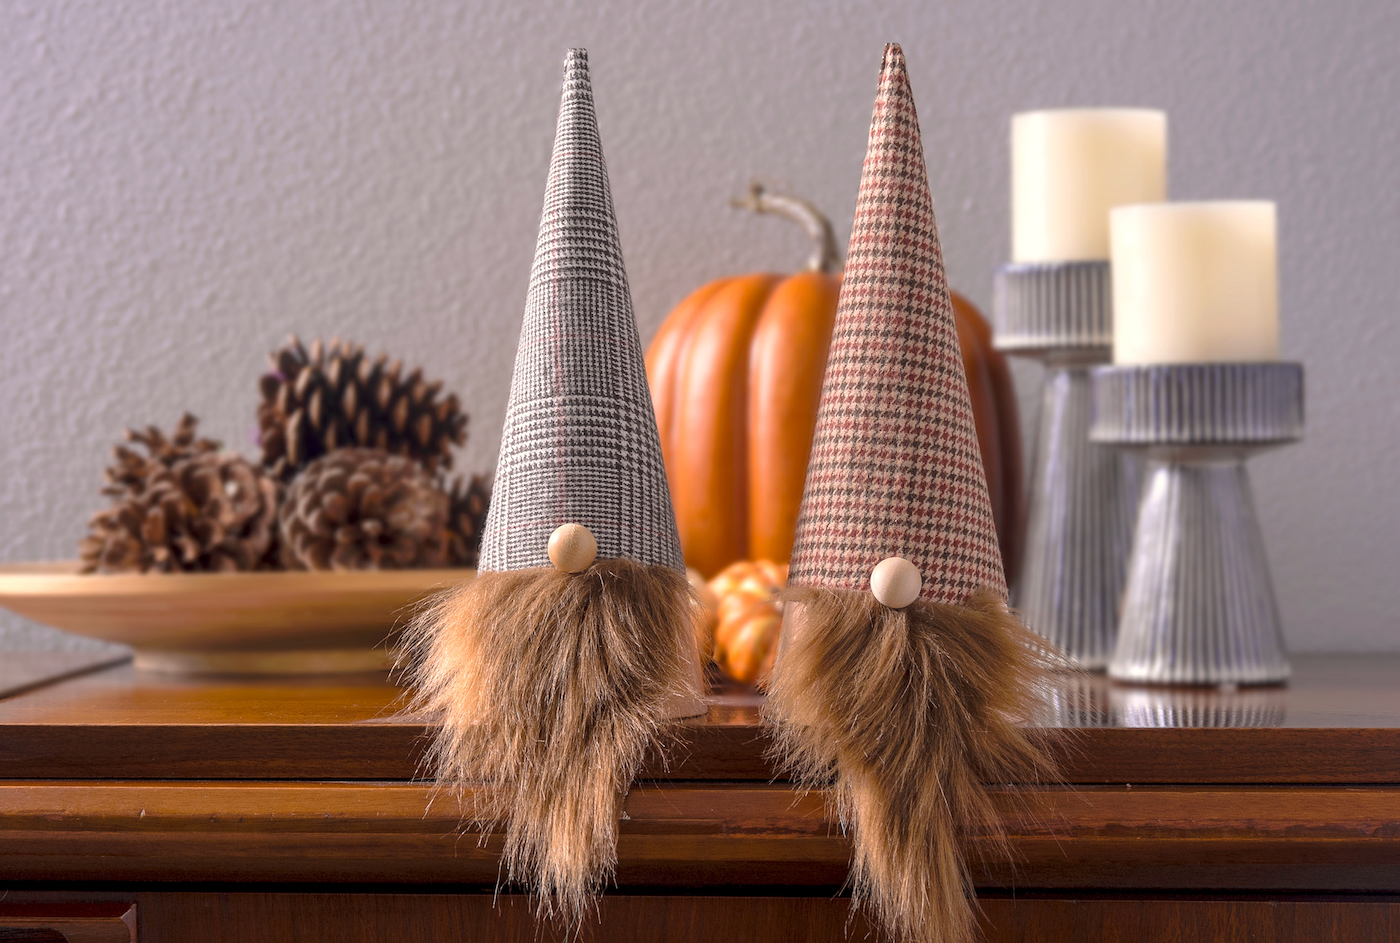
These cuties transition from the standard white beard to the brown, and I picked herringbone fabrics for the hats that remind me of November. I’m not sure how fabric can remind me of November, but can you disagree with me?
These stay out on my mantel or side table until the Christmas gnomes come out to play for the year. If you’ve never made them before . . you’re going to be shocked at how easy they are! No, really.
Cones to Use
The paper mache cones for my base can be found here. They are 10.63 x 4″. The template I made works for this size cone, but I’m sure you can alter it easily for other sizes.
I prefer the look of the paper mache, but you can also use foam cones. To be honest, they are a little bit cheaper and more readily available. I’m just a paper mache girl for whatever reason (and you can stack them).
Gather These Supplies
- Paper mache cones – 2
- Cone template
- Beard template
- Wood beads – 2 (5/8″)
- Acrylic paint – skin tone of your choice
- Flannel fabric – enough to cover the cone
- Faux fur pieces
- Paper to print template
- Paintbrushes
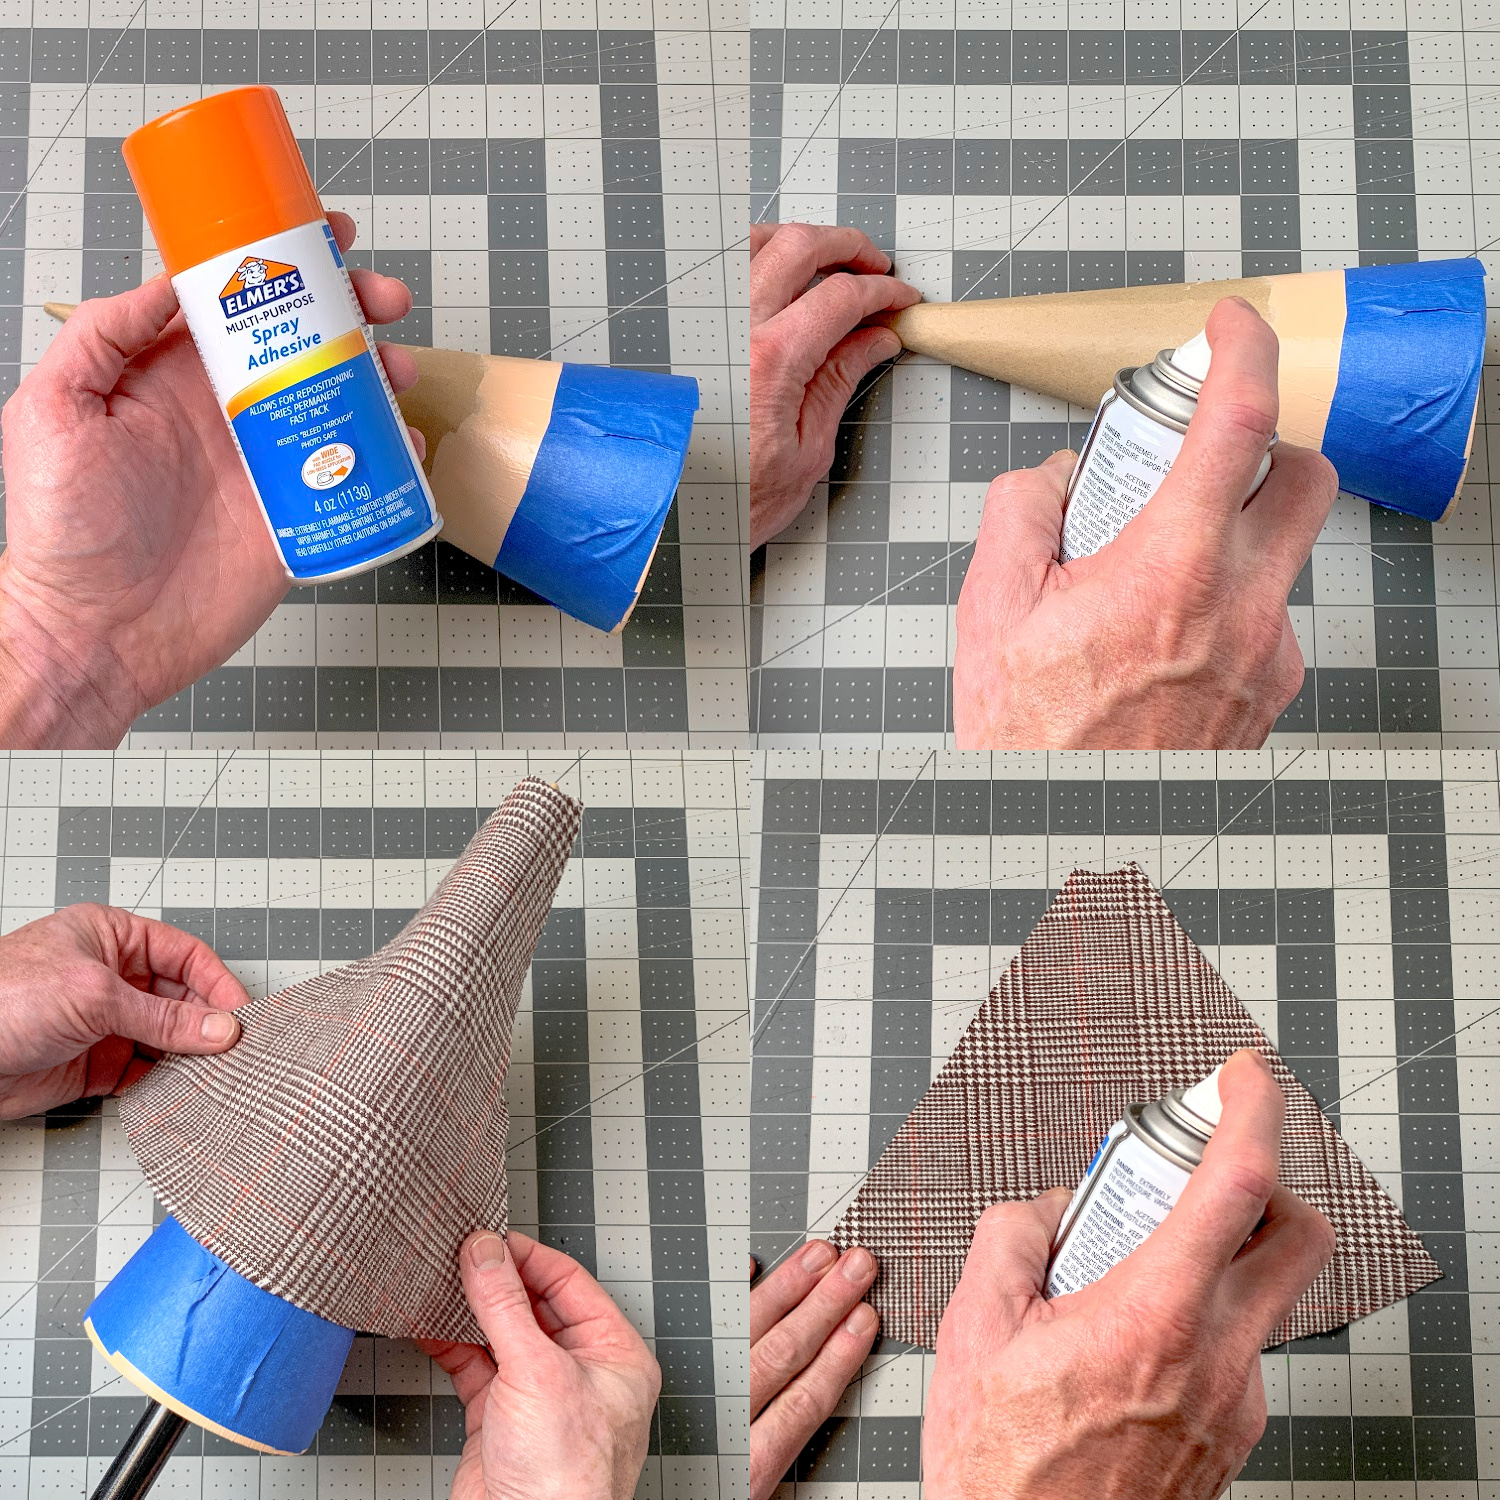
- Spray adhesive
- Sharpie or pen
- Painter’s tape
- Sandpaper
- Scissors
- Hot glue gun
Make as many gnome as you like! Pick fun fabrics, and even add fun embellishments if you like. If you want to add a leaf or turkey leg embellishment on the hat anywhere, you can. Here’s how mine turned out.
Get the printable how to card below:

Thanksgiving Gnomes
Equipment
- Sharpie or pen
- Sandpaper
Materials
- 2 Paper mache cones 10.63 x 4 in
- Cone template
- Beard template
- 2 Wood beads
- Acrylic paint skin tone of your choice
- Flannel fabric enough to cover the cone
- Faux fur pieces
- Paper to print template
- Spray adhesive
- Painter’s tape
Video
Instructions
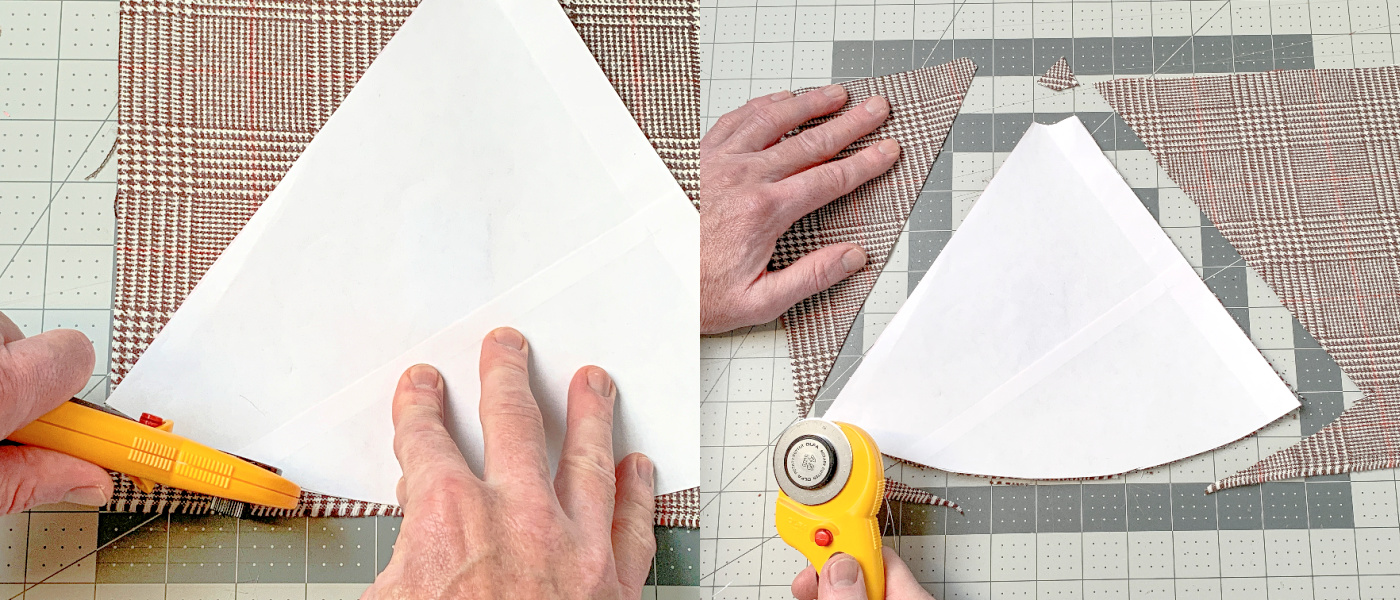
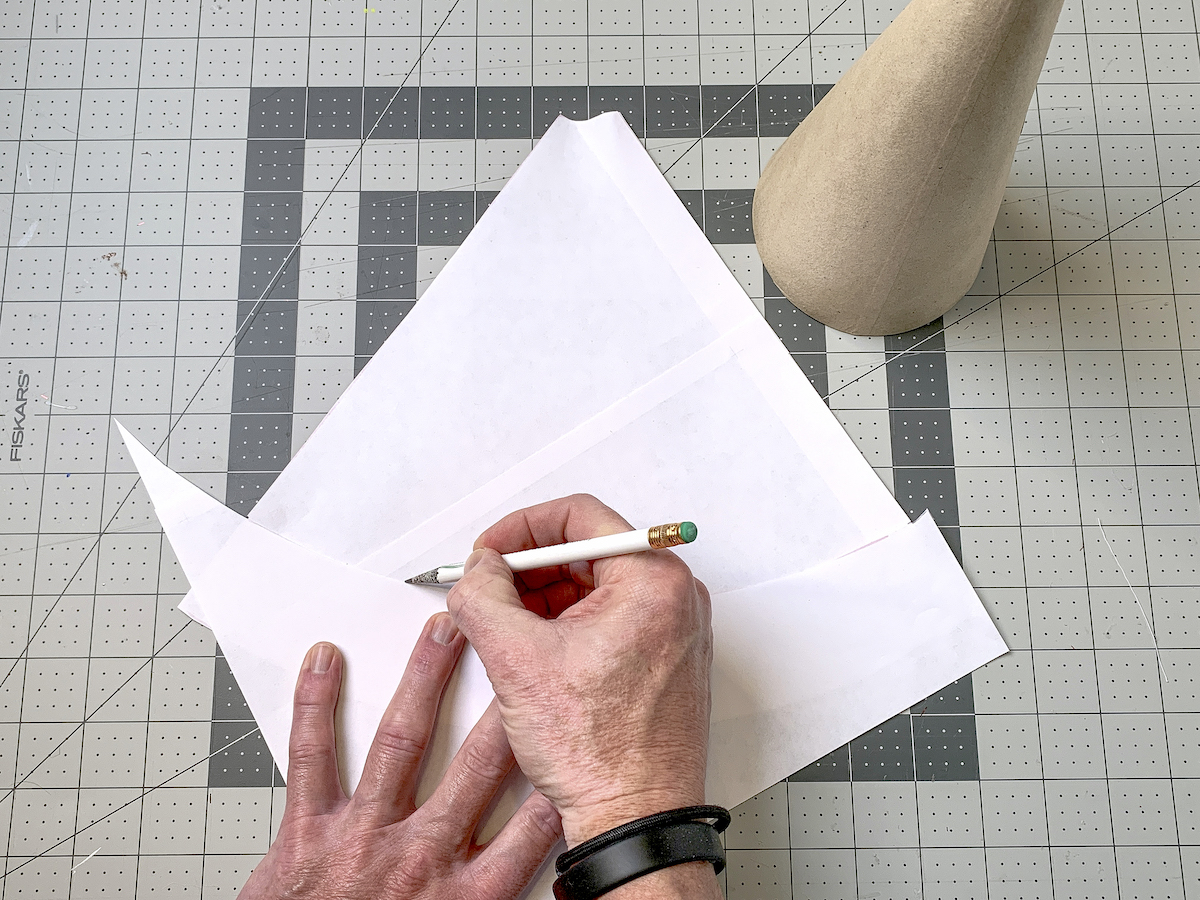
- Print out the template and assemble using tape. Cut out.
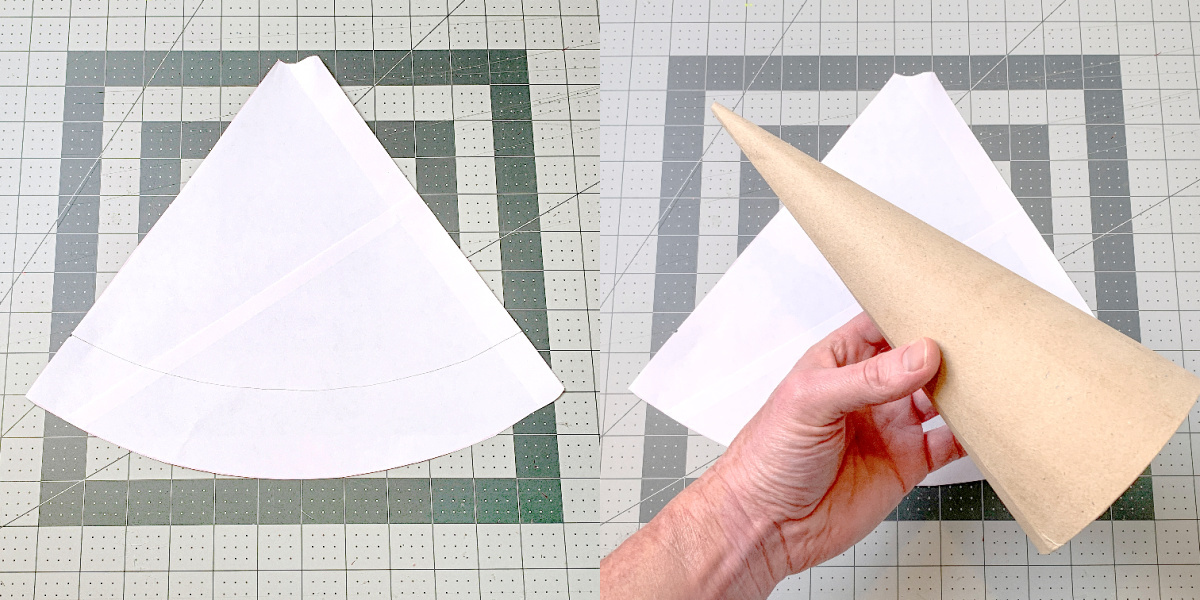
- Cut 1 3/4" off of the bottom of the template. Test fit and then set aside for the moment.

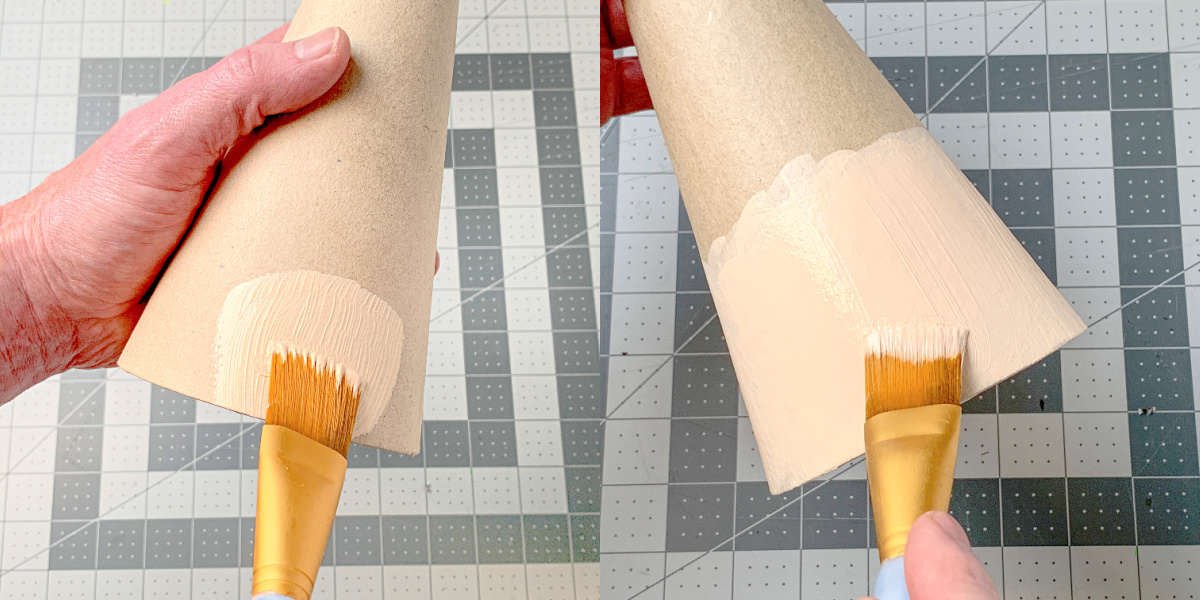
- Choose your skin tone paint color. Paint the bottom of the cone with the skin tone. Paint the wood bead nose that color too.
- Cut the fabric of the hat out using the template.
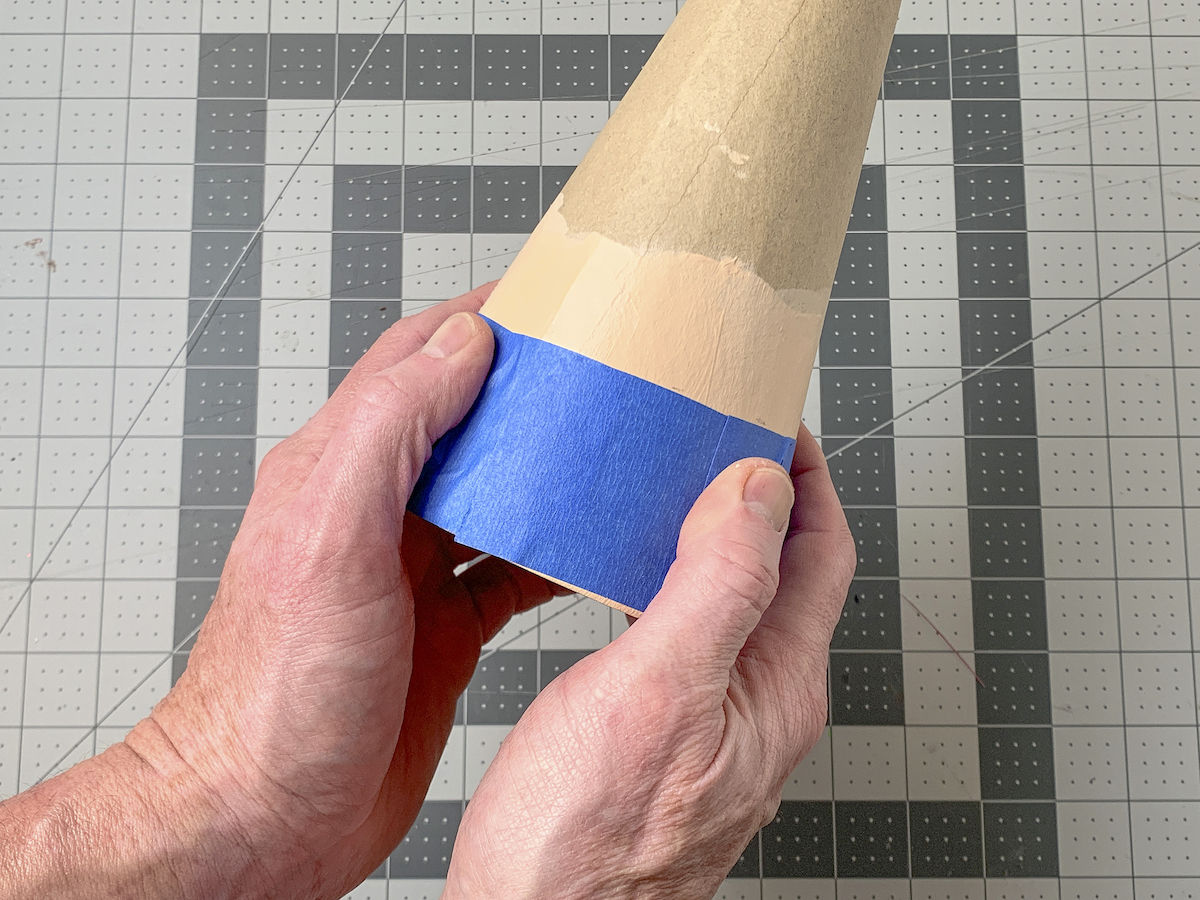
- Tape off the bottom of the cone with painter's tape so you don't get adhesive on the skin of the gnome.
- Apply spray adhesive to the top portion. Wrap the fabric around, smooth, and let dry.
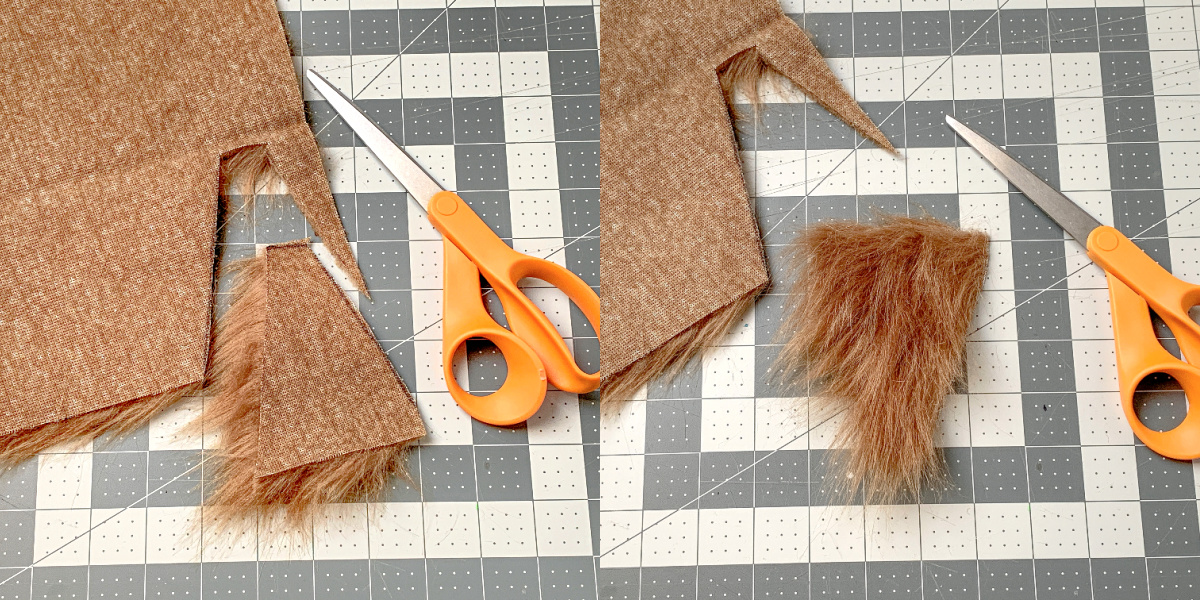
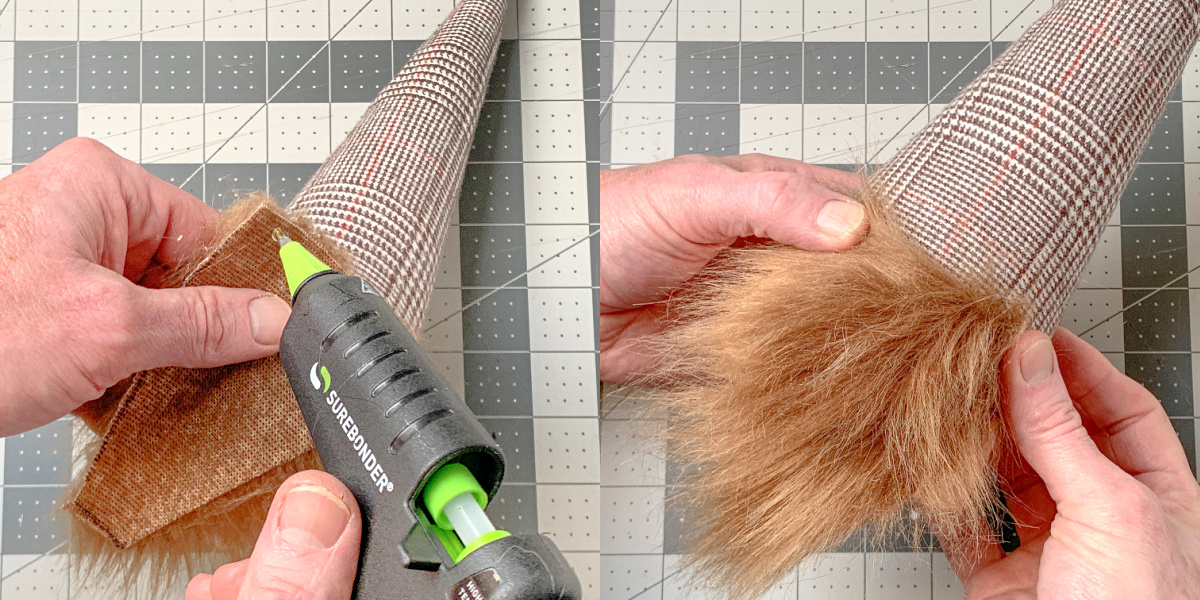
- Cut the faux fur for beards using the template. Trace on the back and then keep the faux fur forward while cutting so you don't trim off all the hair.
- Attach a beard piece to the base of the cone using a hot glue gun.
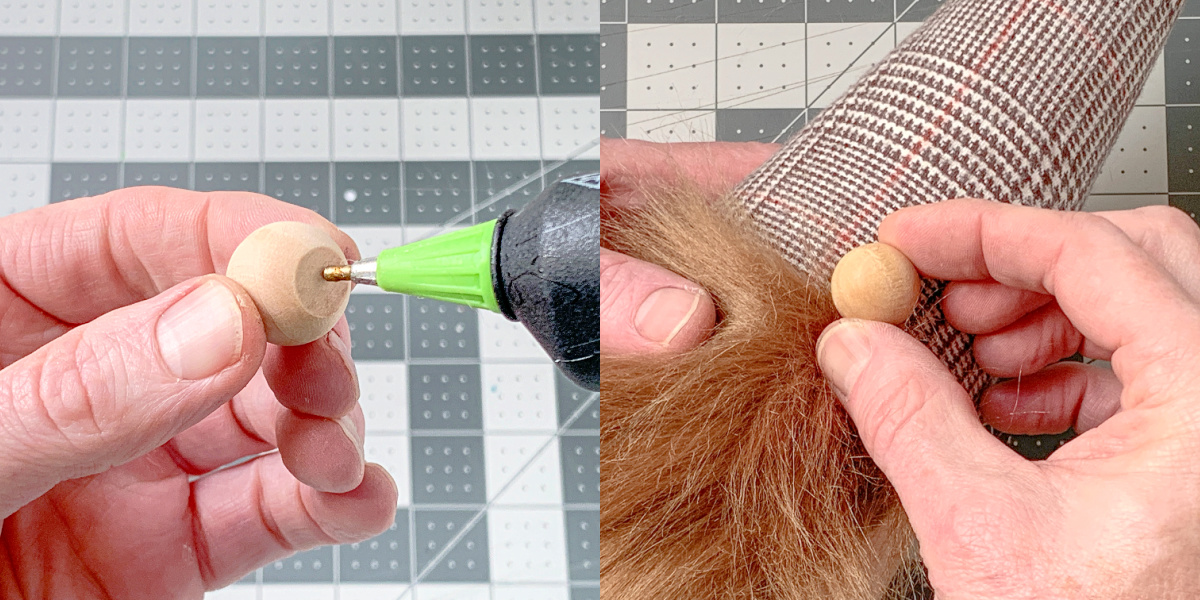
- Sand a flat spot on the wood bead using sandpaper. Hot glue the nose in the center where the beard meets the fabric to finish.
Notes
I hope you enjoyed these gnomies! If you love them, let me know in the comments. We have St. Patrick’s Day gnomes and Valentine’s Day gnomes you might like as well.
I’d also love for you to check out the following posts. Happy Thanksgiving y’all!