Festive DIY St. Patrick’s Day Gnomes That Bring Good Luck
Learn how to make the cutest St. Patrick’s Day gnomes to accent your seasonal decor! These are such an easy project that is great for kids or adults.
Skills Required: Beginner. Even if you’ve never crafted before, you can easily make a gnome using a paper cone. You’ll be doing some cutting (using templates), painting, and attaching things using adhesive.

I’ll admit it – we’re wild about making gnomes around here. I mean I’ve done them for every major holiday including Valentine’s Day, Christmas, and Thanksgiving. And it’s not like that’s going to be the end of it.
I’m determined to bring gnomes into every holiday. And why wouldn’t I? They are so easy to make, and all you have to do is customize the hat fabric and beard color.
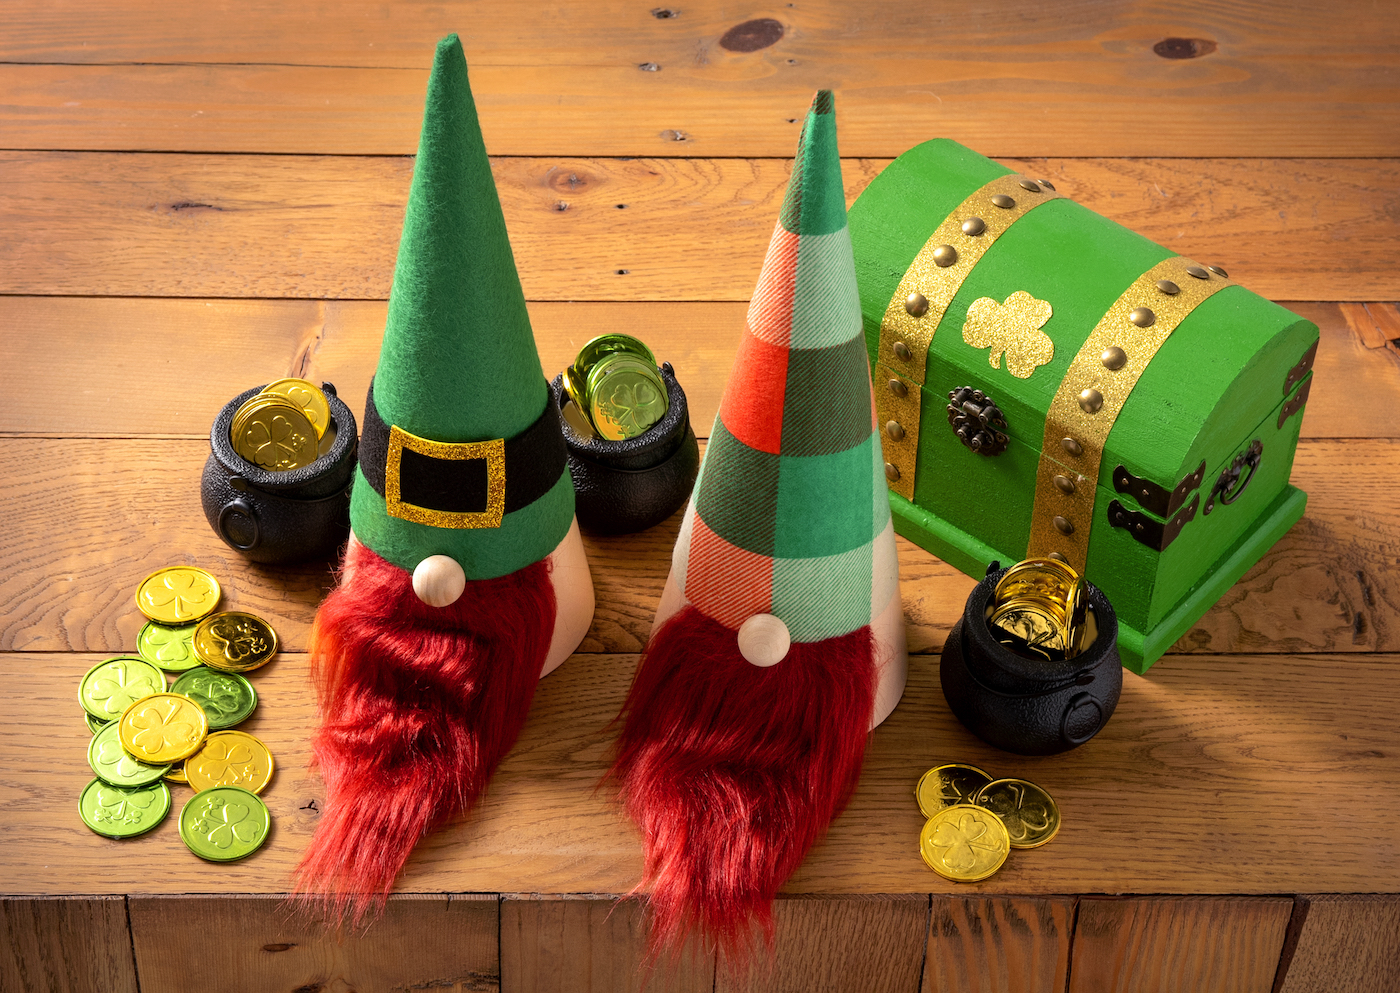
And along those lines, I’m excited to share my St. Patty gnomes. And I’ve named them: Seamus and Liam O’ Toole.
They’re brothers, in case you’re wondering.
Seamus is the leprechaun gnome, and Liam is his twin brother who prefers a plaid hat. As I said, they are very easy to make, and they look great on a holiday mantle.
I’m hoping that you want to make my St. Patrick’s Day gnomes too, and I’m going to show you how below.
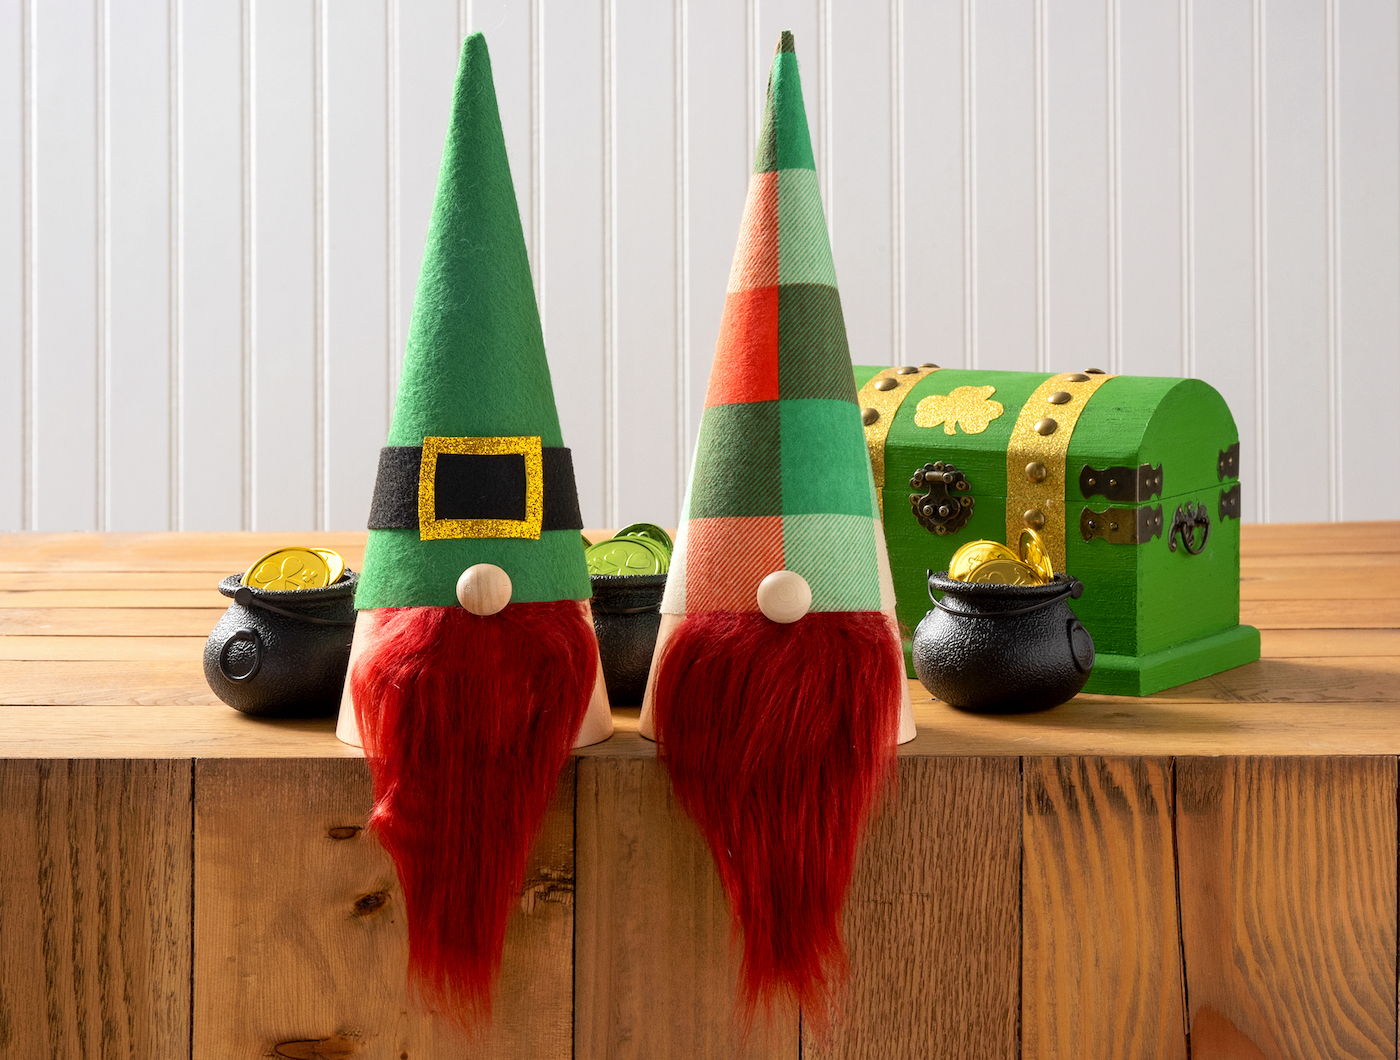
Learn how to make festive gnomes in just six simple steps! Here’s a quick overview: create a template, paint the cone, cut and attach the hat fabric, then add the beard and nose. That’s it—you’re done!
Before you jump in, here are some quick tips:
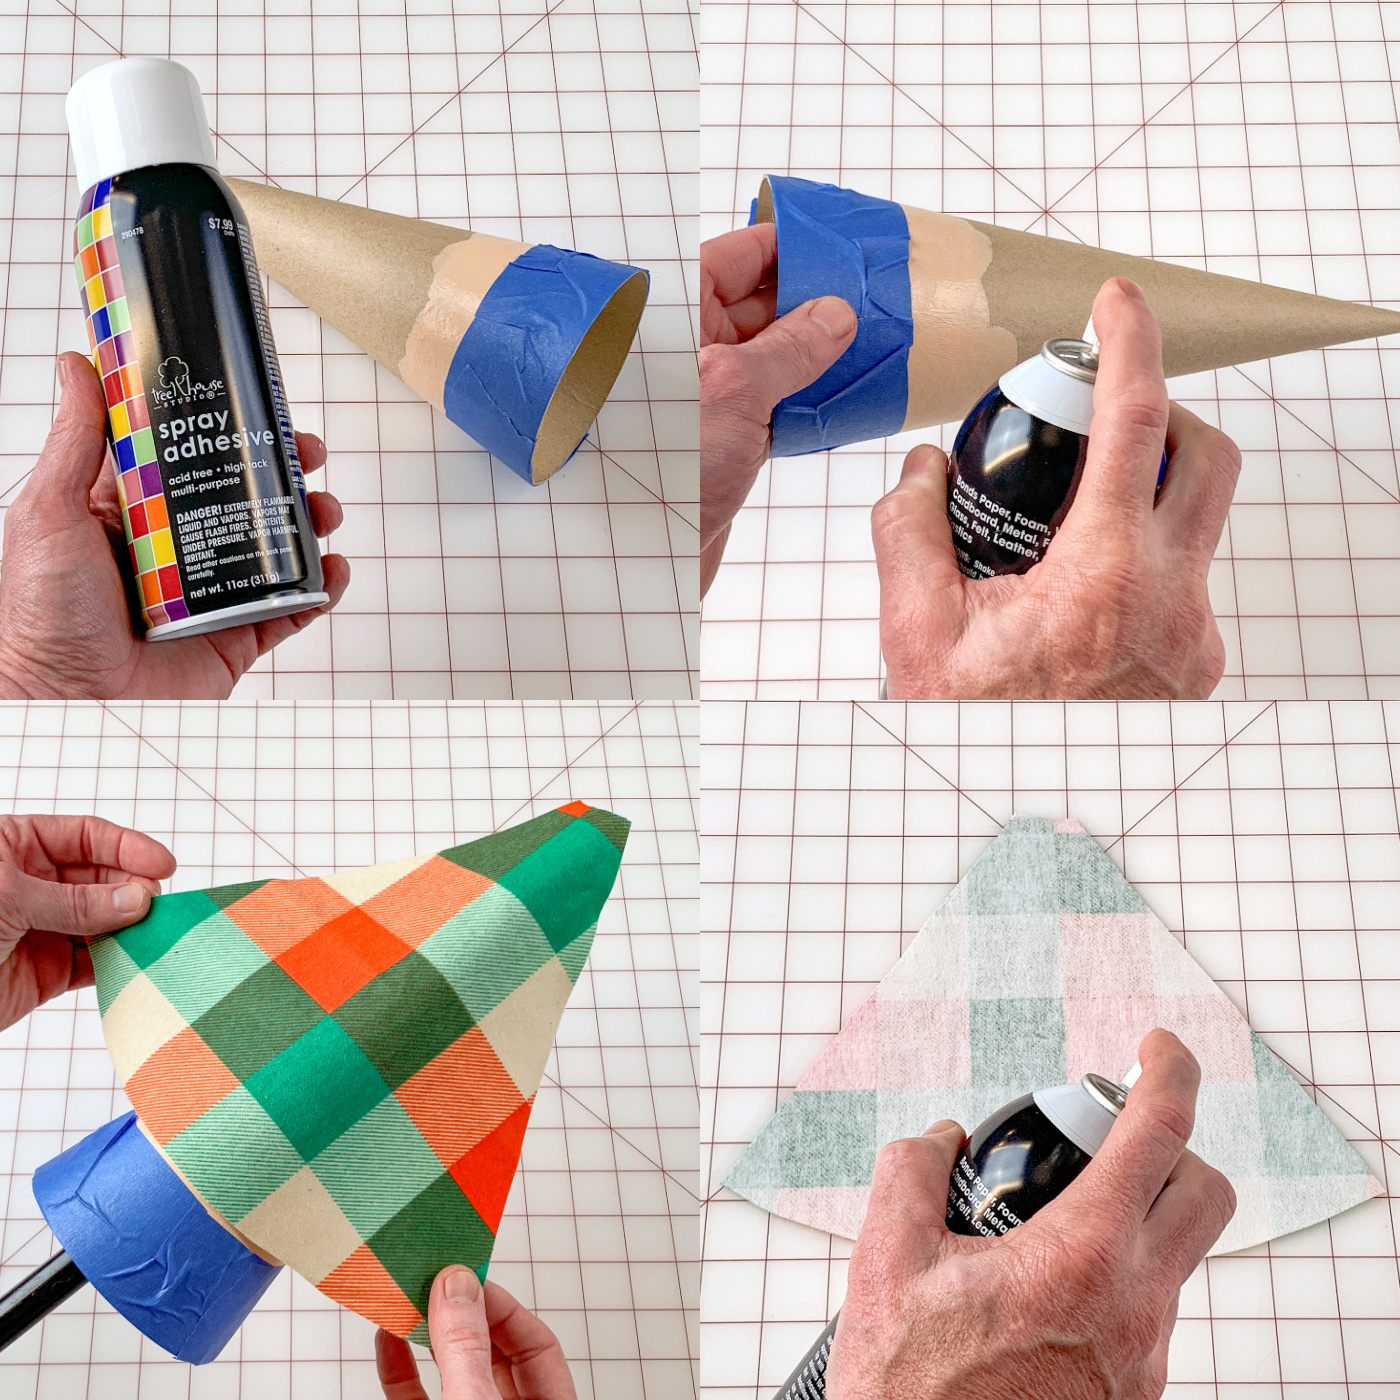
Attaching Fabric: Spray adhesive works great. If using a liquid glue like Mod Podge, choose a thicker fabric to avoid dark spots showing through.
Why Gnomes? Gnomes symbolize good luck, protection, hard work, and playfulness—perfect for St. Patrick’s Day vibes!
Base Options: I used paper mache cones (10.63 x 4″), but foam cones are a cheaper alternative. Paper mache is my favorite because it’s stackable and has a charming texture.
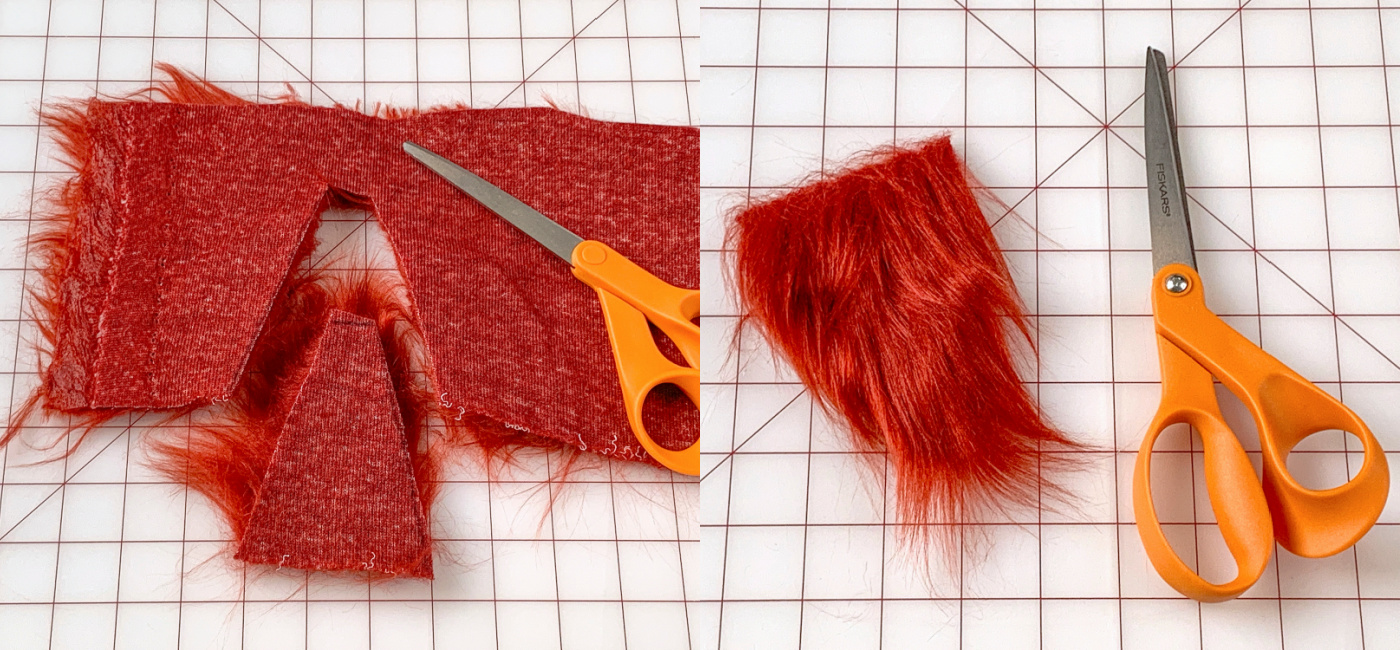
Beard Materials: Faux fur looks amazing, but you can also use felt, yarn, or even pieces of a mop head for a creative twist.
Gather These Supplies
- Paper mache cones – 2
- Cone template
- Beard template
- Wood beads – 2 (5/8″)
- Acrylic paint – skin tone of your choice
- Flannel fabric – enough to cover the cone
- Black felt – one sheet
- Gold glitter foam – small piece
- Faux fur pieces
- Paper to print template
- Paintbrushes
- Spray adhesive
- Sharpie or pen
- Painter’s tape
- Sandpaper
- Scissors
- Hot glue gun
Note: use spray adhesive in a well ventilated area and check safety information if you are sensitive (you might want to use a mask).
Get the printable how to card below.

St. Patrick’s Day Gnomes
Equipment
- Sharpie or pen
- Sandpaper
Materials
- 2 Paper mache cones
- Cone template
- Beard template
- 2 Wood beads
- Acrylic paint skin tone of your choice
- Flannel fabric enough to cover the cone
- 1 piece Craft foam sheets Gold glitter
- 1 piece Red faux fur
- Paper to print template
- Spray adhesive
- Painter’s tape
Video
Instructions
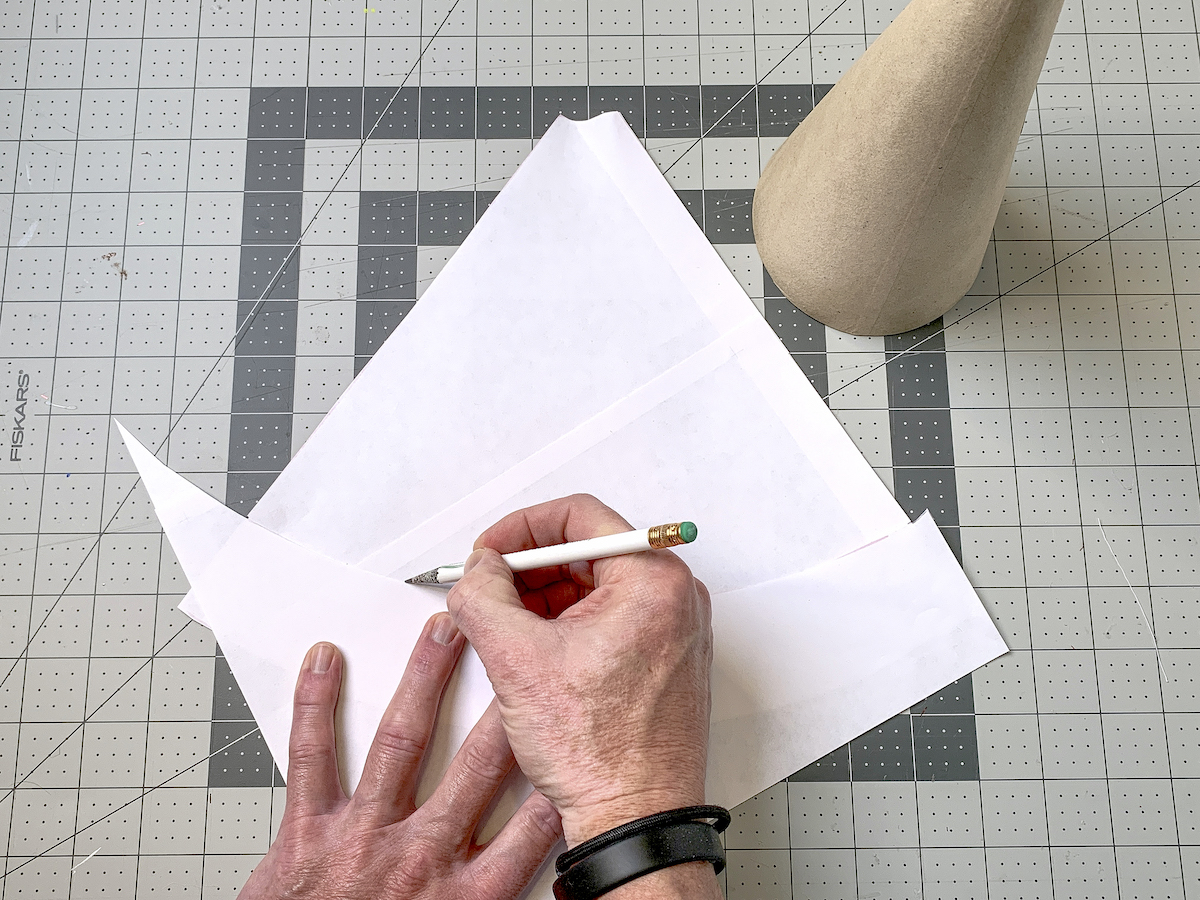
- Print out the template and assemble using tape. Cut out with the scissors.
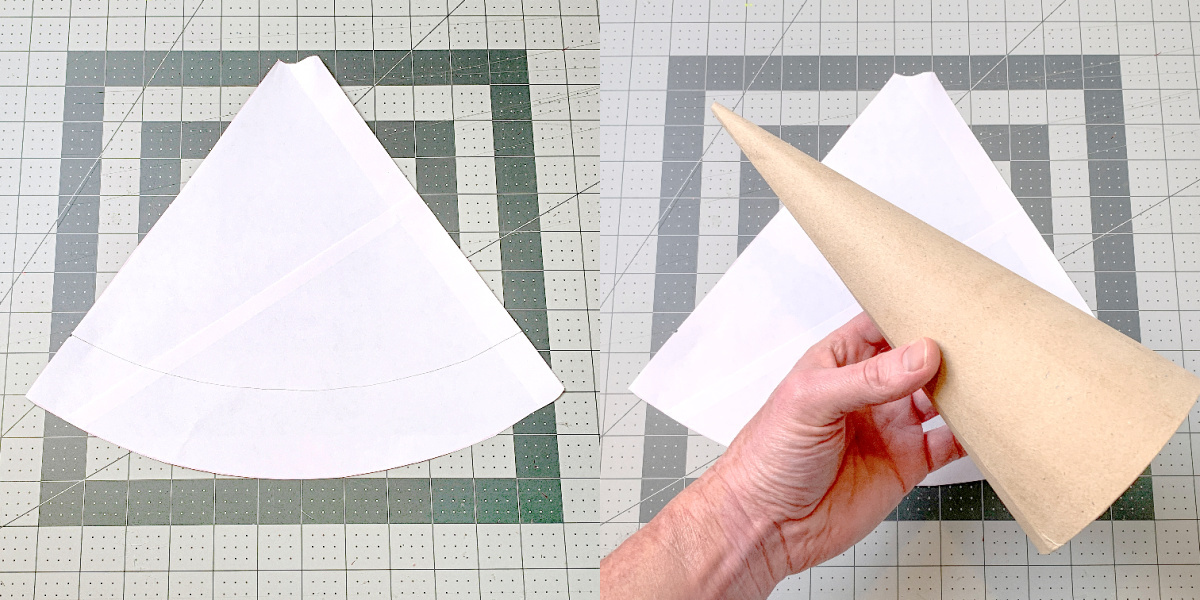
- Cut 1 3/4" off of the bottom of the template (see notes). Test fit, make any adjustments, and then set aside for the moment.

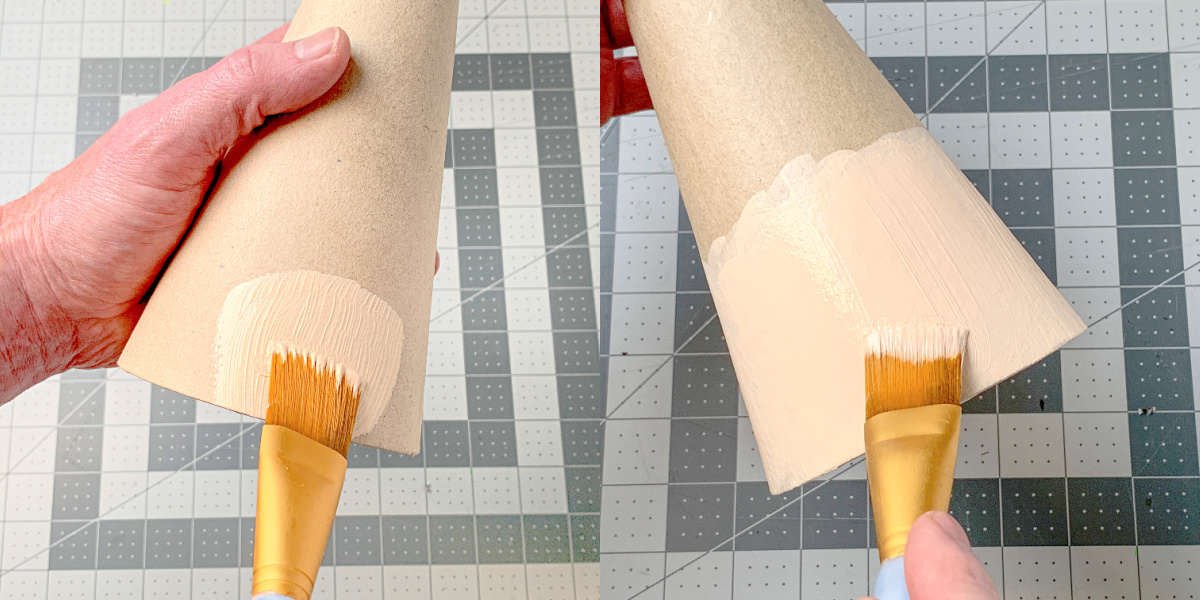
- Paint the bottom of the cone with a few coats of acrylic paint, using the skin tone of your choice. Let dry.
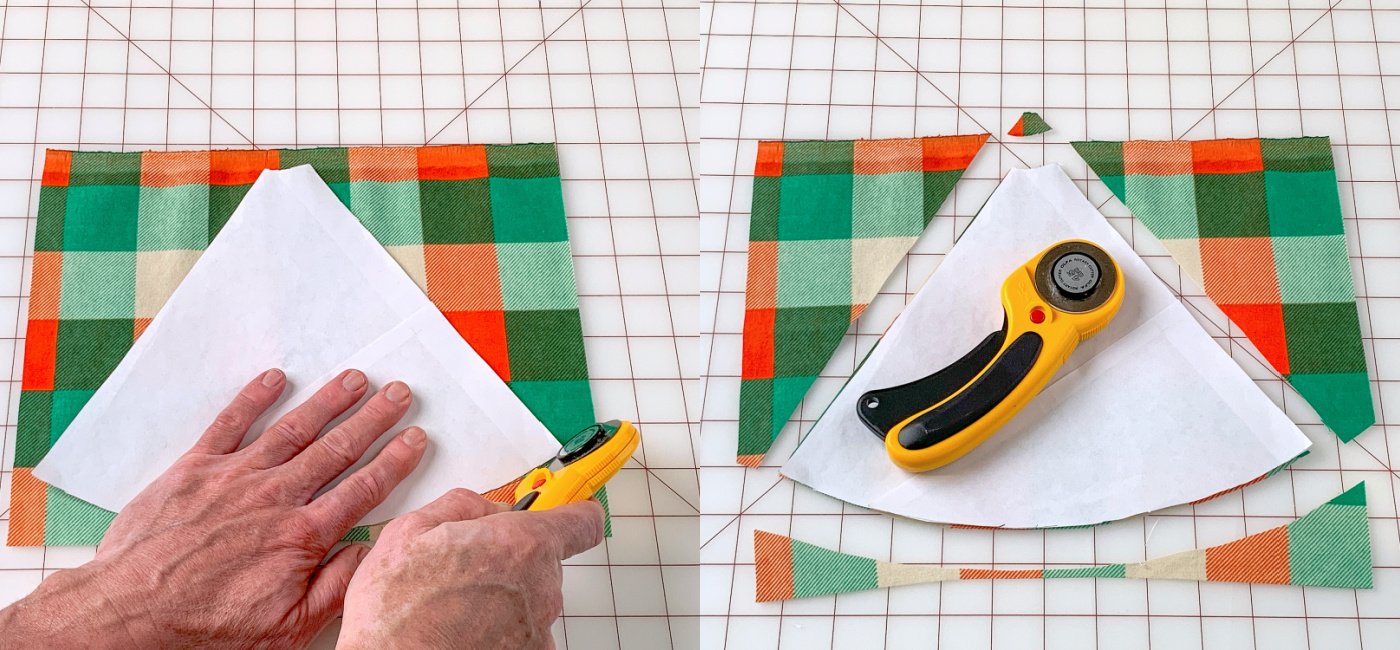
- Cut the fabric of the hat out using the template. Cut one piece of the plaid flannel and one piece of the green flannel.
- Tape off the bottom of the cone, and apply spray adhesive to the top portion. Wrap the fabric around, smooth, and let dry. Repeat with the green fabric.
- Cut the rust faux fur for beards using the template. Trace on the back and then keep the faux fur forward while cutting.
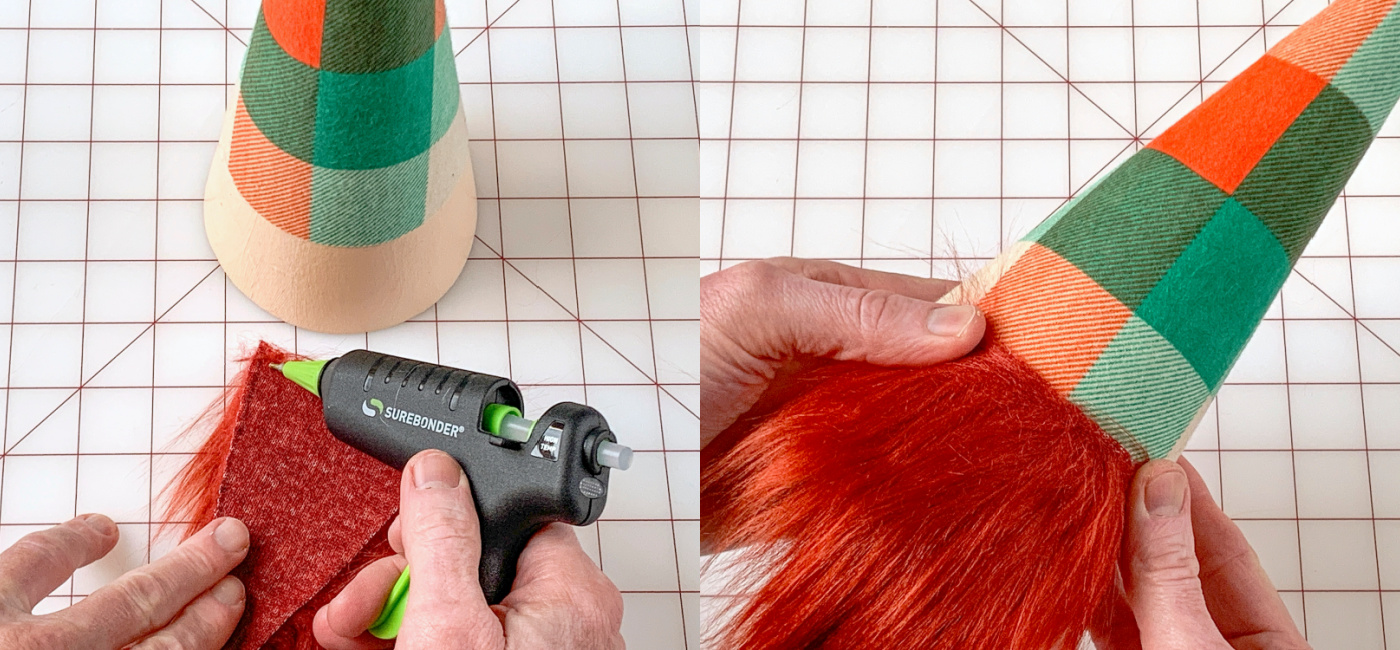
- Attach a beard piece to the base of the cone using a hot glue gun.
- Add the ribbon and buckle to the leprechaun gnome. Cut a small piece of black felt, and band of black felt that wraps around the hat, and a small rectangle of gold glitter foam. Hot glue them on. Glue the small piece of black felt in the center of the gold foam.
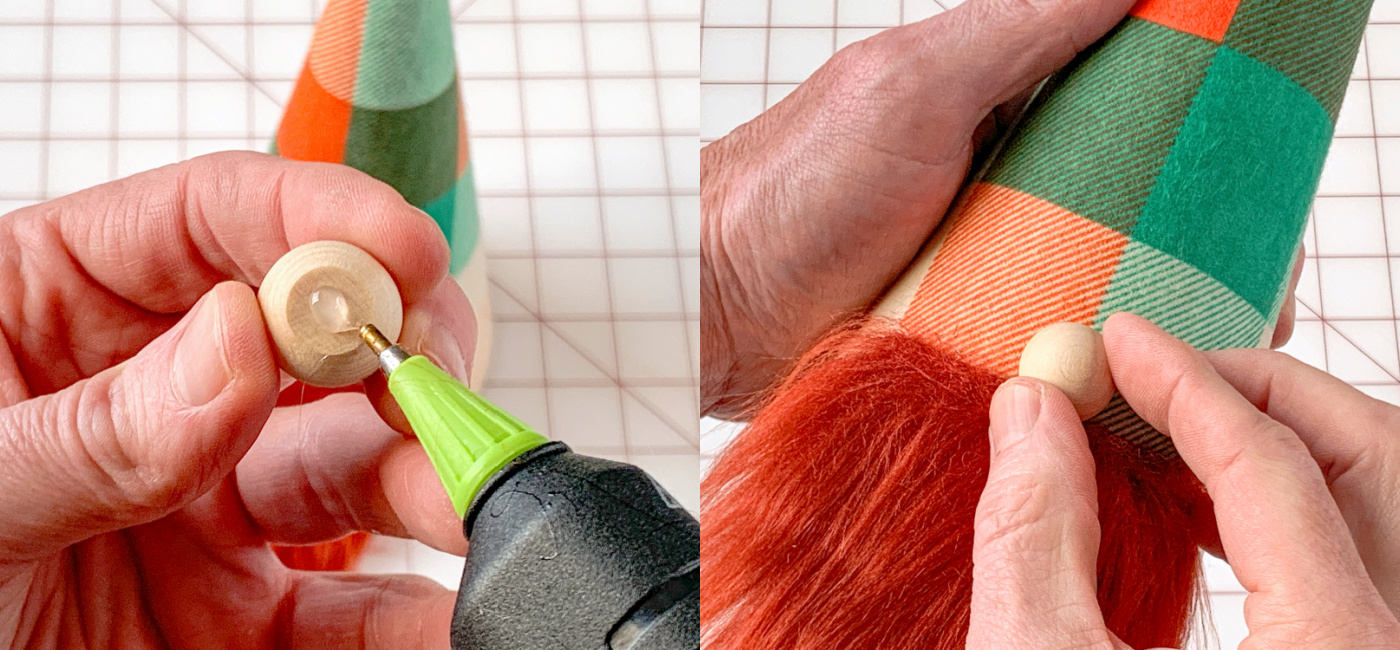
- Sand a flat spot on a wood bead using sandpaper. Hot glue the nose in the center where the beard meets the fabric to finish.
Notes
If you try these St Patty gnomes, I’d love to hear what you think about them in the comments. You’re going to love these other ideas too: