Wine Cork Snowman for Your Holiday Decor
This DIY wine cork snowman makes a perfect addition to your Christmas or winter decor! Save your corks to make this unique project.
Skills Required: None. Perfect for those who have never crafted before. You’ll be painting and hot gluing primarily. The had takes a little finagling, but I think you’ll easily be able to follow what I did.
I’ve been on a wine cork crafts kick lately! Laugh if you must (and I don’t blame you), but I like the crafts a lot more than I like the fermented grape juice. I may have had a few too many good times in my 20s with wine, so I really don’t drink it anymore. BUT – I still love working with the corks in projects.
It started when I made the wine cork reindeer with my niece and shared that tutorial . . . plus I had done a wine cork wreath before (that I still love!). I had a huge bag of wine corks I bought from Amazon, and there were a bunch leftover. That’s when I decided it was time to make a wine cork snowman.
This project is a great craft for adults, but you can also do this for a kids Christmas craft. You can tell your children you have a lot of corks in your collection due to them ;).
There are a variety of ways you can approach this project. You can make an entire snowman (including the body) out of wine corks. You can make a small or large version if you make a snowman with two or three segments.
You can also use ONE wine cork, standing it up on the small end. Paint it like a snowman, and then screw an eye hook in the top and hang as an ornament with baker’s twine.
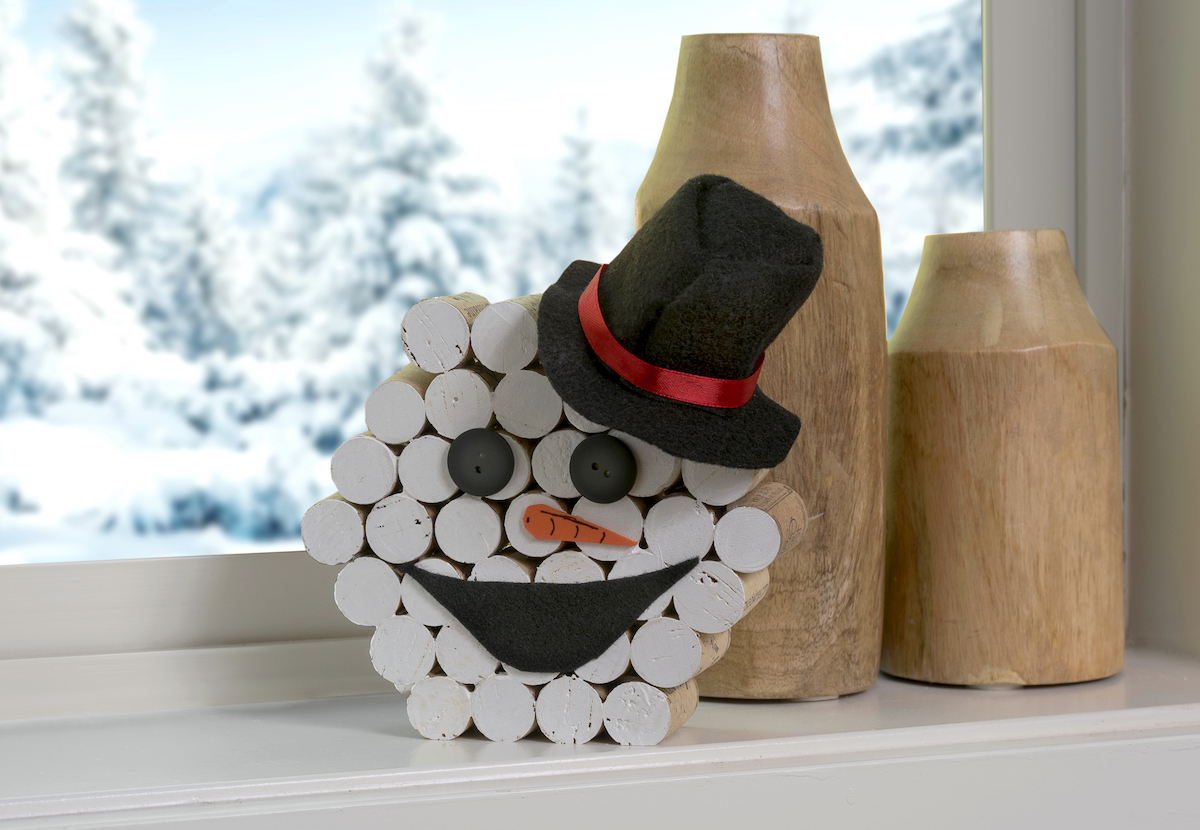
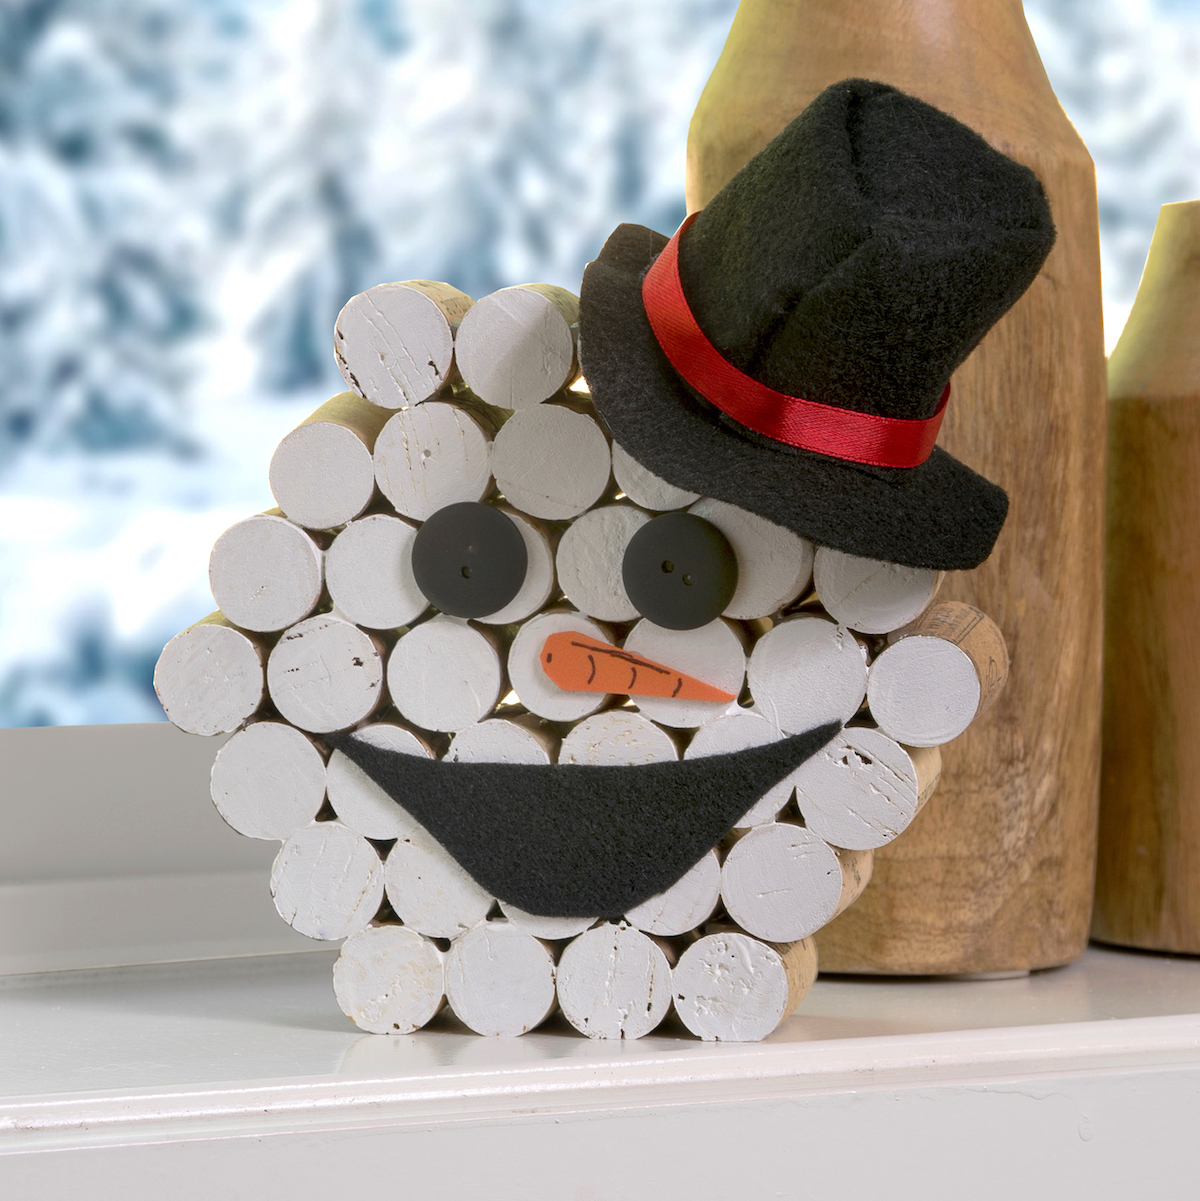
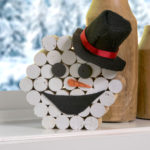
My favorite way to make a wine cork snowman is just the head, with the corks stacked up so that you can place it into a winter tablescape or on a mantel. What can I say – I like my Frosty to be a little more substantial!
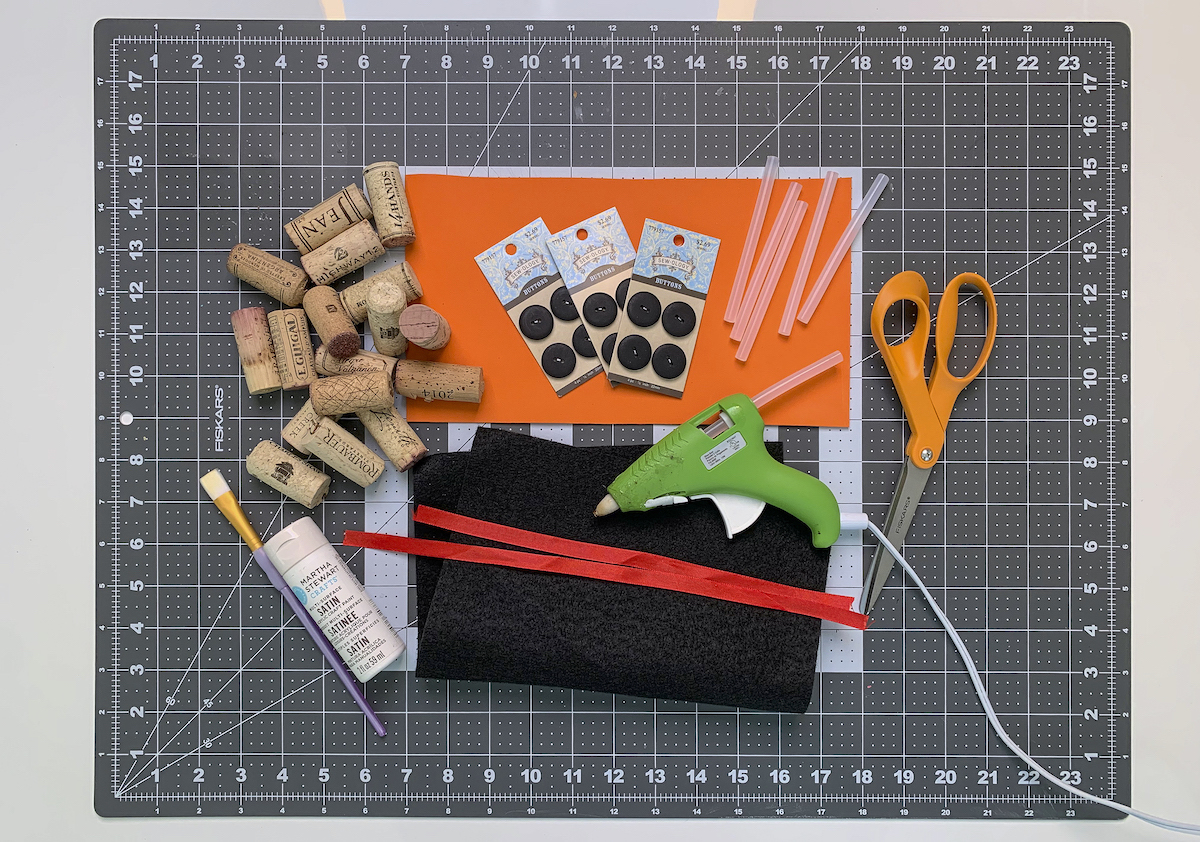
Gather These Supplies
- Wine corks – 35 to 40
- Acrylic paint – white
- Orange felt or foam
- Black felt or foam
- Black buttons – 2
- Red ribbon – about 1
- Black Sharpie or pen – fine tip
- Scissors
- Paintbrush
- Hot glue gun and glue sticks
The finished size of this project is about 5.5″ square (minus the hat). It’s the perfect size for decorating, but you can make it smaller or larger to fit your space.
Look how happy my snowman friend is! He’s excited to be on my shelf . . . because who wouldn’t be?
And the best part about this Frosty is that he’ll never melt. Oh, and I can keep him out past Christmas because he’s technically winter themed. I love that!
Cork Snowman
Materials
- 38 Wine corks 35 to 40
- Acrylic paint white
- 2 sheets Craft foam or felt 1 sheet orange, 1 sheet black
- 2 Buttons black
- 1" Ribbon(s) red
- 1 Sharpie(s) fine tip
Video
Instructions
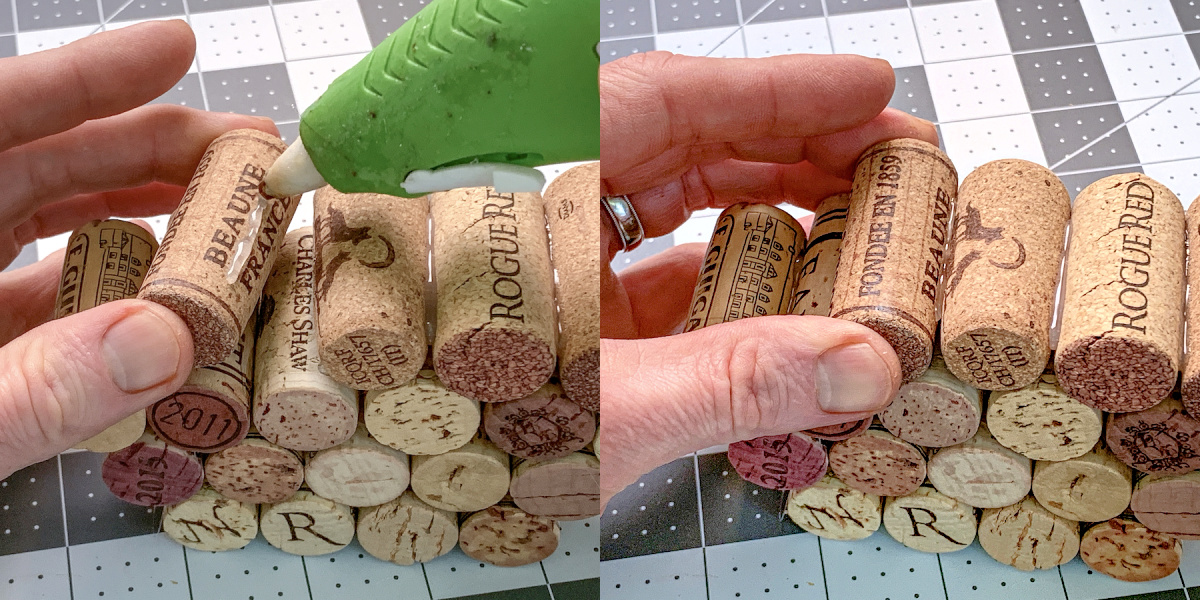
- Gather approximately 35 – 40 wine corks and clean them if necessary Let dry.
- Glue a foundational row of four wine corks with hot glue, then continue stacking and gluing wine corks until you've made the entire head.
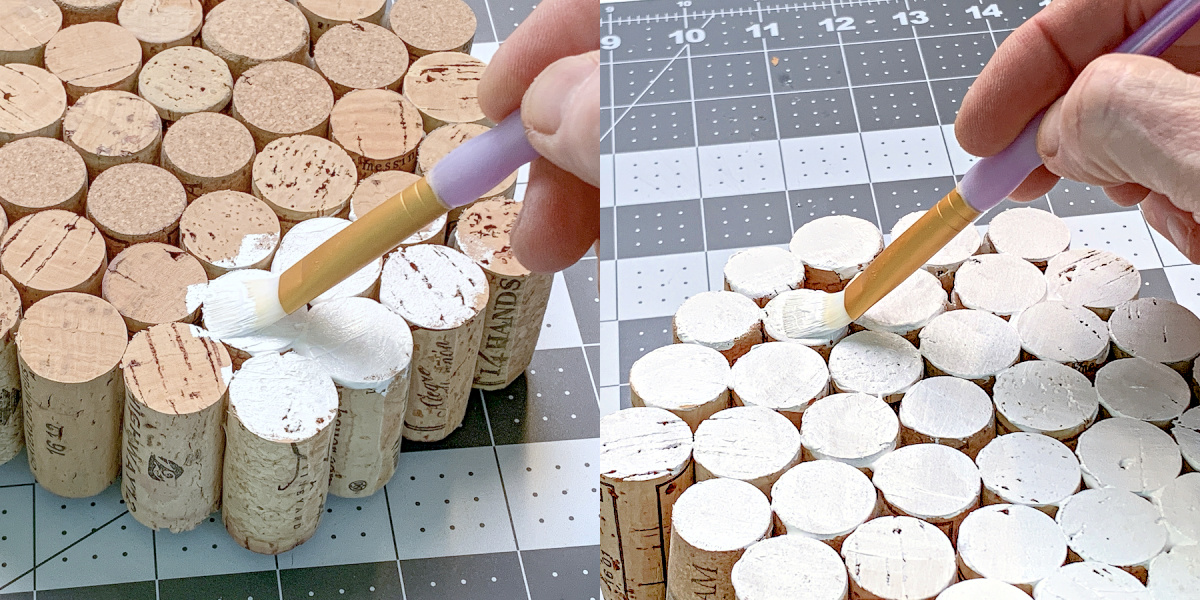
- Paint one side of the cork head with white acrylic paint, let dry.
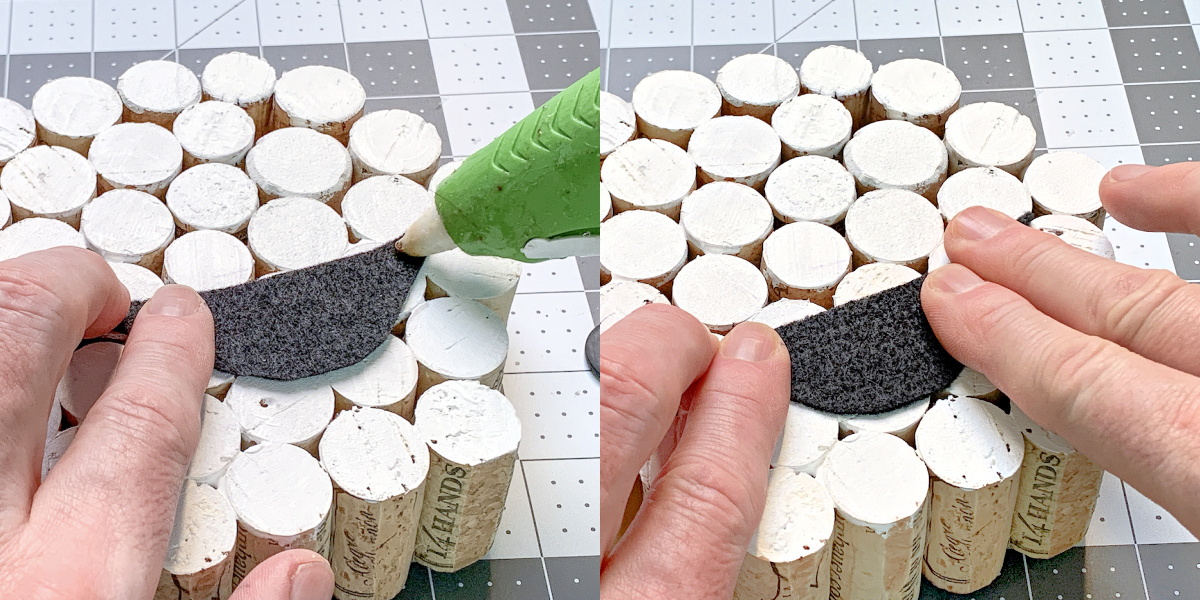
- Cut a mouth out of black felt or craft foam and glue to the front of the face.
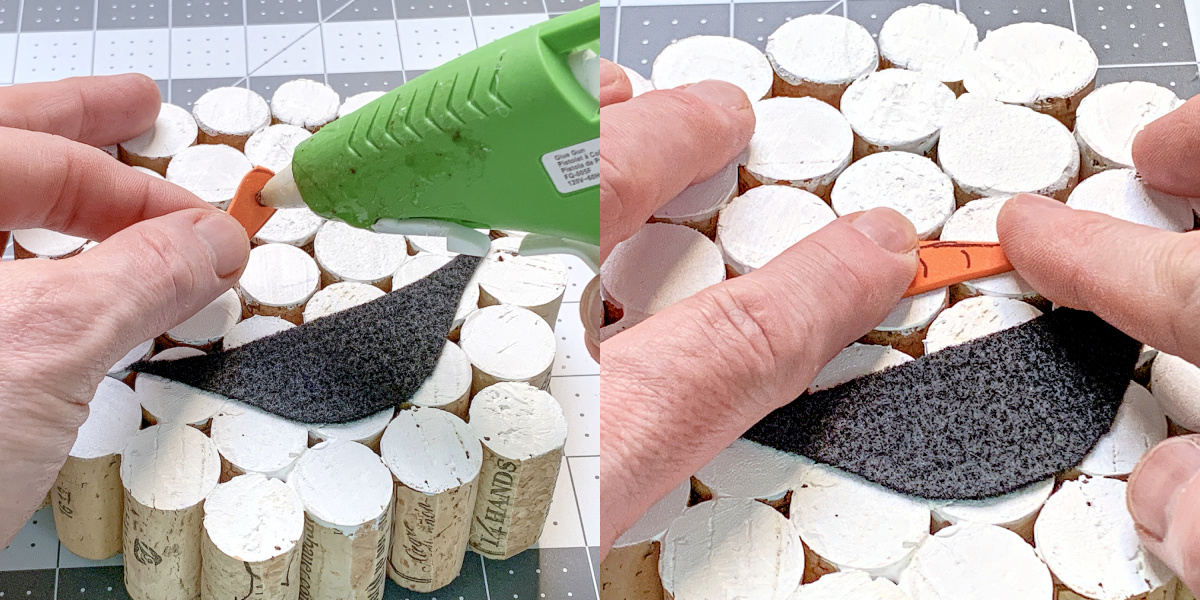
- Cut a nose out of orange felt or craft foam and draw on carrot accents with a fine tip pen. Glue to the front of the face.
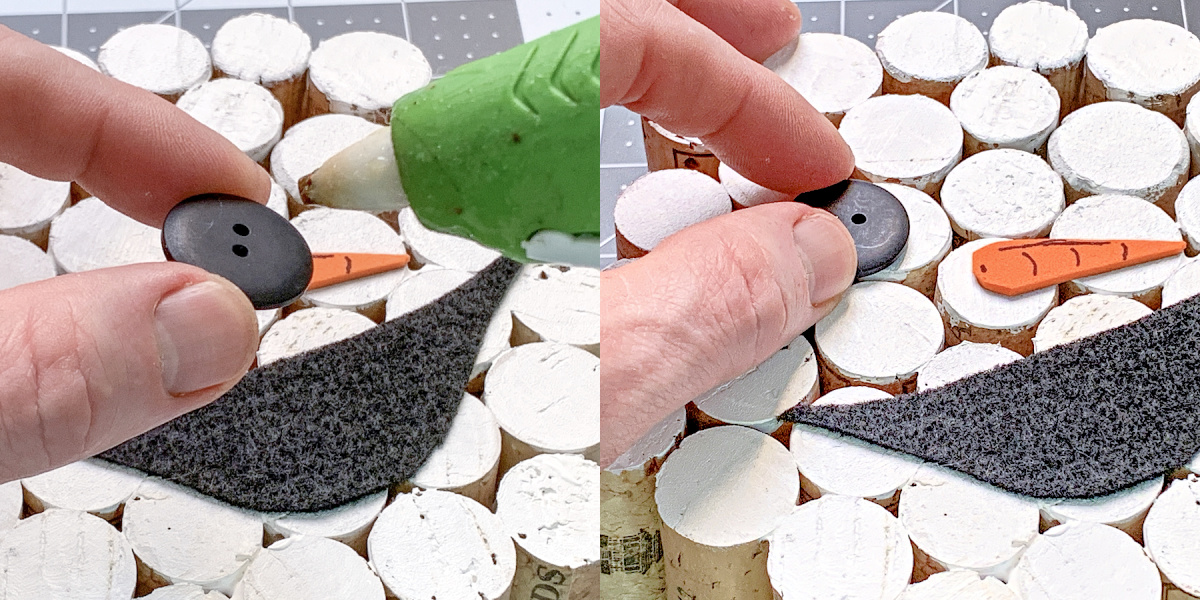
- Glue the buttons down to the front of the face to act as eyes.
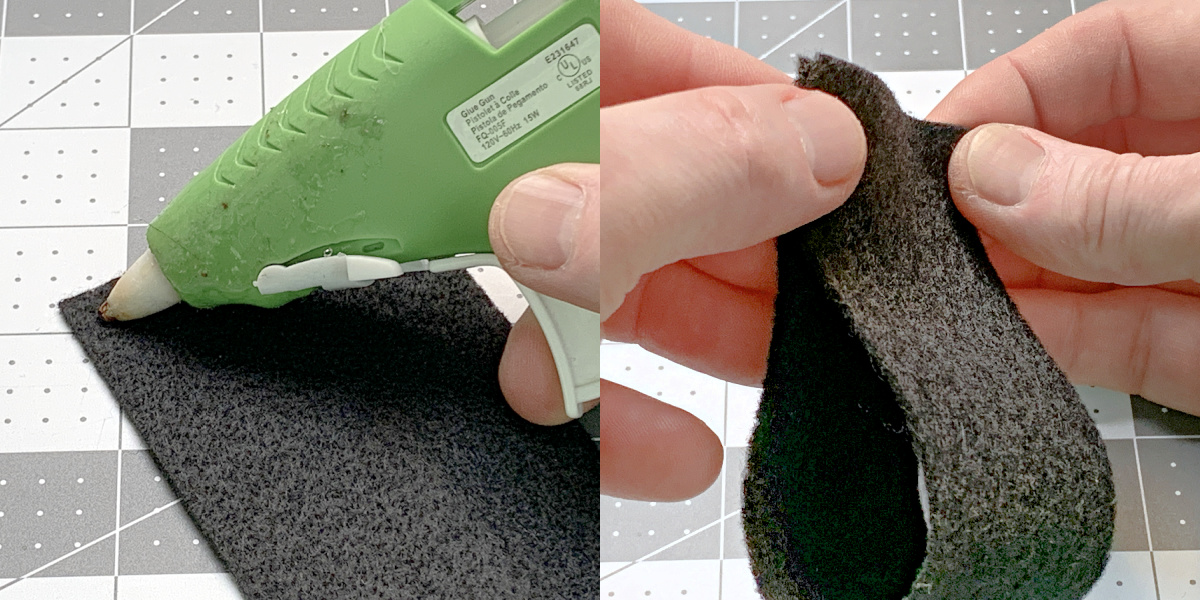
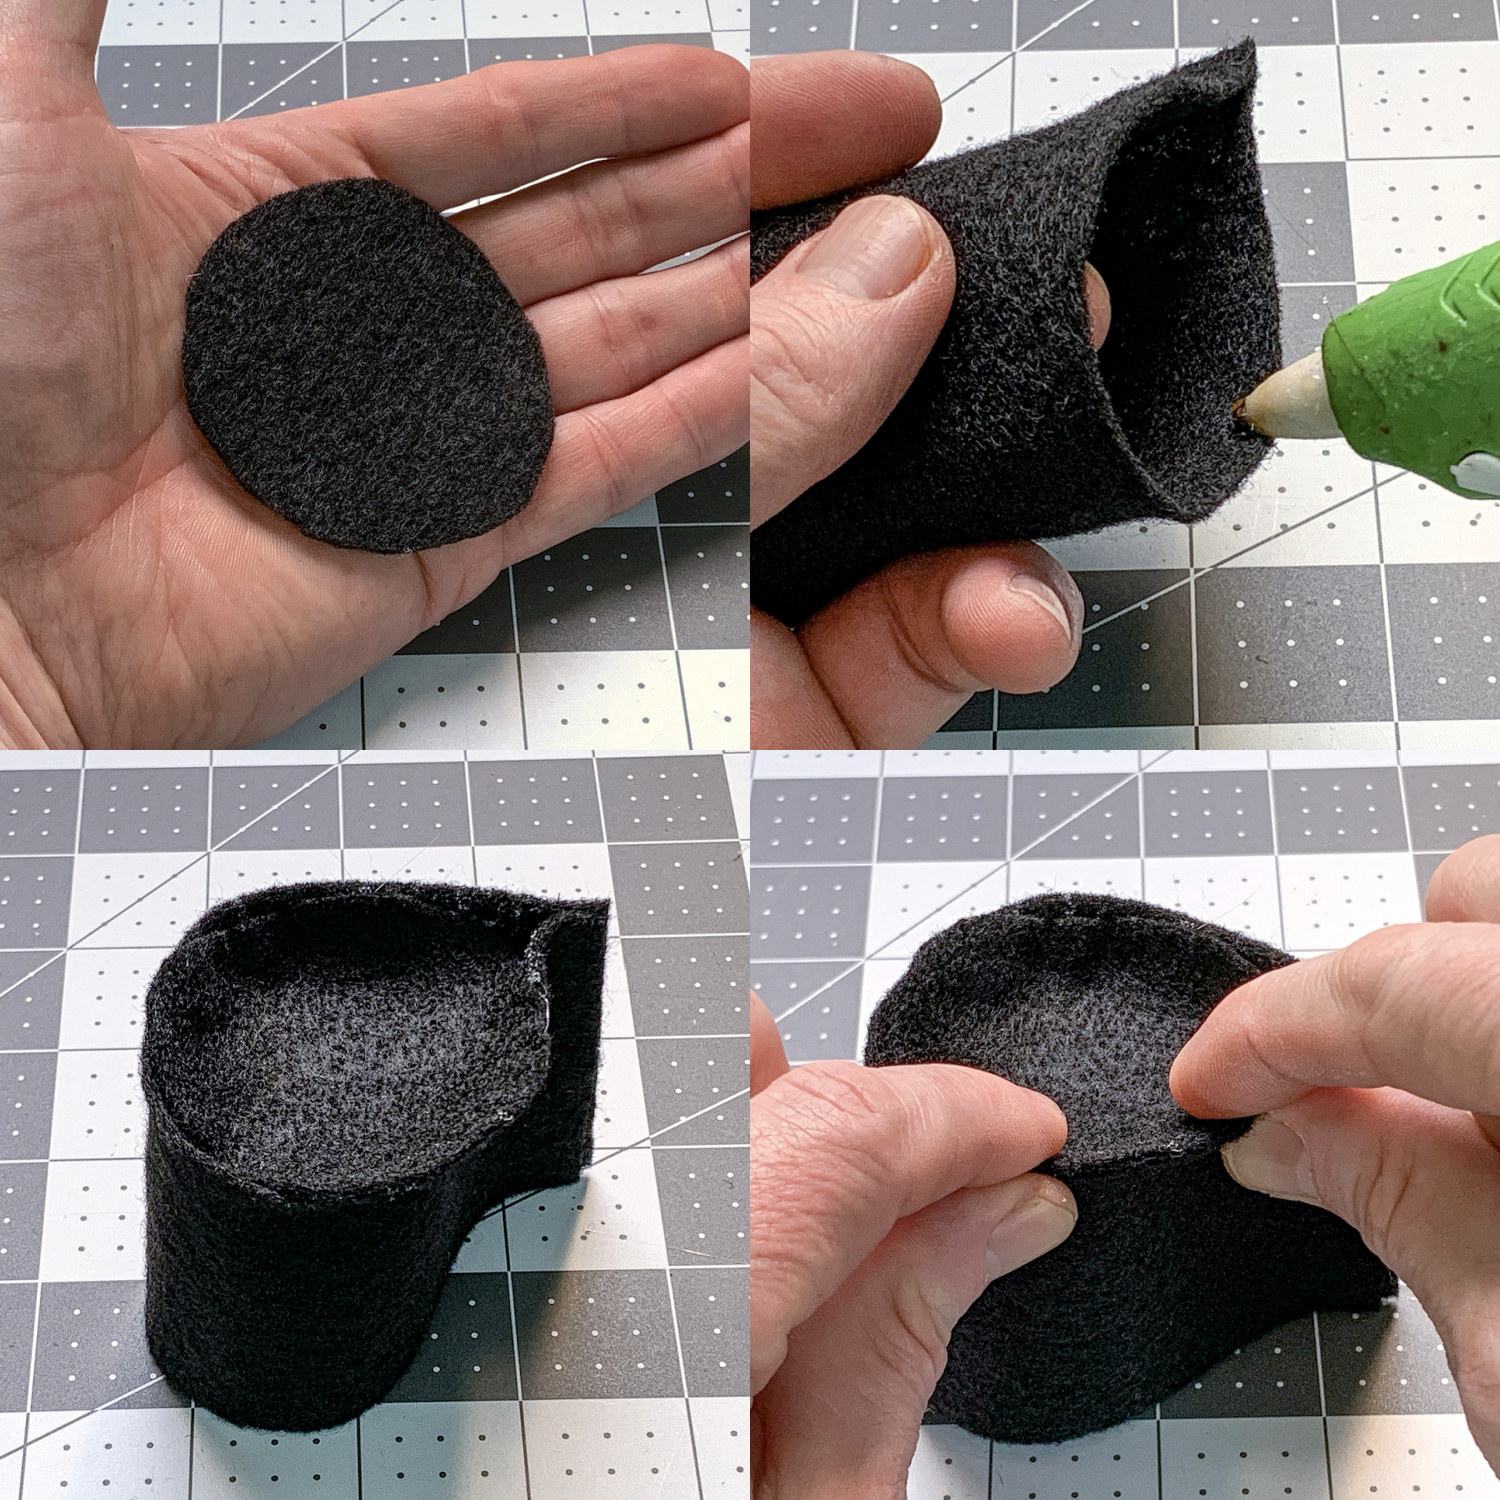
- Cut a black strip of felt that is approximately 2.5" x 7". Glue together at one end.
- Cut a circle and glue into one end to act as the top of the hat. Flip inside out and this is the top of the hat.
- Cut a brim out of black felt. Cut a circle into the center and then glue the brim to the top of the hat.
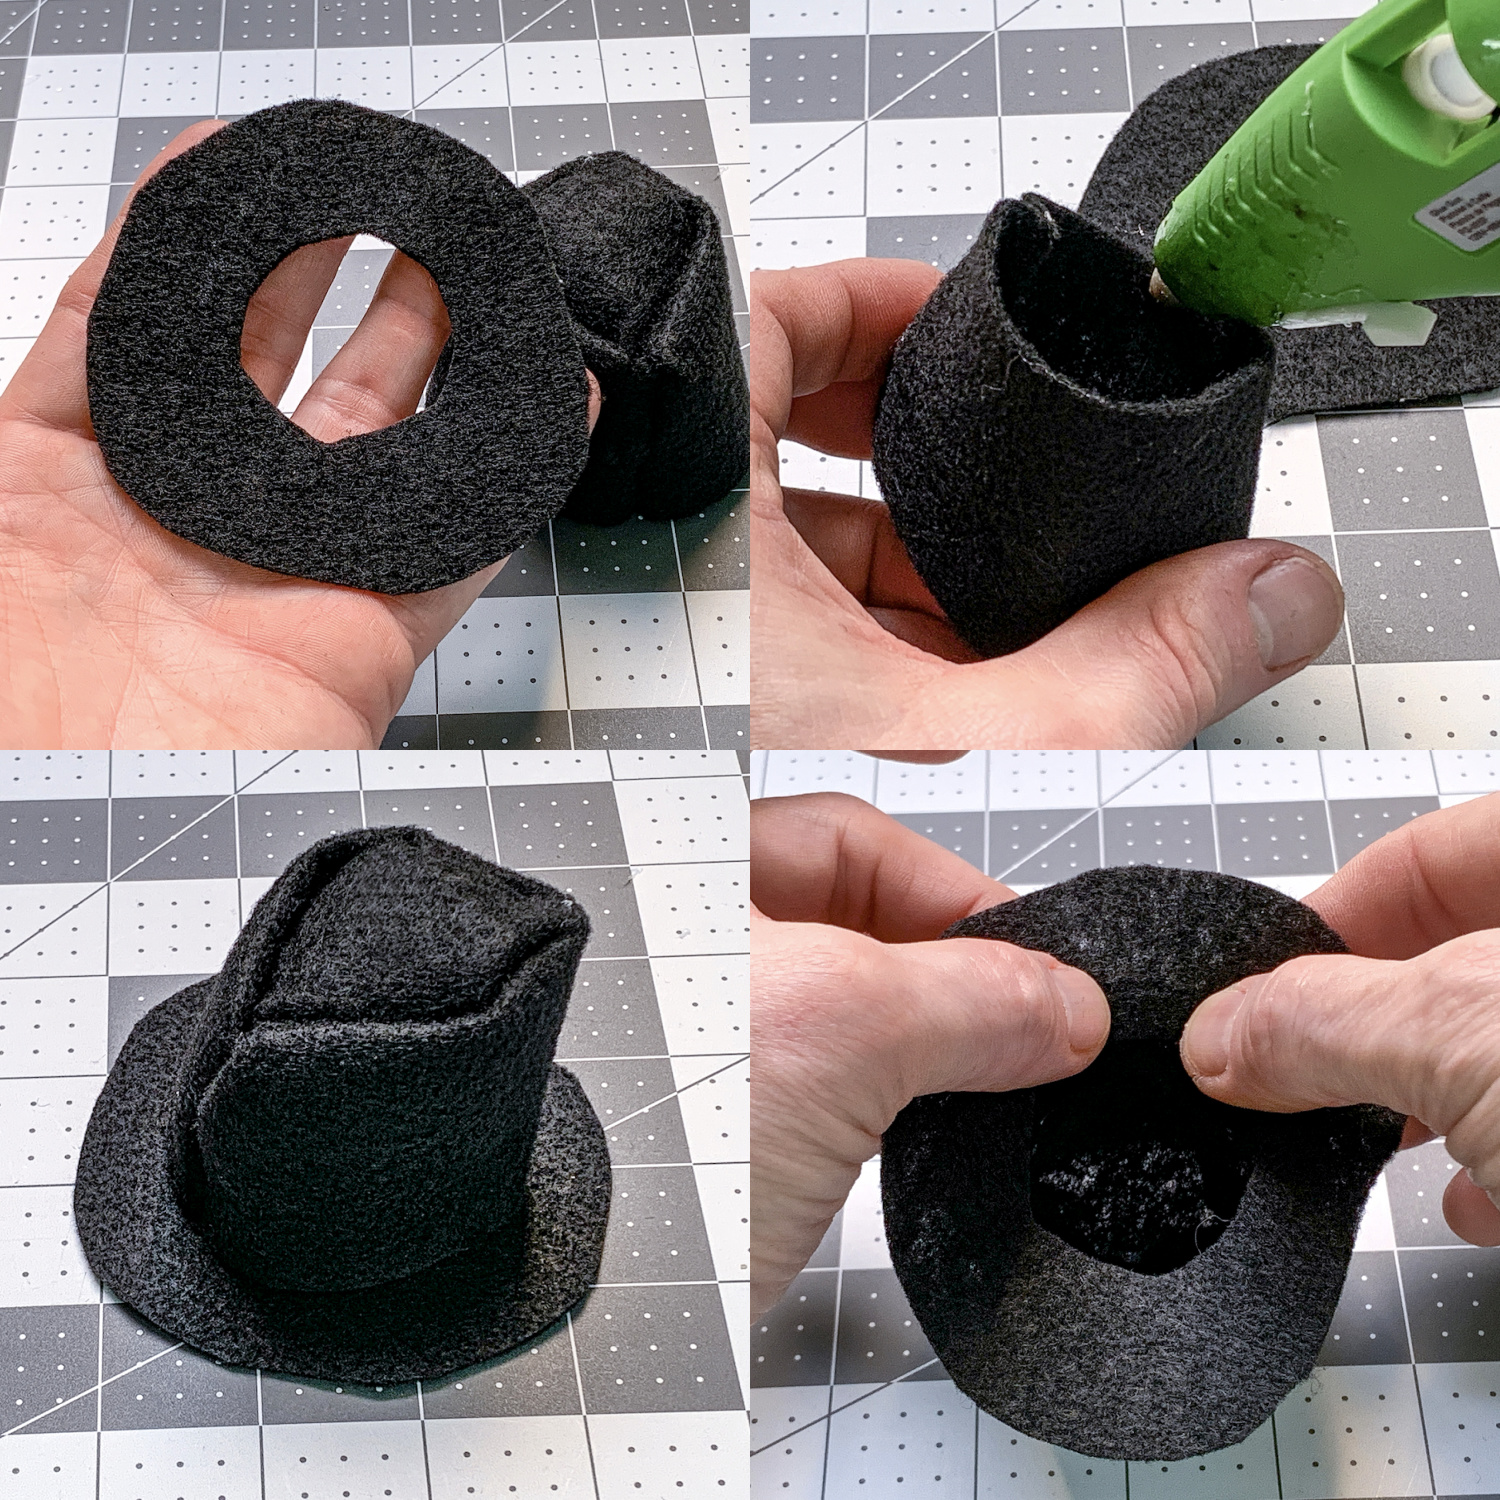
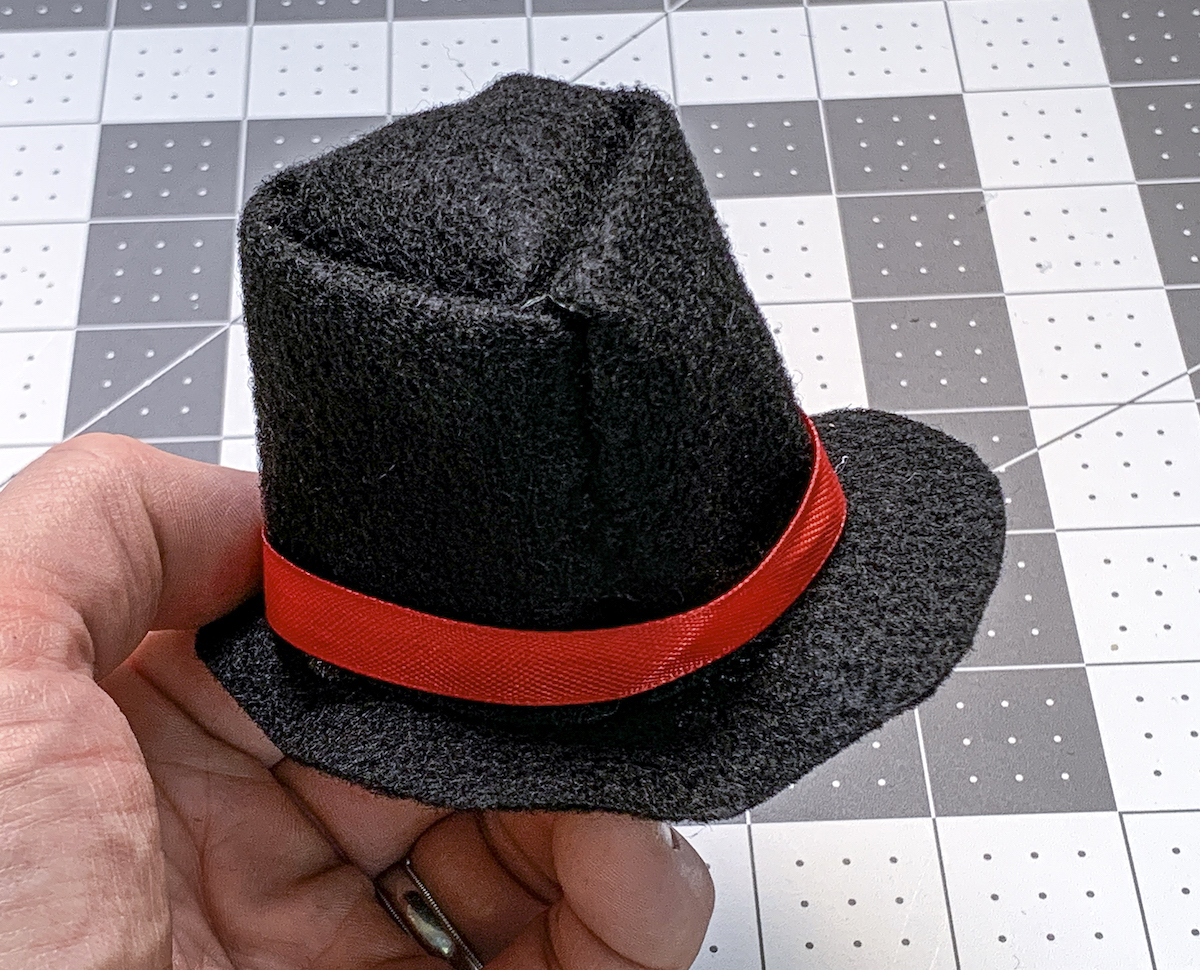
- Glue a red ribbon over the seam to act as a hatband. Attach to the cork snowman to finish.
Notes
Did you make a snowman of your very own? I’d love for you to let me know in the comments! I’d also love for you to visit these other cute projects: