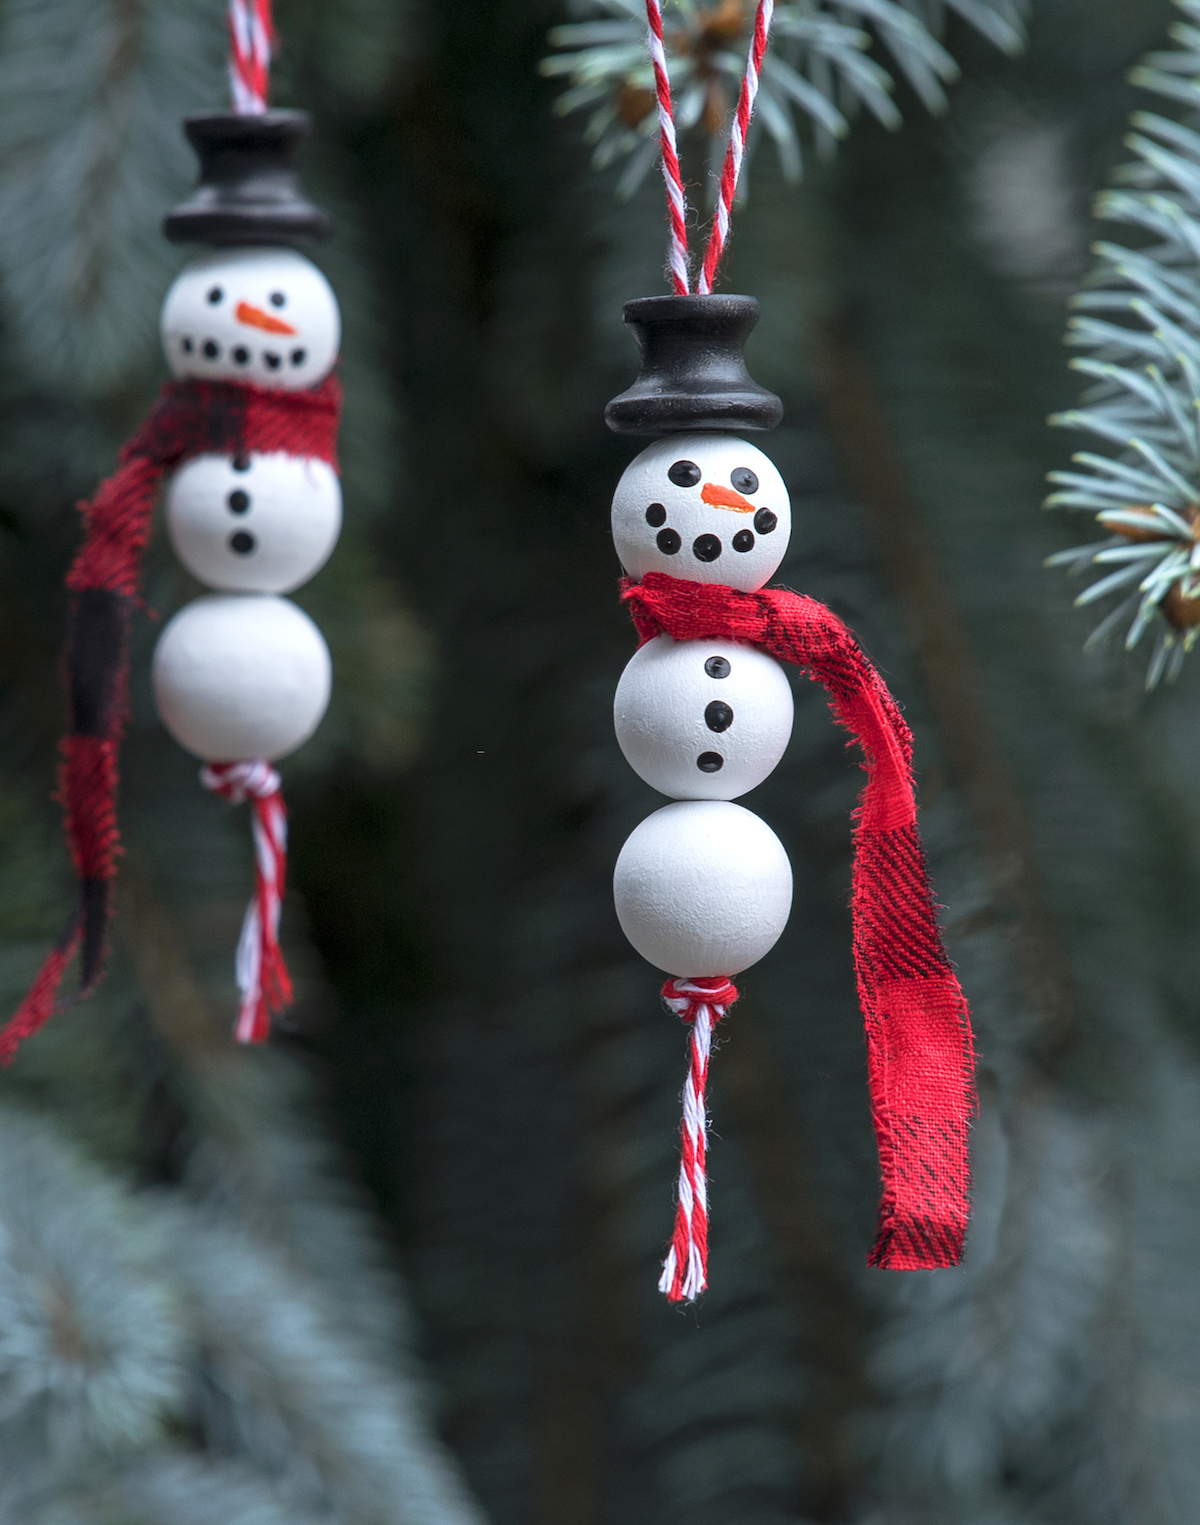
Wood Bead Snowman Ornament to Brighten Your Tree
Learn how to make a wood bead snowman ornament for your Christmas tree using simple craft supplies! Easy for both adults and kids.
Skills Required: Beginner. You’ll be painting small beads with acrylic paint, sanding, using a drill, and threading everything on baker’s twine. If you’ve crafted before this will be no problem.
I absolutely love snowmen! If I had to pick my two favorite “characters” or symbols of the Christmas or winter season, it would be snowmen and gingerbread men. They always make me happy!
Happiness. And we all need a little bit of that during the holidays, right? I think so.
If you know me in real life, you know I love making Christmas ornaments. There’s an immediate satisfaction because, typically, the work surface is small. It never takes long and you’ve got a project completed.
I love it! So not only does it put a smile on my face to make a snowman ornament . . . it makes me feel good about completed something. So many good vibes.
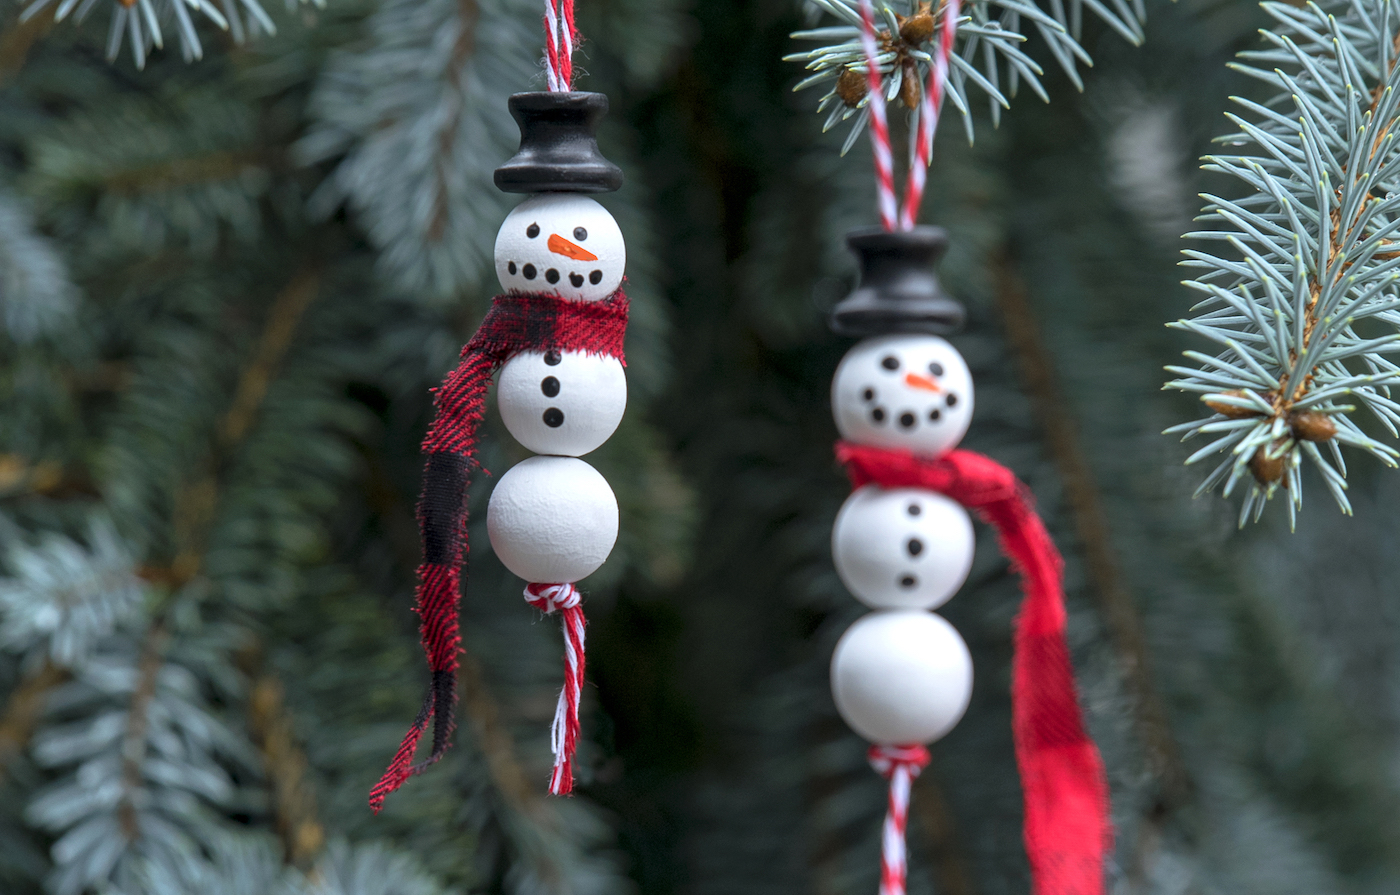
So what did I do this year? I made a wood bead snowman ornament! Actually more than one of them. And I can’t wait to show you how I did it. I promise these ornies are quite easy.
You’ll make these ornaments in four easy steps. You’re going to paint the snowman body, then drill and paint the hat. Then you’re going to string it together. And finally, you’ll add the scarf to finish.
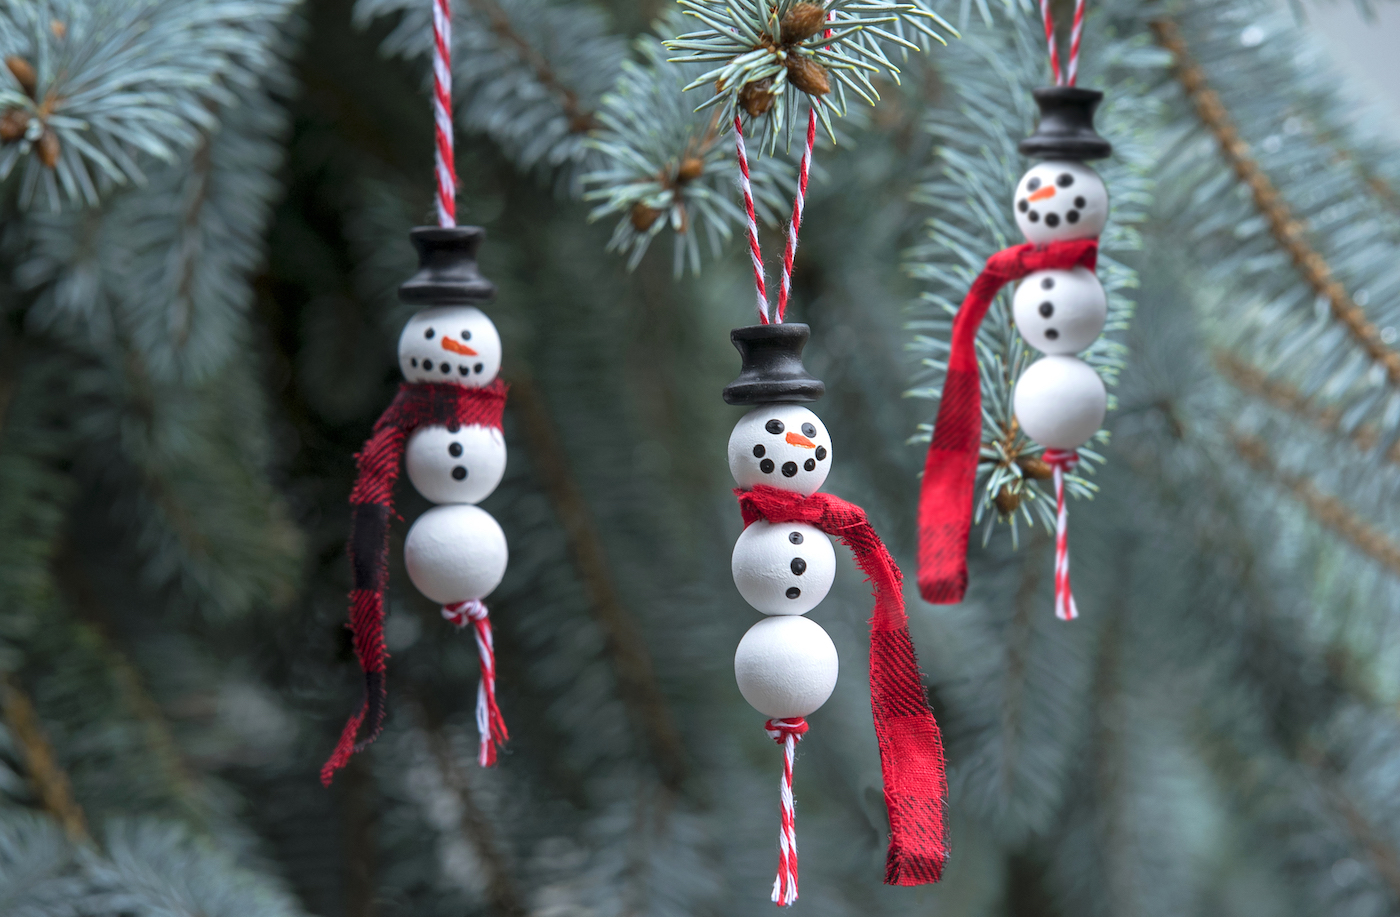
I think these would be great for a farmhouse or a rustic look. But honestly, they’re just cute! They could even be a fun kids’ craft (adults will need to drill the hat). It’s a very versatile Christmas craft.
Learn how to make these cuties below!
Gather These Supplies
- Wood beads (5/8″) – 3 per ornament
- Wood pull (3/4″) – 1 for the hat
- Acrylic paint – white, black, orange
- Baker’s twine – 14 – 15″
- Bandana or fabric scrap
- Scissors
- Paintbrushes
- Sandpaper
- Drill with 1/8″ bit
Some wood beads don’t have holes. Make sure your round ones do, or you can drill into them like you do the knob for the hat.
I just love the finished look. And the little hats tickle me. Wondering if I should’ve added glitter to the hat or maybe even a red band? Hmmm.
Get the printable how to card below:
Snowman Bead Ornament
Equipment
- Sandpaper
- Drill with drill bits 1/8" bit
- Paper clip or piece of wire, for stringing
Materials
- 3 5/8" Wood beads 3 per ornament
- 1 3/4" Wood pull 1 for the hat
- 3 bottles Acrylic paint white, black, orange
- 15 inches Baker's twine
- 1 Bandana(s) or fabric scraps
Video
Instructions
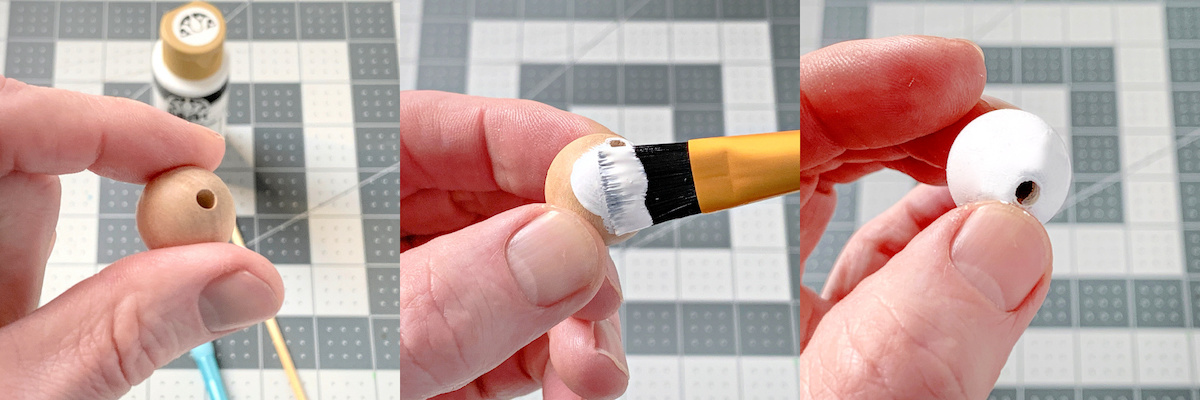
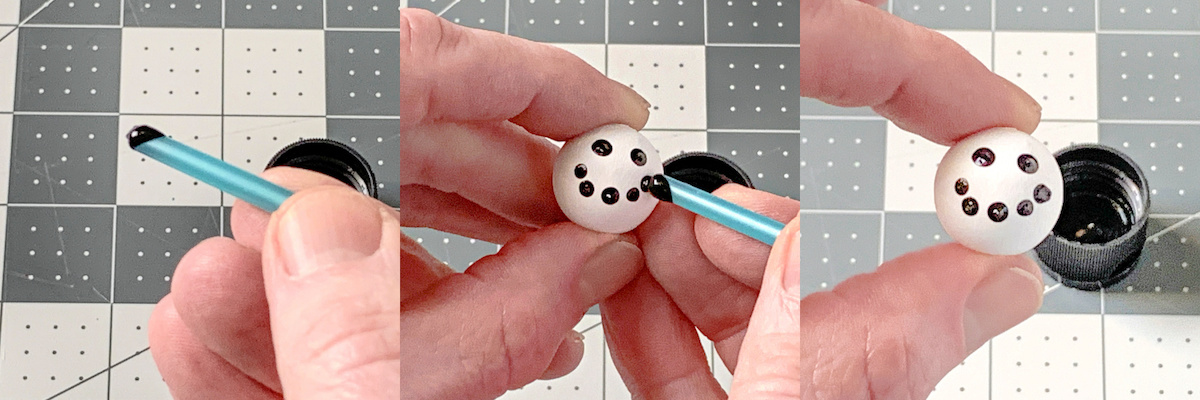
- Begin by painting the snowman's body beads with white. You can put the bead on the end of a paintbrush to paint – you can also paint half, let dry, and then paint the other half.
- Once the beads are dry, use the end of a paintbrush to dot a face on one of the beads. Then on another bead, put three black dots on it for buttons (bottom to top). Let dry. After you're done painting the eyes and buttons, you'll want to add an orange nose with a small paintbrush and orange craft paint.
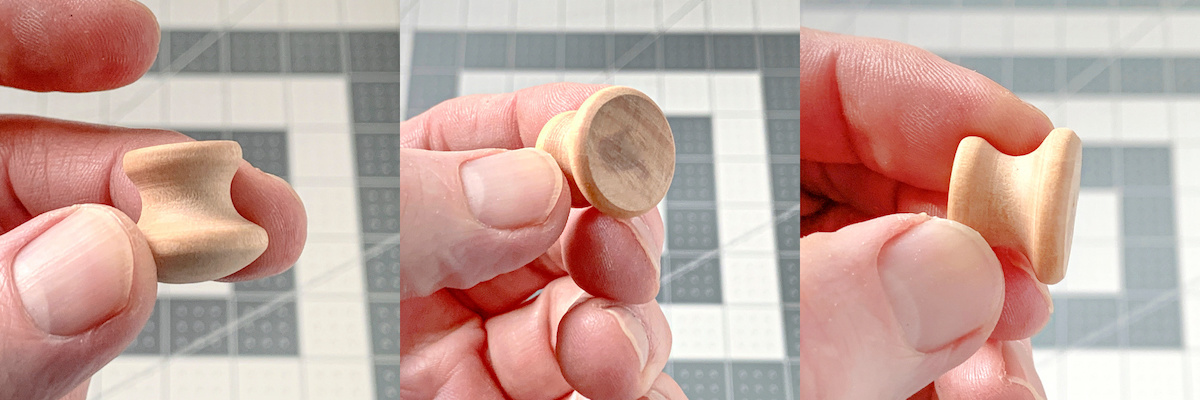
- I was lucky enough to find the cutest little knobs to act as a snowman's hat! To start, sandpaper the round end down as flat as possible. It will look more hat-like.
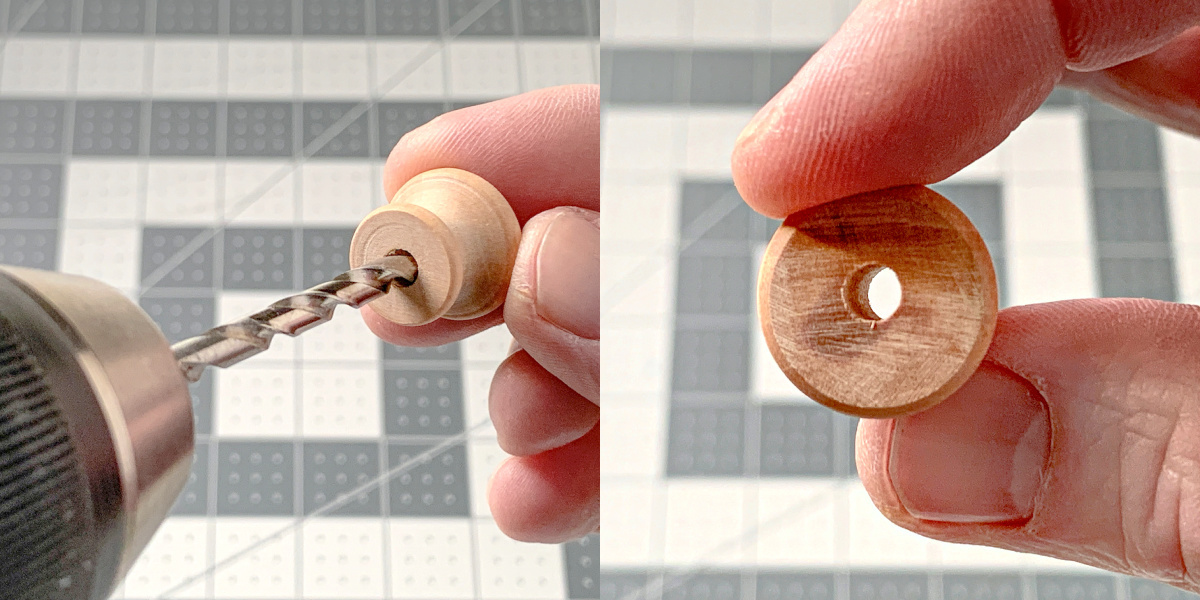
- Choose a 1/8" – 1/4" bit – you just need the hole large enough for the thread hanger to go through. Drill all the way through to create your hole.
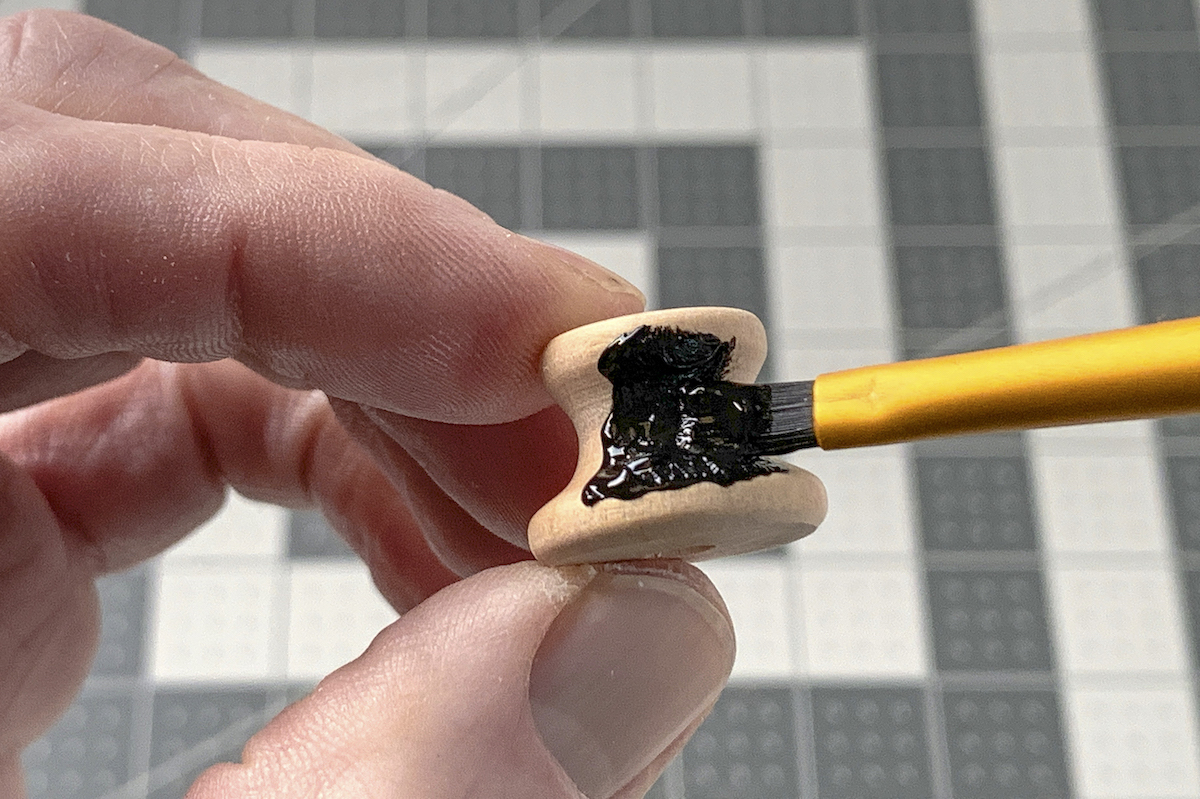
- Paint the hat black with acrylic paint. Let dry.
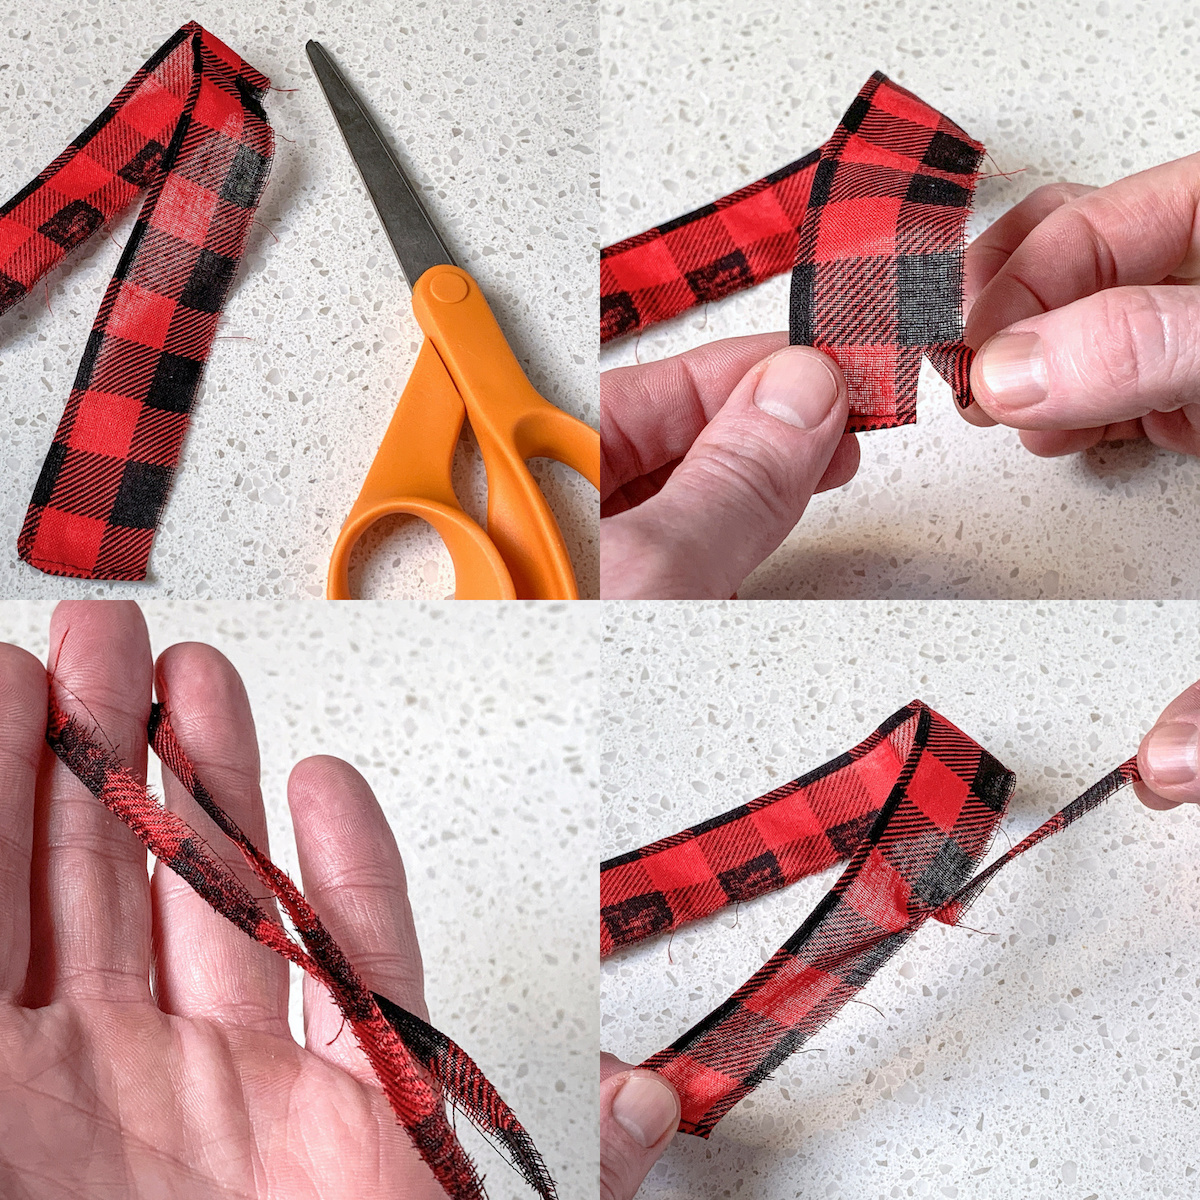
- Cut a small slit in one end of the fabric or bandana. Tear a piece of the bandana to act as a small scarf.
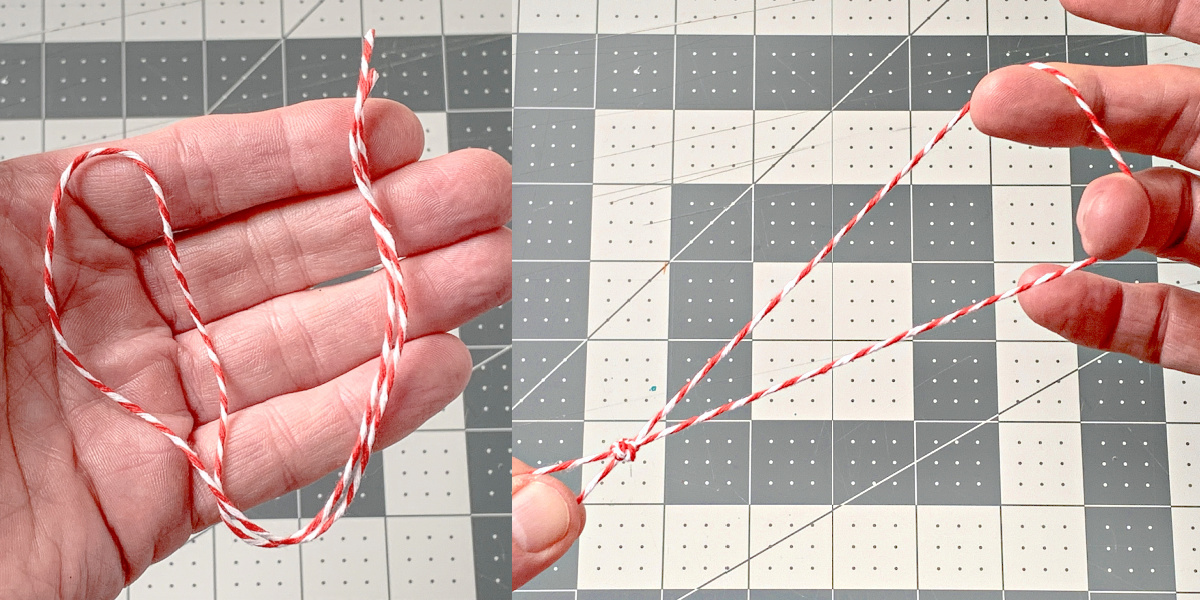
- Cut the length of baker's twine. Loop and create a knot at the bottom.
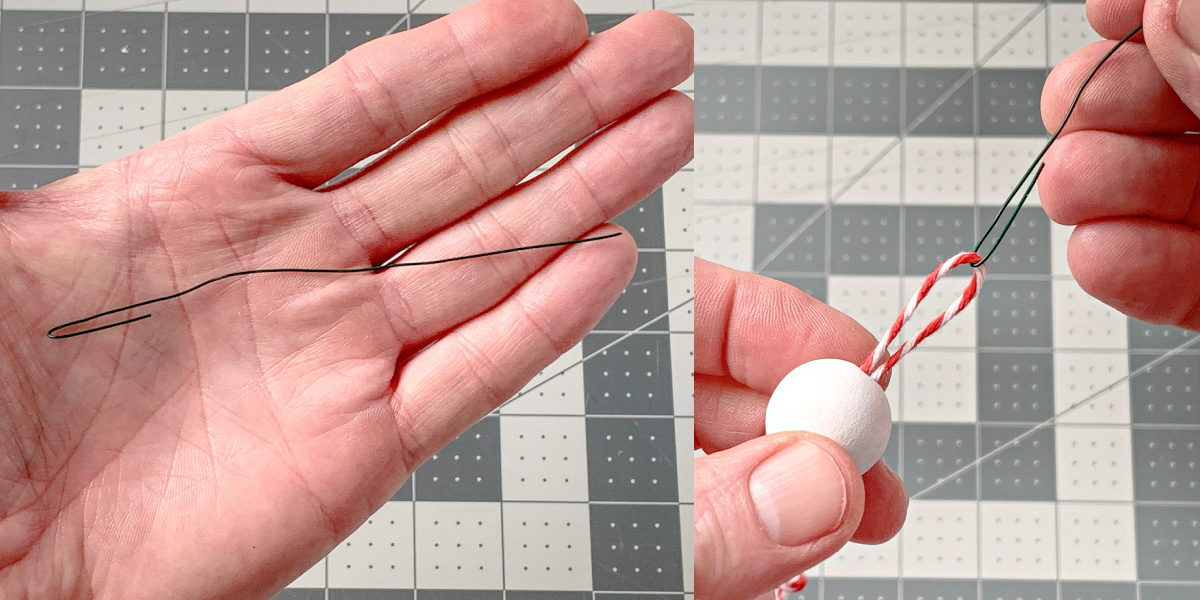
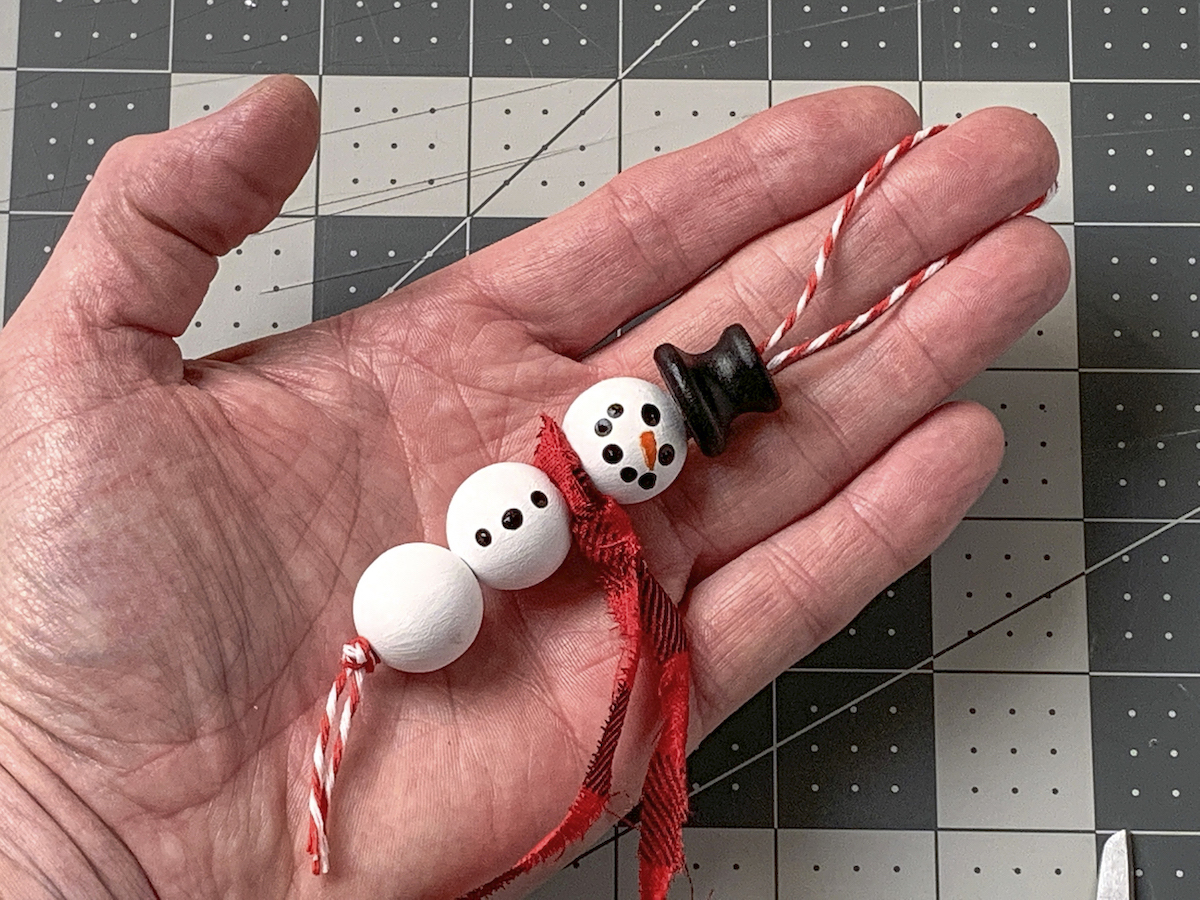
- String the beads onto the twine, and make sure they are in the right order. White bead, button bead, face bead, and then the hat. Use the paperclip or wire to help you.
- Create a loop for the scarf as shown.
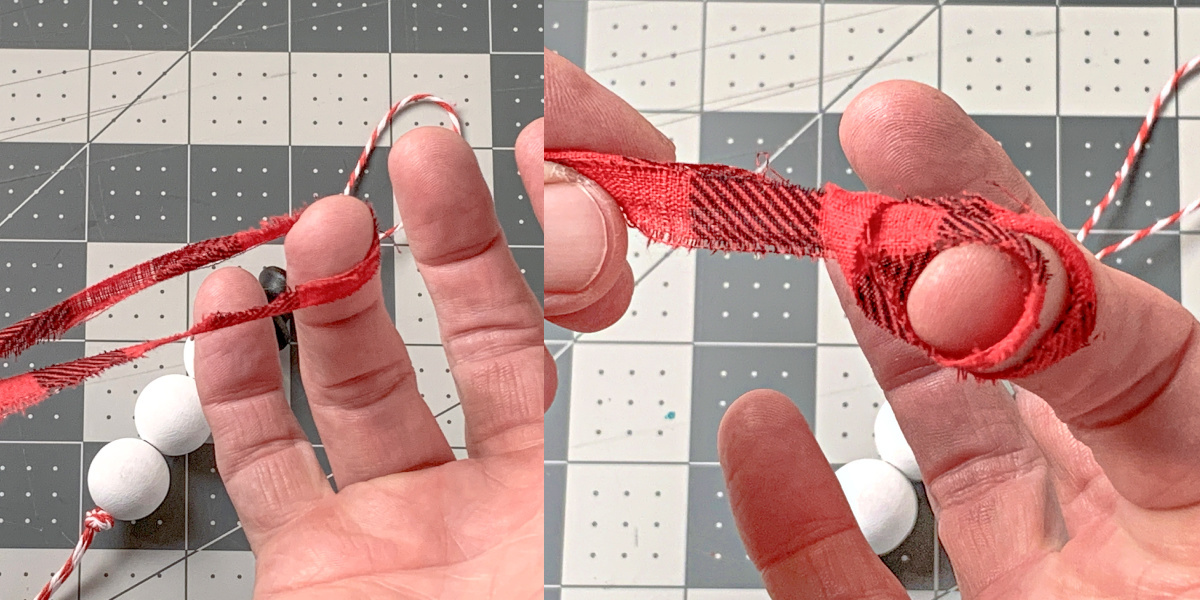
- Add the scarf loosely around the neck and pull a little bit to tighten. Then hang.
Notes
If you enjoyed making these snowman bead ornaments, I’d love for you to check out these other projects:
Beaded Star Ornament • DIY Gnome Ornaments • Snowman Mason Jar • Wine Cork Snowman • Winter Candlesticks • Wood Bead Ornament