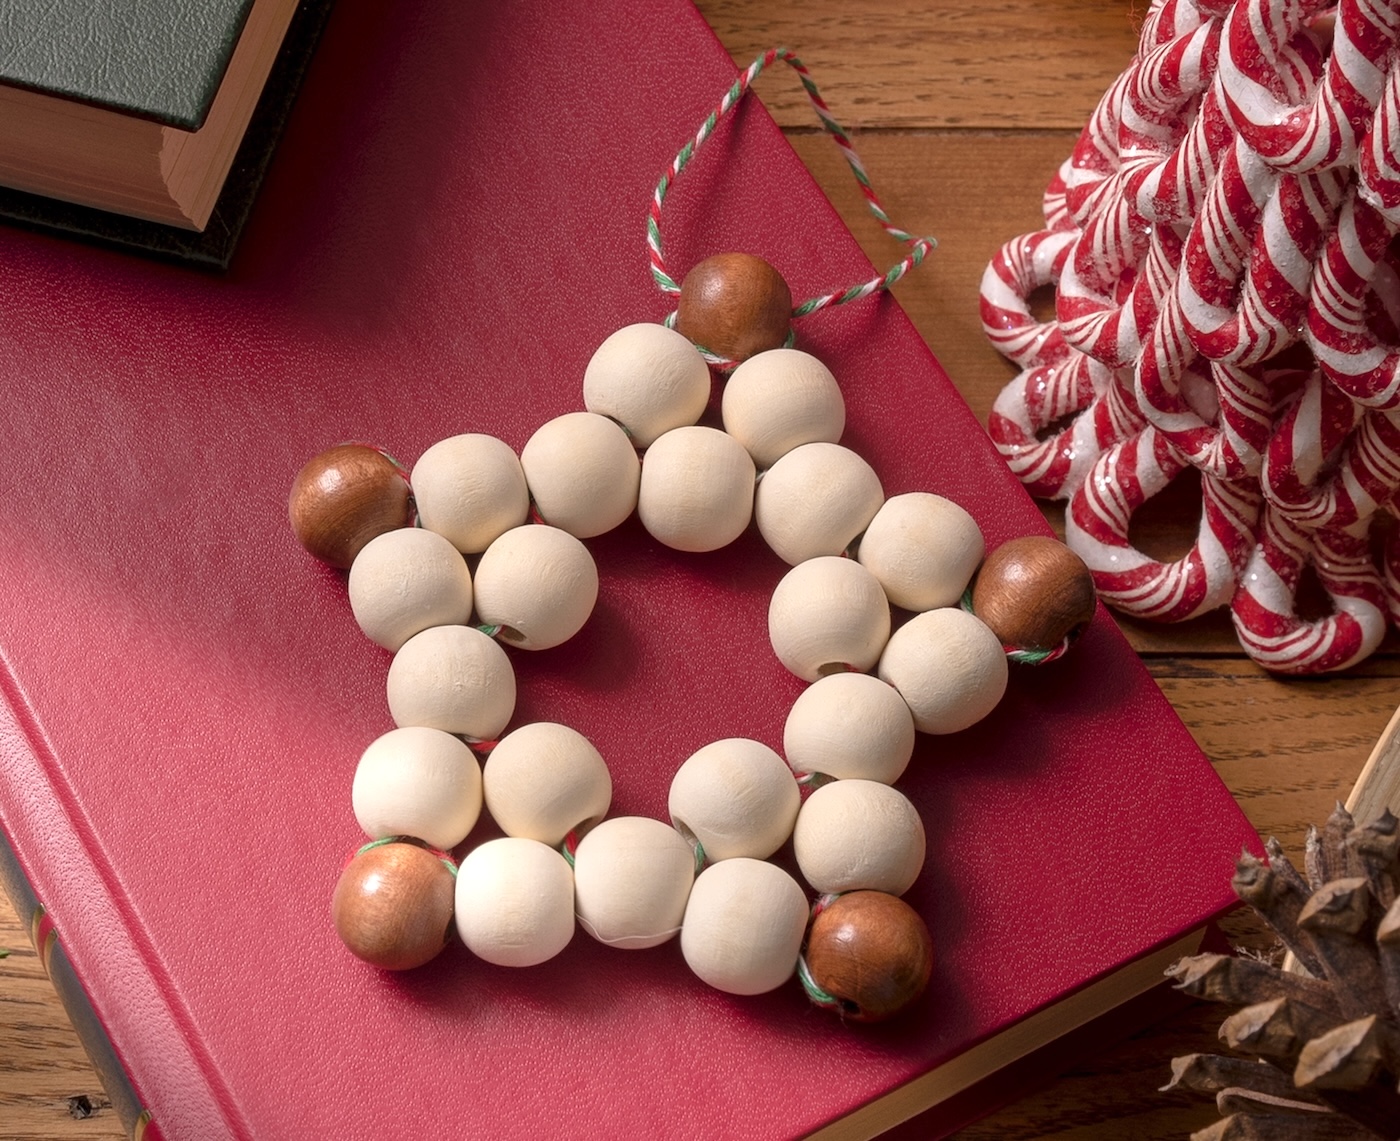
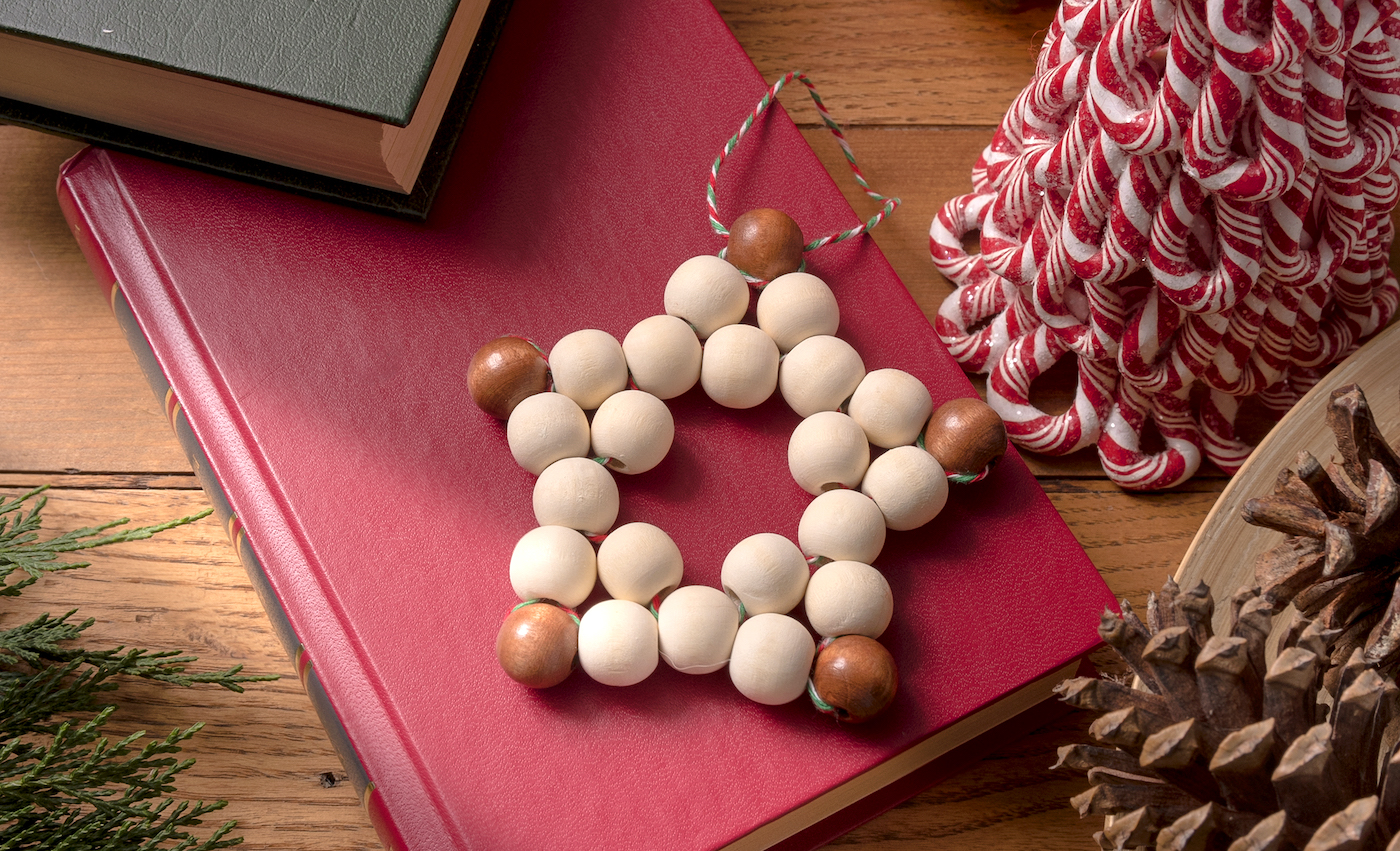
DIY Wood Beaded Star Ornament: Perfect for Holiday Decor
Learn how to make a beautiful wood bead star ornament that will look awesome in your Christmas home! Hang on your tree, in a window, and more.
Skills Required: Beginner. This might look complicated, but it’s not at all. You’re going to be stringing beads follow the instructions. An older child could do it and definitely a teen or tween.
Wood beads are such a versatile craft supply! I’ve used them in a lot of projects, including Christmas ornaments. I made wood bead wreaths, gnome ornaments, and snowman ornaments – all with small beads.
And I couldn’t stop there!
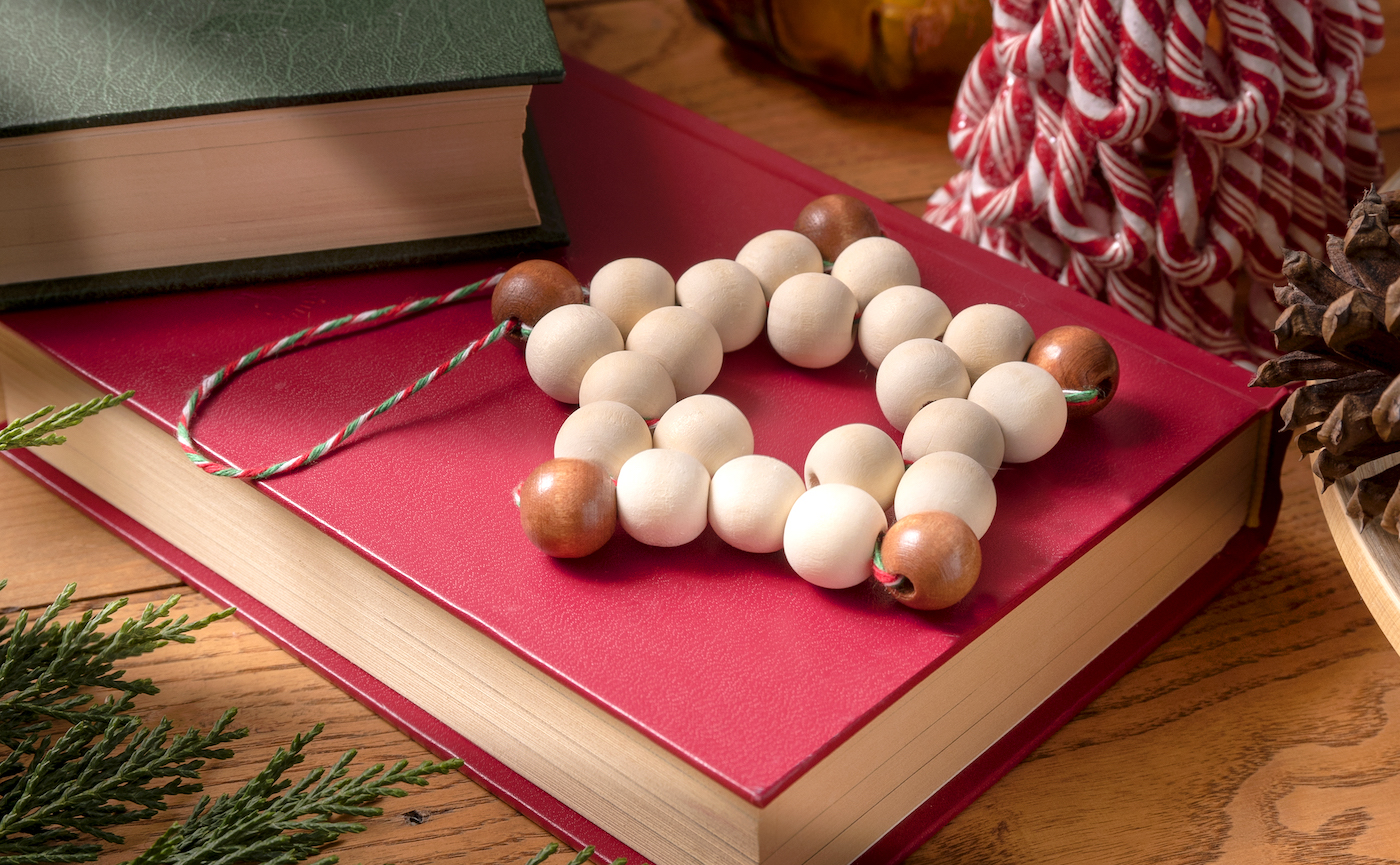
Once I made the wreaths, I thought about doing some additional stringing of the ornaments to make shapes. I decided on a wooden bead star ornament, and I’m really happy with the results.
When I first saw this Christmas ornament I thought it would be pretty difficult to make . . . but it’s not.
You’re going to make this beaded ornament in four simple steps. You’ll string the beads in three separate rows (your first three steps). Then finally, you’re going to add the baker’s twine loop so you can hang this bad boy on your Christmas tree!
For this project, I rooted around in my stash to see what beads I had. I found some stained ones from a jewelry project, and decided I wanted my star tips to be the five stained beads. I really like the way it turned out.
Gather These Supplies
- Wood beads, unfinished (5/8″) – 20
- Wood beads, stained (5/8″) – 5
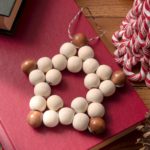
- Baker’s twine – several feet
- Tapestry needle (optional, but makes it easier)
- Scissors
It has such a Scandinavian feel – but I could also see it for farmhouse or rustic holiday decor. What do you think? Leave me a comment!
Get the printable how to card below:
Wood Bead Star Ornament
Equipment
- 1 Tapestry needle optional, but makes it easier
Materials
- 20 Wood beads unfinished (5/8")
- 5 Wood beads stained (5/8")
- Baker's twine several feet
Video
Instructions
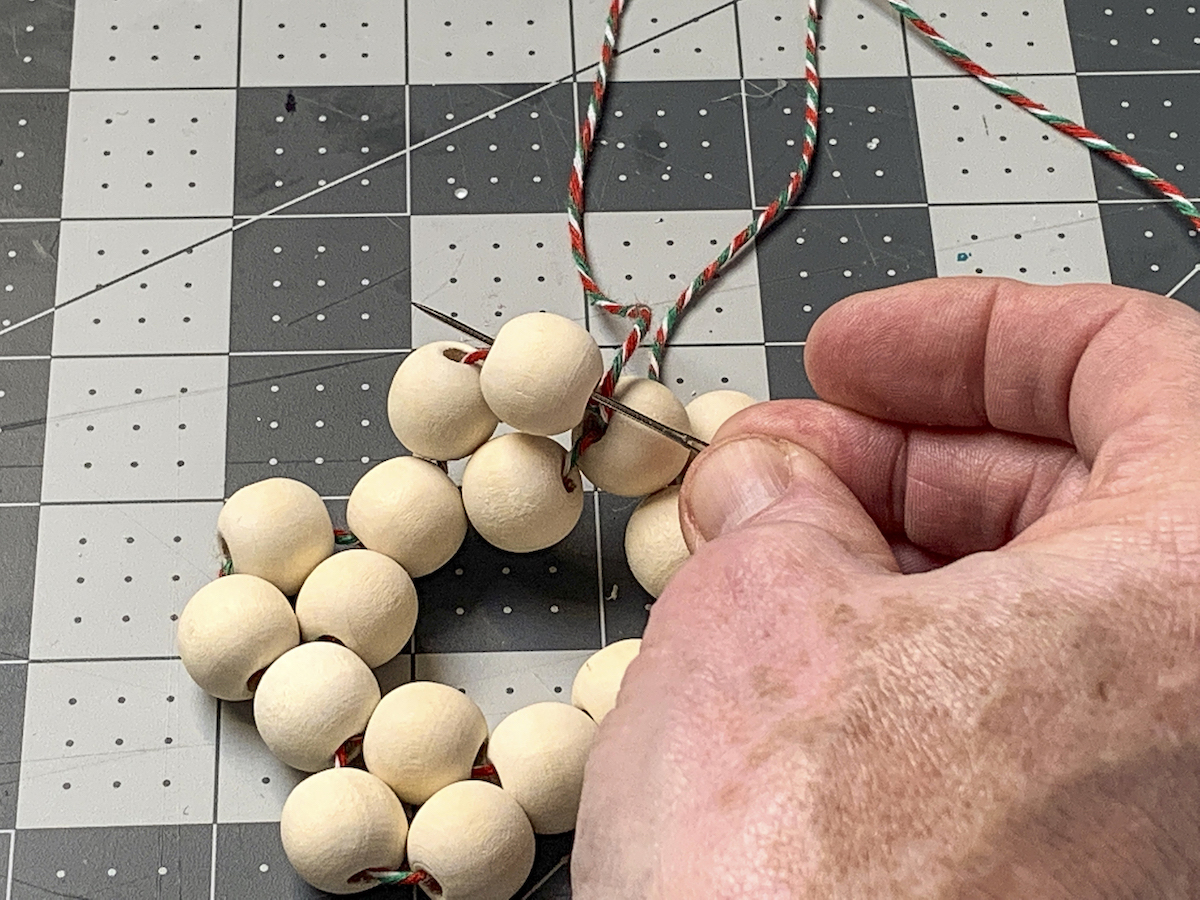
- Grab some baker's twine or other thread and cut a long length. Thread onto a tapestry needle for ease in stringing.
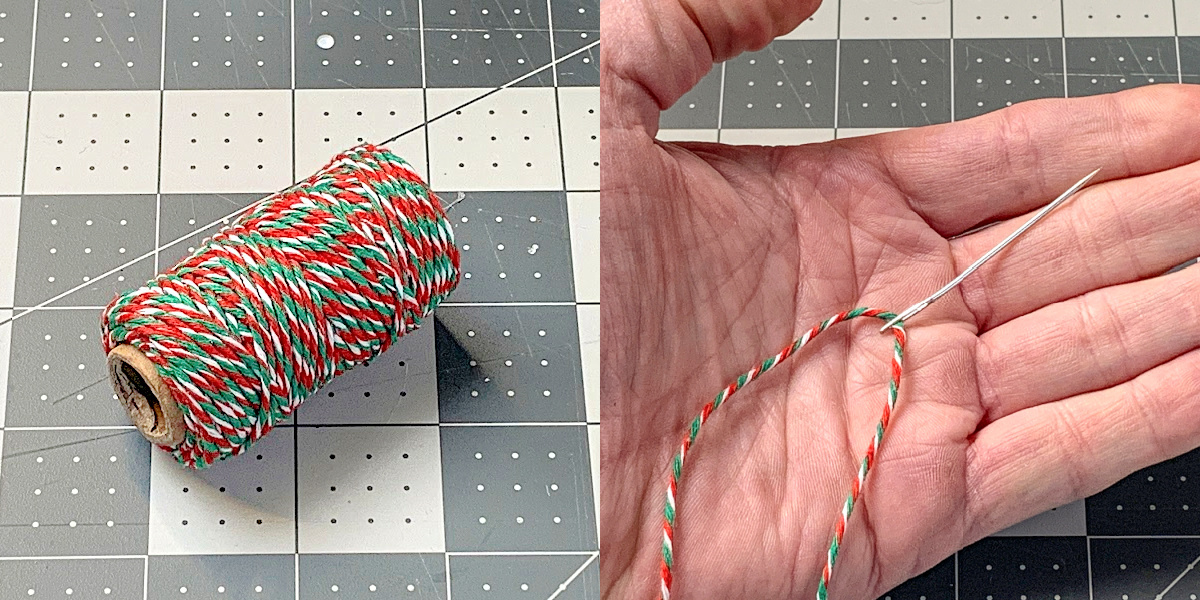
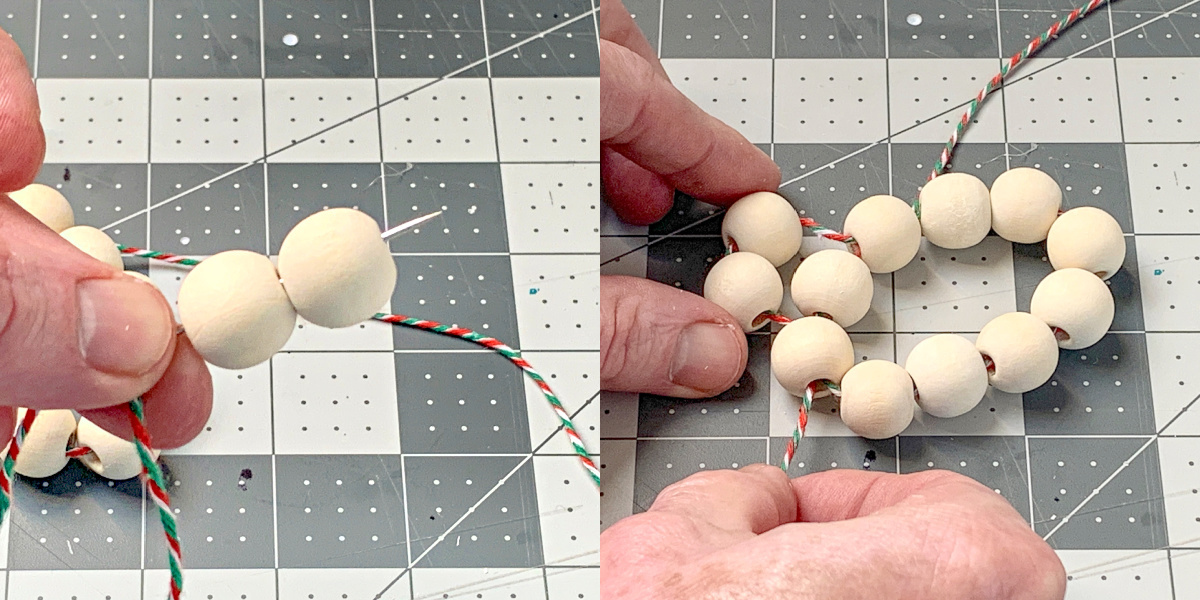
- To establish the inner circle of your ornament, you're going to string ten beads onto the middle of the thread.
- Now create a circle. String the right hanging thread through the very last bead. You will have thread coming out of this bead from both the left and the right. This completes your first inner row.

- Now you're going to put the second row of beads onto your ornament. Take the string coming out of the left side and put it onto the needle. Add two beads onto that needle. Then you're going to skip a bead, and insert the needle into the next bead.
- You're going to continue around the outside of your first row, stringing on two beads, skipping a bead, and then inserting the thread. Refer to the diagram below.
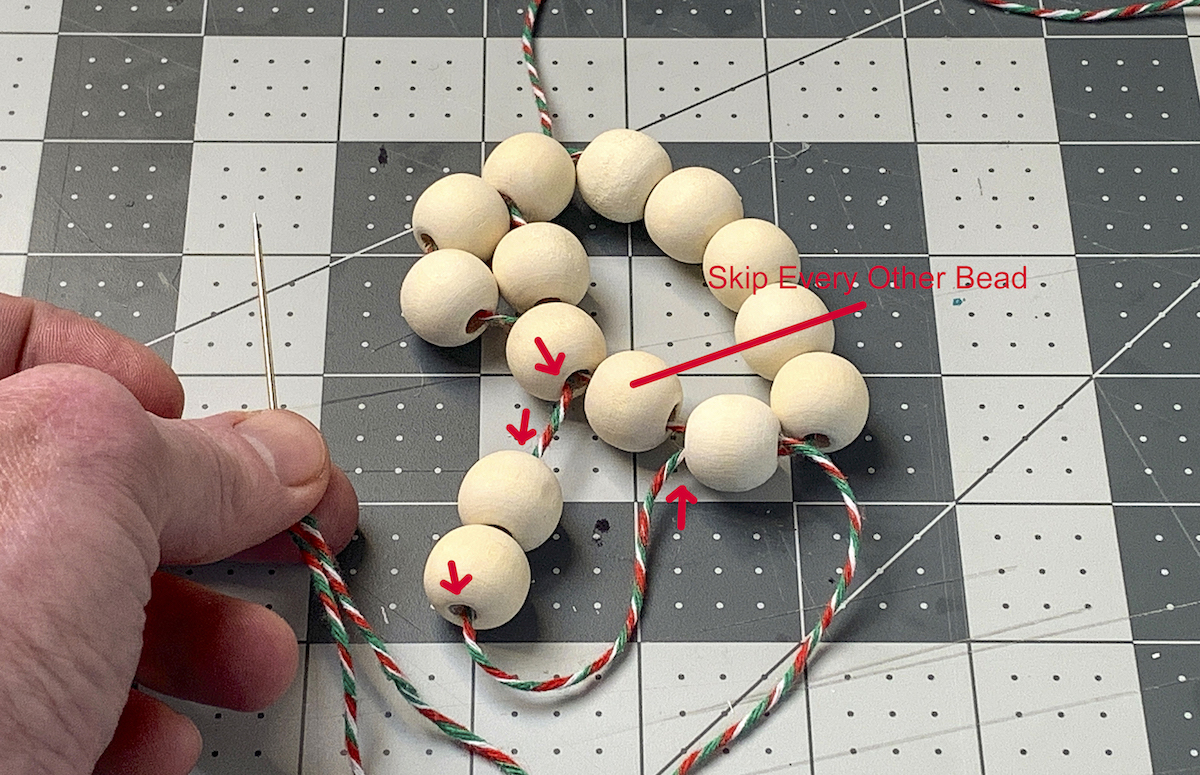
- Continue all the way around the base row. You will use ten beads for this step.
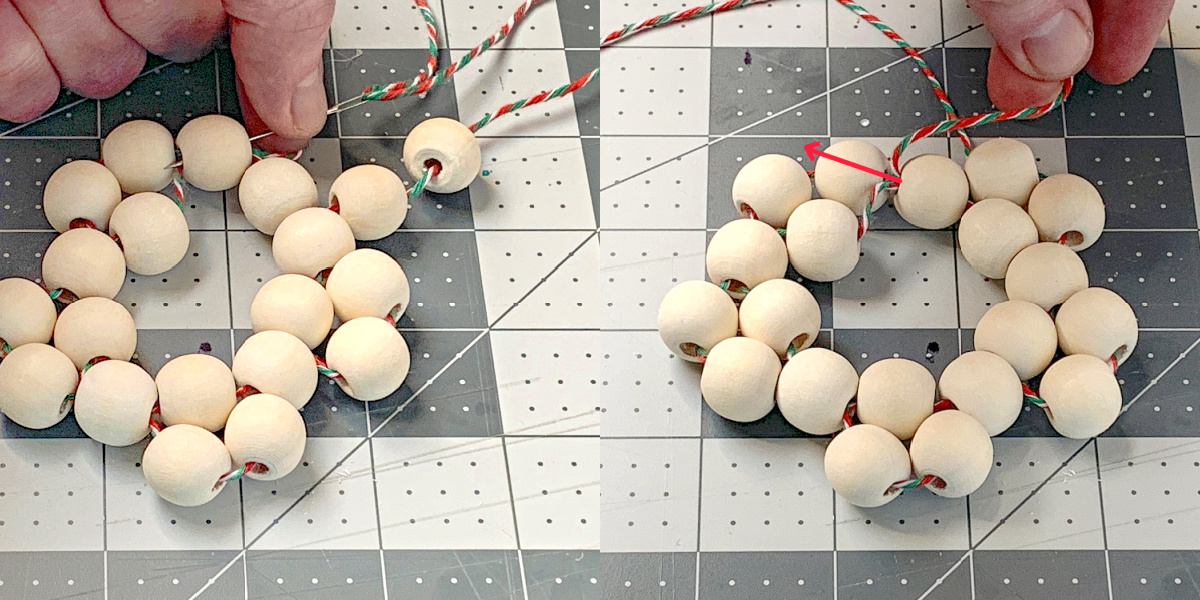
- Once you get back to the original bead, you will thread the bead from right to left as shown.
- Bring the thread out through the first bead of the second row. The thread should come out to the left between those first two beads you put on.
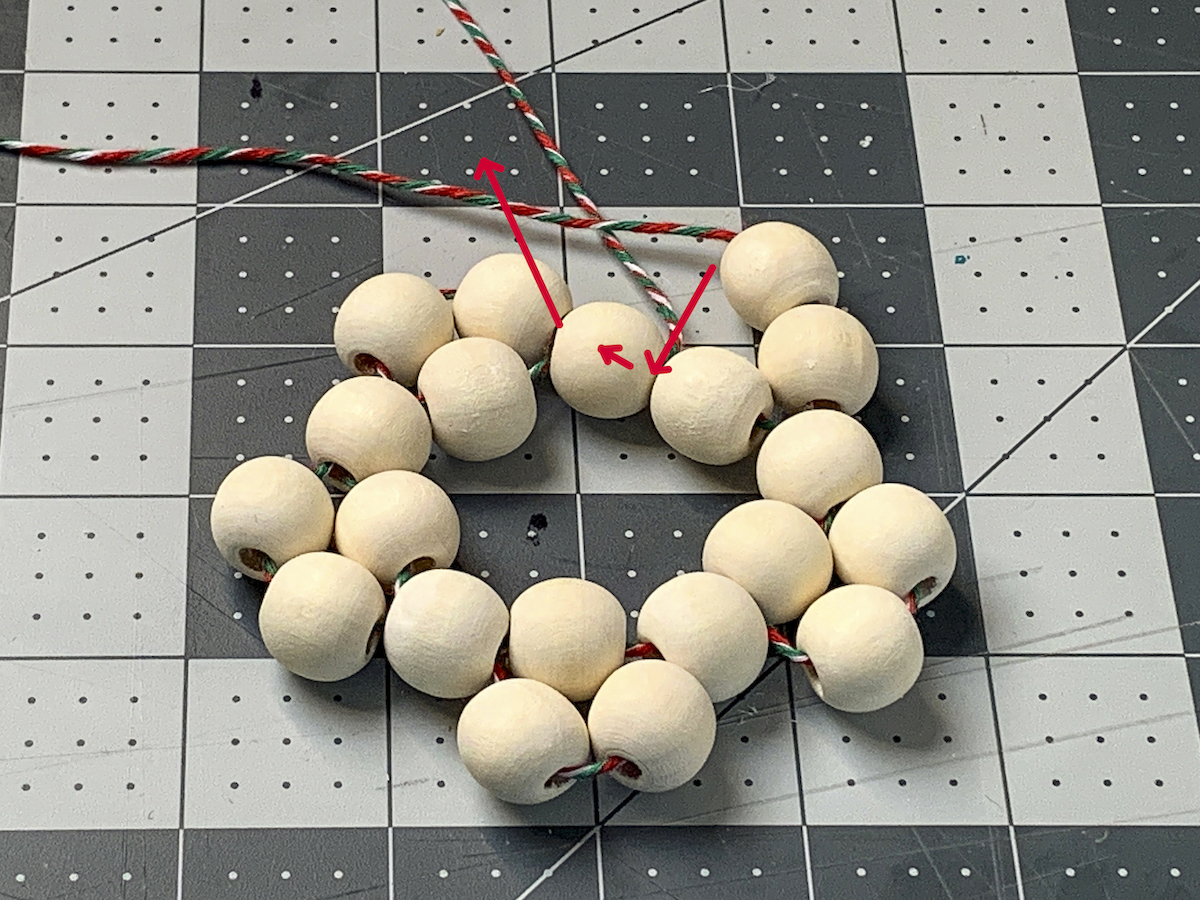
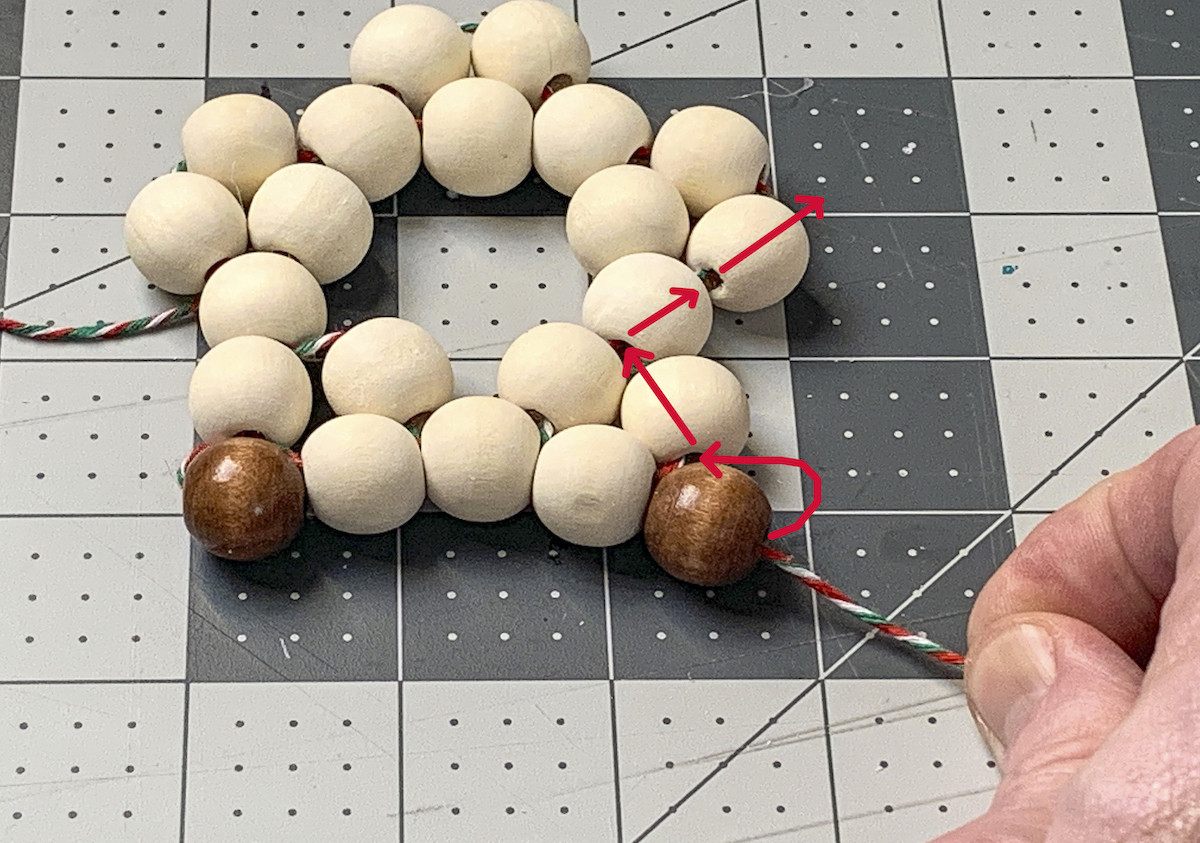
- For this third row, you'll use five beads to make the points of the star. You'll also thread around the entire ornament. The thread is already between two beads, so add the first stained bead.
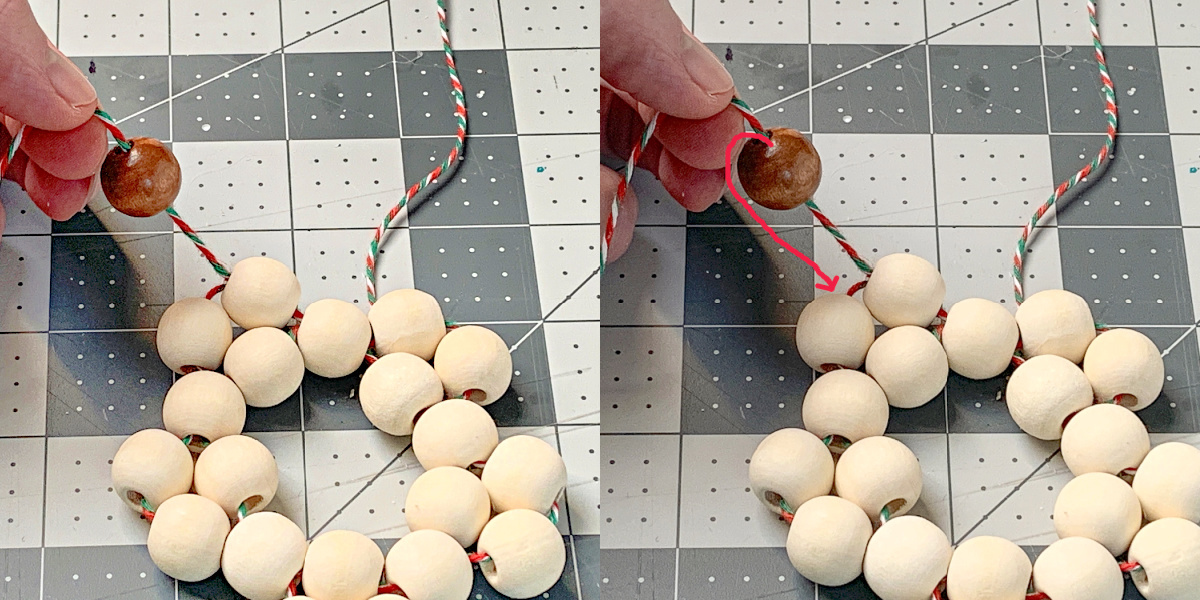
- Thread the twine through the next three beads on your ornament as shown in the diagram.
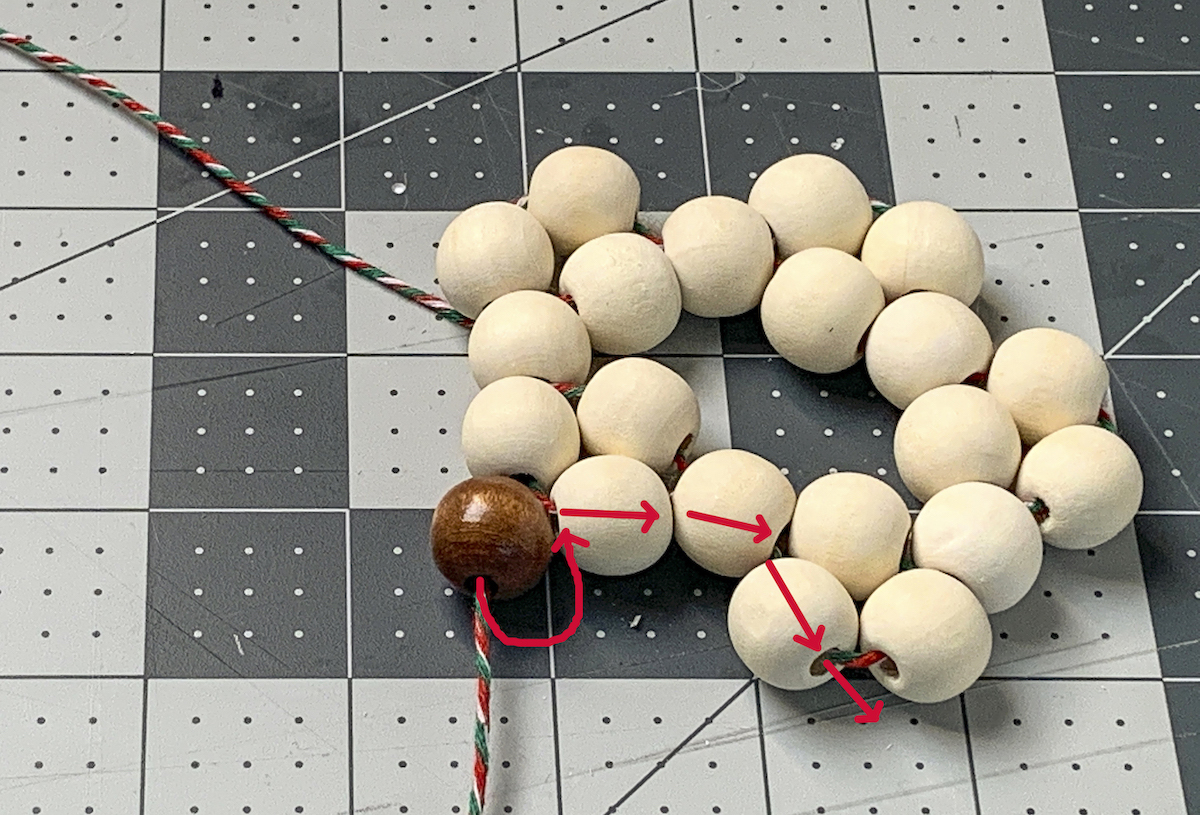
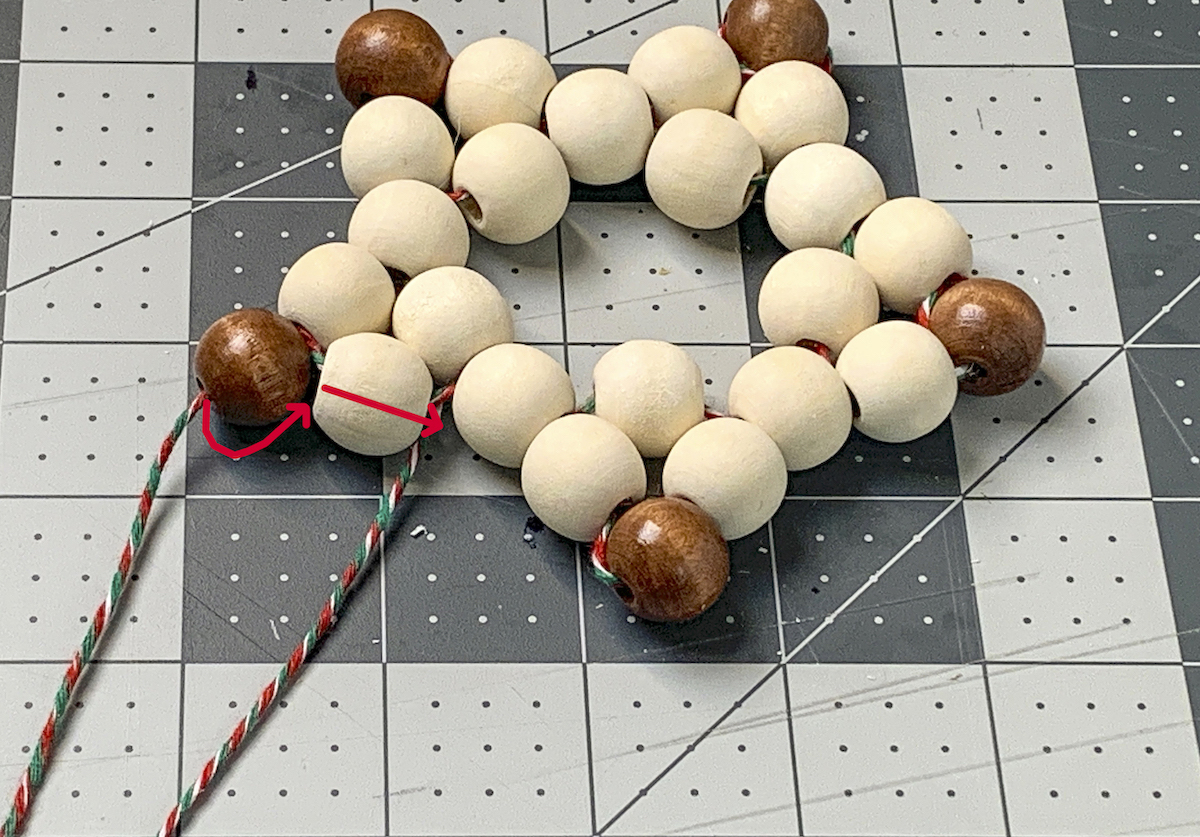
- String on another stained bead.
- Now string the twine through the next three beads.
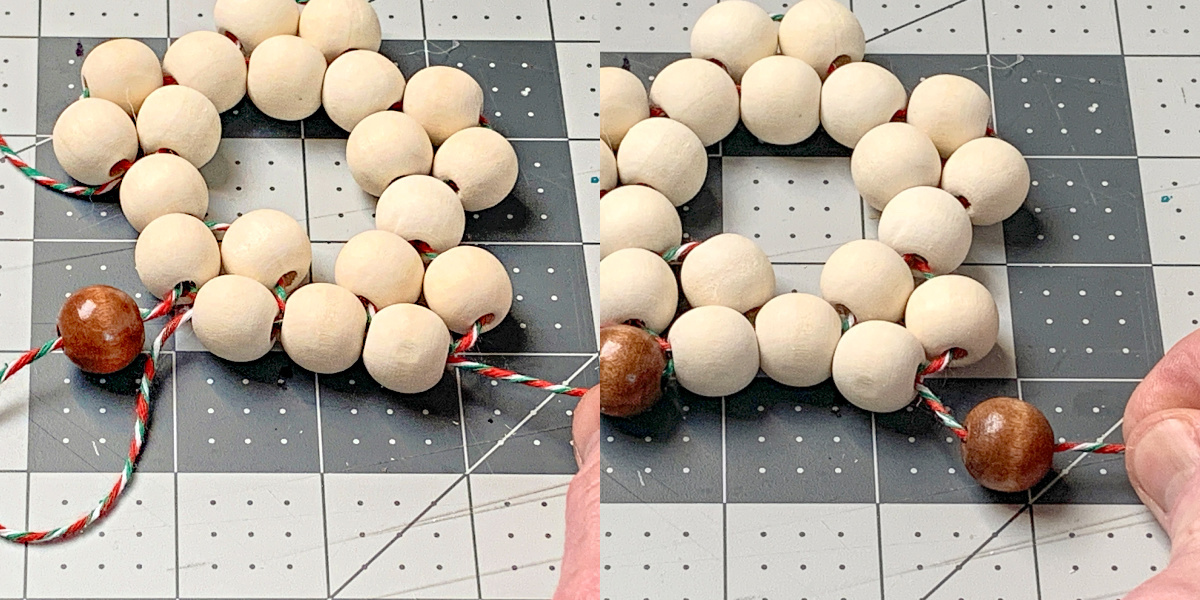
- Add another stained bead, and continue in this way until you've strung on the five points of the star.
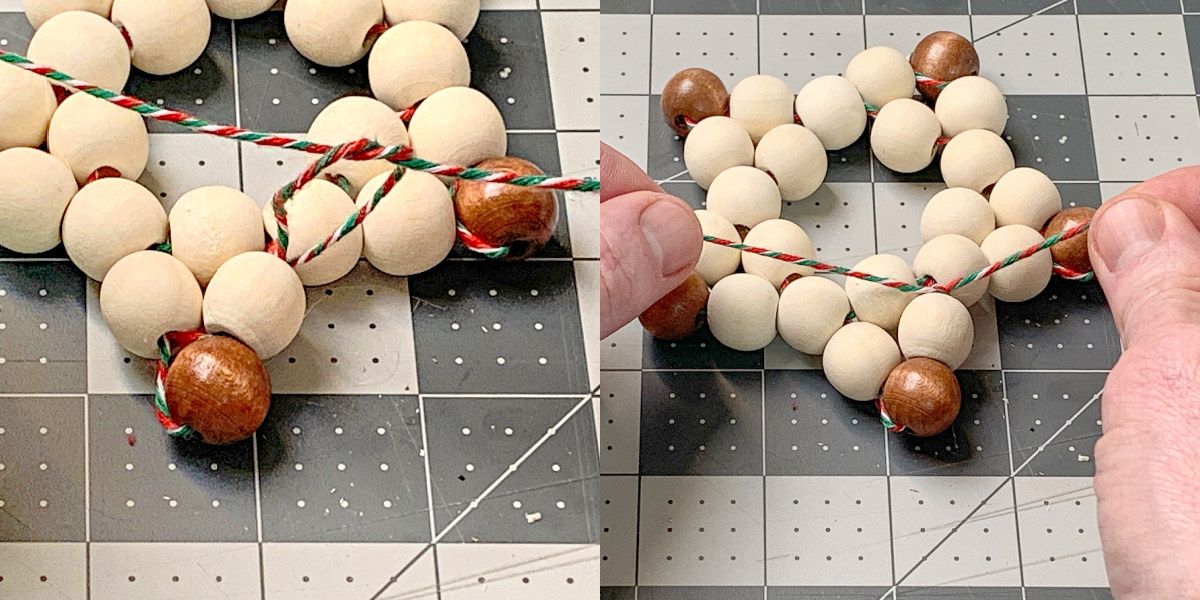
- Put the twine down through the next bead, meeting the original twine. Tie a secure knot, pulling everything someone tight (but don't go crazy).
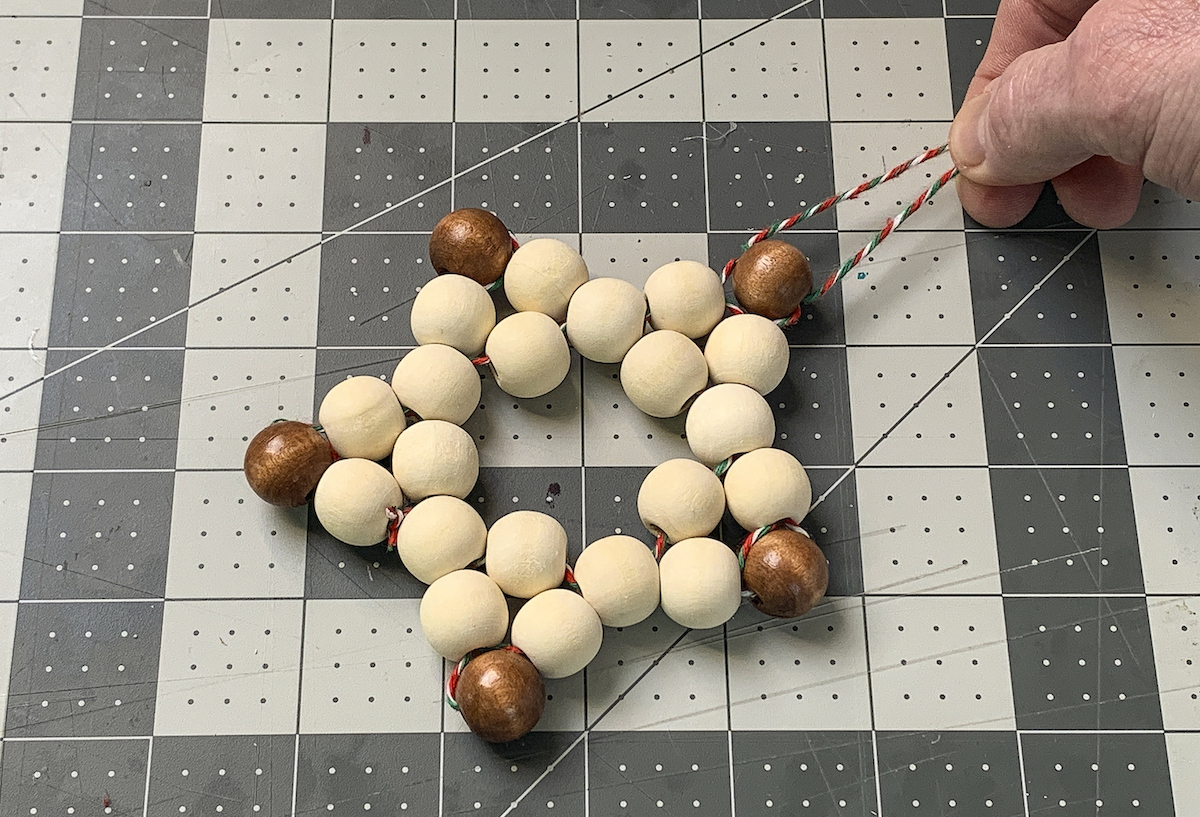
- Snip off any loose twine and admire your star shape.
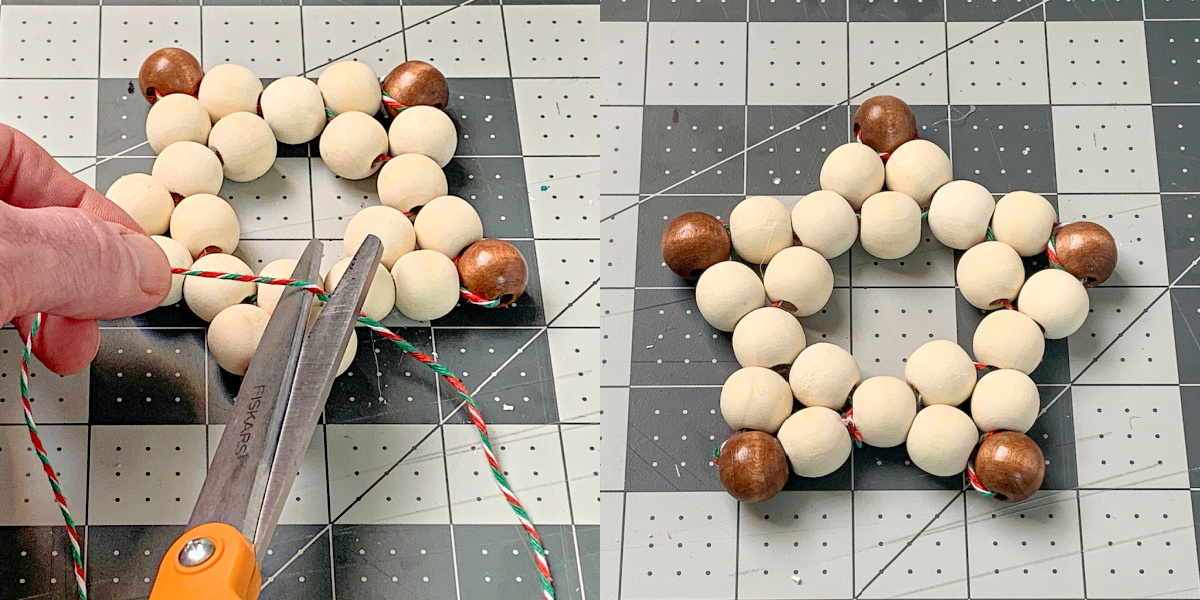
- Thread some of the twine through one of the stained beads and tie it into a knot.
Notes
If you enjoyed making this ornament, I’d love for you to check out these other ornament ideas:
Candy Cane • Cookie Cutters • Crochet Angel • Crochet Bell • Cross Stitch • DIY Snow Globe • Mandala • Metallic Keys • Mini Wreath • Origami • Poinsettia • Polymer Clay • Temporary Tattoos • Washer Star • Wood Slice • Yarn Wrapped