Easy DIY Wood Slice Ornaments to Rustic Up Your Tree
Learn how to make wood slice ornaments for your Christmas tree and other holiday decorating. These are SO easy and inexpensive. There’s also a free printable provided to use as a template for your designs!
Skills Required: Beginner. Beginning crafters should be able to tackle this project pretty easily, especially if you buy the wood slices pre-cut and dried. If you choose to use cut branches, you’ll need to know how to use power tools and go through a drying process (which also isn’t hard).
You guys. I’m so excited to share this tutorial for wood slice ornaments with you today because it’s so easy. If you love wood burning, this is going to be fun for you. Not that burning is the only method for decorating these wood ornaments . . . there are other ideas too.
And I will show you those as well.
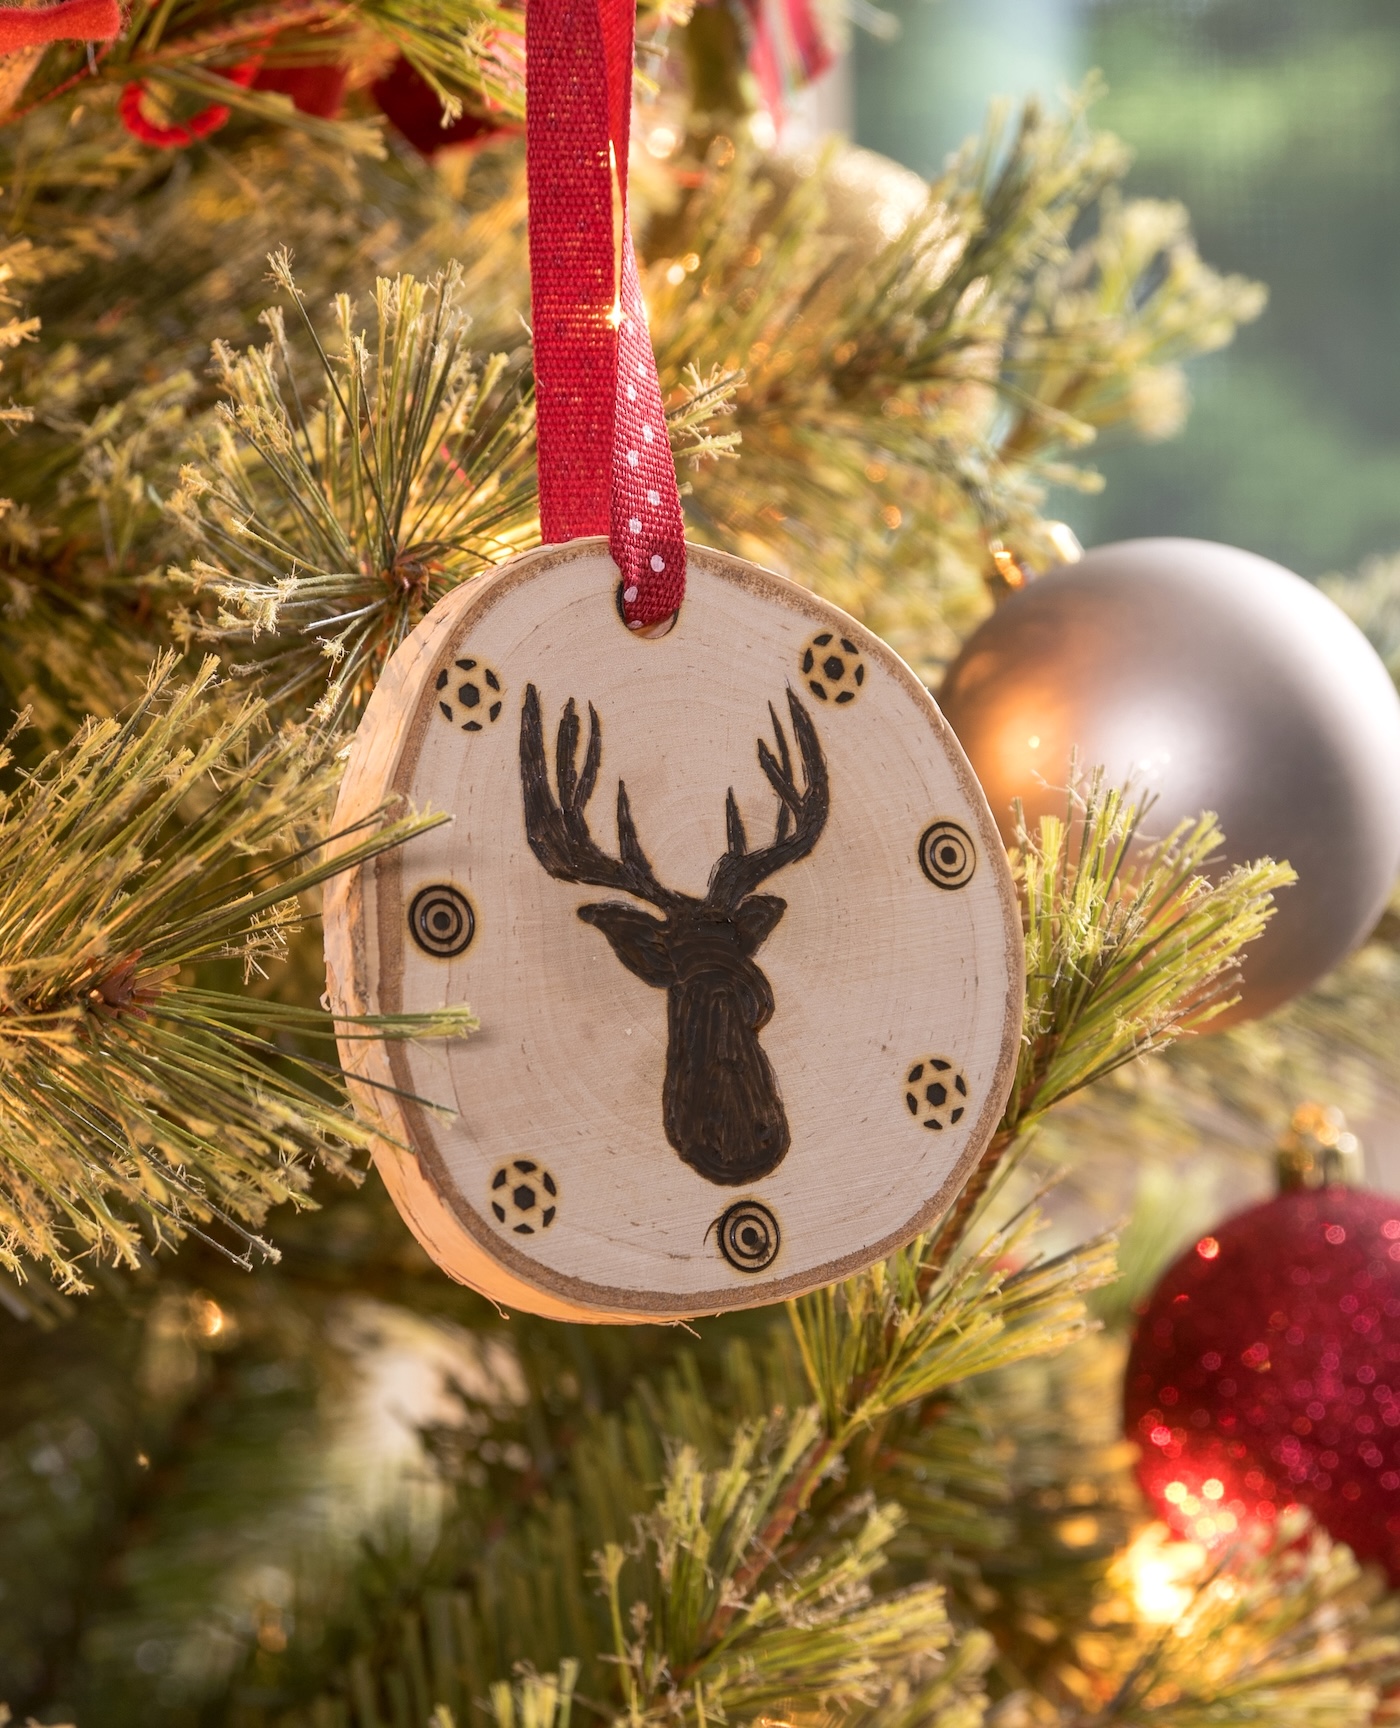
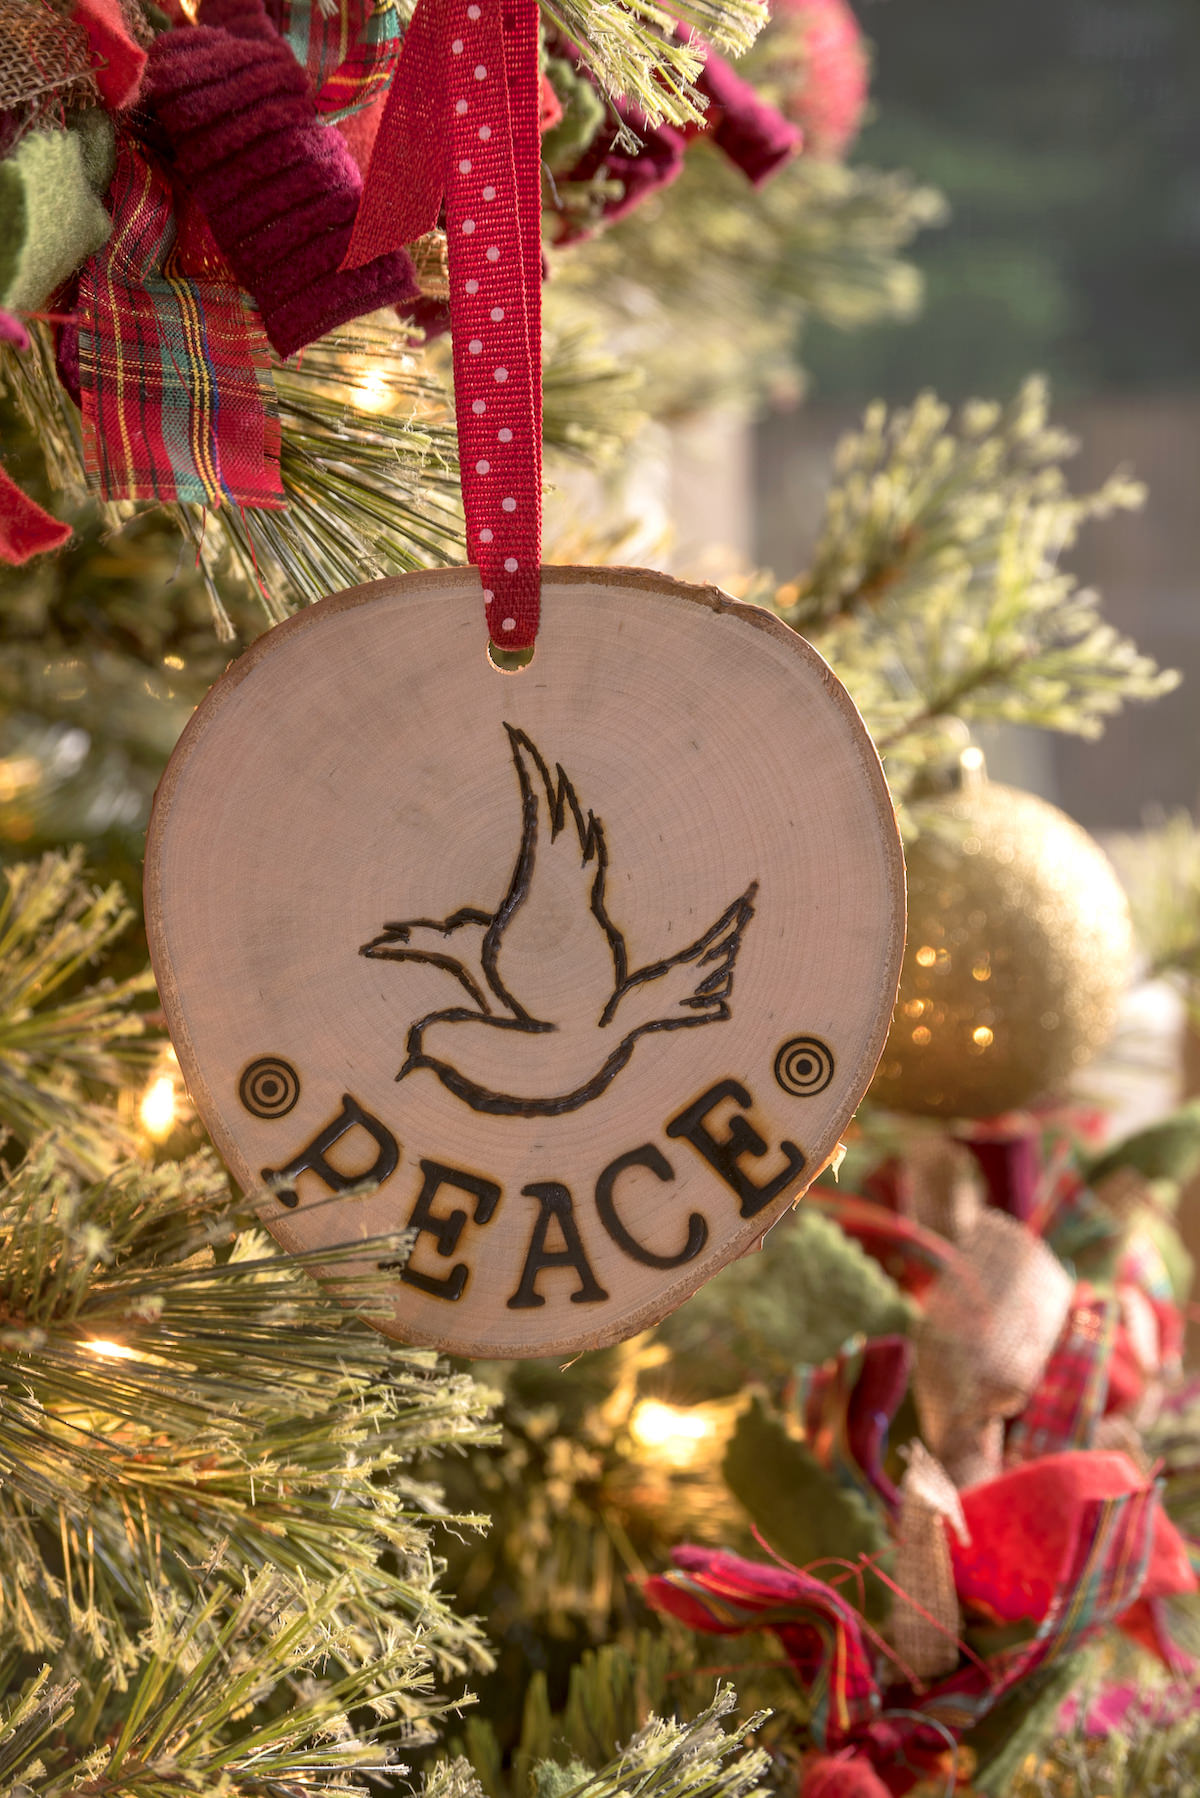
But first I’m going to show you how to wood burn ornaments, because that’s what I did for these. And frankly, I love the outcome.
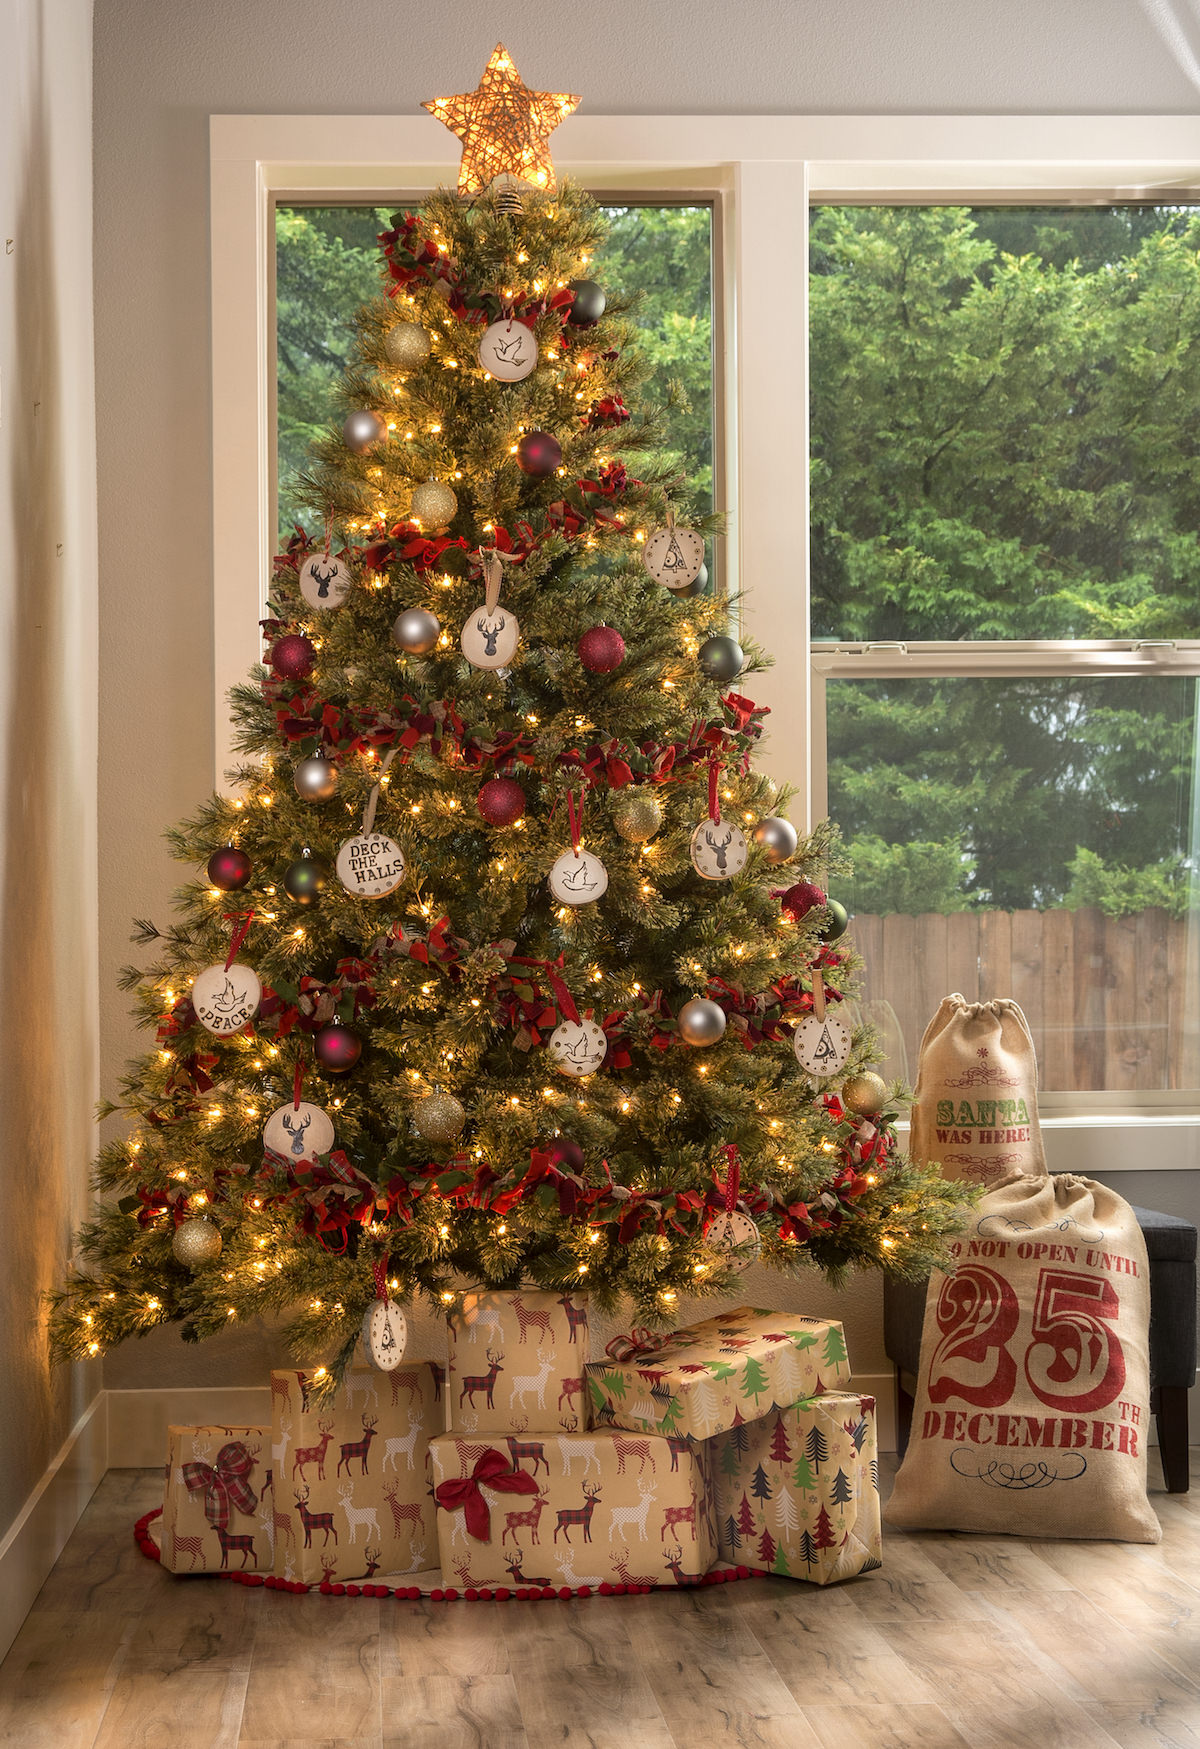
These ornaments are so perfect for a rustic or farmhouse style Christmas tree – or gift tags – or any sort of festive decorating. I just love them so much.
I have used both wood circles purchased from the craft store in projects as well as ones that were cut from tree branches.
If you’re going to cut your own, it will be free, but you’ll also have to go through some steps. You need a hand saw, and you’ll cut the branches to about 1/2″ or 1/4″ thickness to use for your wood slice ornaments. Then you need to wipe away the sawdust and let them dry before using.
But here’s the catch – usually the rule for drying out wood is a year for every inch of thickness. This would mean that, depending on the thickness, it’s going to be about 3 – 6 months before you can use them.
If you cut down a tree in spring, that time frame could work. Otherwise . . . read the next section for drying information.
You can let wood dry naturally (which takes a lot of time), but my other favorite methods that cut to the chase are using denatured alcohol and baking. I discuss both below.
Baking
If you cut your own wood, baking is the easiest option. To do this, set your oven to 200°F and place the slices in on a cookie sheet. Leave for 45 minutes, then flip over to the other side.
Denatured Alcohol
Another option is to use denatured alcohol. This blog post describes the details of the method, but essentially you will let the wood sit in a bath of denatured alcohol for about 24 hours, and then dry out for 24 hours.
Gather These Supplies
- Wood slices – one per ornament
- Wood burning tool
- Transfer paper (also known as graphite or carbon paper)
- Pen or pencil
- Ribbon (for hanging)
- Scissors
- Tape
- Drill with a small bit
- Free printable – or your own graphics
Be sure to follow all safety instructions on your wood burning tool! It’s a serious burning tool and that includes your hands . . . so be careful.
Get the printable how to below:

Wood Slice Ornaments
Equipment
- Pen or pencil
- Computer and printer
Materials
- 6 Wood slice(s)
- Transfer paper
- Ribbon(s)
- Painter's tape
- Scrap wood
Instructions
- Print out downloaded designs, sized to fit your wood circles, using a computer and printer.
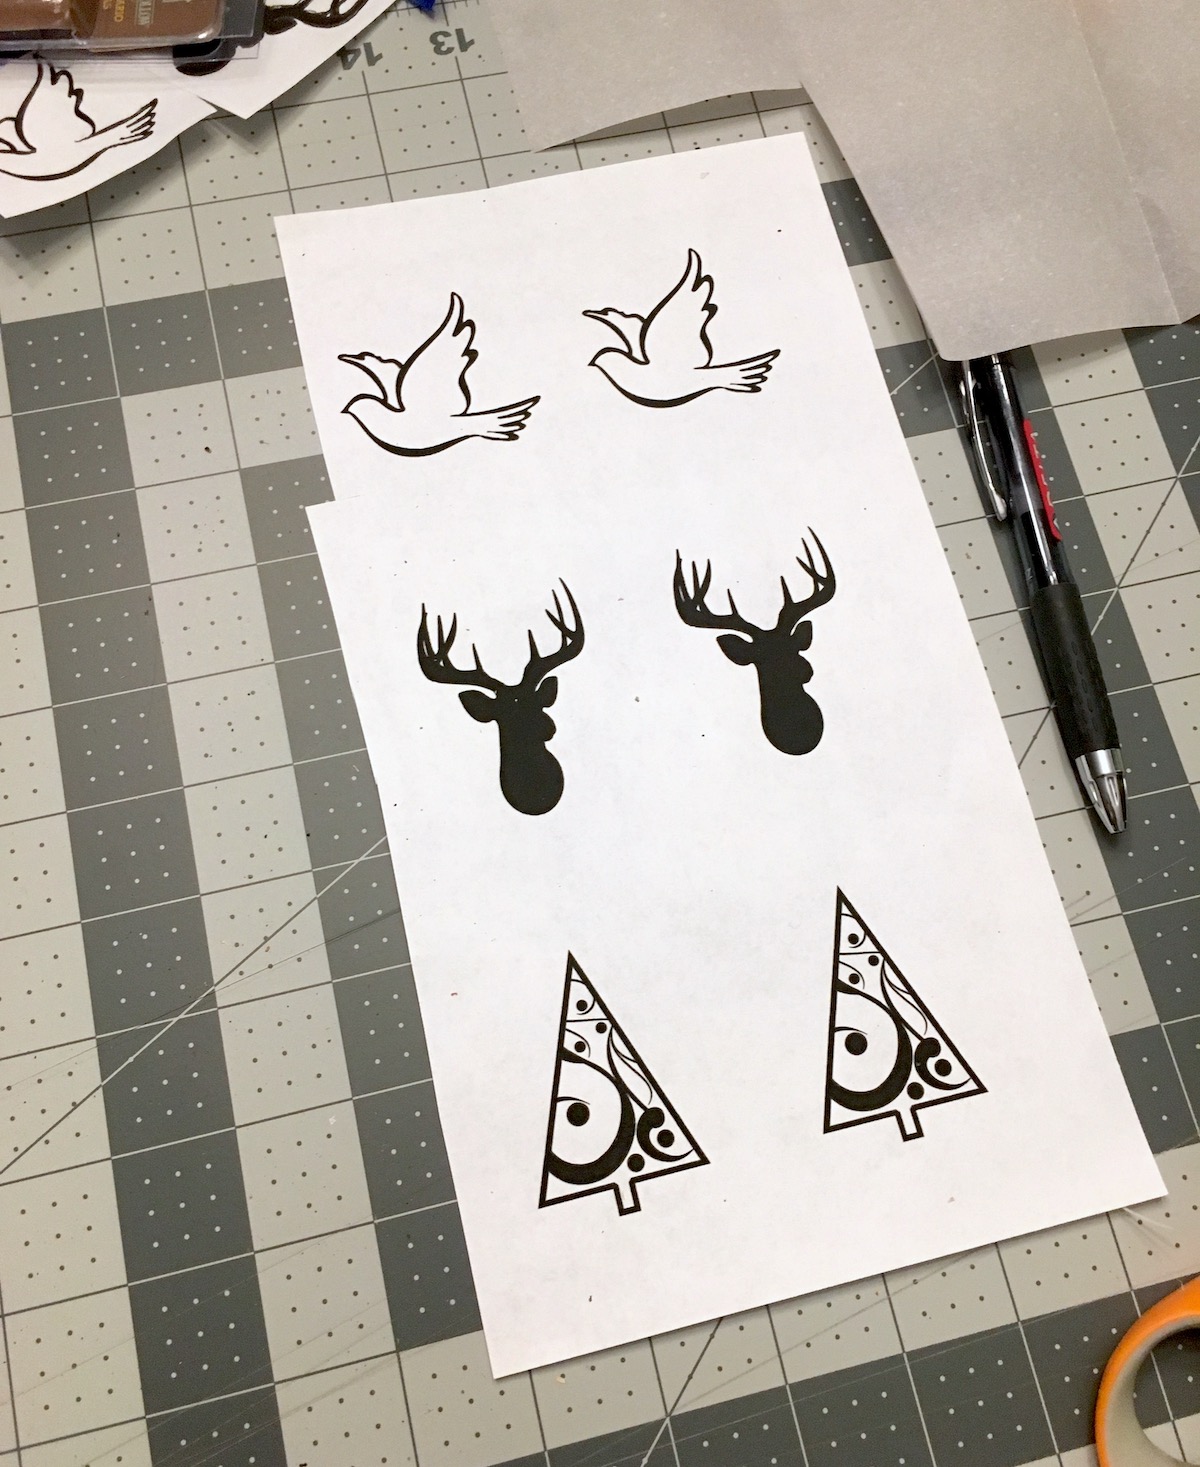
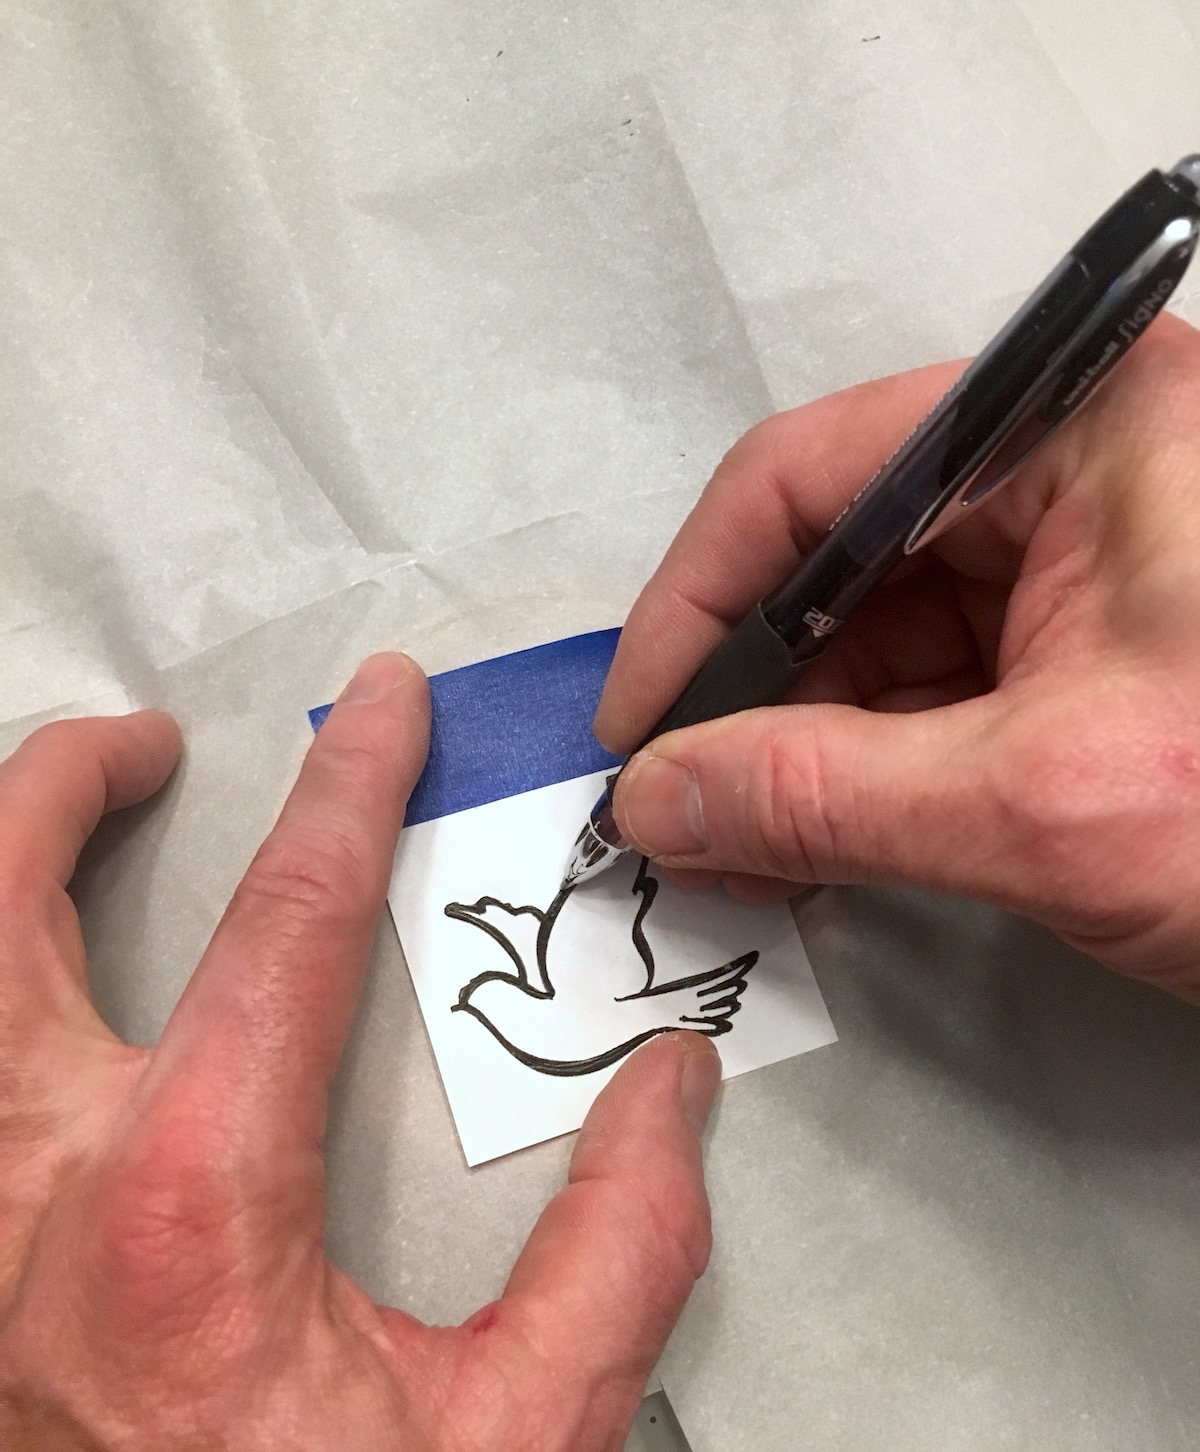
- Cut out each individual design as well as a piece of transfer paper the same size. Place the transfer paper, dark side down, onto the wood circle. Tape down, then tape the design on top.

- Begin tracing on top of the design with a pen or pencil. This will transfer the design to the top of the wood slice. Be sure to fill in the entire line, even if it's thick.
- Remove the transfer paper and design and heat up the wood burning tool. Follow the lines of the design to burn them into the wood.
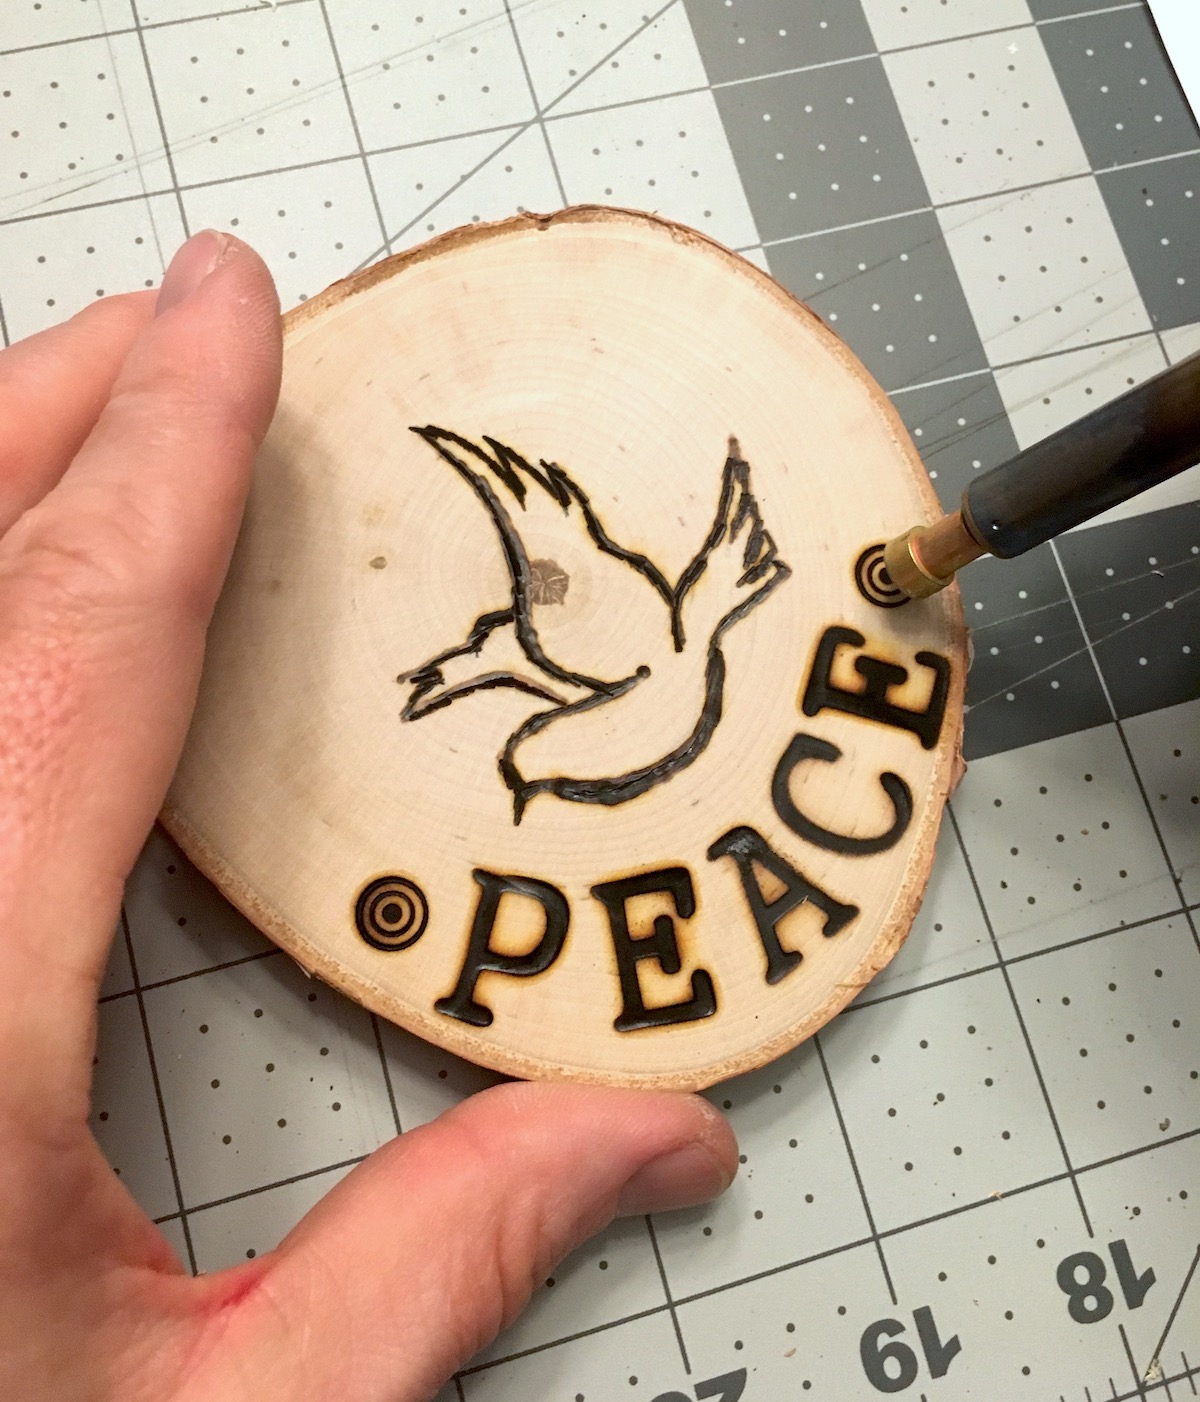
- Use wood burning stamps or various tips to accent your design. Repeat with all wood circles.
- Place the ornament onto a piece of scrap wood and drill a small hole in the top. Reverse the drill to back out of the hole.
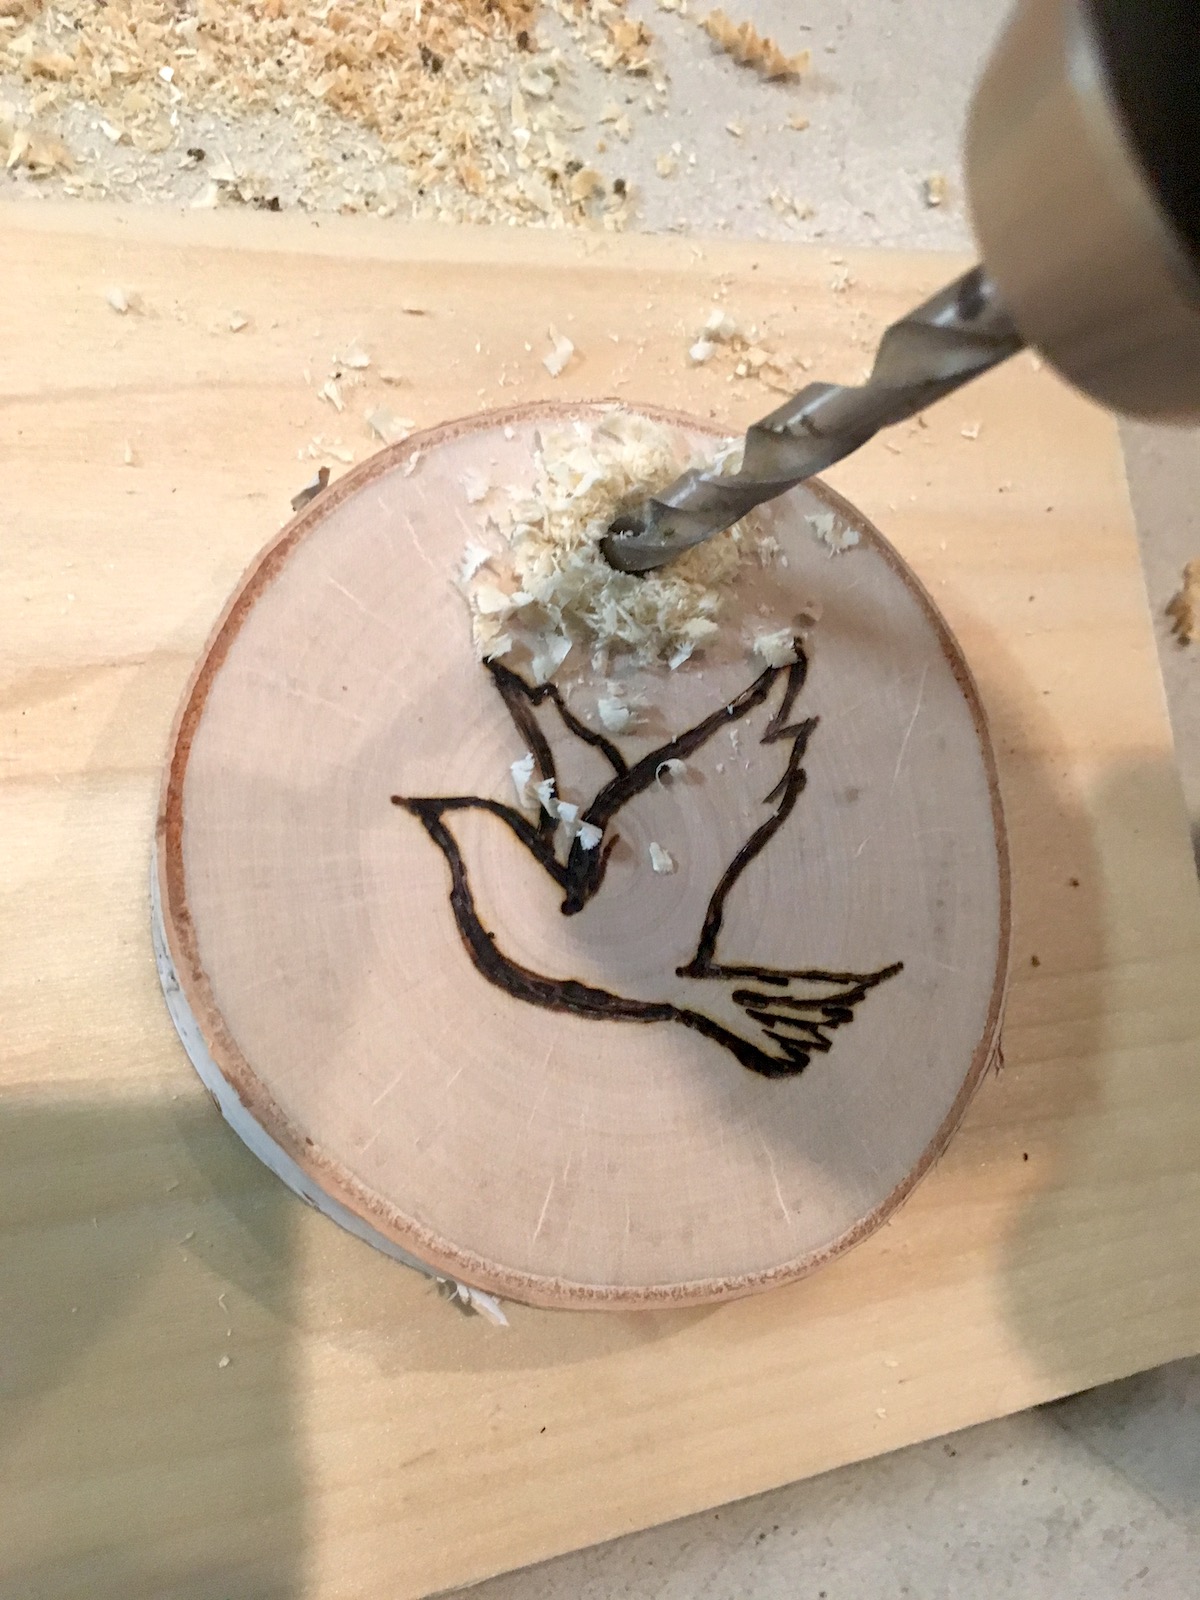
- Cut a length of ribbon, thread it through the hole, and tie into a knot on the top for hanging.
Wood burning isn’t the only way to decorate wood slices! You can also use these other projects as inspiration for wood slice ornament ideas.
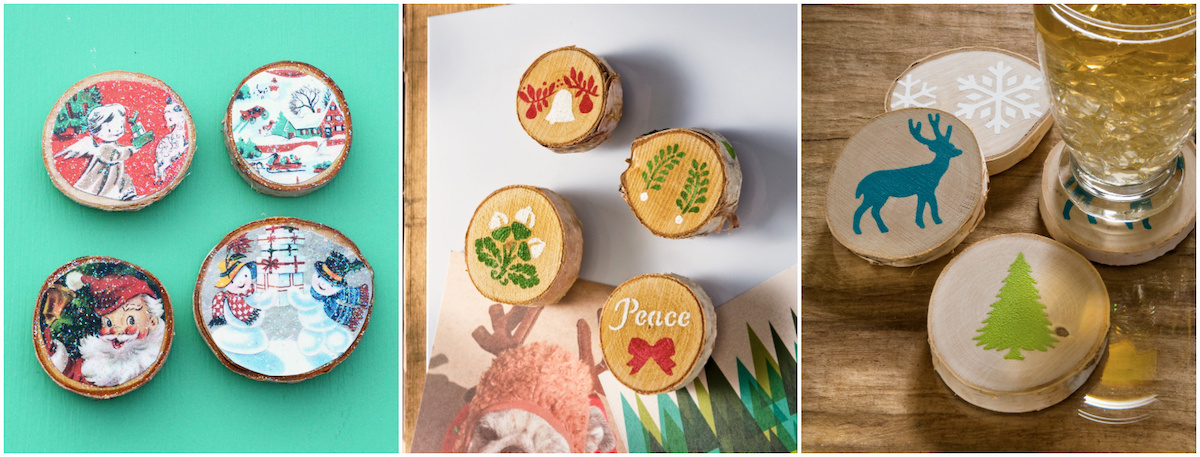
Wood Slice Magnets / Easy DIY Christmas Magnets / Wood Slice Coasters
I also hope you’ll check out these other ornament ideas:
Candy Cane • Cookie Cutters • DIY Gnomes • DIY Snow Globe • Mandala • Metallic Keys • Mini Wreath • Origami • Poinsettia • Polymer Clay • Temporary Tattoos • Washer Star • Wood Bead • Wood Bead Snowman • Wood Bead Star • Yarn Wrapped