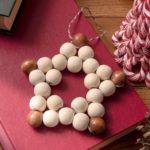
Wood Bead Star Ornament
Make a wooden bead star ornament for your tree! Perfect for rustic or farmhouse decor.
Servings 1 ornament
Cost $2
Equipment
- 1 Tapestry needle optional, but makes it easier
Ingredients
- 20 Wood beads unfinished (5/8")
- 5 Wood beads stained (5/8")
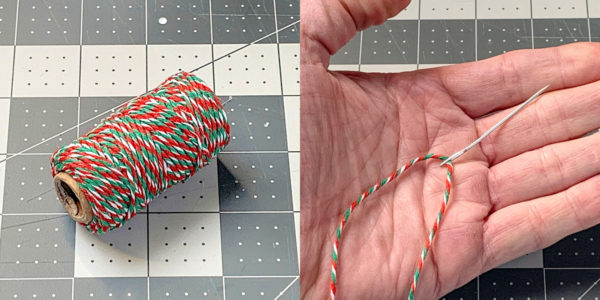
- Baker's twine several feet
Instructions
- Grab some baker's twine or other thread and cut a long length. Thread onto a tapestry needle for ease in stringing.
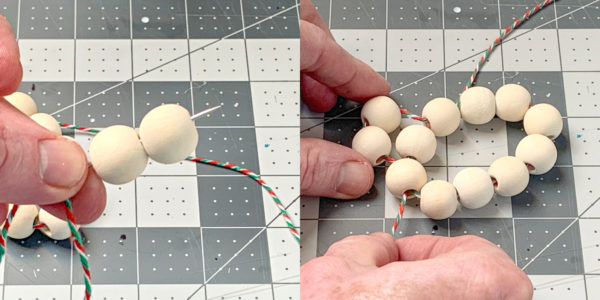
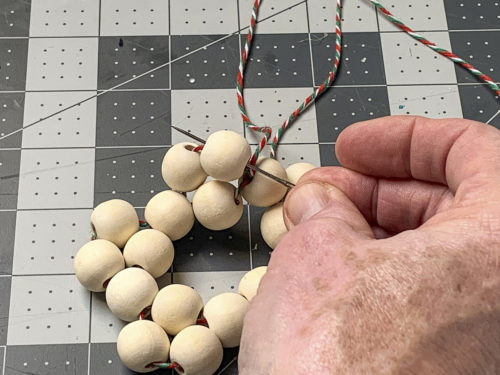
- To establish the inner circle of your ornament, you're going to string ten beads onto the middle of the thread.
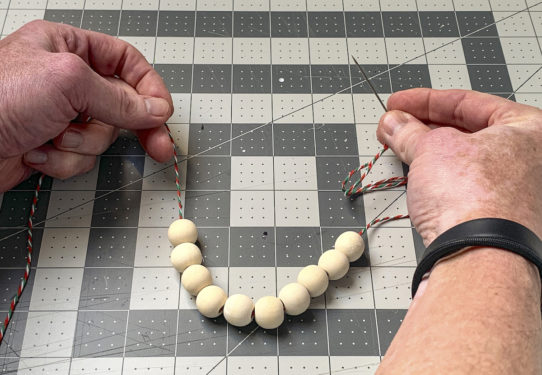
- Now create a circle. String the right hanging thread through the very last bead. You will have thread coming out of this bead from both the left and the right. This completes your first inner row.
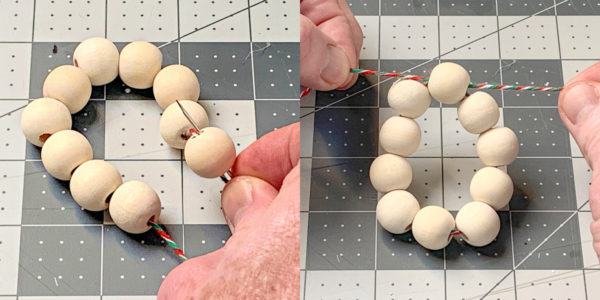
- Now you're going to put the second row of beads onto your ornament. Take the string coming out of the left side and put it onto the needle. Add two beads onto that needle. Then you're going to skip a bead, and insert the needle into the next bead.
- You're going to continue around the outside of your first row, stringing on two beads, skipping a bead, and then inserting the thread. Refer to the diagram below.
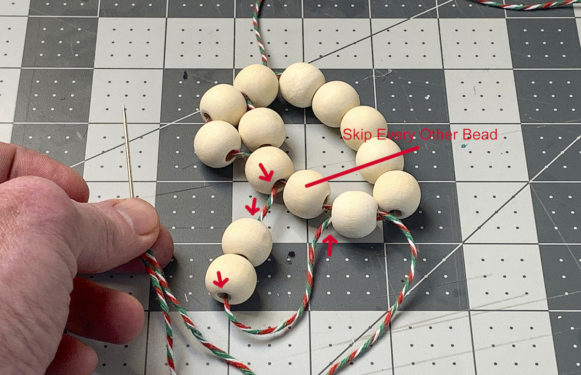
- Continue all the way around the base row. You will use ten beads for this step.
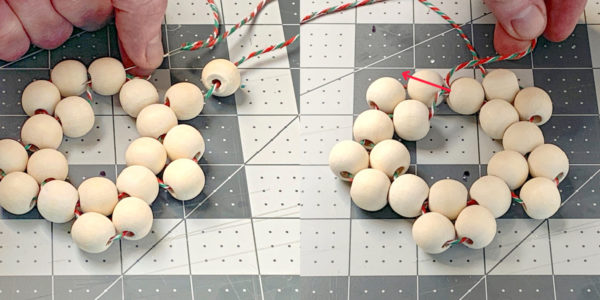
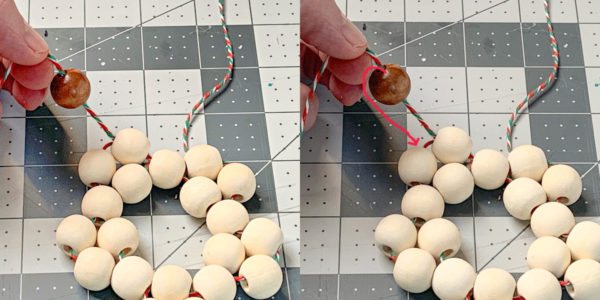
- Once you get back to the original bead, you will thread the bead from right to left as shown.
- Bring the thread out through the first bead of the second row. The thread should come out to the left between those first two beads you put on.
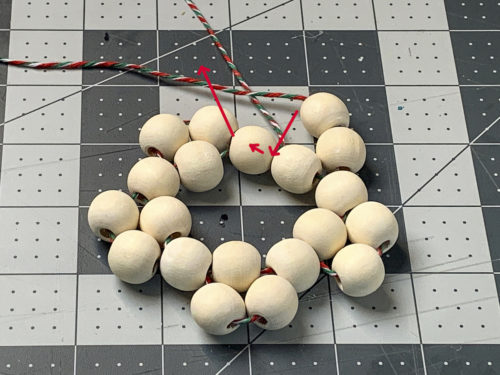
- For this third row, you'll use five beads to make the points of the star. You'll also thread around the entire ornament. The thread is already between two beads, so add the first stained bead.
- Thread the twine through the next three beads on your ornament as shown in the diagram.
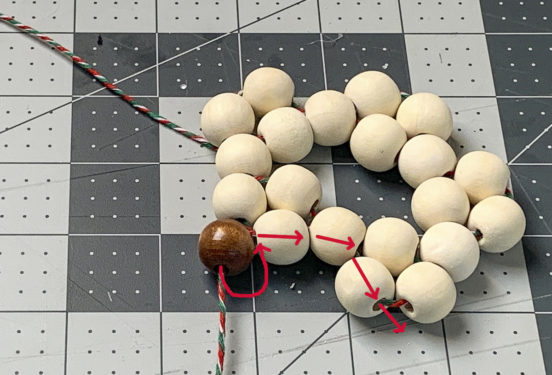
- String on another stained bead.
- Now string the twine through the next three beads.
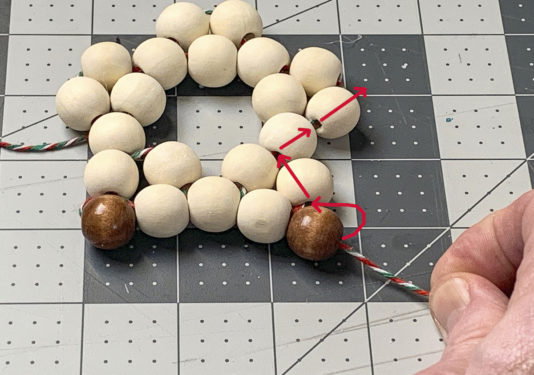
- Add another stained bead, and continue in this way until you've strung on the five points of the star.

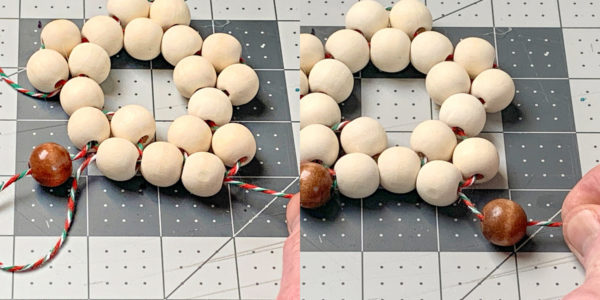
- Put the twine down through the next bead, meeting the original twine. Tie a secure knot, pulling everything someone tight (but don't go crazy).
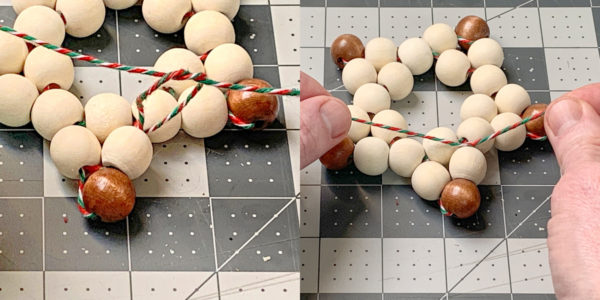
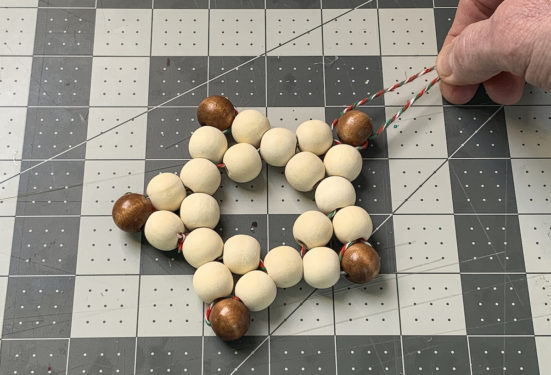
- Snip off any loose twine and admire your star shape.
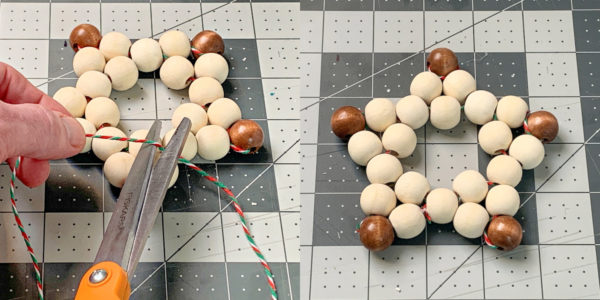
- Thread some of the twine through one of the stained beads and tie it into a knot.
Video
Notes
If you can't find stained beads - you can also paint some unfinished ones in any colors you like.