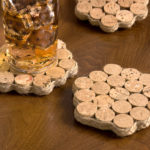
Make Wine Cork Coasters Without Breaking the Bank
Learn how to make wine cork coasters that look great, on a budget! Save your old wine corks and make these for unique decor or gifts.
Skills Required: Beginner. These coasters are easy to make, even if you’ve never crafted before. You’re going to be cutting cork and felt and then hot gluing it together.
Do you love wine cork crafts? Because I do. There’s nothing like the luxury of being able to drink and then use your leftovers in craft projects! Haha!
I’m being silly but seriously, wine corks are a great craft supply that a lot of people just throw away or stick in a drawer. Like twigs, yarn scraps, Scrabble tiles, maps, and clothespins – there are so many things to make that don’t immediately occur to me.
I actually don’t drink that much wine, but I wanted to make a corkboard. So I started getting friends to collect wine corks. And they gave me a LOT of them! Which is great because I had a lot of ideas.
After making the corkboard, a wine cork wreath, and some stamps, I decided to use the leftovers in some wine cork coasters.
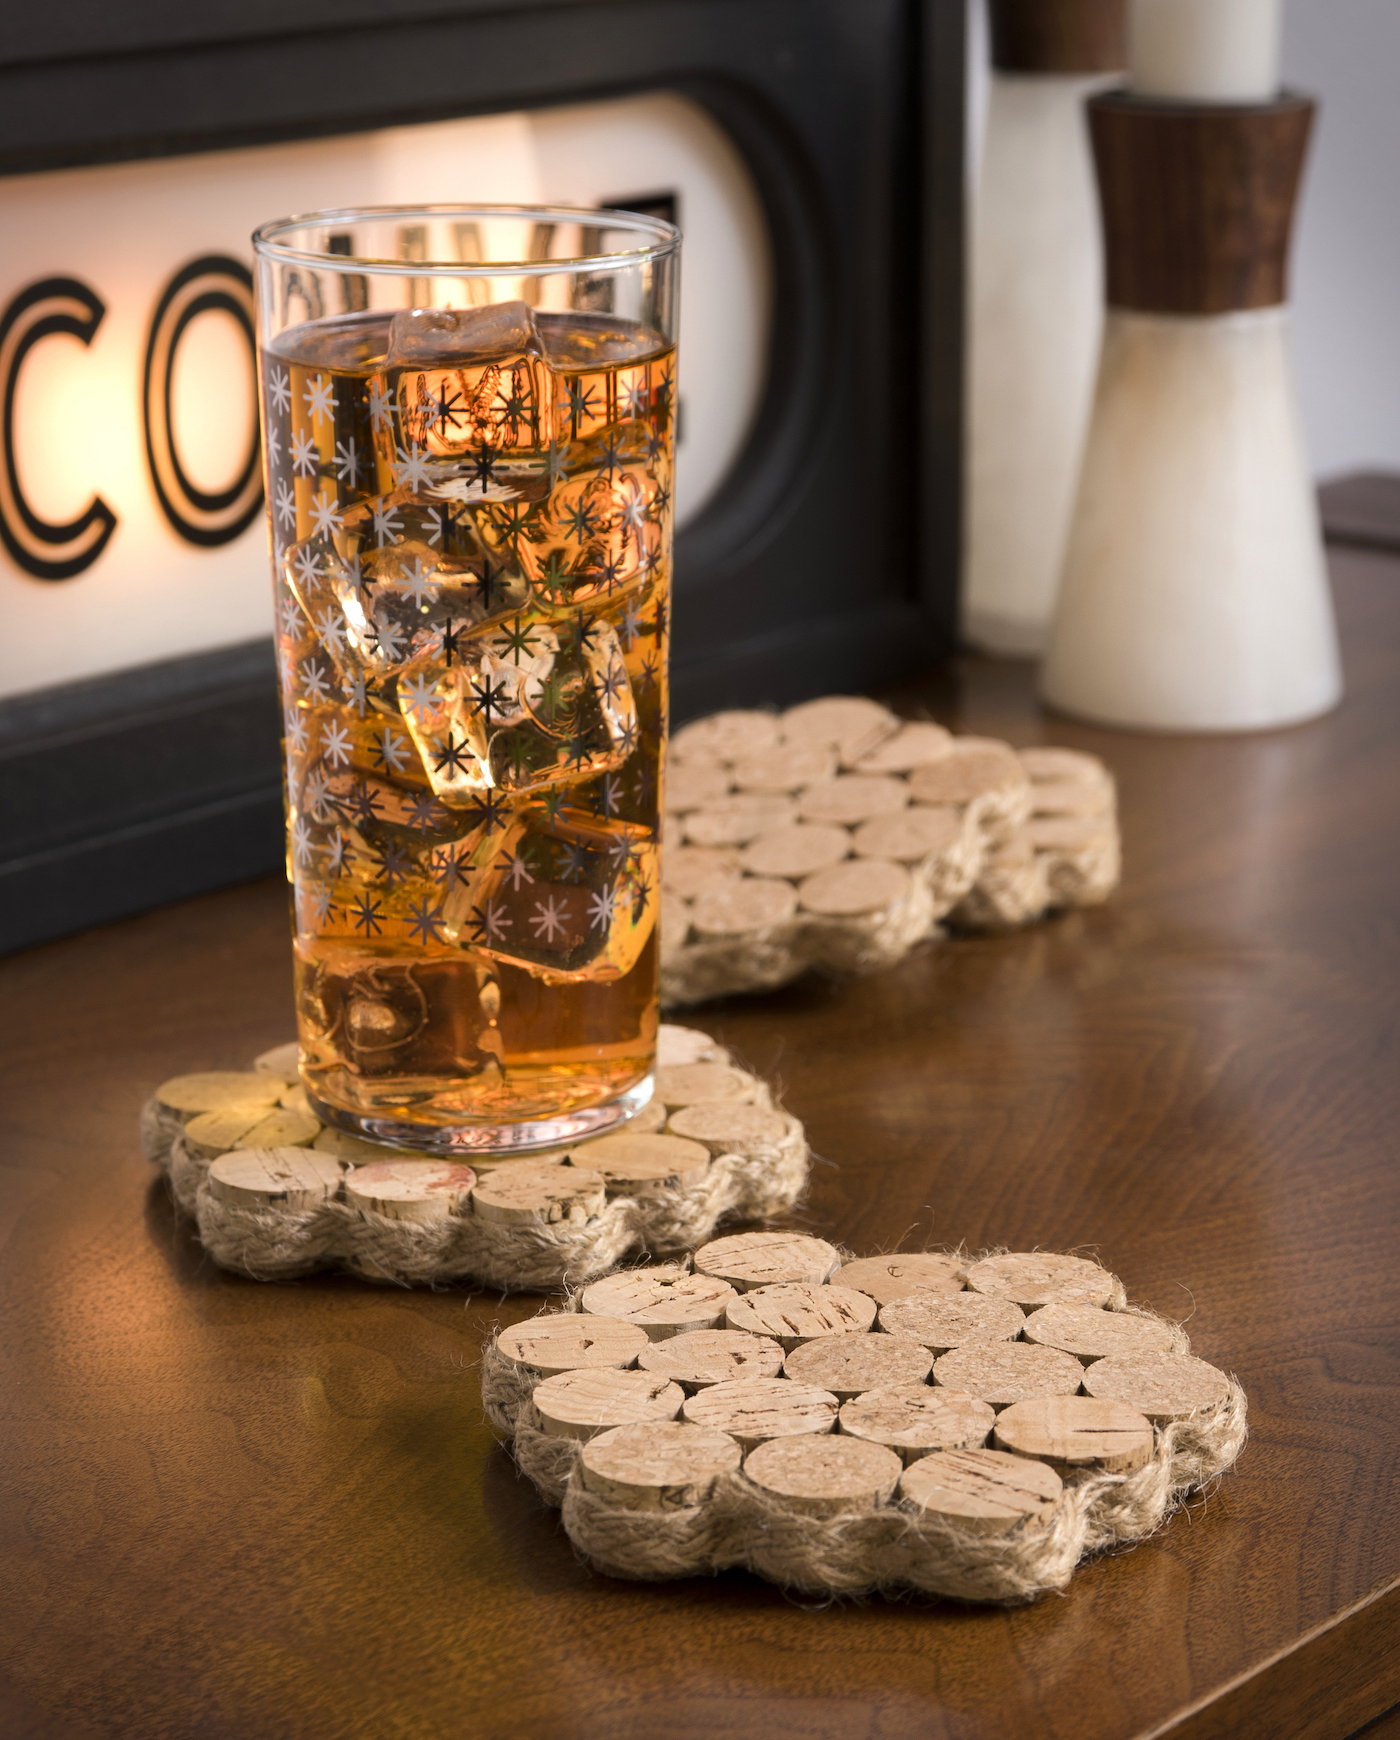
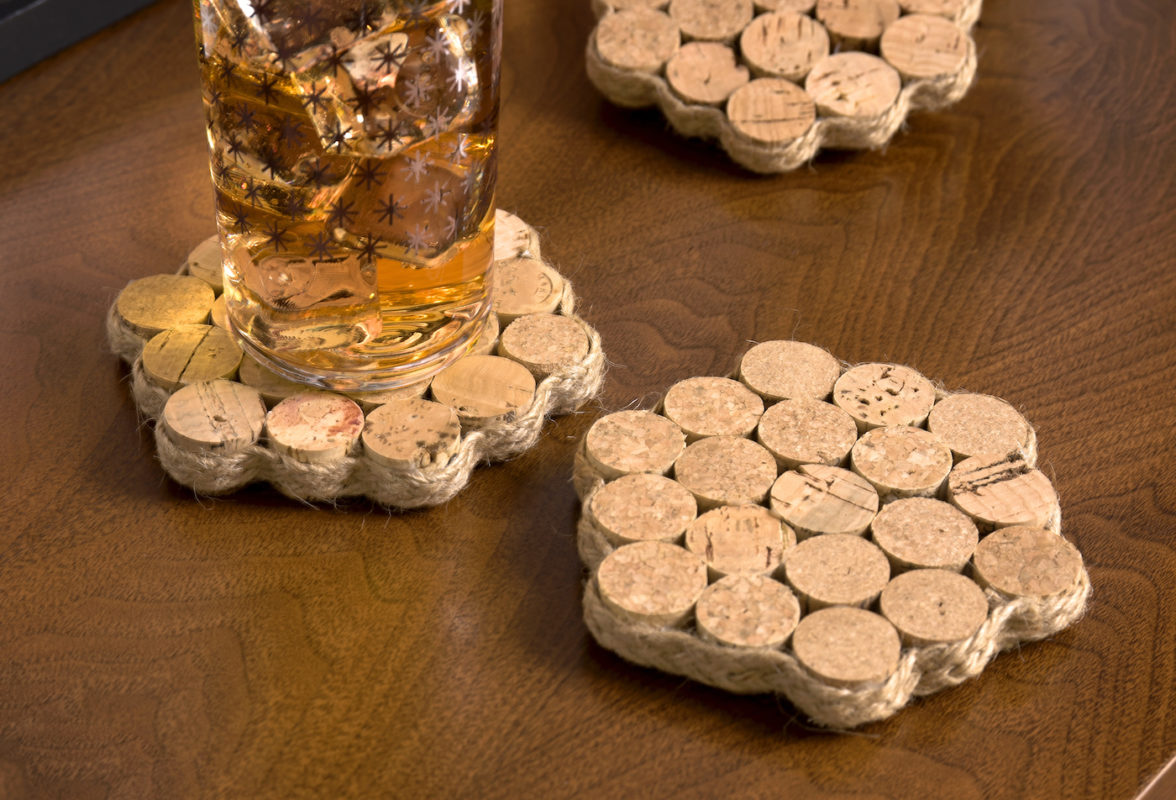
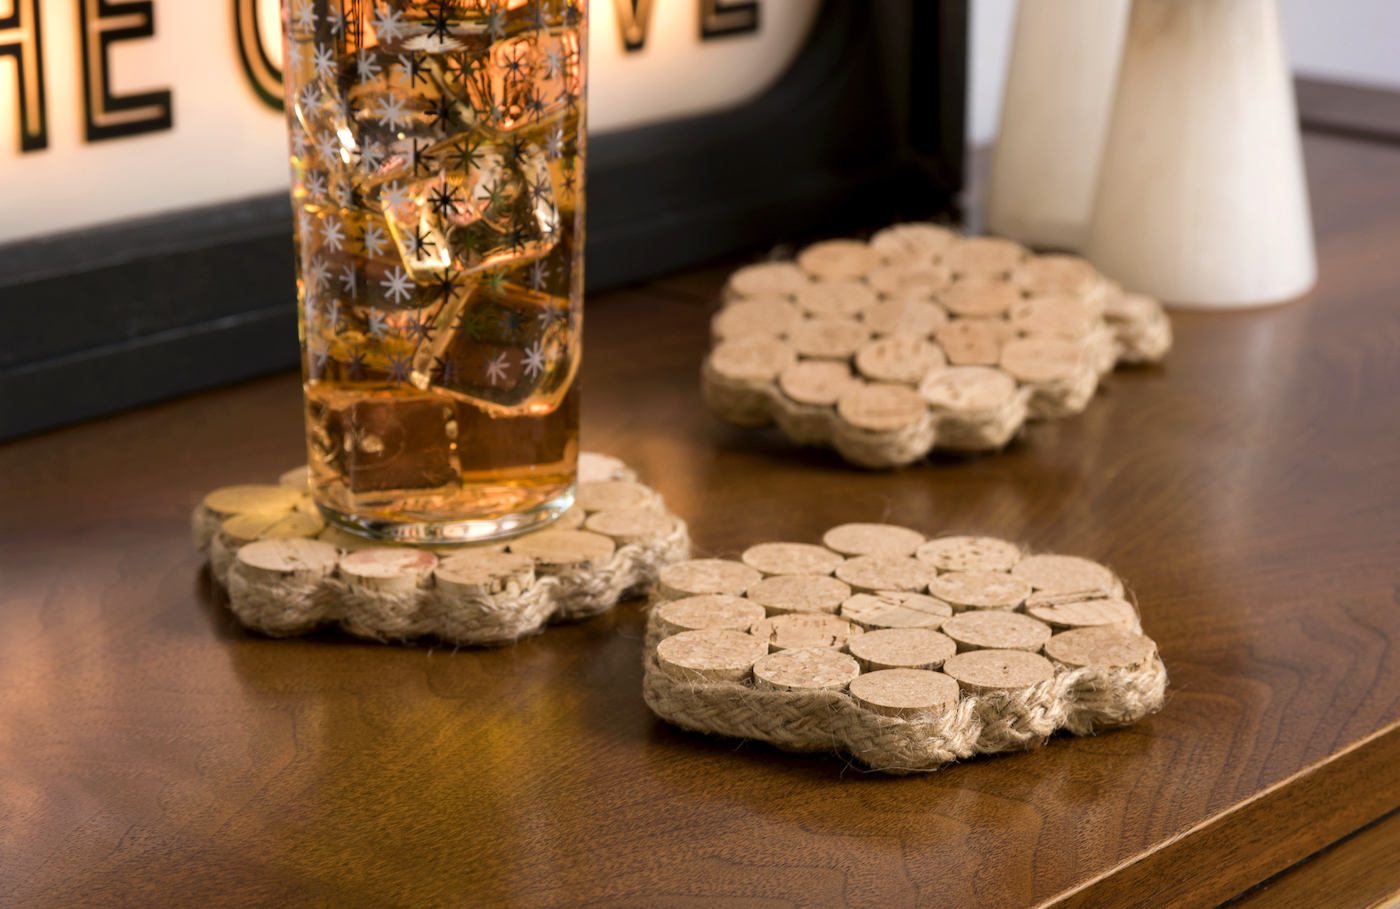
These DIY coasters turned out great and are both water resistant and heat resistant. Cork can handle temperature ranges of -292° F to 248° F. That’s pretty cool, right? I’m excited to show you how to make them!
You may be wondering if there are any things you should keep in mind when crafting with wine corks. Before you begin your project, make sure to read these important tips for working with cork.
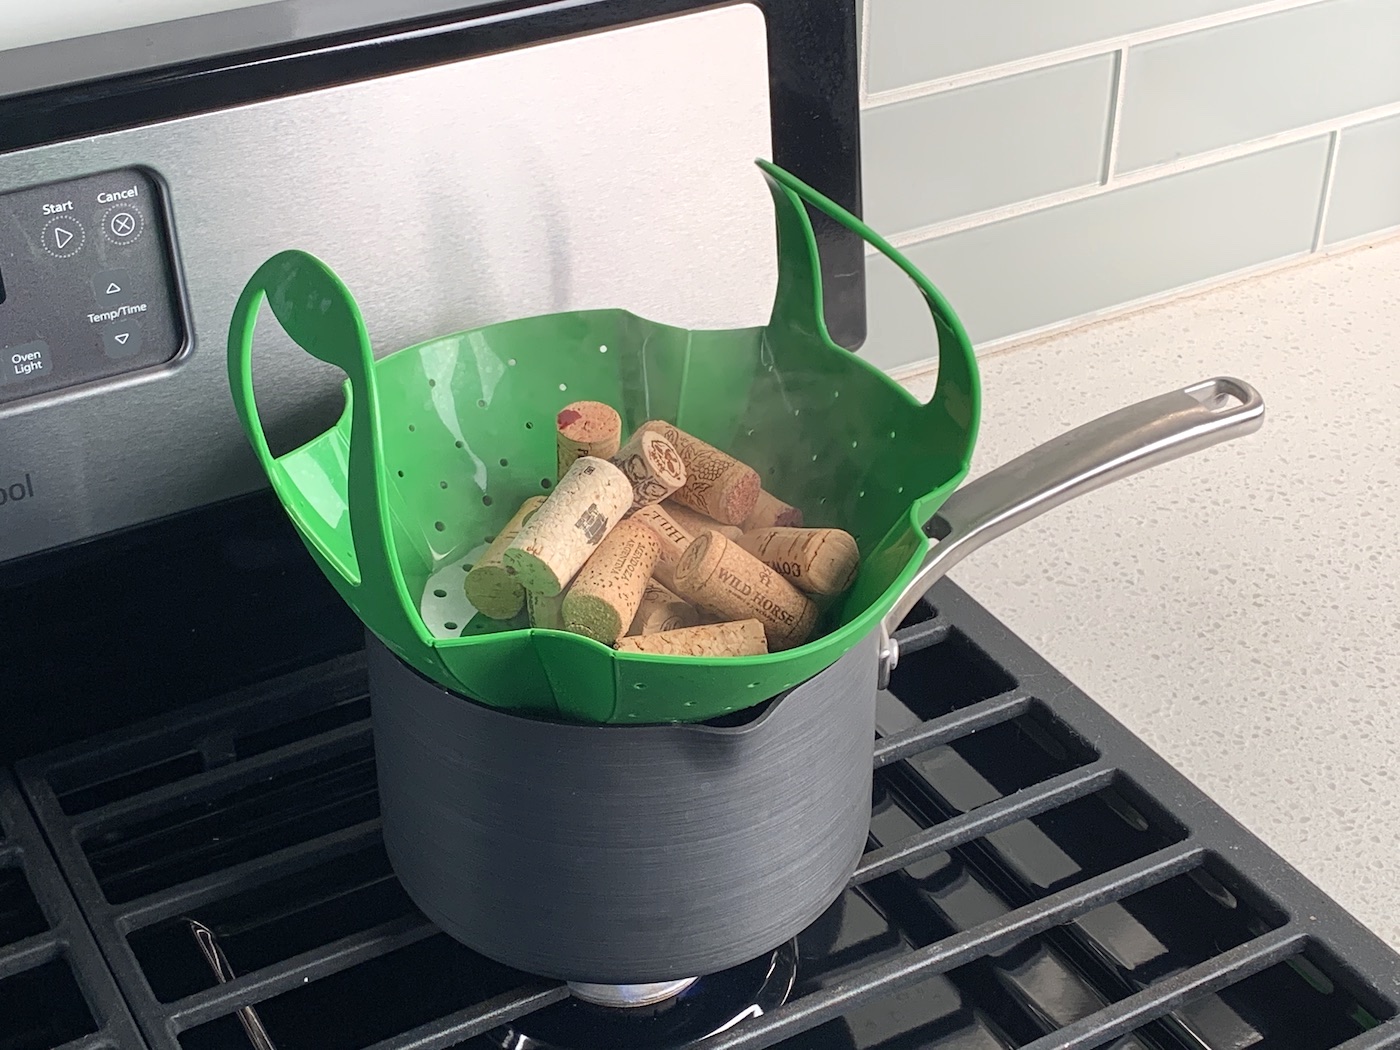
If you have recycled corks, you can boil them as I explain in the instructions, which also cleans them. If you purchase them new, you can boil them to soften for cutting. OR you can simply use a hot knife to cut. It’s up to you.
You’re going to make these wine cork coasters in four easy steps. First you will boil and cut the corks. Then you’re going to glue them together and add a bottom. And finally, add the ribbon. It’s very easy!
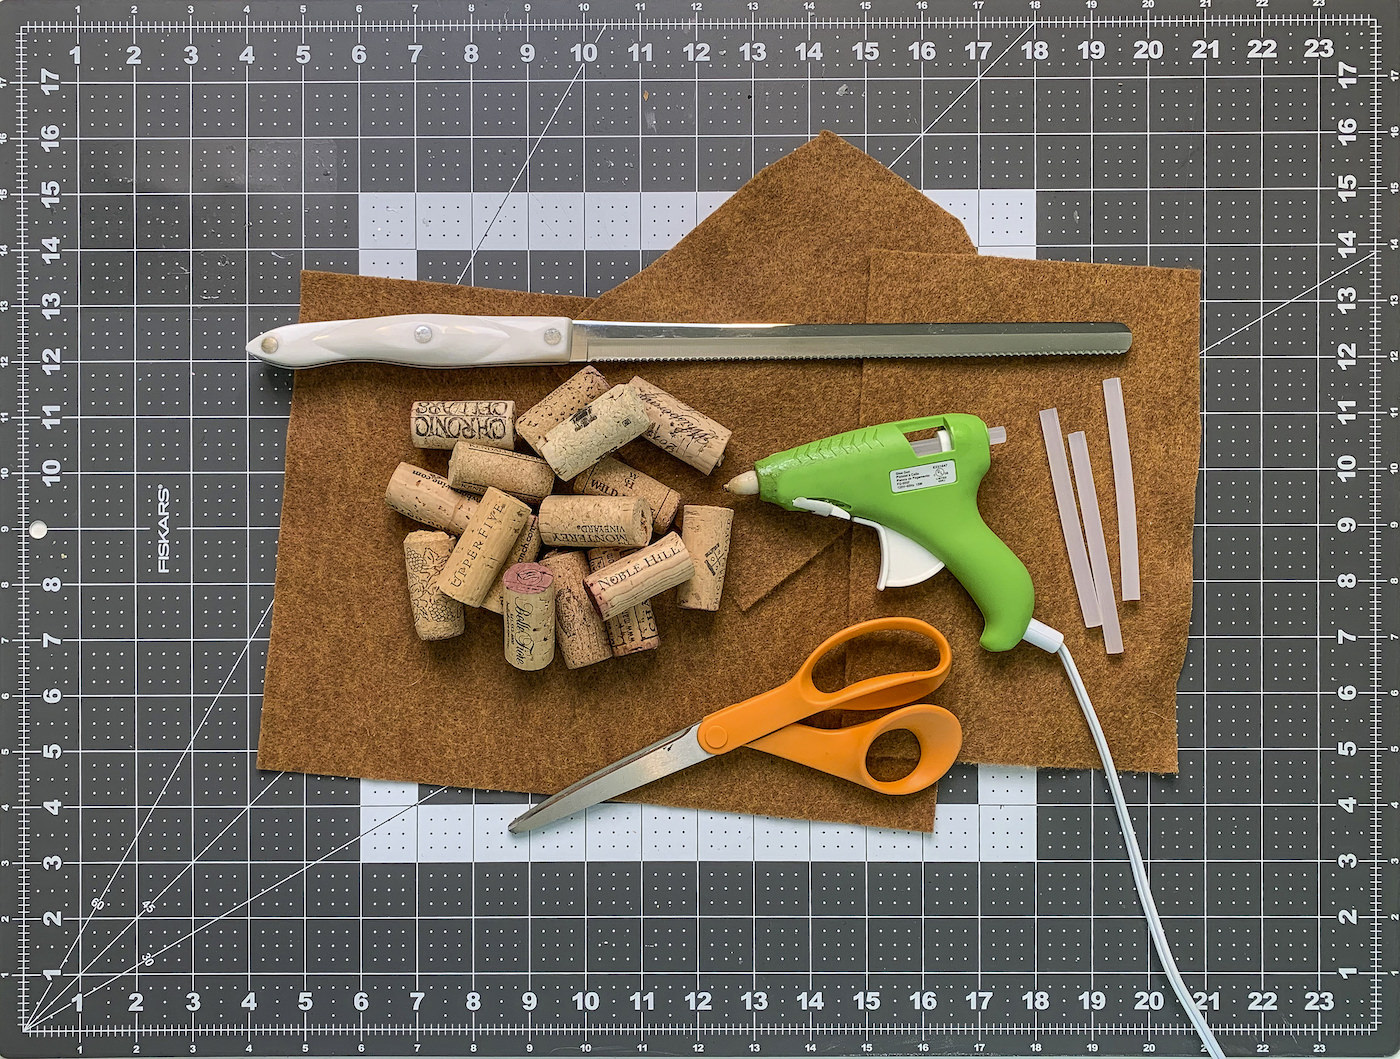
Gather These Supplies
- Wine corks – 7 per coaster
- Felt for the bottom
- Twine or ribbon
- Knife
- Cutting board
- Hot glue gun and glue sticks
- Saucepan
- Scissors
- Craft knife and mat
I absolutely love the look of these. You’re going to love how easy this craft is, I promise! Let me know what you think in the comments.
Get the printable how to card below.
Wine Cork Coasters
Equipment
- Serrated knife
- Cutting board
- Saucepan
Materials
- 7 Wine corks 7 per coaster
- Braided twine or ribbon
- Felt sheet(s)
Video
Instructions
- Bring a pot of water to a boil and add the corks directly to the water or a steamer basket. Leave on a low boil for ten minutes. Strain the corks and let cool to the point they can be touched with fingers (don't let them cool all the way).
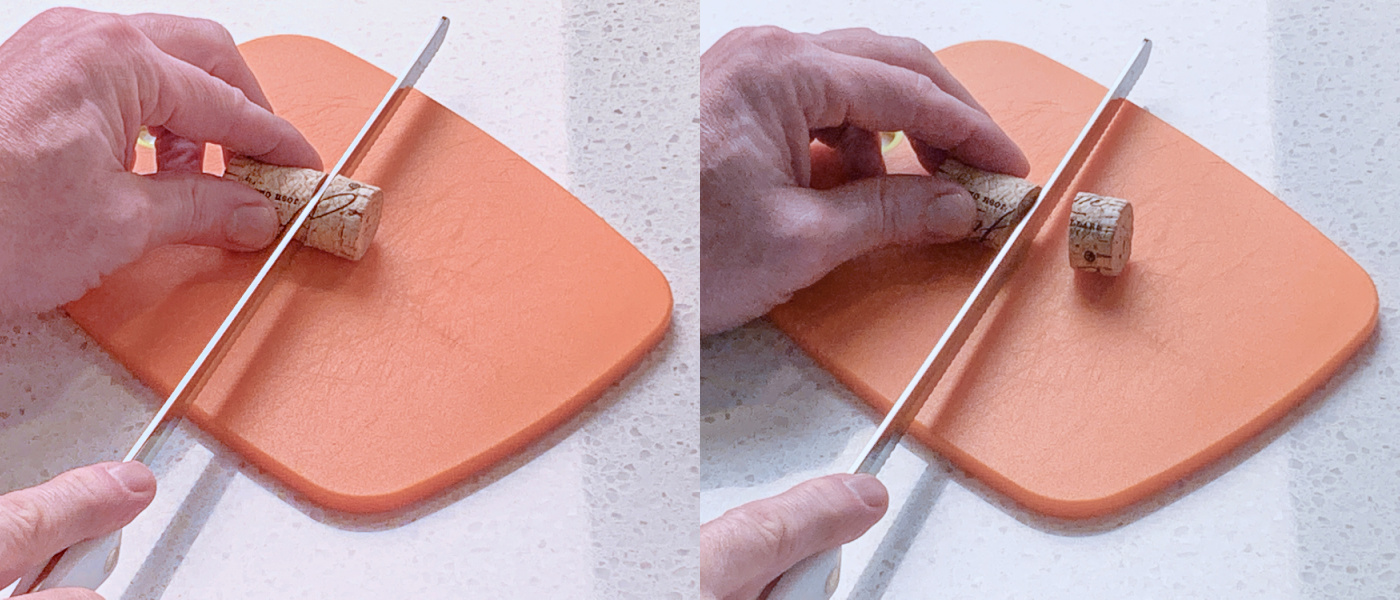
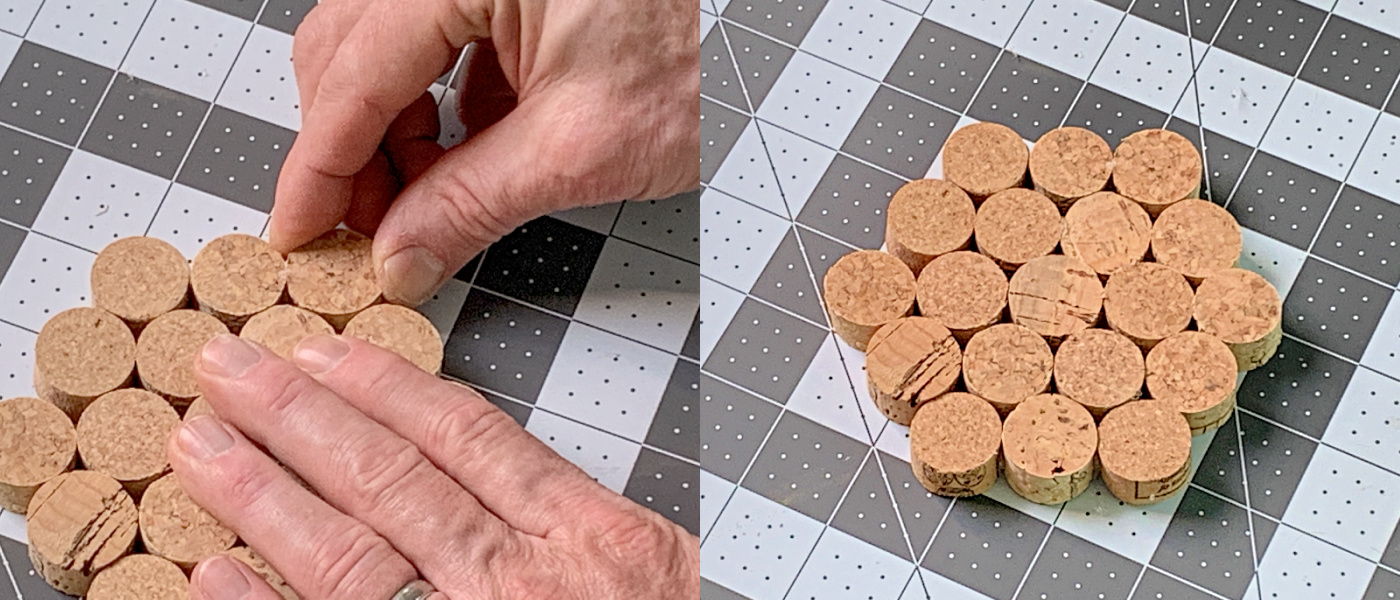
- Cut each cork into three equal parts using a serrated knife. You will need 19 pieces per coaster. Let the corks dry and cool completely.
- Start with one cork, place hot glue on the side, and attach another piece of cork. Do this until you have a row of five.
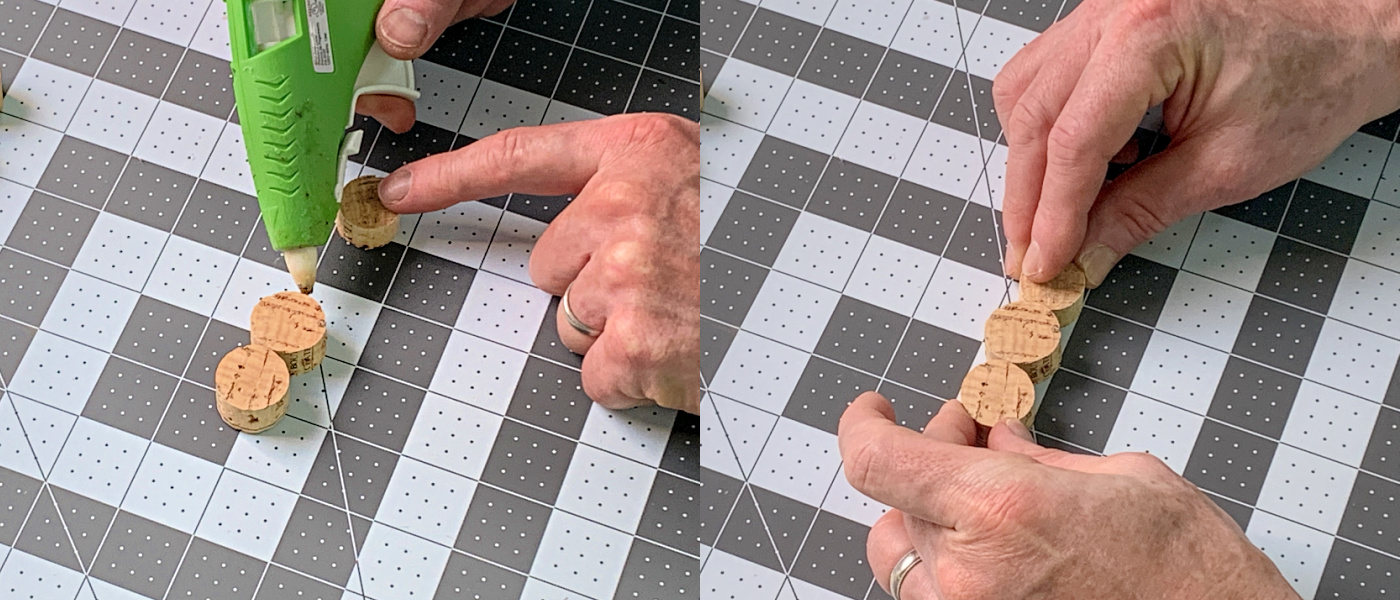
- Keep gluing. On either side of the row of five, glue a row of four corks. Then on either side, glue a row of three. Let cool.
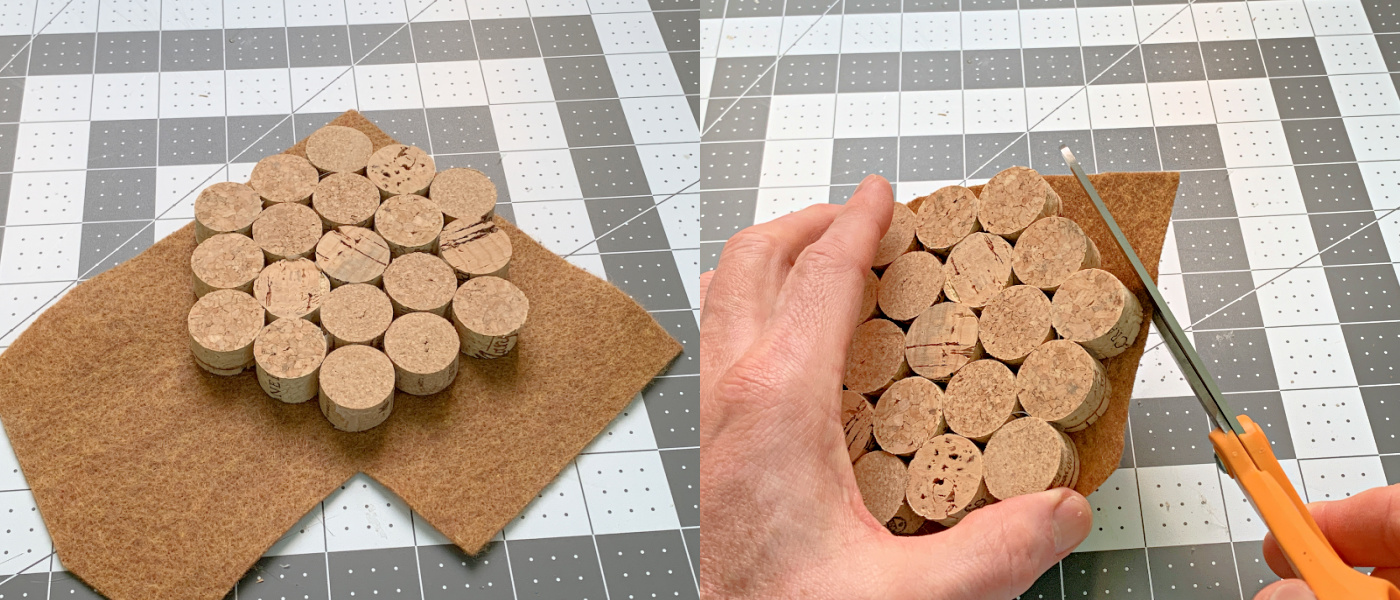
- Decide which side you would like to be the top of your coaster. Put the bottom on your work surface facing up. Glue the felt to the bottom of the coaster.

- Let cool and trim the excess around the edge with scissors. For the smaller areas, remove felt with craft knife.
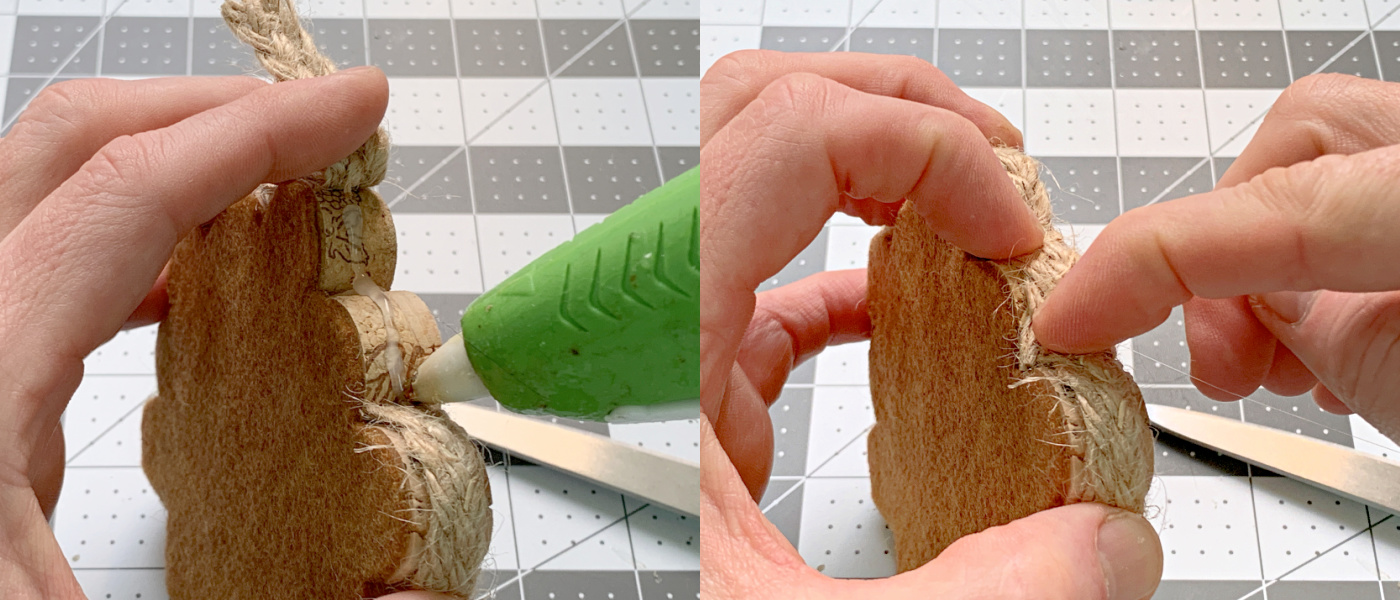
- Hot glue the trim around the edge and then cut with scissors. Glue the end in place. Let cool before using.
Notes
If you enjoy making these coasters, I’d love for you to check out these other ideas made out of wine corks: